Fundamental Task for Beginners using Compute Engine
 Hridhi Kumari
Table of contents
- Task 1: Create a Simple VM (Compute Engine Instance)
- Task 2: Create a VM with an Attached Disk
- Task 3: Create a VM Using a Predefined Image
- Task 4: Create a VM from a Snapshot
- Task 5: Create a VM with a Startup Script
- Task 6: Accessing a VM via SSH
- Task 7: Install Software on a VM
- Task 8: Host a Simple Website on a VM
- Task 9: Create and Attach a Persistent Disk
Google Cloud's Compute Engine is a scalable, flexible, and powerful Infrastructure-as-a-Service (IaaS) offering that allows users to create and manage virtual machines (VMs) in the cloud. This blog will guide through some beginner-level tasks that cover the basics of using Compute Engine.
Task 1: Create a Simple VM (Compute Engine Instance)
The first step to getting started with Compute Engine is launching a basic Virtual Machine (VM). Here’s how to create one using default settings.
Steps:
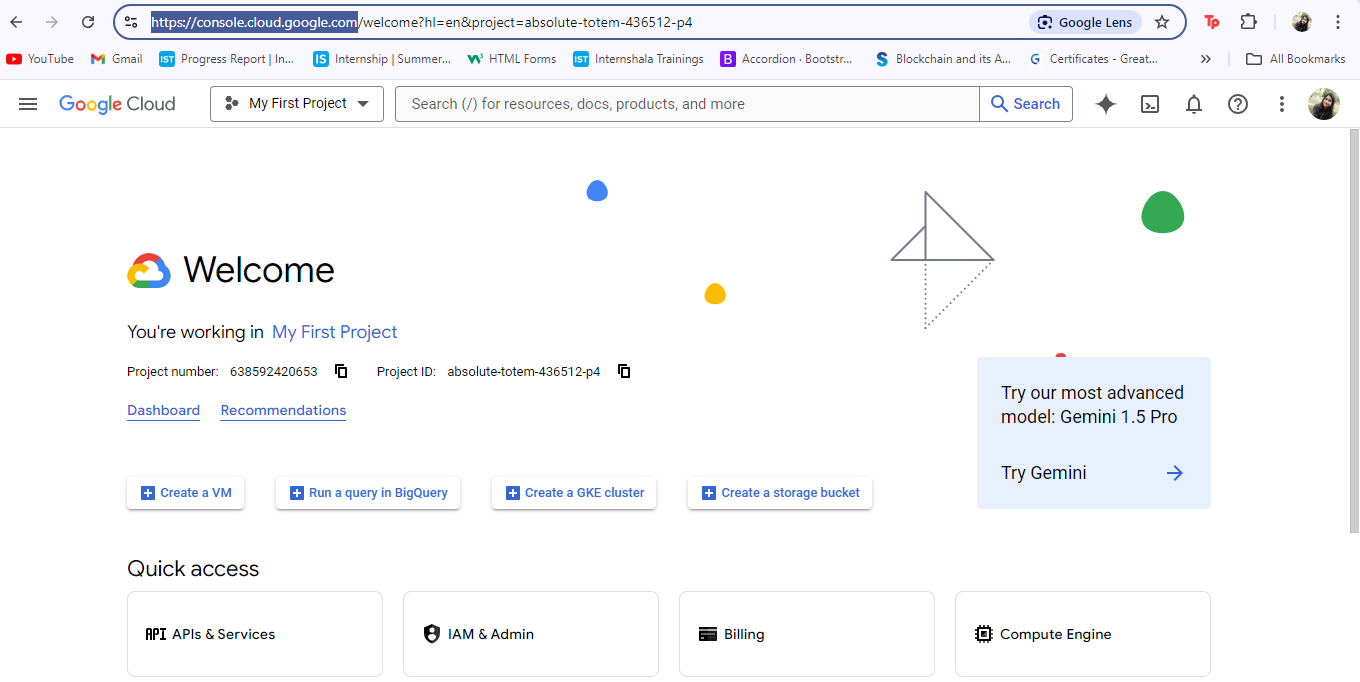
Navigate to the Google Cloud Console.
https://console.cloud.google.com
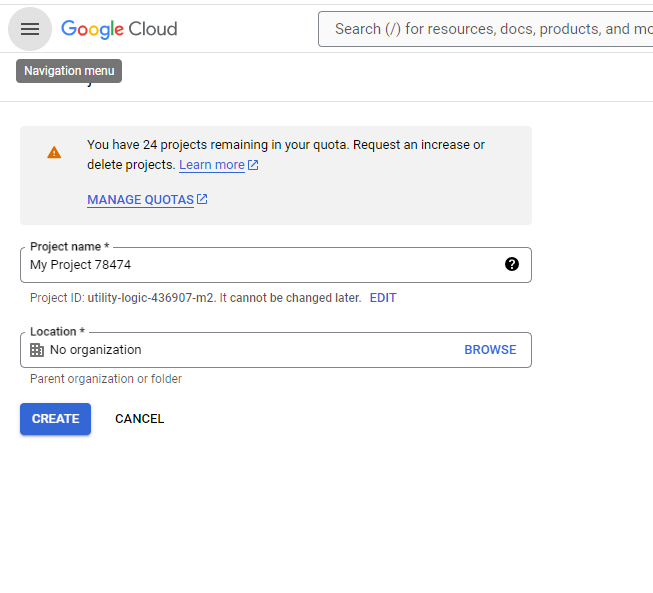
Go to Select Project, click New Project add project name, select organization( if student then go for no organization ) and then click Create.
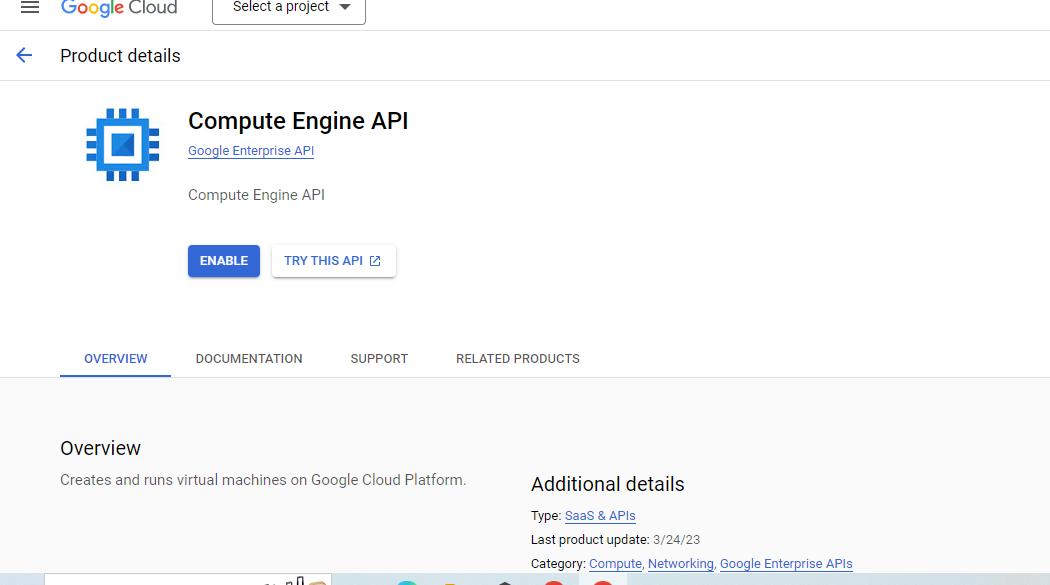
search Compute Engine API, click Enable.
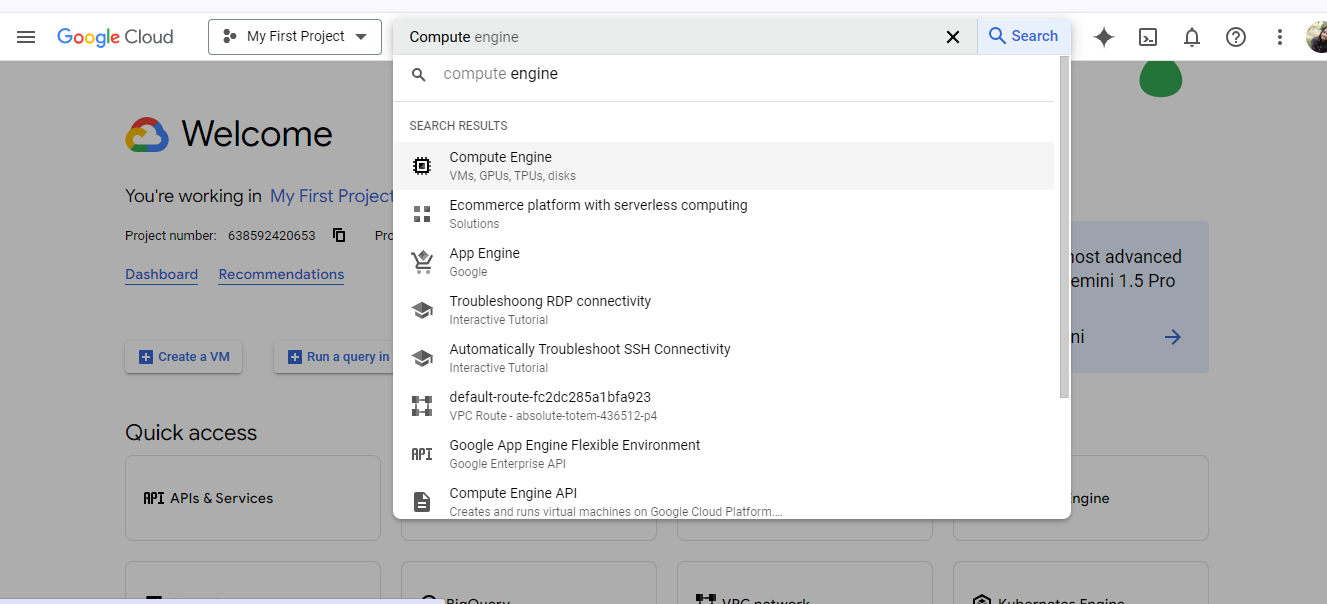
Navigate to Compute Engine.
In the Compute Engine section, click VM Instance.
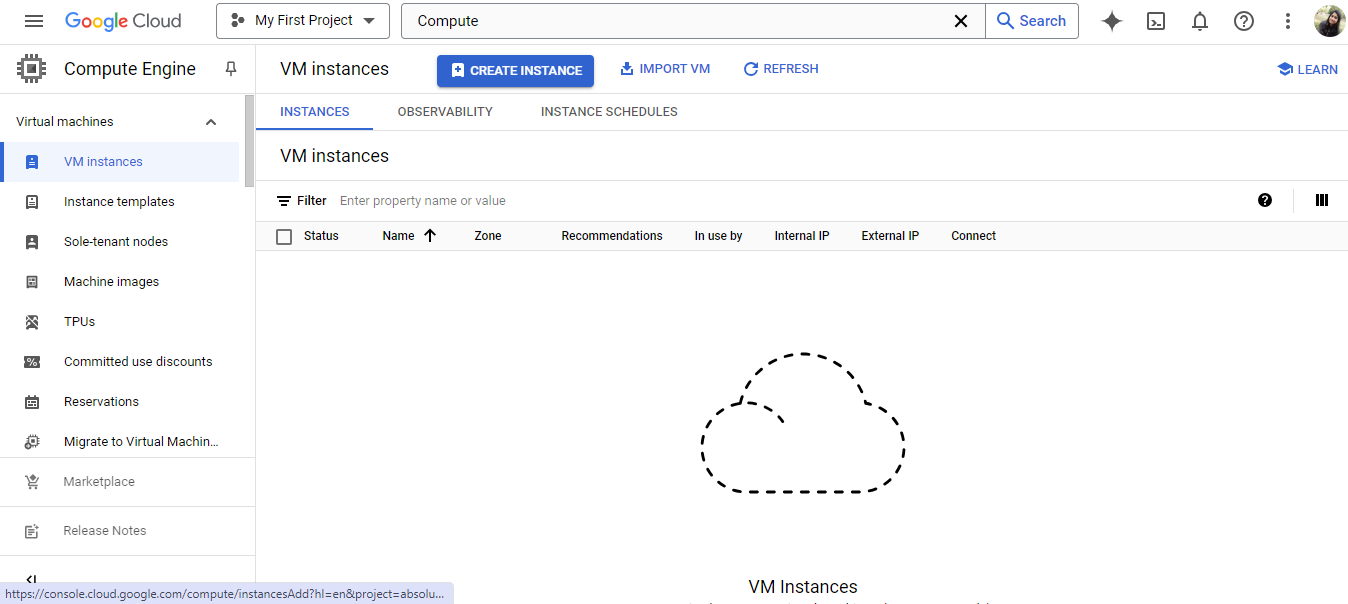
Select Create Instance.
Use the default Name, Location(region, zone), Machine type(E2, N2) and OS (Debian or Ubuntu) etc.
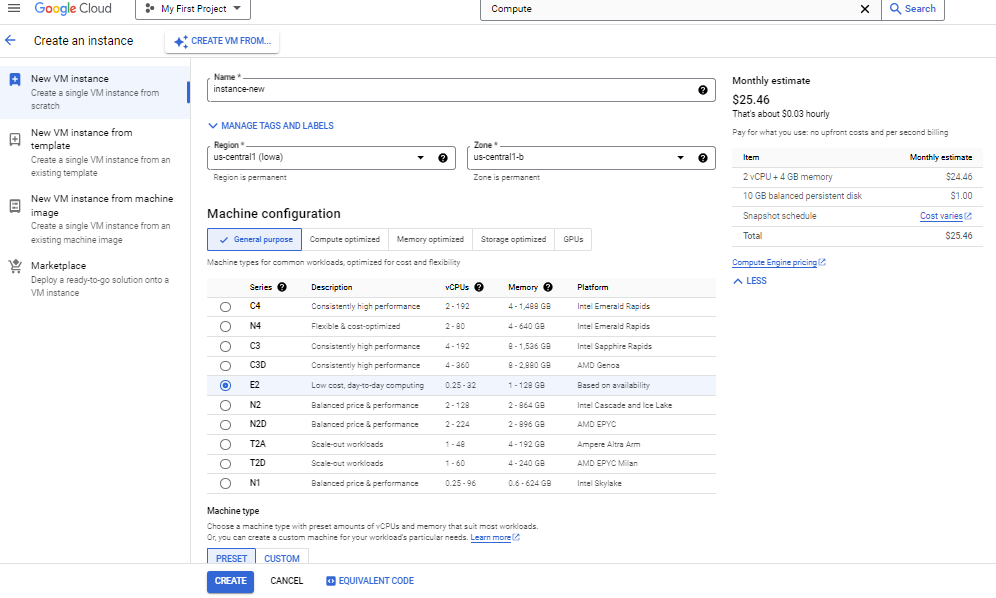
Click Create to launch VM Instance.

VM Instance should now be up and running. This instance can be used to perform basic operations and explore Google Cloud features.
Task 2: Create a VM with an Attached Disk
Sometimes, the default storage provided with a VM may not be sufficient for the workload. An additional persistent disk can be created and attached to the existing VM for expanded storage.
Steps:
Create a new VM Instance by following the steps in Task 1.
Scroll to the Storage section and click Add new disk.
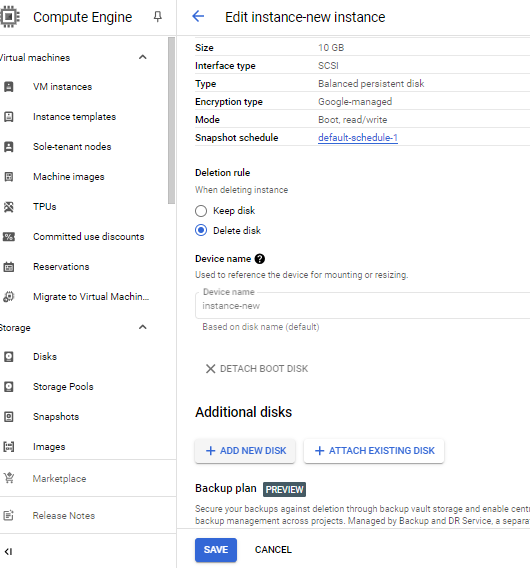
Define the size, type, and encryption for the disk.
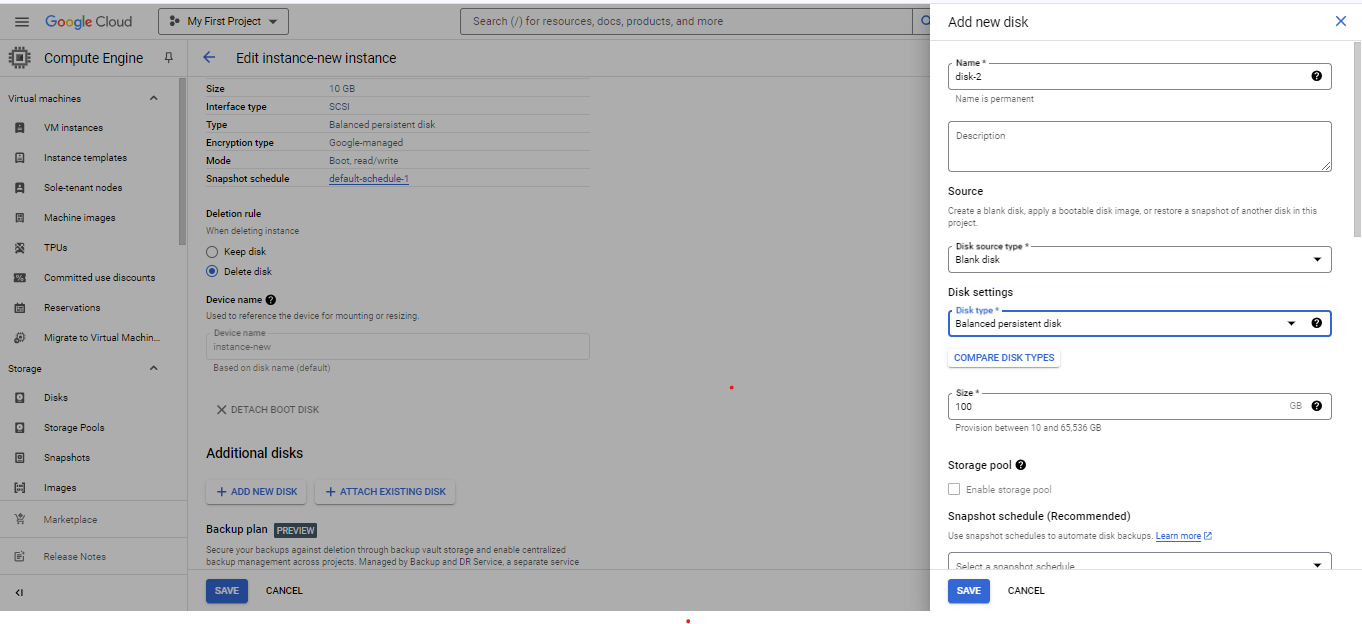
Click SAVE to launch the VM with the attached disk.
This will create a VM instance with additional storage.
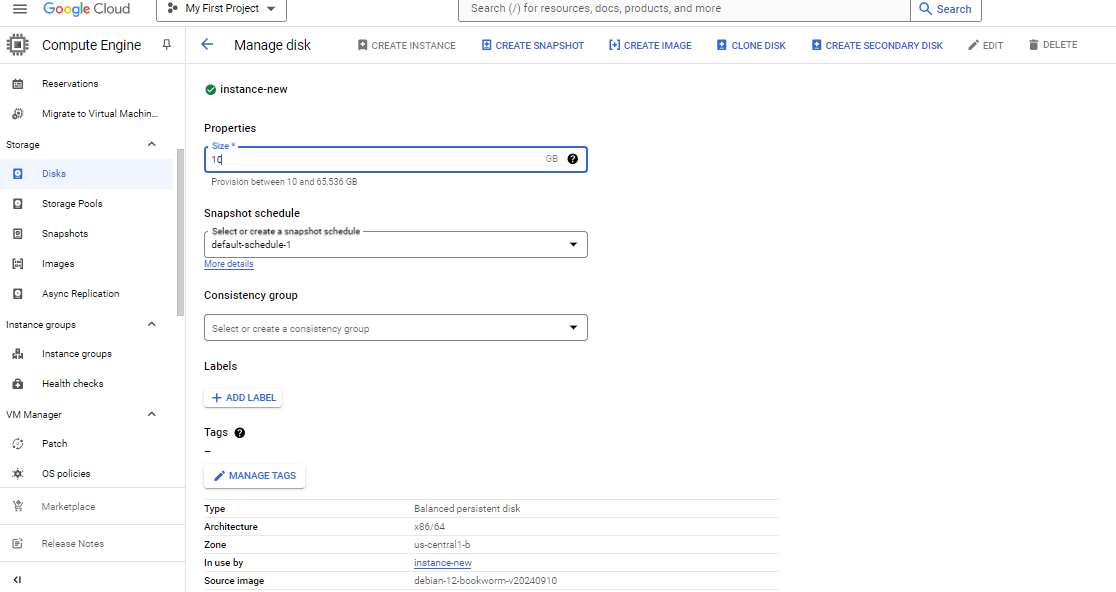
Note: The disk size can be increased whenever necessary; however, once the disk size is increased, it cannot be reduced.
Task 3: Create a VM Using a Predefined Image
Google Cloud offers a variety of predefined images (like Ubuntu, CentOS, Windows) that can be used to launch a VM quickly. Here’s how to launch a VM using one of these images.
Steps:
In Compute Engine > VM Instances and click Create Instance.
In the Boot Disk section, click Change.
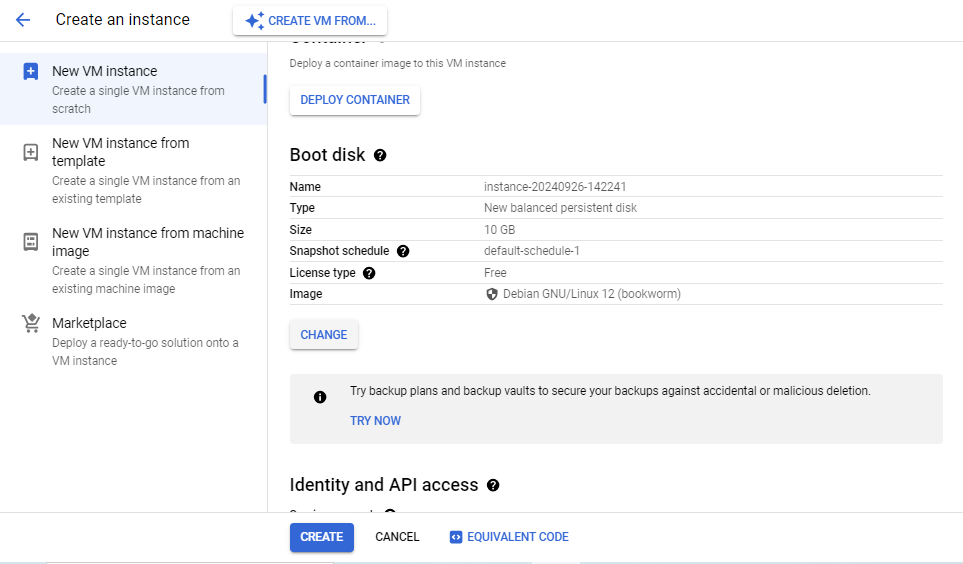
Browse through the list of predefined images and select one (e.g., Ubuntu 20.04 LTS).
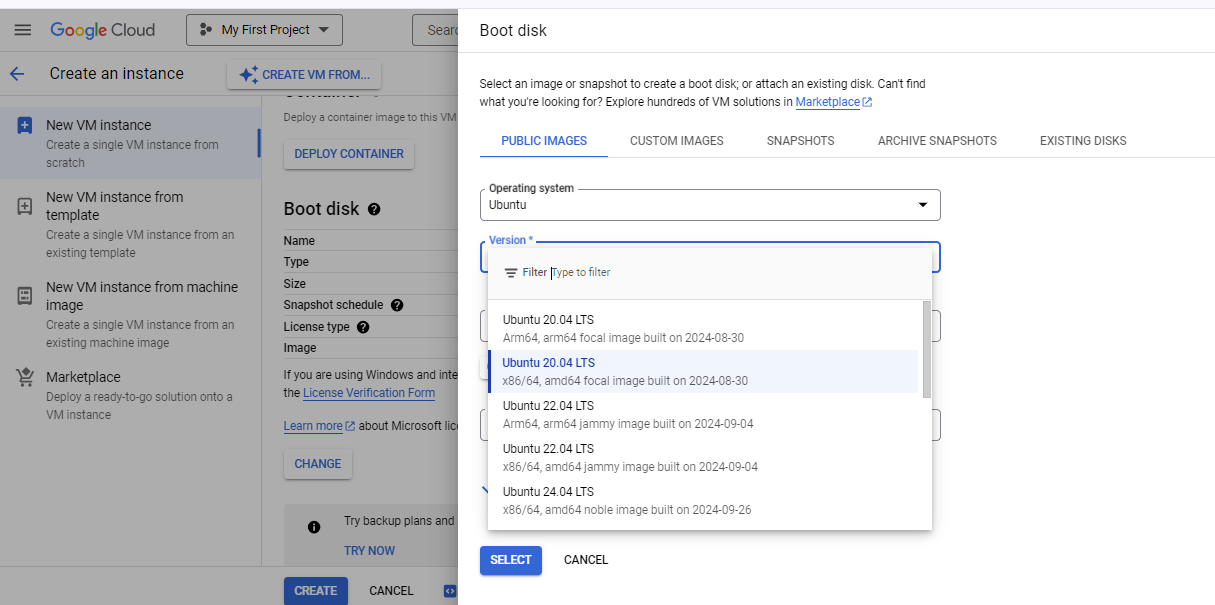
Click Select and then Create to proceed.
Task 4: Create a VM from a Snapshot
Snapshots allow to capture the state of a disk, which can later be used to restore or clone a VM. If a snapshot is available, a new VM can be easily launched using that snapshot.
Steps:
Navigate to Compute Engine > Snapshots.
Click Created Snapshot to take snapshot of VM Instance.
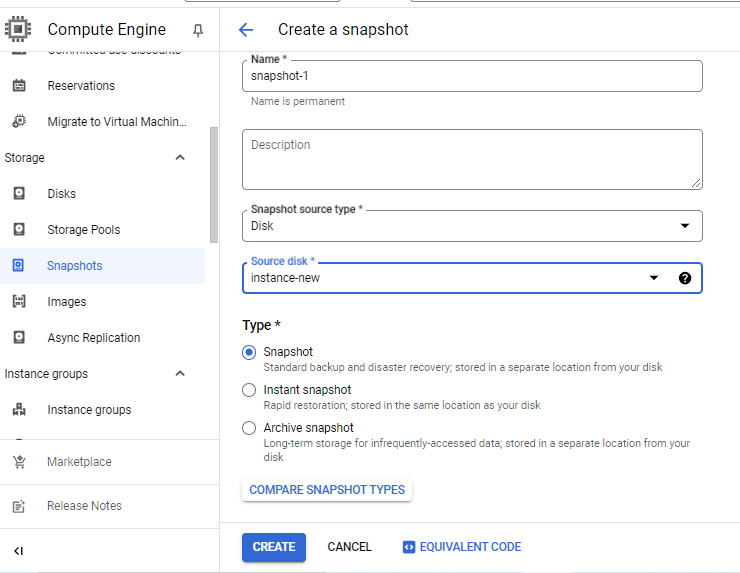
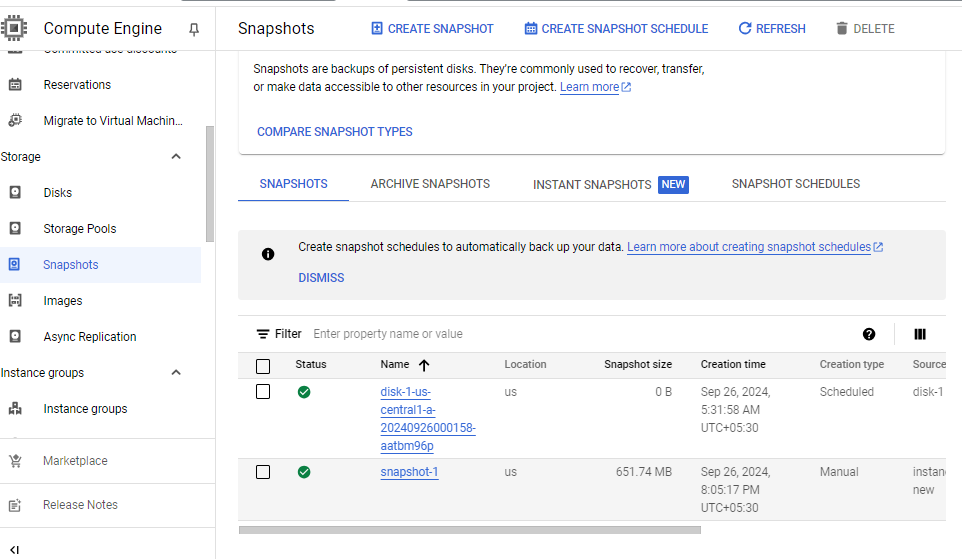
We can also create VM Instance using an existing Snapshot.
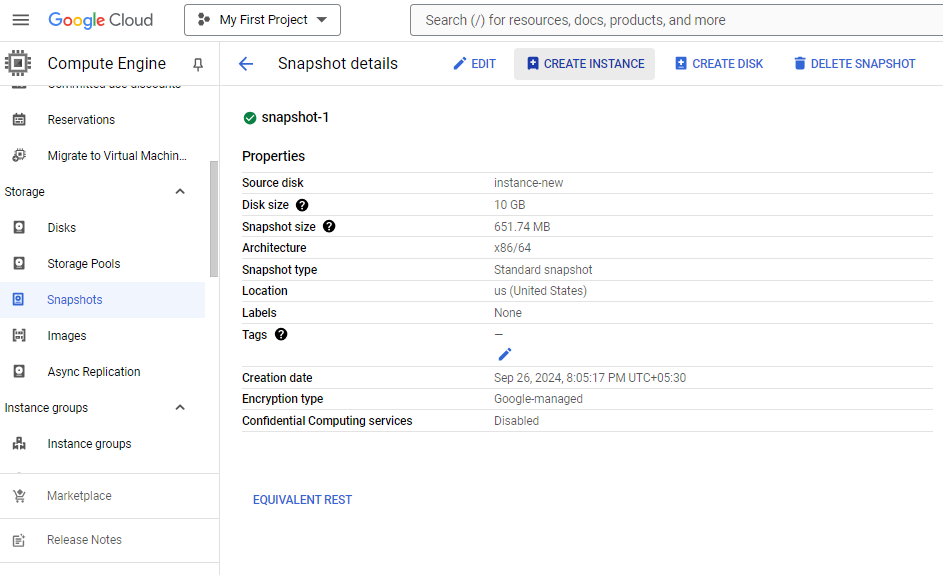
Go to previously created snapshot and click Create Instance.
While creating a new VM, in the Boot Disk section, select Snapshot as the source.
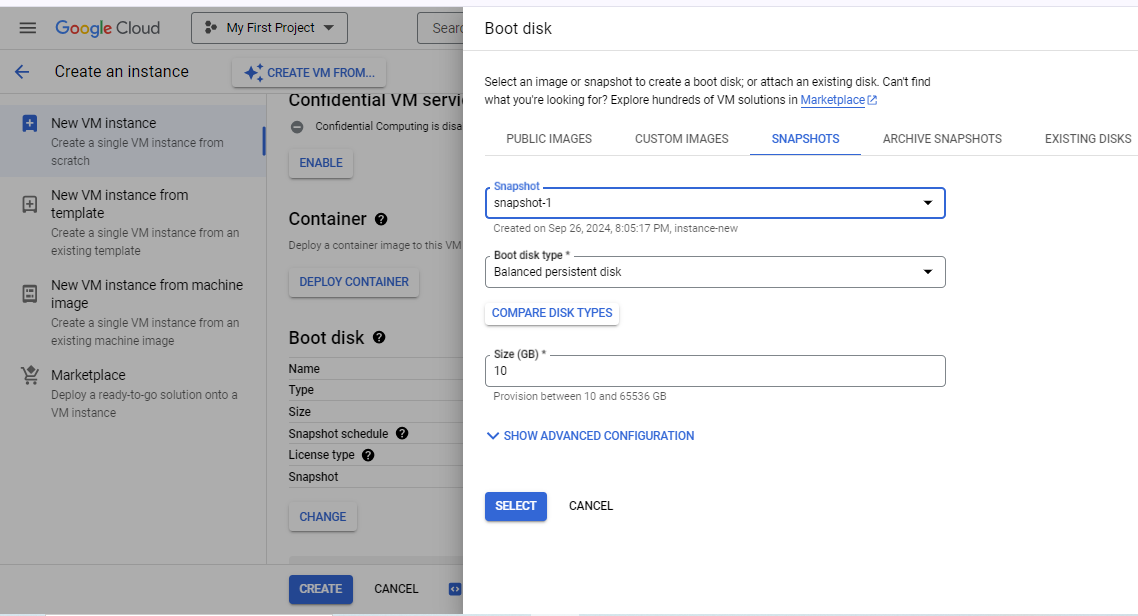
Select previous snapshot from the list and click Select and then click Create.
This is useful for restoring a system to a previous state or replicating VMs.
Task 5: Create a VM with a Startup Script
Startup scripts can be used to automate configuration tasks when a VM boots up. Example:- software can be automatically installed or settings updated.
Steps:
Start by creating a VM Instance by using steps in Task1.
In the Management, Security, Disks section, click Management.
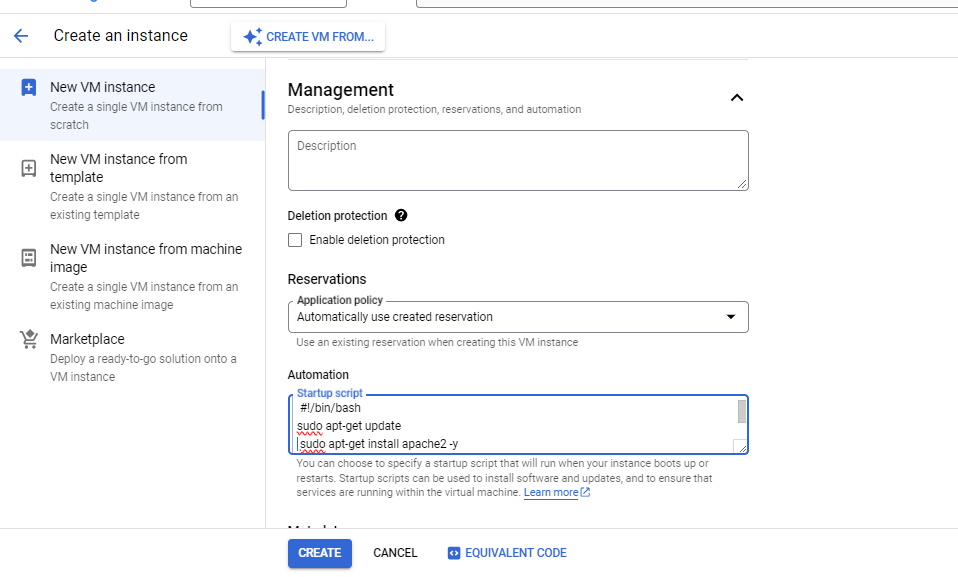
In the Startup script box, add a simple script, like installing Apache:
 #!/bin/bash
 sudo apt-get update
 sudo apt-get install apache2 -y
Click Create to launch the VM Instance with the script.
This script will automatically run when the VM is first booted, installing Apache in the process.
Task 6: Accessing a VM via SSH
Once VM Instance is created, we can connect to it using SSH from the Google Cloud Console or a terminal.
Steps:
In the Compute Engine > VM Instances.
Find the instance you want to connect to and click SSH.
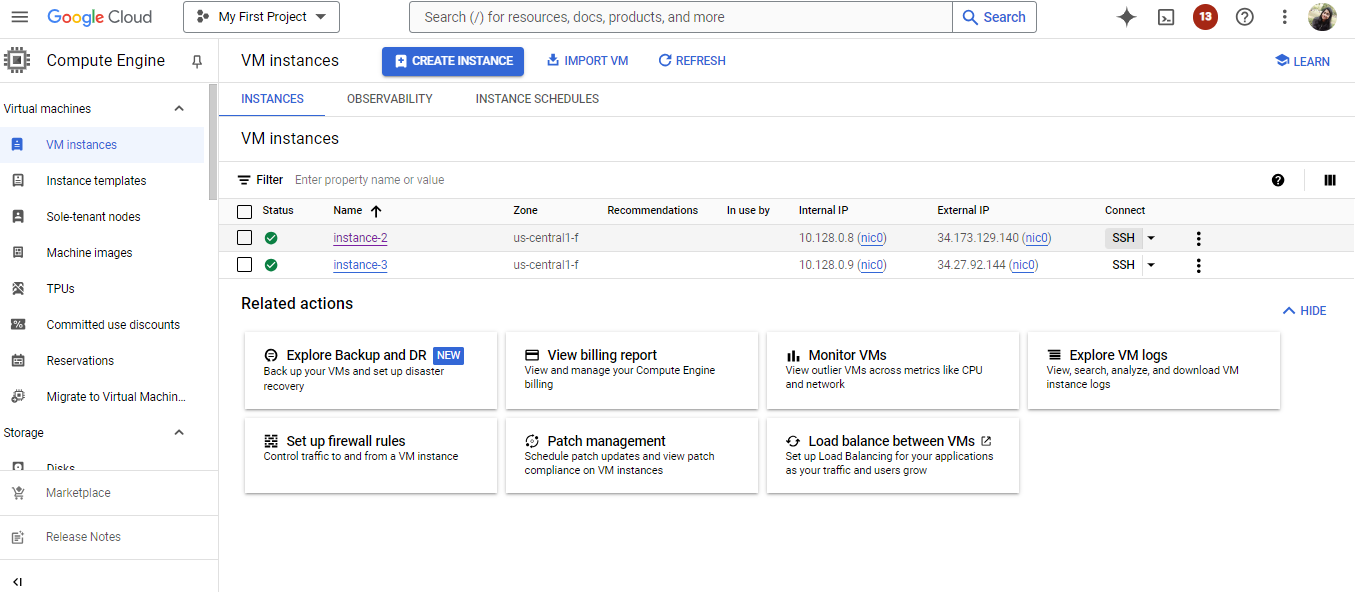
Click Authorize to connect SSH with your VM Instance.
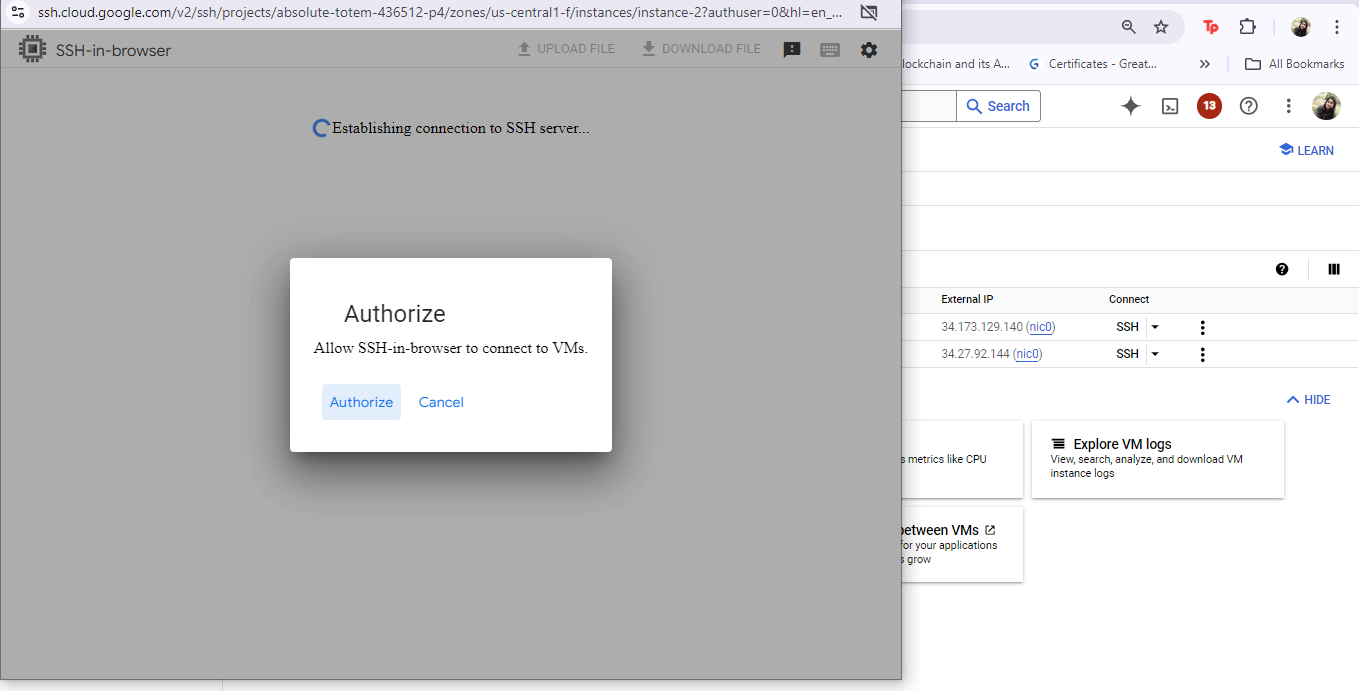
A browser-based SSH terminal will open, allowing us to interact with our VM Instance.
Task 7: Install Software on a VM
Software packages like Nginx and Apache can be installed by using SSH into the VM and package managers.
Steps :
Connect to your VM using SSH.
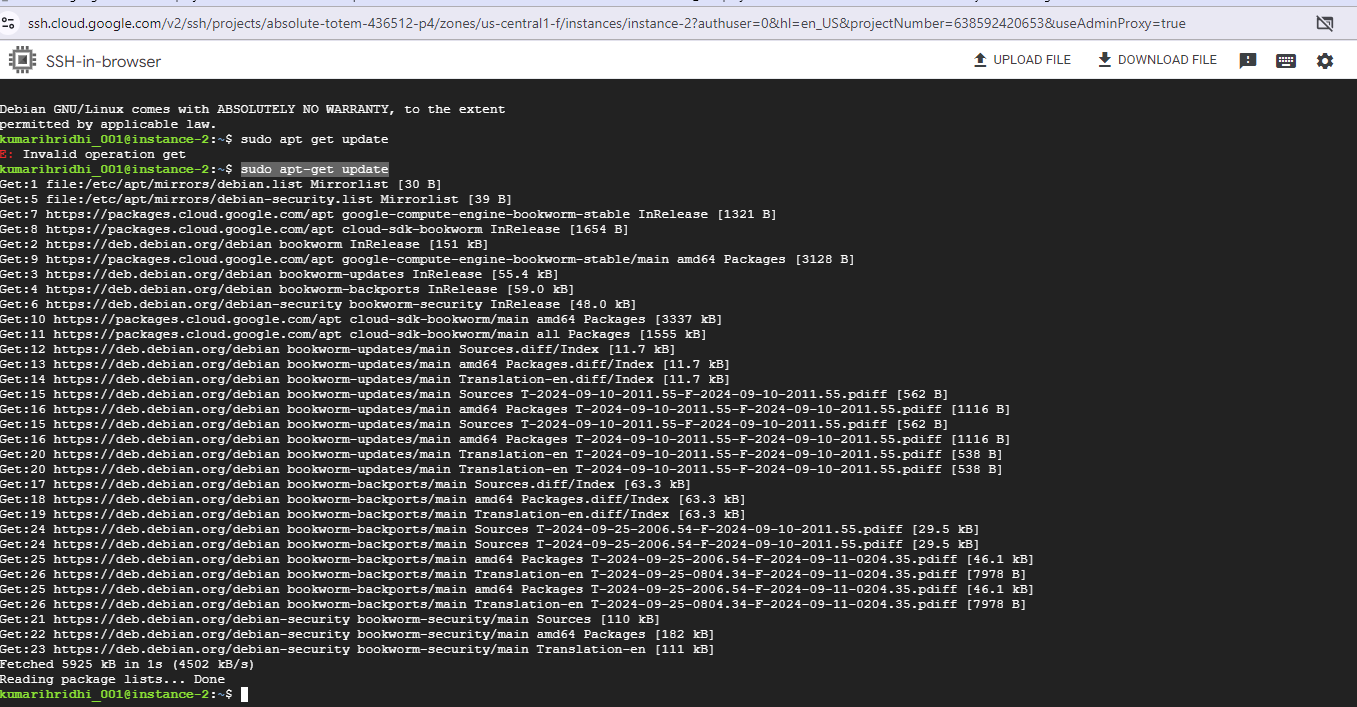
Run the following commands:
 sudo apt-get update
 sudo apt-get install nginx -y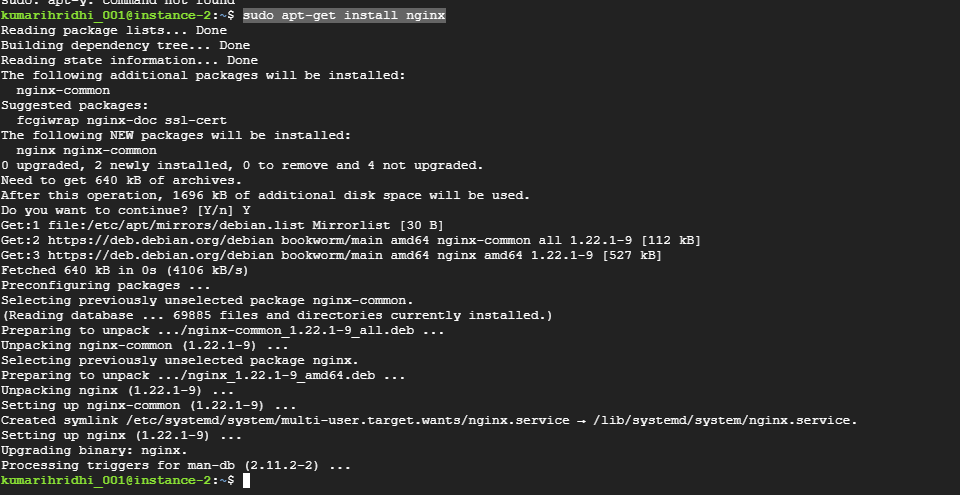
Once installed, you can start and manage the Nginx server.
Task 8: Host a Simple Website on a VM
Hosting a simple static website is a great way to get started with Compute Engine. Here’s how to use a VM to host a website.
Steps:
SSH into your VM Instance by following the steps in Task-6.
Install Nginx or Apache by following steps in Task-7 or use the code below.
 sudo apt-get update
 sudo apt-get install nginx -y
 sudo apt-get install apache2 -y
Get back to the Compute Engine > VM Instances.
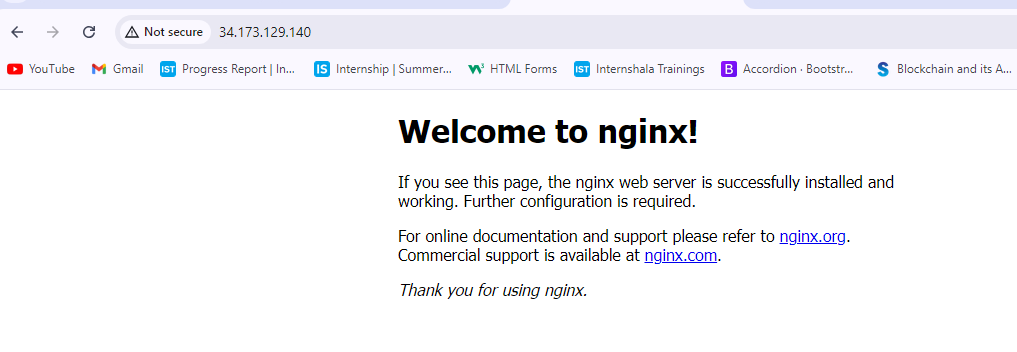
Now click on Instance External IP to host the website.
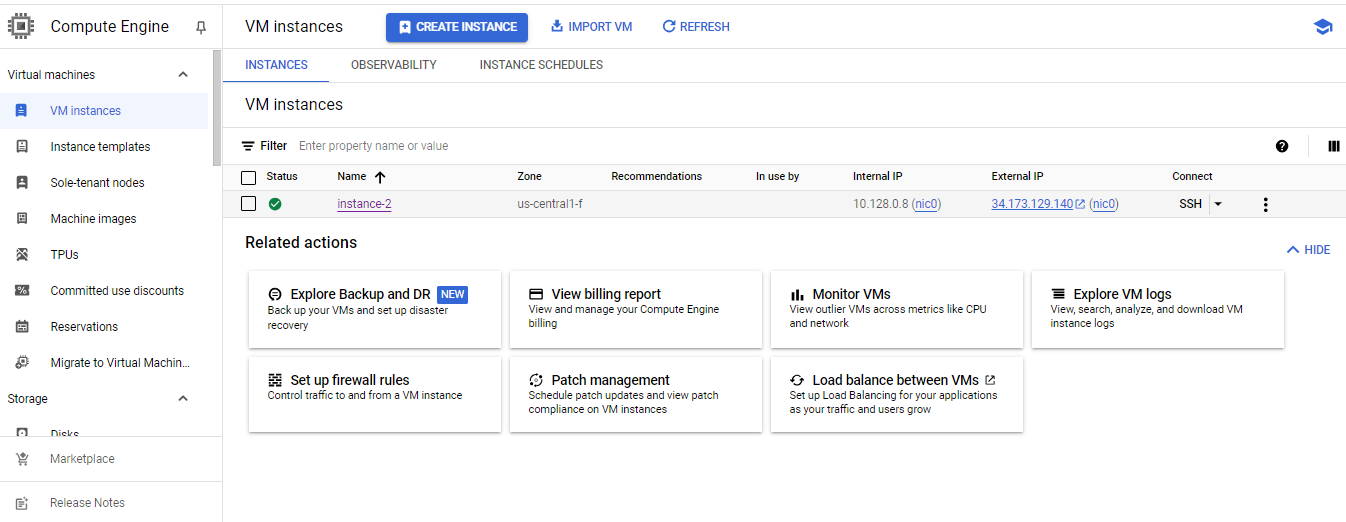
The website can now be viewed in a new browser tab.
Task 9: Create and Attach a Persistent Disk
If additional storage is needed for a VM, a persistent disk can be created and attached at any time.
Steps:
Go to Compute Engine > Disks and click Create Disk.
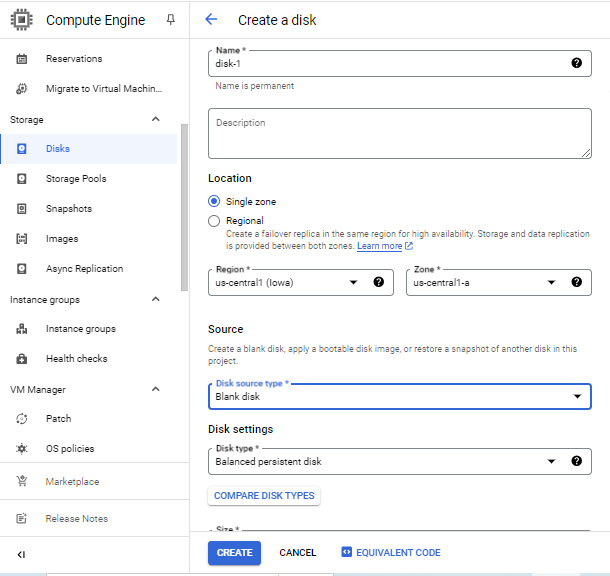
Define the size, type, and region for the disk.
Click Create.
Once created, go to VM Instances, select your VM Instance, and choose Edit.
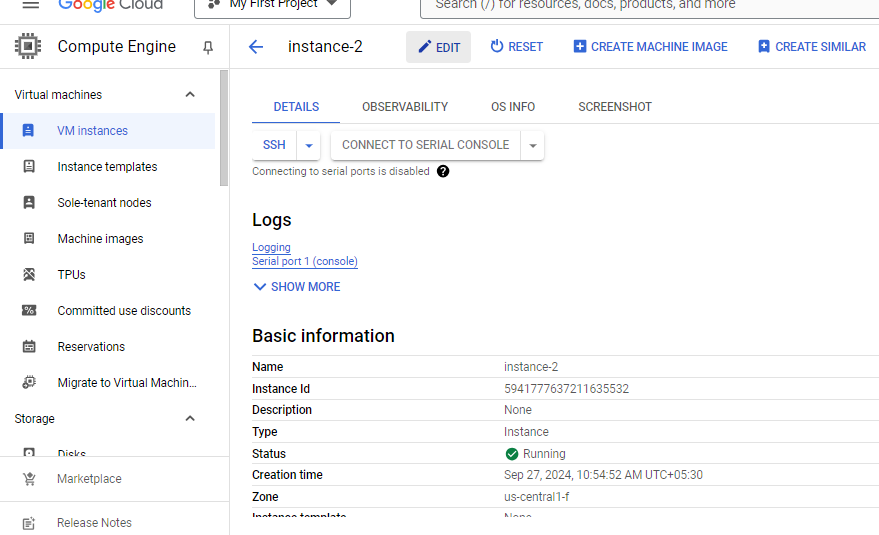
Scroll down to Additional Disks, click Attach Existing Disk, and select the disk you created.
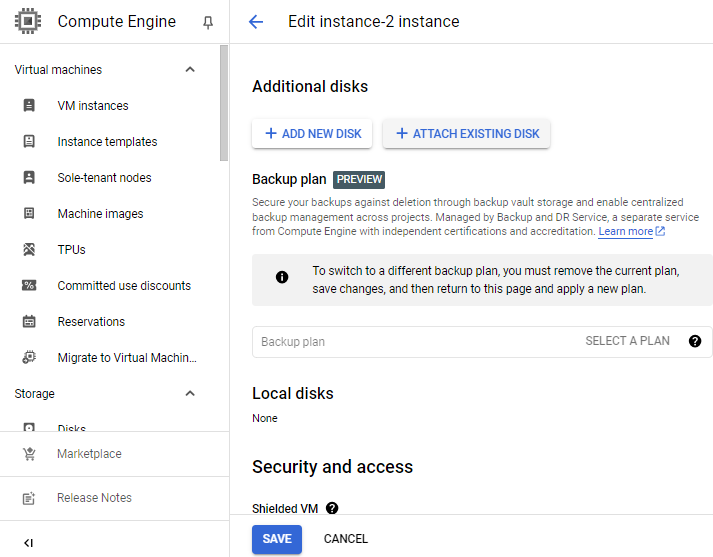
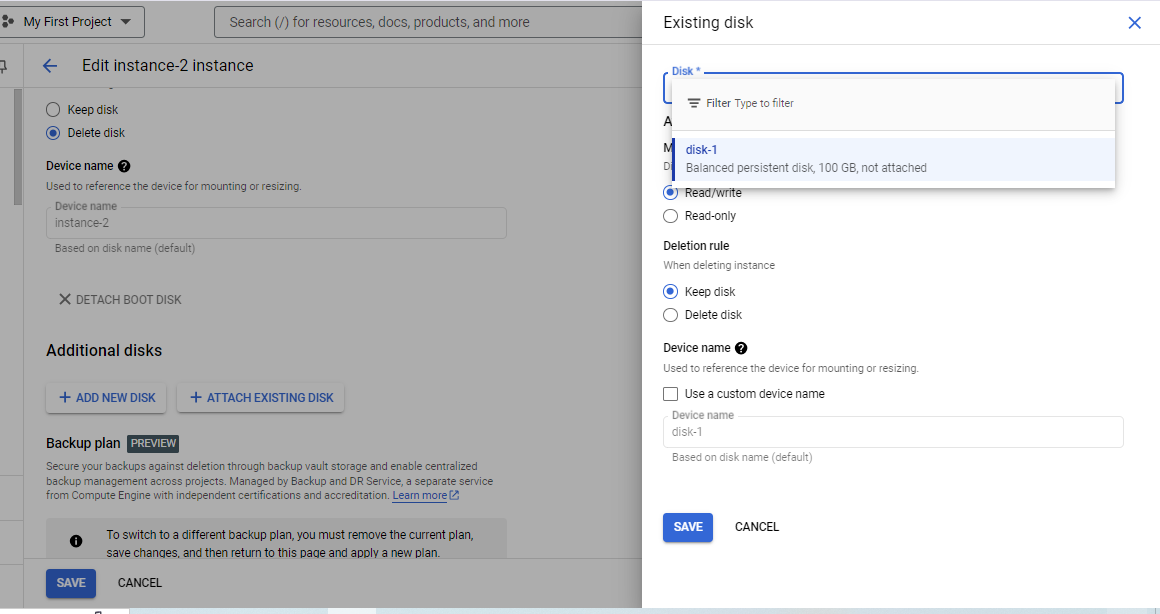
click SAVE, again click SAVE.

This will add an additional disk to an existing VM Instance.
Conclusion
By following these tasks, one should now have a solid understanding of how to create, manage, and customize virtual machines in Google Cloud’s Compute Engine. Whether launching simple instances or more complex setups, Compute Engine provides the flexibility to adapt to various use cases. Continue experimenting to further build cloud skills!
Subscribe to my newsletter
Read articles from Hridhi Kumari directly inside your inbox. Subscribe to the newsletter, and don't miss out.
Written by
