Create Elastic Block Storage Volume
 Muhammad Sufiyan
To create an Elastic Block Storage (EBS) volume in AWS, you can follow these steps. I'll guide you through both the AWS Management Console method (graphical interface) and the AWS CLI method (command-line interface).
Method 1: Using the AWS Management Console
Log in to the AWS Management Console:
Go to the AWS Management Console.
Log in with your credentials.
Navigate to the EC2 Dashboard:
- In the AWS console, search for "EC2" in the search bar and select EC2 from the services dropdown.
Go to Elastic Block Store (EBS):
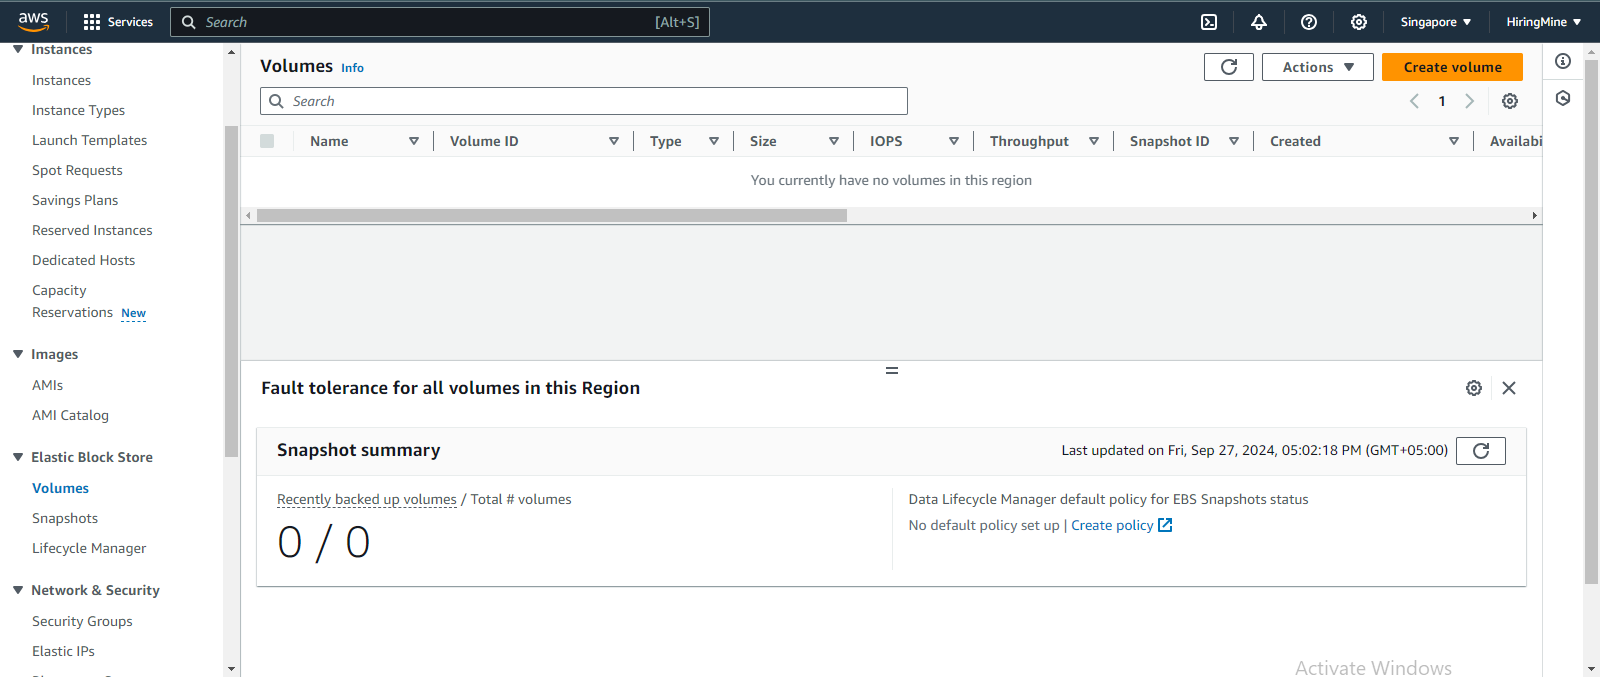
From the EC2 dashboard, scroll down to find the Elastic Block Store section in the left-hand menu.
Click on Volumes.

Create a New Volume:
Click on the Create Volume button at the top of the page.

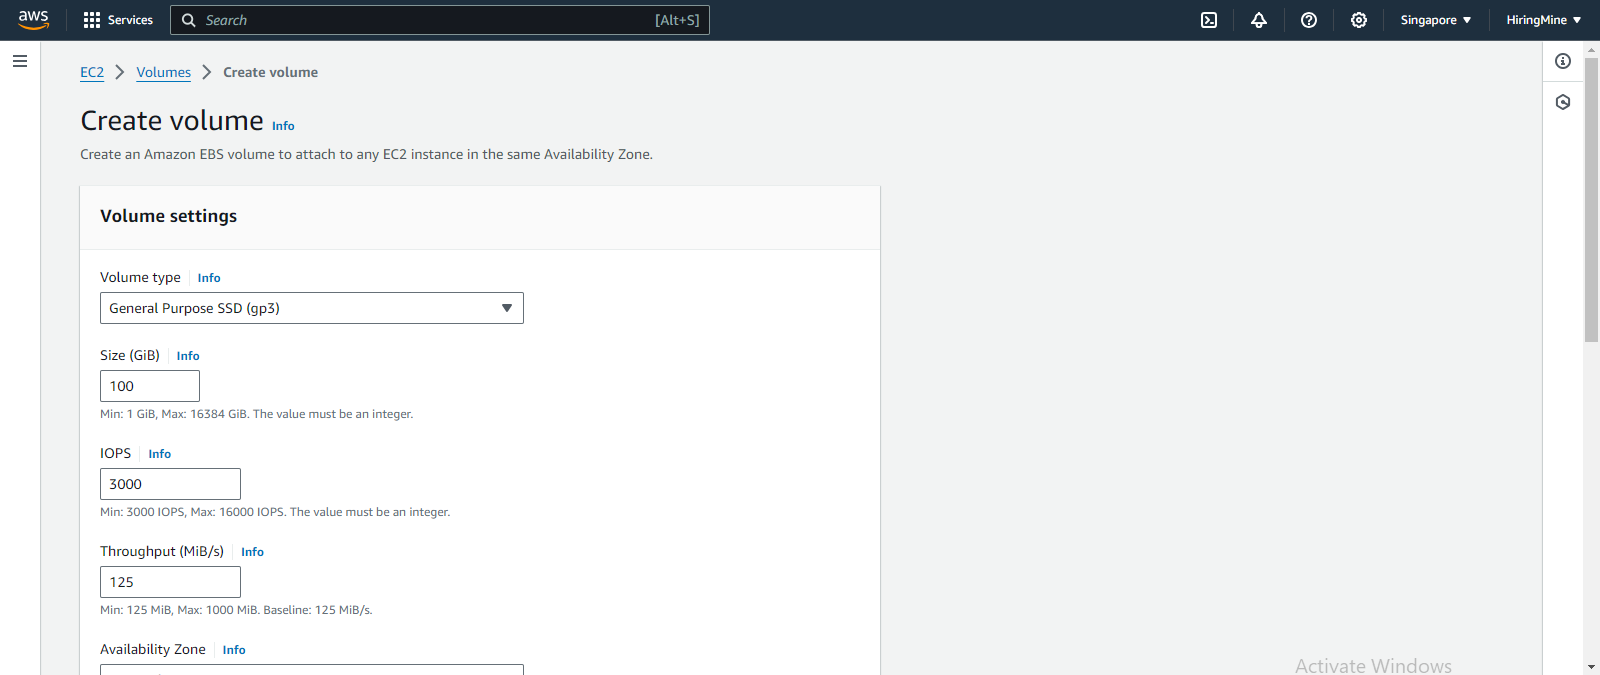
Configure Volume Settings:
Volume Type: Choose the type of volume you need (e.g.,
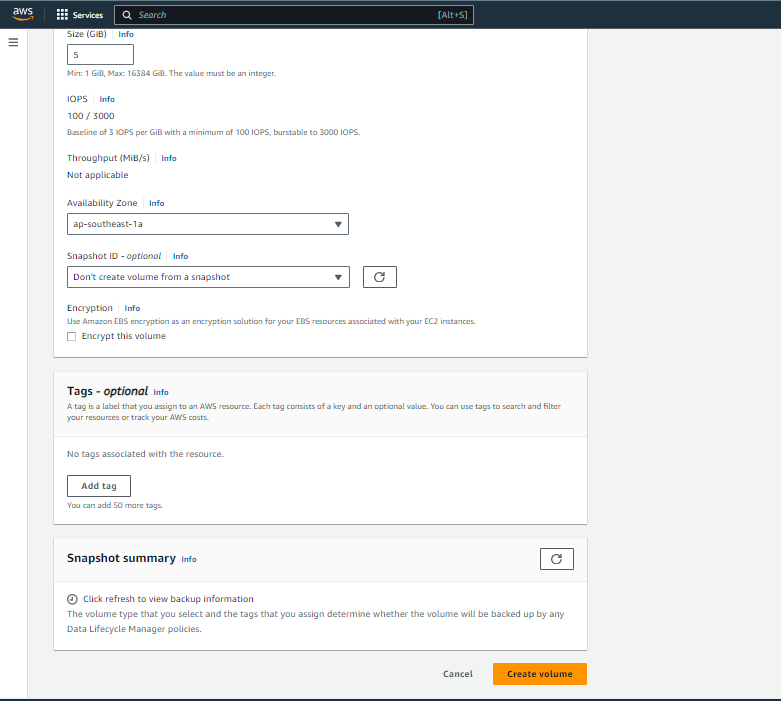
gp3,gp2,io2,st1, etc.).Size: Specify the size of the volume in GB.

Availability Zone (AZ): Select the Availability Zone where your EC2 instance resides. Volumes can only be attached to instances in the same AZ.
IOPS: If you're using Provisioned IOPS SSD (
io2,io1), specify the number of IOPS.Throughput: If you’re using gp3, you can adjust the throughput settings.
Encryption: Check the box to encrypt the volume. You can use AWS’s Key Management Service (KMS) to manage your encryption keys.
Review and Create:
Review your settings and click Create Volume.

Attach the Volume to an EC2 Instance:
After creating the volume, you will see it in the Volumes list.

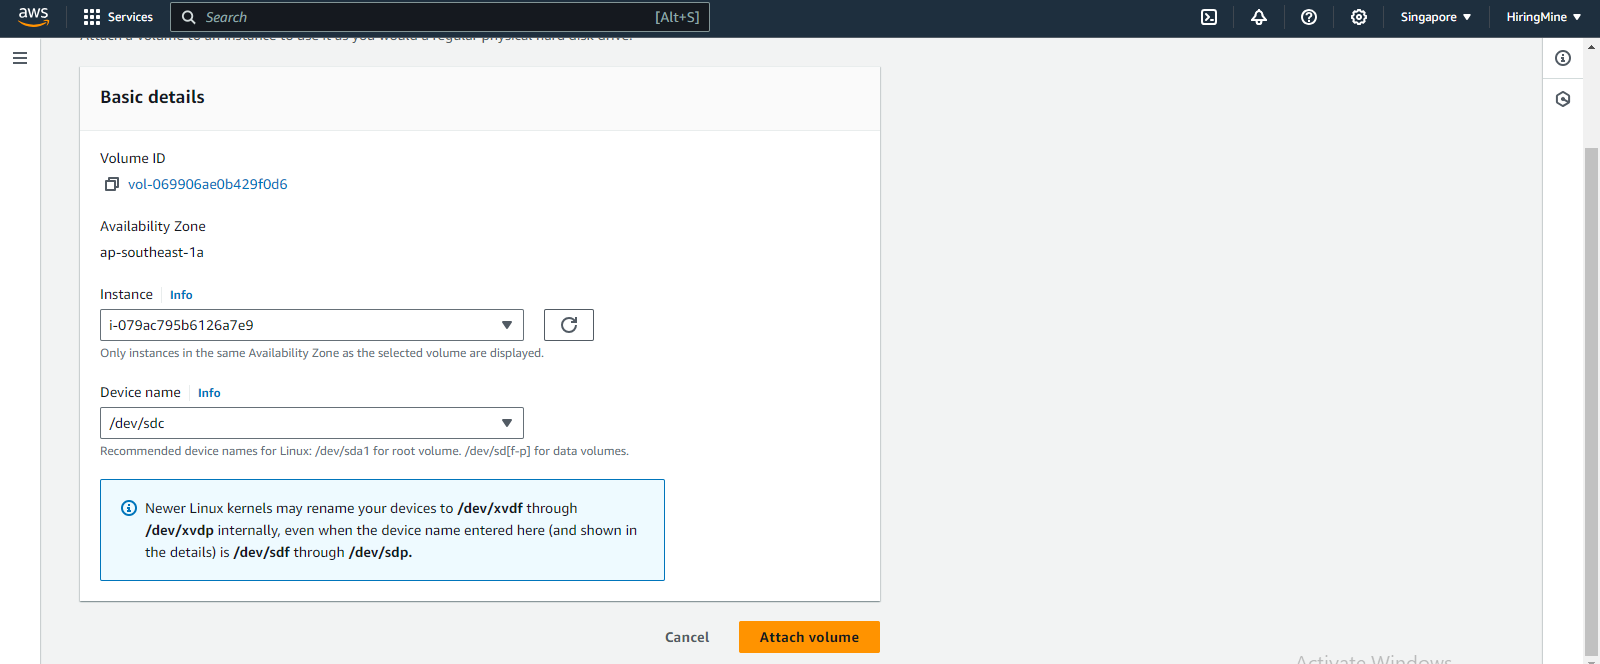
Select the volume, click on the Actions dropdown, and choose Attach Volume.

Select the EC2 instance to which you want to attach the volume and choose the correct Device Name (e.g.,
/dev/sdffor Linux or/dev/xvdf).
Click Attach to complete the process.
Mount the Volume (Linux EC2 instance):
After attaching the volume, SSH into your EC2 instance to mount the volume to your file system.
Check if the volume is attached:
lsblkThe new volume should appear, but it won’t be mounted yet.
Create a filesystem (if the volume is new):
sudo mkfs -t ext4 /dev/xvdfMount the volume:
  sudo mkdir /mnt/myebsvolume
  sudo mount /dev/xvdf /mnt/myebsvolume
Verify the mounted volume:
df -h
Method 2: Using the AWS CLI
To use the AWS CLI to create an EBS volume, make sure the AWS CLI is installed and configured on your machine.
Configure AWS CLI: If you haven't configured your AWS CLI, run:
aws configureEnter your AWS Access Key ID, Secret Access Key, region, and output format (e.g., JSON).
Create an EBS Volume: Use the following command to create an EBS volume:
aws ec2 create-volume \ --size 10 \ --volume-type gp3 \ --availability-zone us-east-1a \ --tag-specifications 'ResourceType=volume,Tags=[{Key=Name,Value=MyEBSVolume}]'--size: Size of the volume in GB.--volume-type: The type of volume (gp3,gp2,io2, etc.).--availability-zone: Specify the AZ where your EC2 instance resides.--tag-specifications: Add tags to help identify the volume.
Attach the Volume to an Instance:
aws ec2 attach-volume \ --volume-id vol-1234567890abcdef0 \ --instance-id i-1234567890abcdef0 \ --device /dev/xvdf--volume-id: The ID of the EBS volume (from the previous step).--instance-id: The ID of the EC2 instance to which the volume will be attached.--device: The device name (e.g.,/dev/xvdf).
Mount the Volume on Linux Instance: After attaching the volume, follow the same steps as mentioned in the AWS Management Console method to mount the volume.
Conclusion
Creating and managing EBS volumes is straightforward using both the AWS Management Console and the AWS CLI. EBS provides flexible, scalable, and persistent storage solutions for your EC2 instances. Whether you're running databases, applications, or general data storage, EBS can handle various workloads with its range of volume types tailored for performance or cost efficiency.
Subscribe to my newsletter
Read articles from Muhammad Sufiyan directly inside your inbox. Subscribe to the newsletter, and don't miss out.
Written by

Muhammad Sufiyan
Muhammad Sufiyan
As a former 3D Animator with more than 12 years of experience, I have always been fascinated by the intersection of technology and creativity. That's why I recently shifted my career towards MERN stack development and software engineering, where I have been serving since 2021. With my background in 3D animation, I bring a unique perspective to software development, combining creativity and technical expertise to build innovative and visually engaging applications. I have a passion for learning and staying up-to-date with the latest technologies and best practices, and I enjoy collaborating with cross-functional teams to solve complex problems and create seamless user experiences. In my current role as a MERN stack developer, I have been responsible for developing and implementing web applications using MongoDB, Express, React, and Node.js. I have also gained experience in Agile development methodologies, version control with Git, and cloud-based deployment using platforms like Heroku and AWS. I am committed to delivering high-quality work that meets the needs of both clients and end-users, and I am always seeking new challenges and opportunities to grow both personally and professionally.