The API Client I Didn’t Know I Needed: Bruno
 Yohan LB
1. Introduction: The Search for the Perfect API Client
While developing the API for my GeoQuiz app, I needed a reliable and simple API client for testing, documenting, and managing routes across different environments. I initially explored well-known tools like Postman and Insomnia, but while they offer powerful features, I found them expensive and an overkill for my needs.
I also experimented with Thunder Client, which I was excited about because it works as a VS Code extension, eliminating the need for additional installations. This was great for keeping my coding environment simple and efficient.
However, since I often work from different computers, I quickly ran into the issue of having to redefine and edit my routes and requests every time I switched workspaces. Thunder Client doesn’t give you direct control over your files, and the free version doesn’t offer cloud sync.
That’s when I decided to search for an API client that was lightweight, open-source, and most importantly, allowed me to control and sync my API request definitions with the rest of my code through Git. This led me to useBruno.com, and it turned out to be exactly what I was looking for.
2. What is Bruno
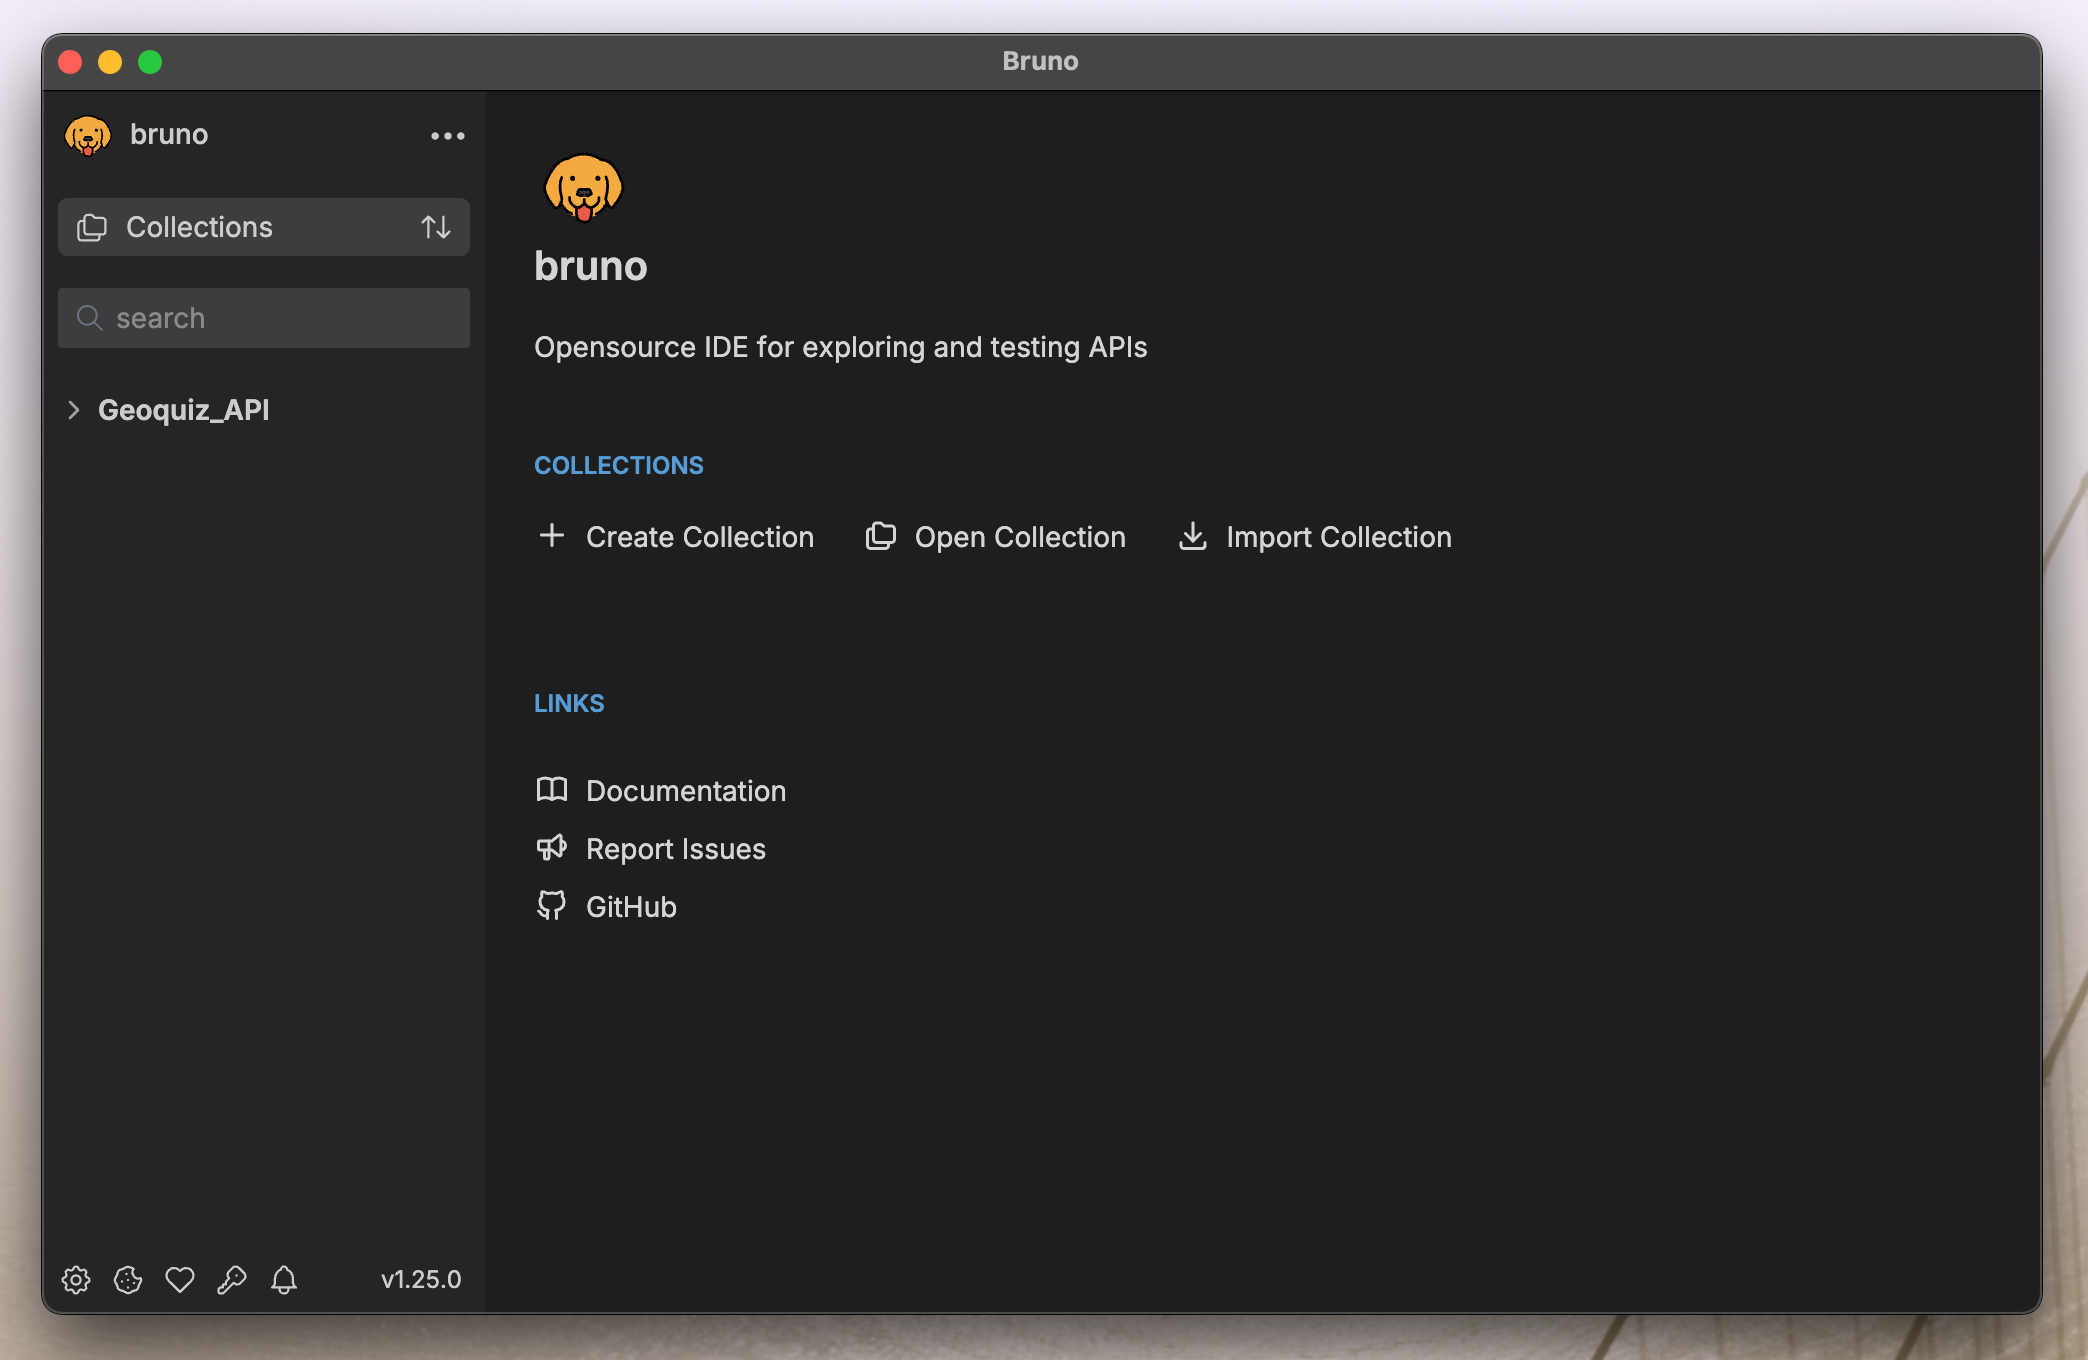
Bruno is an open-source API client designed to help developers test and manage their API requests. Unlike many tools that store API configurations in the cloud, Bruno saves requests locally as plain text files using the Bru markup language. This makes it easy to version control API definitions using Git or other systems, allowing you to sync across multiple devices or workspaces seamlessly.
Bruno includes standard API client features such as the ability to define different environments with unique variables and secrets, create collections of requests, and write automated tests to ensure your API behaves as expected across environments. For instance, you can set up one environment for testing your local development and another for your remote production server, and easily switch between them with a single click.
3. Setting Up Bruno in a Few Steps
Download and Install Bruno
Bruno is available for Windows, Linux and Mac. You can find it on the Official Bruno Website.
On mac you can also install it using Homebrew:
brew install bruno
a. Create a Collection
After launching Bruno, you’ll need to create a new collection:
Click on the “Create Collection” button.
Name the collection
Choose a directory where your collection will be saved. Bruno will store your requests in this folder using the Bru markup language. Remember to place it inside your repository, so you can commit the .bru files you create later.
b. Create Your First Request
Once your collection is created, right-click on it and select “New Request“. Name your request, choose the method (Get, Post, Delete, etc.), and enter the URL you want to request.
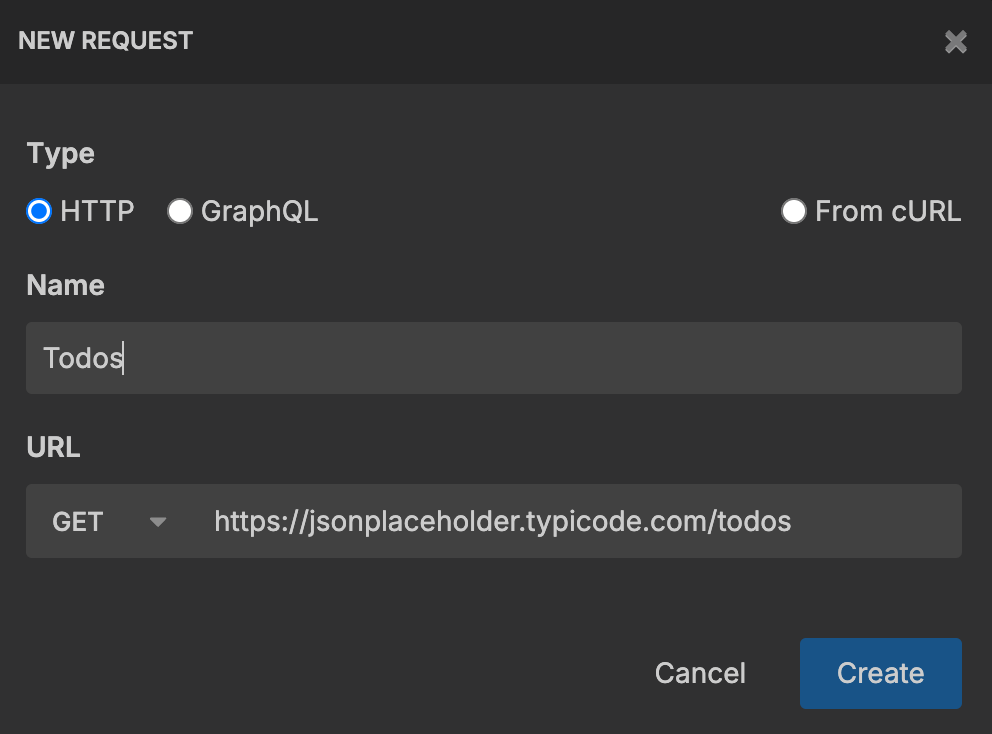
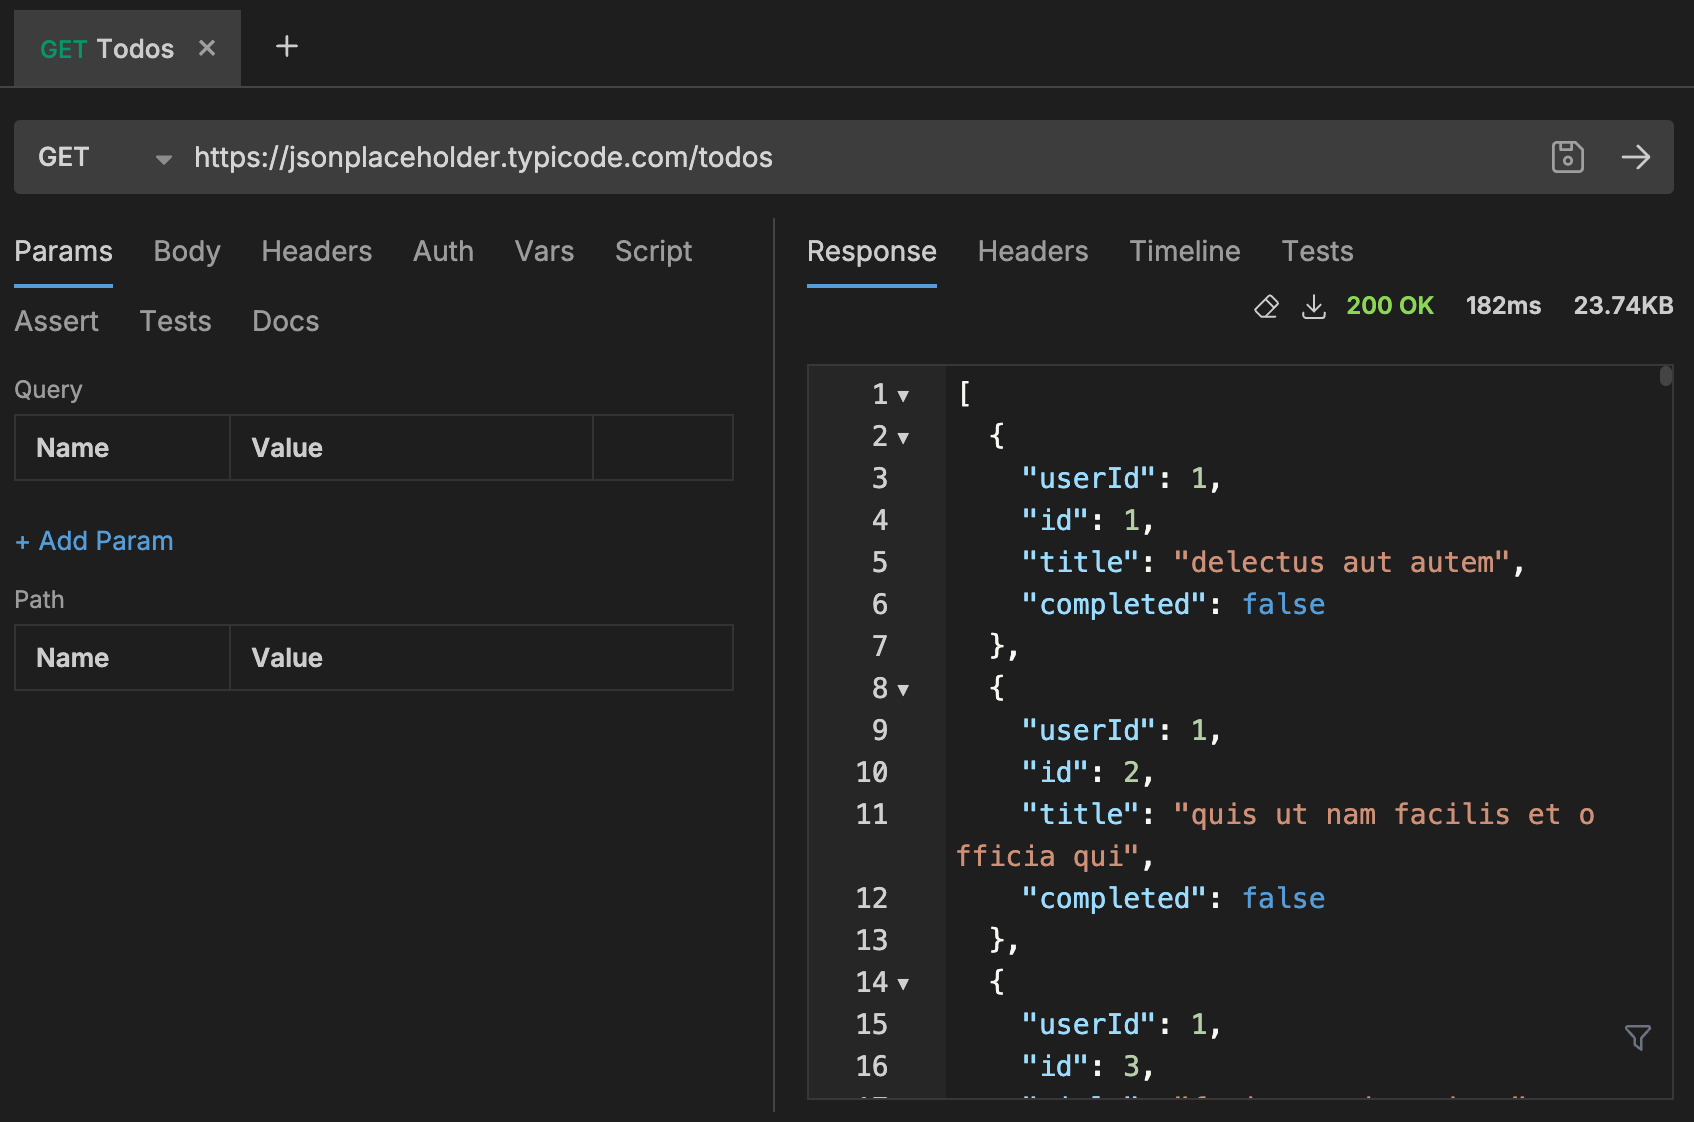
That’s it! Your request is created. You can test it by clicking on the arrow at the top right of the window.
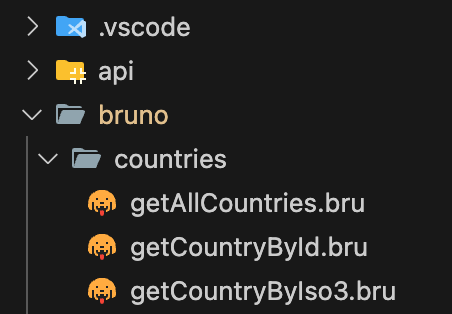
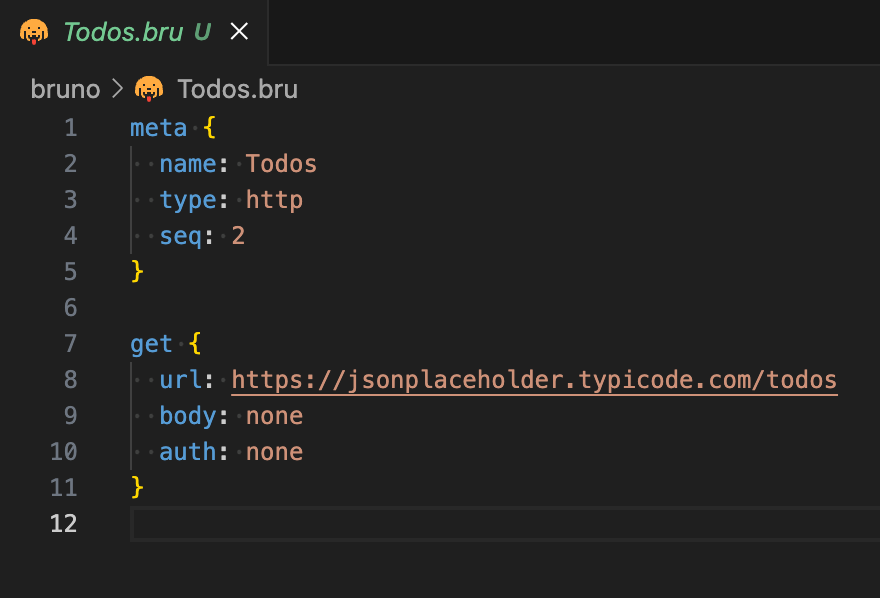
If you go back to your code editor, you’ll notice a .bru file has been created. This file contains all the information related to the request you just defined.
c. Create an environment
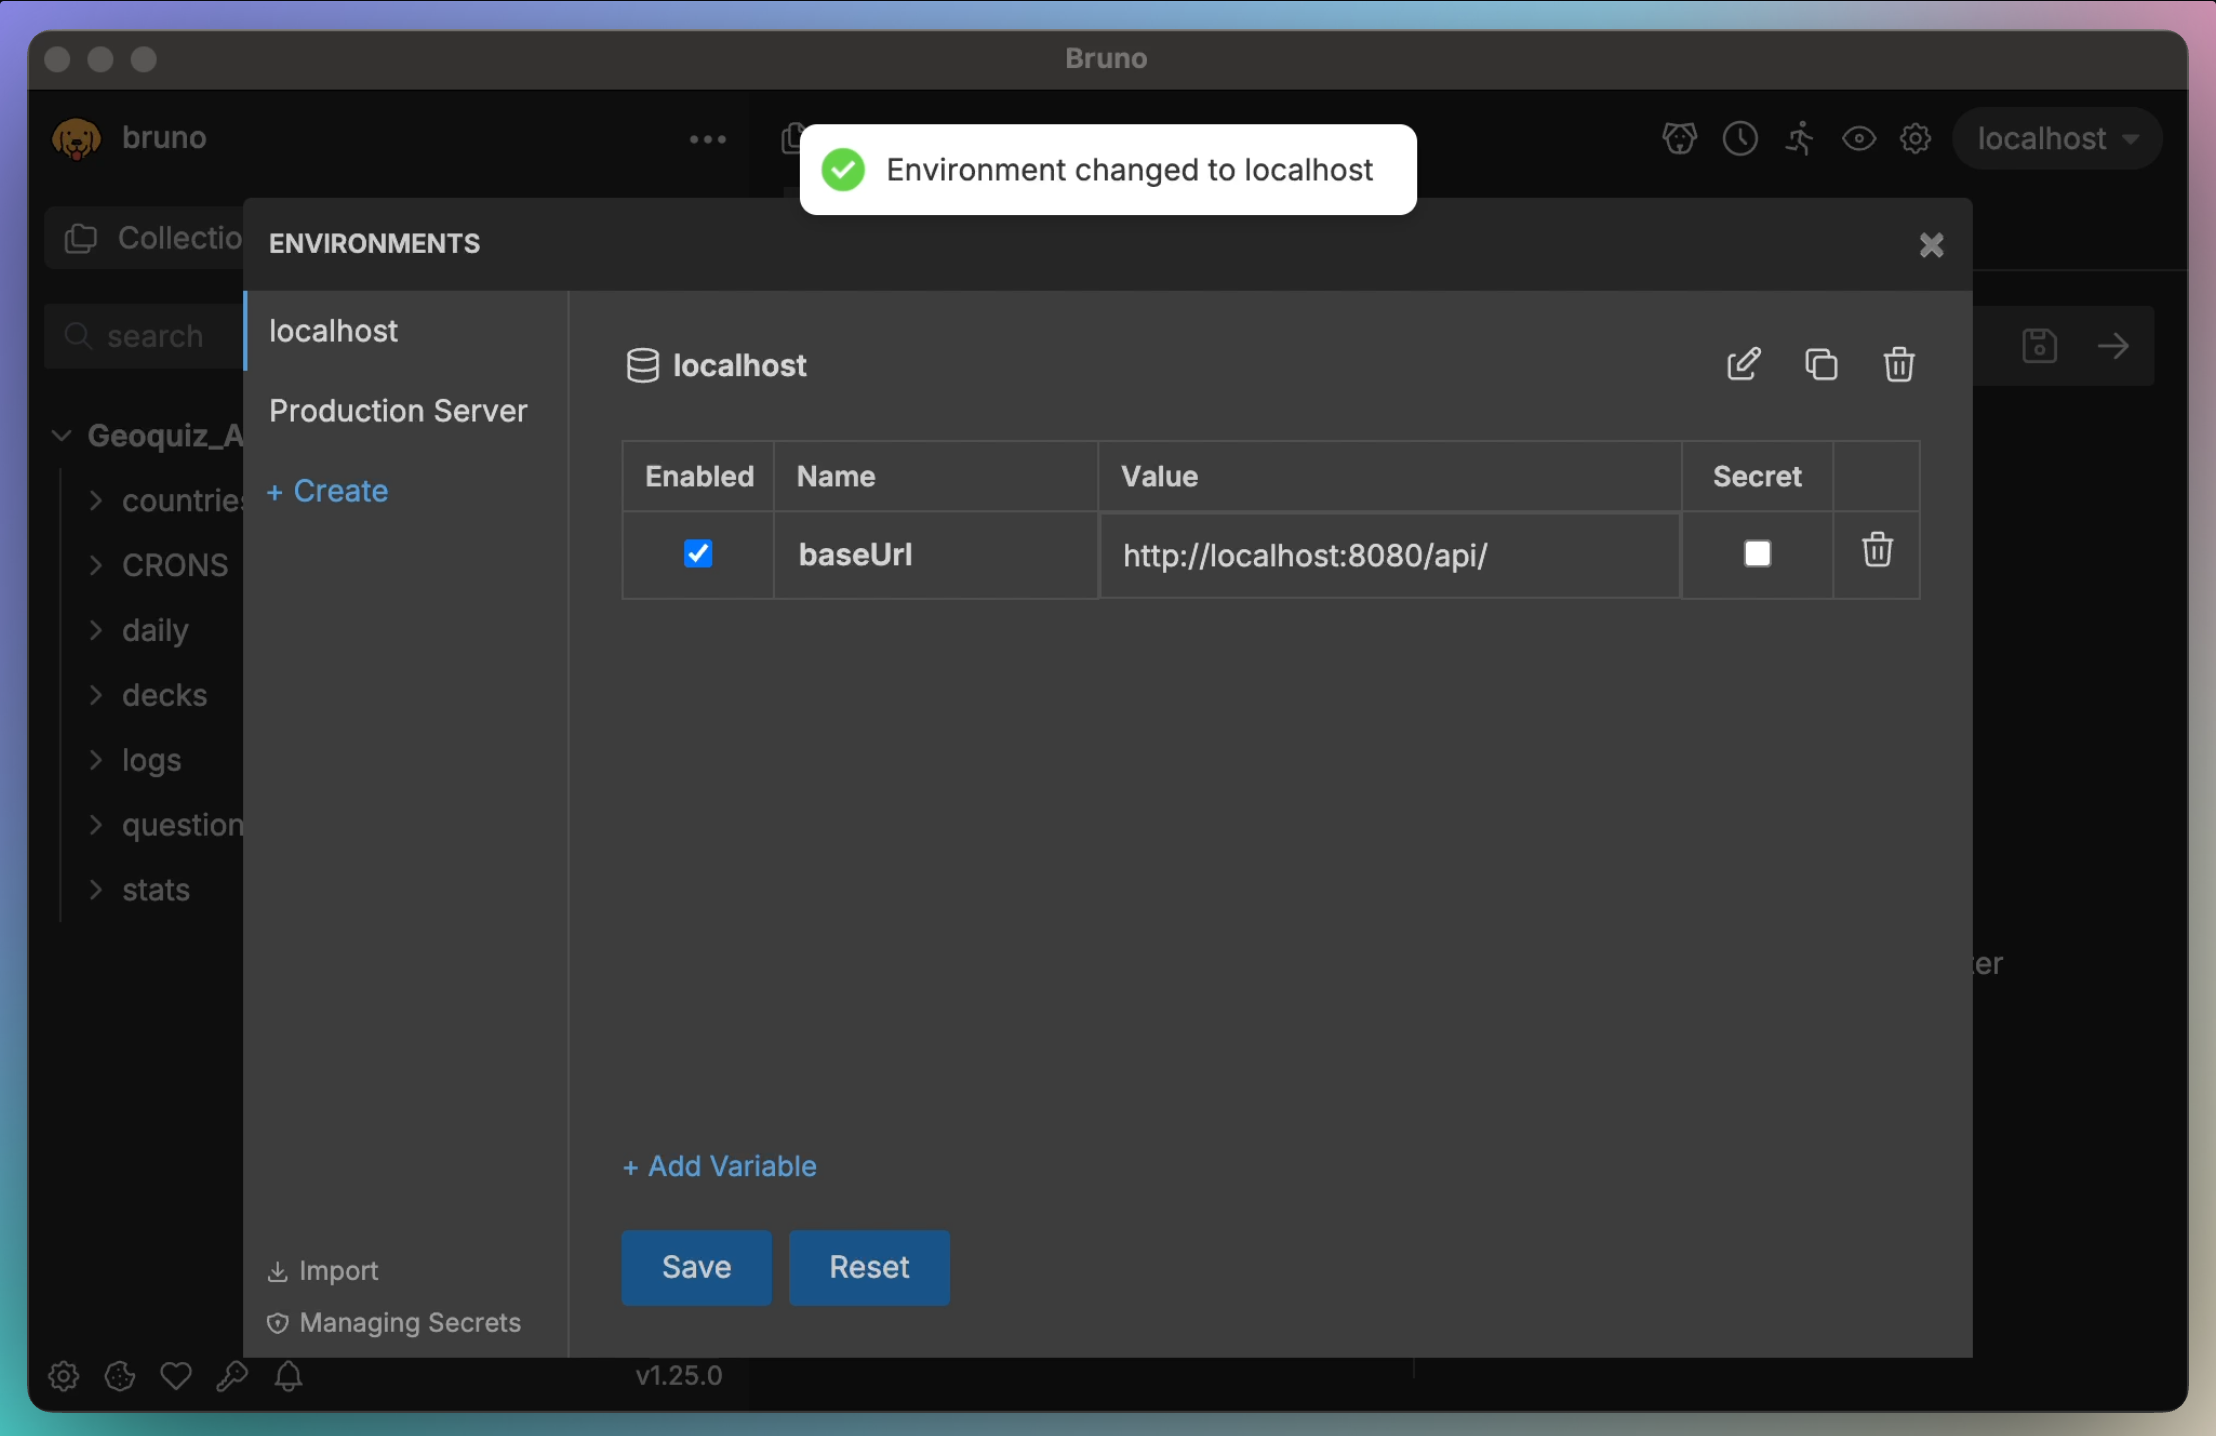
If your API requires authentication, or even if you simply want to save a variable like a base URL, you will probably want to use Bruno’s environments.
You can for example, create a localhost and production environment in which you will store your base API url.
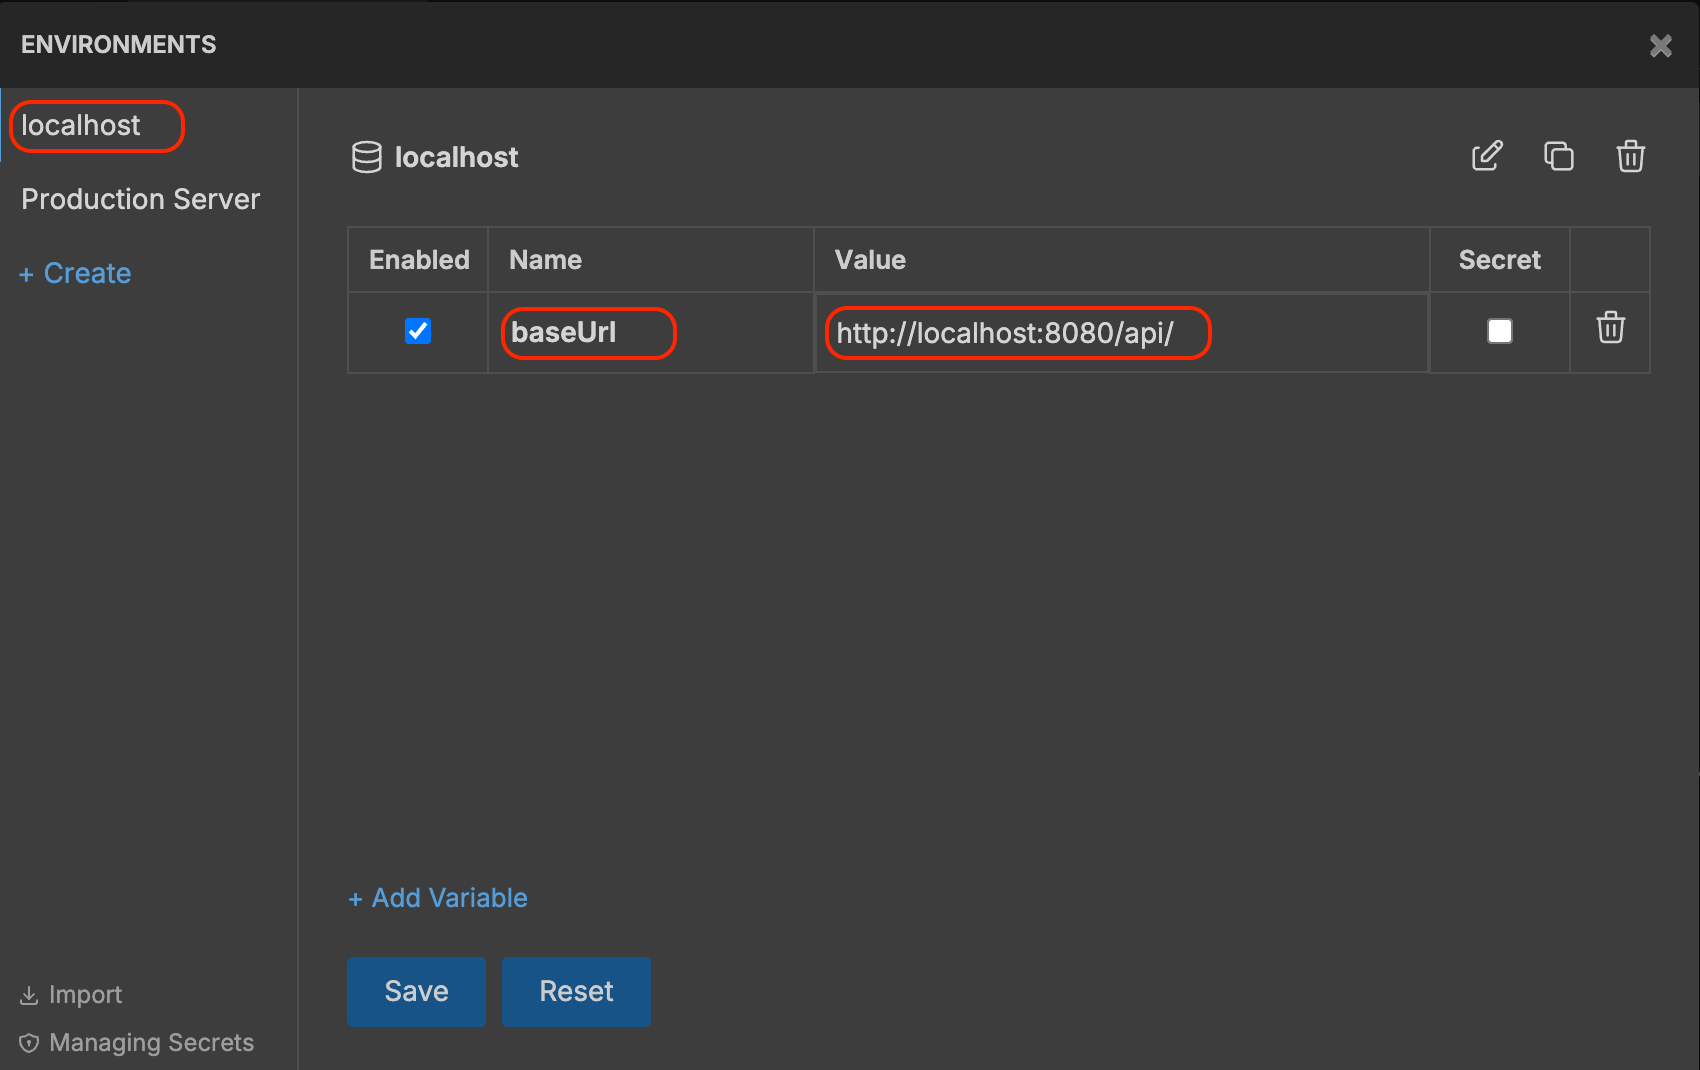
Once saved, you can then use your variable in your request definition, wrapping it in double curly braces: {{baseUrl}}.
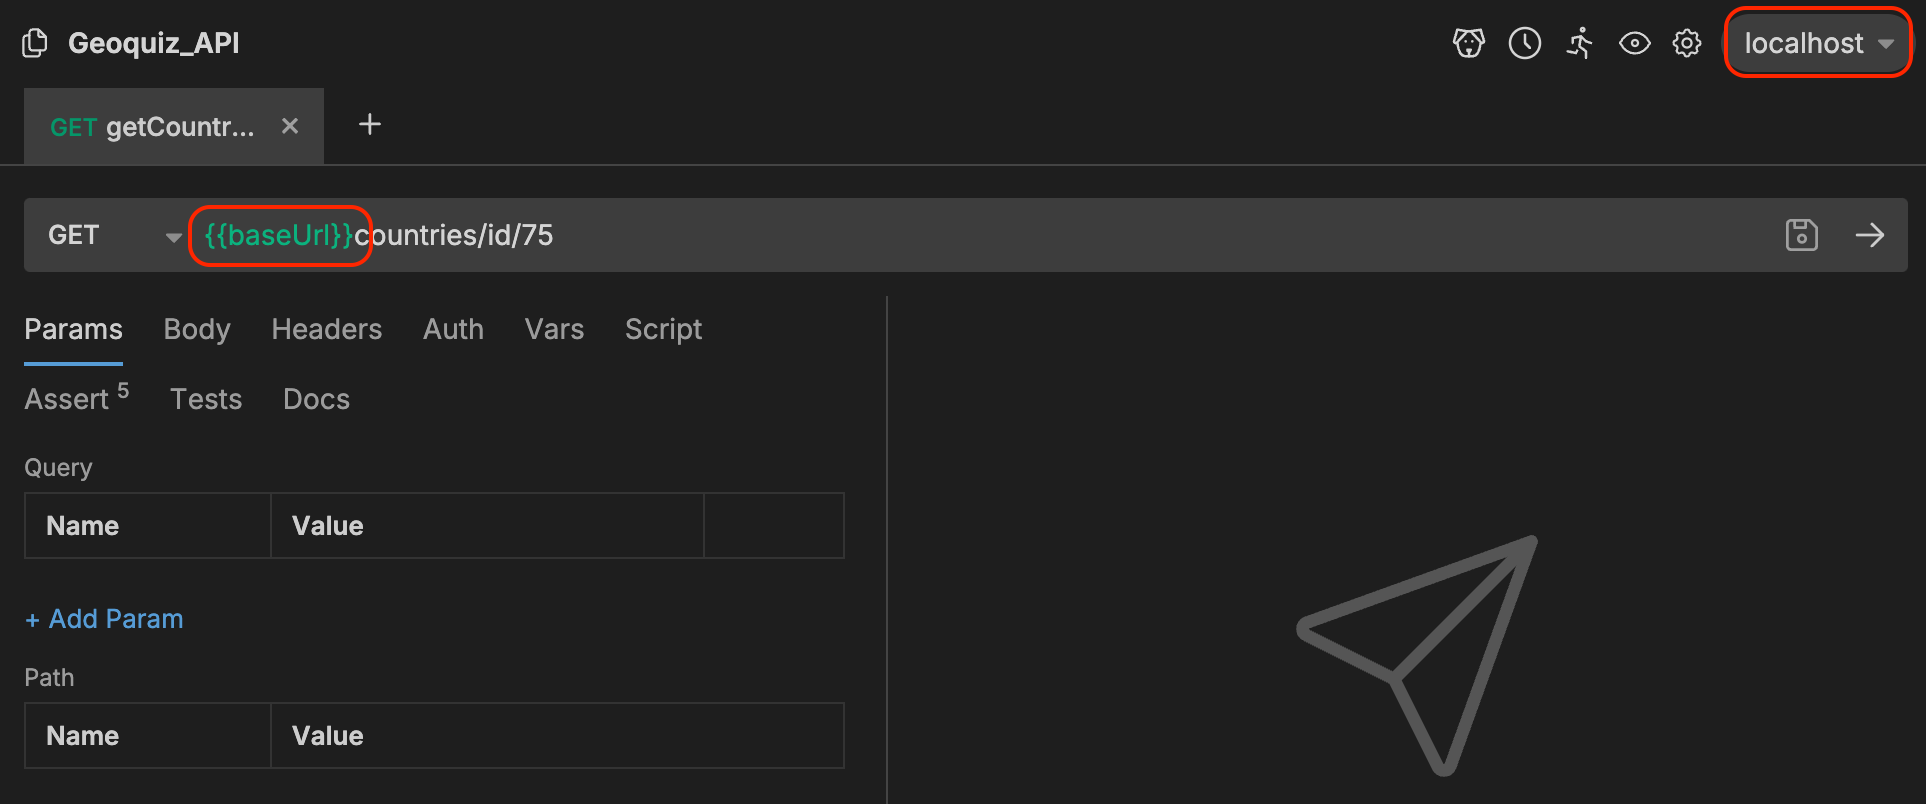
Now you can simply click on the top right dropdown to easily change between your two environments.
.bru file, and so prevents git from committing it.Bruno now also supports DotEnv files, allowing you to use a .env file at the root of your project and read it directly in the Bruno app. More about it in the Official Documentation.
d. Test your request
Now that you have setup your first requests, defined your environments, and committed everything with the rest of your repository, it is already a great way to “pre-document“ your API’s routes and payloads, for you and for everyone working on the repository.
But you can even go further by writing test and assertion that will allow you to check all your requests in one click on the selected environment!
Assertions:
The quickest and easiest way to test your API is assertions. Go to the “Assert“ tab, and build them like this:
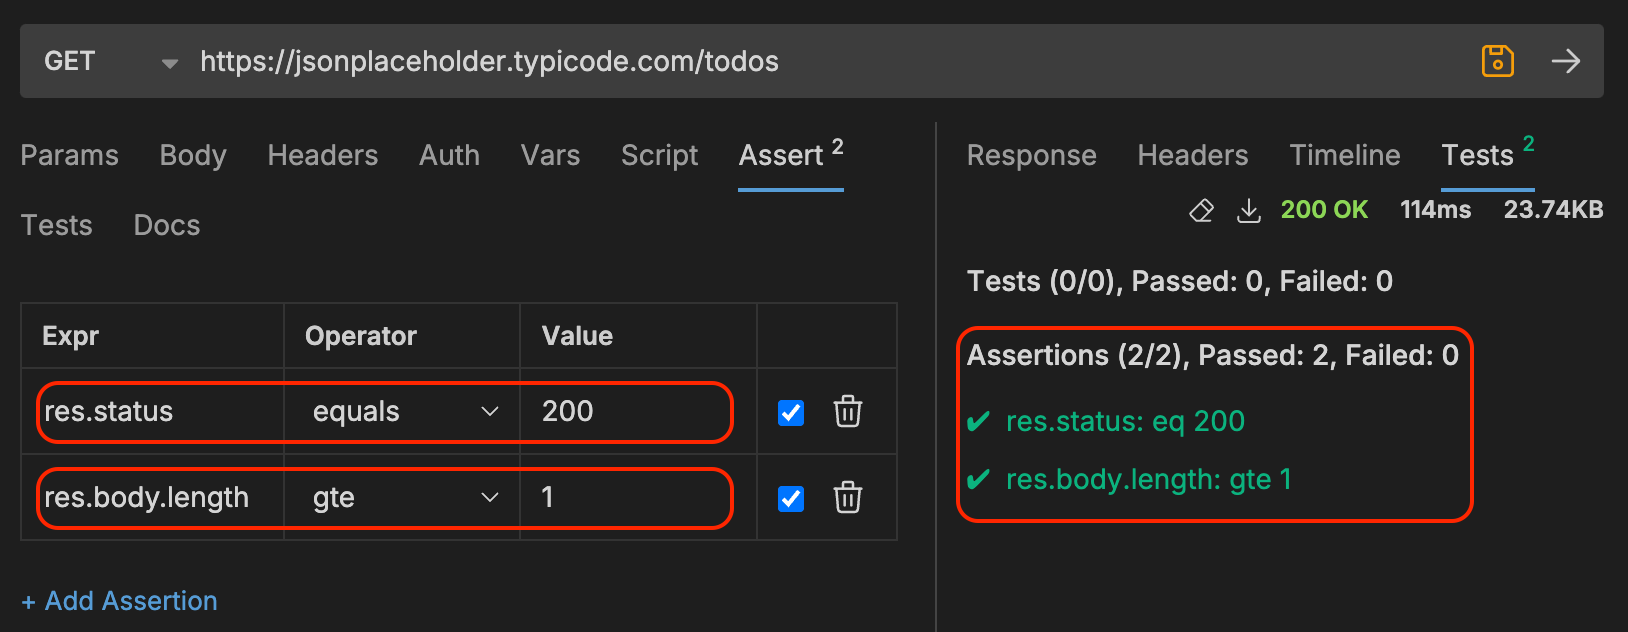
For example, the res.status line will test that your response status is 200 (response OK).
JavaScript Test Scripts:
If you want to write more complex tests, you also can! Jump to the “Script“ tab and start coding your tests using javascript.

Now that you’ve written tests and assertions for all your requests, here comes the fun part:
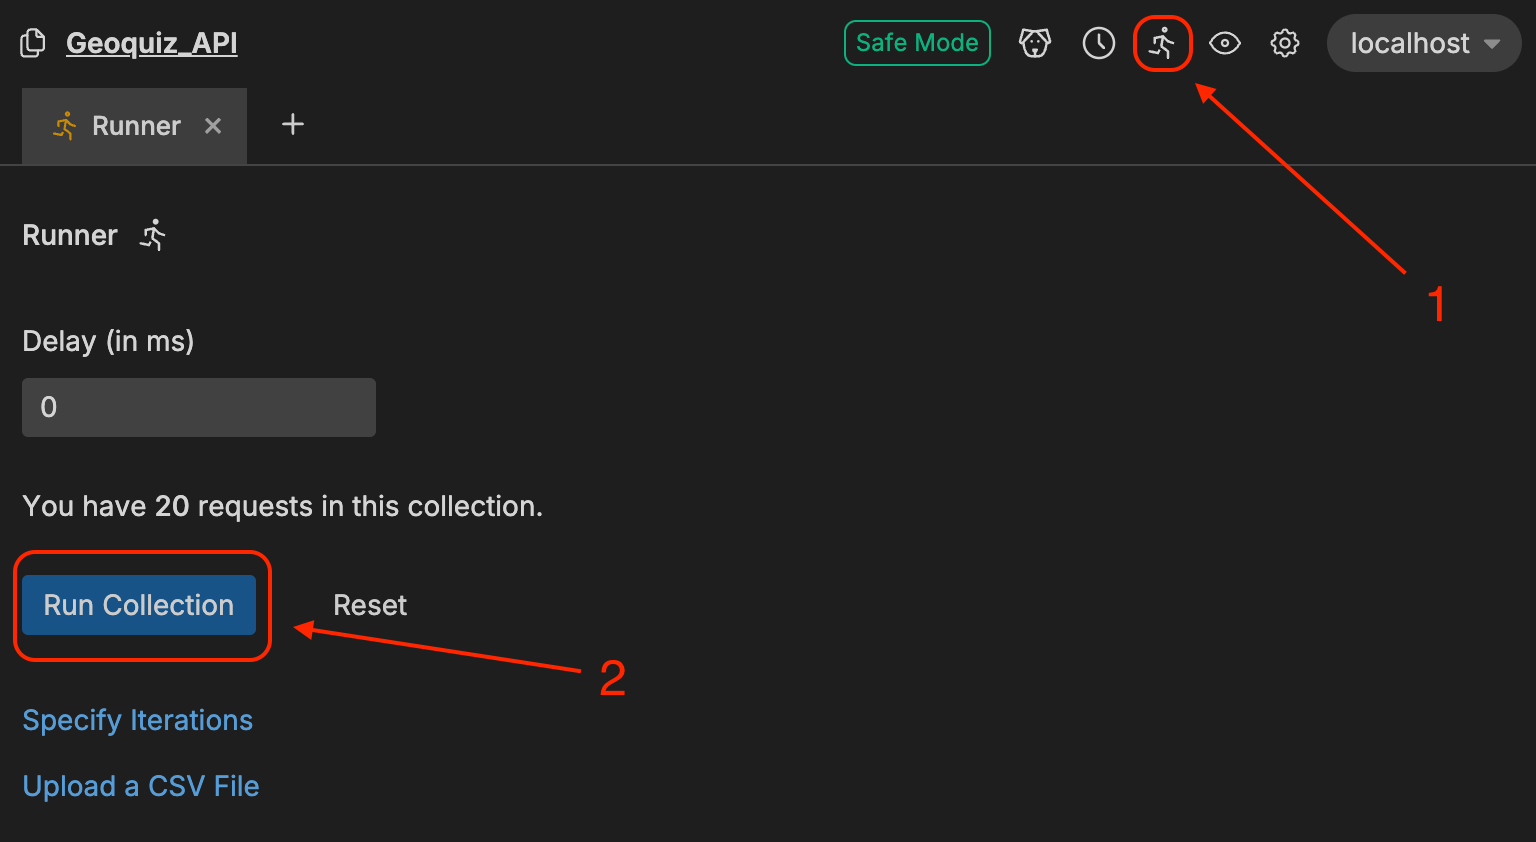
Click on the runner icon at the top right of your screen
Make sure you have selected the correct environment
Click “Run Collection“
This will execute each request in your collection one by one, running all the tests and assertions with it. It’s a great way to ensure you didn’t break anything in your API before and after deploying some updates!
4. Conclusion
That’s it! As you can see Bruno is super easy to use and comes with a lot of great features. Its creator, @Anoop, seems highly committed to keeping the tool “Free and Open-Source forever“ as stated on the website. And that makes me more confident in using it long term for testing and documenting my own projects.
There IS a paid and proprietary “Golden Edition“ that offers extra features like a built-in file explorer and an OpenAPI designer. So hopefully this business model will help support Bruno’s development team in continuing to update both versions and maintaining the main version as free and open source in the future.
What about you? Let me know what you think about Bruno and if you’ve had the chance to try it already!
Subscribe to my newsletter
Read articles from Yohan LB directly inside your inbox. Subscribe to the newsletter, and don't miss out.
Written by

Yohan LB
Yohan LB
Currently working on GeoQuiz.co !