Mastering Istio: Enhancing Micro-services with Service Mesh
 Pravesh Sudha

💡 Introduction
In this blog, we are going to explore Service Mesh and understand why it is important. We will also dive into Istio, a popular service mesh tool, and see how it helps solve various challenges in managing microservices. To demonstrate Istio in action, we will deploy a sample application provided on the Istio website. Along the way, we will look at concepts like admission controllers, sidecar containers, and how to install and configure Istio. We will also cover some important features of Istio, such as traffic management, mTLS (mutual TLS) for secure communication, gateways, and observability. Lastly, we’ll compare Ingress with Service Mesh to understand their differences.
💡 What is Service Mesh & Why we use it?
Before diving into what a service mesh is, let’s take a simple example. Imagine you are working on an e-commerce website, like Amazon or Flipkart. There are different parts of the website that work together, and each part is a microservice. For example, you might have:
Login (Authentication): This handles user login.
Product Selection: This allows users to browse and select products.
Transaction Page: This processes payments.
Notification Service: This notifies the user whether the payment was successful or not.
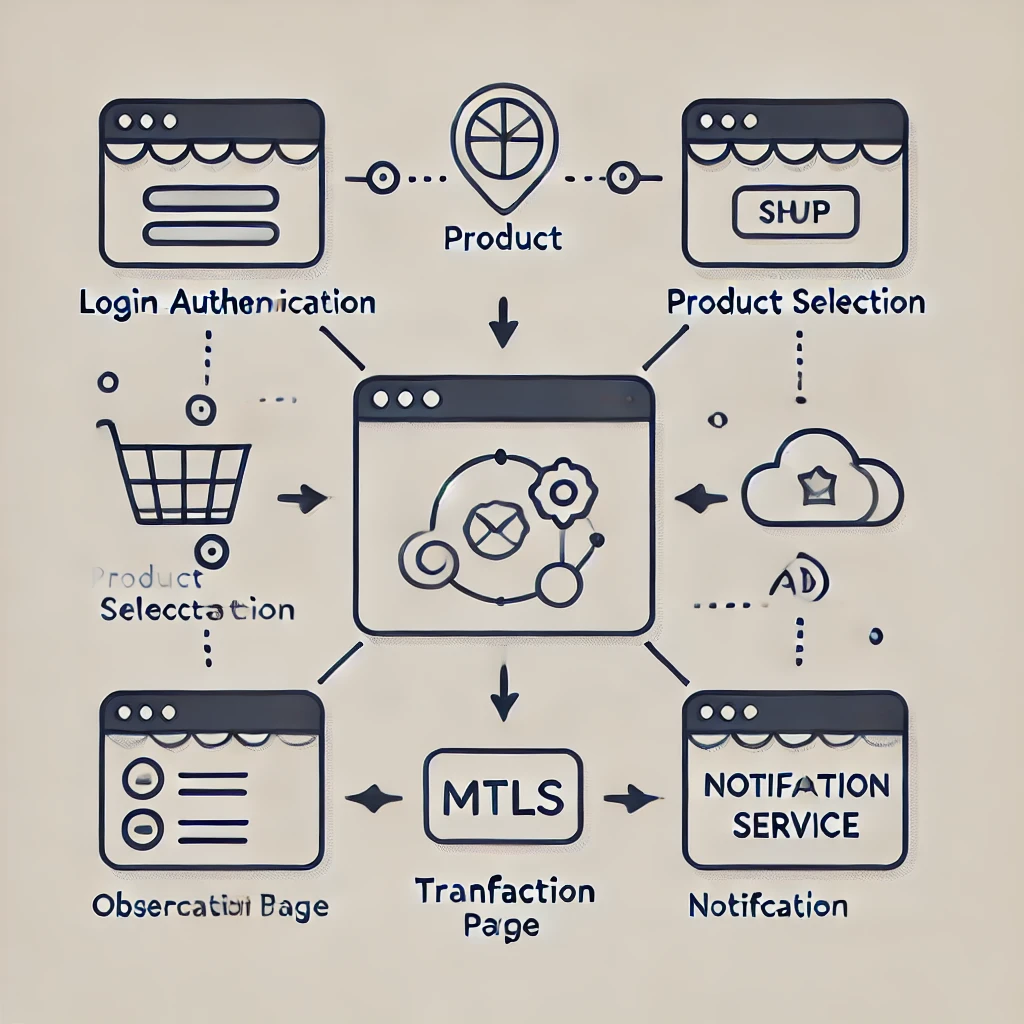
All these microservices need to communicate with each other smoothly. However, in a real-world scenario, managing this communication can get complex. This is where a service mesh comes in.
Basically, A Service mesh (Istio) is a dedicated infrastructure layer for facilitating service-to-service communications between services or micro-services using a proxy. With a service mesh like Istio, the communication between these micro services is enhanced with extra features like observability(tracking and monitoring) with Kiali, mTLS (mutual TLS for secure communication), and advanced traffic management strategies like Canary or A/B testing. To understand Canary deployment strategy, consider an example of the above scenario, if Product selection is talking to Payment service (version 1) and the company wants to try out a version 2 of the service, it can route a certain percentage (10%) of traffic to version 2 of service and eventually if the nothing goes wrong, they can shift whole traffic to version 2. These features make it easier to manage, secure, and scale the micro services.
💡 How Service Mesh (Istio) is implemented?
Istio works by installing a sidecar container inside every pod that it has access to. This sidecar container contains an Envoy proxy application, and all communication between services goes through this proxy. The sidecar container keeps a record of every communication, making it easy to manage and track. It also plays a critical role in traffic managementfor the pod.
Let’s revisit our e-commerce application example with the four microservices: Login, Product Selection, Transaction, and Notification. With Istio, each of these services would have its own sidecar container, ensuring that every communication between the services goes through these proxies. This setup allows Istio to provide features like observability, making it easier to track and monitor traffic between microservices.
In addition, each sidecar container publishes a TLS certificate, which is then verified by the sidecar container of the receiving service. If the trust is established (i.e., the certificates are valid), the communication is allowed. This ensures secure communication between services, using mutual TLS (mTLS).
💡 Role of Admission Controller
To inject a sidecar container into every pod, Istio needs information about the pods, which it gets through the API server of Kubernetes. This is done using an admission controller. Admission controllers are mechanisms in Kubernetes that validate and mutate pod components before they are deployed.
Kubernetes has over 30 admission controllers for different purposes. For example, consider you are using a Persistent Volume Claim (PVC) but forgot to add a storage class to it. In this case, a Storage Class Admission Controller can step in, modify the configuration, and automatically add a storage class like "XYZ" to the PVC file.
💡 Admission Controller Demo
Now, let’s see how Admission controller works in a practical way. First, we need to install Docker and Minikube on our system. Here are the commands to install them:
Installing Docker
# For Ubuntu
sudo apt-get update
sudo apt-get install docker.io
Installing Minikube
# For Ubuntu
curl -LO https://storage.googleapis.com/minikube/releases/latest/minikube-linux-amd64
sudo install minikube-linux-amd64 /usr/local/bin/minikube
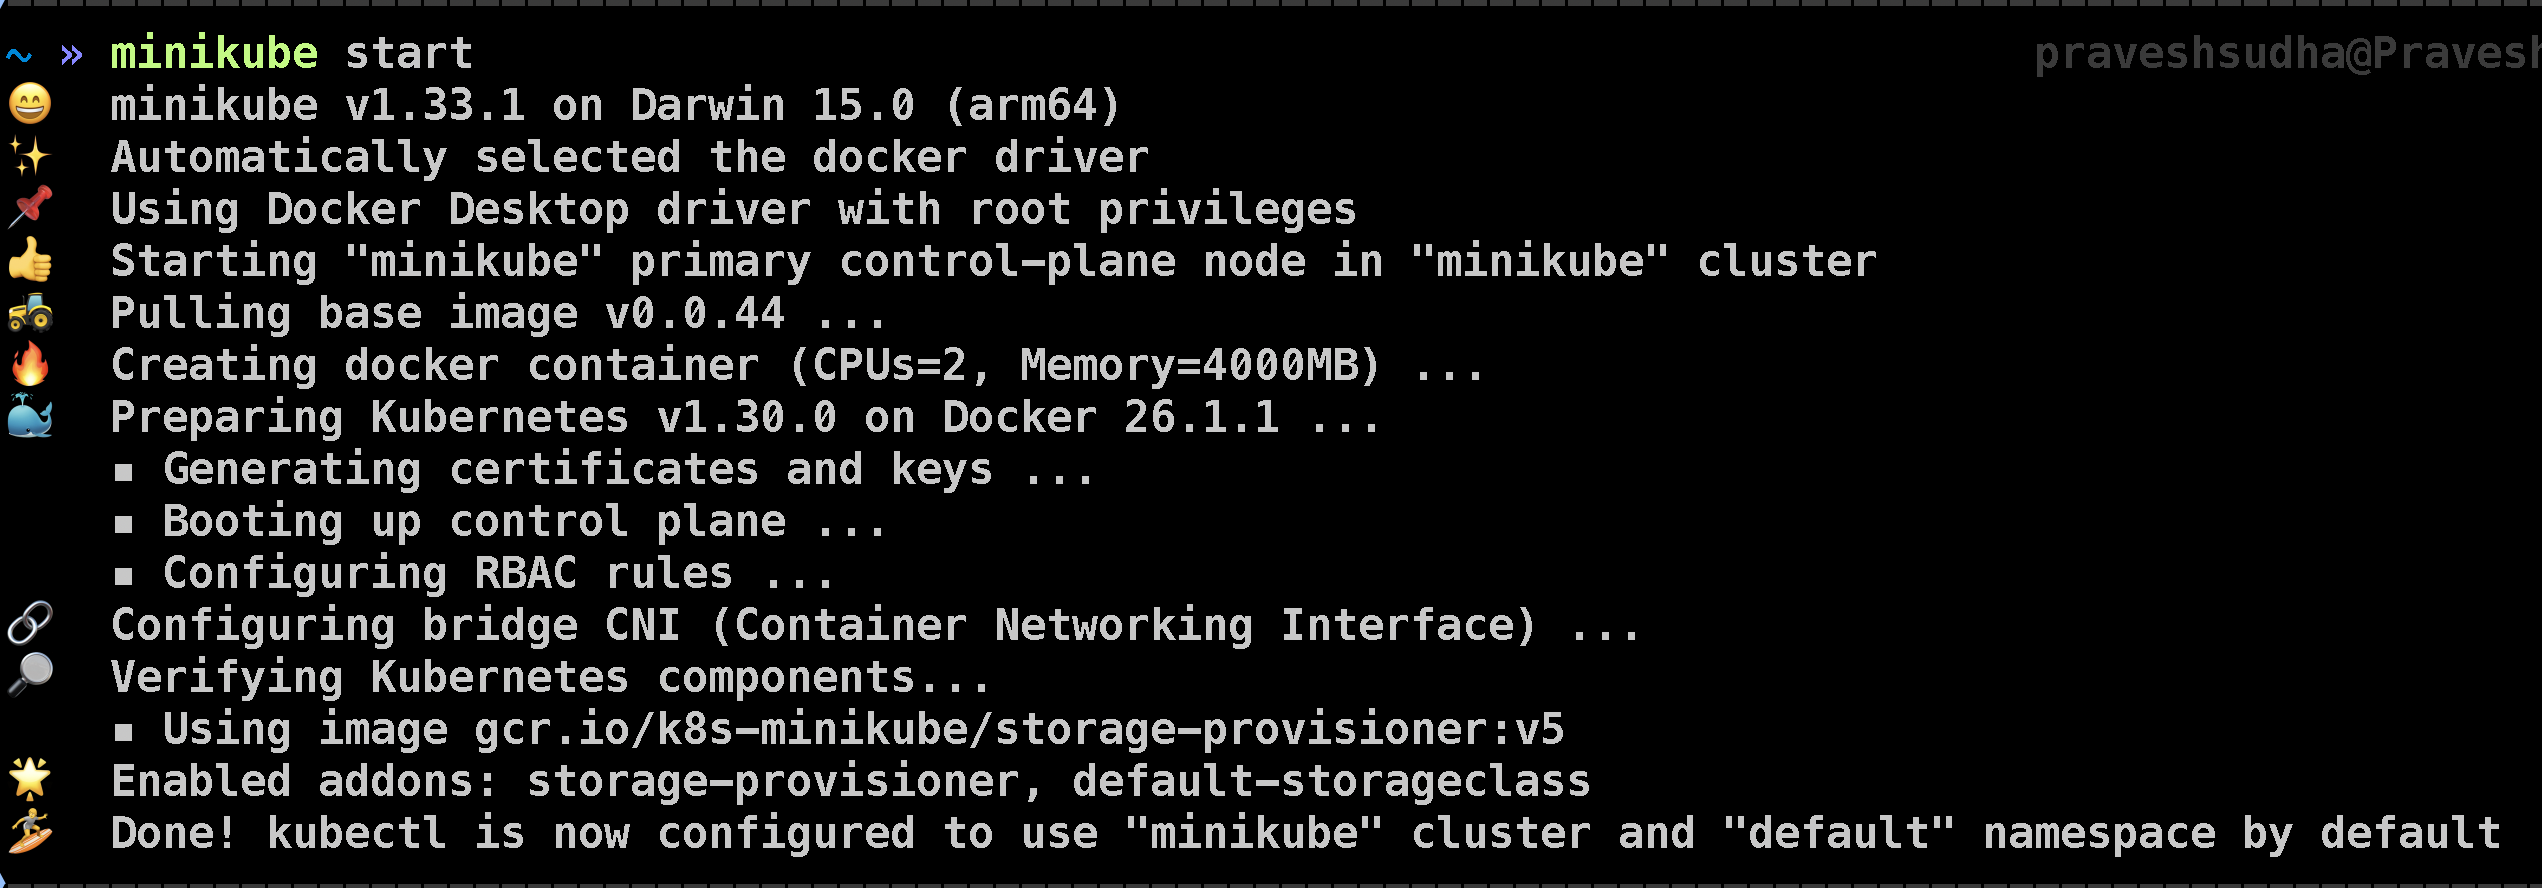
After installing Docker and Minikube, we can start the Minikube cluster. Minikube provides a local Kubernetes cluster that is fully functional and free to use. To start the Minikube cluster, run the following command:
minikube start
It will show this output:
Next, we need to SSH into the Minikube server. You can do this by running:
minikube ssh
Once inside, use the following command to view the Kubernetes API server configuration:
sudo cat /etc/kubernetes/manifests/kube-apiserver.yaml
It will show the following output (here you can see the enabled admission plugins):
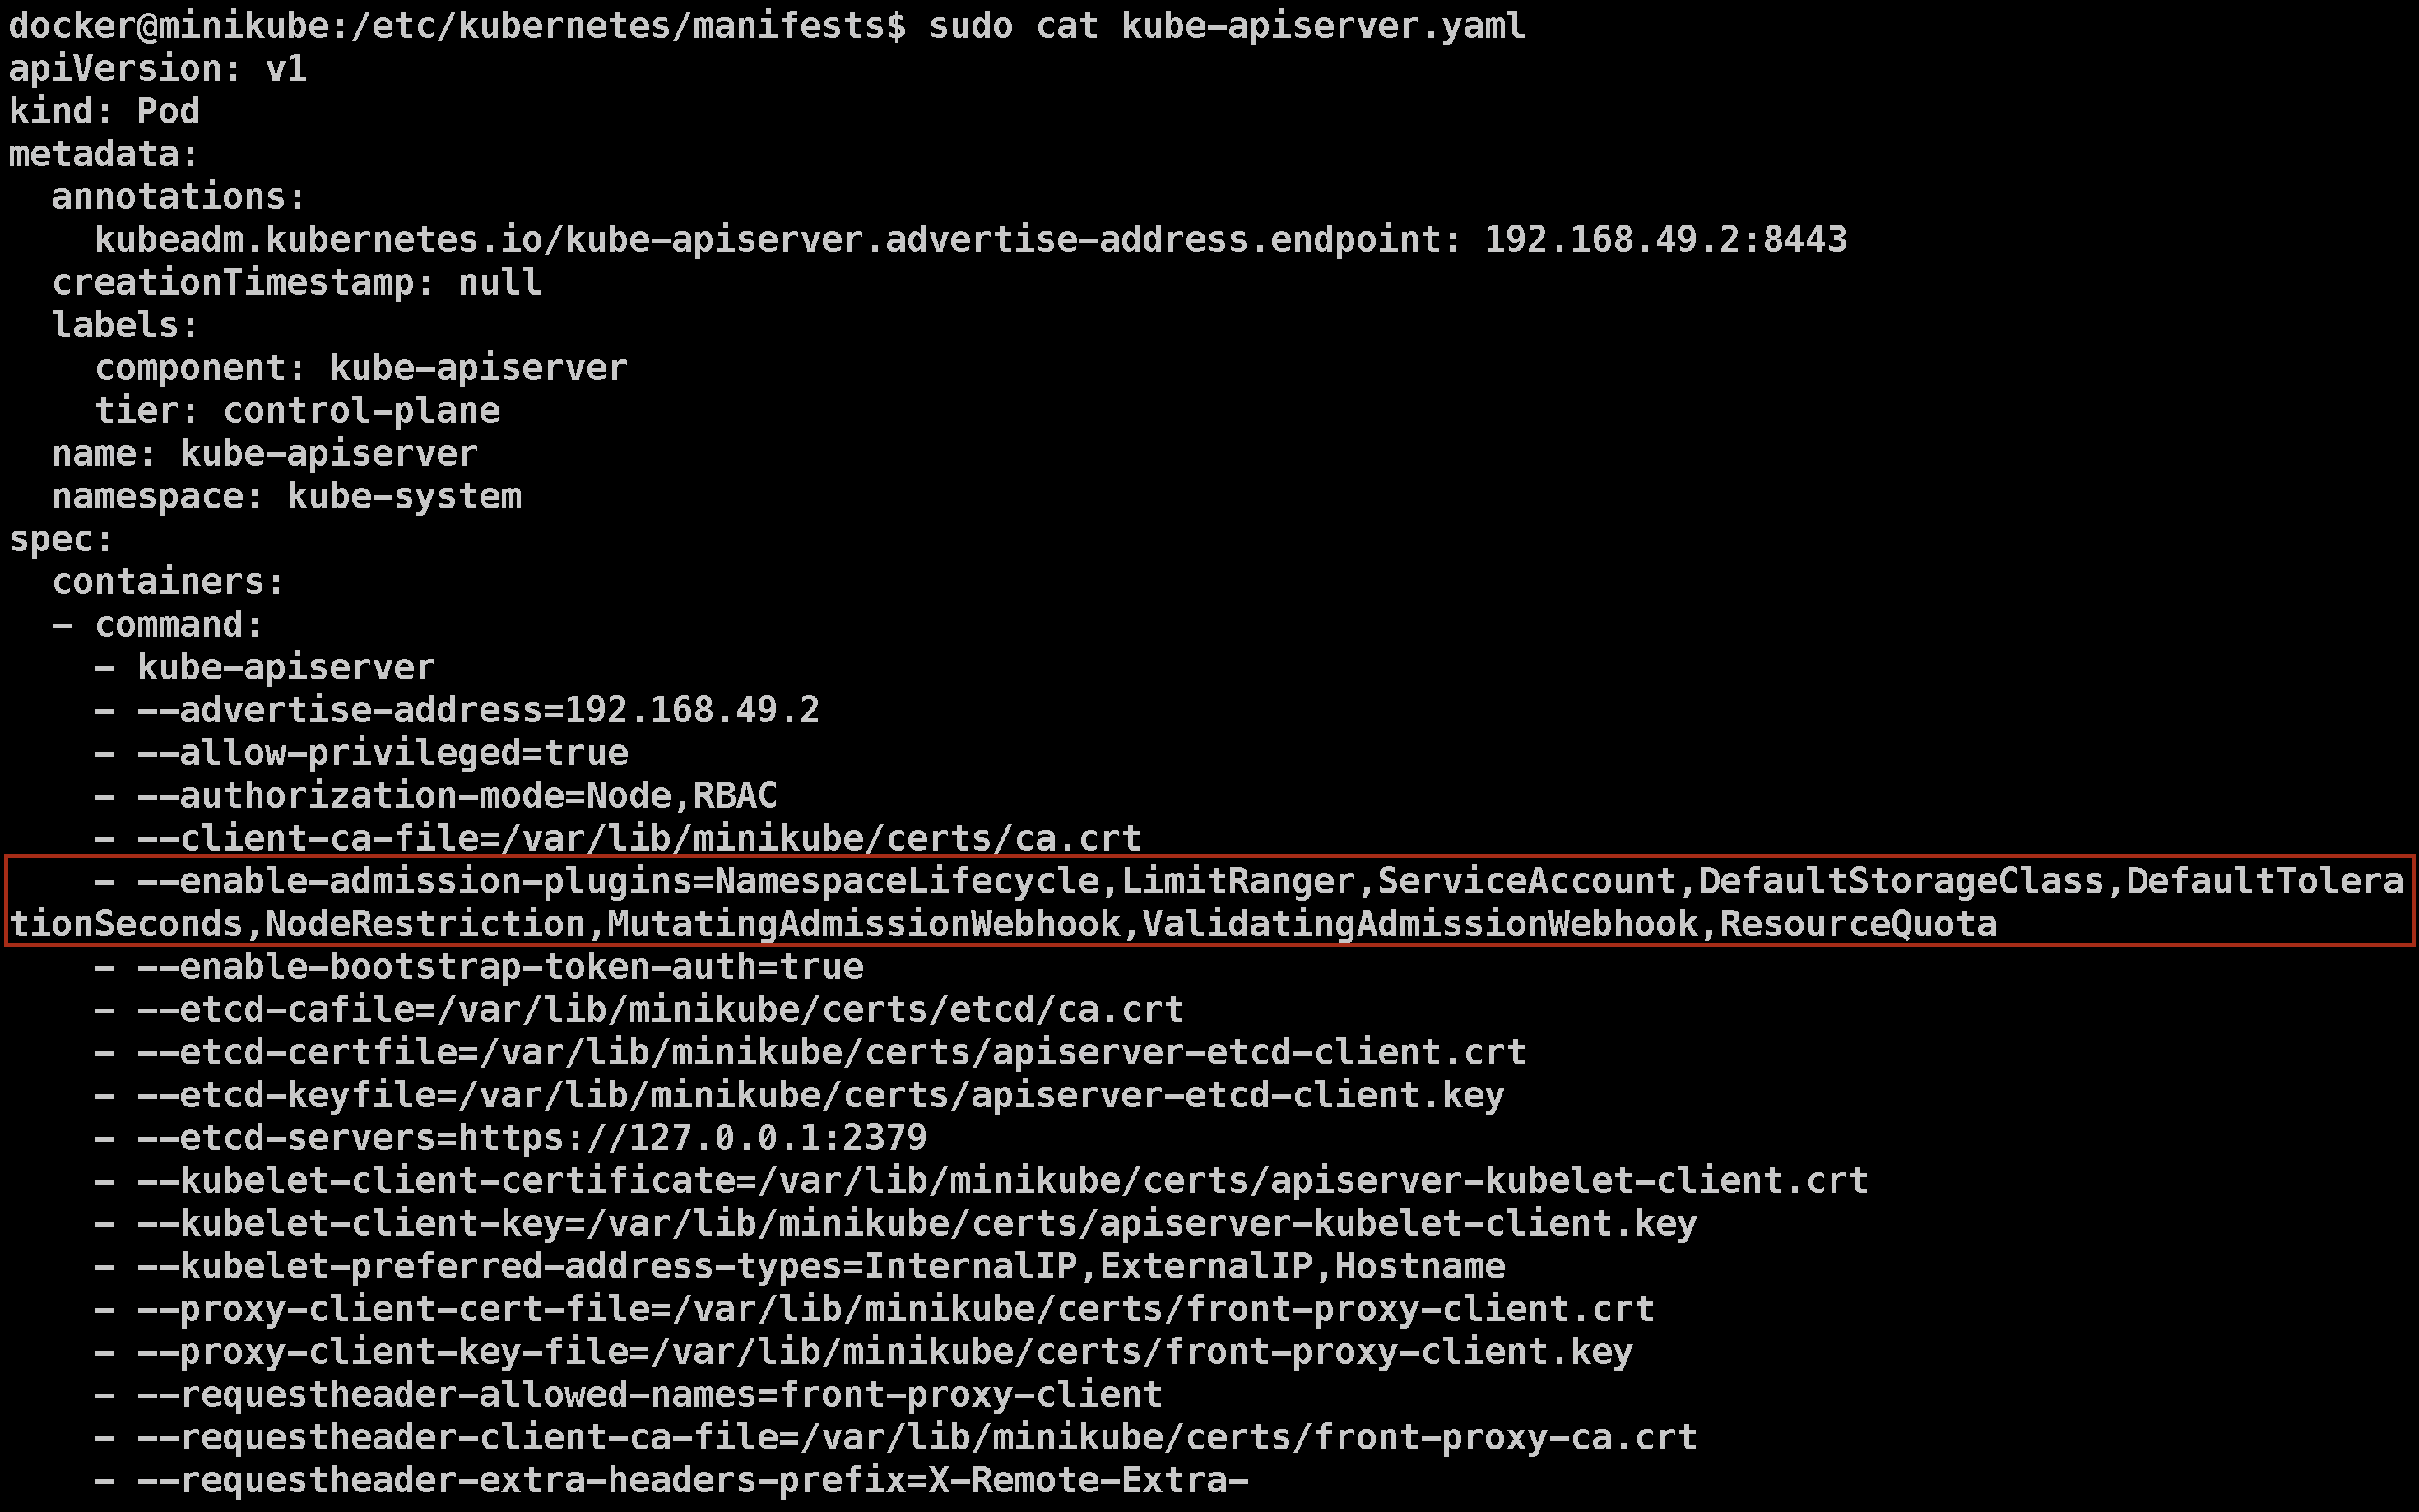
In the output, look for the specifications of the container, particularly the --enable-admission-plugins section. This will help you understand how Istio utilizes admission controllers for its functionality.
💡 Understanding Mutation Feature with PVC
To demonstrate the mutation feature of Service Mesh, we will create a Persistent Volume Claim (PVC) by creating a pvc.yamlfile. Here’s the content for that file:
apiVersion: v1
kind: PersistentVolumeClaim
metadata:
  name: myclaim
spec:
  accessModes:
    - ReadWriteOnce
  volumeMode: Filesystem
  resources:
    requests:
      storage: 8Gi
  selector:
    matchLabels:
      release: "stable"
    matchExpressions:
      - {key: environment, operator: In, values: [dev]}
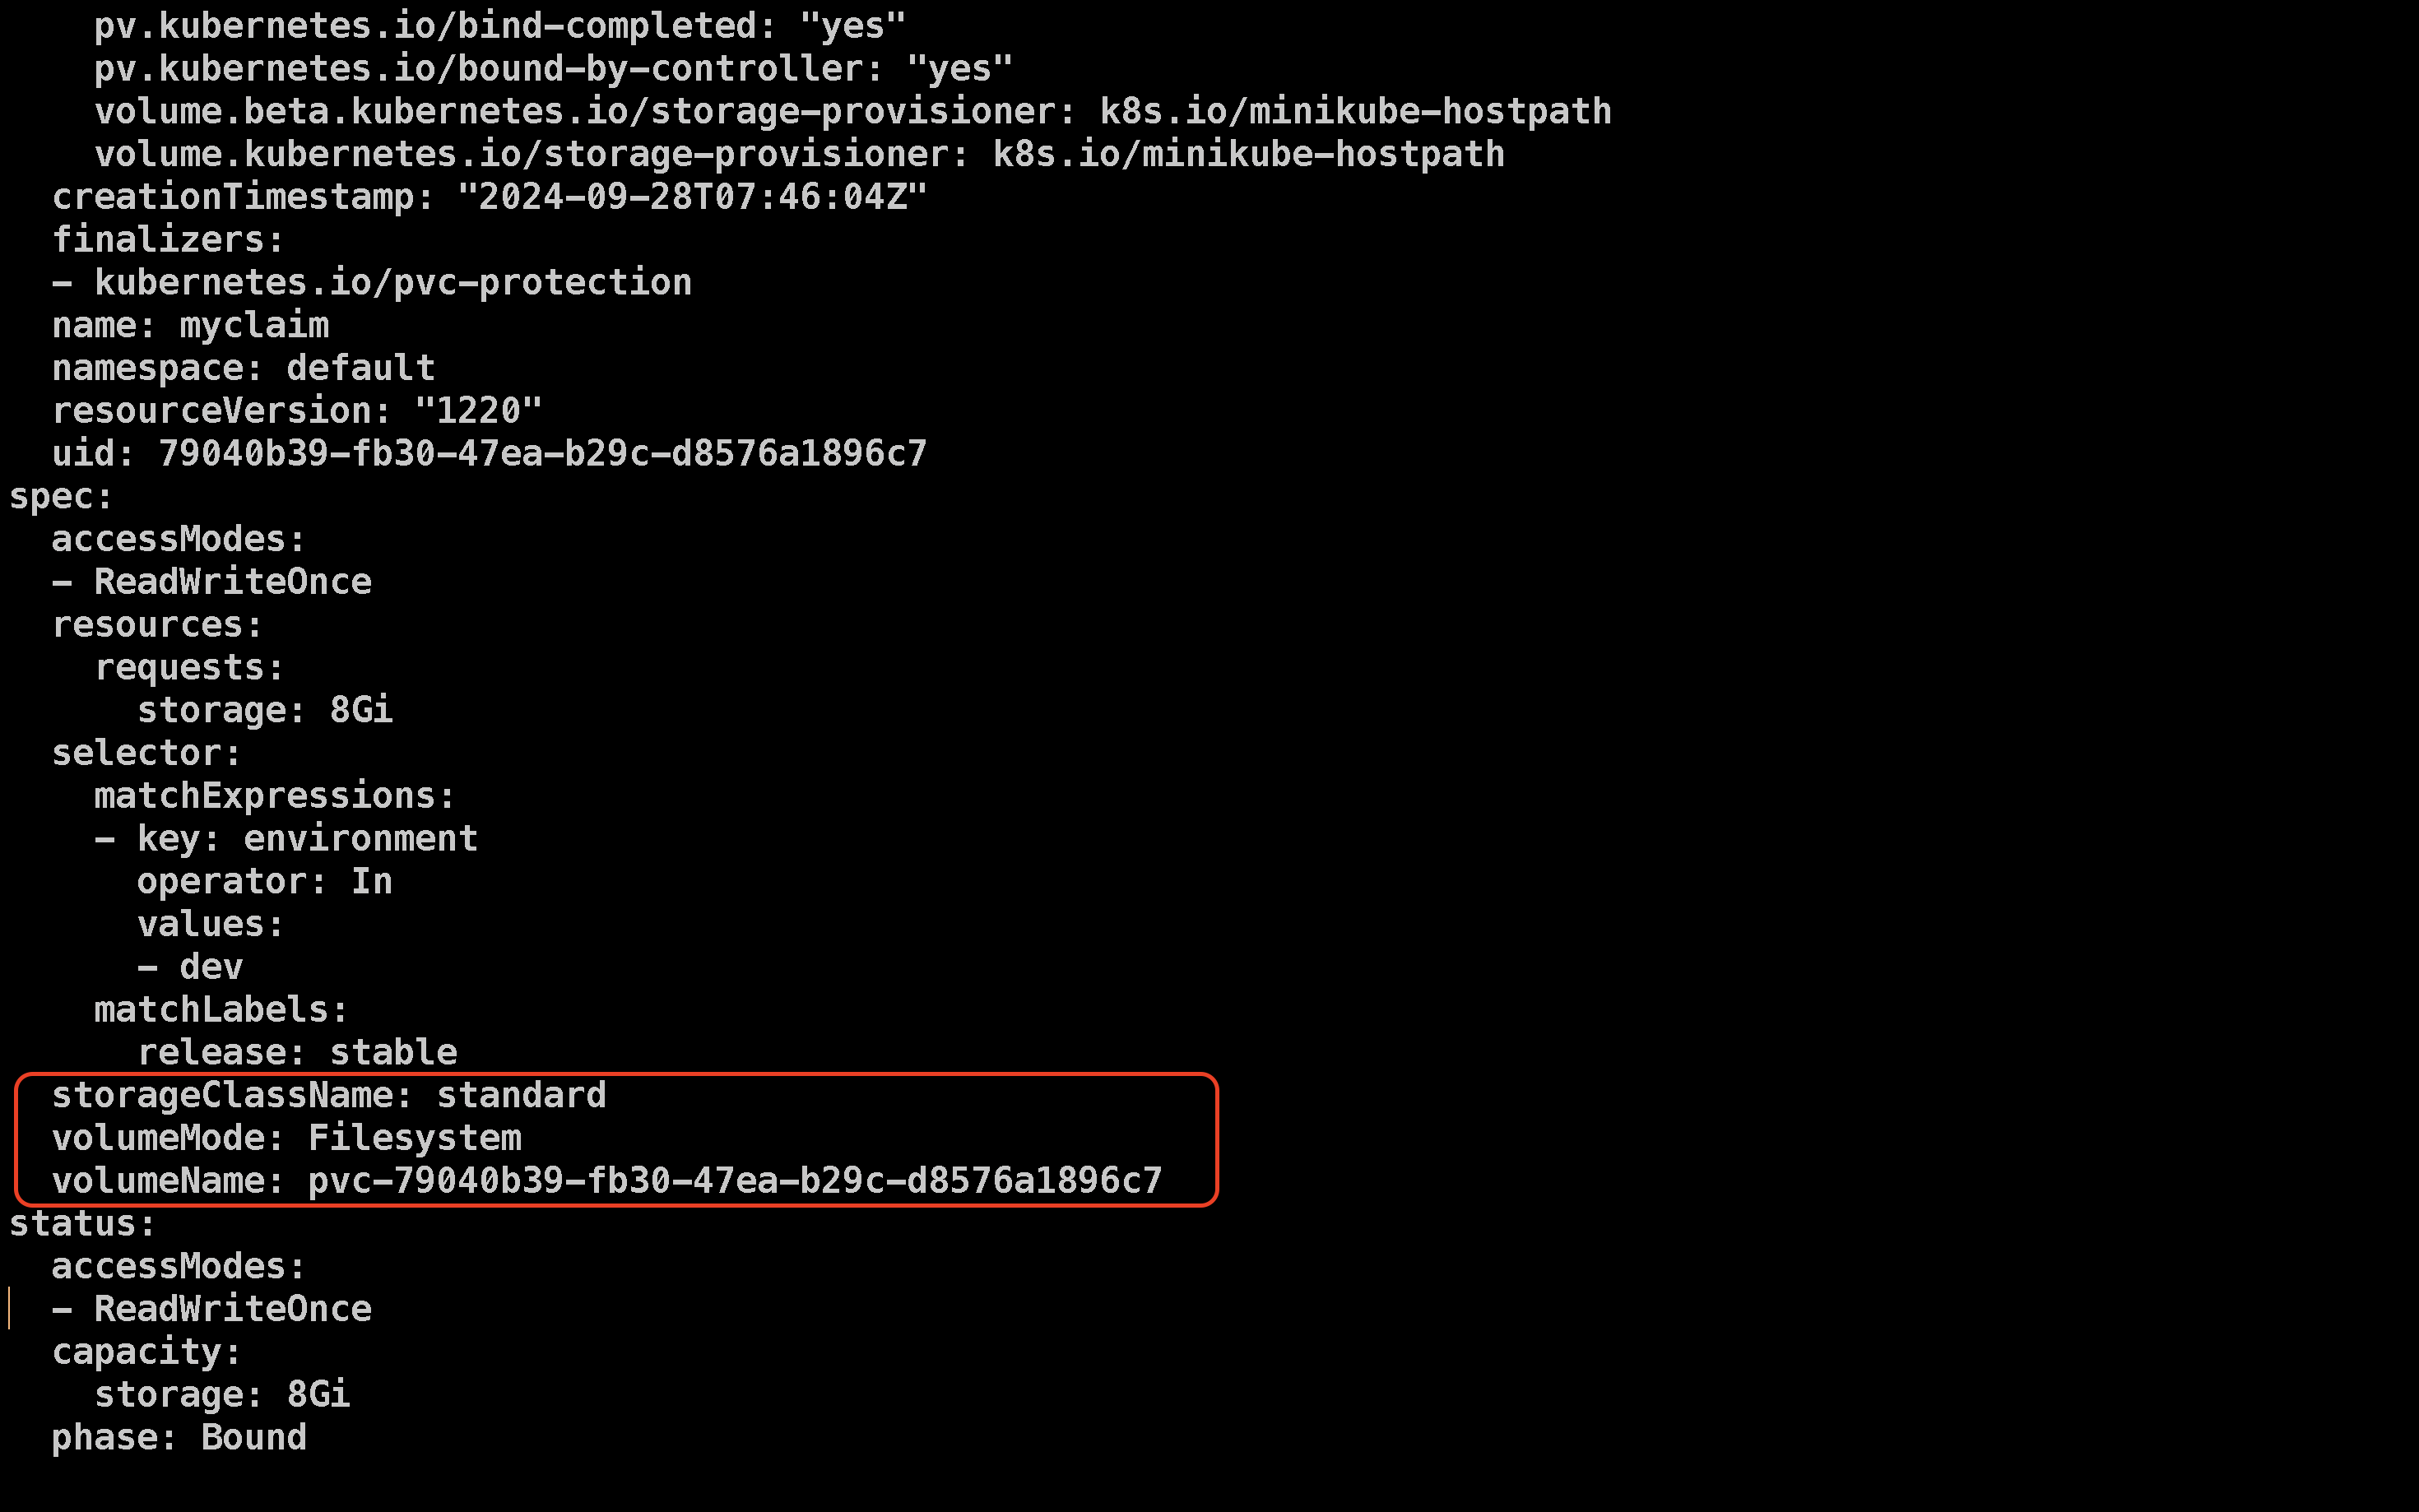
Note that we are not providing a storage class for the PVC. After creating the pvc.yaml file, apply it using:
kubectl -f apply pvc.yaml
To check the configuration of the created PVC, use the following command:
kubectl edit pvc myclaim
When you scroll down in the output (Like shown below), you should see that a STANDARD STORAGE CLASS has been automatically added to the PVC configuration. This illustrates how Istio’s admission controller can mutate the configuration to ensure the necessary settings are in place.
💡 Istio Installation
Now, let’s install Istio on our system. Here are the steps you need to follow:
Step 1: Download and Install Istio
You can download Istio using the following commands:
# Download Istio
curl -L https://istio.io/downloadIstio | sh -

# Change into the Istio directory
cd istio-*  # Replace with the specific version number if necessary

# Add the istioctl client to your PATH
export PATH=$PWD/bin:$PATH
The istioctl command-line tool is used for interacting with Istio and managing its configurations.
Step 2: Install Istio using istioctl
To install Istio, use the following command:
istioctl install -f samples/bookinfo/demo-profile-no-gateways.yaml -y
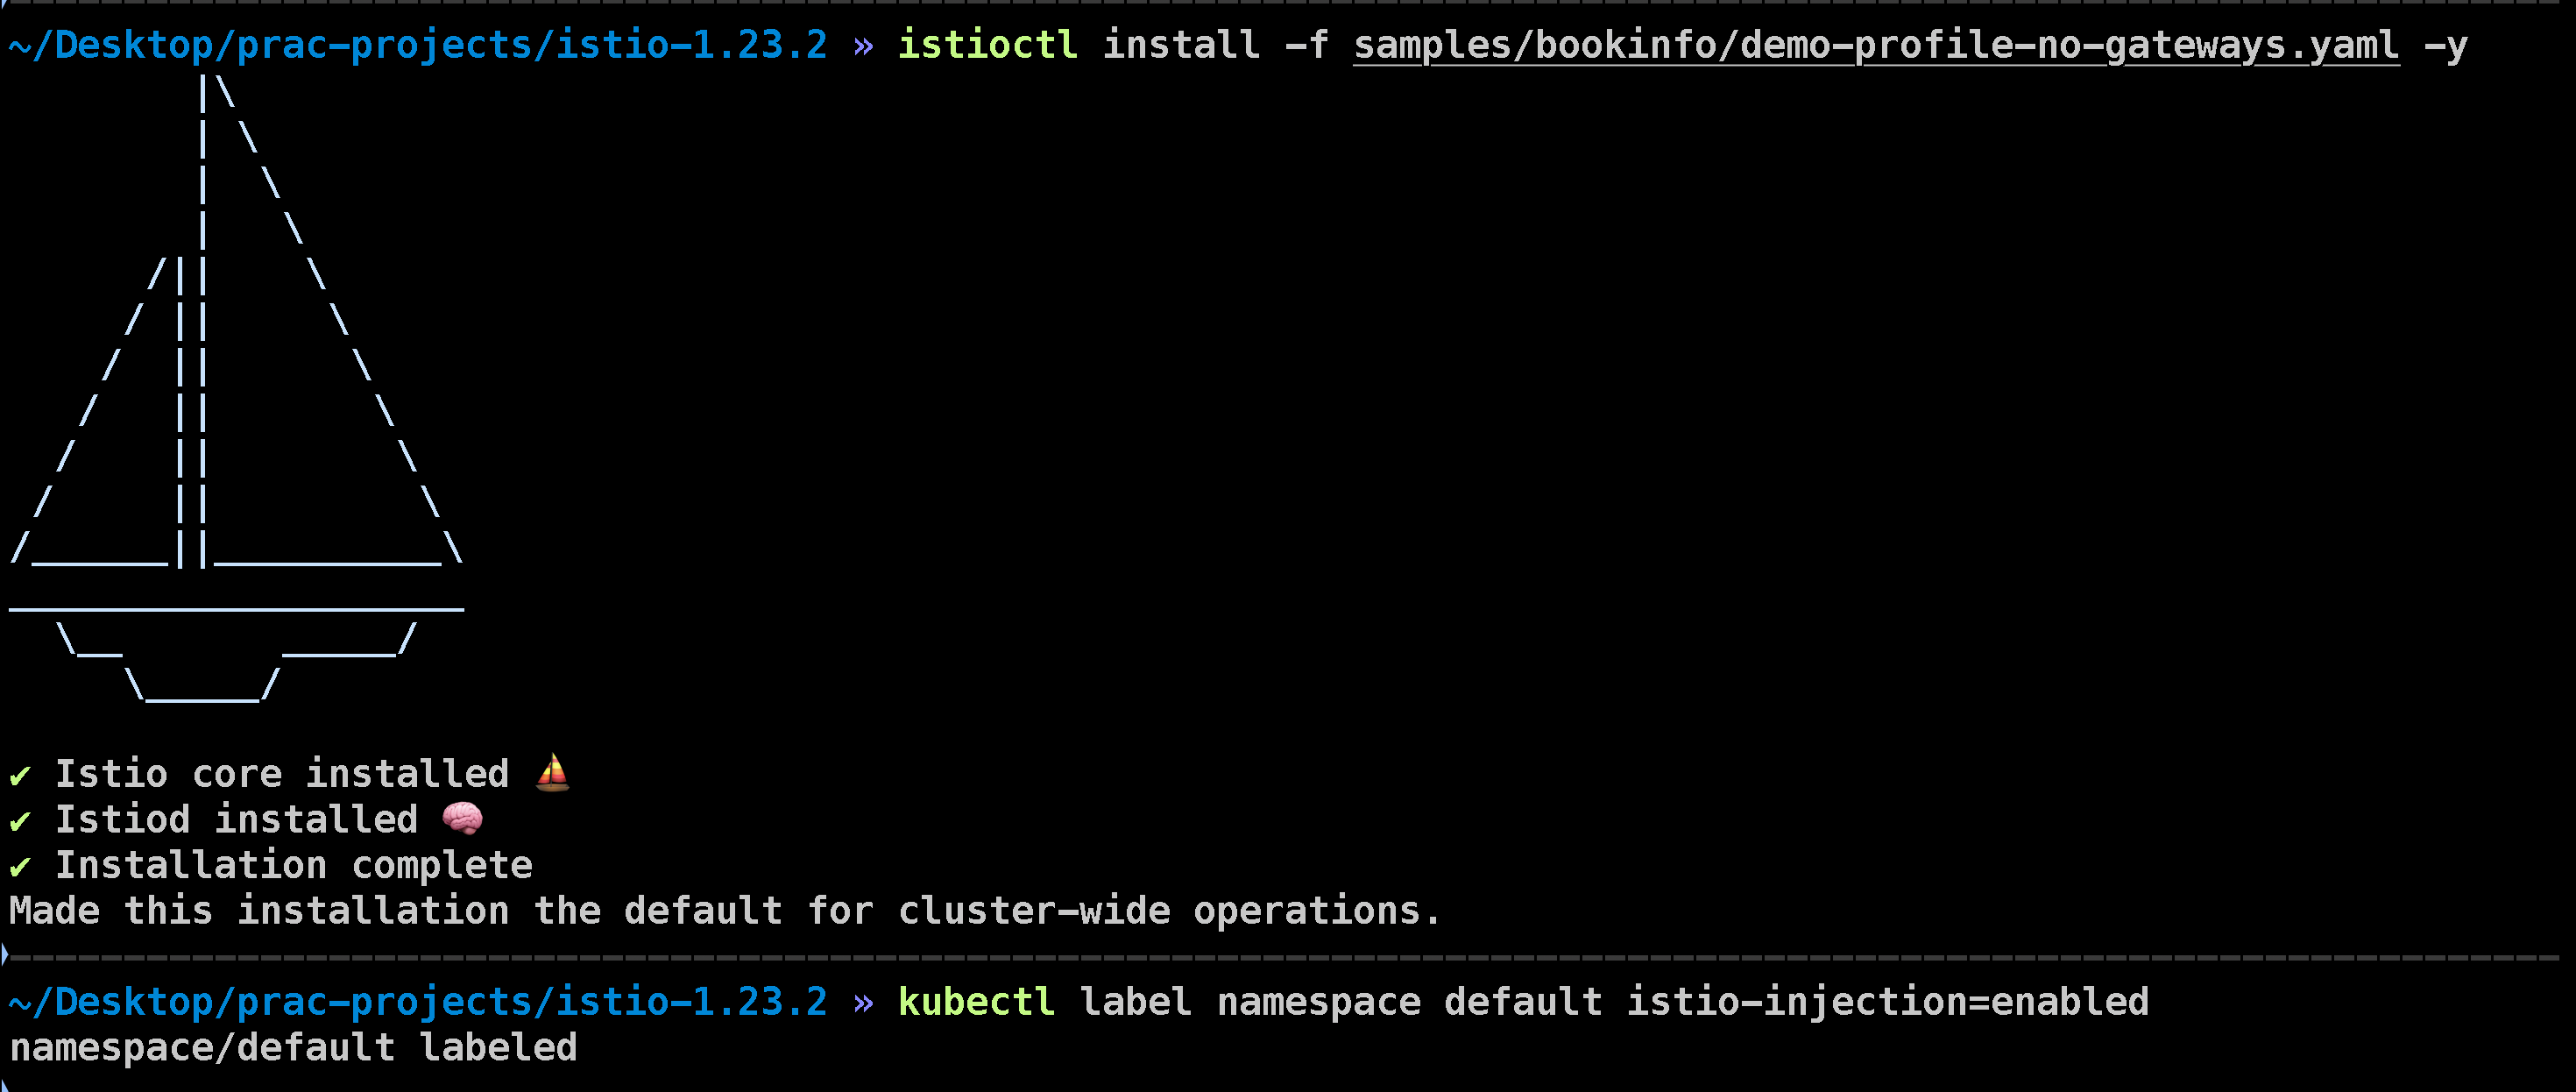
This command will set up Istio with the specified configuration profile.
Step 3: Enable Istio Injection in the Default Namespace
Next, you need to enable Istio sidecar injection in the default namespace. Run the following command:
kubectl label namespace default istio-injection=enabled
Step 4: Install Gateway API Custom Resource Definitions (CRDs)
Finally, to install the Gateway API CRDs, use the following command:
kubectl get crd gateways.gateway.networking.k8s.io &> /dev/null || \
{ kubectl kustomize "github.com/kubernetes-sigs/gateway-api/config/crd?ref=v1.1.0" | kubectl apply -f -; }
This command checks if the Gateway API CRDs are already installed; if not, it installs them.
💡 Deploying a Sample Application
Now that we’ve learned about Istio, let’s see how it works by deploying a sample application on Kubernetes. This application, called the Bookinfo application, consists of four microservices:
Product Page (Python)
Details (Ruby)
Reviews (Java)
Ratings (Node.js)
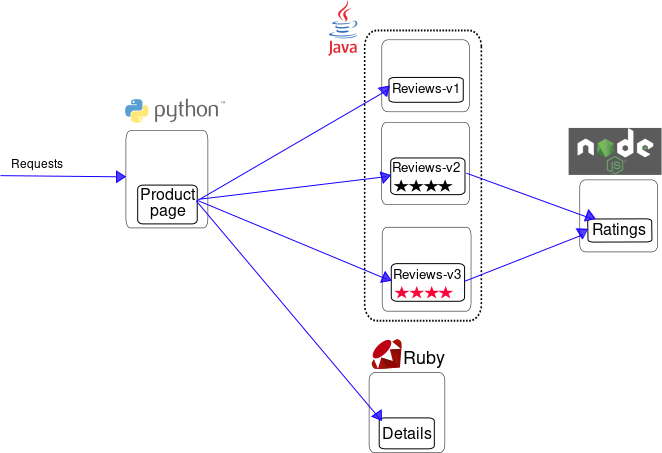
The product page microservice talks to the details and reviews microservices, and the reviews microservice communicates with the ratings service. This application is available on the Istio website, and we’ll use it to understand how Istio manages the interactions between these services.
To start, apply the Bookinfo application YAML file to your Kubernetes cluster using the following command:
kubectl apply -f https://raw.githubusercontent.com/istio/istio/release-1.23/samples/bookinfo/platform/kube/bookinfo.yaml
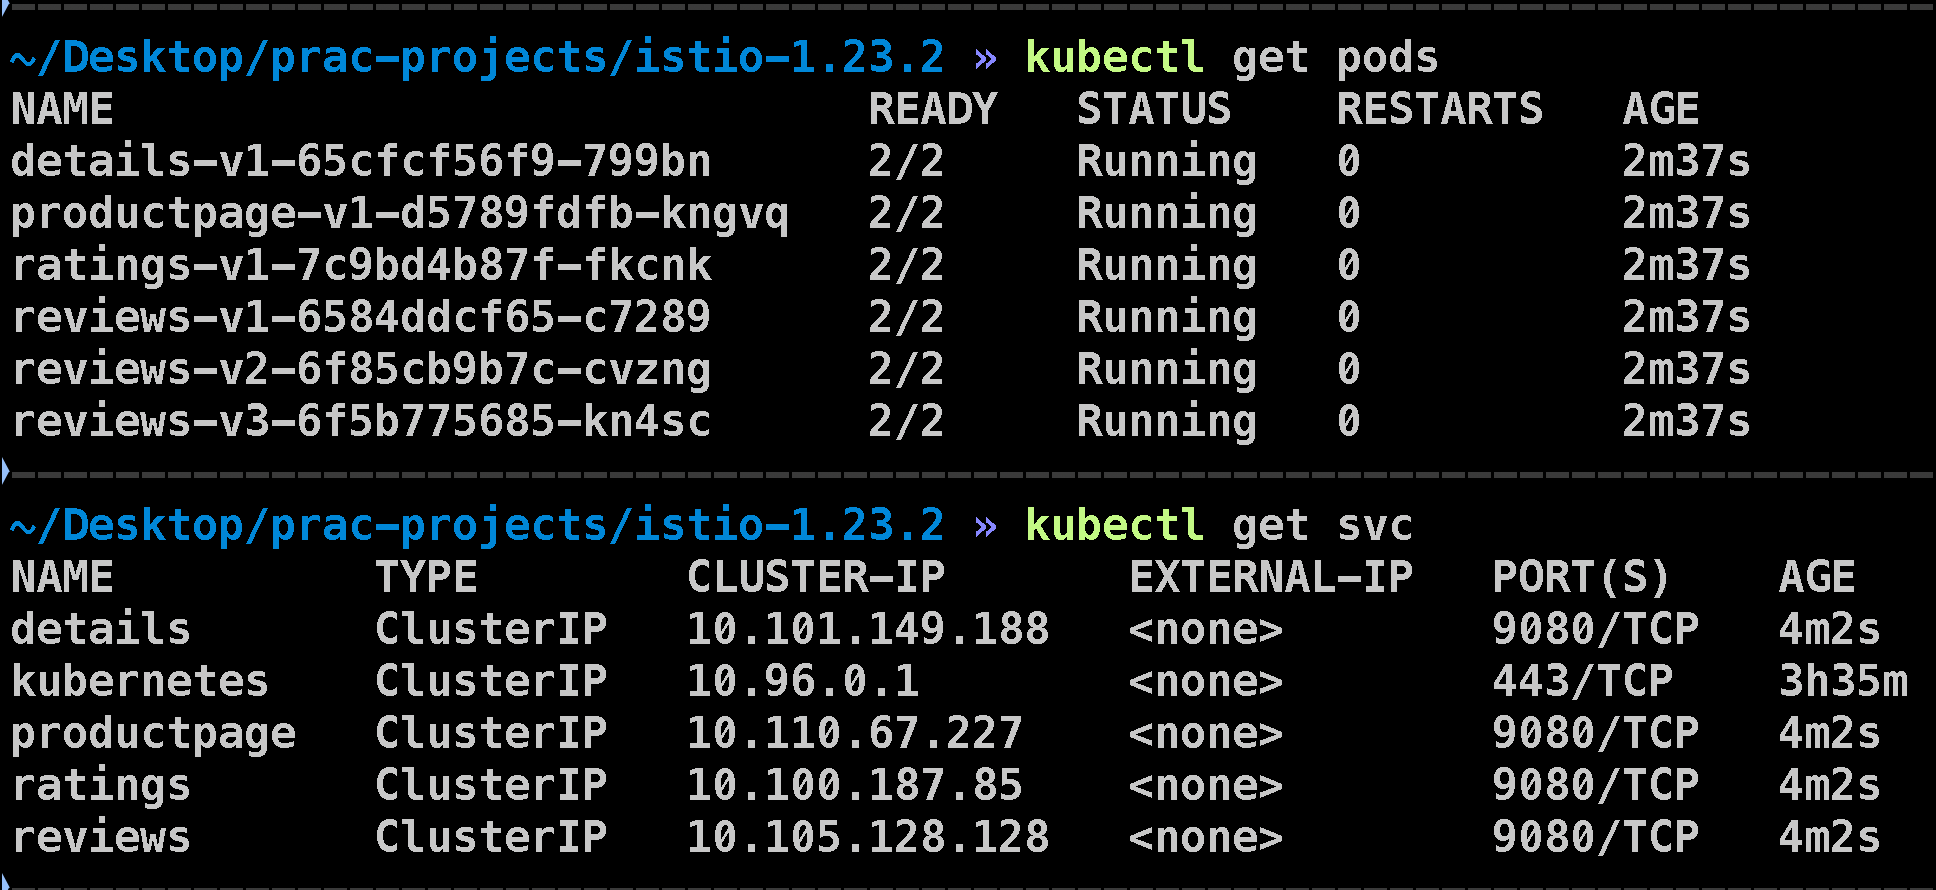
After applying the file, give it about 5 minutes to create the pods. Once everything is set up, you can check whether the pods and services are running properly with the following commands:
kubectl get pods
kubectl get svc
It will show this output:
Validating the Application
To ensure the application is running inside the cluster, check for the page title in the response with this command:
kubectl exec "$(kubectl get pod -l app=ratings -o jsonpath='{.items[0].metadata.name}')" -c ratings -- curl -sS productpage:9080/productpage | grep -o "<title>.*</title>"
This will return:
<title>Simple Bookstore Application</title>
Creating an Istio Gateway
To make the application accessible to the outside world, we need to create an Istio Gateway. Run the following command to create it:
kubectl apply -f samples/bookinfo/gateway-api/bookinfo-gateway.yaml
Once the gateway is created, change the Service type to ClusterIP so that you can access the application in your web browser:
kubectl annotate gateway bookinfo-gateway networking.istio.io/service-type=ClusterIP --namespace=default
You can validate the creation of the gateway using:
kubectl get gateway
Accessing the Application
To access the application through the gateway, use the kubectl port-forward command:
kubectl port-forward svc/bookinfo-gateway-istio 8080:80
Now, open your browser and navigate to http://localhost:8080/productpage to view the Book Info application.
💡 Understanding Istio's mTLS (Mutual TLS) Feature
One of the key features of Istio is its ability to enforce secure communication between services using mTLS (Mutual Transport Layer Security). mTLS ensures that communication between services happens only when certificates are verified on both sides. By default, Istio runs mTLS in Permissive Mode, which means services can communicate either with or without mTLS. However, to fully secure communication, we can switch to STRICT mode, where only mTLS-enabled connections are allowed.
Applying PeerAuthentication for STRICT mTLS Mode
To enforce STRICT mTLS, we need to create a configuration for PeerAuthentication. Let’s create a YAML file, tls-mode.yaml, that configures Istio to run in STRICT mode:
apiVersion: security.istio.io/v1beta1
kind: PeerAuthentication
metadata:
  name: mtls-mode
  namespace: default
spec:
  mtls:
    mode: STRICT
Before applying this configuration, let’s verify that services are able to communicate without mTLS. Run the following command to check if you can access the products API endpoint:
curl -L http://localhost:8080/api/v1/products
You should see output similar to this:
[{"id": 0, "title": "The Comedy of Errors", "descriptionHtml": "<a href=\"https://en.wikipedia.org/wiki/The_Comedy_of_Errors\">Wikipedia Summary</a>: The Comedy of Errors is one of <b>William Shakespeare's</b> early plays. It is his shortest and one of his most farcical comedies, with a major part of the humour coming from slapstick and mistaken identity, in addition to puns and word play."}]

Now, let’s apply the STRICT mTLS mode by running:
kubectl apply -f tls-mode.yaml
After the configuration is applied, Istio will require mTLS for any communication between services. If you try to access the products page again with the same curl command:
curl -L http://localhost:8080/api/v1/products
Instead of seeing the JSON output, you will get the following error:
curl: (56) Recv failure: Connection reset by peer
This indicates that the communication attempt was blocked because it was not using mTLS. This is how STRICT mode enforces a higher level of security by ensuring that only authenticated services with valid certificates can communicate.
💡 Canary Deployment Strategy with Istio
A Canary Deployment is a strategy used to gradually release a new version of an application by sending a small percentage of traffic to the new version, while the majority continues to go to the stable version. This helps in testing new features with minimal risk before fully rolling them out.
In Istio, we can achieve Canary deployments using Virtual Services and Destination Rules to manage traffic routing between different versions of a service. Let's dive into a demo to see how this works.
Step 1: Routing All Traffic to Version 1
First, we will create a old-version.yaml file that ensures all traffic is routed to version 1 (v1) of the app. Here’s the YAML file:
apiVersion: networking.istio.io/v1alpha3
kind: VirtualService
metadata:
  name: productpage
spec:
  hosts:
    - productpage
  http:
    - route:
        - destination:
            host: productpage
            subset: v1
---
apiVersion: networking.istio.io/v1alpha3
kind: VirtualService
metadata:
  name: reviews
spec:
  hosts:
    - reviews
  http:
    - route:
        - destination:
            host: reviews
            subset: v1
---
apiVersion: networking.istio.io/v1alpha3
kind: VirtualService
metadata:
  name: ratings
spec:
  hosts:
    - ratings
  http:
    - route:
        - destination:
            host: ratings
            subset: v1
---
apiVersion: networking.istio.io/v1alpha3
kind: VirtualService
metadata:
  name: details
spec:
  hosts:
    - details
  http:
    - route:
        - destination:
            host: details
            subset: v1
This configuration ensures that every request goes to the v1 version of the microservices (productpage, reviews, ratings, and details).
To apply this configuration, use the following command:
kubectl apply -f samples/bookinfo/networking/destination-rule-all.yaml
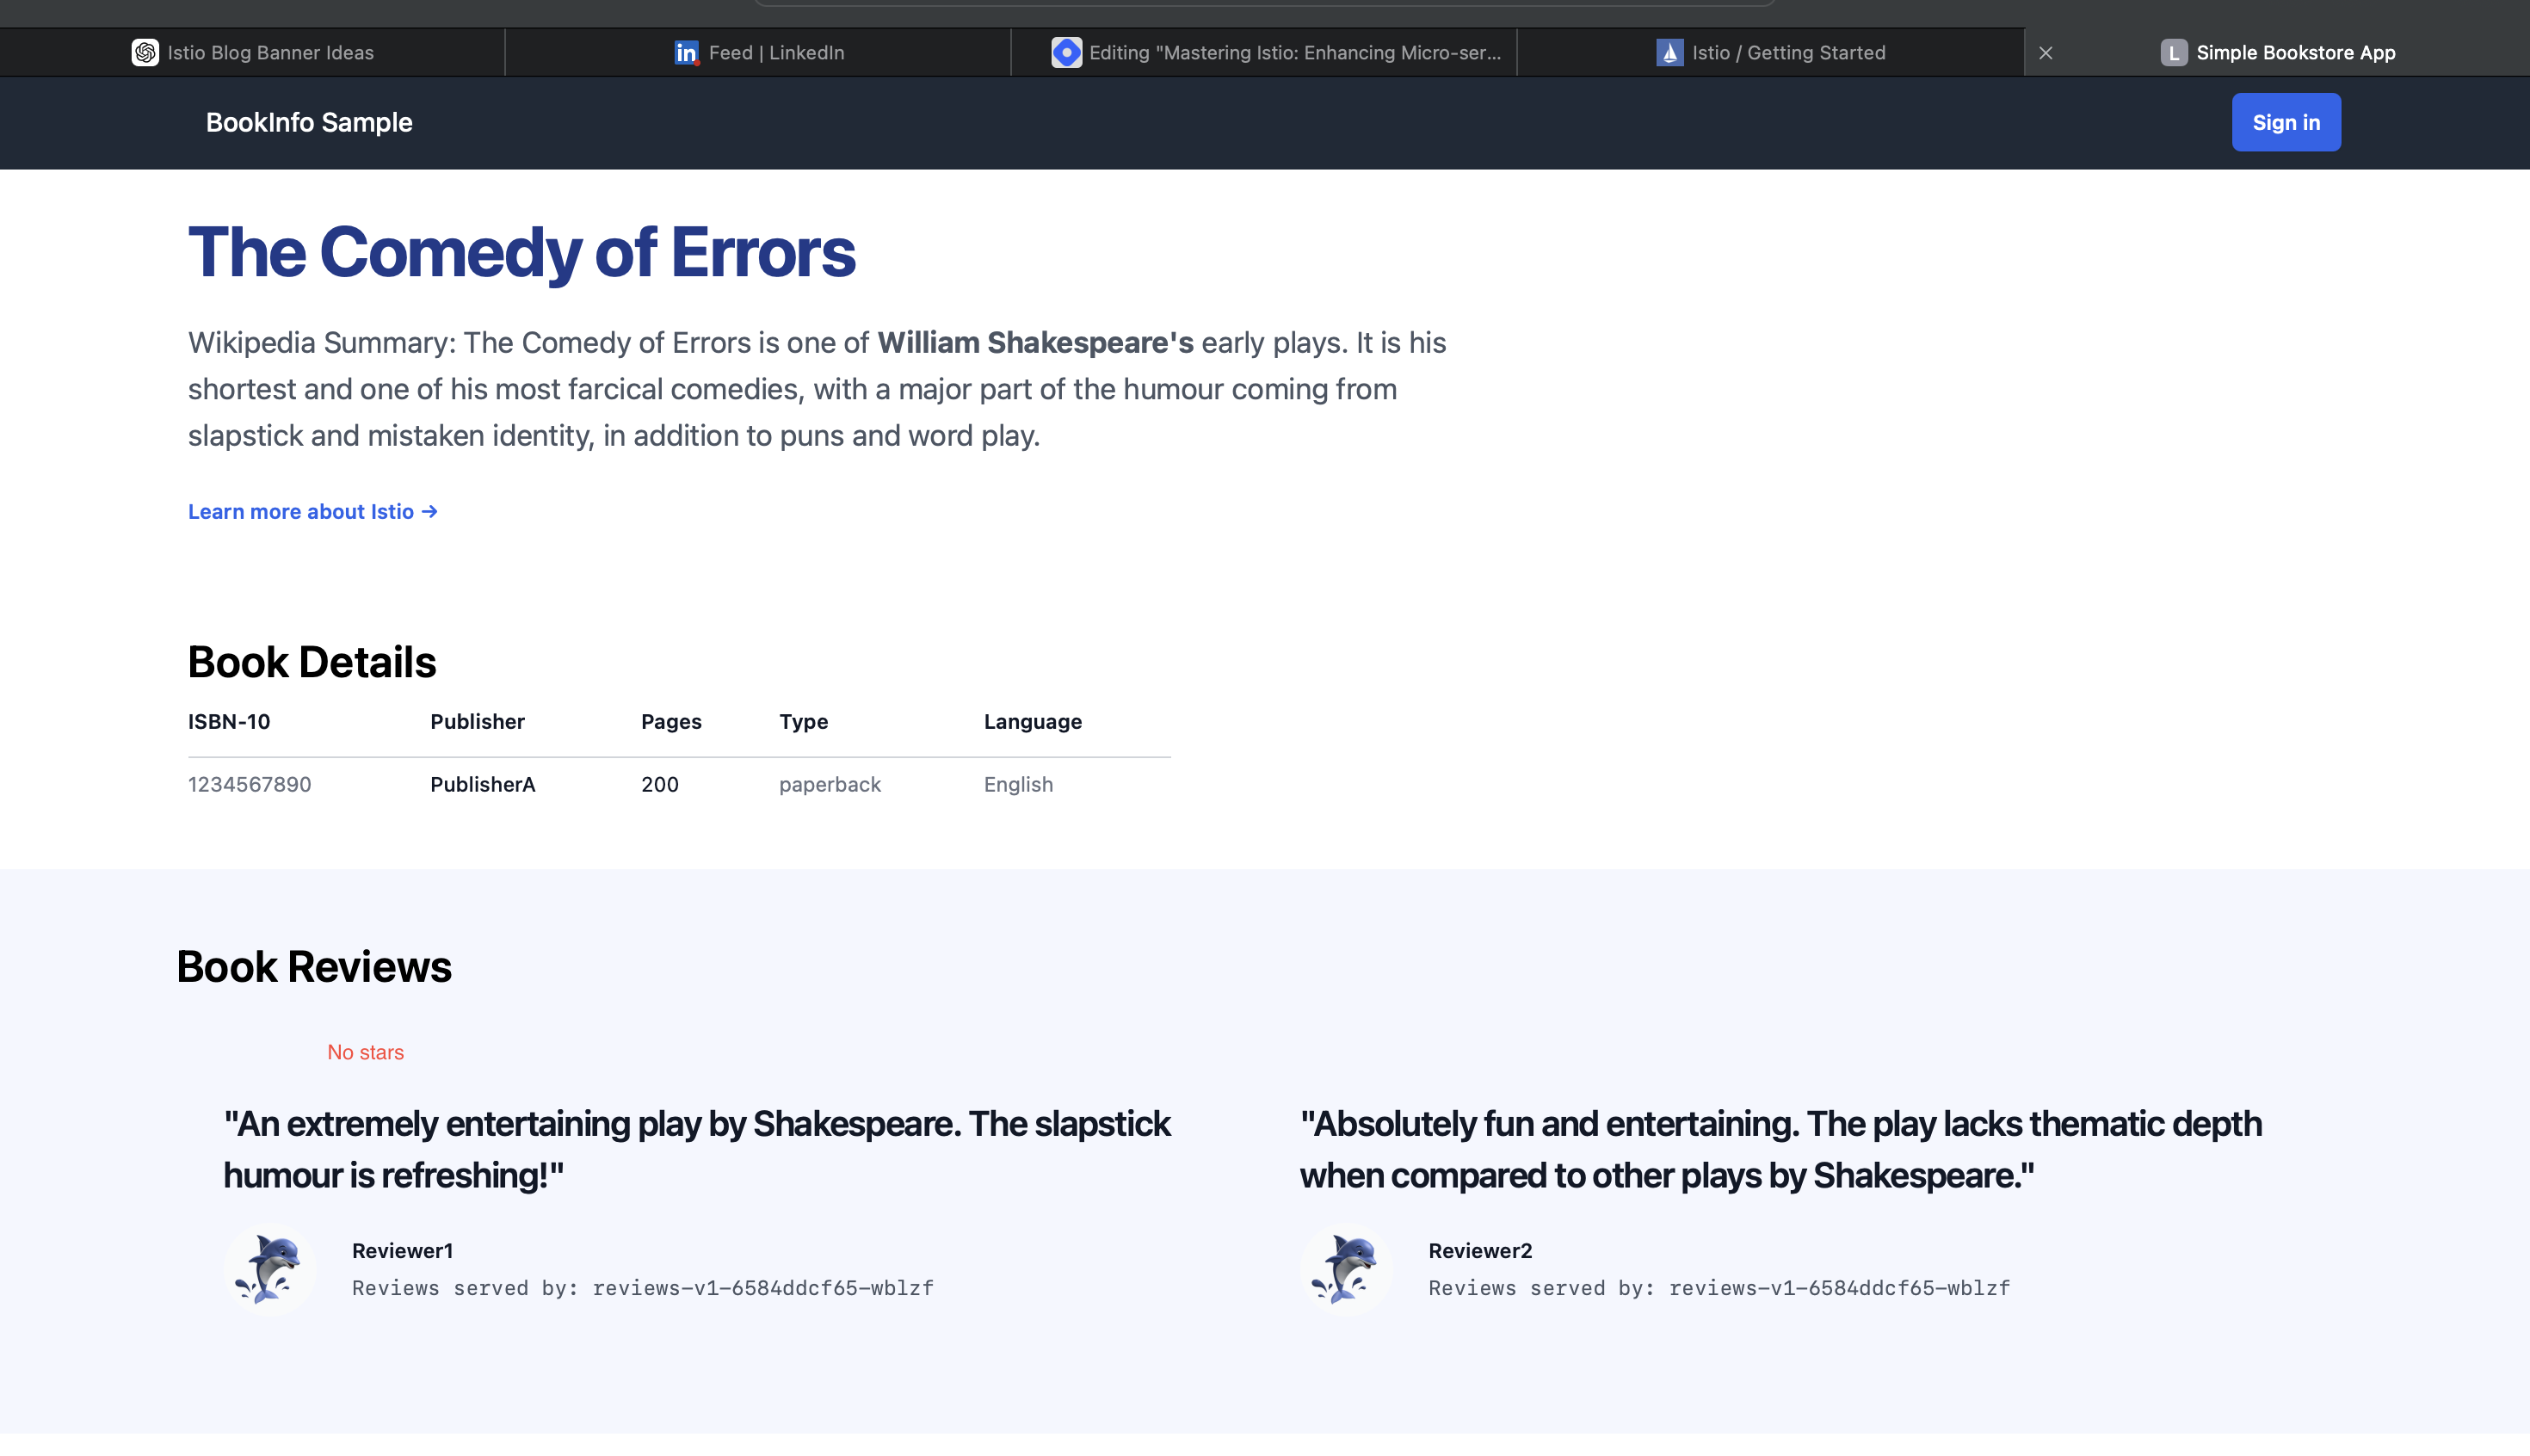
Once applied, you can observe the Bookinfo application will only show version 1 (v1) of the app, where no ratings are displayed.
Step 2: Implementing Canary Deployment
Now, to implement a Canary deployment, we'll route 50% of the traffic to version 1 (v1) and 50% to version 3 (v3) of the reviews service. Here's the traffic-management.yaml file:
apiVersion: networking.istio.io/v1alpha3
kind: VirtualService
metadata:
  name: reviews
spec:
  hosts:
    - reviews
  http:
    - route:
        - destination:
            host: reviews
            subset: v1
          weight: 50
        - destination:
            host: reviews
            subset: v3
          weight: 50
To apply this configuration, run:
kubectl apply -f traffic-management.yaml
After applying the file, you’ll notice that the traffic is now distributed evenly between version 1 (v1) and version 3 (v3) of the reviews service. Version 1 displays no ratings, while version 3 shows red stars for ratings. You can experiment with different traffic weights by modifying the weight values to control the distribution of traffic between the versions.
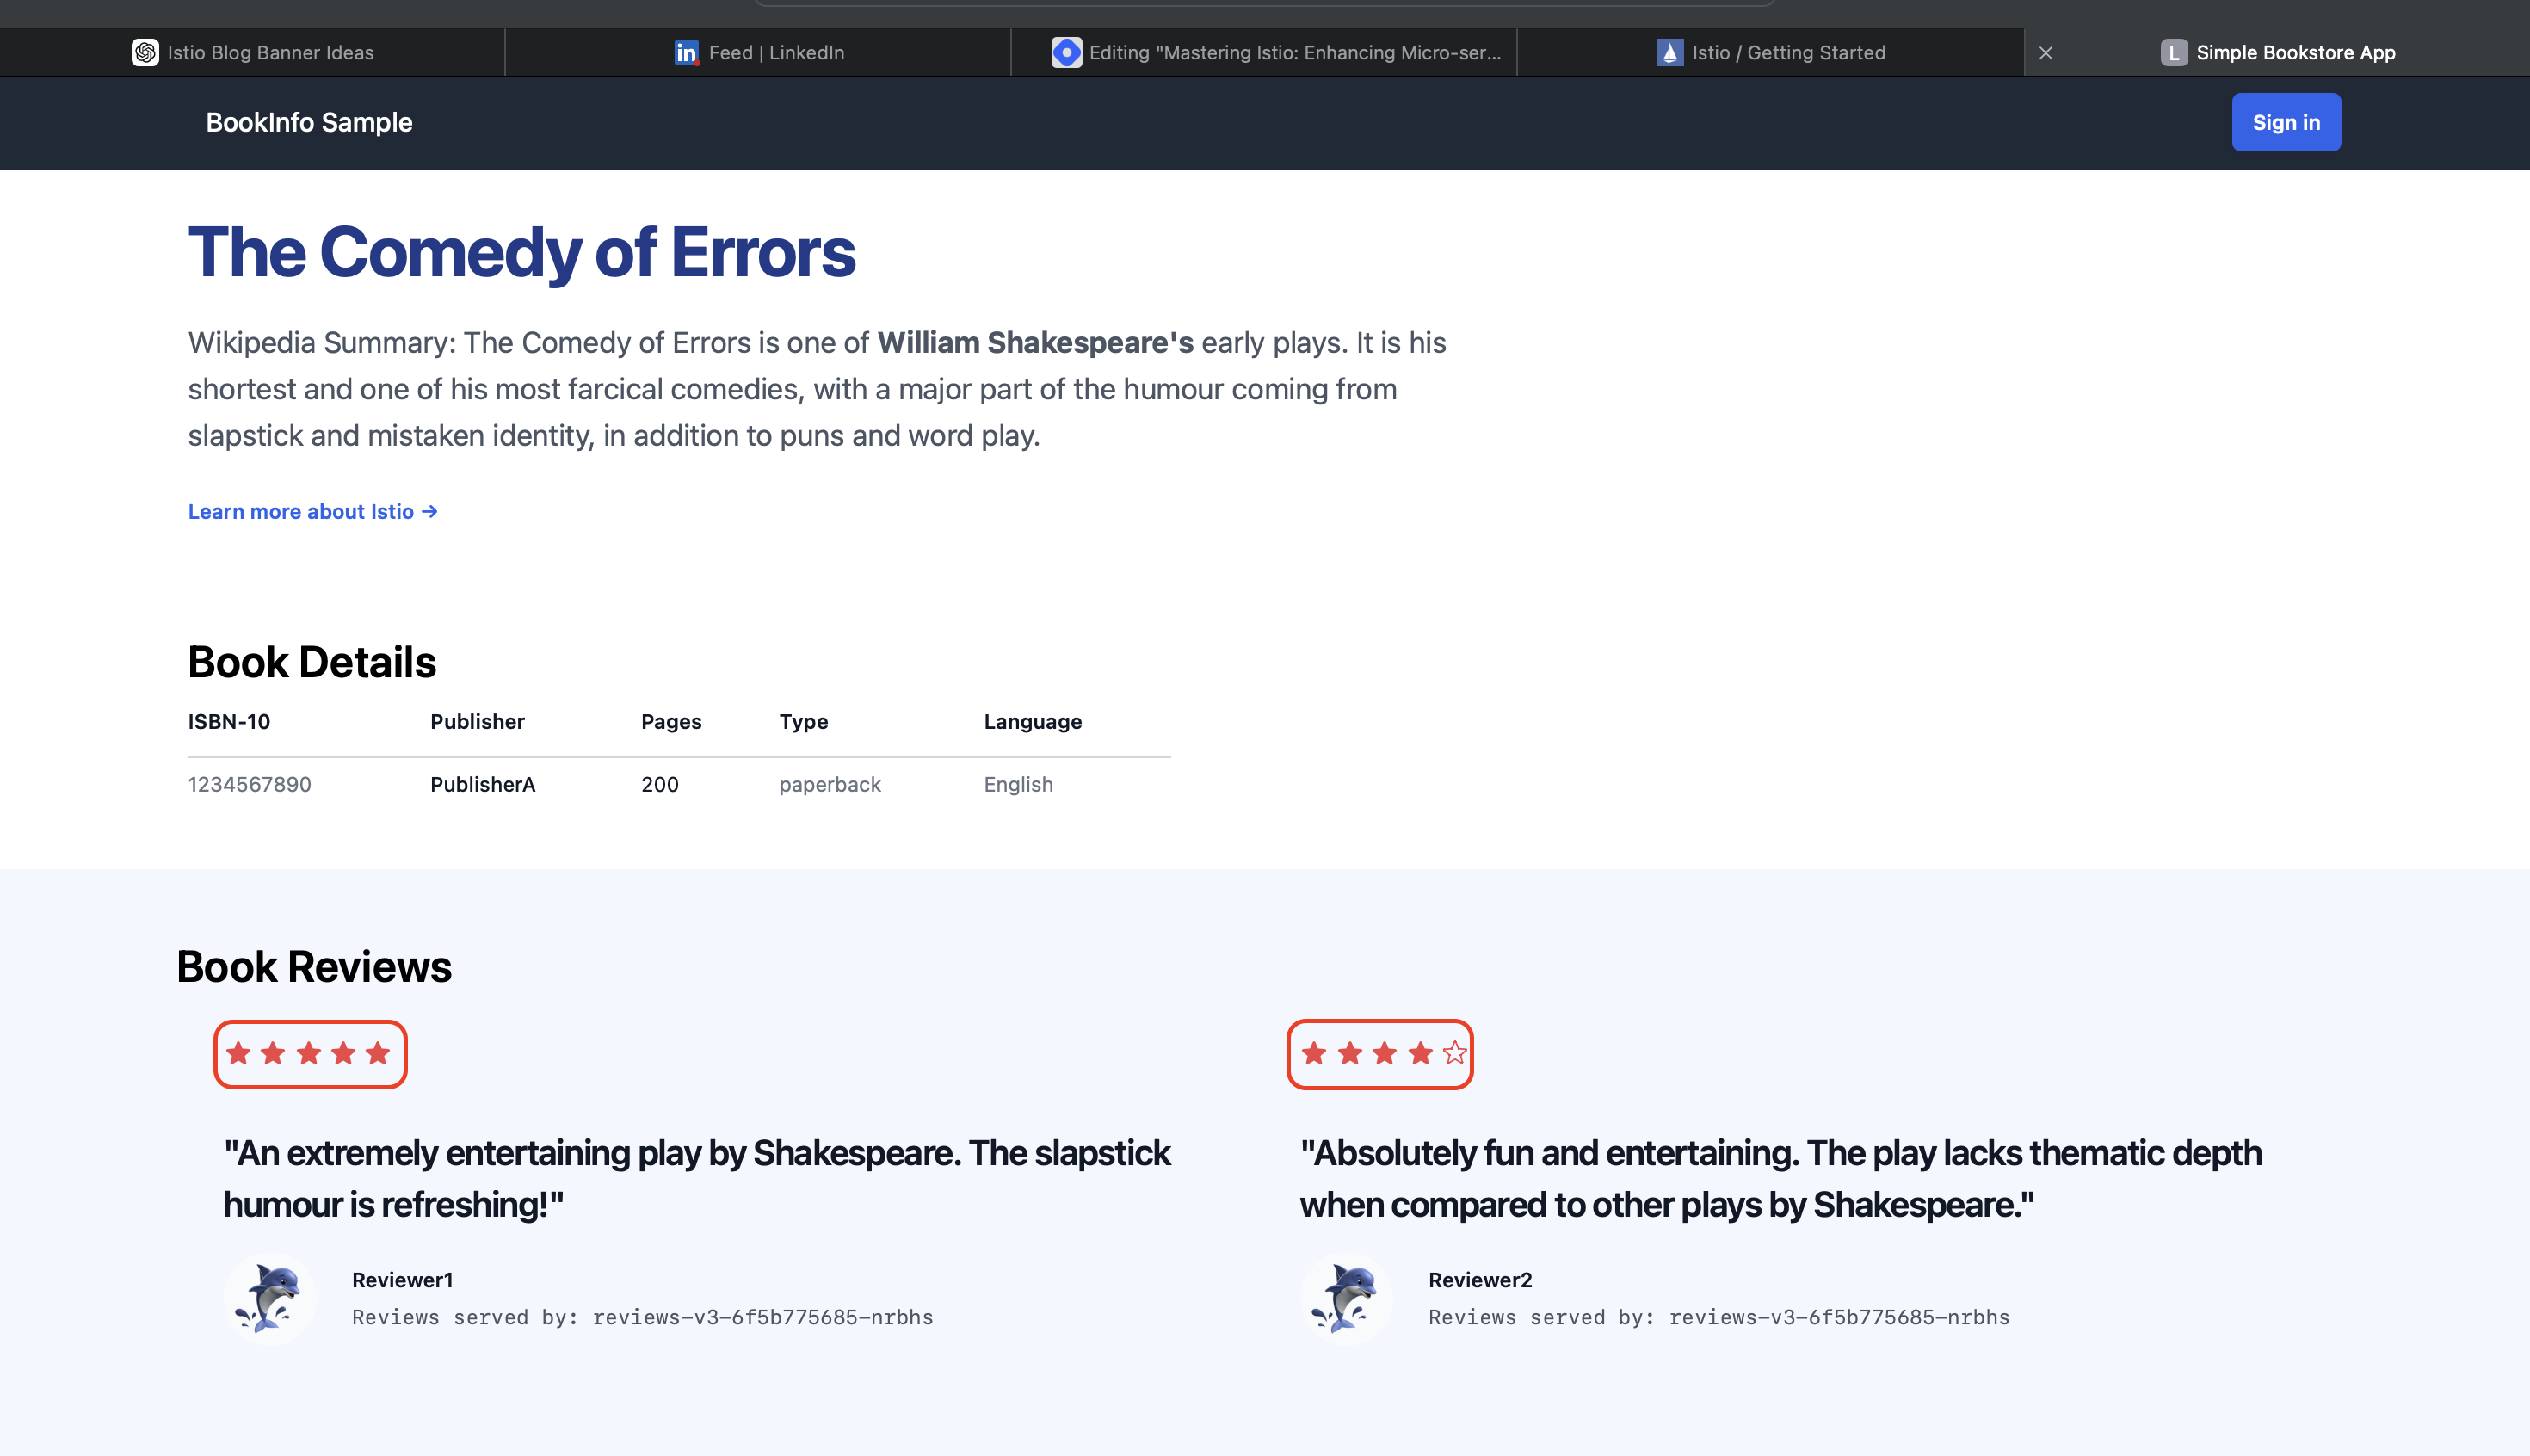
This showcases how Istio simplifies Canary deployments, allowing us to manage traffic gradually and ensure a smooth transition between versions of an application.
💡 Conclusion
In this blog, we explored the concept of Service Mesh and how Istio helps manage microservices in Kubernetes clusters. We discussed the importance of admission controllers, sidecar containers, traffic management, mTLS for secure communication, and Istio’s features like observability and gateways. By deploying the Bookinfo application, we demonstrated how Istio efficiently manages the communication between multiple microservices, ensuring features like traffic routing and security.
Through this practical example, we saw how Istio injects sidecar containers into pods and manages communication, provides gateways to expose services, and simplifies microservice interactions within a Kubernetes cluster. Istio’s extensive feature set and seamless integration with Kubernetes make it a powerful tool for managing the complexity of modern microservices-based applications. For more informative blog, Follow me on Hashnode, X(Twitter) and LinkedIn.
Till then, Happy Coding!!
Subscribe to my newsletter
Read articles from Pravesh Sudha directly inside your inbox. Subscribe to the newsletter, and don't miss out.
Written by

Pravesh Sudha
Pravesh Sudha
Bridging critical thinking and innovation, from philosophy to DevOps.