How To Install Wazuh Manager on a Cloud Service
 Bisola Adediji
Wazuh is a powerful open-source security platform that provides threat detection, integrity monitoring, and incident response capabilities. One of the key components of Wazuh is the Wazuh Manager, responsible for data collection, threat analysis, and alerting. There are several options for installing Wazuh manager including the virtual machine image and docker installation. Installing Wazuh Manager on a cloud service for your homelab is a great option if you are low on memory or storage space. This option provides scalability, flexibility and allows you to monitor agents outside of your local network.
Prequisite
A cloud service provider. For this guide, I’ll be using DigitalOcean. On sign up, you get free $200 credit for 60 days. However, this can work with any cloud service provider.
Termius for managing VM instances. It allows you manage multiple SSH instances without re-entering IP addresses, ports, and passwords.
Setting Up a Virtual Machine
Create a DigitalOcean account here.
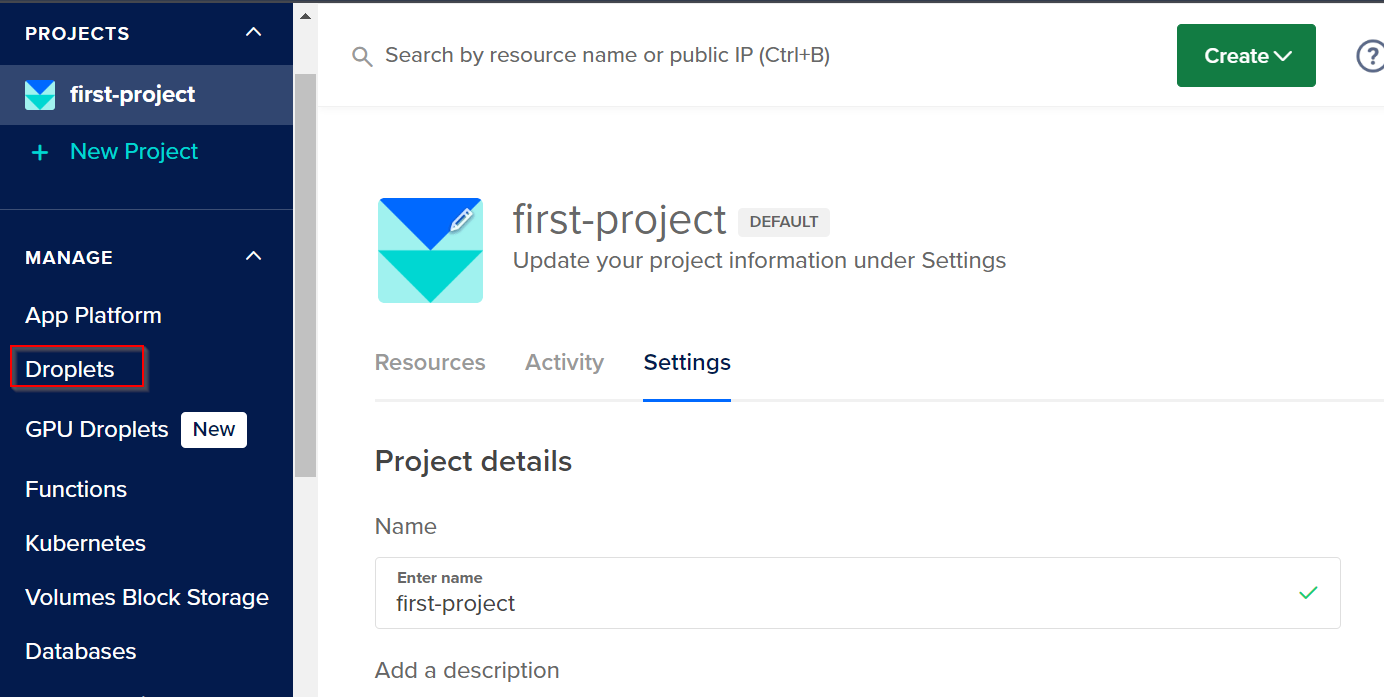
On the left corner, click the Manage dropdown and select Droplet to create a virtual machine.
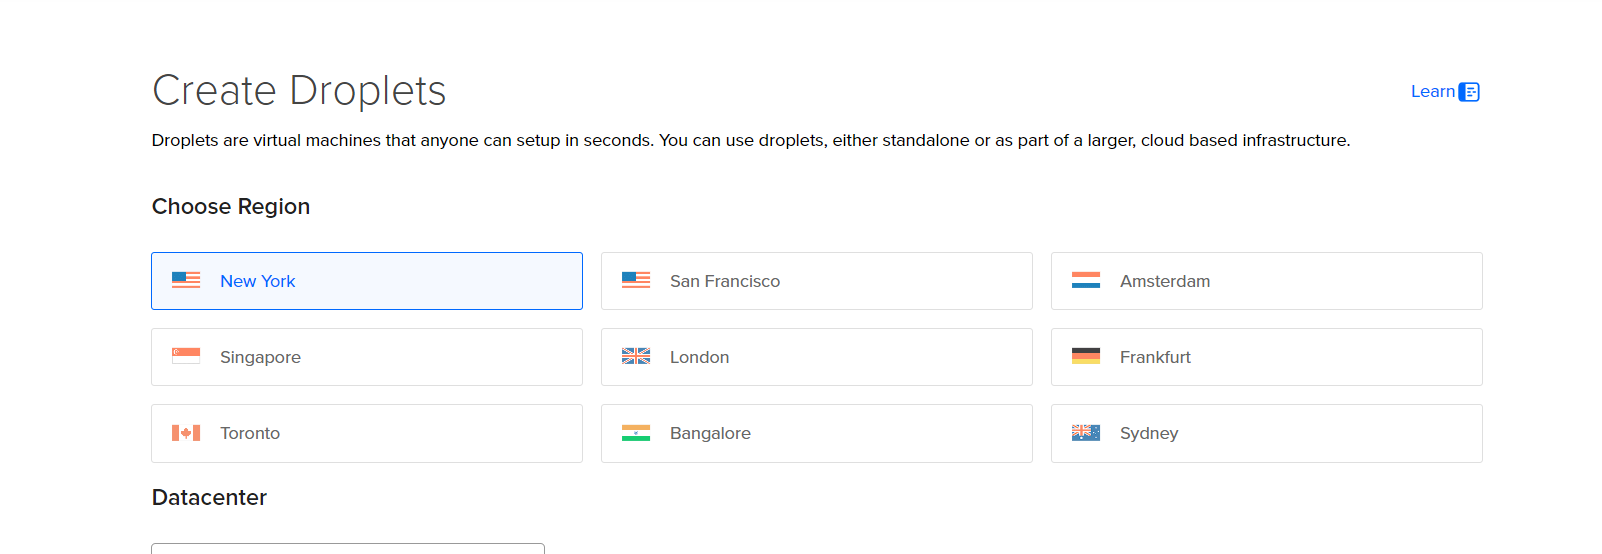
Choose the region closest to you
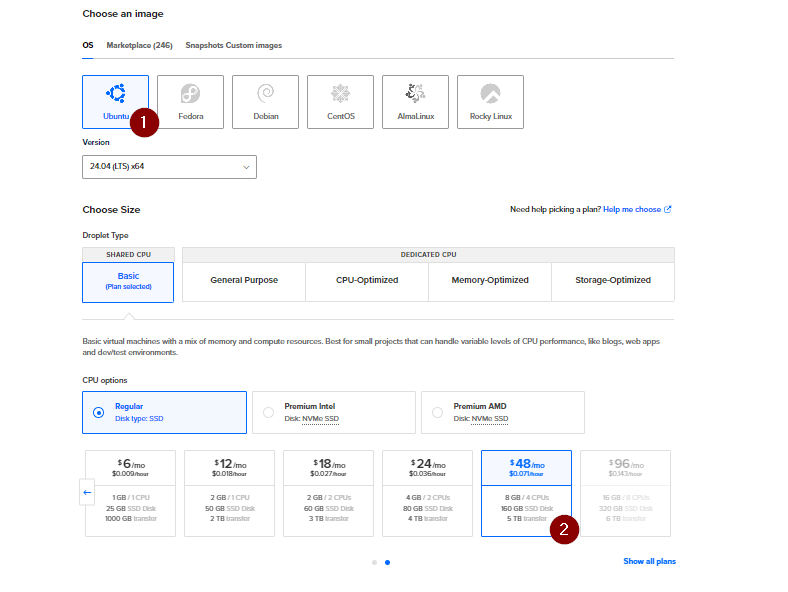
- Choose Ubuntu as the disk image. Under CPU Options, choose the Basic plan, the Regular disk type and the $48/month option. This will provide adequate resources to ensure your manager runs smoothly.
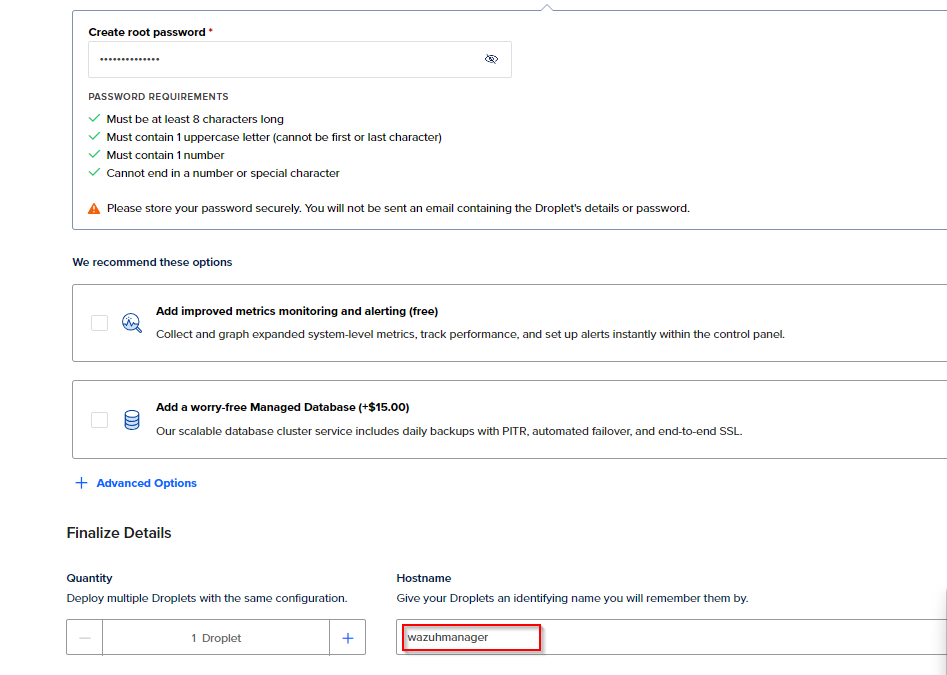
- Choose the Password authentication method and set a strong password. This password will be used to access the machine remotely. Name your machine and click the Create Droplet button at the bottom of the screen and your VM is ready to go.
Firewall Setup
The VM instance is internet facing so it’s important to setup a firewall to ensure only authorized IPs can access the manager. To do this:
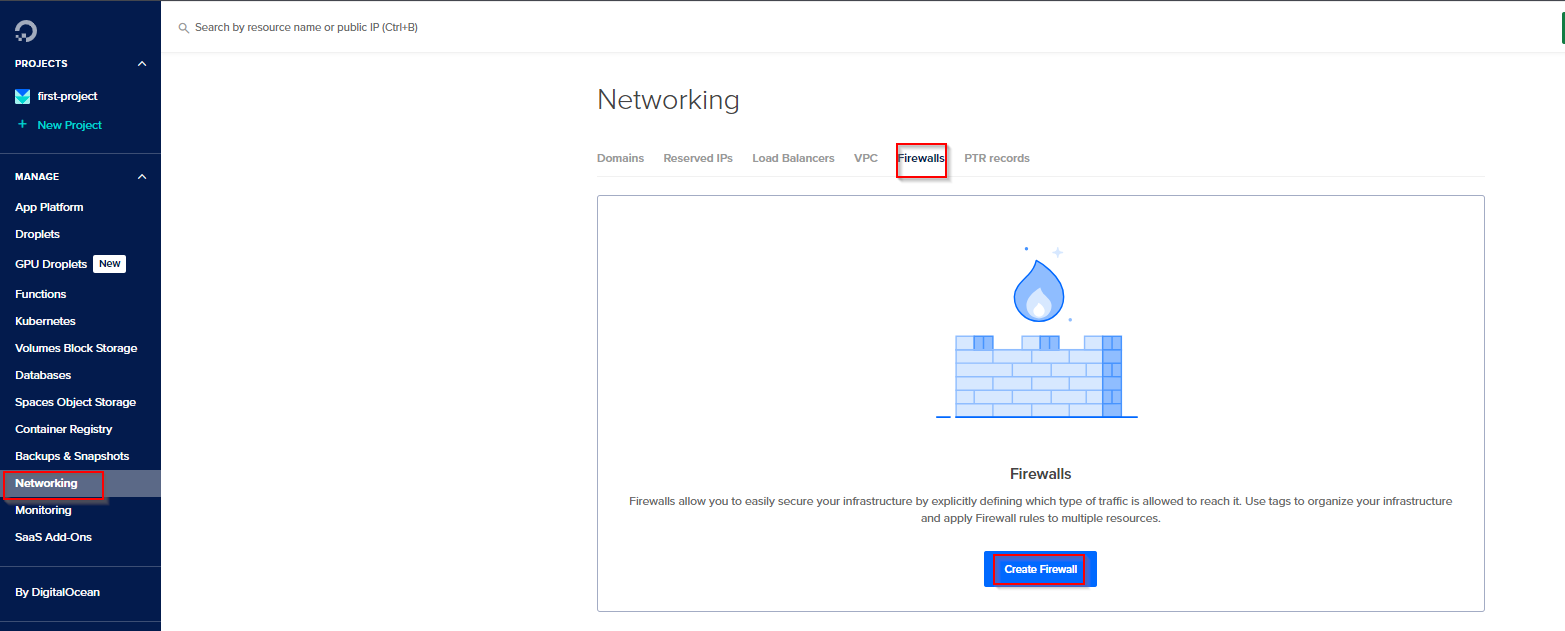
- On the left corner of your DigitalOcean dashboard, choose Networking. Click the Firewall tab and create firewall.
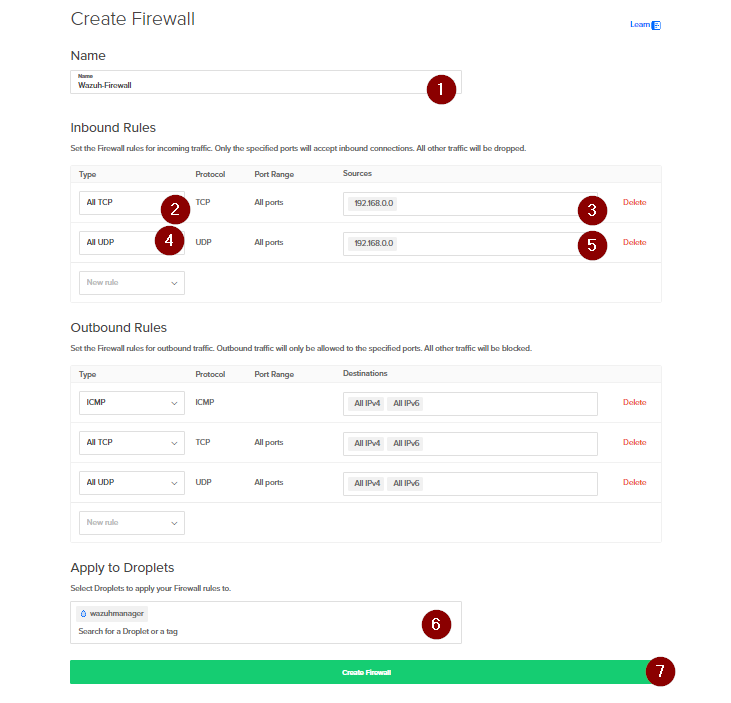
- Name the firewall. Set the Inbound Rules to only allow TCP and UDP traffic from your local machine’s public IPv4 address. Add your VM under Apply to Droplets and create the firewall. This should only permit the specified IP to access the machine.
Install Wazuh Manager
Create a Termius account and download the desktop app.
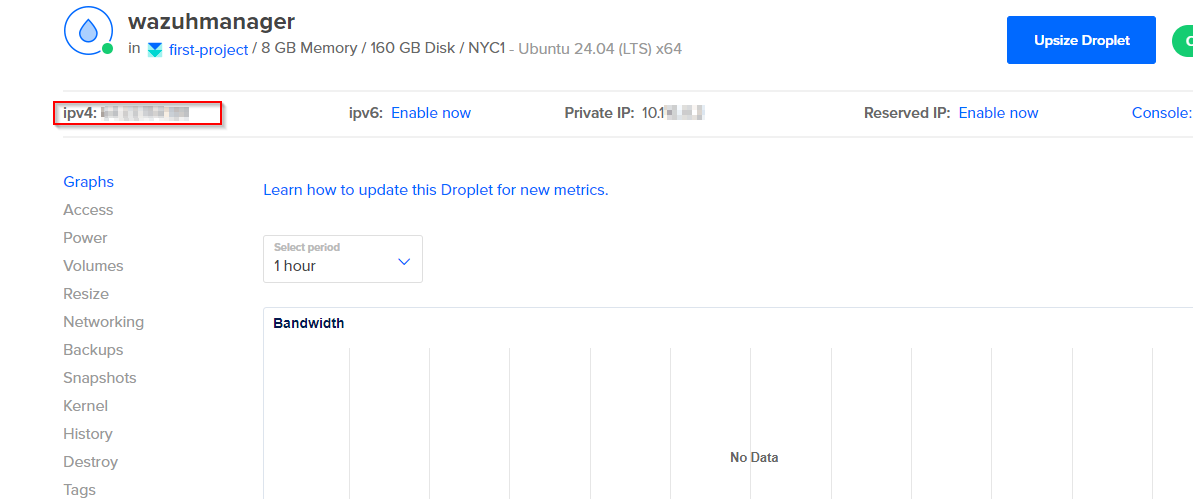
On the dashboard of the VM you created in the previous, copy the public IPv4 address.
On Termius, SSH into the machine using the command. Click Connect, when prompted for a password, input the password you created when setting up the virtual machine.
ssh root@your_ip
Once the terminal is running, it’s always best to ensure your system packages are up to date. Run the following commands:
 apt update
 apt upgrade -y
Run the command below to download and install the Wazuh manager.
curl -sO https://packages.wazuh.com/4.9/wazuh-install.sh && sudo bash ./wazuh-install.sh -aOnce the installation is done, you should see the login details for the dashboard (web interface)

Once installed, start and enable the Wazuh API:
 systemctl start wazuh-manager
 systemctl enable wazuh-manager
To access the dashboard, go to https://VM_public_IPv$4 in your browser
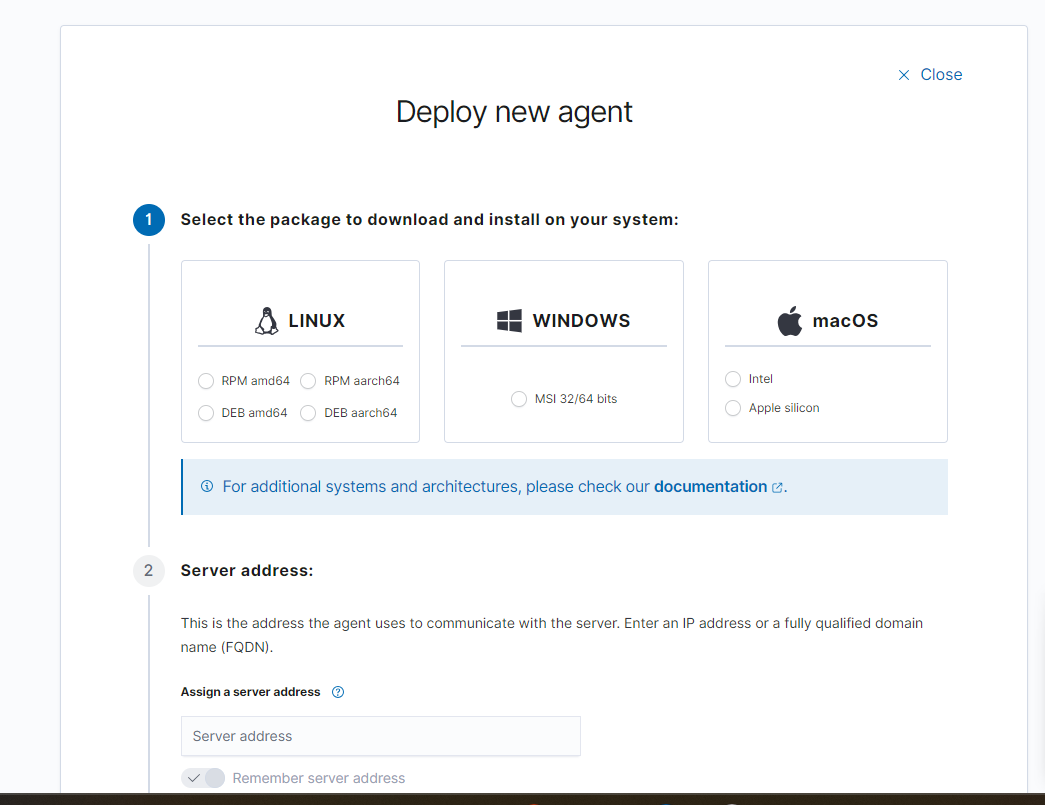
Upon login, you can add endpoints by navigating to Endpoint Summary on the left pane of your dashboard.
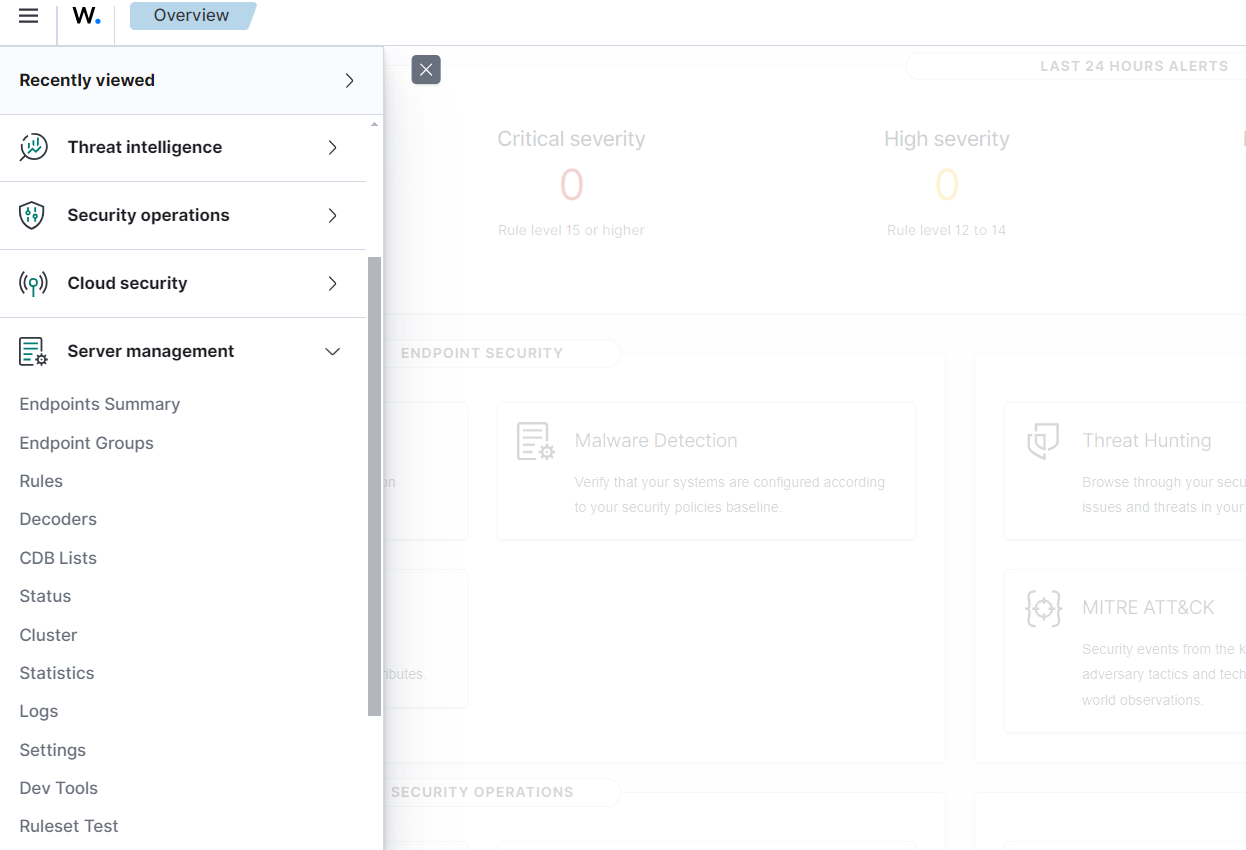
Click on Deploy Agents and follow the instructions. This can be repeated as many endpoints you want.
You have successfully installed Wazuh manager on your cloud service. Next steps include installing Wazuh agents on the systems you want to monitor and configuring the Wazuh dashboard for visualization and analysis.
Subscribe to my newsletter
Read articles from Bisola Adediji directly inside your inbox. Subscribe to the newsletter, and don't miss out.
Written by
