A Simple Guide to Using GitHub Desktop for Project Management 🚀
 Tobi Oyekanmi
As developers, we often work with version control systems to manage projects, especially when collaborating with teams. GitHub is a leading platform for managing code repositories, allowing us to collaborate, track changes, and manage different project versions effortlessly. This blog is an extract from my GitHub Usage Teaching Assistance class in Software Engineering, I’ll walk you through the basics of using GitHub Desktop to create and manage projects. This will include creating branches, handling pull requests, and resolving merge conflicts—all essential Git skills!
Let’s dive into how you can get started with GitHub Desktop and use it to manage your projects effectively.
Why GitHub Desktop? 🤔
GitHub Desktop is a user-friendly interface for interacting with GitHub repositories. It provides a simple, less intimidating environment for developers who may not be comfortable using Git via the command line. With GitHub Desktop, you can do everything from creating new repositories, committing changes, creating branches, and pushing updates to your online repository.
If you haven’t already, you can download GitHub Desktop here:
GitHub Desktop
Creating a New Project from GitHub Desktop
Once you've installed GitHub Desktop, let’s start by creating a new project.
1. Create a New Repository:
Open GitHub Desktop and click on the "New Repository" option.
Name your project, decide the repository path on your local machine, and click on Create Repository.
On the next window, click on Publish repository, whether you want to make the repository public or private by toggling the “Keep this code private” checkbox then click on Publish repository button.
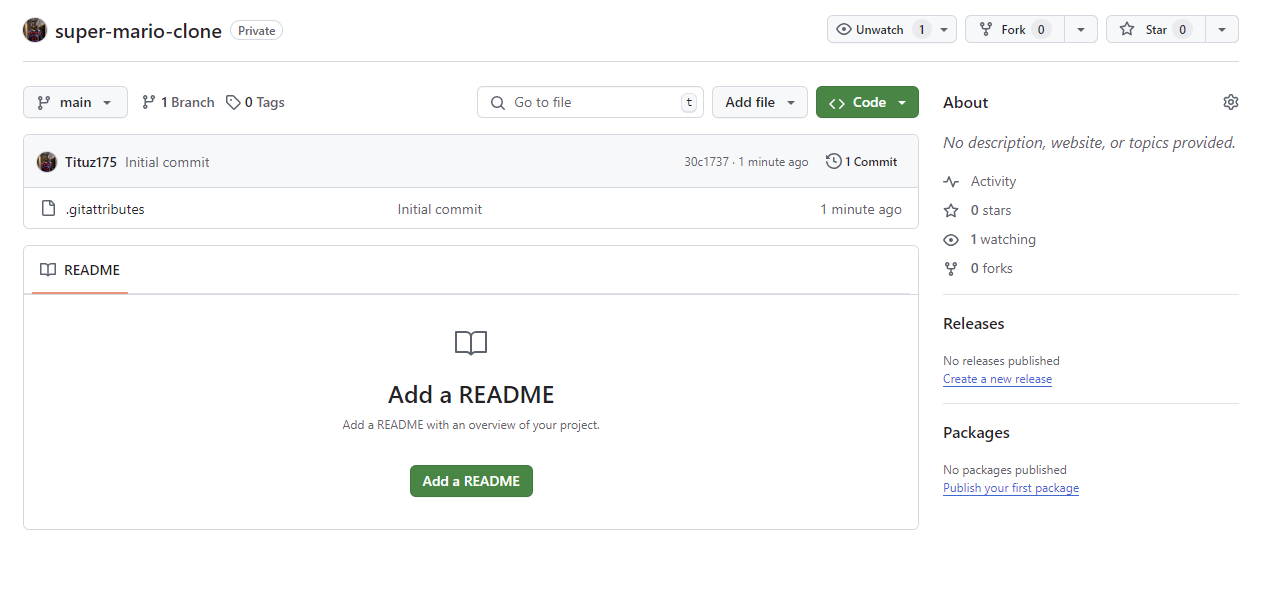
The repository will now be visible on your GitHub account online, and the webpage should resemble something like this:

Syncing Local Changes with GitHub 🌍
Let’s now add some code to your repository.
2. Open the Repository in an Editor:
From GitHub Desktop, open the repository in your desired text editor (for example, VS Code).
Create a new file (e.g.,
app.py), add some code, and save it.
GitHub Desktop will automatically detect the changes made to the repository.
3. Committing Changes:
For each change you make, you need to commit it to GitHub to track the modification. Here’s how:
In GitHub Desktop, you’ll see the updated files.
Add a commit message summarizing the changes made. The message should be descriptive enough to capture the essence of the update.
Click Commit to Main to commit the changes locally.
To reflect these changes on GitHub’s online repository, click the Push origin button. This ensures that the local changes are synced with GitHub.
Creating and Managing Branches 🌿
In collaborative projects, branches play an important role in managing code changes without interfering with the main codebase. Let’s see how to create a branch and make changes safely.
4. Creating a New Branch:
In GitHub Desktop, click on the Branch tab, then select New Branch.
Name your branch (e.g.,
feature-save), and click Create Branch. This new branch is a copy of the main branch and can be used to develop new features safely.
5. Committing Changes to the New Branch:
Make your changes in the branch, save them, and follow the same process as before—commit your changes and push them to GitHub by clicking Publish Branch. This ensures the new branch is available online for review.
Pull Requests and Merging Branches 🔄
Once you've completed your work in the feature branch, you can merge it into the main branch using Pull Requests.
6. Creating a Pull Request:
A pull request (PR) allows you to propose changes to the main branch. Here’s how to create one:
On GitHub’s website, go to your repository and click New Pull Request.
Select the branch you want to merge into the main branch (e.g.,
feature-save), and GitHub will compare the changes.
Since you’re the owner of the repository, you can approve the pull request. If you’re working in a team, this step would typically be handled by the project lead.
Handling Merge Conflicts ⚠️
Merge conflicts happen when two branches contain competing changes to the same lines of code. In a team, this is quite common, but it’s important to know how to resolve these conflicts gracefully.
7. Simulating a Conflict:
Let’s simulate a conflict by modifying the same file in two different branches.
Create a new branch called
conflict, and modify theapp.pyfile.Switch back to the
mainbranch and make another modification inapp.py.
When you try to merge the conflict branch into the main branch, GitHub will raise a conflict alert.
8. Resolving Conflicts:
To resolve the conflict:
GitHub Desktop or your text editor will allow you to edit the conflicting code manually.
Decide which changes to keep, remove the conflicting lines, and save the file.
Commit the merge and push the changes to GitHub.
Once resolved, the changes will reflect on the GitHub website after you click the Push origin button.
Best Practices for GitHub Branches 💡
Here are a few best practices when working with Git branches in collaborative projects:
Always create branches for new features or bug fixes. Avoid working directly on the main branch to prevent unnecessary issues.
Sync your branch with the main branch frequently. This ensures you’re always working with the latest code and minimizes conflicts.
Write descriptive commit messages. A well-written commit message helps others (and future you) understand what changes were made and why.
Conclusion 🏁
Using GitHub Desktop simplifies project management, especially for those new to Git. In this guide, we’ve covered the basics of creating projects, managing branches, making pull requests, and resolving conflicts.
Understanding how to use GitHub effectively is a key skill in software development, particularly when collaborating on teams. The more you practice, the more natural it will become, and soon you’ll be able to handle large projects with ease.
Happy coding! 👩💻👨💻
Let me know if you have any questions or comments. You can also connect with me on GitHub or LinkedIn. Let’s build something awesome together!
Subscribe to my newsletter
Read articles from Tobi Oyekanmi directly inside your inbox. Subscribe to the newsletter, and don't miss out.
Written by
