Industry Ready CICD : A Practical Guide
 Ayush Tripathi
In this blog, I’ll explain the process to make a complete industry ready DevOps project. This project will contain complete CICD implementation on a local setup. In a real setup, we would use a cloud provider for kubernetes and a few additional tools like service mesh and gateway service but this project is a relatively simple implementation. I have used macOS so if you are going to use Windows / WSL on your end, please replace the commands according to it, there won’t be a huge difference other than package manager diffs.
Tools used:
Docker
Docker is the most famous container runtime, helping to containerize applications.
Kubernetes - Minikube
Famously known as k8s, Kubernetes is a container orchestration tool that helps manage a large number of containers and clusters. Minikube is the local setup for k8s. According to the architecture, a k8s cluster has a control plane and node but minikube combines them and allows us to test manifests and projects.
Gitlab
Gitlab is a famous continuous integration and Version Control System (VCS) platform for DevOps. It helps to implement Continuous Integration (CI) in a very simple manner.
Kustomize
Kustomize is a Kubernetes tool for customizing YAML configurations without altering the originals. It allows you to apply patches, overlays, and manage environment-specific setups for easier, reusable deployments.
ArgoCD:
Argo CD is a Kubernetes-native continuous delivery tool that automates application deployment. It ensures Git repositories serve as the source of truth, syncing applications and maintaining the desired state in clusters.
Pre-requisites:
Container runtime:
We will use docker as specified in the tools section. You need to install docker desktop which is a docker engine provider will provide you with docker runtime. In my case, I have used colima as the docker engine provider.
Minikube setup:
It is a local setup for kubernetes, generally used for testing and for small projects. In case of macOS just simply run: (after starting the docker runtime)
 brew install minikube kubectl
 minikube start
Gitlab account and Git:
You need to have a Gitlab account to make the continuous integration pipeline. Nothing fancy, simply login or signup to the free tier of Gitlab. Git is a version control system which is used to manage and store code and manifests on platforms like Gitlab.
Some knowledge of DevOps.
Basic Project Flow:

The project will start with dockerizing our demo app - podinfo. In this process we’ll use the multi-stage docker approach for efficient image formation. We’ll push this image to dockerhub which is a famous public artifact registry.
Next, we’ll use this image in a kustomize setup. We’ll pull our image from dockerhub which we created and pushed earlier.
Next, we’ll setup argocd in our minikube cluster. In our argocd, we’ll make a top-level-app to facilitate all future deployments.
Finally, we’ll deploy our application via argocd in our minikube k8s (kubernetes) cluster.
Implementation:
Part 1: Dockerizing the application
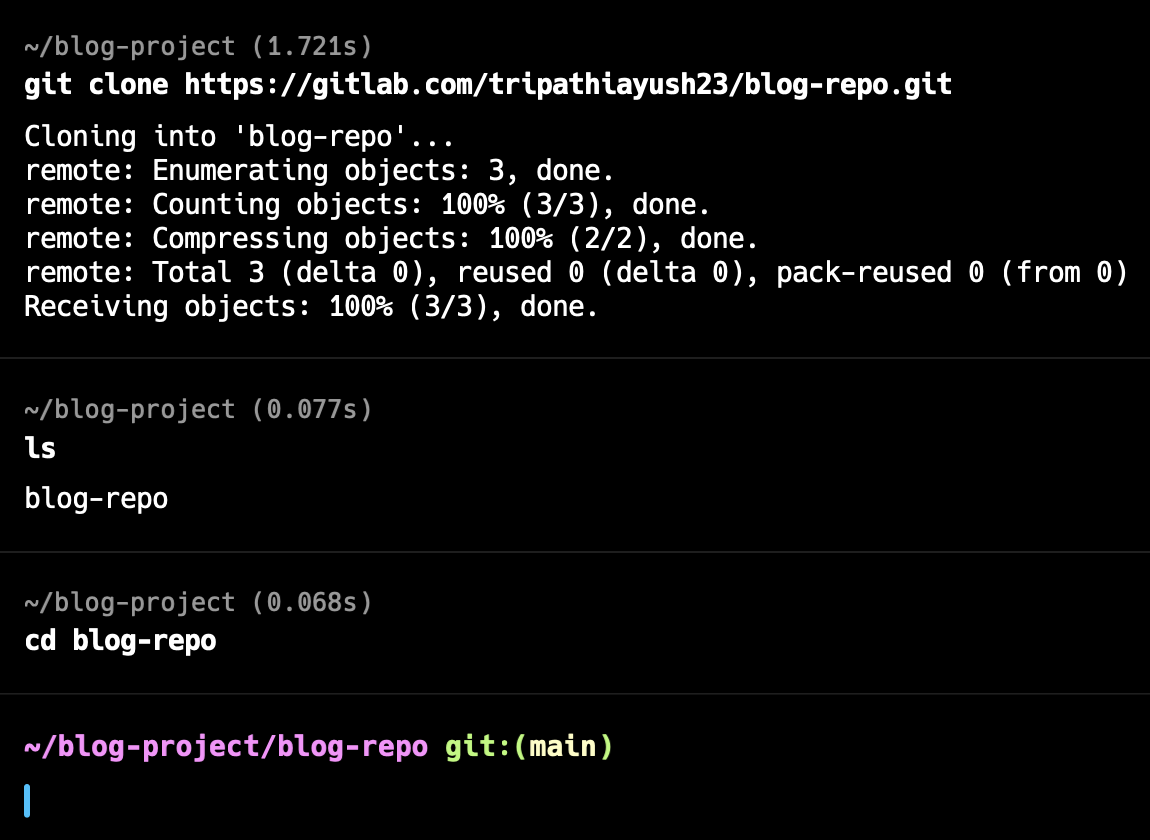
The application that we will use is a simple Go application linked here. We will start by cloning the repository in your local setup and simply going to its path.
git clone https://gitlab.com/tripathiayush23/blog-repo.git
cd blog-repo
Next, we start writing the Dockerfile. Create a new file and name it “Dockerfile” strictly. Next copy the below snippet and paste it there. I’ll explain this code.
# stage 1
FROM golang:1.23.0-alpine AS builder
WORKDIR /podinfo
ADD . /podinfo/

# dependency install and binary creation
RUN go mod download
RUN go build -o /podinfo

# giving permission to execute to the binary
RUN chmod +x ./podinfo

# stage 2
# This is a distroless image
FROM gcr.io/distroless/base-nossl-debian11
COPY --from=builder ./podinfo .
EXPOSE 9898
CMD [ "./podinfo" ]
First, this is a multi-stage build, it is an advanced concept in docker. If you are a beginner you can do it in a simpler way. I have used this approach to reduce my image size.
Stage 1:
In this stage, we will build a binary for our go application. That’s it.
FROM <base-image> AS <alias>
This specifies a base image for stage 1 of the Dockerfile, and the alias is used to refer to stage 1 in later stages of the file.
WORKDIR <dir-name>
ADD . <dir-name>
Here we specify a working directory within our docker container. ADD is used to add files and directories from host to the container. So, here we add everything from host to the ‘podinfo’ directory within our container.
RUN <commands>
This is used to run any linux commands within the container which is alpine (refer the base image). These commands differ from app to app. In this case, we have downloaded the dependencies and built a binary file called podinfo(since a name is not specified the binary has the same name as the directory). Finally we have given executable permissions to the newly created binary.
Stage 2:
In this stage, we copy the binary we created in the stage 1 and execute it. That’s it.
Now the things to understand here:
Multi-stage docker file: Splitting our dockerfile into multiple stages and in the end only the last stage matters while building the image because we copy essentials like binaries from one stage to next.
Distroless Images:
These are extremely minimalistic base images which only contain the bare minimum requirements. (eg: shell). You may find over the internet that distroless images are empty, but they still have an inbuilt shell.
# To build docker image from the Dockerfile
docker-buildx build -t <dockerhub-username>/blog-project:1.0 .

# To see all the docker images on your system
docker images

# To push docker image to dockerhub
docker push <dockerhub-username>/blog-repo:1.0
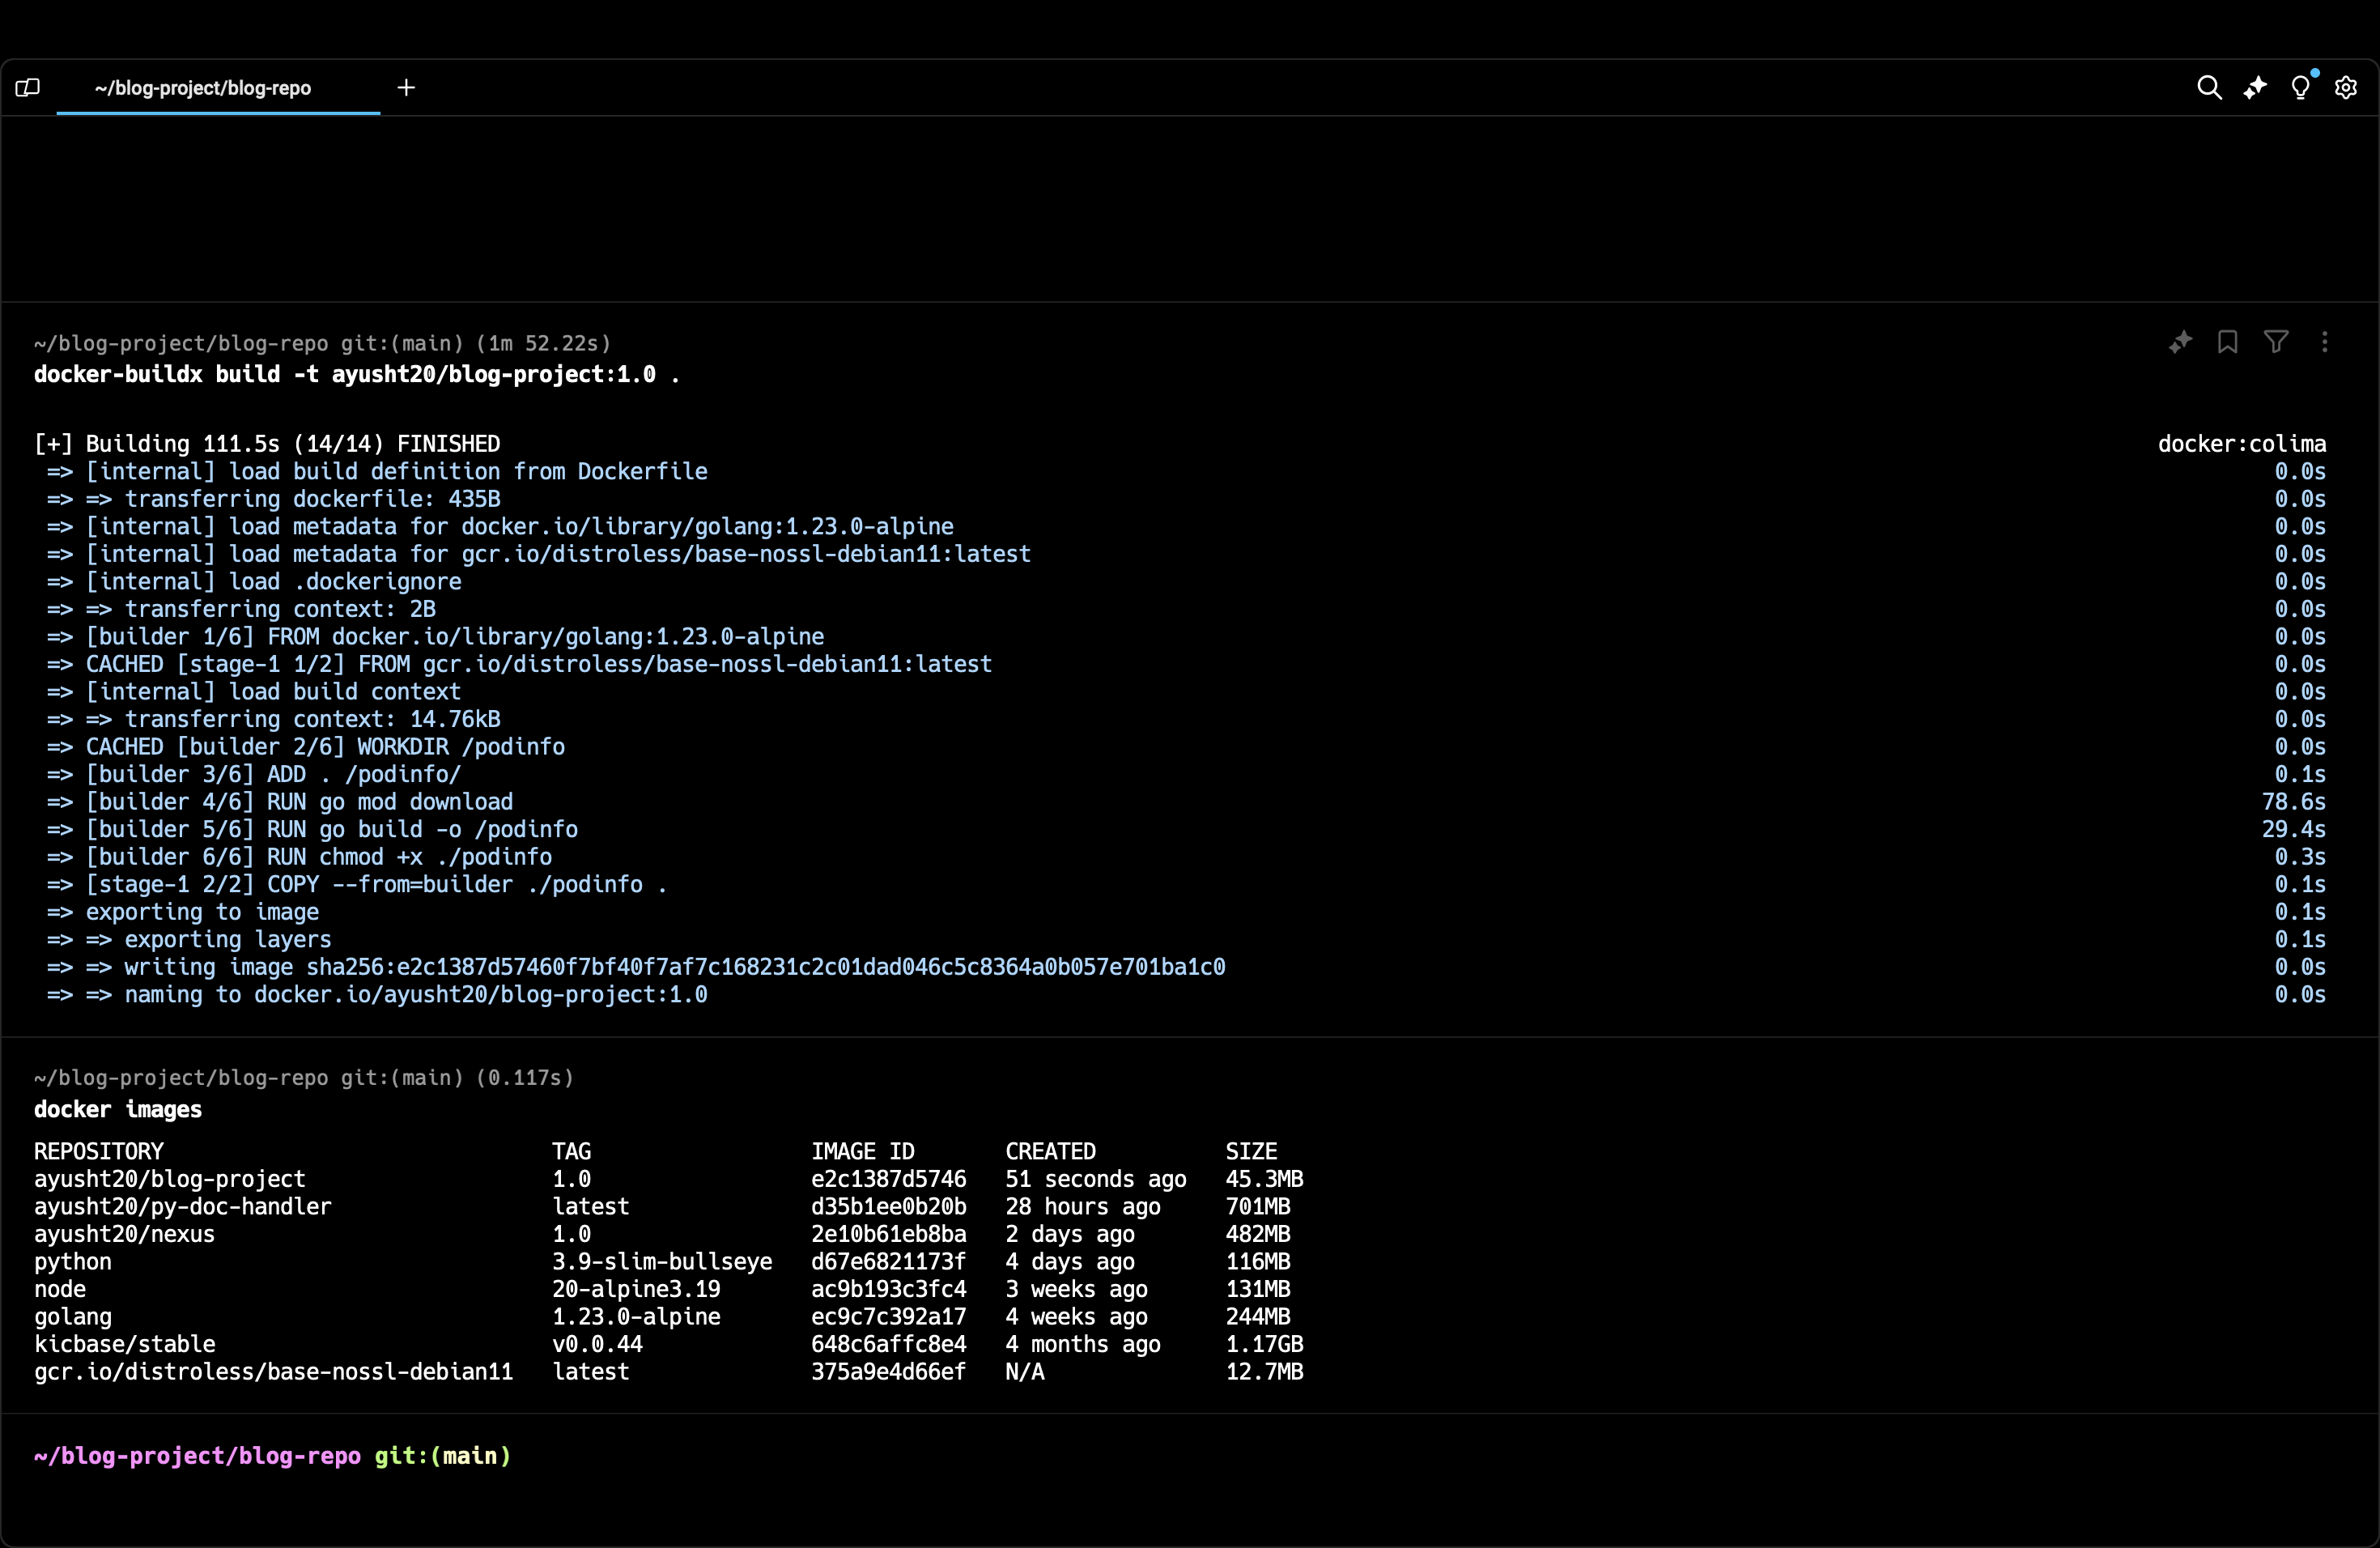
‘-t’ flag refers to tag, we have to tag the image in the fashion as written above to be able to push to our dockerhub account. You can change the name and version. The ‘.‘ simply means that both the Dockerfile and the code is present in the current directly.
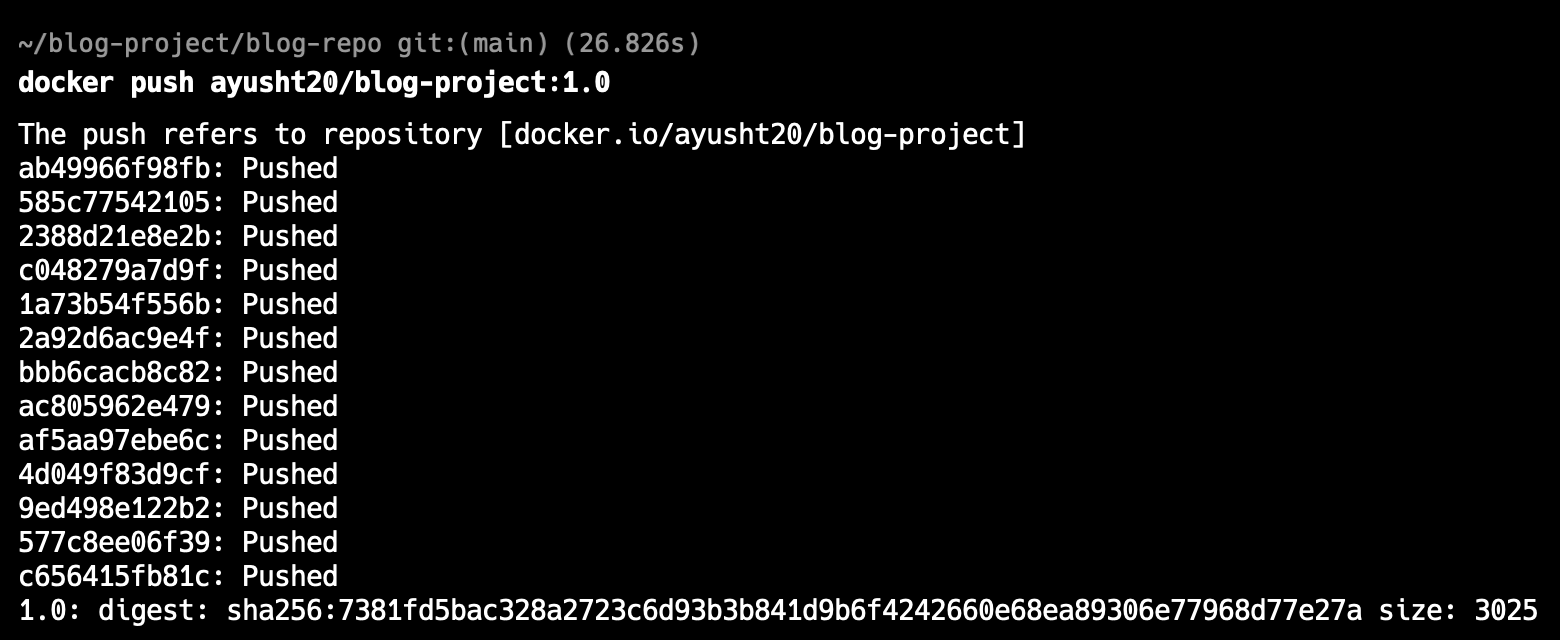
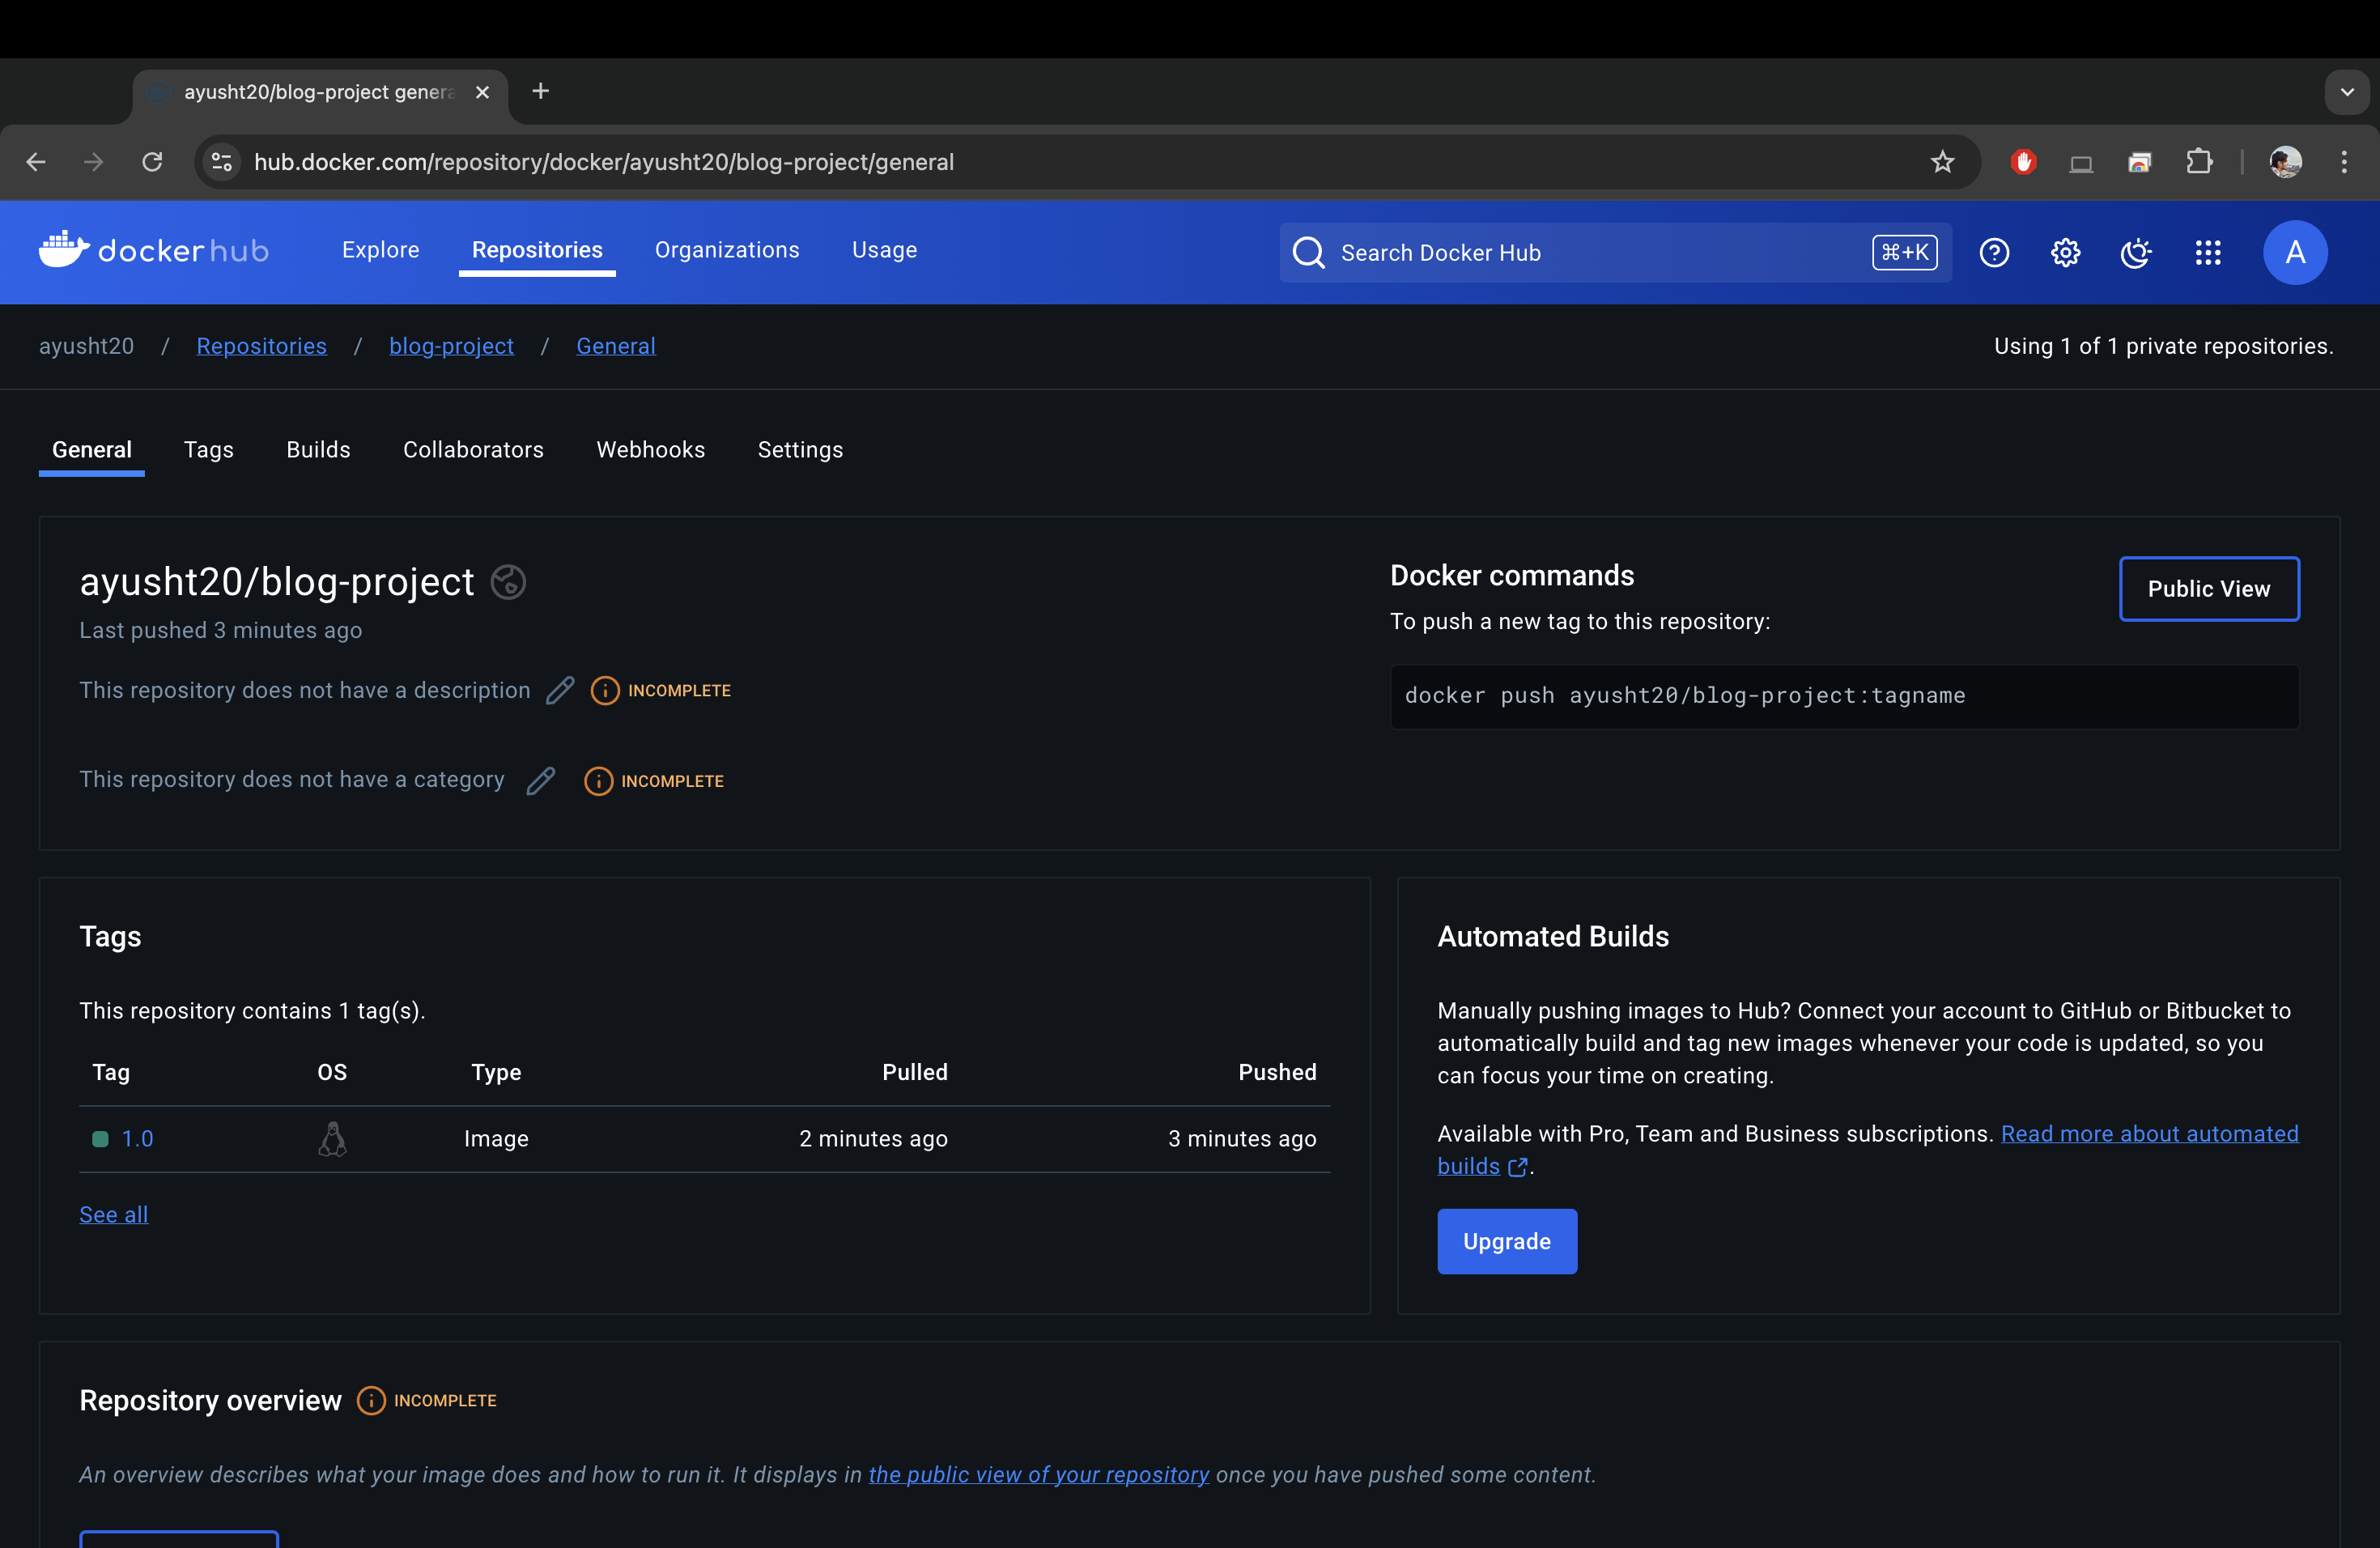
Fun fact: By default ‘docker push’ pushes the image to dockerhub. If you want to push to somewhere else like a private artifact registry then you need to provide access and the entire URL.
Part 2: Write gitlab-ci.yml
stages:
  - build

build_and_push:
  stage: build
  image: "docker:latest"
  services:
    - docker:dind
  script:
    - docker login -u "$DOCKER_USERNAME" -p "$DOCKER_PASSWORD"
    - docker build -t "$DOCKER_USERNAME/blog-project:1.0" .
    - docker push "$DOCKER_USERNAME/blog-project:1.0"
This file is present in my repo already but just remember that the file name has to strictly .gitlab-ci.yml.
Next create 2 variables DOCKER_USERNAME & DOCKER_PASSWORD and fill in the required values. To create these navigate to the repo, on the left side Settings > CICD > Variables.
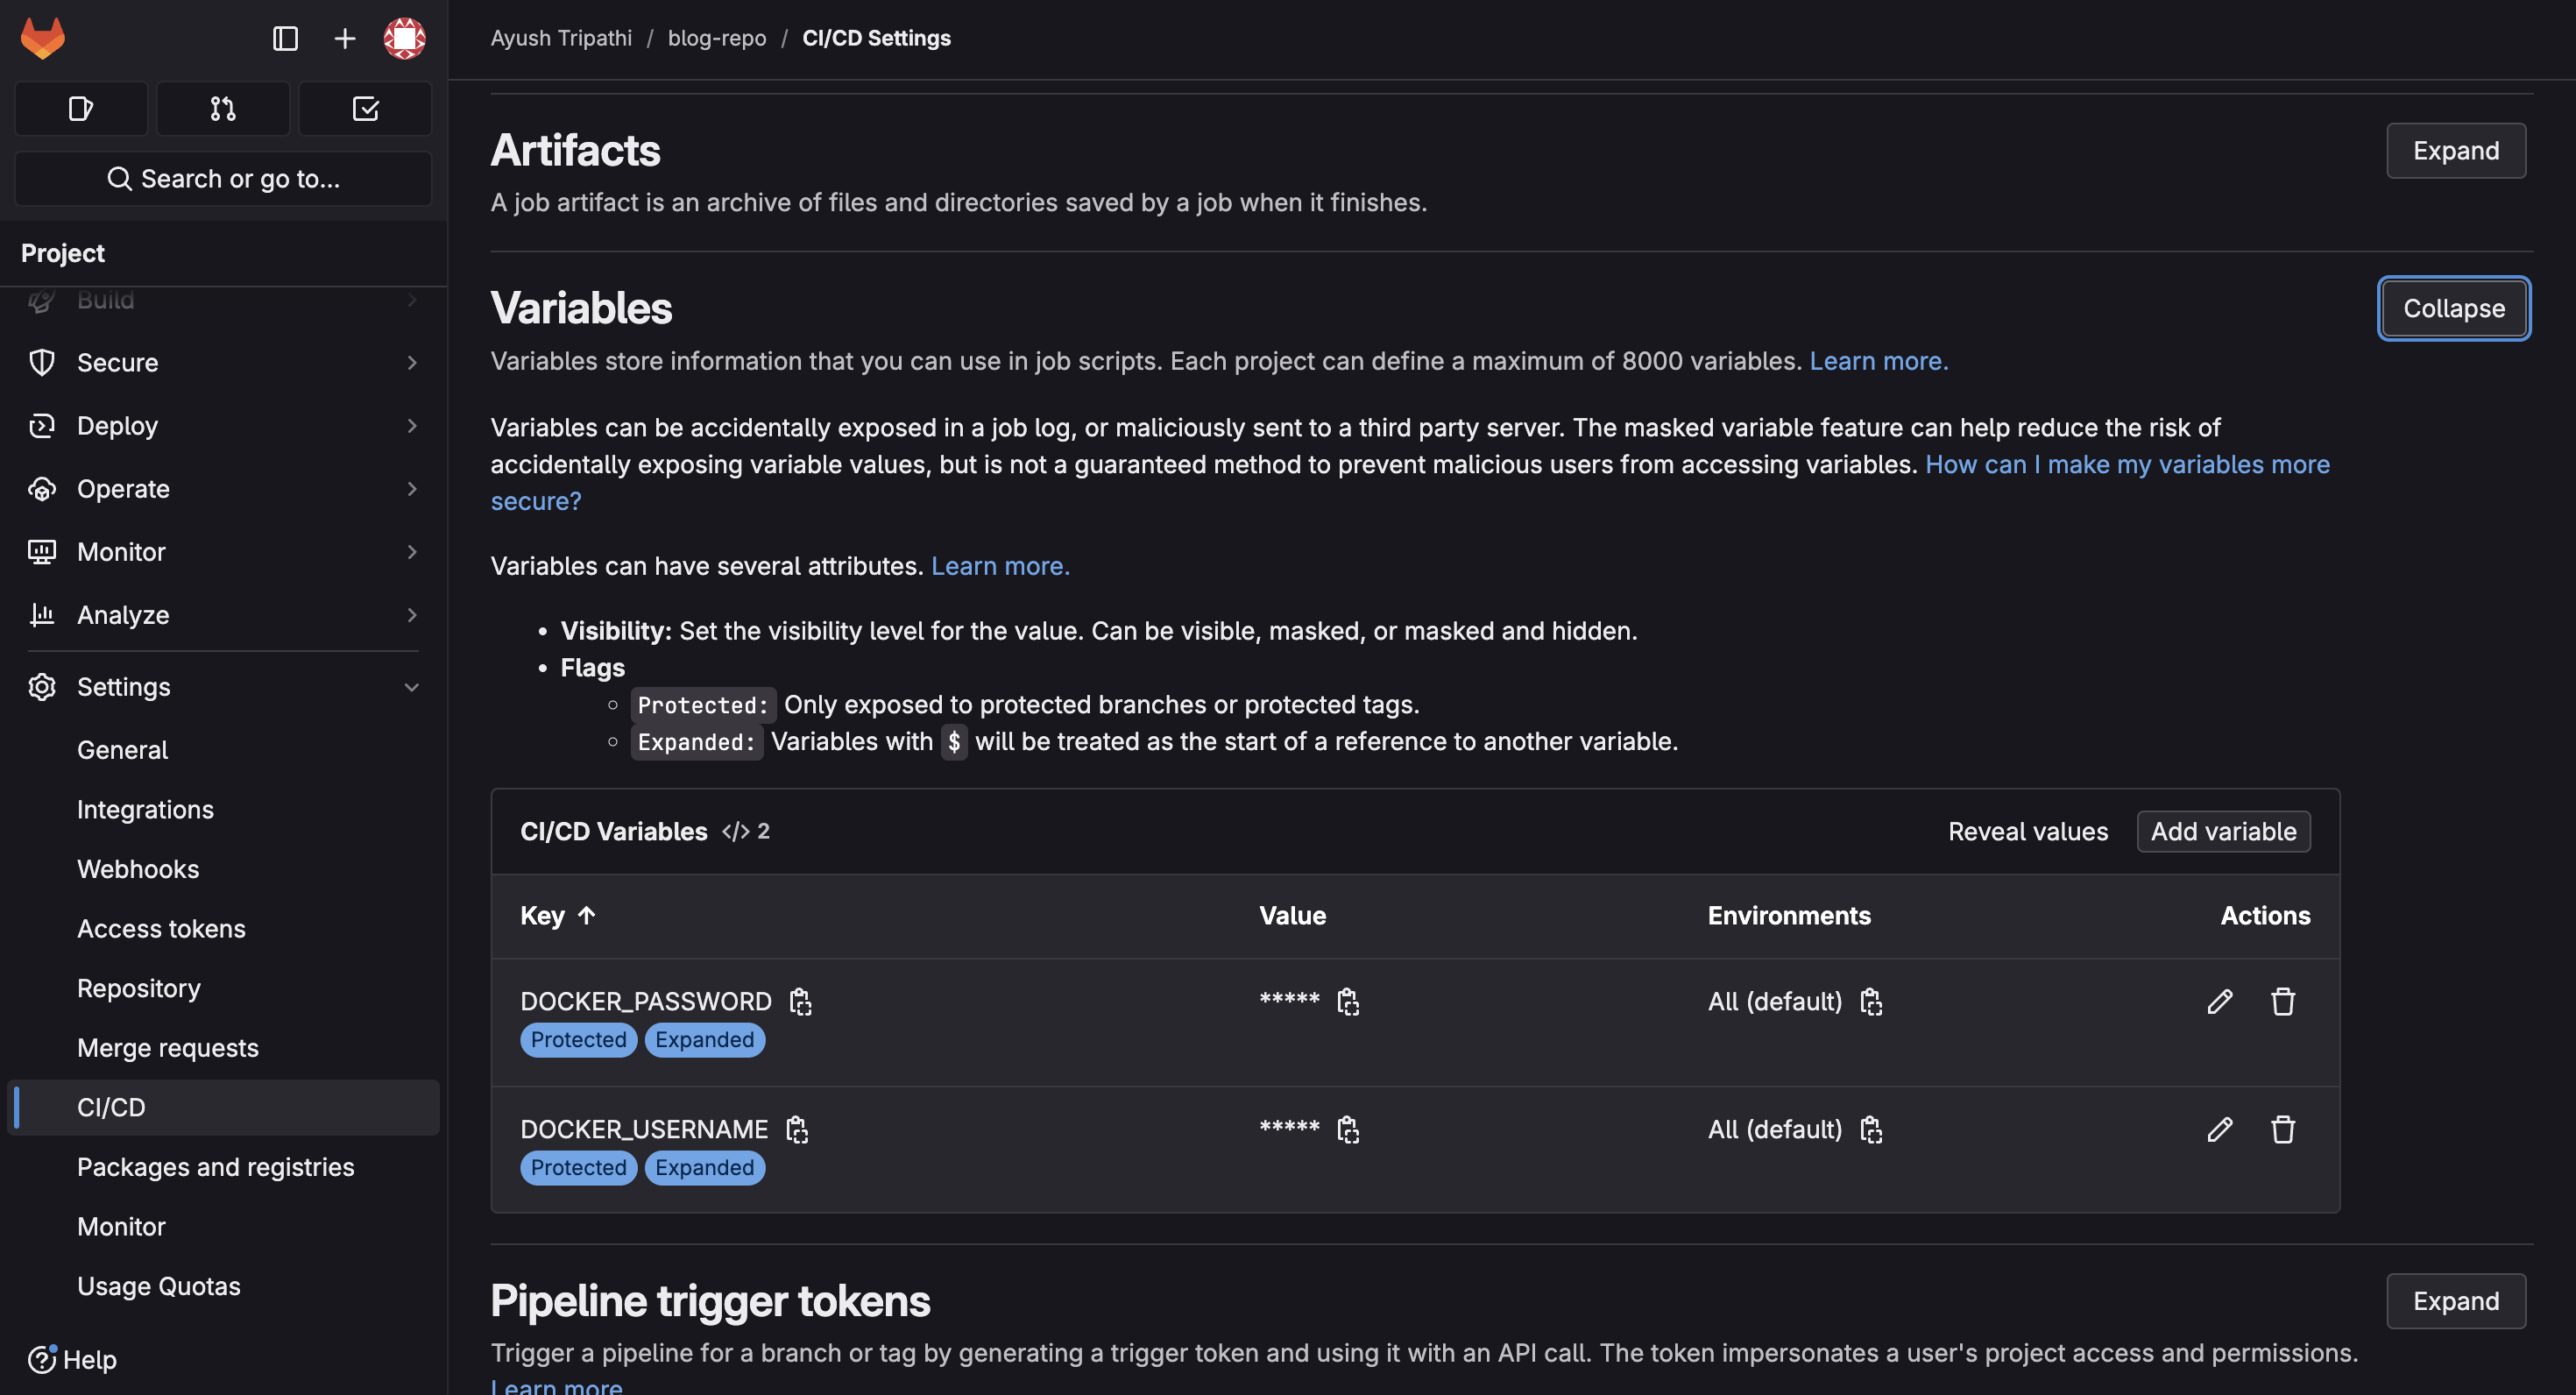
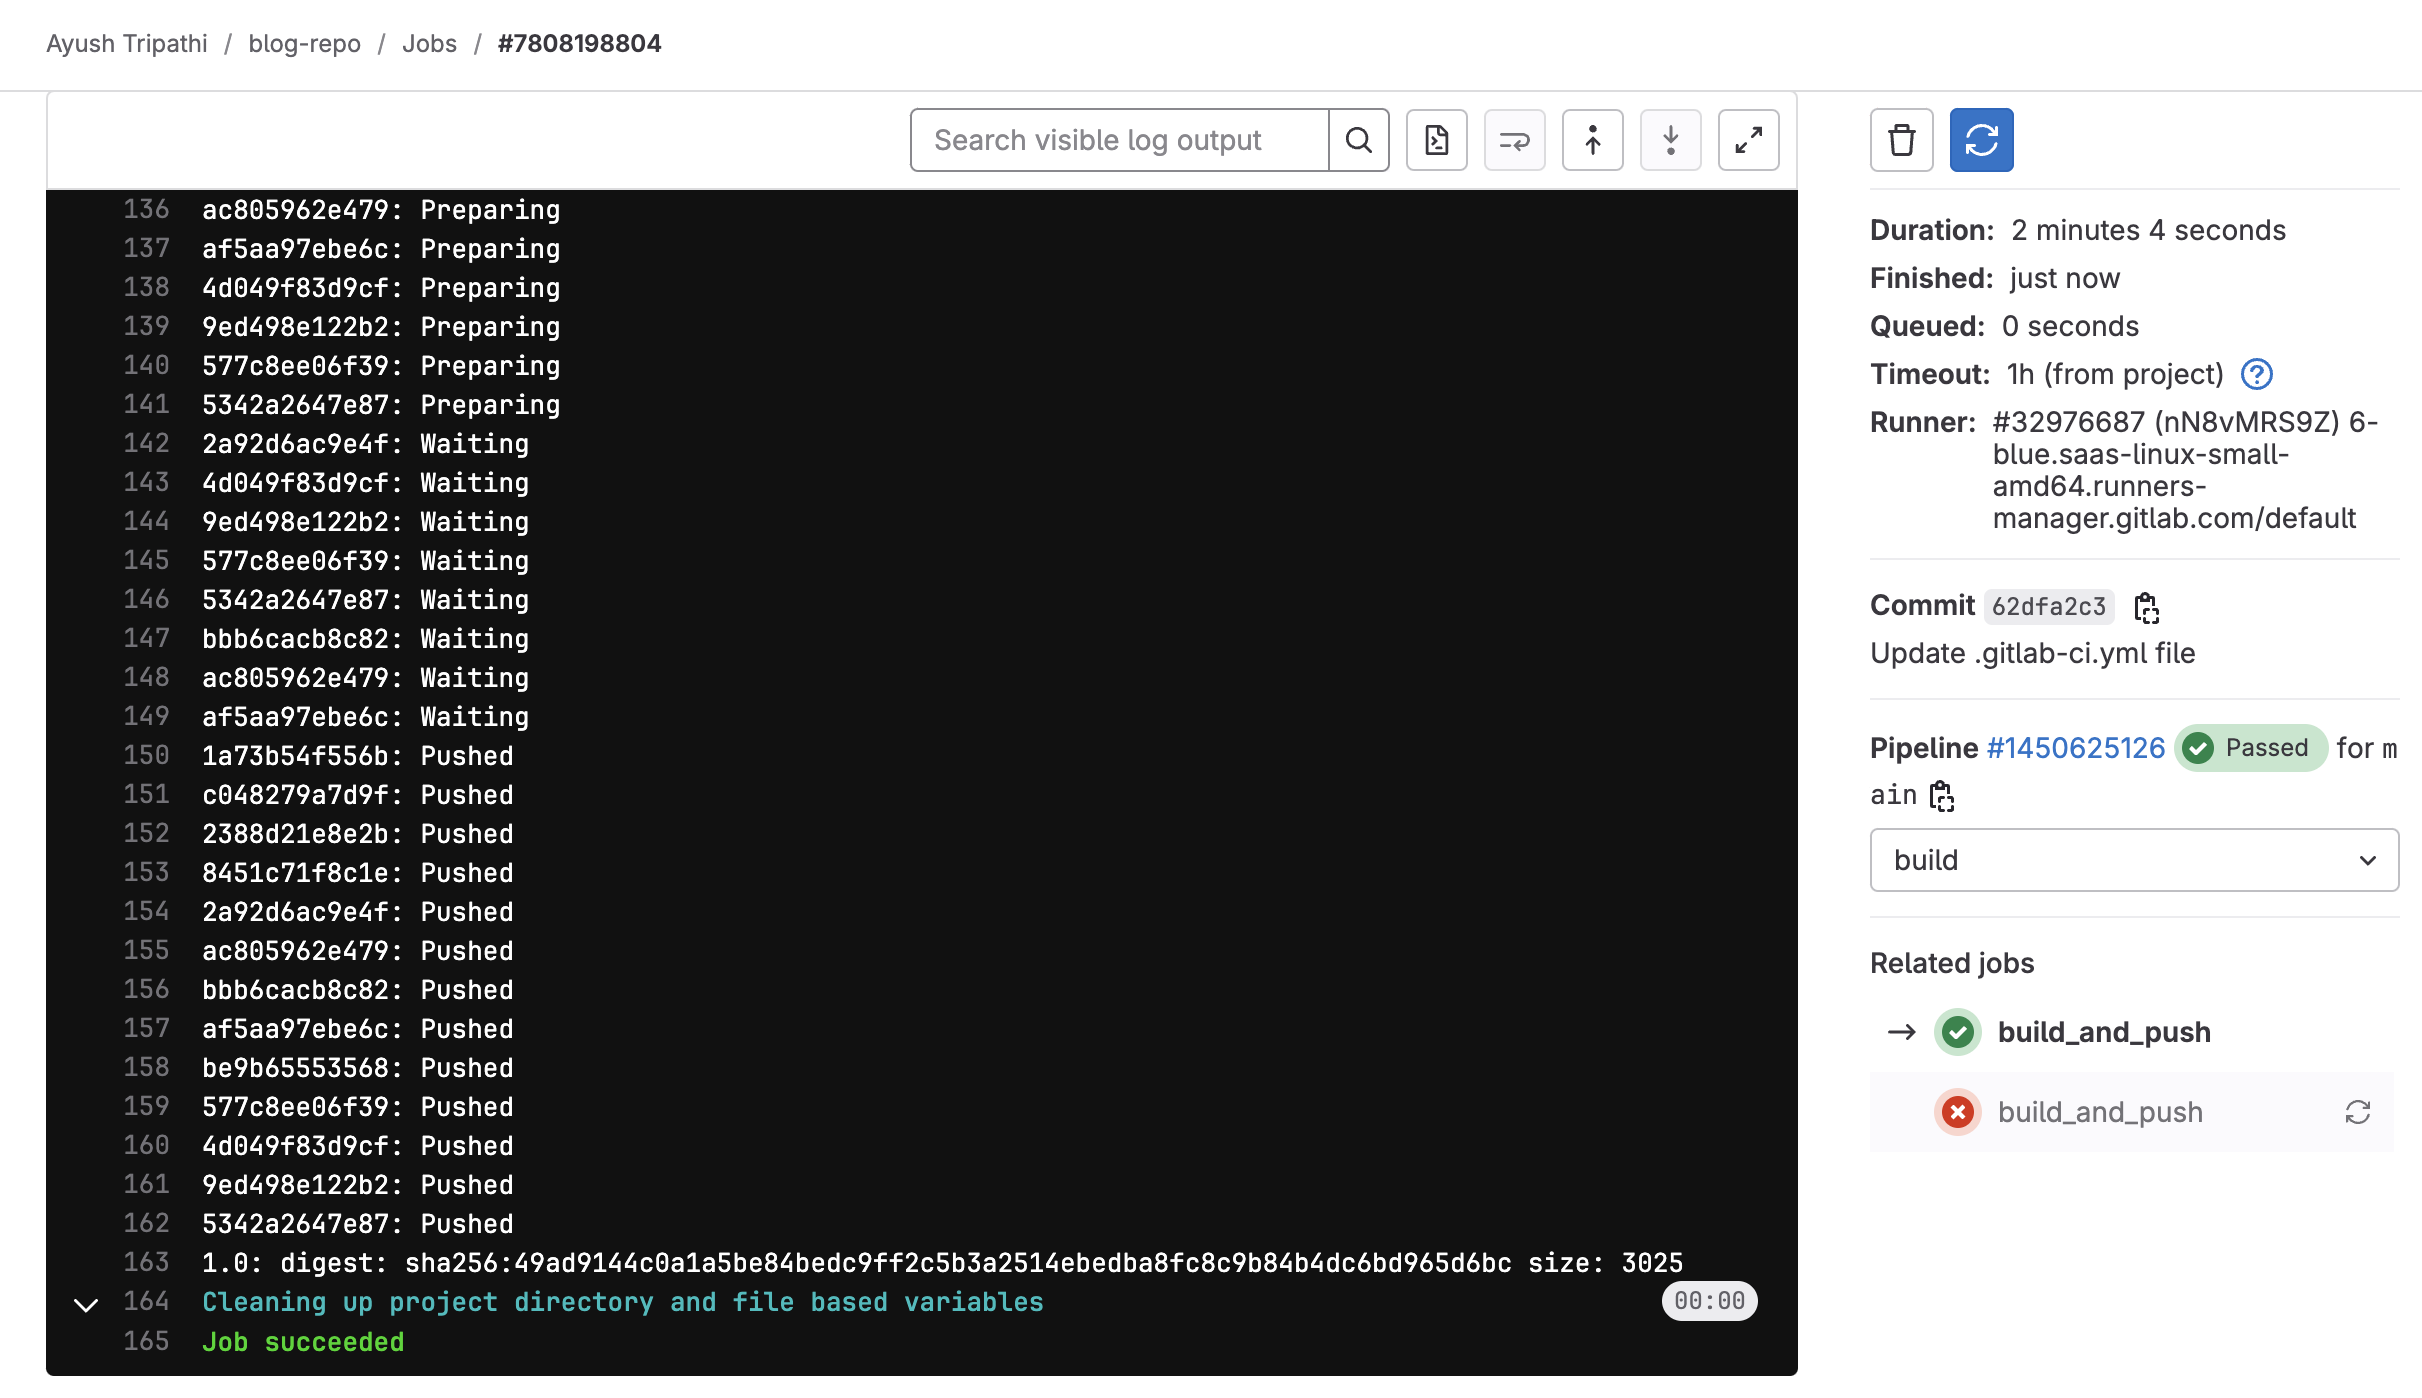
We start by buiding a stage, it is crucial to build a stage to define which job runs at which stage. Next we make a job ‘build_and_push‘ (name can be anything), in this job we specify the stage ‘build‘ from above. Now the image used here is the image that the runner will use. Inside the runner container which has docker image, we will have our container with the image we pushed to our dockerhub. This is called dind.
dind stands for Docker-in-Docker. It allows you to run Docker commands inside a Docker container. In GitLab CI, this is useful because the CI runner itself runs in a container, but you still need to use Docker to build and push images. By using docker:dind, it creates a Docker environment inside the container, letting you build, tag, and push Docker images as if you were working on a regular machine. This setup requires the docker:dind service to be enabled in the GitLab CI job.
Part 3: Write Kustomize manifests
Link to the code is here: Kustomize code
Kustomize generally comes pre-installed with minikube and kubectl but if there is some issue you can install the CRD.
# Run this if you get kustomize CRD issues
kubectl apply -k github.com/kubernetes-sigs/kustomize//config/crds
In kustomize the folder structure is very important. Here is a very basic structure that I have used for this project.
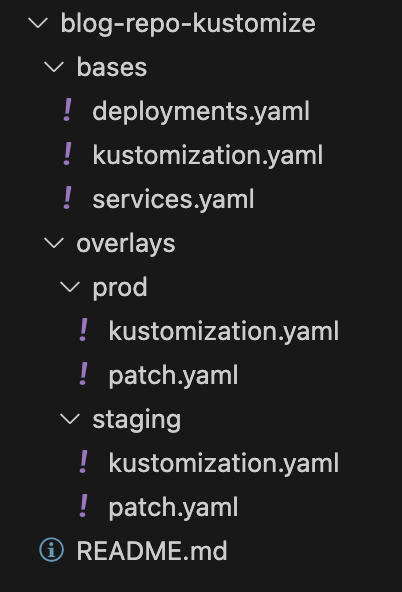
In simple terms, kustomize helps us to create different versions of the application for different environments. In this case, we have one base deployment and 2 overlays for it, which counts as 3 different environments. In each overlay environment we have a patch to make any changes in the base environment according to our needs.
For writing the kustomization code, you need to understand k8s manifest files. In this project we have simply created a deployment and service and exposed it through loadbalancer (to be visible in the browser). If you are beginner, you can use vscode extensions (k8s official extension has template generation feature) to generate the manifests instead of hardcoding them. To be honest, even in companies nobody writes manifests from scratch but it is important to understand what each line of the manifest means.
In each environment of kustomize we need to have a kustomization.yaml file. In the bases, the kustomization file is used to include the deployment and service manifests into the enviroment.
resources:
  - deployments.yaml
  - services.yaml
Similarly, if you see the kustomization.yaml for any overlay we have to include the required manifests from bases and then if we need to make some changes for an environment we can have multiple patch files (in this case there is only one file - patch.yaml) and include them as well to override base environment. We do the overriding of the base environment by patchesStrategicMerge. (may get deprecated)
resources:
  - ../../bases/

patchesStrategicMerge:
  - patch.yaml
If you want to see how the final manifest for any environment looks like you can run the following command with the path of the environment you want to build.
kustomize build overlays/staging
there is a ‘-k’ flag that you can use by piping (|) it with kubectl but here we will deploy using ArgoCD so we don’t need to build a manifest manually.
Part 4: Deployment using ArgoCD
Setup ArgoCD on local system:
Simply run the following commands in the terminal, it will create a namespace ‘argocd‘ and install the required latest CRDs for argocd in the created namespace.
kubectl create namespace argocd
kubectl apply -n argocd -f https://raw.githubusercontent.com/argoproj/argo-cd/stable/manifests/install.yaml
Next, we want to see the argocd UI. For this, we simply port-forward the argo-server service which is created in the namespace argocd. In port-forwarding, it is host:container, which means you use container’s port 443 via host’s port 8080.
kubectl port-forward svc/argocd-server -n argocd 8080:443
After port forwarding, open the IP:8080 shown in the CLI. Generally it is 127.0.0.1:8080. Now you should be able to see the user interface of ArgoCD.
Next, login to your argoCD.
Username - admin
For password
kubectl get secret argocd-initial-admin-secret -n argocd -o jsonpath="{.data.password}" | base64 -d

After signing in to argocd UI, this is how the UI will look.
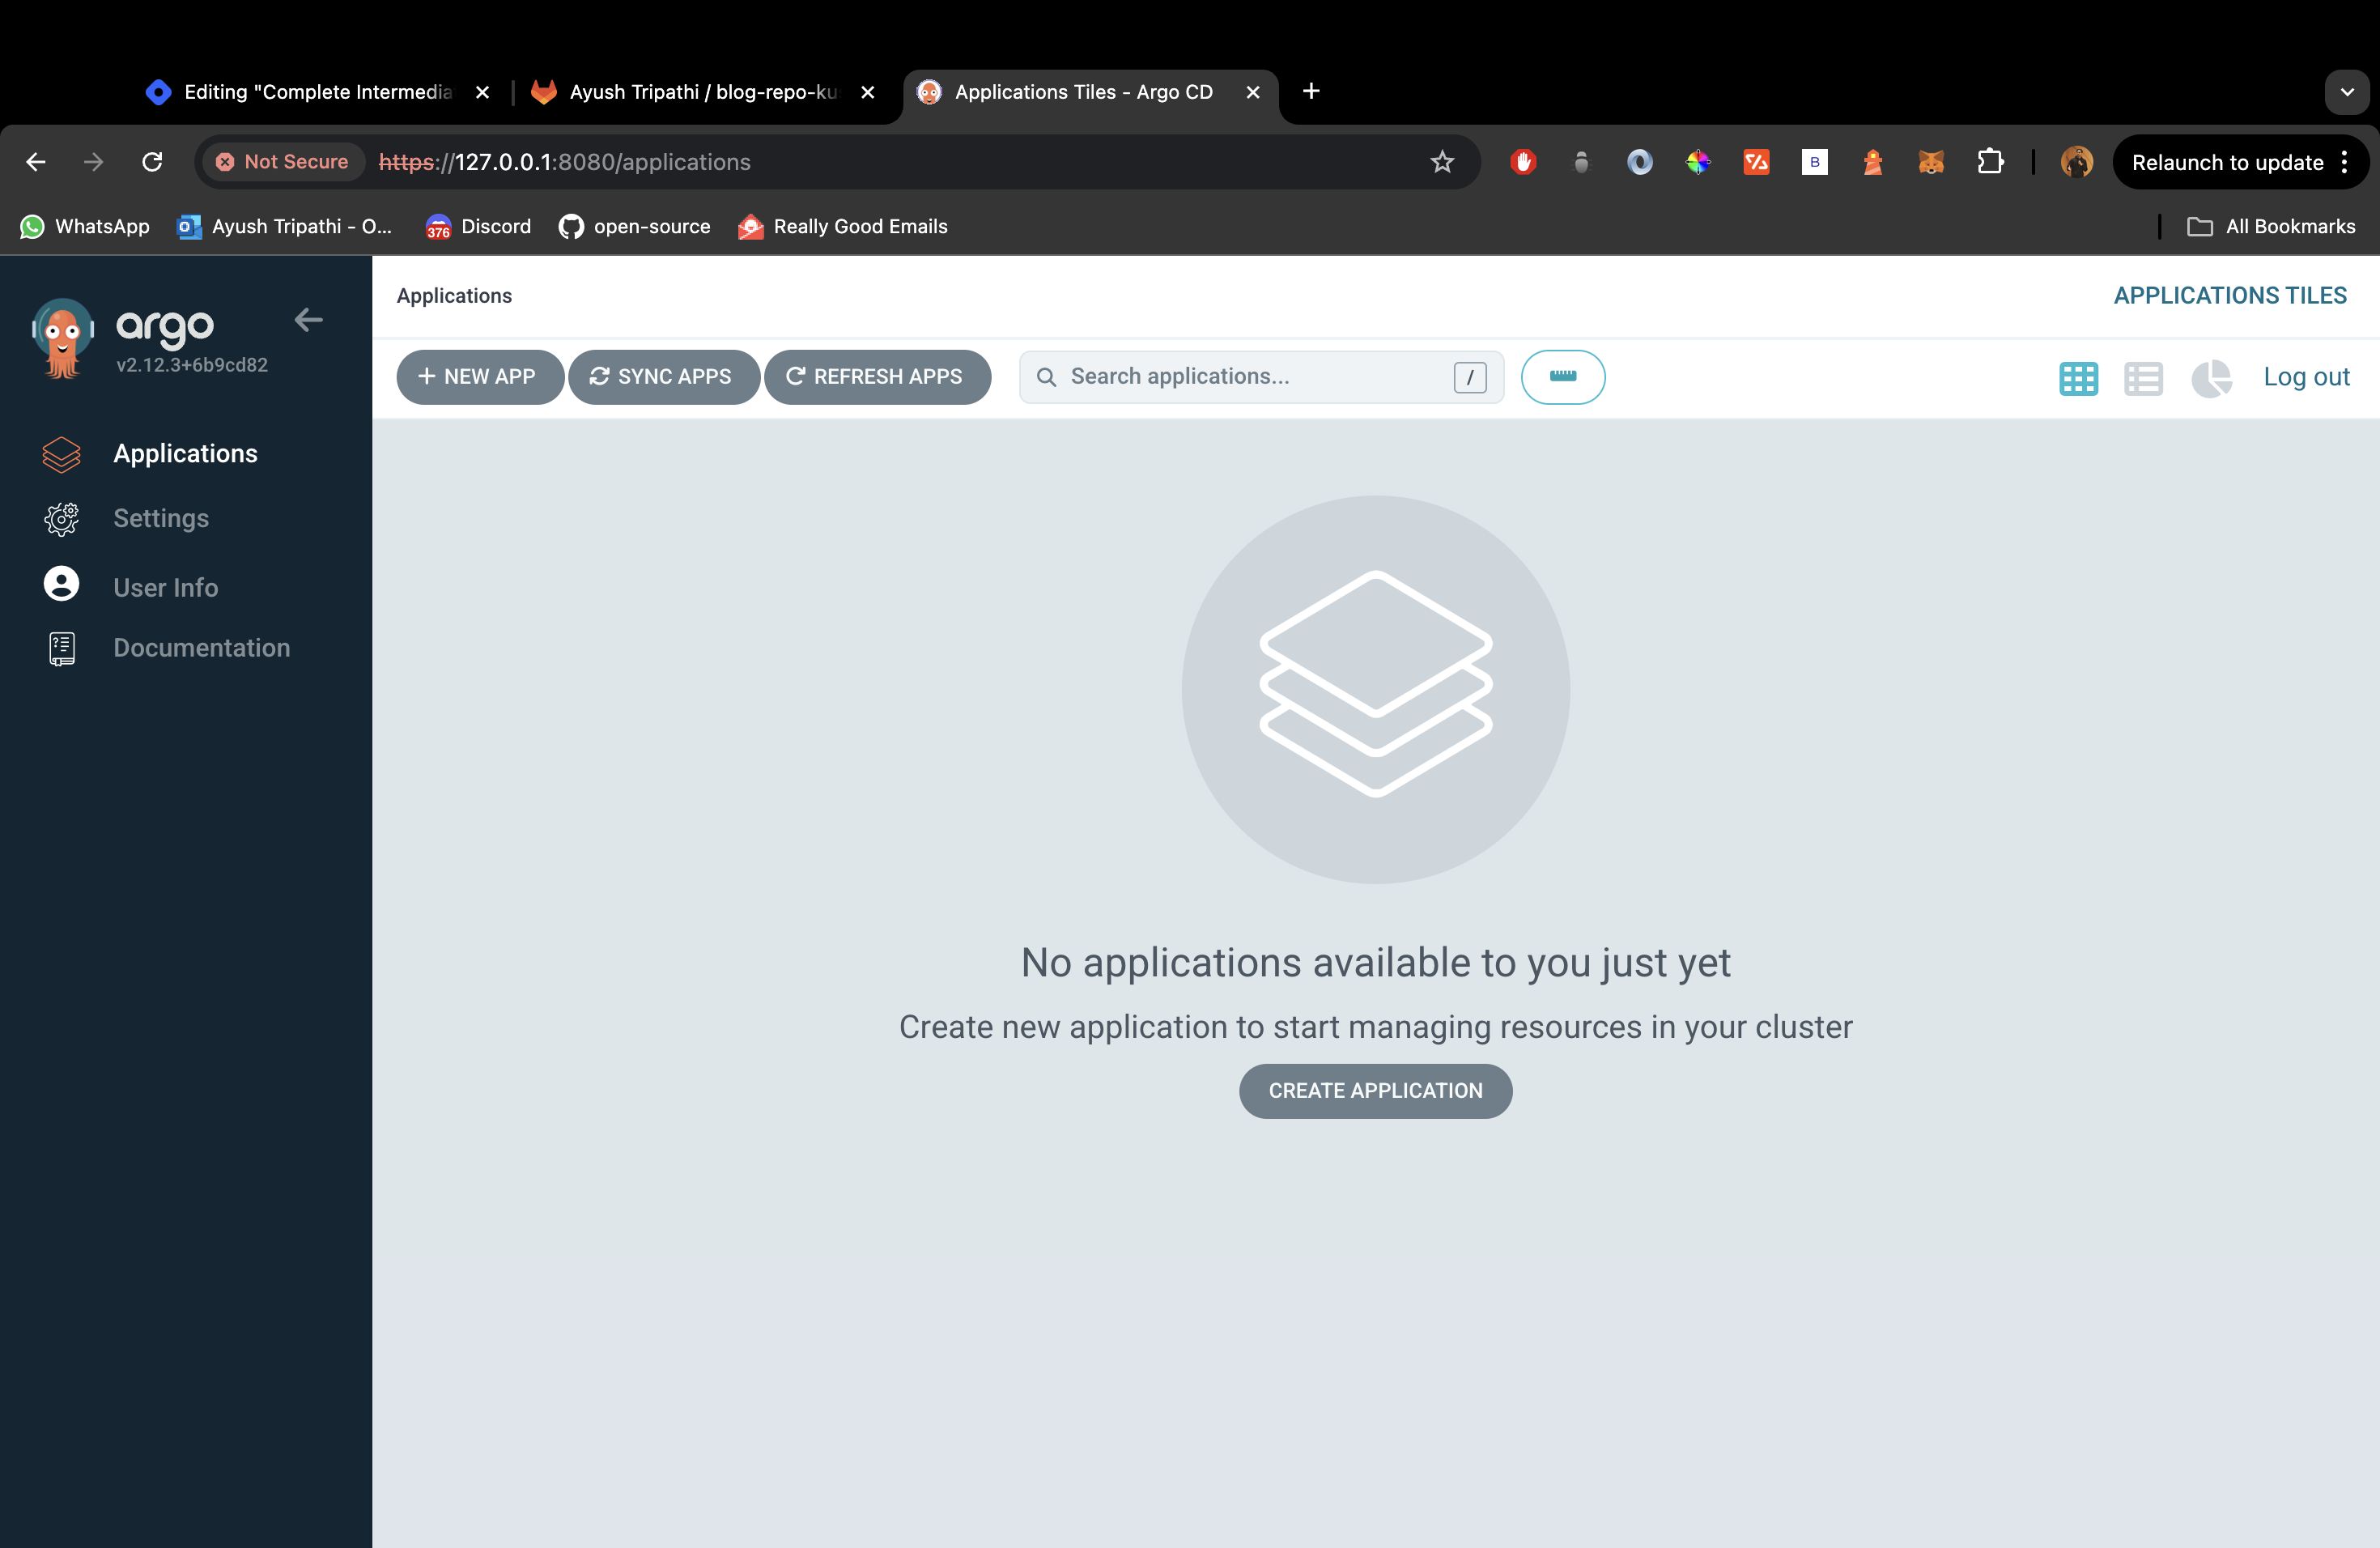
Here comes an important industry concept, Top level app. Now imagine you work in a company and it deploys a lot of apps on a daily basis, will you go around deploying each app separately? No right. That is why we create a top-level-app where we add all our manifests and it then shows us all the different apps that can be deployed (sync). So basically your gitlab should contain three repositories like this,
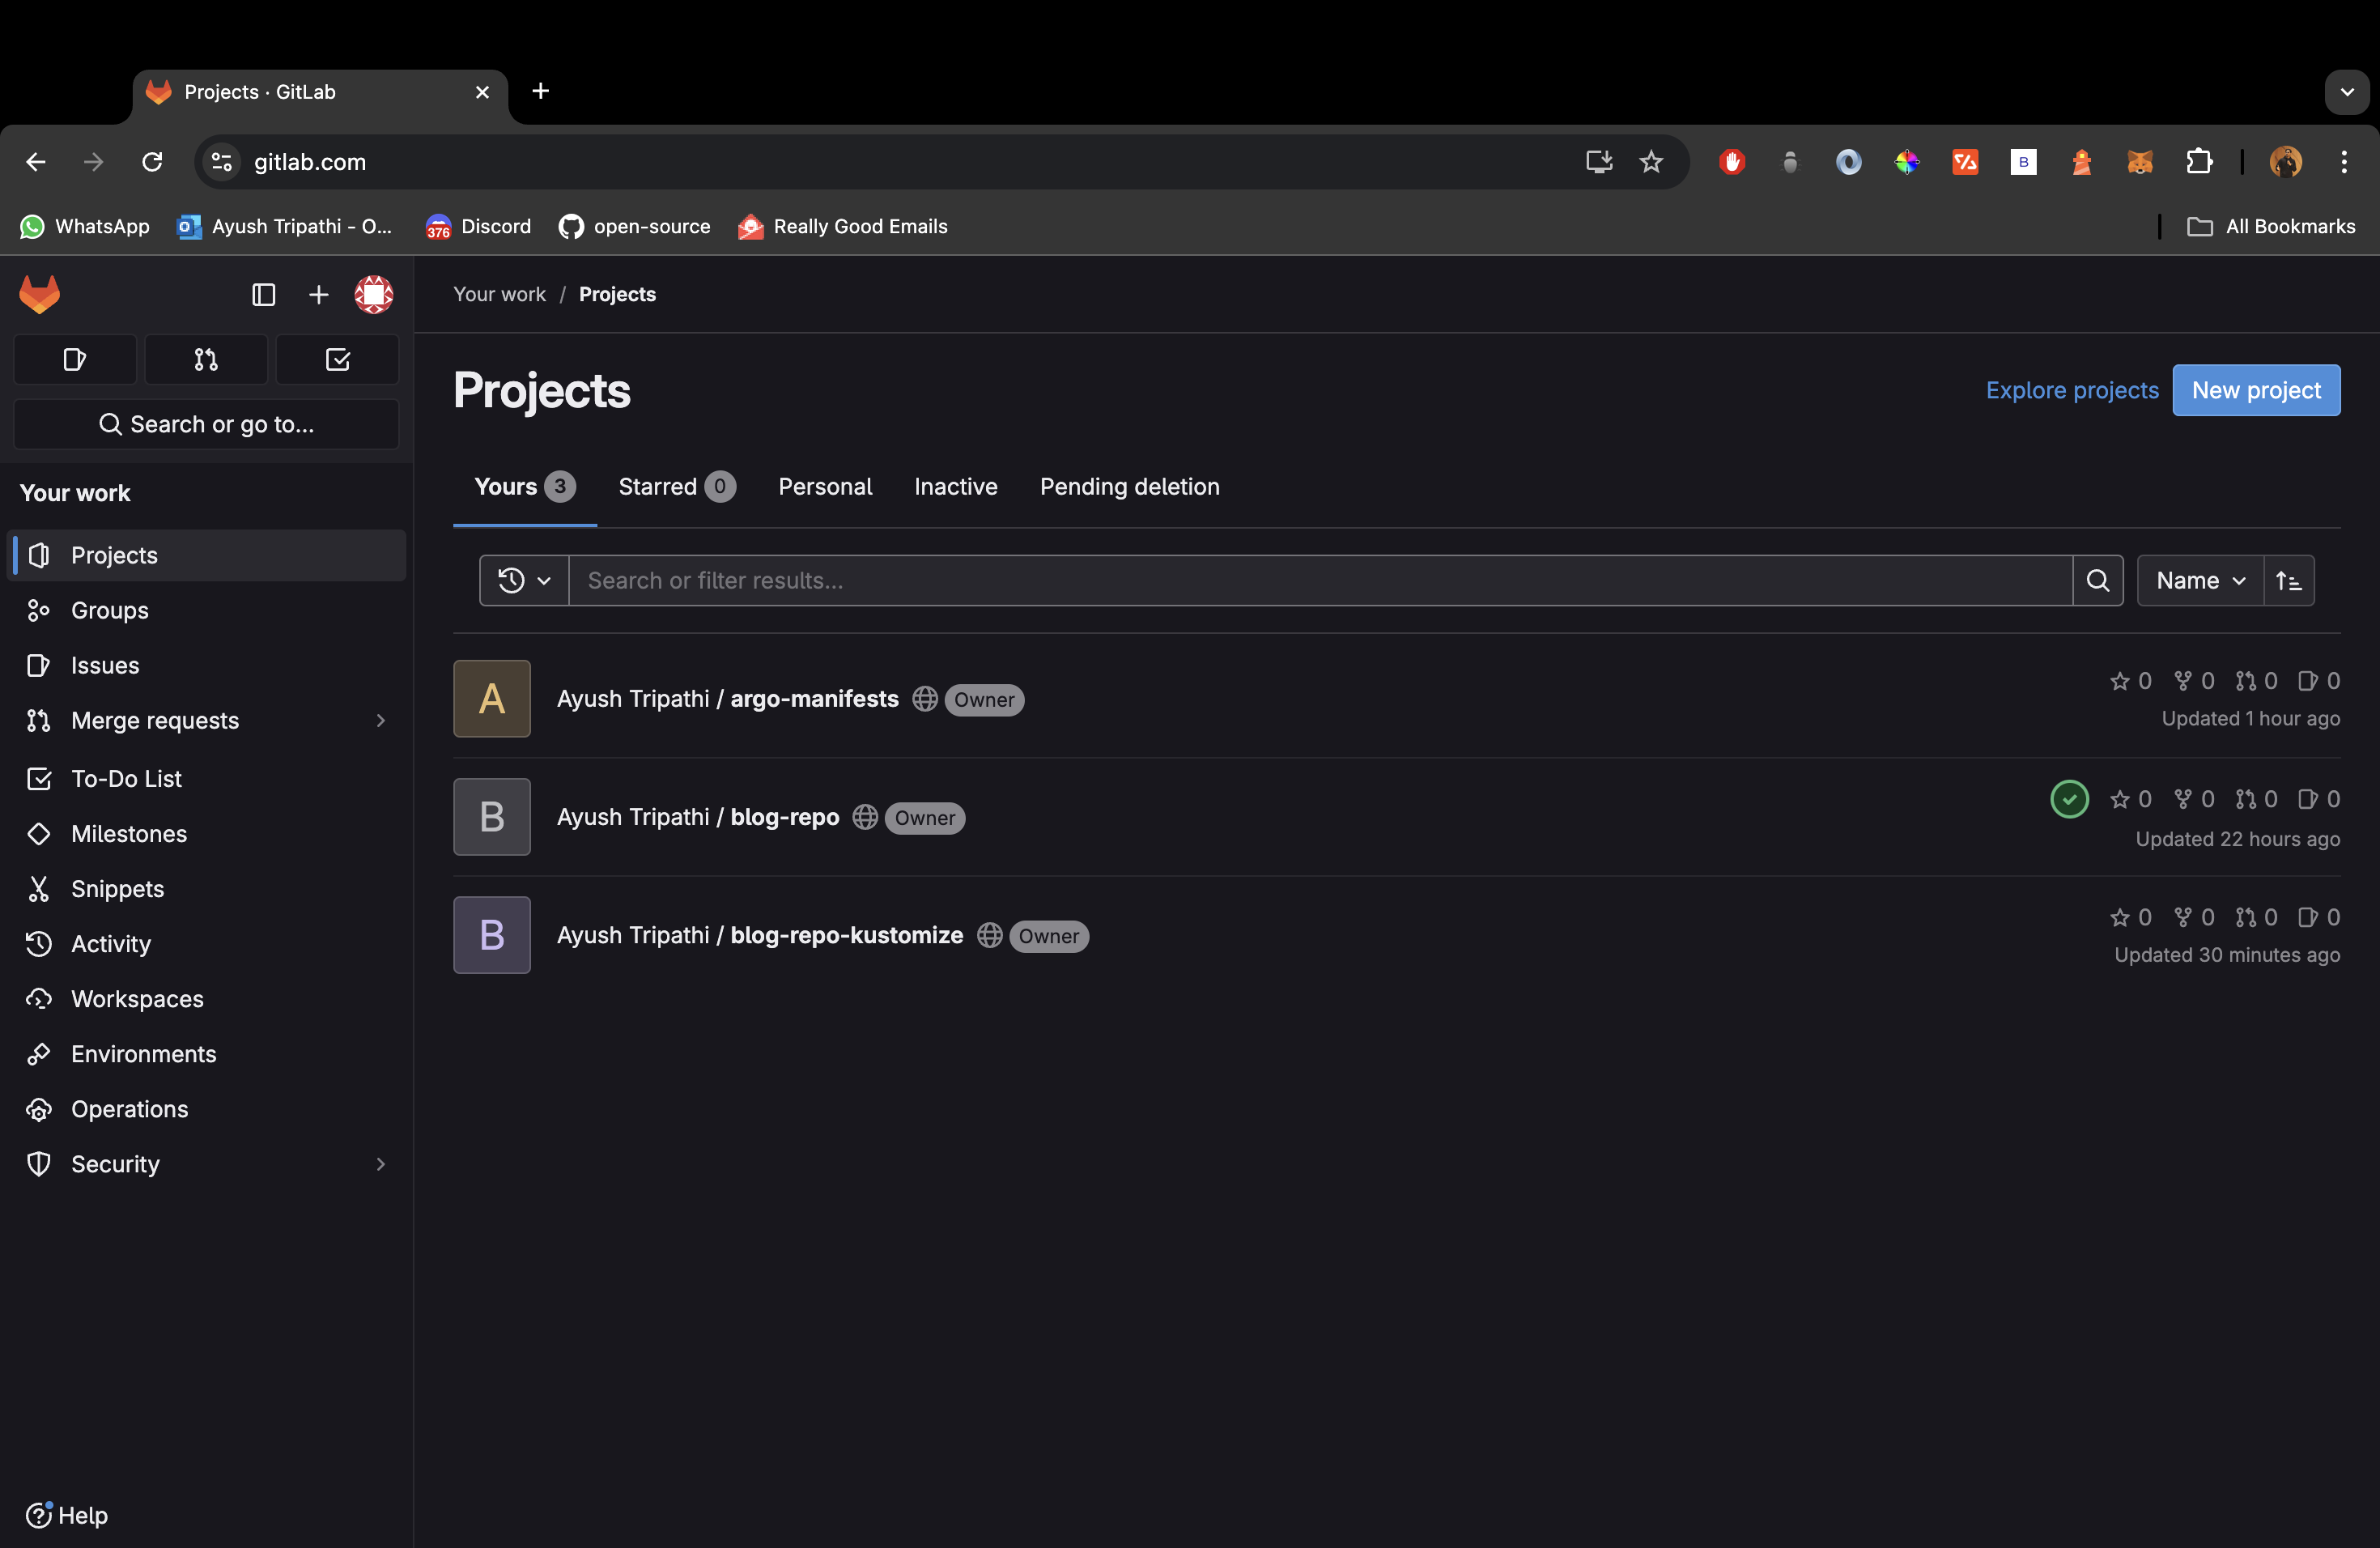
Link to the argo-manifests repo: LINK
Next, we need to add argocd manifests for the application we want to deploy, in this case, we will simply deploy one of the environments (staging) we created in kustomize.
apiVersion: argoproj.io/v1alpha1
kind: Application
metadata:
  name: blog
  namespace: argocd
spec:
  project: default
  source:
    repoURL: 'https://gitlab.com/tripathiayush23/blog-repo-kustomize.git'
    targetRevision: HEAD
    path: overlays/staging
  destination:
    server: 'https://kubernetes.default.svc'
    namespace: default
To continue, we need to add our repositories to ArgoCD. Make sure to add both argo-manifests repo and the kustomize repo for the application.
To add the repos, navigate to settings → Repositories → Connect Repo → Connection Method (via HTTPS) → Type (git) → Project (Default) → Enter your repo URL → Enter your username → Enter your personal access token (create a PAT in gitlab) → Click connect.
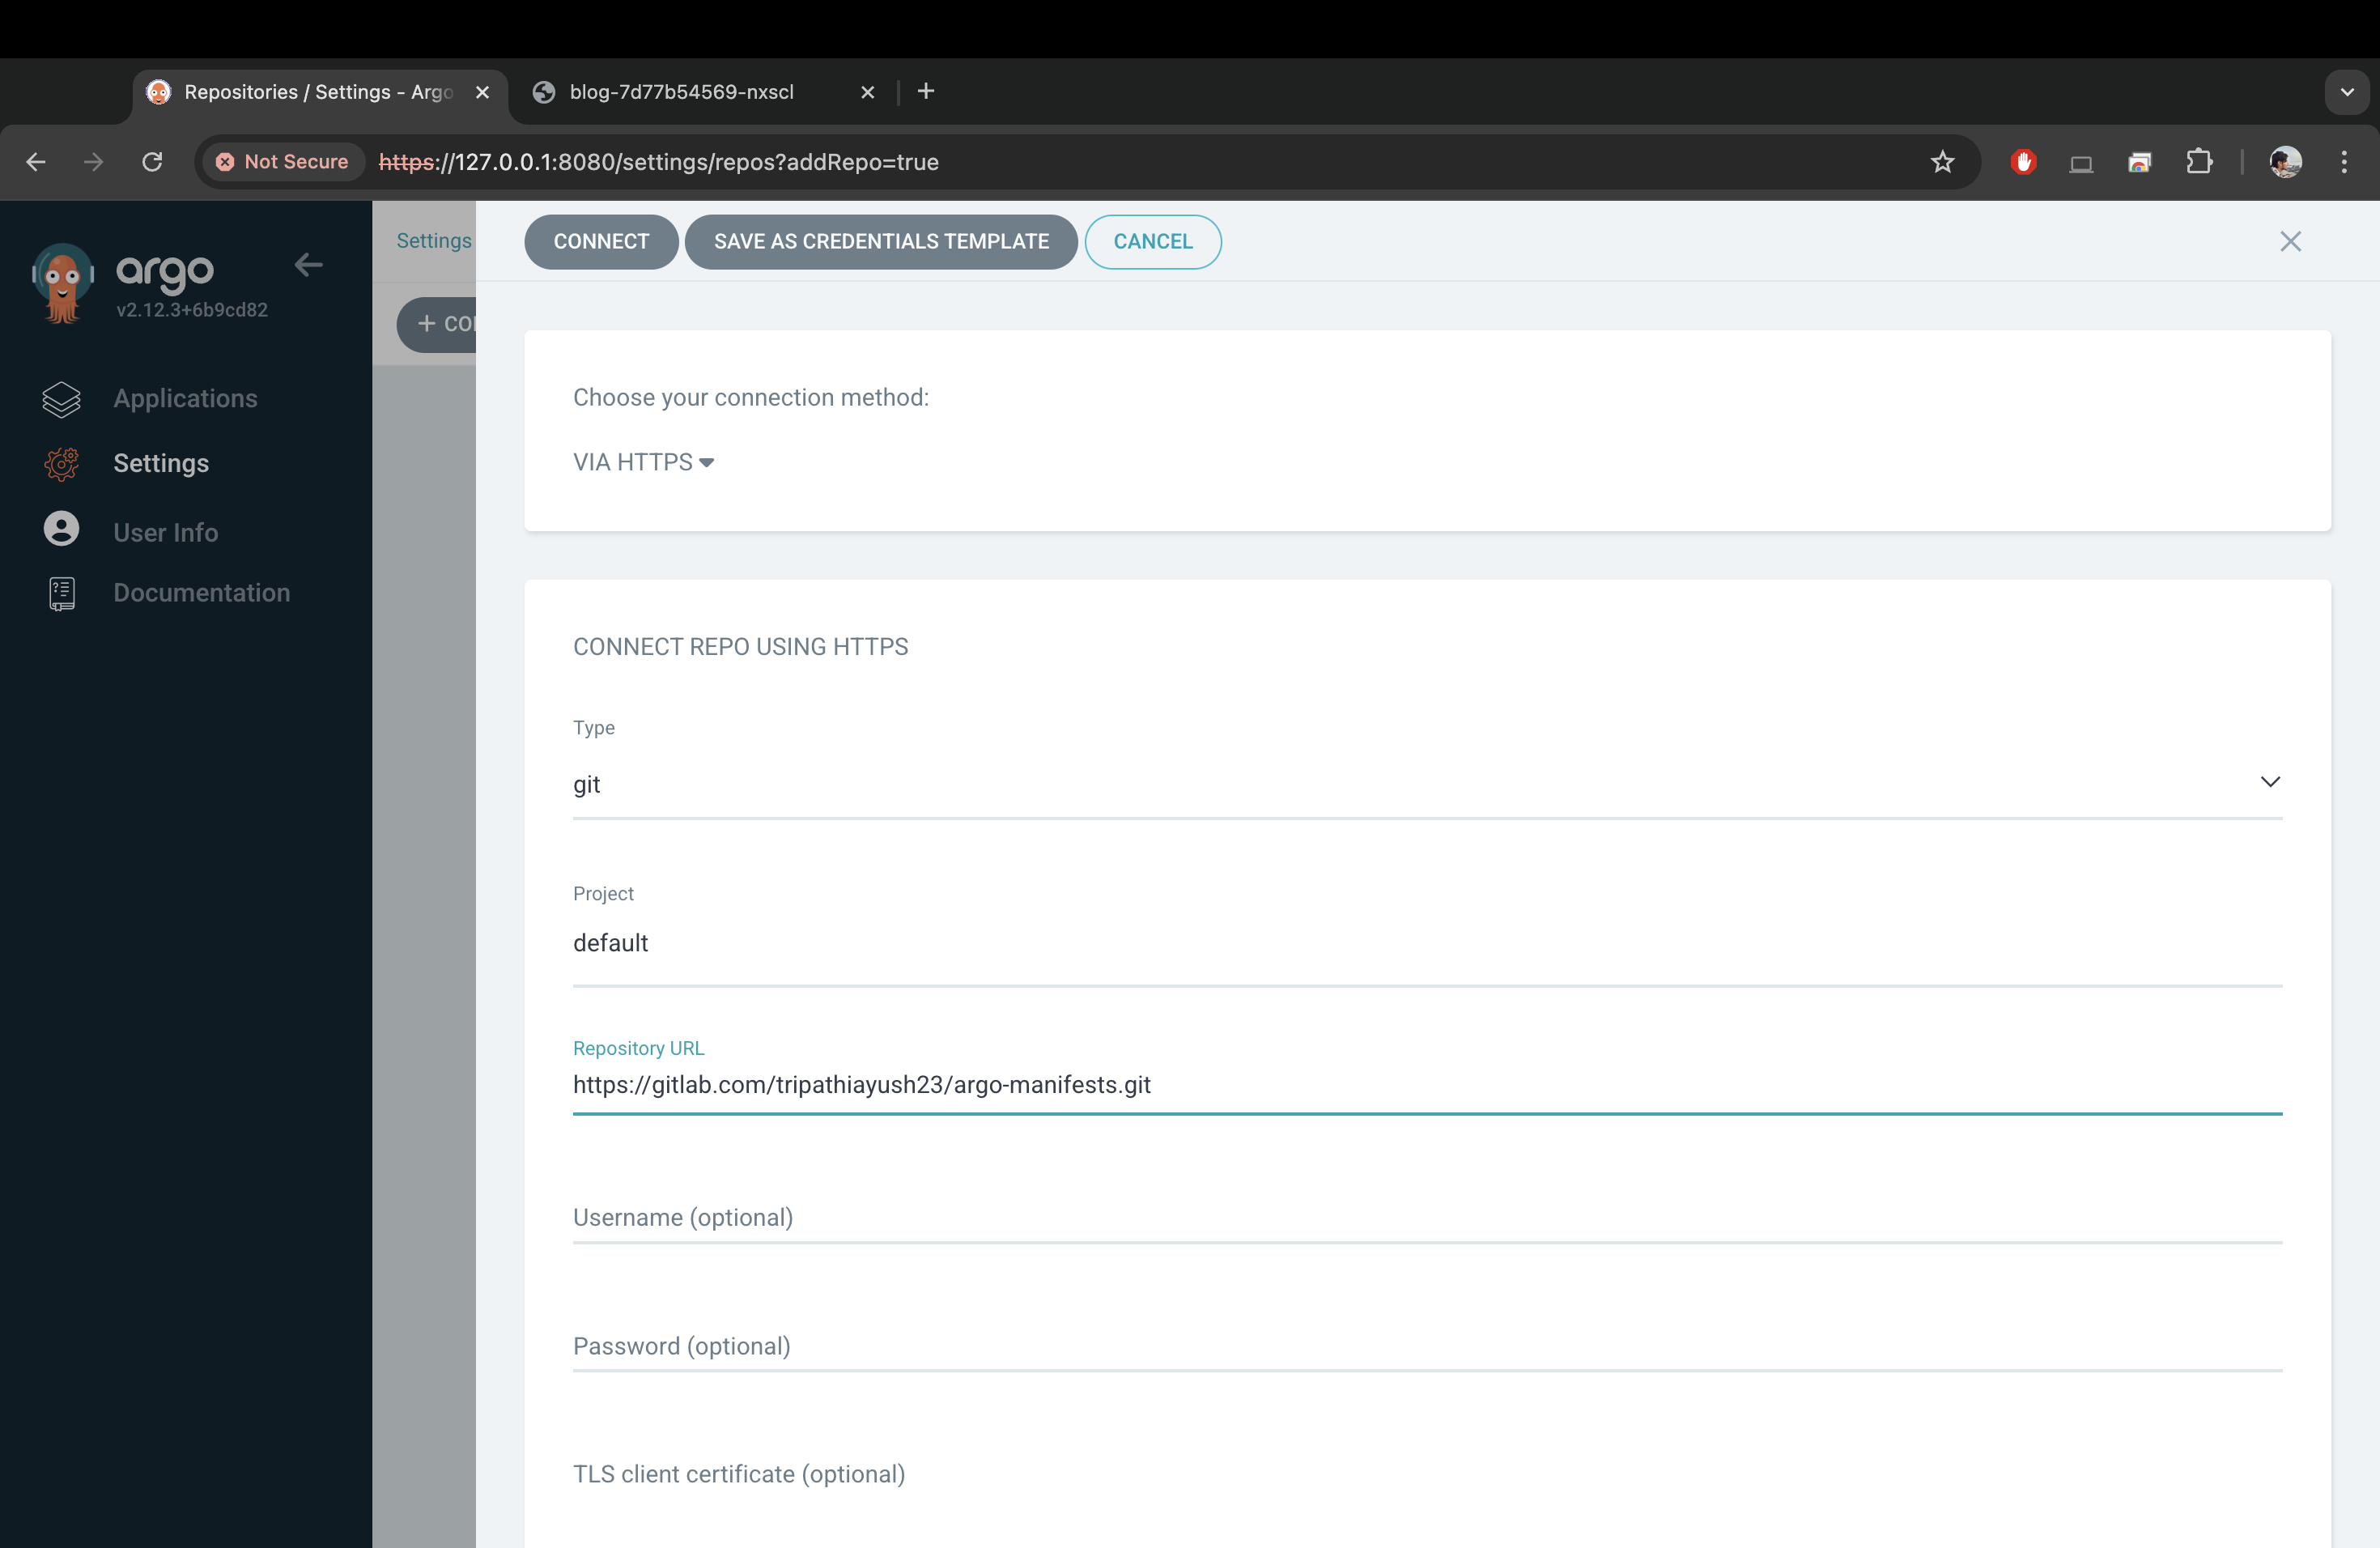

Here, you should also add the kustomize repository in the connection list (forgot to add a screenshot, my bad)
After you add these links, you’ll see that our blog app is an extension of the top-level-app. Everytime you add some manifest to your argo-manifests repo you’ll see the app as an extension like this. You will not need to manually deploy your apps, simply open the application extension and click on ‘SYNC‘.
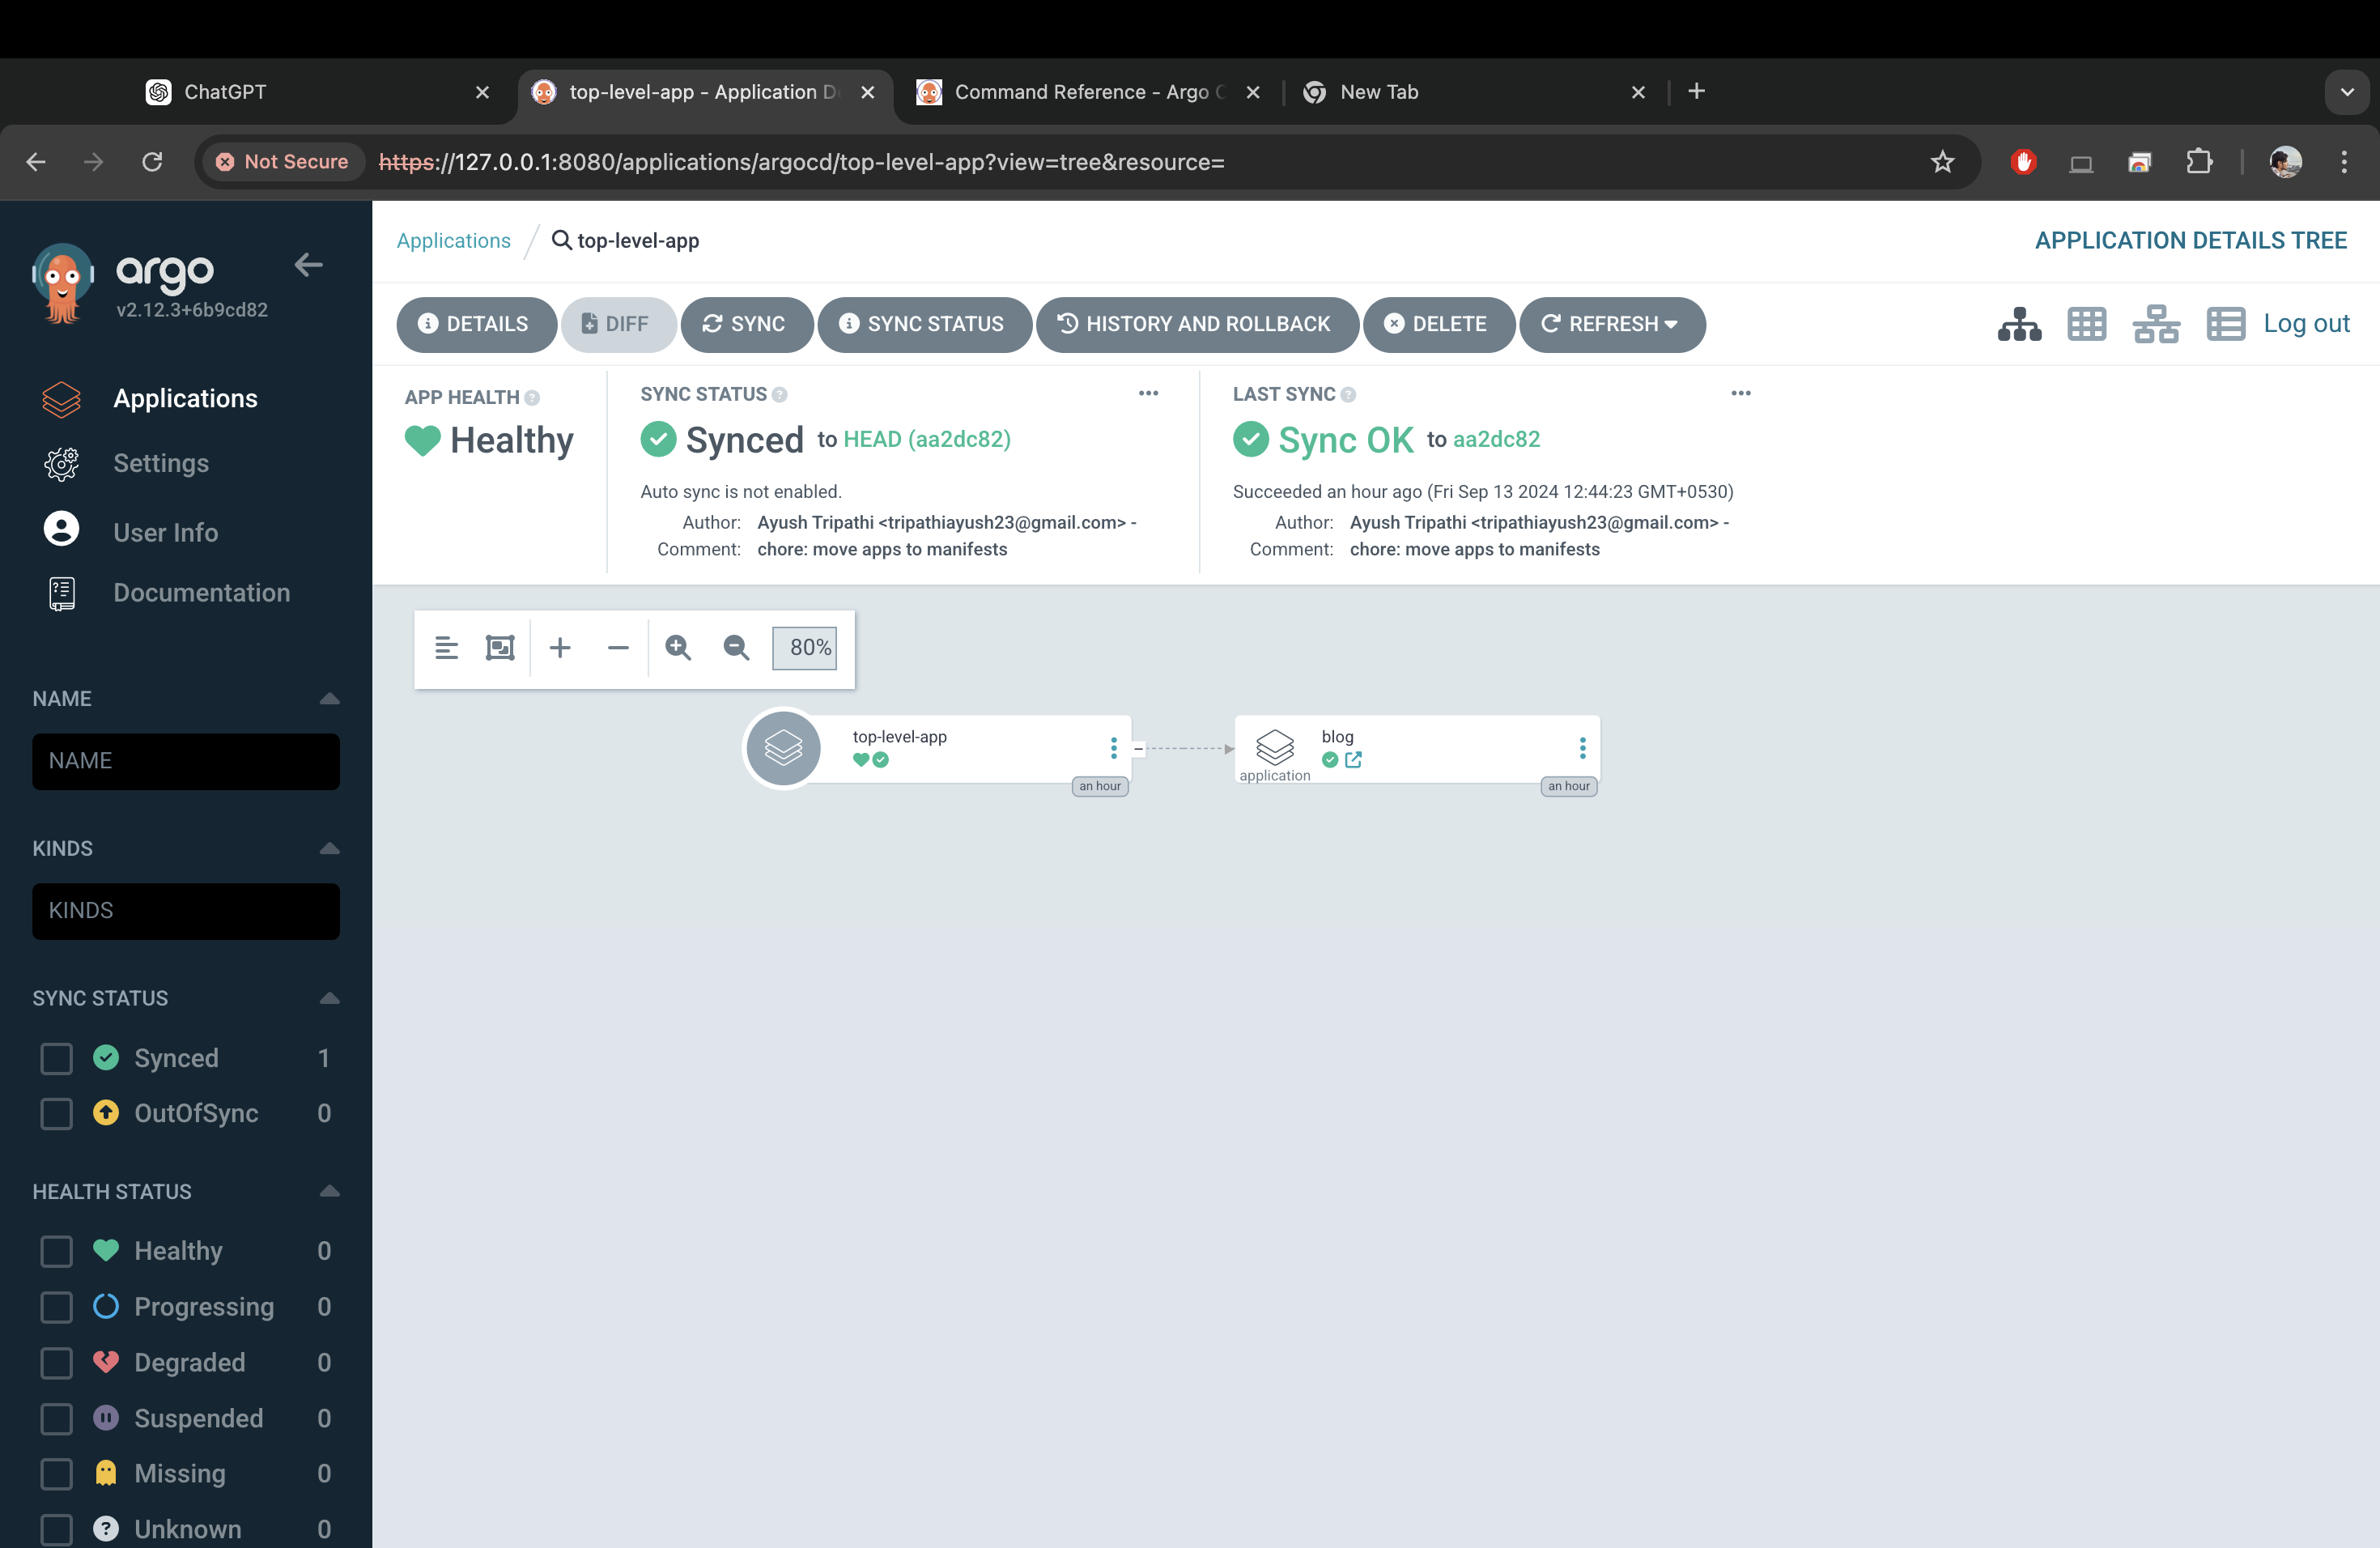
This is how the application will look like when synced and therefore deployed.
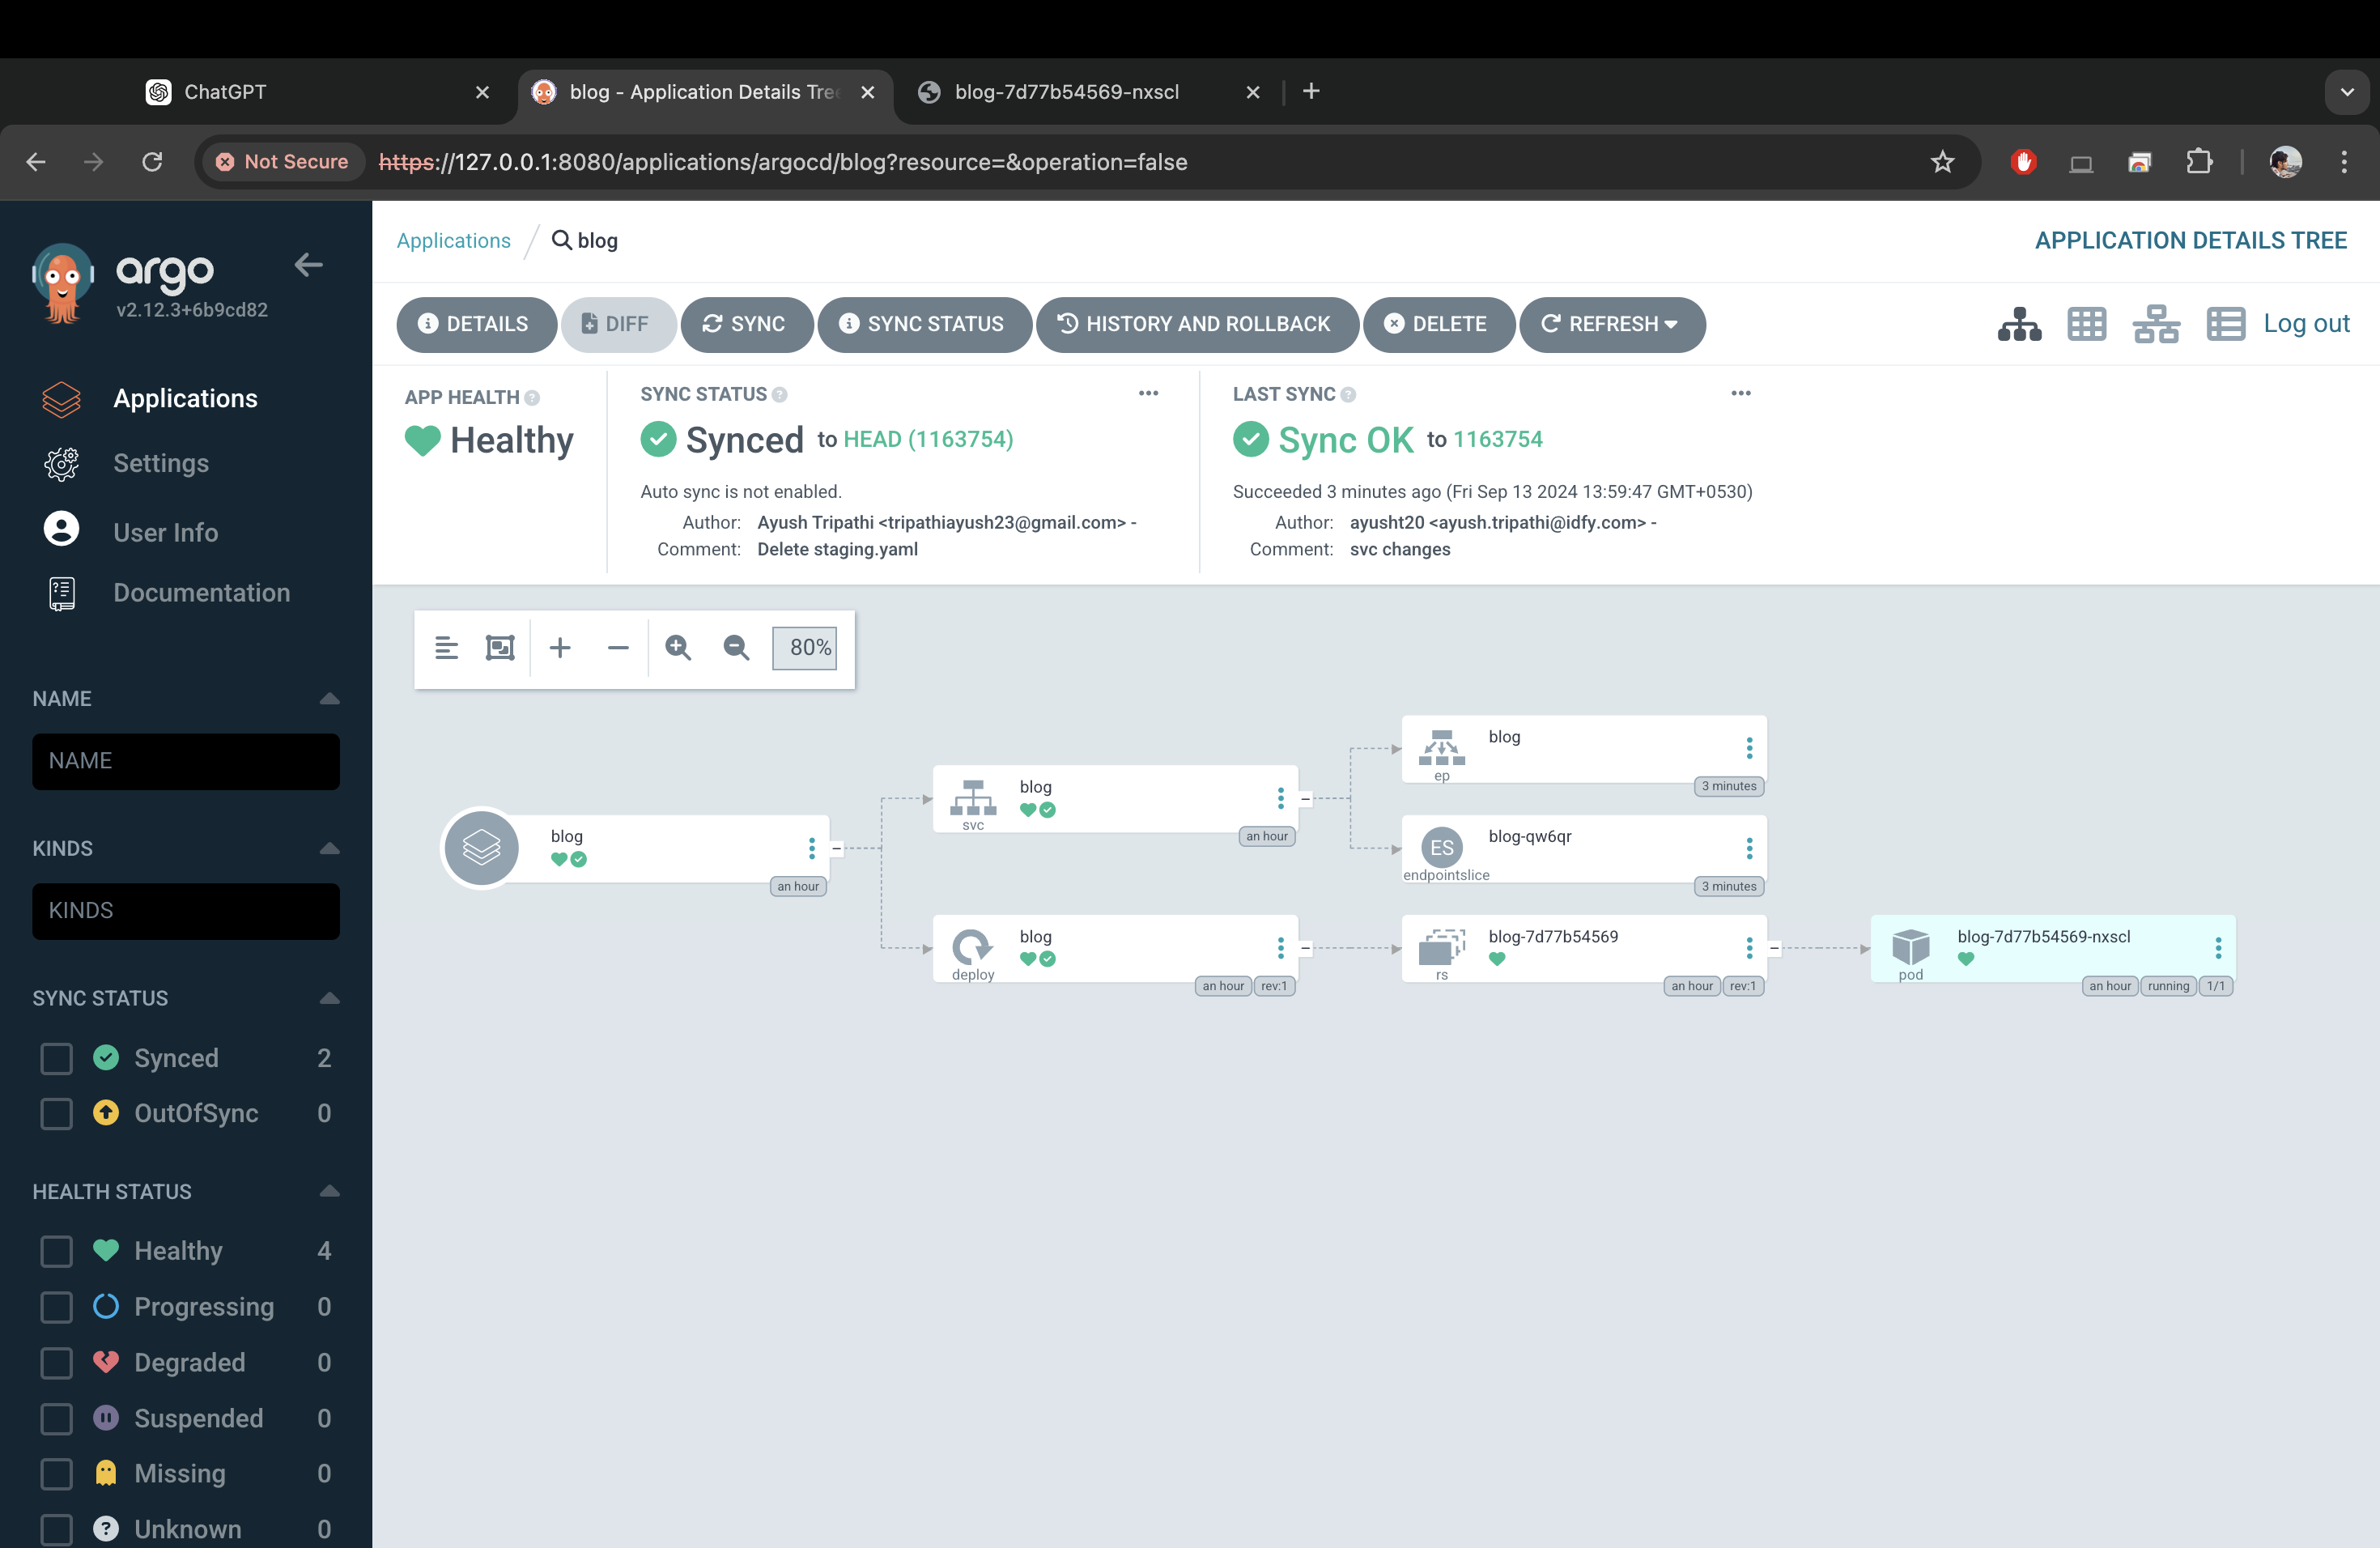
You may see that the health status for your service may be ‘progressing‘. To make the service ‘healthy’ simply run (this is optional)
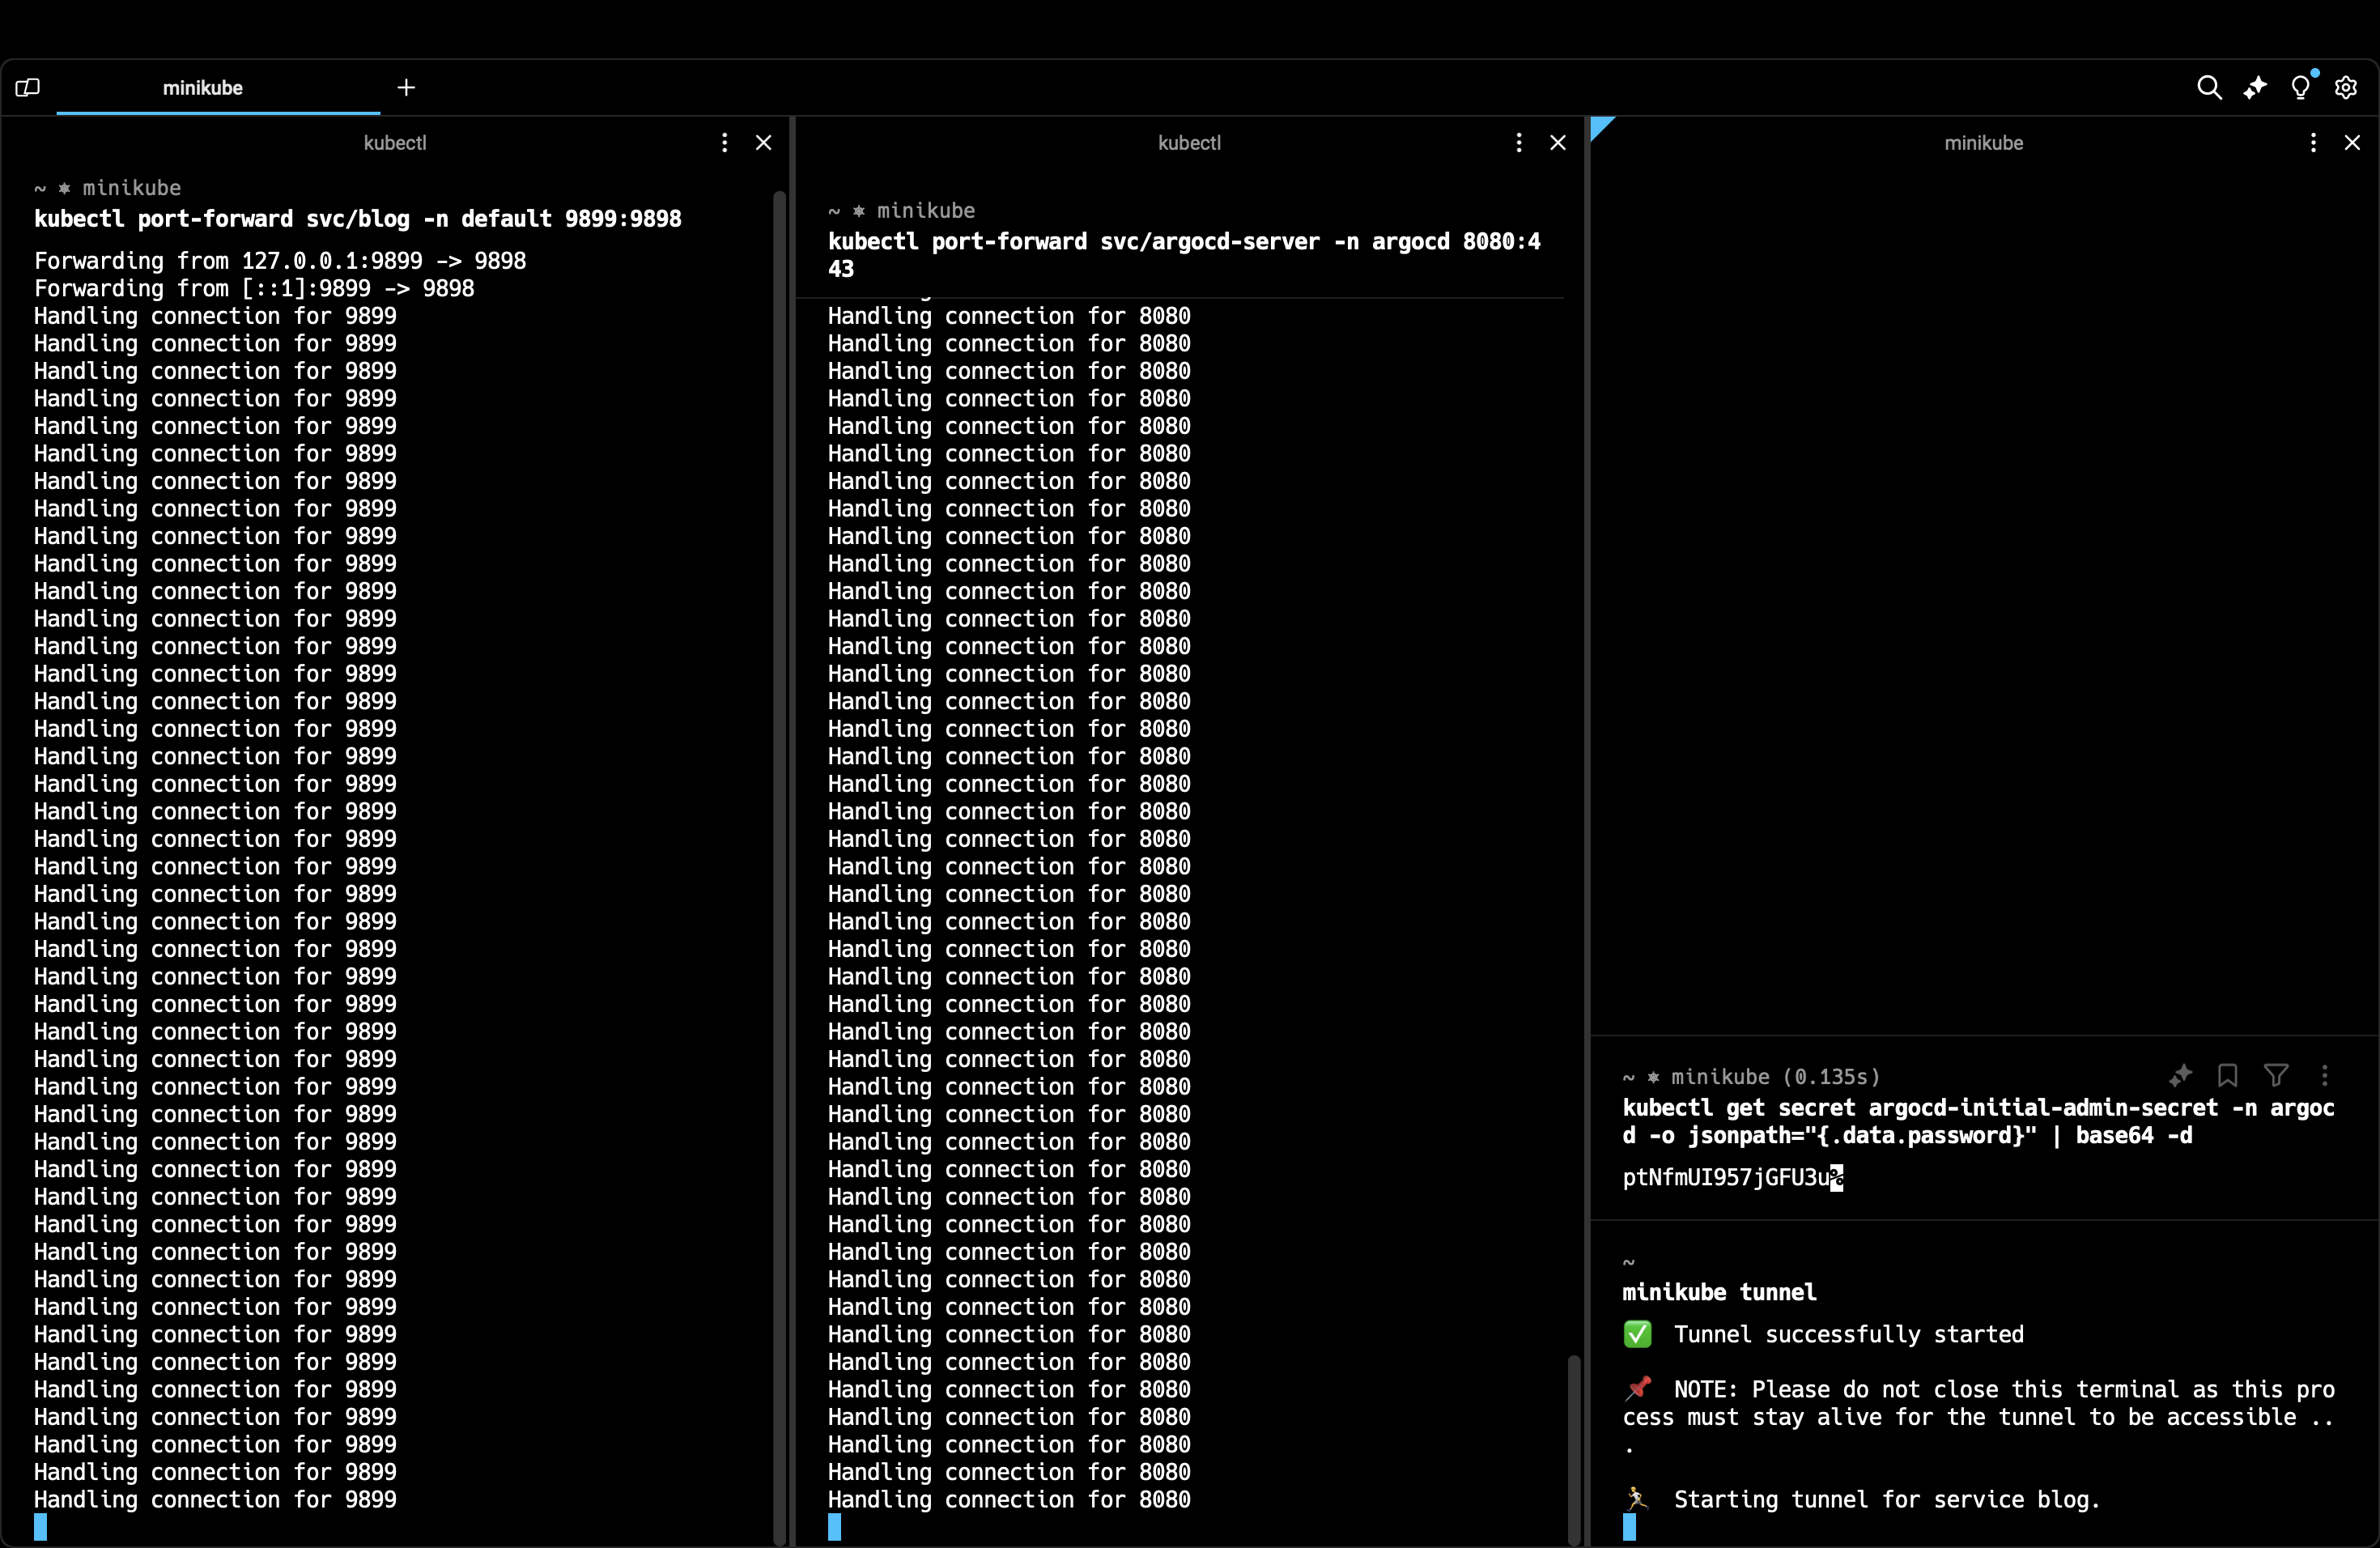
minikube tunnel
By this command your service will directly open in the browser but sometimes this doesn’t work, so we’ll do port-forwarding for this too. Minikube tunnel creates an external IP for our application service since it is a loadbalancer. This is something you need to do on your local setup to expose the service externally. You can also check the application - deployment, service and pods in the cli by,
# since our app is deployed in the default namespace.
kubectl get all
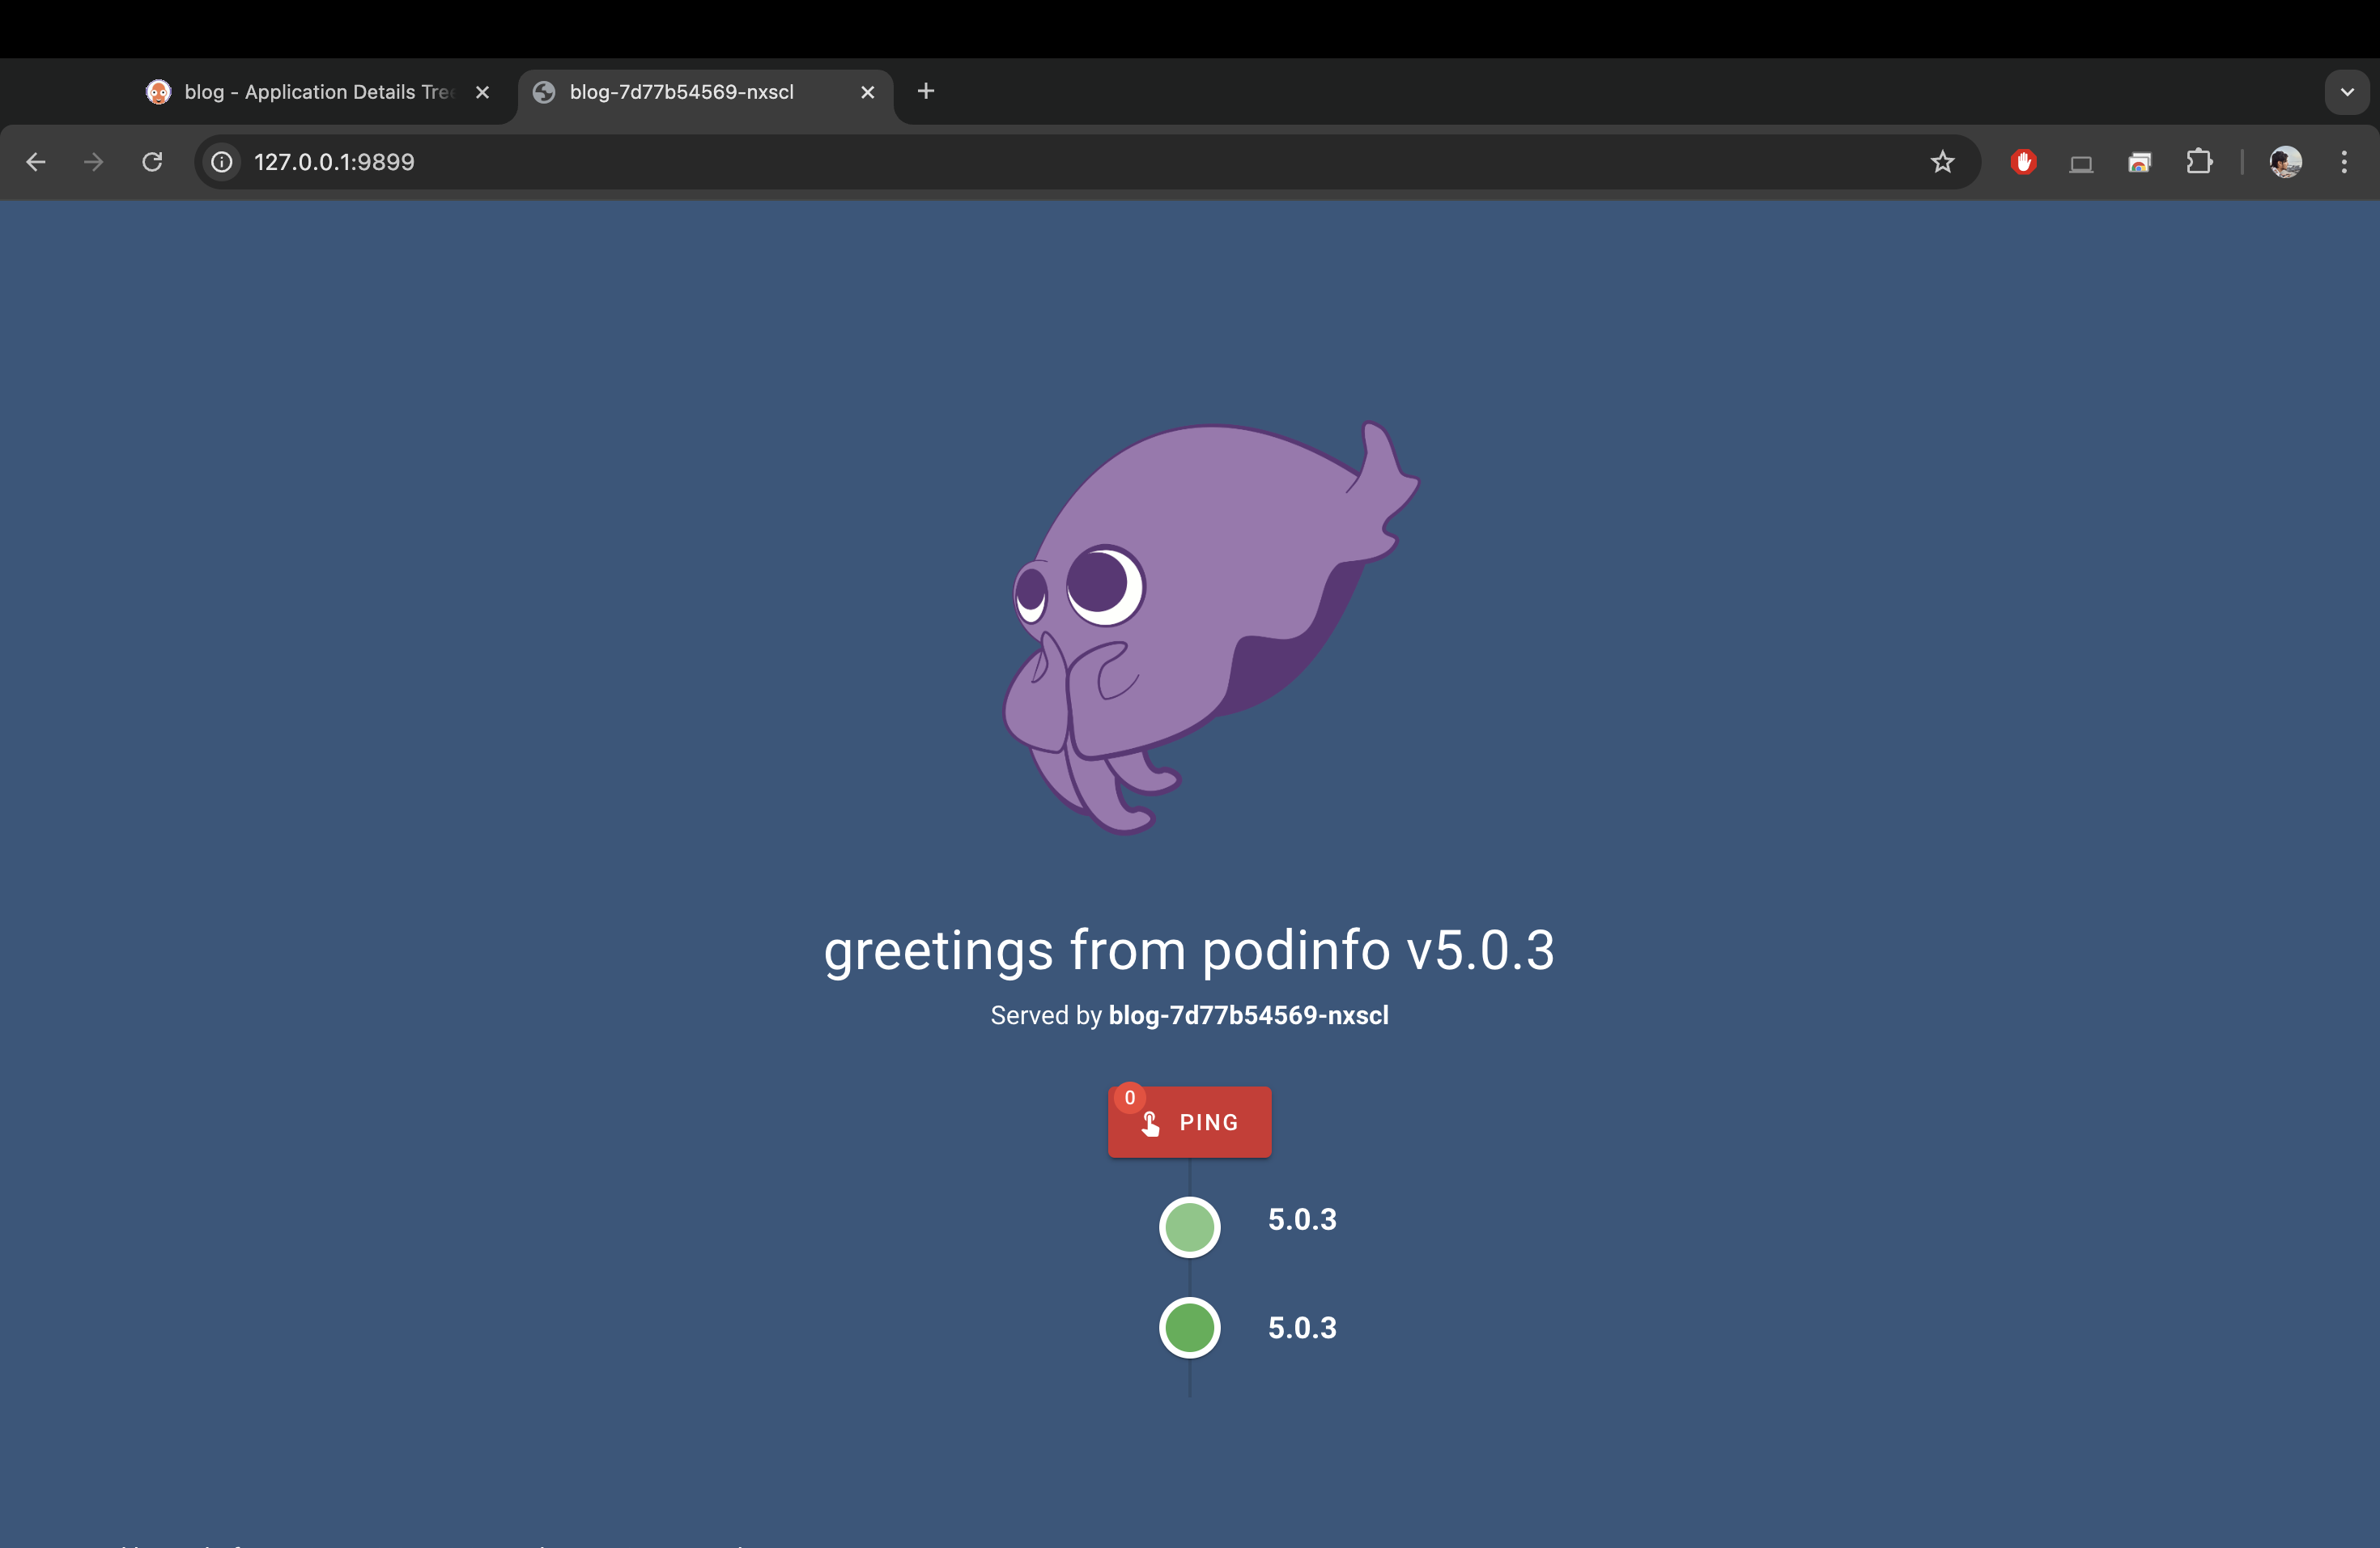
Finally, to view our application via port-forwarding.
# you can play around with ports, just remember that podinfo runs
# on port 9898
kubectl port-forward svc/blog -n default 9899:9898
Connect with me: https://linktr.ee/ayusht02
Subscribe to my newsletter
Read articles from Ayush Tripathi directly inside your inbox. Subscribe to the newsletter, and don't miss out.
Written by

Ayush Tripathi
Ayush Tripathi
DevOps Engineer @ IDfy | Mentor @ GSSoC '24 / WoB '24