Step-by-Step Guide to Deploying the Spring PetClinic App in Kubernetes
 Subbu Tech Tutorials

Here's the tree structure for the deployment of the Spring PetClinic app in Kubernetes:
1. Setup Kubernetes Cluster
   ├── Initialize control plane with kubeadm
   └── Add worker nodes to the cluster

2. Prepare Docker Images
   ├── Build PetClinic app Docker image
   └── Push Docker image to DockerHub

3. Deploy MySQL in Kubernetes
   ├── Create MySQL Deployment
   └── Expose MySQL Service

4. Deploy PetClinic Application
   ├── Create Deployment
   └── Expose PetClinic Service (NodePort)

5. Expose Application
   ├── Access via NodePort
   └── Verify application access

6. Test and Verify
   ├── Run tests on PetClinic
   └── Validate database connection

7. Basic Checks to Perform
   ├── Verify Pod Status
   ├── Check Logs for Database Connectivity
   ├── Verify DNS Resolution
   ├── Ensure MySQL Service is Running
   ├── Verify MySQL Database Health
   ├── Check Service Endpoints
   ├── Test the PetClinic Application
   ├── Monitor Resources
   ├── Check Kubernetes Events
   └── Automate Health Checks with Probes (Optional)
Set up a K8s Cluster with one master and 2 worker nodes.
Master or Control-Plane Setup:
#:/home/ubuntu# ls
master.sh
#:/home/ubuntu# sh master.sh
-e [INFO] Starting Kubernetes master node setup...
-e [INFO] Running as root user.
-e [INFO] Swap is already disabled.
-e [INFO] Loading necessary kernel modules...
overlay
br_netfilter
-e [INFO] Applying sysctl settings for networking...
-e [INFO] Installing containerd as the container runtime...
-e [INFO] Installing Kubernetes components (kubelet, kubeadm, kubectl)...
-e [INFO] Initializing Kubernetes master node...
Your Kubernetes control-plane has initialized successfully!
To start using your cluster, you need to run the following as a regular user:
  mkdir -p $HOME/.kube
  sudo cp -i /etc/kubernetes/admin.conf $HOME/.kube/config
  sudo chown $(id -u):$(id -g) $HOME/.kube/config
Alternatively, if you are the root user, you can run:
  export KUBECONFIG=/etc/kubernetes/admin.conf
You should now deploy a pod network to the cluster.
root@ip-172-31-6-52:/home/ubuntu# kubectl cluster-info
Kubernetes control plane is running at https://172.31.6.52:6443
CoreDNS is running at https://172.31.6.52:6443/api/v1/namespaces/kube-system/services/kube-dns:dns/proxy
Worker Node-1:
#:/home/ubuntu# sh worker.sh
[INFO] Running as root user.
[INFO] Swap is already disabled.
[INFO] Configuring kernel modules and sysctl settings...
overlay
br_netfilter
[INFO] Installing containerd...
[INFO] Configuring containerd to use systemd as the cgroup driver...
[INFO] Installing Kubernetes components...
[INFO] Enabling and starting kubelet service...
[INFO] Kubernetes worker node setup complete.
root@ip-172-31-10-71:/home/ubuntu# kubeadm join 172.31.6.52:6443 --token lfe688.coovikvbbezsrdor --discovery-token-ca-cert-hash sha256:bb6f4d505db272fc17dce99ad05c22f46d31ad2dfc556440ff5bad4e8c02207c
[preflight] Running pre-flight checks
        [WARNING FileExisting-socat]: socat not found in system path
[preflight] Reading configuration from the cluster...
[preflight] FYI: You can look at this config file with 'kubectl -n kube-system get cm kubeadm-config -o yaml'
[kubelet-start] Writing kubelet configuration to file "/var/lib/kubelet/config.yaml"
[kubelet-start] Writing kubelet environment file with flags to file "/var/lib/kubelet/kubeadm-flags.env"
[kubelet-start] Starting the kubelet
[kubelet-check] Waiting for a healthy kubelet at http://127.0.0.1:10248/healthz. This can take up to 4m0s
[kubelet-check] The kubelet is healthy after 501.724062ms
[kubelet-start] Waiting for the kubelet to perform the TLS Bootstrap

This node has joined the cluster:
* Certificate signing request was sent to apiserver and a response was received.
* The Kubelet was informed of the new secure connection details.

Run 'kubectl get nodes' on the control-plane to see this node join the cluster.
Do same for worker node-2 also:
Check the Cluster-info and Nodes information:
#:/home/ubuntu# kubectl cluster-info
Kubernetes control plane is running at https://172.31.6.52:6443
CoreDNS is running at https://172.31.6.52:6443/api/v1/namespaces/kube-system/services/kube-dns:dns/proxy

To further debug and diagnose cluster problems, use 'kubectl cluster-info dump'.
#: kubectl get nodes
NAME               STATUS   ROLES           AGE     VERSION
ip-172-31-10-71    Ready    <none>          12m     v1.31.1
ip-172-31-12-137   Ready    <none>          8m50s   v1.31.1
ip-172-31-6-52     Ready    control-plane   22m     v1.31.1
Get all resources information in the cluster:
#:/home/ubuntu# kubectl get all -A
NAMESPACE     NAME                                         READY   STATUS    RESTARTS      AGE
kube-system   pod/coredns-7c65d6cfc9-h7s2k                 1/1     Running   0             27m
kube-system   pod/coredns-7c65d6cfc9-zlpd4                 1/1     Running   0             27m
kube-system   pod/etcd-ip-172-31-6-52                      1/1     Running   0             27m
kube-system   pod/kube-apiserver-ip-172-31-6-52            1/1     Running   0             27m
kube-system   pod/kube-controller-manager-ip-172-31-6-52   1/1     Running   0             27m
kube-system   pod/kube-proxy-2hmc4                         1/1     Running   0             27m
kube-system   pod/kube-proxy-fhxt2                         1/1     Running   0             13m
kube-system   pod/kube-proxy-q6rqs                         1/1     Running   0             17m
kube-system   pod/kube-scheduler-ip-172-31-6-52            1/1     Running   0             27m
kube-system   pod/weave-net-28s2h                          2/2     Running   0             17m
kube-system   pod/weave-net-6g5wm                          2/2     Running   0             13m
kube-system   pod/weave-net-qt6rs                          2/2     Running   1 (27m ago)   27m

NAMESPACE     NAME                 TYPE        CLUSTER-IP   EXTERNAL-IP   PORT(S)                  AGE
default       service/kubernetes   ClusterIP   10.96.0.1    <none>        443/TCP                  27m
kube-system   service/kube-dns     ClusterIP   10.96.0.10   <none>        53/UDP,53/TCP,9153/TCP   27m

NAMESPACE     NAME                        DESIRED   CURRENT   READY   UP-TO-DATE   AVAILABLE   NODE SELECTOR            AGE
kube-system   daemonset.apps/kube-proxy   3         3         3       3            3           kubernetes.io/os=linux   27m
kube-system   daemonset.apps/weave-net    3         3         3       3            3           <none>                   27m

NAMESPACE     NAME                      READY   UP-TO-DATE   AVAILABLE   AGE
kube-system   deployment.apps/coredns   2/2     2            2           27m
I have created a name space called ‘dev’
#:/home/ubuntu# kubectl get namespaces
NAME              STATUS   AGE
default           Active   36m
dev               Active   93s
kube-node-lease   Active   36m
kube-public       Active   36m
kube-system       Active   36m
Set as dev namespace as default namespace:
# kubectl config set-context --current --namespace=dev
Context "kubernetes-admin@kubernetes" modified.
#:/home/ubuntu# kubectl get pods
No resources found in dev namespace.
#:/home/ubuntu# kubectl get all
No resources found in dev namespace.
Prepare Docker Image for Spring Petclinic Application:
You can fork the project repository from the link below for practice and hands-on experience:
#:git clone https://github.com/SubbuTechTutorials/petclinic-app.git
Cloning into 'petclinic-app'...
remote: Enumerating objects: 10029, done.
remote: Counting objects: 100% (10029/10029), done.
remote: Compressing objects: 100% (4730/4730), done.
remote: Total 10029 (delta 3789), reused 10019 (delta 3782), pack-reused 0 (from 0)
Receiving objects: 100% (10029/10029), 7.57 MiB | 13.45 MiB/s, done.
Resolving deltas: 100% (3789/3789), done.
#: cd petclinic-app/
#:/home/ubuntu/petclinic-app# ls
Dockerfile   build.gradle        gradle   gradlew.bat  mvnw.cmd  readme.md        src
LICENSE.txt  docker-compose.yml  gradlew  mvnw         pom.xml   settings.gradle
Build PetClinic app Docker image based on Dockerfile:
#: docker build -t <repository>/<image-name>:<tag> <path>
Example
#: docker build -t subbu7677/petclinic-spring-app:v1 .
[+] Building 56.0s (17/17) FINISHED                                                                                 docker:default
 => [internal] load build definition from Dockerfile                                                                          0.0s
 => => transferring dockerfile: 453B                                                                                          0.0s
 => [internal] load metadata for docker.io/library/eclipse-temurin:17-jdk-alpine                                              1.5s
 => [internal] load metadata for docker.io/library/maven:3.9.4-eclipse-temurin-17-alpine                                      1.5s
 => [auth] library/maven:pull token for registry-1.docker.io                                                                  0.0s
 => [auth] library/eclipse-temurin:pull token for registry-1.docker.io                                                        0.0s
 => [internal] load .dockerignore                                                                                             0.0s
 => => transferring context: 2B                                                                                               0.0s
 => [build 1/6] FROM docker.io/library/maven:3.9.4-eclipse-temurin-17-alpine@sha256:794090b9b10405a55c81ffa3dbfcb2332ea988a1  0.0s
 => [runtime 1/3] FROM docker.io/library/eclipse-temurin:17-jdk-alpine@sha256:af68bcb9474937f06d890450e3e2bd7623913187282597  0.0s
 => [internal] load build context                                                                                             0.1s
 => => transferring context: 9.65MB                                                                                           0.1s
 => CACHED [build 2/6] WORKDIR /app                                                                                           0.0s
 => CACHED [build 3/6] COPY pom.xml .                                                                                         0.0s
 => CACHED [build 4/6] RUN mvn dependency:go-offline -B                                                                       0.0s
 => [build 5/6] COPY . .                                                                                                      0.2s
 => [build 6/6] RUN mvn clean package -DskipTests                                                                            52.4s
 => CACHED [runtime 2/3] WORKDIR /app                                                                                         0.0s
 => [runtime 3/3] COPY --from=build /app/target/spring-petclinic-*.jar /app/app.jar                                           0.3s
 => exporting to image                                                                                                        0.3s
 => => exporting layers                                                                                                       0.3s
 => => writing image sha256:186eaecb9c8d52f35f74d3ed0765502f30b1a970693597458a237f2e06712428                                  0.0s
 => => naming to docker.io/subbu7677/petclinic-spring-app:v1
Check the Docker Image:
#: docker images
REPOSITORY                       TAG       IMAGE ID       CREATED         SIZE
subbu7677/petclinic-spring-app   v1        186eaecb9c8d   5 minutes ago   376MB
Push Docker image to DockerHub:
# docker login -u subbu7677
Password:
WARNING! Your password will be stored unencrypted in /root/.docker/config.json.
Configure a credential helper to remove this warning. See
https://docs.docker.com/engine/reference/commandline/login/#credential-stores

Login Succeeded
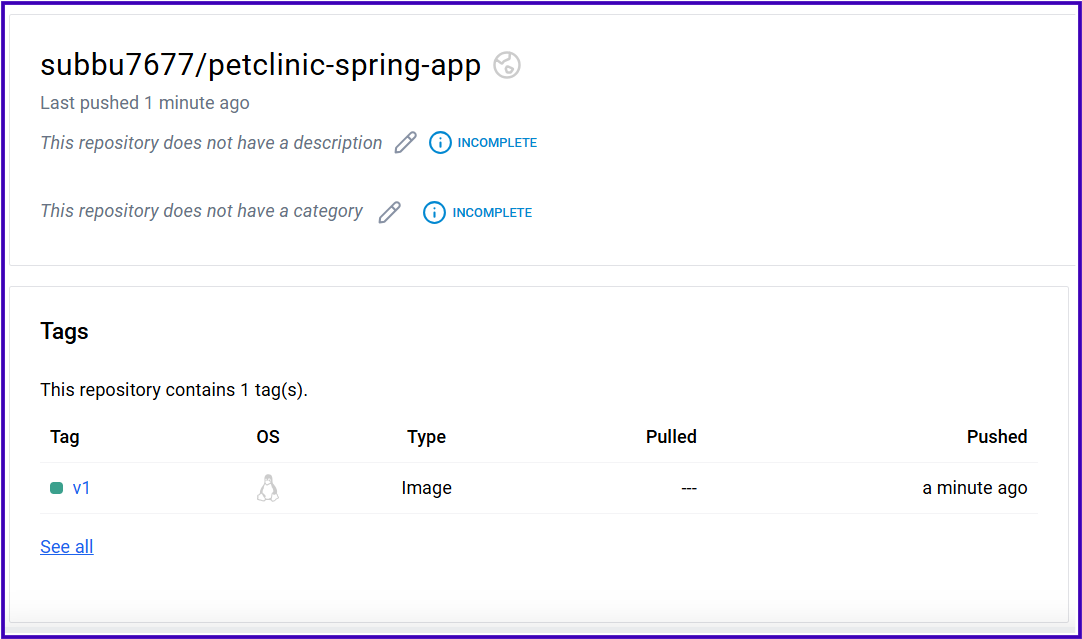
#: docker push subbu7677/petclinic-spring-app:v1
The push refers to repository [docker.io/subbu7677/petclinic-spring-app]
b19fe842d6f4: Pushed
4996fc293a83: Layer already exists
a8a5d72c52b0: Layer already exists
b480ad7bdbcc: Layer already exists
25cc22fd22a0: Layer already exists
e29c7d3c6568: Layer already exists
63ca1fbb43ae: Layer already exists
v1: digest: sha256:996392644653de3d5498bfa2b82ffb3d8d72e840076a2264eb3a39630bea109e size: 1786
Check it in your Docker Hub Account:
Deploy MySQL in Kubernetes:
Set Up MySQL Database for Spring PetClinic
Create a MySQL deployment and service in the dev namespace.
MySQL Deployment: Deploy a MySQL 8.4 instance with environment variables for MYSQL_USER, MYSQL_PASSWORD, MYSQL_DATABASE, and MYSQL_ROOT_PASSWORD.
MySQL Service: Expose MySQL internally via a ClusterIP service on port 3306 to allow the PetClinic app to connect.
In this step, we set up a MySQL database for the Spring PetClinic application using a Kubernetes deployment and service.
MySQL Deployment: We create a deployment that runs a single MySQL 8.4 instance with environment variables to configure the database (
petclinic) and user credentials. Kubernetes ensures this MySQL instance remains up and can restart automatically if needed.MySQL Service: To allow the Spring PetClinic app to connect to the database, we create a
ClusterIPservice. This exposes MySQL on port3306within the cluster, allowing internal communication between the app and the database.
With this setup, MySQL is fully operational within our Kubernetes cluster, ready to support the Spring PetClinic app.
mysql-deployment.yaml:
apiVersion: apps/v1
kind: Deployment
metadata:
  name: mysql-db
  namespace: dev
spec:
  replicas: 1
  selector:
    matchLabels:
      app: mysql
  template:
    metadata:
      labels:
        app: mysql
    spec:
      containers:
      - name: mysql
        image: mysql:8.4
        ports:
        - containerPort: 3306
        env:
        - name: MYSQL_USER
          value: petclinic
        - name: MYSQL_PASSWORD
          value: petclinic
        - name: MYSQL_ROOT_PASSWORD
          value: root
        - name: MYSQL_DATABASE
          value: petclinic
---
apiVersion: v1
kind: Service
metadata:
  name: mysql-service
  namespace: dev
spec:
  type: ClusterIP
  ports:
    - port: 3306
      targetPort: 3306
  selector:
    app: mysql
Now, apply the mysql-deployment.yaml file.
controlplane ~ ➜  kubectl apply -f mysql-deployment.yaml
deployment.apps/mysql-db created
service/mysql-service created

controlplane ~ ➜  kubectl get all
NAME                           READY   STATUS    RESTARTS   AGE
pod/mysql-db-7d8cf944c-mcvnq   1/1     Running   0          15s

NAME                    TYPE        CLUSTER-IP     EXTERNAL-IP   PORT(S)    AGE
service/mysql-service   ClusterIP   10.108.5.126   <none>        3306/TCP   15s

NAME                       READY   UP-TO-DATE   AVAILABLE   AGE
deployment.apps/mysql-db   1/1     1            1           15s

NAME                                 DESIRED   CURRENT   READY   AGE
replicaset.apps/mysql-db-7d8cf944c   1         1         1       15s
Inspect the Database Connection:
You can verify whether the Spring PetClinic application is properly communicating with the MySQL database by checking the active database connections.
Connect to the MySQL database inside the Kubernetes cluster:
controlplane ~ ➜  kubectl exec -it mysql-db-7d8cf944c-mcvnq -- /bin/sh
sh-5.1# ls
afs  boot  docker-entrypoint-initdb.d  home  lib64  mnt  proc  run   srv  tmp  var
bin  dev   etc                         lib   media  opt  root  sbin  sys  usr
sh-5.1# mysql -u root -p
Enter password:
Welcome to the MySQL monitor.  Commands end with ; or \g.
Your MySQL connection id is 28
mysql> SHOW DATABASES;
+--------------------+
| Database           |
+--------------------+
| information_schema |
| mysql              |
| performance_schema |
| petclinic          |
| sys                |
+--------------------+
5 rows in set (0.00 sec)
mysql> USE petclinic;
Reading table information for completion of table and column names
You can turn off this feature to get a quicker startup with -A

Database changed
mysql> SHOW TABLES;
+---------------------+
| Tables_in_petclinic |
+---------------------+
| owners              |
| pets                |
| specialties         |
| types               |
| vet_specialties     |
| vets                |
| visits              |
+---------------------+
7 rows in set (0.00 sec)
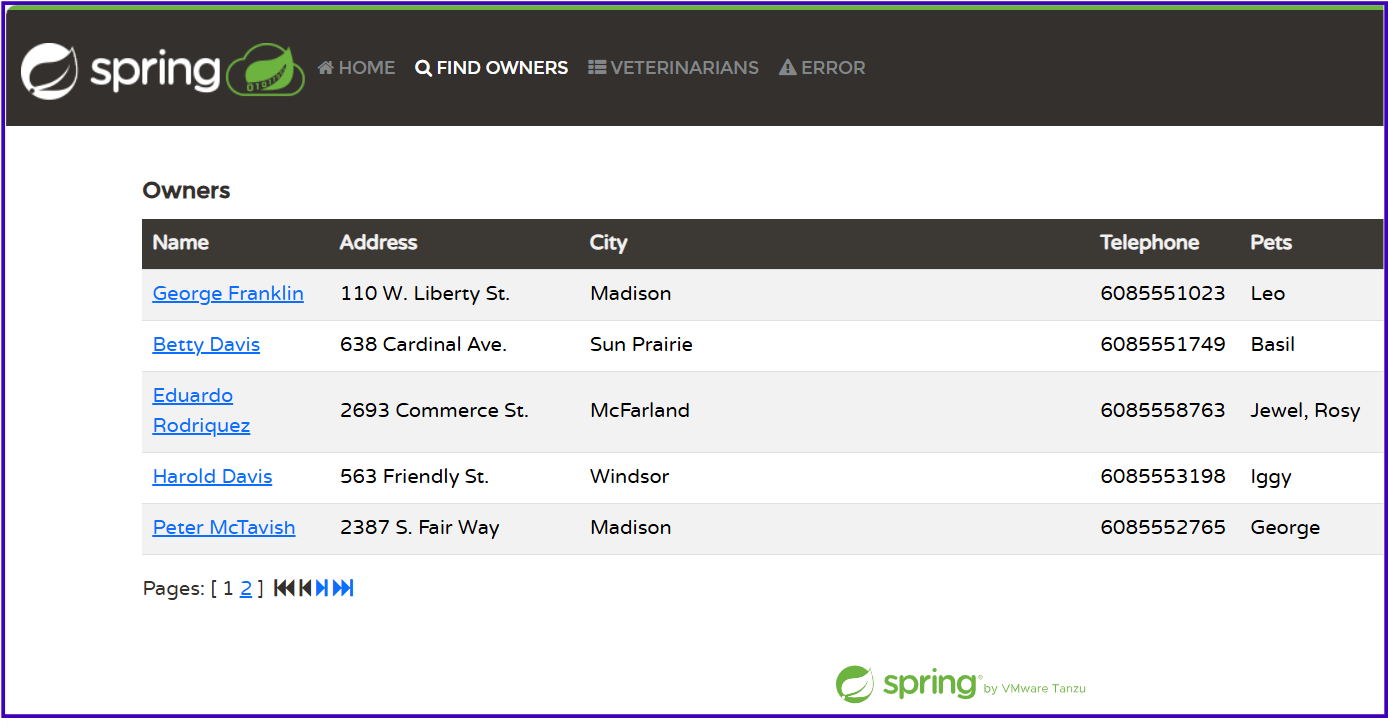
mysql> SELECT * FROM owners;
+----+------------+-----------+-----------------------+-------------+------------+
| id | first_name | last_name | address               | city        | telephone  |
+----+------------+-----------+-----------------------+-------------+------------+
|  1 | George     | Franklin  | 110 W. Liberty St.    | Madison     | 6085551023 |
|  2 | Betty      | Davis     | 638 Cardinal Ave.     | Sun Prairie | 6085551749 |
|  3 | Eduardo    | Rodriquez | 2693 Commerce St.     | McFarland   | 6085558763 |
|  4 | Harold     | Davis     | 563 Friendly St.      | Windsor     | 6085553198 |
|  5 | Peter      | McTavish  | 2387 S. Fair Way      | Madison     | 6085552765 |
|  6 | Jean       | Coleman   | 105 N. Lake St.       | Monona      | 6085552654 |
|  7 | Jeff       | Black     | 1450 Oak Blvd.        | Monona      | 6085555387 |
|  8 | Maria      | Escobito  | 345 Maple St.         | Madison     | 6085557683 |
|  9 | David      | Schroeder | 2749 Blackhawk Trail  | Madison     | 6085559435 |
| 10 | Carlos     | Estaban   | 2335 Independence La. | Waunakee    | 6085555487 |
+----+------------+-----------+-----------------------+-------------+------------+
10 rows in set (0.00 sec)
mysql> SELECT * FROM pets;
+----+----------+------------+---------+----------+
| id | name     | birth_date | type_id | owner_id |
+----+----------+------------+---------+----------+
|  1 | Leo      | 2000-09-07 |       1 |        1 |
|  2 | Basil    | 2002-08-06 |       6 |        2 |
|  3 | Rosy     | 2001-04-17 |       2 |        3 |
|  4 | Jewel    | 2000-03-07 |       2 |        3 |
|  5 | Iggy     | 2000-11-30 |       3 |        4 |
|  6 | George   | 2000-01-20 |       4 |        5 |
|  7 | Samantha | 1995-09-04 |       1 |        6 |
|  8 | Max      | 1995-09-04 |       1 |        6 |
|  9 | Lucky    | 1999-08-06 |       5 |        7 |
| 10 | Mulligan | 1997-02-24 |       2 |        8 |
| 11 | Freddy   | 2000-03-09 |       5 |        9 |
| 12 | Lucky    | 2000-06-24 |       2 |       10 |
| 13 | Sly      | 2002-06-08 |       1 |       10 |
+----+----------+------------+---------+----------+
13 rows in set (0.00 sec)
mysql> SELECT * FROM specialties;
+----+-----------+
| id | name      |
+----+-----------+
|  3 | dentistry |
|  1 | radiology |
|  2 | surgery   |
+----+-----------+
3 rows in set (0.00 sec)
mysql> SELECT * FROM types;
+----+---------+
| id | name    |
+----+---------+
|  5 | bird    |
|  1 | cat     |
|  2 | dog     |
|  6 | hamster |
|  3 | lizard  |
|  4 | snake   |
+----+---------+
6 rows in set (0.00 sec)
mysql> SELECT * FROM visits ;
+----+--------+------------+-------------+
| id | pet_id | visit_date | description |
+----+--------+------------+-------------+
|  1 |      7 | 2010-03-04 | rabies shot |
|  2 |      8 | 2011-03-04 | rabies shot |
|  3 |      8 | 2009-06-04 | neutered    |
|  4 |      7 | 2008-09-04 | spayed      |
+----+--------+------------+-------------+
4 rows in set (0.01 sec)
Deploy PetClinic Application:
Create a deployment for the Spring PetClinic application with two replicas.
PetClinic Deployment: Use the image subbu7677/petclinic-spring-app:v1 and set up environment variables to connect to the MySQL service.
PetClinic Service: Expose the application externally via a NodePort service on port 30007 for access from outside the cluster.
In this step, we deploy the Spring PetClinic application in our Kubernetes cluster. We use a deployment with two replicas of the application, ensuring high availability. The app connects to the MySQL database using environment variables for the database URL and credentials.
A NodePort service is used to expose the application on port 30007, allowing external access through any node in the cluster. With this setup, the Spring PetClinic app is now running and accessible in Kubernetes.
As Albert Einstein once said, “Strive not to be a success, but rather to be of value.” This setup ensures the Spring PetClinic app is valuable by maintaining high availability and database connectivity.
petclinic-app-deployment.yaml:
apiVersion: apps/v1
kind: Deployment
metadata:
  name: petclinic-app
  namespace: dev
spec:
  replicas: 2
  selector:
    matchLabels:
      app: petclinic
  template:
    metadata:
      labels:
        app: petclinic
    spec:
      containers:
      - name: petclinic
        image: subbu7677/petclinic-spring-app:v1
        ports:
        - containerPort: 8080
        env:
        - name: MYSQL_URL
          value: jdbc:mysql://mysql-service:3306/petclinic
        - name: MYSQL_USER
          value: petclinic
        - name: MYSQL_PASSWORD
          value: petclinic
        - name: MYSQL_ROOT_PASSWORD
          value: root
        - name: MYSQL_DATABASE
          value: petclinic
---
apiVersion: v1
kind: Service
metadata:
  name: petclinic-service
  namespace: dev
spec:
  type: NodePort
  ports:
    - port: 8080
      targetPort: 8080
      nodePort: 30007
  selector:
    app: petclinic
Now, apply the petclinic-app-deployment.yaml file.
controlplane ~ ➜  kubectl apply -f petclinic-app-deployment.yaml
deployment.apps/petclinic-app created
service/petclinic-service created

controlplane ~ ➜  kubectl get all
NAME                                 READY   STATUS              RESTARTS   AGE
pod/mysql-db-7d8cf944c-mcvnq         1/1     Running             0          116s
pod/petclinic-app-749c6798fd-rw72q   0/1     ContainerCreating   0          7s
pod/petclinic-app-749c6798fd-x4w6l   0/1     ContainerCreating   0          7s

NAME                        TYPE        CLUSTER-IP      EXTERNAL-IP   PORT(S)          AGE
service/mysql-service       ClusterIP   10.108.5.126    <none>        3306/TCP         116s
service/petclinic-service   NodePort    10.108.39.206   <none>        8080:30007/TCP   7s

NAME                            READY   UP-TO-DATE   AVAILABLE   AGE
deployment.apps/mysql-db        1/1     1            1           116s
deployment.apps/petclinic-app   0/2     2            0           8s

NAME                                       DESIRED   CURRENT   READY   AGE
replicaset.apps/mysql-db-7d8cf944c         1         1         1       116s
replicaset.apps/petclinic-app-749c6798fd   2         2         0       8s
Expose Application:
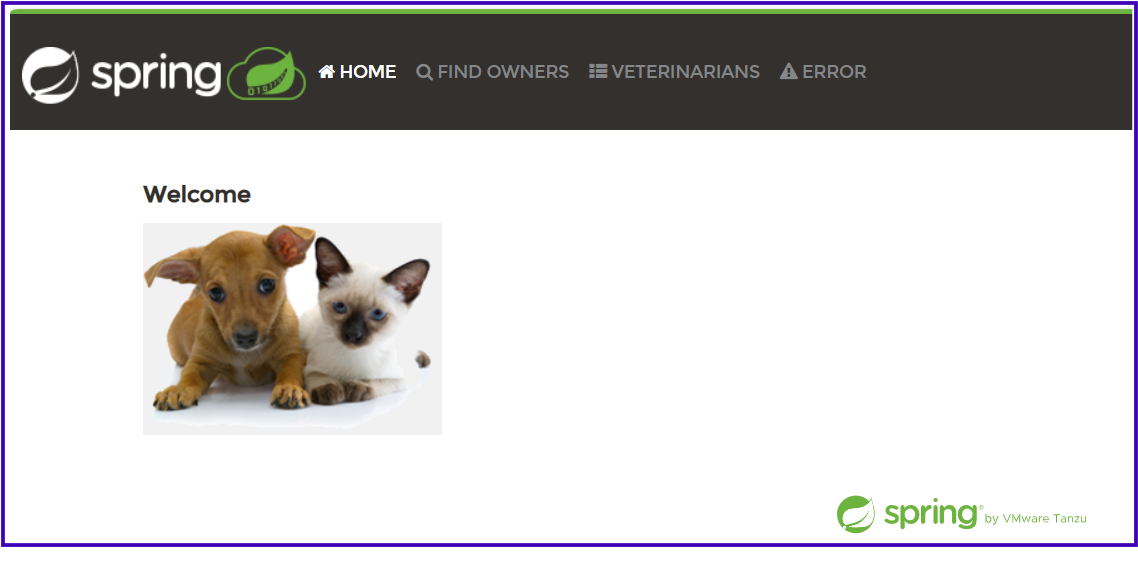
Access the Spring PetClinic application using the NodePort URL
http://<node-ip>:30007.Ensure the application communicates with the MySQL database properly by testing the functionality.
PetClinic Application Homepage:
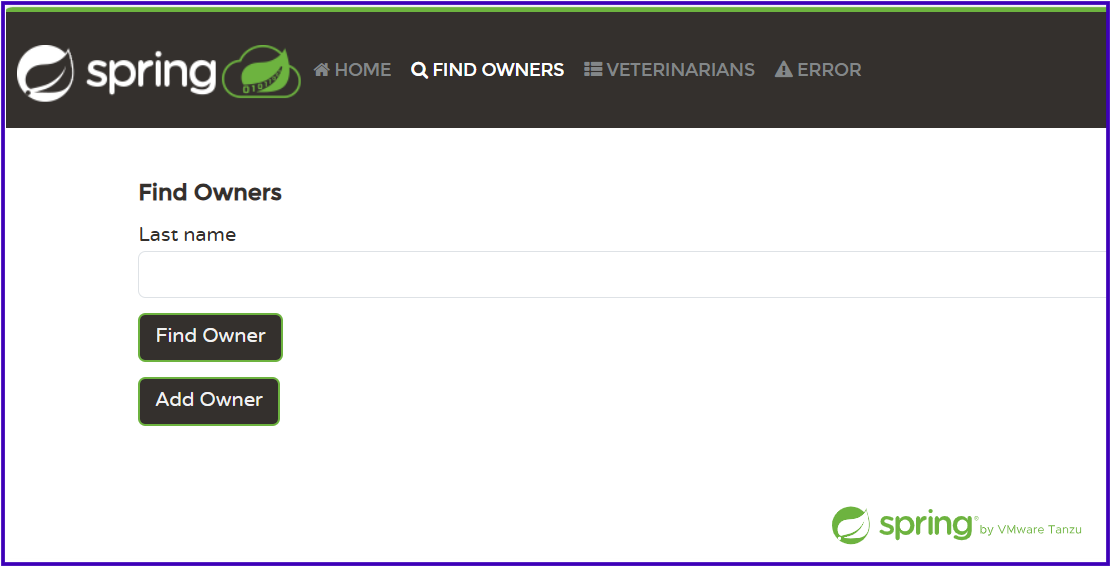
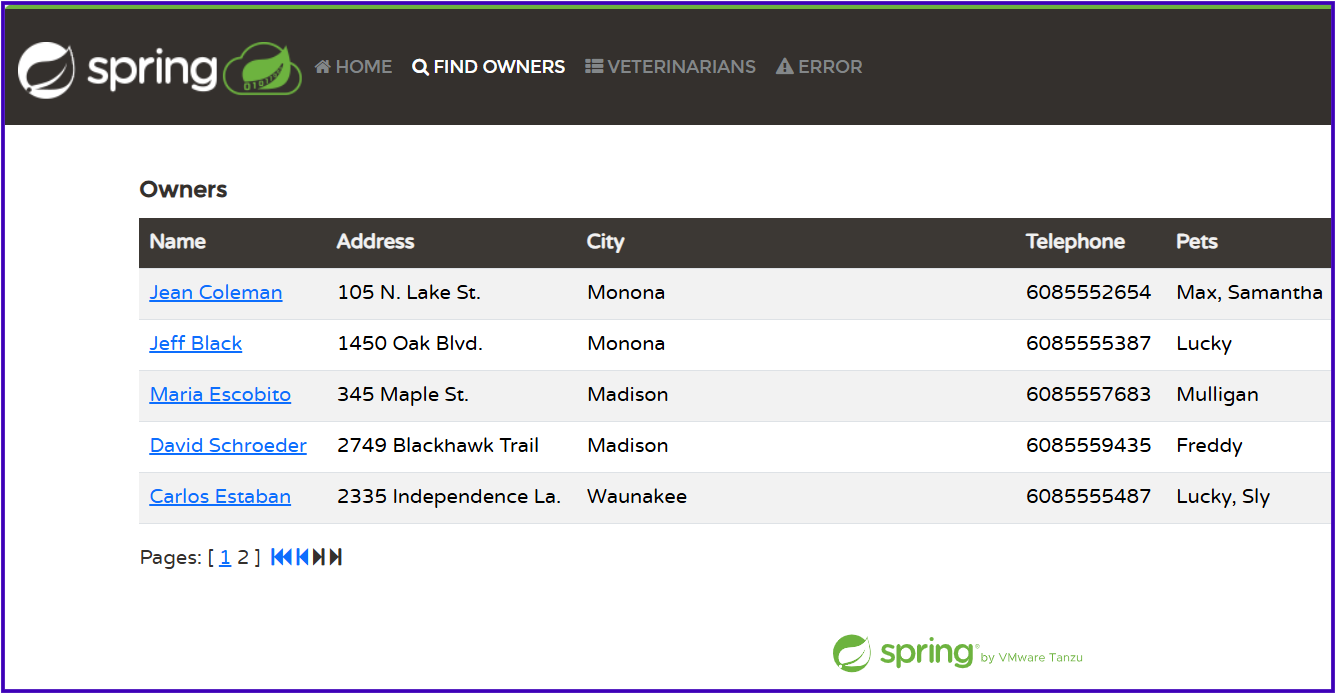
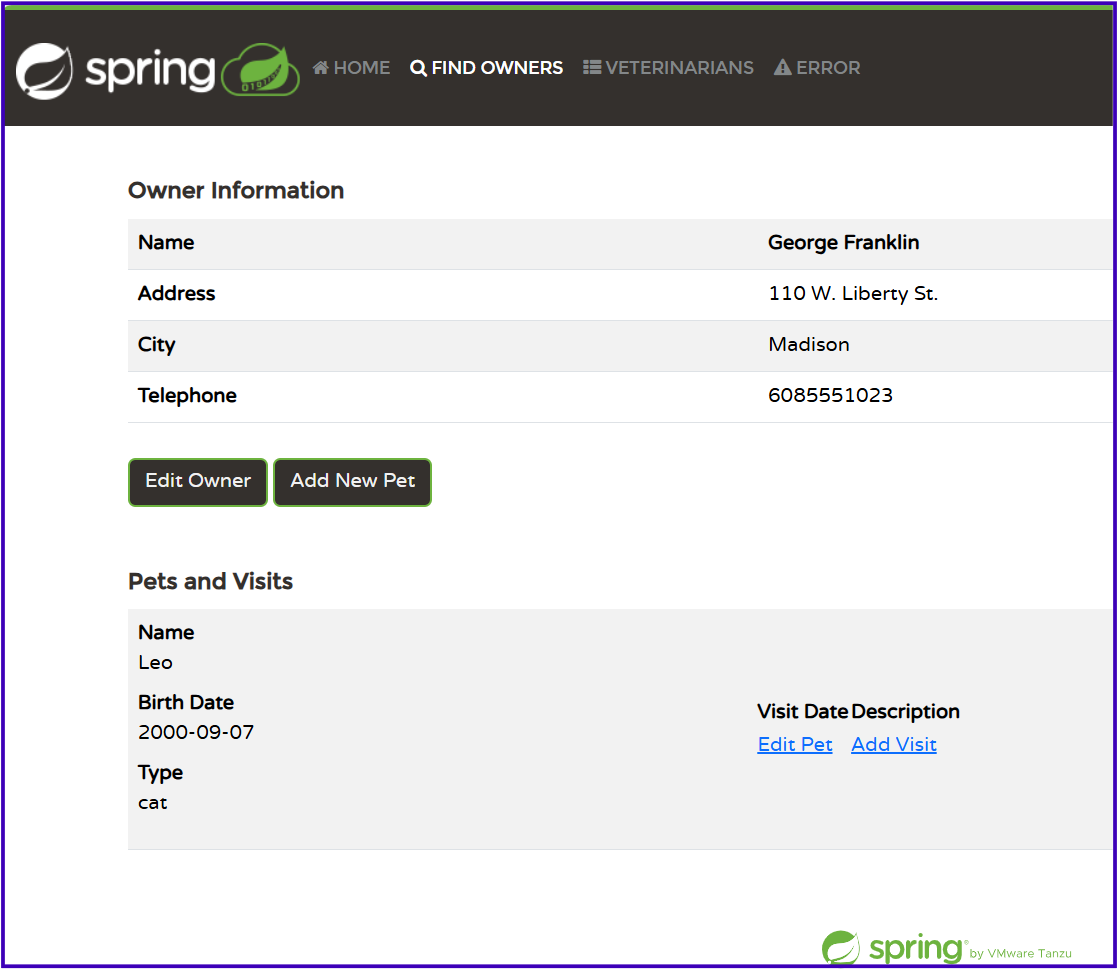
Find Owners Page and details of a particular Owner:
Test and Verify:
Add a new Owner and adding Pets to him:
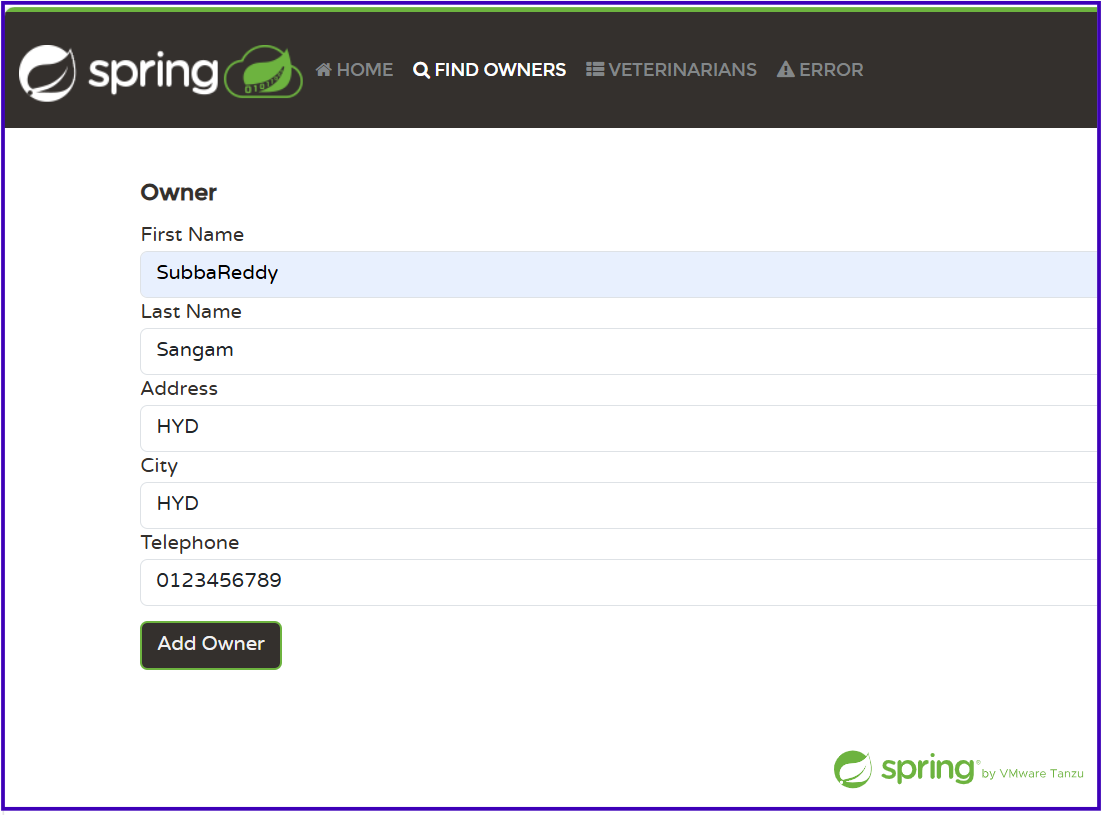
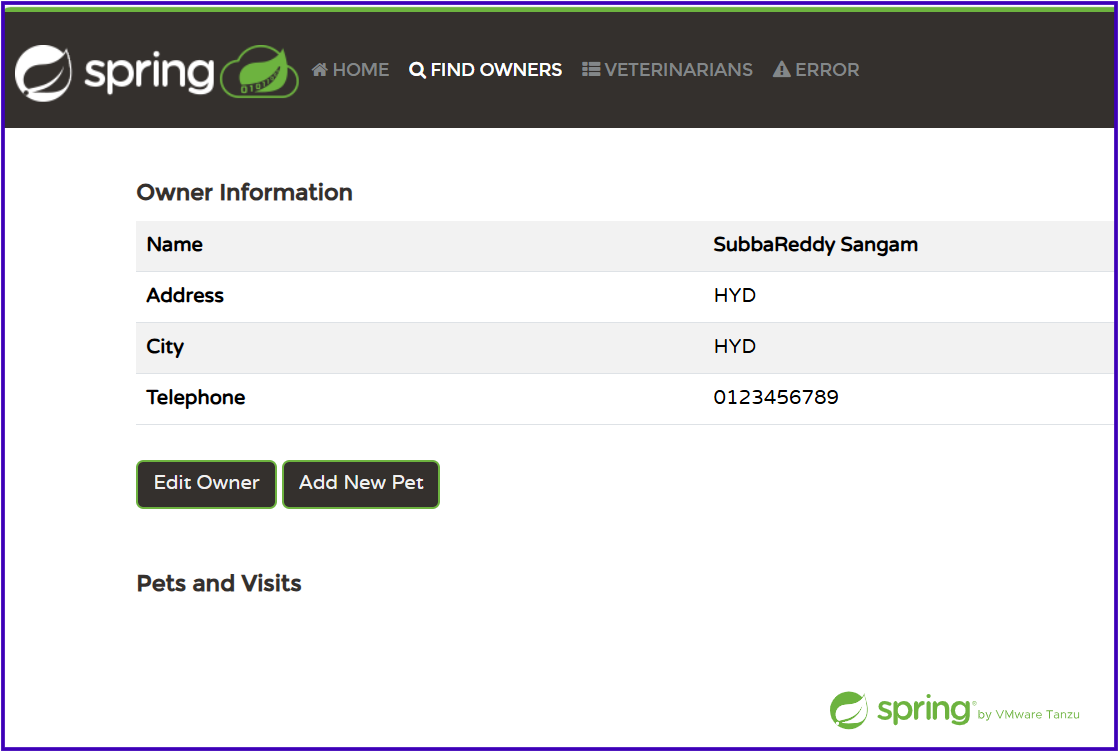
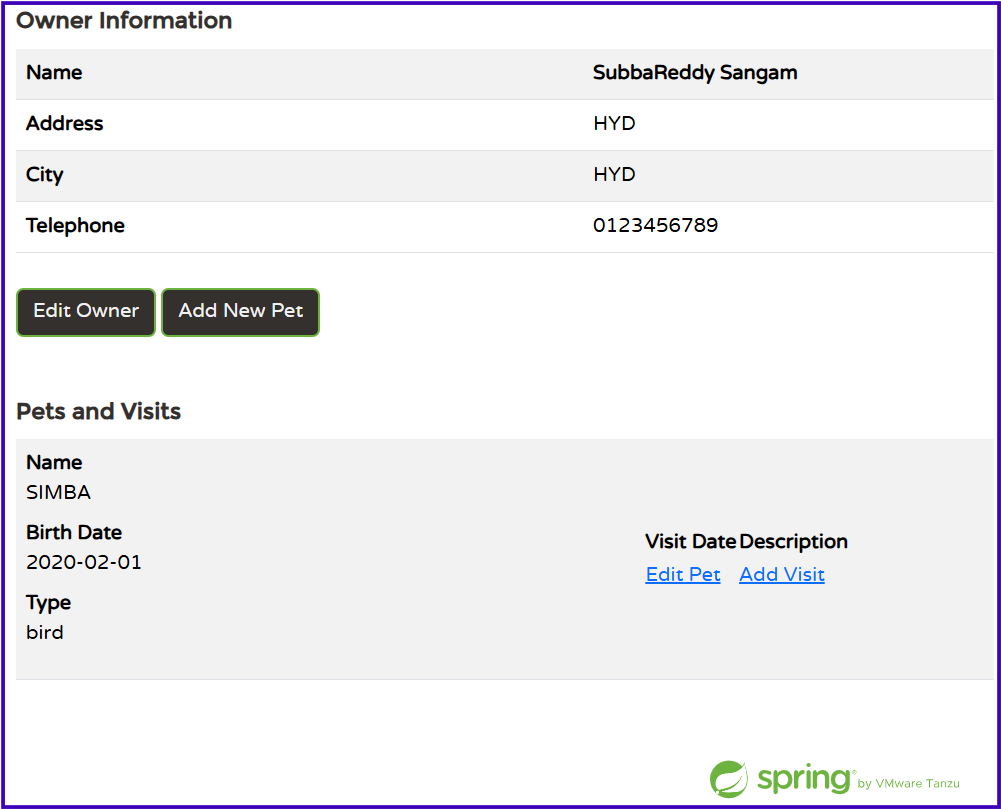
Now you can check in MySQL shell that new user has been added or not:
mysql> SELECT * FROM owners;
+----+------------+-----------+-----------------------+-------------+------------+
| id | first_name | last_name | address               | city        | telephone  |
+----+------------+-----------+-----------------------+-------------+------------+
|  1 | George     | Franklin  | 110 W. Liberty St.    | Madison     | 6085551023 |
|  2 | Betty      | Davis     | 638 Cardinal Ave.     | Sun Prairie | 6085551749 |
|  3 | Eduardo    | Rodriquez | 2693 Commerce St.     | McFarland   | 6085558763 |
|  4 | Harold     | Davis     | 563 Friendly St.      | Windsor     | 6085553198 |
|  5 | Peter      | McTavish  | 2387 S. Fair Way      | Madison     | 6085552765 |
|  6 | Jean       | Coleman   | 105 N. Lake St.       | Monona      | 6085552654 |
|  7 | Jeff       | Black     | 1450 Oak Blvd.        | Monona      | 6085555387 |
|  8 | Maria      | Escobito  | 345 Maple St.         | Madison     | 6085557683 |
|  9 | David      | Schroeder | 2749 Blackhawk Trail  | Madison     | 6085559435 |
| 10 | Carlos     | Estaban   | 2335 Independence La. | Waunakee    | 6085555487 |
| 11 | SubbaReddy | Sangam    | HYD                   | HYD         | 0123456789 |
+----+------------+-----------+-----------------------+-------------+------------+
11 rows in set (0.00 sec)
mysql> SELECT * FROM pets;
+----+----------+------------+---------+----------+
| id | name     | birth_date | type_id | owner_id |
+----+----------+------------+---------+----------+
|  1 | Leo      | 2000-09-07 |       1 |        1 |
|  2 | Basil    | 2002-08-06 |       6 |        2 |
|  3 | Rosy     | 2001-04-17 |       2 |        3 |
|  4 | Jewel    | 2000-03-07 |       2 |        3 |
|  5 | Iggy     | 2000-11-30 |       3 |        4 |
|  6 | George   | 2000-01-20 |       4 |        5 |
|  7 | Samantha | 1995-09-04 |       1 |        6 |
|  8 | Max      | 1995-09-04 |       1 |        6 |
|  9 | Lucky    | 1999-08-06 |       5 |        7 |
| 10 | Mulligan | 1997-02-24 |       2 |        8 |
| 11 | Freddy   | 2000-03-09 |       5 |        9 |
| 12 | Lucky    | 2000-06-24 |       2 |       10 |
| 13 | Sly      | 2002-06-08 |       1 |       10 |
| 14 | SIMBA    | 2020-02-01 |       5 |       11 |
+----+----------+------------+---------+----------+
14 rows in set (0.00 sec)
Get list of Veterinarians information:
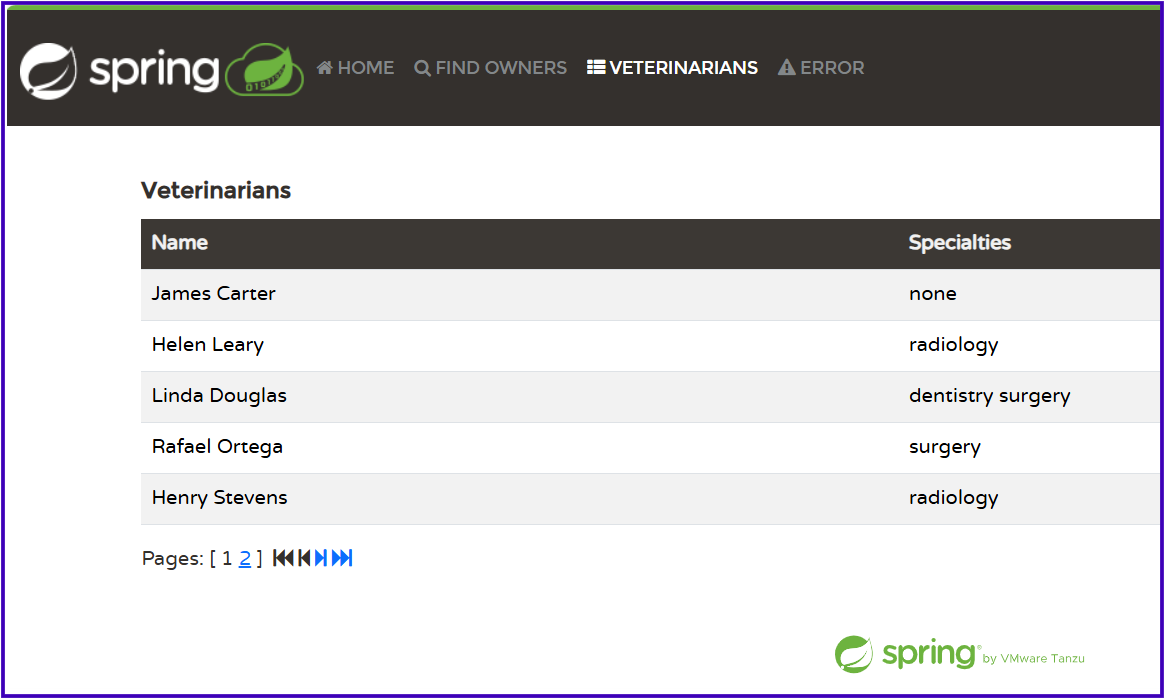
Default Error Handling Page:
Basic Checks to Perform:
Basic checks to perform when deploying a MySQL database and the PetClinic application in Kubernetes.
1. Verify Pod Status:
The first step after deploying the PetClinic app and MySQL database is to check the status of the pods to ensure they are running properly.
controlplane ~ ➜  kubectl get pods
NAME                             READY   STATUS    RESTARTS   AGE
mysql-db-7d8cf944c-mcvnq         1/1     Running   0          63m
petclinic-app-749c6798fd-rw72q   1/1     Running   0          61m
petclinic-app-749c6798fd-x4w6l   1/1     Running   0          61m
What to Check:
Ensure both the PetClinic application and MySQL pods are in the
Runningstate.If the pods are stuck in
ContainerCreatingorCrashLoopBackOff, investigate the pod logs to understand the issue.
2. Check Logs for Database Connectivity:
It is crucial to ensure that the PetClinic application has connected to the MySQL database.
kubectl logs <petclinic-pod-name>
Example:
controlplane ~ ➜  kubectl logs petclinic-app-749c6798fd-rw72q
              |\      _,,,--,,_
             /,`.-'`'   ._  \-;;,_
  _______ __|,4-  ) )_   .;.(__`'-'__     ___ __    _ ___ _______
 |       | '---''(_/._)-'(_\_)   |   |   |   |  |  | |   |       |
 |    _  |    ___|_     _|       |   |   |   |   |_| |   |       | __ _ _
 |   |_| |   |___  |   | |       |   |   |   |       |   |       | \ \ \ \
 |    ___|    ___| |   | |      _|   |___|   |  _    |   |      _|  \ \ \ \
 |   |   |   |___  |   | |     |_|       |   | | |   |   |     |_    ) ) ) )
 |___|   |_______| |___| |_______|_______|___|_|  |__|___|_______|  / / / /
 ==================================================================/_/_/_/
:: Built with Spring Boot :: 3.3.3

2024-09-29T08:11:26.738Z  INFO 1 --- [main] o.s.s.petclinic.PetClinicApplication     : Starting PetClinicApplication v3.3.0-SNAPSHOT using Java 17.0.12 with PID 1 (/app/app.jar started by root in /app)
2024-09-29T08:11:26.743Z  INFO 1 --- [main] o.s.s.petclinic.PetClinicApplication     : No active profile set, falling back to 1 default profile: "default"
2024-09-29T08:11:37.444Z  INFO 1 --- [main] .s.d.r.c.RepositoryConfigurationDelegate : Bootstrapping Spring Data JPA repositories in DEFAULT mode.
2024-09-29T08:11:37.851Z  INFO 1 --- [main] .s.d.r.c.RepositoryConfigurationDelegate : Finished Spring Data repository scanning in 309 ms. Found 2 JPA repository interfaces.
2024-09-29T08:11:47.839Z  INFO 1 --- [main] o.s.b.w.embedded.tomcat.TomcatWebServer  : Tomcat initialized with port 8080 (http)
2024-09-29T08:11:48.139Z  INFO 1 --- [main] o.apache.catalina.core.StandardService   : Starting service [Tomcat]
2024-09-29T08:11:48.139Z  INFO 1 --- [main] o.apache.catalina.core.StandardEngine    : Starting Servlet engine: [Apache Tomcat/10.1.28]
2024-09-29T08:11:49.132Z  INFO 1 --- [main] o.a.c.c.C.[Tomcat].[localhost].[/]       : Initializing Spring embedded WebApplicationContext
2024-09-29T08:11:49.135Z  INFO 1 --- [main] w.s.c.ServletWebServerApplicationContext : Root WebApplicationContext: initialization completed in 21985 ms
2024-09-29T08:11:54.134Z  INFO 1 --- [main] com.zaxxer.hikari.HikariDataSource       : HikariPool-1 - Starting...
2024-09-29T08:11:59.543Z  INFO 1 --- [main] com.zaxxer.hikari.pool.HikariPool        : HikariPool-1 - Added connection com.mysql.cj.jdbc.ConnectionImpl@4fe2dd02
2024-09-29T08:11:59.549Z  INFO 1 --- [main] com.zaxxer.hikari.HikariDataSource       : HikariPool-1 - Start completed.
2024-09-29T08:12:02.442Z  INFO 1 --- [main] o.hibernate.jpa.internal.util.LogHelper  : HHH000204: Processing PersistenceUnitInfo [name: default]
2024-09-29T08:12:03.540Z  INFO 1 --- [main] org.hibernate.Version                    : HHH000412: Hibernate ORM core version 6.5.2.Final
2024-09-29T08:12:04.236Z  INFO 1 --- [main] o.h.c.internal.RegionFactoryInitiator    : HHH000026: Second-level cache disabled
2024-09-29T08:12:08.237Z  INFO 1 --- [main] o.s.o.j.p.SpringPersistenceUnitInfo      : No LoadTimeWeaver setup: ignoring JPA class transformer
2024-09-29T08:12:12.959Z  INFO 1 --- [main] o.h.e.t.j.p.i.JtaPlatformInitiator       : HHH000489: No JTA platform available (set 'hibernate.transaction.jta.platform' to enable JTA platform integration)
2024-09-29T08:12:13.240Z  INFO 1 --- [main] j.LocalContainerEntityManagerFactoryBean : Initialized JPA EntityManagerFactory for persistence unit 'default'
2024-09-29T08:12:16.343Z  INFO 1 --- [main] o.s.d.j.r.query.QueryEnhancerFactory     : Hibernate is in classpath; If applicable, HQL parser will be used.
2024-09-29T08:12:38.537Z  INFO 1 --- [main] o.s.b.a.e.web.EndpointLinksResolver      : Exposing 14 endpoints beneath base path '/actuator'
2024-09-29T08:12:40.333Z  INFO 1 --- [main] o.s.b.w.embedded.tomcat.TomcatWebServer  : Tomcat started on port 8080 (http) with context path '/'
2024-09-29T08:12:40.538Z  INFO 1 --- [main] o.s.s.petclinic.PetClinicApplication     : Started PetClinicApplication in 77.602 seconds (process running for 82.329)
What to Look For:
Successful connection logs such as:
HikariPool-1 - Starting...
HikariPool-1 - Start completed.
Any database connection errors or exceptions, such as:
Cannot create PoolableConnectionFactory (Communications link failure)
3. Verify DNS Resolution:
Kubernetes uses DNS for service discovery. Make sure the PetClinic app can resolve the MySQL service via DNS.
Inside the PetClinic pod, use nslookup to verify DNS resolution:
kubectl exec -it <petclinic-pod-name> -- nslookup <mysql-service-name>
Example:
controlplane ~ ➜  kubectl exec -it petclinic-app-749c6798fd-rw72q -- nslookup mysql-service
Server:         10.96.0.10
Address:        10.96.0.10:53
Name:   mysql-service.dev.svc.cluster.local
Address: 10.108.5.126
4. Ensure the MySQL Service is Running:
The MySQL service is responsible for allowing the PetClinic application to connect to the database.
Check service status:
controlplane ~ ➜  kubectl get svc
NAME                TYPE        CLUSTER-IP      EXTERNAL-IP   PORT(S)          AGE
mysql-service       ClusterIP   10.108.5.126    <none>        3306/TCP         74m
petclinic-service   NodePort    10.108.39.206   <none>        8080:30007/TCP   72m
What to Check:
Ensure the MySQL service is listed and accessible.
Make sure the service type (ClusterIP, NodePort, or LoadBalancer) is set up correctly for the app's needs.
5. Verify MySQL Database Health:
Once the MySQL pod is running, ensure that the database is healthy and functioning correctly.
Connect to MySQL inside the pod:
kubectl exec -it <mysql-pod-name> -- mysql -u <user> -p
Example:
controlplane ~ ➜  kubectl get svc
NAME                TYPE        CLUSTER-IP      EXTERNAL-IP   PORT(S)          AGE
mysql-service       ClusterIP   10.108.5.126    <none>        3306/TCP         78m
petclinic-service   NodePort    10.108.39.206   <none>        8080:30007/TCP   76m

controlplane ~ ➜  kubectl get po
NAME                             READY   STATUS    RESTARTS   AGE
mysql-db-7d8cf944c-mcvnq         1/1     Running   0          78m
petclinic-app-749c6798fd-rw72q   1/1     Running   0          77m
petclinic-app-749c6798fd-x4w6l   1/1     Running   0          77m

controlplane ~ ➜  kubectl exec -it mysql-db-7d8cf944c-mcvnq -- mysql -u petclinic -p
Enter password:
Welcome to the MySQL monitor.  Commands end with ; or \g.
Your MySQL connection id is 69
Server version: 8.4.2 MySQL Community Server - GPL

Copyright (c) 2000, 2024, Oracle and/or its affiliates.

Oracle is a registered trademark of Oracle Corporation and/or its
affiliates. Other names may be trademarks of their respective
owners.

Type 'help;' or '\h' for help. Type '\c' to clear the current input statement.

mysql> SHOW DATABASES;
+--------------------+
| Database           |
+--------------------+
| information_schema |
| performance_schema |
| petclinic          |
+--------------------+
3 rows in set (0.00 sec)

mysql> USE petclinic;
Reading table information for completion of table and column names
You can turn off this feature to get a quicker startup with -A

Database changed
mysql> SHOW TABLES;
+---------------------+
| Tables_in_petclinic |
+---------------------+
| owners              |
| pets                |
| specialties         |
| types               |
| vet_specialties     |
| vets                |
| visits              |
+---------------------+
7 rows in set (0.00 sec)

mysql>
What to Check:
Ensure the PetClinic database (
petclinic) and its tables are created successfully.Run queries to verify the data.
6. Check Service Endpoints:
Ensure that Kubernetes is routing traffic correctly between the PetClinic app and MySQL.
kubectl get endpoints <mysql-service-name>
Example:
controlplane ~ ➜  kubectl get svc
NAME                TYPE        CLUSTER-IP      EXTERNAL-IP   PORT(S)          AGE
mysql-service       ClusterIP   10.108.5.126    <none>        3306/TCP         81m
petclinic-service   NodePort    10.108.39.206   <none>        8080:30007/TCP   79m

controlplane ~ ➜  kubectl get endpoints mysql-service
NAME            ENDPOINTS         AGE
mysql-service   10.244.1.2:3306   82m
What to Check:
Confirm that the service has endpoints (i.e., IP addresses of the MySQL pods).
If the endpoints are missing, the service won’t be able to route traffic to the MySQL database.
7. Test the PetClinic Application:
Once deployment is done, ensure the PetClinic application is accessible and functioning correctly:
Access the app via a browser:
http://<node-ip>:<nodePort>
Basic Tests:
Add new owners, pets, and visits via the UI.
Ensure you can view veterinarians and their schedules.
8. Monitor Resources:
Ensure that both MySQL and the PetClinic app are not consuming excessive resources.
Check pod resource usage:
kubectl top pod
Before running the above command, ensure that your Metrics Server pod is up and running.
controlplane ~ ➜  kubectl get pods -n kube-system
NAME                                   READY   STATUS    RESTARTS   AGE
coredns-77d6fd4654-pksdt               1/1     Running   0          112m
coredns-77d6fd4654-wrvh6               1/1     Running   0          112m
etcd-controlplane                      1/1     Running   0          113m
kube-apiserver-controlplane            1/1     Running   0          113m
kube-controller-manager-controlplane   1/1     Running   0          113m
kube-proxy-bn59c                       1/1     Running   0          112m
kube-proxy-fhpvh                       1/1     Running   0          112m
kube-proxy-pdzrm                       1/1     Running   0          112m
kube-scheduler-controlplane            1/1     Running   0          113m
metrics-server-587b667b55-kmfs9        1/1     Running   0          61s
Now check pod resource usage:
controlplane ~ ➜  kubectl top pod
NAME                             CPU(cores)   MEMORY(bytes)
mysql-db-7d8cf944c-l2rrq         5m           473Mi
petclinic-app-749c6798fd-lrnsl   2m           315Mi
petclinic-app-749c6798fd-nwb5s   2m           317Mi
What to Check:
Look for high CPU or memory usage.
Ensure there are no resource limits that might affect performance.
9. Check Kubernetes Events:
Review Kubernetes events to troubleshoot any issues related to the deployment.
kubectl get events
controlplane ~ ➜  kubectl get events
LAST SEEN   TYPE     REASON              OBJECT                                MESSAGE
18m         Normal   Scheduled           pod/mysql-db-7d8cf944c-l2rrq          Successfully assigned dev/mysql-db-7d8cf944c-l2rrq to node01
18m         Normal   Pulling             pod/mysql-db-7d8cf944c-l2rrq          Pulling image "mysql:8.4"
18m         Normal   Pulled              pod/mysql-db-7d8cf944c-l2rrq          Successfully pulled image "mysql:8.4" in 13.831s (13.831s including waiting). Image size: 169786508 bytes.
18m         Normal   Created             pod/mysql-db-7d8cf944c-l2rrq          Created container mysql
18m         Normal   Started             pod/mysql-db-7d8cf944c-l2rrq          Started container mysql
18m         Normal   SuccessfulCreate    replicaset/mysql-db-7d8cf944c         Created pod: mysql-db-7d8cf944c-l2rrq
18m         Normal   ScalingReplicaSet   deployment/mysql-db                   Scaled up replica set mysql-db-7d8cf944c to 1
17m         Normal   Scheduled           pod/petclinic-app-749c6798fd-lrnsl    Successfully assigned dev/petclinic-app-749c6798fd-lrnsl to node02
17m         Normal   Pulling             pod/petclinic-app-749c6798fd-lrnsl    Pulling image "subbu7677/petclinic-spring-app:v1"
17m         Normal   Pulled              pod/petclinic-app-749c6798fd-lrnsl    Successfully pulled image "subbu7677/petclinic-spring-app:v1" in 9.941s (9.941s including waiting). Image size: 214461451 bytes.
17m         Normal   Created             pod/petclinic-app-749c6798fd-lrnsl    Created container petclinic
17m         Normal   Started             pod/petclinic-app-749c6798fd-lrnsl    Started container petclinic
17m         Normal   Scheduled           pod/petclinic-app-749c6798fd-nwb5s    Successfully assigned dev/petclinic-app-749c6798fd-nwb5s to node01
17m         Normal   Pulling             pod/petclinic-app-749c6798fd-nwb5s    Pulling image "subbu7677/petclinic-spring-app:v1"
17m         Normal   Pulled              pod/petclinic-app-749c6798fd-nwb5s    Successfully pulled image "subbu7677/petclinic-spring-app:v1" in 10.048s (10.048s including waiting). Image size: 214461451 bytes.
17m         Normal   Created             pod/petclinic-app-749c6798fd-nwb5s    Created container petclinic
17m         Normal   Started             pod/petclinic-app-749c6798fd-nwb5s    Started container petclinic
17m         Normal   SuccessfulCreate    replicaset/petclinic-app-749c6798fd   Created pod: petclinic-app-749c6798fd-nwb5s
17m         Normal   SuccessfulCreate    replicaset/petclinic-app-749c6798fd   Created pod: petclinic-app-749c6798fd-lrnsl
17m         Normal   ScalingReplicaSet   deployment/petclinic-app              Scaled up replica set petclinic-app-749c6798fd to 2
What to Look For:
- Look for any errors or warnings that could indicate network issues, scheduling problems, or other errors.
10. Automate Health Checks with Probes (Optional):
Ensure your pods stay healthy by configuring liveness and readiness probes.
Example Configuration in a Deployment YAML:
livenessProbe:
  httpGet:
    path: /actuator/health
    port: 8080
  initialDelaySeconds: 30
  periodSeconds: 10

readinessProbe:
  httpGet:
    path: /actuator/health
    port: 8080
  initialDelaySeconds: 30
  periodSeconds: 10
"Live as if you were to die tomorrow. Learn as if you were to live forever."
— Mahatma GandhiThank you, Happy Learning!
Subscribe to my newsletter
Read articles from Subbu Tech Tutorials directly inside your inbox. Subscribe to the newsletter, and don't miss out.
Written by
