C++ Installation
 Dilip Patel
This article provides a step-by-step guide to installing and setting up a C++ development environment on Windows and macOS using Visual Studio Code. It covers downloading and installing a C++ compiler, setting up the file path, installing Visual Studio Code, and configuring it for C++ development.
When developing C++ projects, you have several IDEs to choose from. One popular choice is Visual Studio Code, which is widely used for C++ development. In this tutorial, we’ll walk through the steps to set up a C++ project using Visual Studio Code and configure the file path.
Step 1: Download and Install a C++ Compiler
For Windows and macOS
C++ is a compiled language meaning your program's source code must be translated (compiled) before it can be run on your computer. The C/C++ extension doesn't include a C++ compiler or debugger, since VS Code as an editor relies on command-line tools for the development workflow. You need to install these tools or use the tools already installed on your computer.
Check if you have a compiler installed
Note: There may already be a C++ compiler and debugger provided by your academic or work development environment. Check with your instructors or colleagues for guidance on installing the recommended C++ toolset (compiler, debugger, project system, linter).
Common compilers that already come preinstalled on some platforms are the GNU Compiler Collection (GCC) on Linux and the Clang tools with Xcode on macOS.
To check if you already have them installed:
Open a new VS Code terminal window using (Ctrl+Shift+`)
Use the following command to check for the GCC compiler g++:
g++ --version
- Or this command for the Clang compiler clang:
clang --version
The output should show you the compiler version and details. If neither are found, make sure your compiler executable is in your platform path (%PATH on Windows, $PATH on Linux and macOS) so that the C/C++ extension can find it. Otherwise, use the instructions in the section below to install a compiler.
Install a compiler
If you don't have a compiler installed, you can follow one of our installation tutorials:
Windows:
Go to the MSVC tutorial
Go to the MinGW tutorial
Linux:
- Go to the GCC tutorial
macOS:
- Go to the Clang tutorial
Example: Install MinGW-x64 on Windows
To understand the process, let's install Mingw-w64 via MSYS2. Mingw-w64 is a popular, free toolset on Windows. It provides up-to-date native builds of GCC, Mingw-w64, and other helpful C++ tools and libraries.
Download using this direct link to the MinGW installer.
Run the installer and follow the steps of the installation wizard. Note, MSYS2 requires 64 bit Windows 8.1 or newer.
In the wizard, choose your desired Installation Folder. Record this directory for later. In most cases, the recommended directory is acceptable. The same applies when you get to setting the start menu shortcuts step. When complete, ensure the Run MSYS2 now box is checked and select Finish. A MSYS2 terminal window will then automatically open.
In this terminal, install the MinGW-w64 toolchain by running the following command:
pacman -S --needed base-devel mingw-w64-ucrt-x86_64-toolchain
Accept the default number of packages in the toolchain group by pressing Enter.
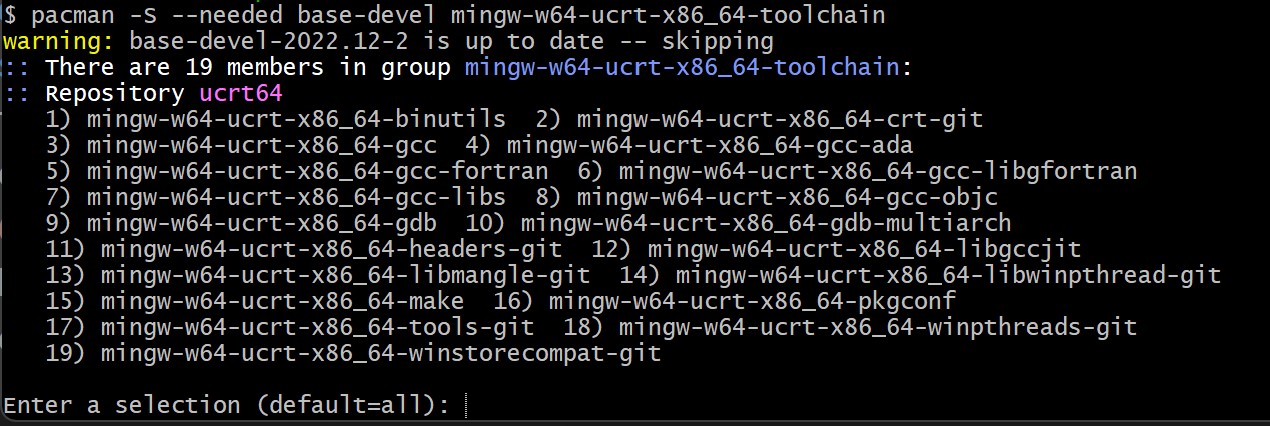
Enter Y when prompted whether to proceed with the installation.
Add the path of your MinGW-w64 bin folder to the Windows PATH environment variable by using the following steps:
In the Windows search bar, type Settings to open your Windows Settings.
Search for Edit environment variables for your account.
In your User variables, select the Path variable and then select Edit.
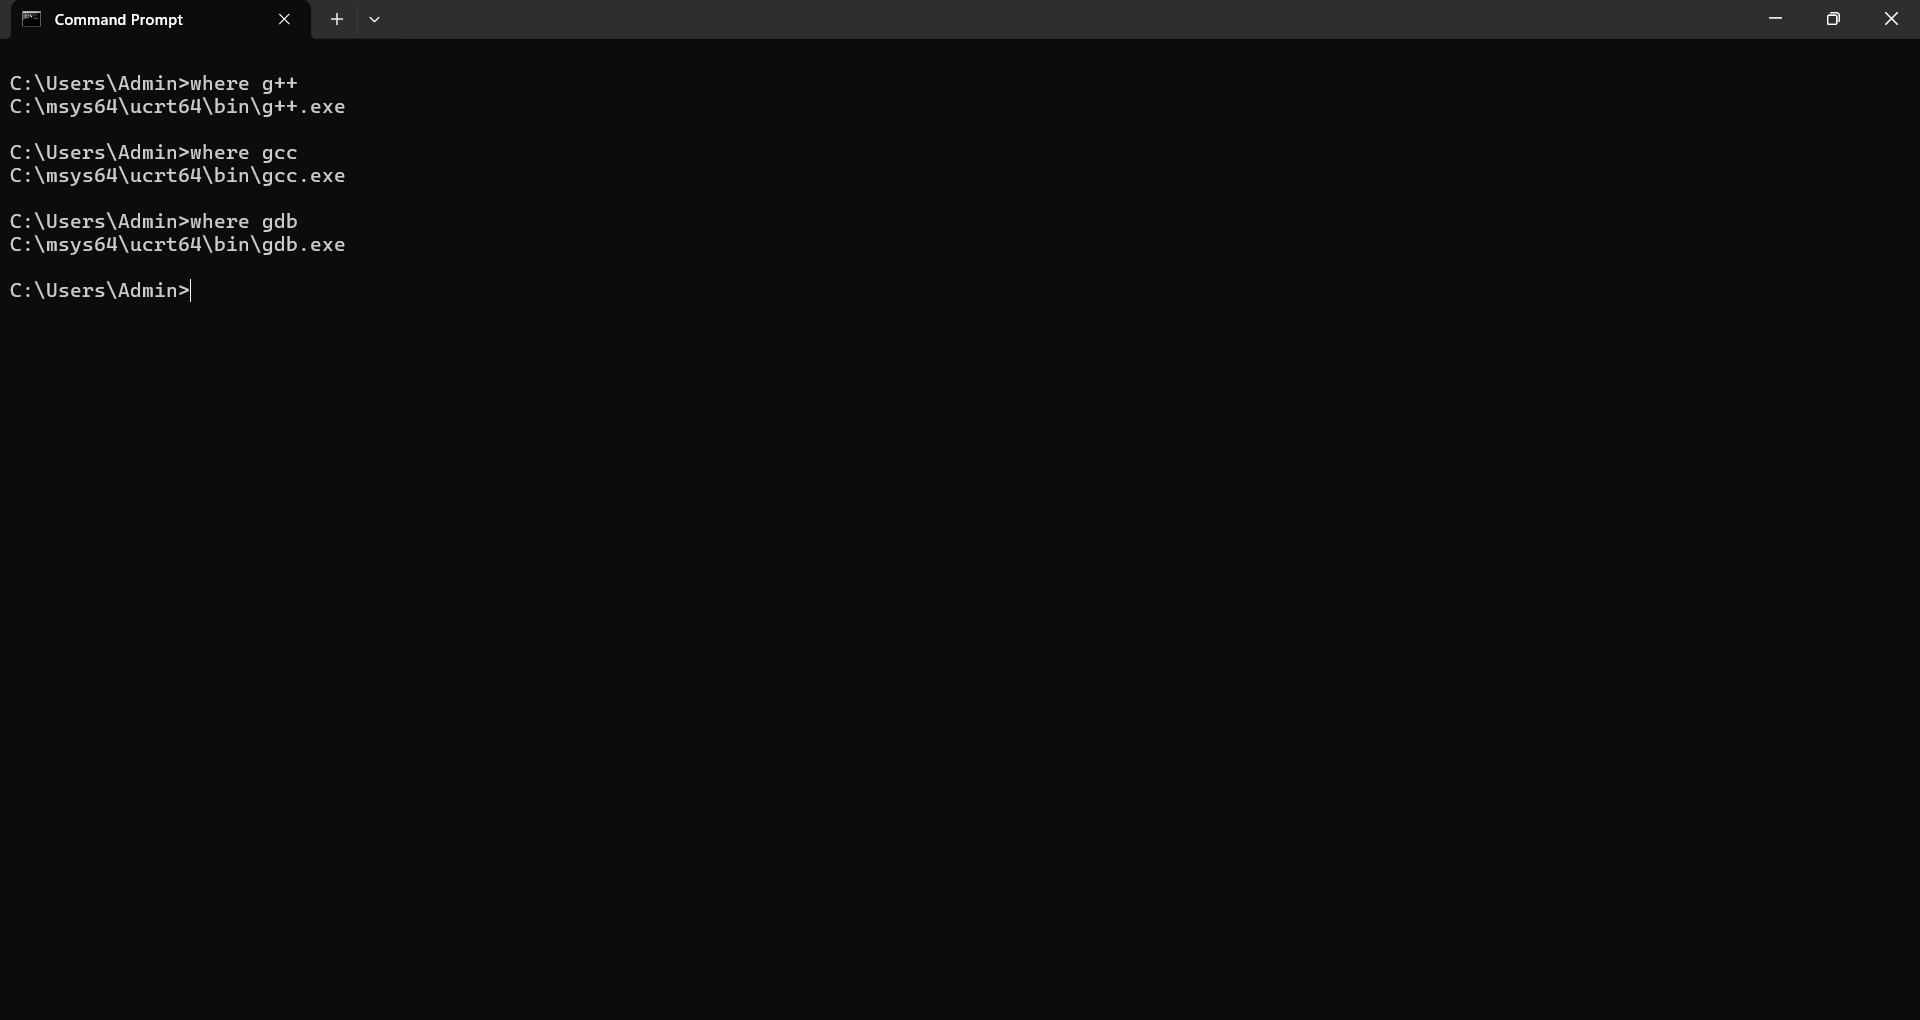
Select New and add the MinGW-w64 destination folder you recorded during the installation process to the list. If you selected the default installation steps, the path is: C:\msys64\ucrt64\bin.
Select OK, and then select OK again in the Environment Variables window to update the PATH environment variable. You have to reopen any console windows for the updated PATH environment variable to be available.
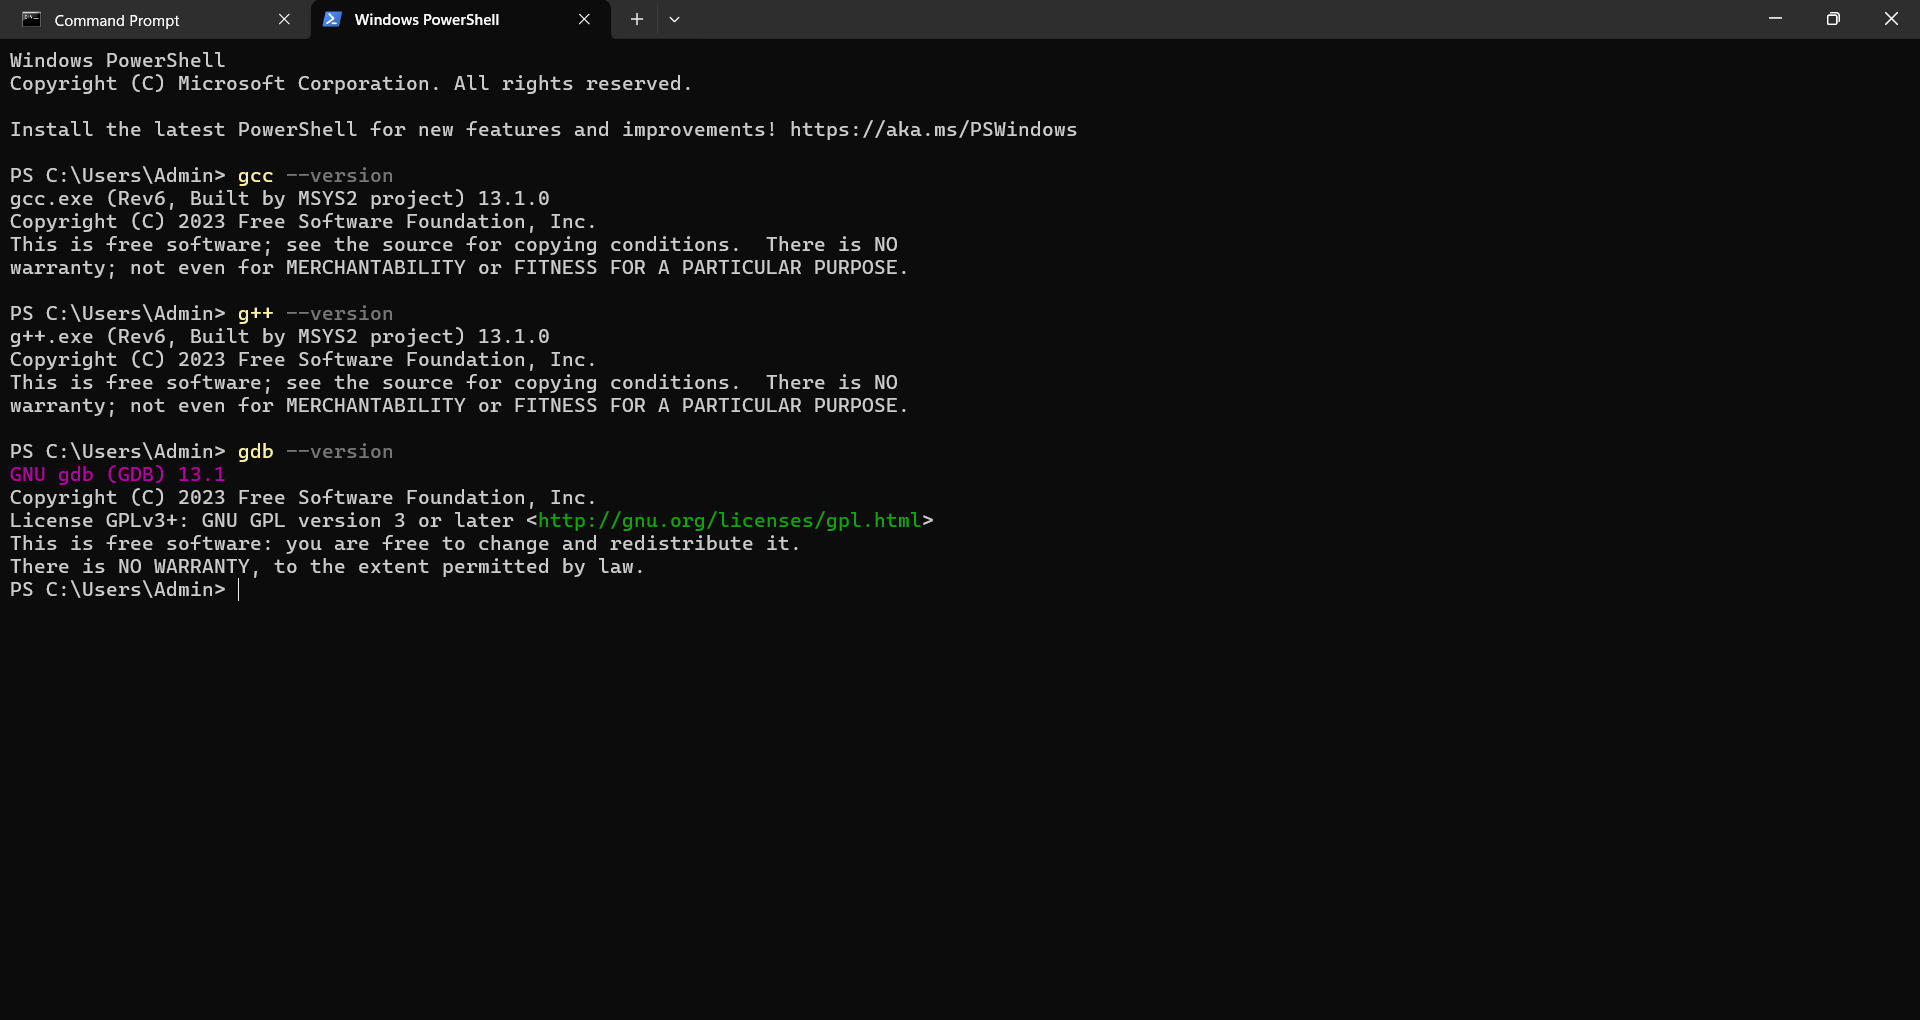
Check that your MinGW-w64 tools are correctly installed and available, open a new Command Prompt and type:
gcc --version
g++ --version
gdb --version
You should see output that states which versions of GCC, g++ and GDB you have installed. If this is not the case, make sure your PATH entry matches the Mingw-w64 binary location where the compiler tools are located or reference the troubleshooting section.
Step 2: Set Up File Path for C++ Compiler
To run your C++ project smoothly, you need to set up the file path correctly.
For Windows
Locate the C++ Compiler: The C++ compiler is usually located in the bin directory of your MinGW installation. For example, it might be C:\MinGW\bin.
Set the Path Environment Variable:
Open the Start Menu and search for "Environment Variables".
Click on "Edit the system environment variables".
In the System Properties window, click on the "Environment Variables" button.
In the Environment Variables window, find the "Path" variable in the "System variables" section and click "Edit".
Click "New" and add the path to the C++ compiler (e.g., C:\MinGW\bin).
Click "OK" to save the changes.
Verify the Path Setup: Open Command Prompt and run the following command:
g++ --version
You should see the version of the C++ compiler printed in the terminal.
For macOS
Locate the C++ Compiler: The C++ compiler is usually located in the bin directory of your GCC installation. For example, it might be /usr/local/bin.
Set the Path Environment Variable:
Open your terminal.
Edit your shell profile file (e.g., .bash_profile, .zshrc, or .bashrc) using a text editor. For example:
nano ~/.zshrc
- Add the following line to set the path to the C++ compiler:
export PATH=$PATH:/usr/local/bin
- Save the file and reload the shell profile:
source ~/.zshrc
Verify the Path Setup: To verify that the path is set up correctly, run the following command in your terminal:
g++ --version
You should see the version of the C++ compiler printed in the terminal.
Step 3: Download and Install a Code Editor
There are many code editors available for building C++ applications. Some popular ones include Visual Studio Code, CLion, and Code::Blocks. In this article, we'll use Visual Studio Code.
For Windows and macOS
Search for Visual Studio Code download:
Open your browser: Launch your preferred web browser (e.g., Chrome, Firefox, Edge, Safari).
Search for "Visual Studio Code download": In the search bar of your browser, type "Visual Studio Code download" and press Enter.
Visit the Visual Studio Code Website:
- Click on the link to download Visual Studio Code: In the search results, look for the official Visual Studio Code website, which is usually listed as "Download Visual Studio Code - Mac, Linux, Windows". Click on this link to navigate to the download page.
Download the Appropriate Version:
Select the version that matches your operating system: On the Visual Studio Code download page, you will see options for different operating systems (Windows, macOS, and Linux). Choose the version that corresponds to your operating system.
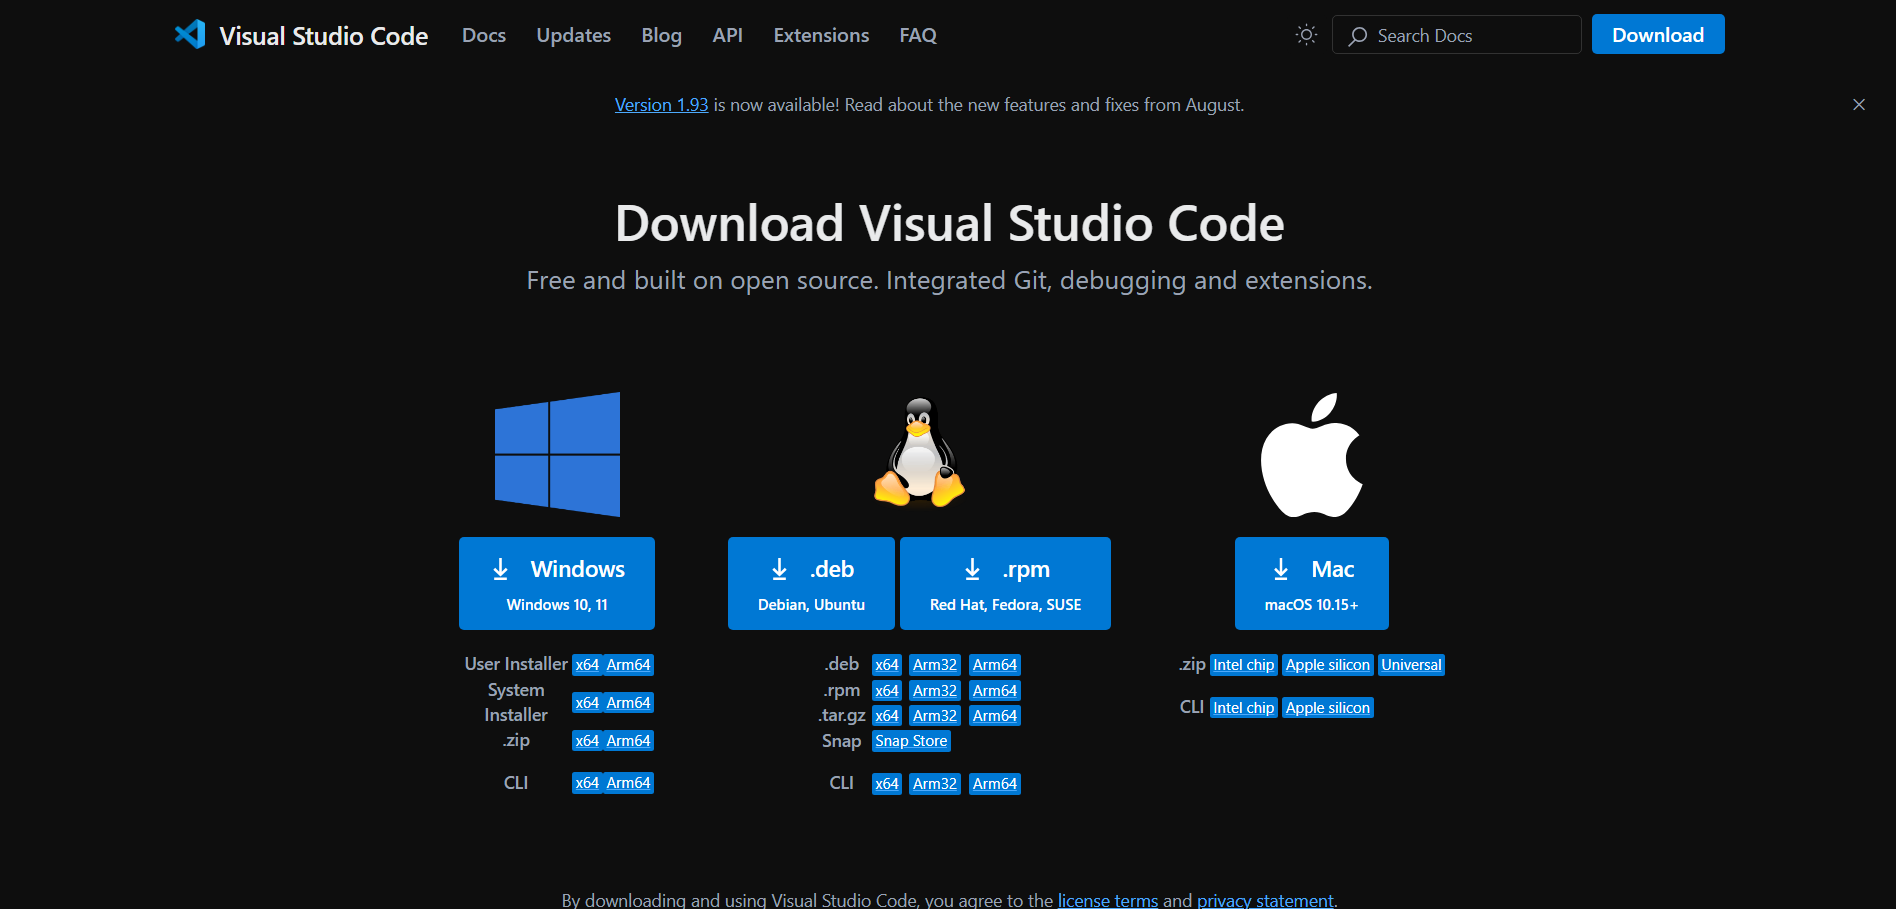
Click on the download link: Click the download button for your operating system to start the download process.
Install Visual Studio Code:
For Windows:
Run the installer: Once the download is complete, locate the downloaded file (usually in your Downloads folder) and double-click on it to run the installer.
Follow the prompts: The installer will guide you through the installation process. Follow the on-screen instructions, which typically include agreeing to the license terms, choosing the installation location, and selecting additional tasks (such as creating a desktop icon).
Complete the installation: Click the "Install" button to begin the installation. Once the installation is complete, you can choose to launch Visual Studio Code immediately by checking the appropriate box and clicking "Finish".
For macOS:
Open the downloaded file: Once the download is complete, locate the downloaded .dmg file (usually in your Downloads folder) and double-click on it to open it.
Drag and drop the application: A new window will open showing the Visual Studio Code application icon and a shortcut to the Applications folder. Drag the Visual Studio Code icon and drop it into the Applications folder.
Complete the installation: Once the application is copied to the Applications folder, you can close the window and eject the .dmg file.
Step 4: Configure Visual Studio Code for C++
To build and run C++ applications in Visual Studio Code, you need to install the C++ extension and configure the environment properly. Here are the detailed steps:
Open Visual Studio Code
- Launch Visual Studio Code: Open Visual Studio Code on your computer.
Go to the Extensions View
- Open the Extensions View: Click on the Extensions icon in the Activity Bar on the side of the window. This icon looks like a square with four squares inside it.
Search for C++ Extension
Search for the C++ Extension: In the Extensions view, type "C++" in the search bar at the top.
Select the C/C++ Extension by Microsoft: From the search results, find the C/C++ extension provided by Microsoft and click on it.
Install the C++ Extension
- Click the Install Button: On the C/C++ extension page, click the "Install" button to add the extension to Visual Studio Code.
Configure the C++ Environment
Create a New File: Click on "File" in the top menu, then select "New File".
Save the File with a .cpp Extension: Save the new file with a
.cppextension by clicking on "File" > "Save As" and naming it something likemain.cpp.Write a Simple C++ Program: Write a simple C++ program in the file. For example:
  #include <iostream>

  int main() {
      std::cout << "Hello, World!" << std::endl;
      return 0;
  }
Save the File: Save the file by clicking "File" > "Save" or pressing
Ctrl+S.
Build the Program
Press Ctrl+Shift+B: Press
Ctrl+Shift+Bto build the program. If this is your first time building a C++ program in Visual Studio Code, you may need to configure the build tasks.Configure Build Tasks: If prompted, select "C++: g++ build active file" or a similar option to configure the build tasks. This will create a
tasks.jsonfile in the.vscodedirectory with the necessary build configurations.
Run Your C++ Program
Press Ctrl+Shift+P: Press
Ctrl+Shift+Pto open the Command Palette.Select "Run Task": Type "Run Task" in the Command Palette and select it.
Choose the Build Task: Select the build task you configured earlier (e.g., "C++: g++ build active file").
Run the Program: After the build is complete, you can run the program by opening a terminal in Visual Studio Code and executing the compiled file. For example, if your compiled file is named
main, you can run it by typing./mainin the terminal.
Summary
Step 1: Download and Install a C++ Compiler
🔍 Check if you have a compiler installed:
Open a new VS Code terminal window using (Ctrl+Shift+`).
Use the command
g++ --versionfor GCC orclang --versionfor Clang.
🔧 Install a compiler if needed:
Windows: Follow the MSVC or MinGW tutorial.
Linux: Follow the GCC tutorial.
macOS: Follow the Clang tutorial.
Example: Install MinGW-x64 on Windows
Download the MinGW installer from this link.
Run the installer and follow the steps.
Install the MinGW-w64 toolchain in the MSYS2 terminal.
Add the MinGW-w64 bin folder to the Windows PATH environment variable.
Verify the installation by checking the versions of GCC, g++, and GDB.
Step 2: Set Up File Path for C++ Compiler
For Windows:
Locate the C++ compiler (e.g., C:\MinGW\bin).
Set the Path Environment Variable via the System Properties.
For macOS:
Locate the C++ compiler (e.g., /usr/local/bin).
Edit your shell profile file to set the path.
Step 3: Download and Install Visual Studio Code
Search for "Visual Studio Code download" in your browser.
Visit the Visual Studio Code website.
Download and install the appropriate version for your OS.
Step 4: Configure Visual Studio Code for C++
Open Visual Studio Code.
Go to the Extensions view and search for the C++ extension.
Install the C/C++ extension by Microsoft.
Create a new file with a
.cppextension and write a simple C++ program.Build and run your program using the configured build tasks.
Conclusion
You have now installed all the necessary tools to build C++ applications on both Windows and macOS. The C++ tutorial page lists down all the important topics you can go through to get a deeper understanding of the language basics and advanced concepts.
Subscribe to my newsletter
Read articles from Dilip Patel directly inside your inbox. Subscribe to the newsletter, and don't miss out.
Written by
Dilip Patel
Dilip Patel
Software Developer