C++ Hello World Program
 Dilip Patel
In this C++ tutorial, you're going to learn how to write and execute your first C++ program. Let's get started with Visual Studio Code (VS Code). When developing C++ projects, VS Code is a popular choice due to its lightweight nature and extensive extension support. In this tutorial, we’ll walk through the steps to set up a C++ project using VS Code.
In addition to setting up a C++ project in VS Code, there’s another convenient way to quickly run C++ code: online compilers. These platforms allow you to write and execute C++ snippets without any local setup.
Prerequisites
Before we begin, ensure that you have Visual Studio Code installed on your computer. If you haven’t already, download the latest version from here and follow the installation instructions. Additionally, you need to have a C++ compiler installed, such as GCC for Windows, macOS, or Linux. If you are using Windows, you can install GCC by downloading and installing MinGW. For macOS, you can use Homebrew to install GCC by running brew install gcc in the terminal. On Linux, you can install GCC using your distribution's package manager, for example, sudo apt-get install g++ on Debian-based systems.
Install C++ Extension in VS Code
Open Visual Studio Code.
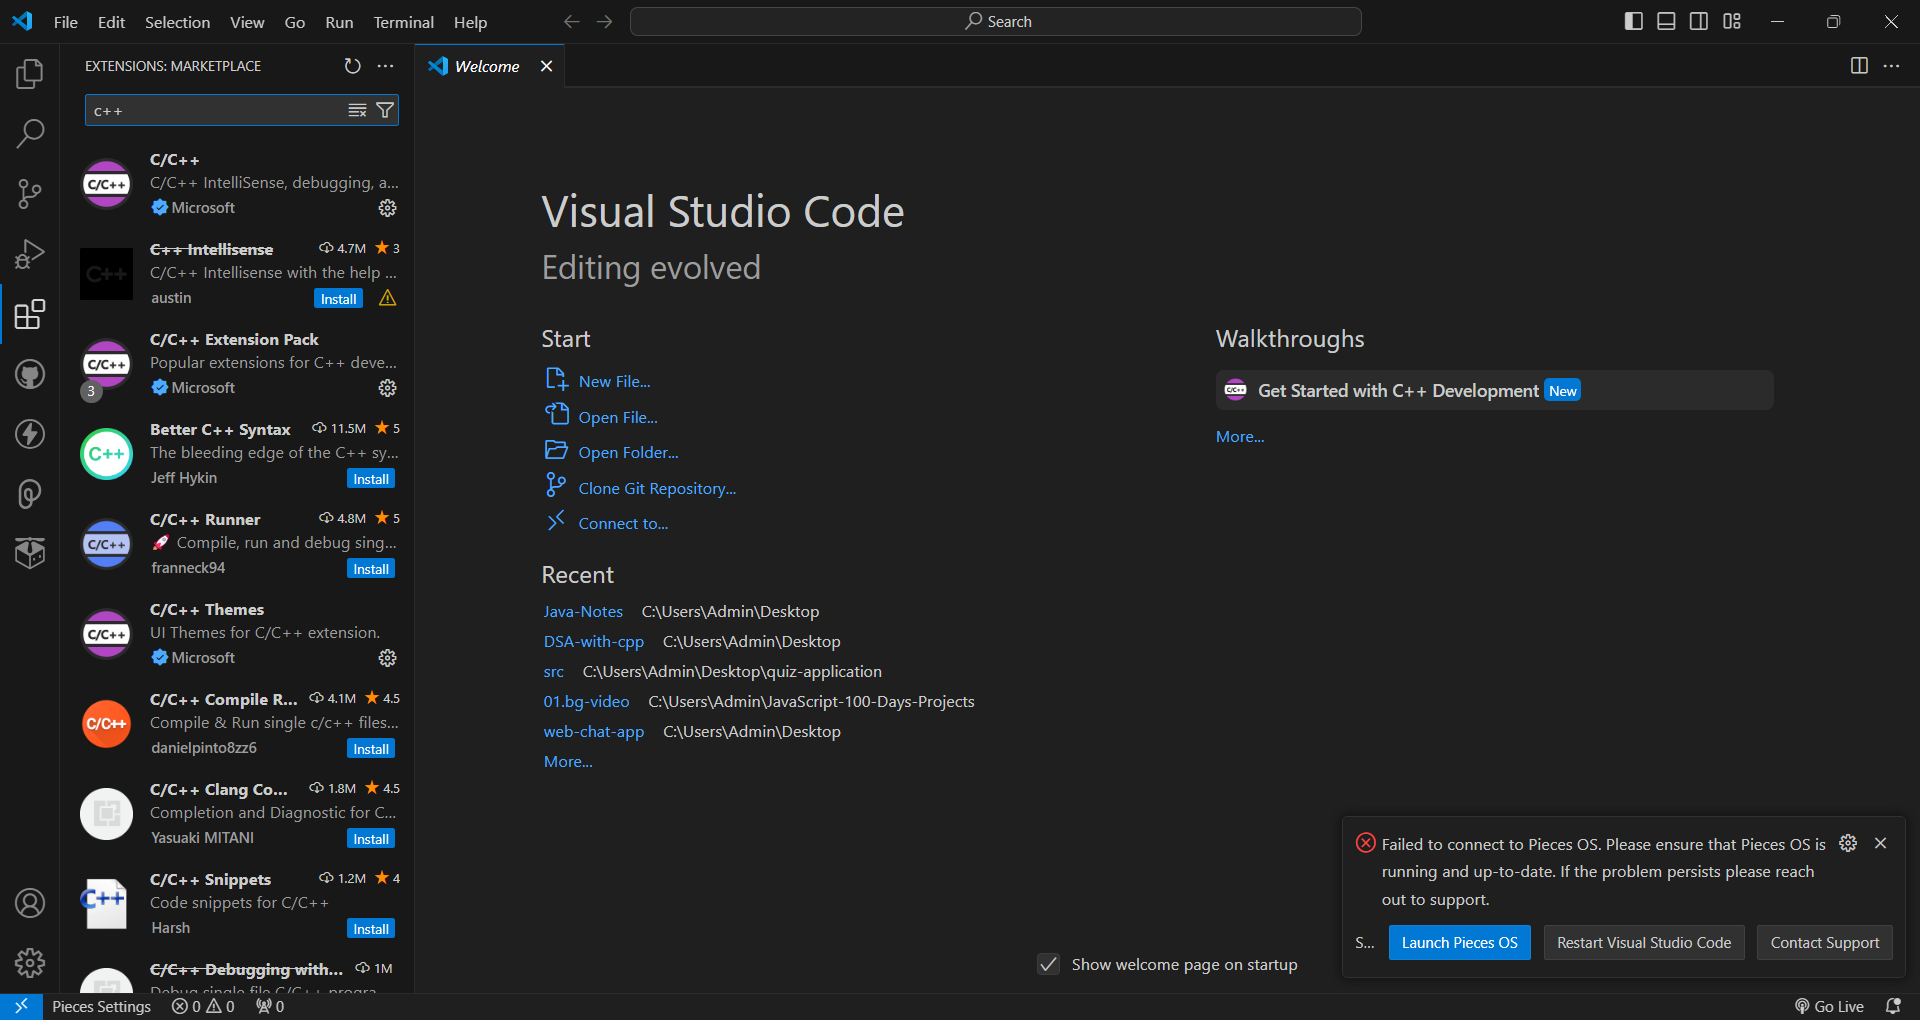
Go to the Extensions view by clicking on the Extensions icon in the Activity Bar on the side of the window or by pressing
Ctrl+Shift+X.In the search box, type "C++" and install the "C/C++" extension by Microsoft.

Create a New C++ Project
Open Visual Studio Code and click on “File” > “Open Folder...” to create or open a folder for your project.
Once the folder is open, create a new file by clicking on “File” > “New File” and name it
main.cpp.
Write the Main Method in the C++ File
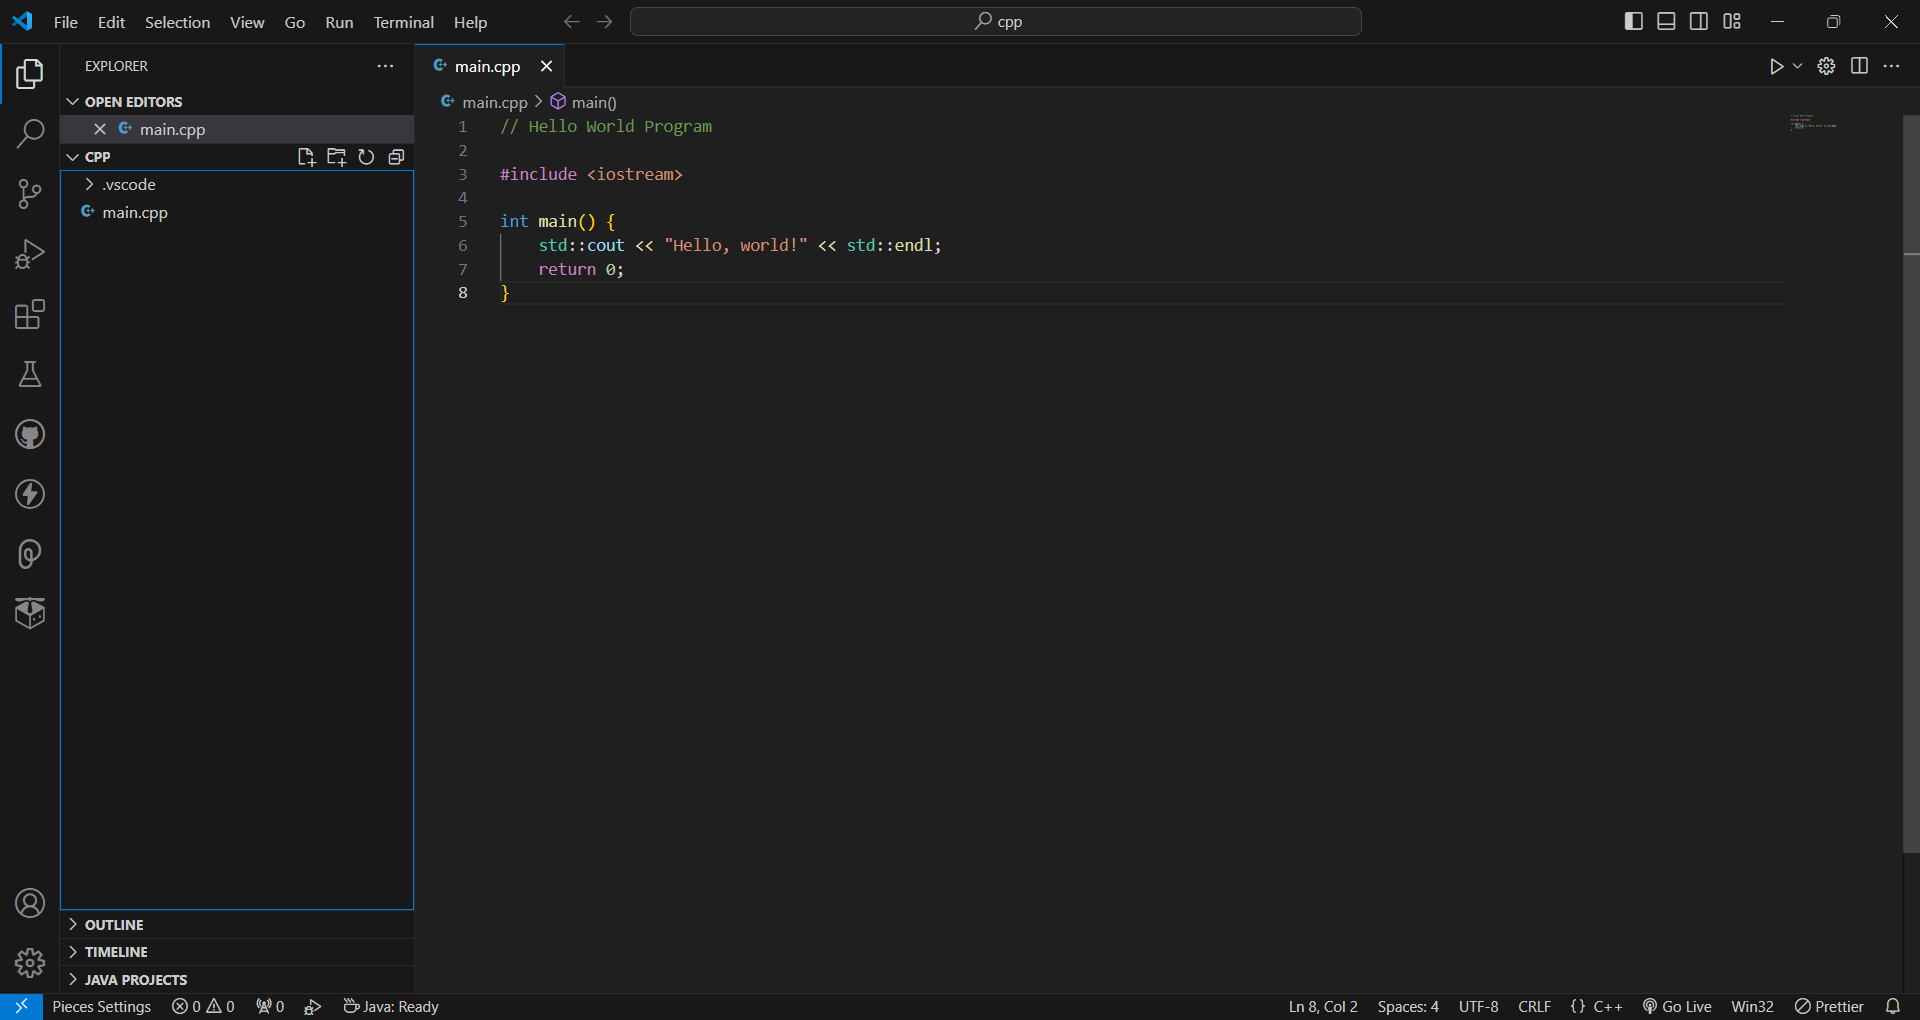
Inside the newly created main.cpp file, write your main method:
// Hello World Program

#include <iostream>

int main() {
    std::cout << "Hello, world!" << std::endl;
    return 0;
}

Configure the Build Task
Go to “Terminal” > “Configure Default Build Task...” and select “C/C++: g++ build active file”.
This will create a
tasks.jsonfile in the.vscodefolder with the necessary build configuration.
Build and Run the Project
To build the project, press
Ctrl+Shift+B. This will compile themain.cppfile.To run the compiled program, open a new terminal in VS Code by going to “Terminal” > “New Terminal”.
In the terminal, type
./main(or.\main.exeon Windows) to execute the program.You’ll see the “Hello, world!” message printed to the output.
Conclusion
Congratulations! You've successfully written and executed your first C++ program using Visual Studio Code. This simple "Hello, world!" program is a great starting point for learning C++. As you progress, you'll learn more about C++'s syntax, object-oriented programming features, and how to build more complex applications. In the next tutorial, we’ll explore basic C++ programming concepts. The C++ tutorial page lists down all the important topics you can go through to get a deeper understanding of the language basics and advanced concepts.
Subscribe to my newsletter
Read articles from Dilip Patel directly inside your inbox. Subscribe to the newsletter, and don't miss out.
Written by
Dilip Patel
Dilip Patel
Software Developer