Jenkins Pipeline for SonarQube Quality Gate Checks
 Alla Yasheela
Table of contents
- Step 1: Prerequisites – Jenkins and SonarQube Integration
- Step 2: Install Required Plugins on Jenkins
- Step 3: Configure SonarQube in Jenkins
- Step 4: Setup Jenkins Pipeline for SonarQube Quality Gate Checks
- Step 5: Write Jenkinsfile for SonarQube Pipeline
- Step 6: Add SonarQube Token as Jenkins Credentials
- Step 7: Configure Maven in Jenkins
- Step 9: Running the Pipeline
- Step 10: Monitor SonarQube Results
- Step 11: Automate Docker Permissions
- Conclusion
Hey everyone! In this blog post, I'll show you
how to create a Jenkins pipeline that integrates with SonarQube for automated code quality checks.
Step 1: Prerequisites – Jenkins and SonarQube Integration
Before we get started with the pipeline, make sure:
Jenkins is installed and running.
SonarQube is installed and configured (if not, follow my previous blog on SonarQube installation).
Docker and Java are installed on both Jenkins and SonarQube VMs.
Make sure both VMs can communicate with each other over the network.


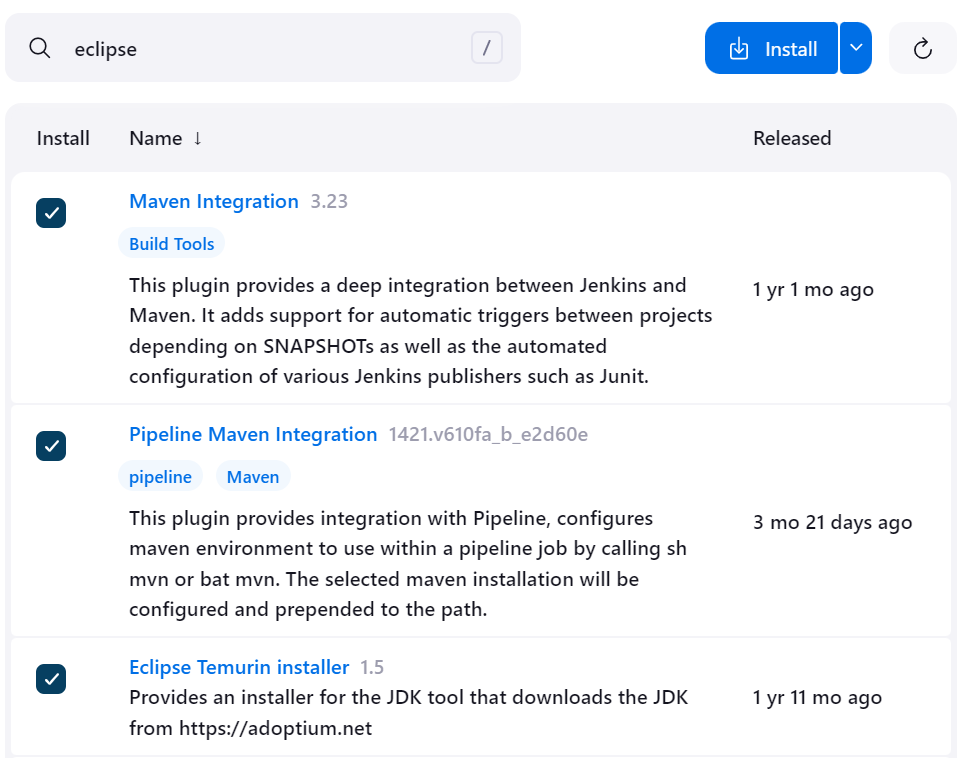
Step 2: Install Required Plugins on Jenkins
To use SonarQube with Jenkins, we need the following Jenkins plugins installed:
SonarQube Scanner: For scanning the code.
Pipeline Maven Integration: If your project uses Maven, this is key.
Quality Gates Plugin: To enforce quality gates from SonarQube in Jenkins.
Docker Pipeline: For Docker-based projects (like ours for SonarQube).
Go to Manage Jenkins > Manage Plugins, and install these plugins.
Step 3: Configure SonarQube in Jenkins
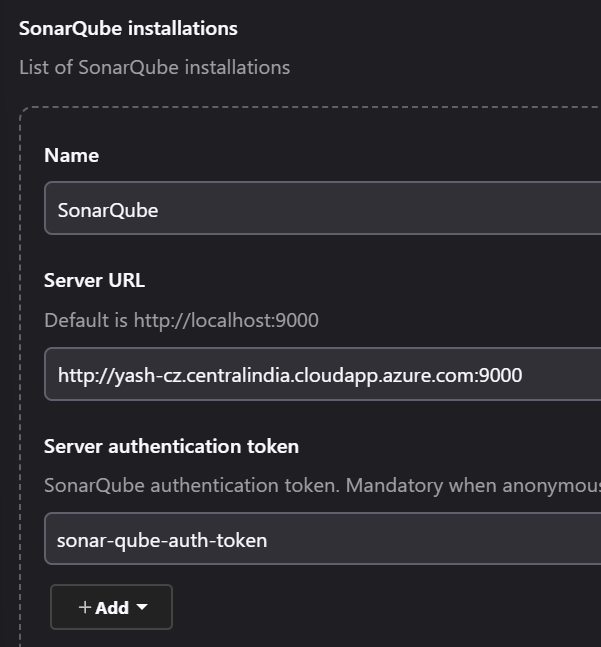
Add SonarQube to Jenkins:
Go to Manage Jenkins > Configure System.
Scroll down to SonarQube Servers.
Click Add SonarQube and configure it with:
Name:
SonarQube-ServerServer URL:
http://<your_sonarqube_vm_ip>:9000Authentication Token: Add the token you created in SonarQube (
Administration > Security > Users > Token).
Save.
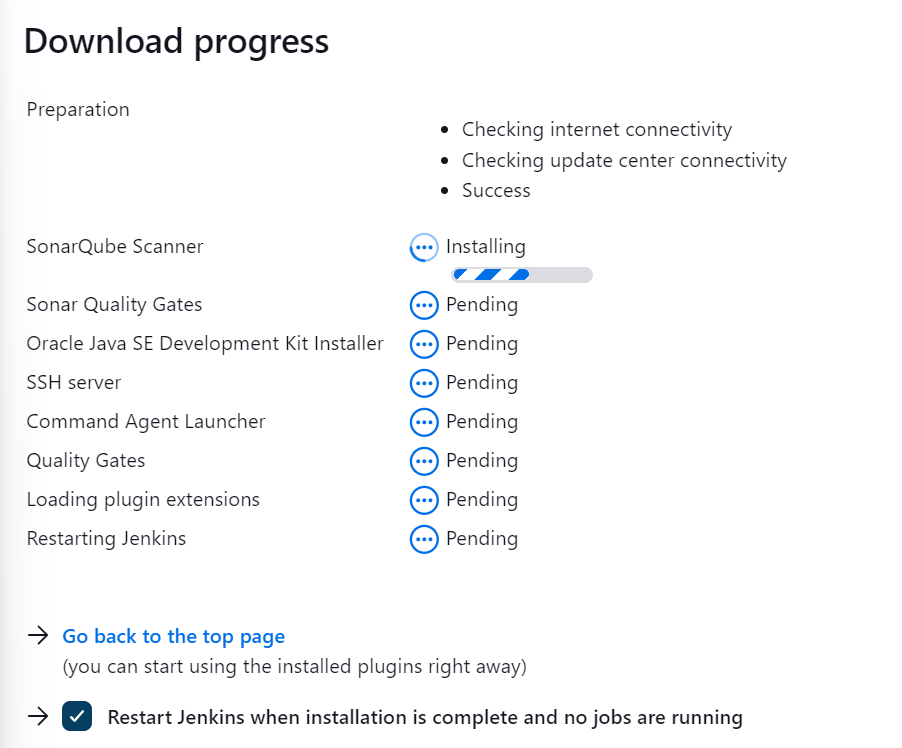
Set Global Tools for SonarQube:
Go to Manage Jenkins > Global Tool Configuration.
Scroll down to SonarQube Scanner.
Add SonarQube Scanner and specify the latest version.
Step 4: Setup Jenkins Pipeline for SonarQube Quality Gate Checks
Create a New Pipeline Job:
In Jenkins, click New Item and select Pipeline.
Name it and select Pipeline script from SCM if you're storing your pipeline in Git, or just Pipeline script if you want to paste it directly.
Step 5: Write Jenkinsfile for SonarQube Pipeline
Here's an example Jenkinsfile for SonarQube integration. You can either add it to your Git repo or paste it directly into the pipeline.
pipeline {
    agent any

    tools {
        maven 'Maven3' // Make sure you configure Maven in Jenkins
        jdk 'Java17' // Java version Jenkins will use
    }

    environment {
        SONARQUBE_SCANNER_HOME = tool name: 'SonarQube Scanner', type: 'hudson.plugins.sonar.SonarRunnerInstallation'
        SONAR_HOST_URL = 'http://<your_sonarqube_vm_ip>:9000'
        SONAR_TOKEN = credentials('sonar-token') // Store the token as Jenkins credentials
    }

    stages {
        stage('Checkout Code') {
            steps {
                git url: 'https://github.com/<your-repo>.git', branch: 'main'
            }
        }

        stage('Compile Code') {
            steps {
                script {
                    sh 'mvn clean compile'
                }
            }
        }

        stage('SonarQube Analysis') {
            steps {
                withSonarQubeEnv('SonarQube-Server') {
                    sh '''
                    mvn sonar:sonar \
                    -Dsonar.projectKey=my-app \
                    -Dsonar.host.url=$SONAR_HOST_URL \
                    -Dsonar.login=$SONAR_TOKEN
                    '''
                }
            }
        }

        stage('Quality Gate') {
            steps {
                waitForQualityGate abortPipeline: true
            }
        }
    }

    post {
        always {
            echo 'Pipeline finished.'
        }
        success {
            echo 'SonarQube Quality Gate passed!'
        }
        failure {
            echo 'Pipeline failed. Check SonarQube quality gate.'
        }
    }
}
Step 6: Add SonarQube Token as Jenkins Credentials
In Jenkins, go to Manage Jenkins > Manage Credentials > Global.
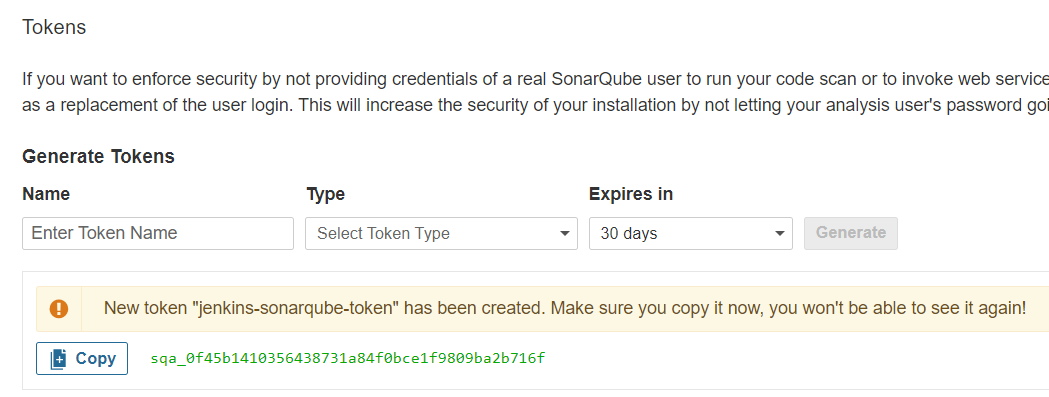
Add a new Secret Text credential with the token you generated in SonarQube.
ID:
sonar-tokenor whatever Id you preferSecret: Paste your SonarQube token.
Step 7: Configure Maven in Jenkins
Go to Manage Jenkins > Global Tool Configuration.
Scroll to Maven and add Maven3 as the tool to be used by the pipeline.
Step 9: Running the Pipeline
Once everything is configured:
Trigger the pipeline in Jenkins.
Jenkins will:
Check out the code from GitHub.
Compile the code using Maven.
Run SonarQube analysis to detect code smells, bugs, and vulnerabilities.
Check the Quality Gate, and if it fails, Jenkins will stop the pipeline and mark the build as failed.
Step 10: Monitor SonarQube Results
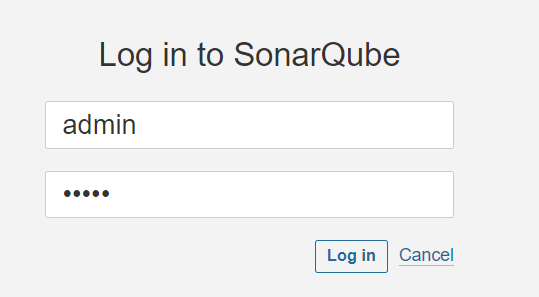
- After the pipeline runs, go to your SonarQube dashboard at
http://<your_sonarqube_vm_ip>:9000.
Step 11: Automate Docker Permissions
For SonarQube and Jenkins to interact with Docker, ensure Jenkins has permission to run Docker commands:
sudo usermod -aG docker jenkins
newgrp docker
This ensures Jenkins can run Docker containers during the pipeline execution.
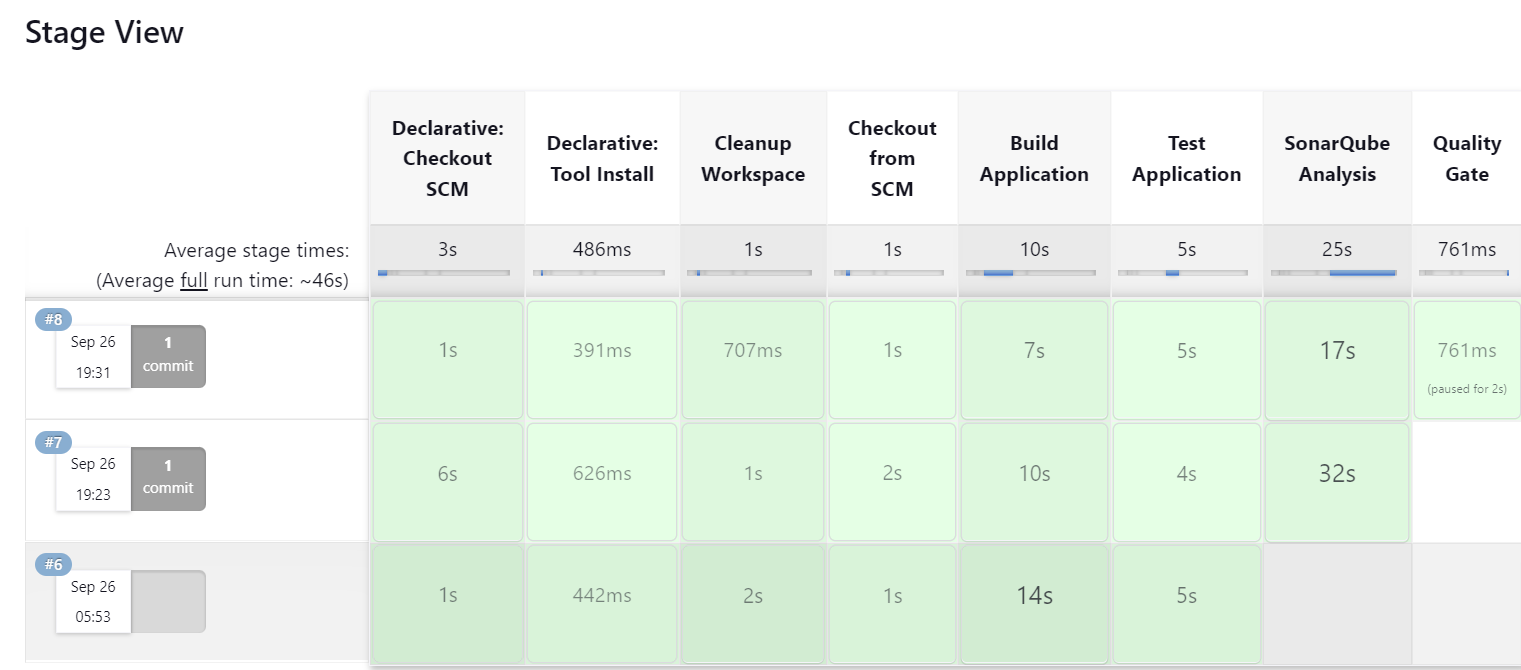
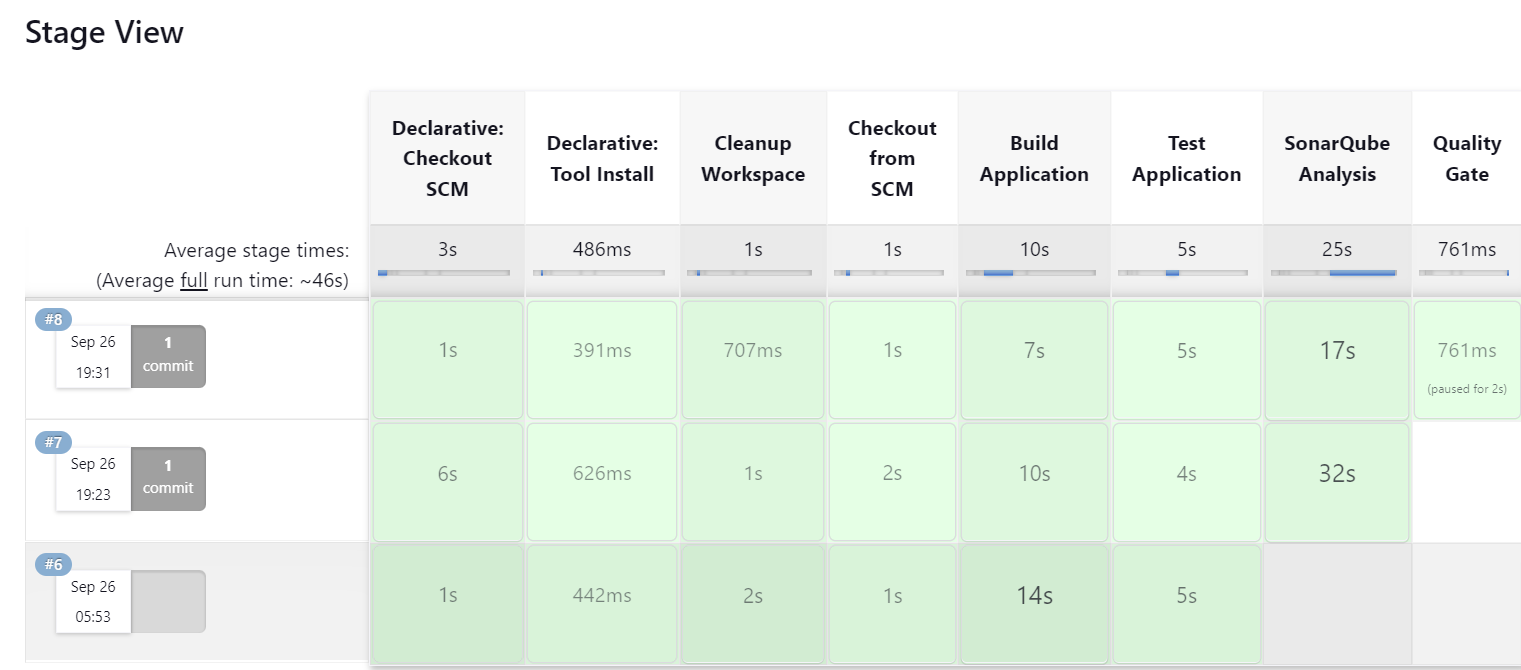
Once the build is Successful, you will see this
Conclusion
That’s it! You now have a fully functional Jenkins pipeline that integrates with SonarQube to automatically check code quality and enforce Quality Gates.
This setup not only ensures that your code is of high quality, but it also automates the process, making it much more efficient.

Stay tuned for more!
remember: clean code leads to secure, maintainable software.
Feel free to drop any questions or thoughts in the comments!
Happy DevOps'ing :)
Subscribe to my newsletter
Read articles from Alla Yasheela directly inside your inbox. Subscribe to the newsletter, and don't miss out.
Written by

Alla Yasheela
Alla Yasheela
I'm Yasheela, an undergraduate with a deep interest in DevOps, and cloud technologies. Currently working on exciting projects on all things DevOps. I’m passionate about simplifying complex concepts and sharing practical insights. Through my Hashnode blog, I document my learning journey, from building scalable applications to mastering cloud services, with the goal of empowering others to grow their tech skills. Let's Learn Together !!