Getting Started with Amazon Linux : Key Pair, Security groups Creation and Basic Commands
 Suresh Vadde
Introduction
Amazon Linux is a powerful and flexible operating system designed for cloud environments. It provides a stable, secure, and high-performance execution environment for applications running on Amazon EC2. In this blog, we’ll walk through the process of creating a key pair, setting up security groups, launching an instance, and exploring some basic Linux commands to help you get started with Amazon Linux.
1. Creating a Key Pair
Key pairs are crucial for securely accessing your EC2 instance. Here’s how to create one:
Open Git Bash: Launch the Git Bash terminal on your computer.
Generate the Key Pair: Use the following command to create a key pair. Replace
devopswith your desired file name for the key pair (without the file extension).ssh-keygen -f devopsYou will be prompted to specify the location to save the key. Since you already provided the
-foption, it will save to the filedevopsin your current directory.You may also be prompted to enter a passphrase for added security. You can choose to enter one or leave it empty by just pressing Enter.
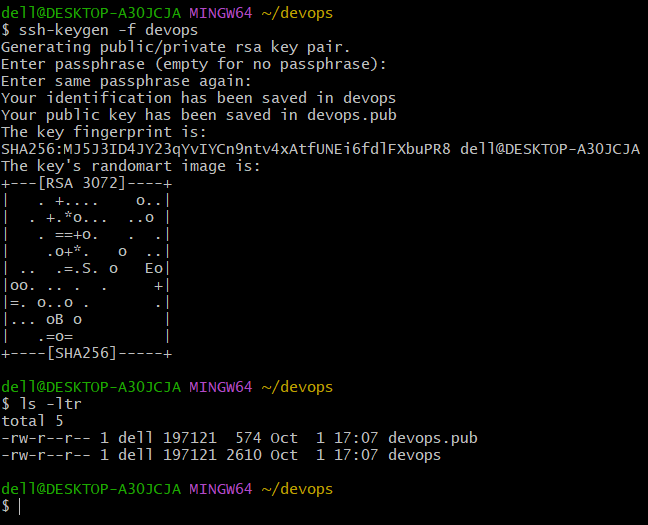
Key Pair Created:
This will generate two files:
devops: This is your private key. Keep it safe and never share it.devops.pub: This is your public key. You can share this with others or use it to set up access to your servers.
Importing a public key:
You can import it into AWS as follows:
Go to the EC2 Dashboard.
Click on Key Pairs under the Network & Security section.
Click on Import Key Pair.

Name your key pair appropriately (e.g.,
devops).Open your public key file (e.g.,
devops.pub) and copy its contents:
Paste the copied public key content into the provided text box in the AWS console.
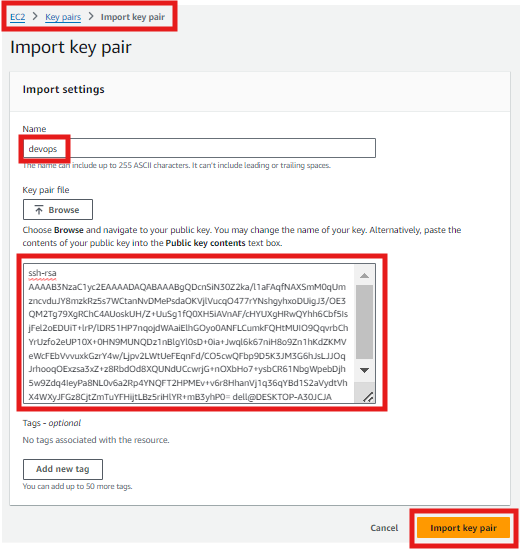
Click Import to add the key pair.

Now, you can use this imported public key when launching your EC2 instances.
2. Setting Up Security Groups
Security groups act as virtual firewalls that control the traffic to and from your instance. Here’s how to set one up:
In the EC2 Dashboard, go to Security Groups.
Click on Create Security Group.
Name your security group and add a description.
Under the Inbound rules tab:
Click Add Rule.
Choose SSH from the type dropdown to allow SSH access.
For Source, you can choose My IP to restrict access to your IP or select Anywhere for broader access (less secure).
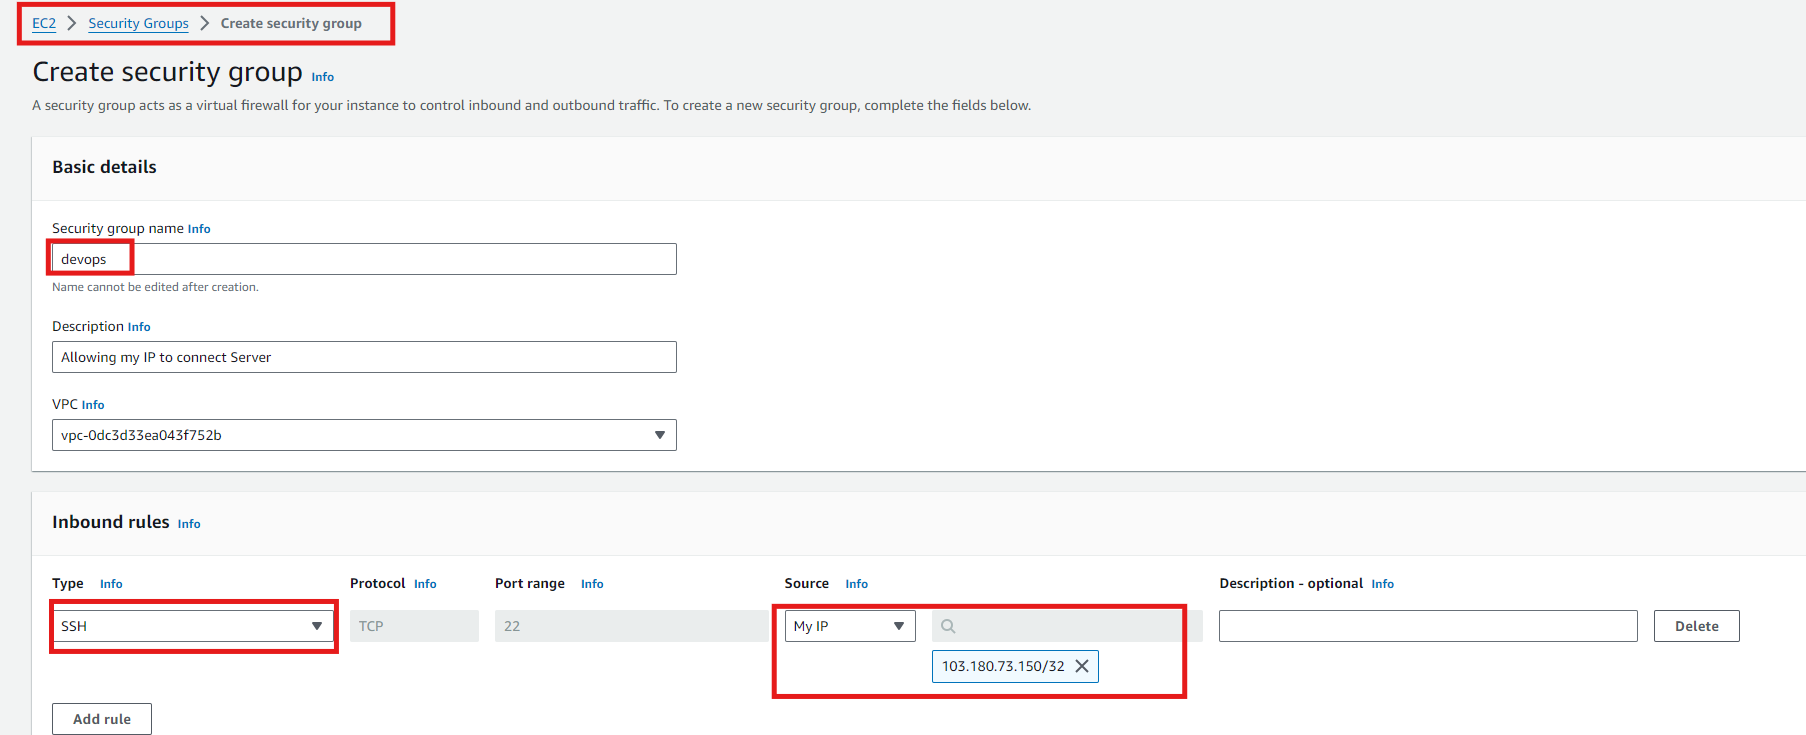
Click Create Security Group.
3. Launching an Amazon Linux Instance
Now that you have your key pair and security group set up, let’s launch an Amazon Linux 2 instance:
Log in to the AWS Management Console.
Navigate to the EC2 Dashboard.
Click on Launch Instance.
Search for Amazon Linux 2023 AMI and select it.

Choose an instance type (e.g., t2.micro for the free tier).
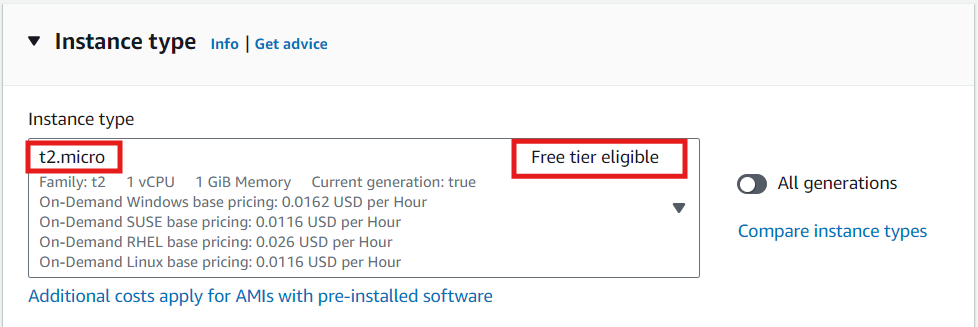
Choose above created key pair(e.g.,
devops).
Under Network settings, select the security group you just created.
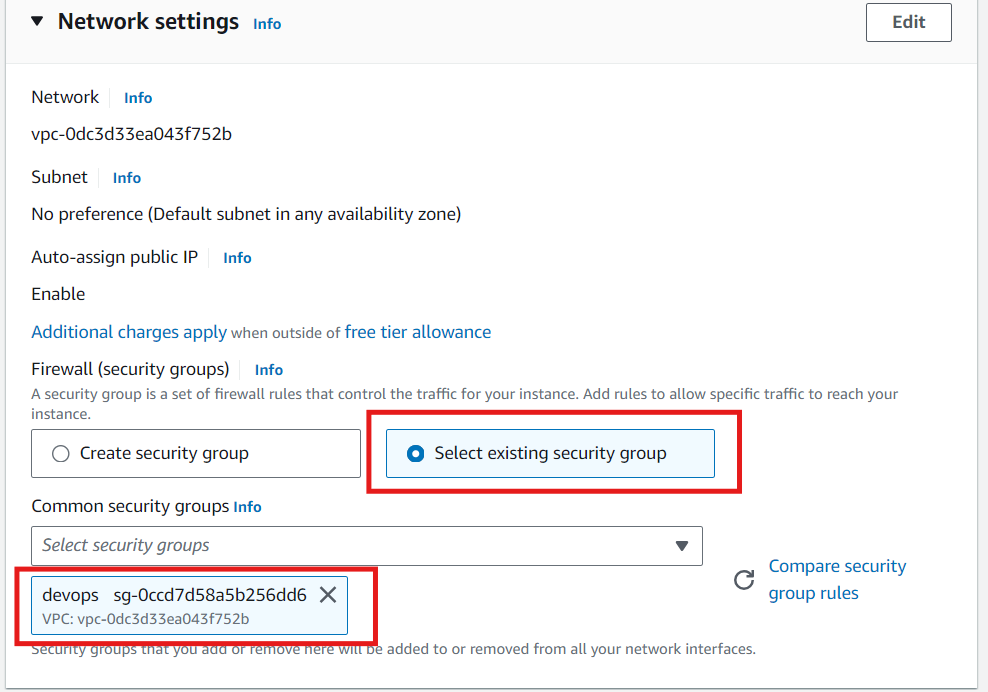
Configure instance details, storage, and tags as needed. check Summary and click on Launch Instance
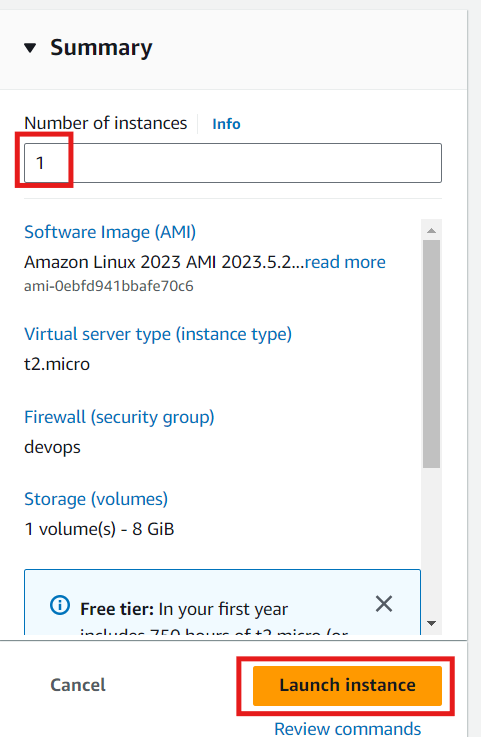
4. Connecting to Your Amazon Linux Instance
Once your instance is running, it’s time to connect:
In the EC2 Dashboard, select your instance and click on Connect.
Choose SSH Client(e.g.,
git bash) and use the below command to Connect to the server.
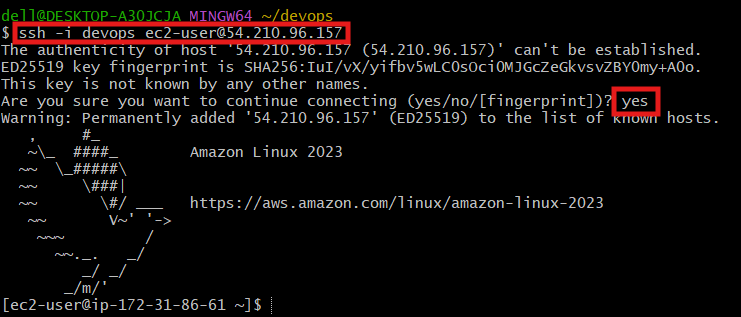
If everything is set up correctly, you’ll be connected to your Amazon Linux instance!
5. Basic Linux Commands
Once logged in, you can start exploring Linux. Here are some essential commands:
ls: List directory contents.cd: Change directories.mkdir: Create a new directory.touch: Create an empty file.cp: Copy files or directories.mv: Move or rename files or directories.rm: Remove files or directories.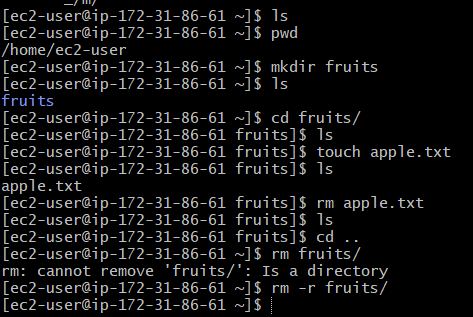
6. Terminating Your EC2 Instance
When you no longer need your EC2 instance, you can terminate it to stop incurring charges:
Navigate to the EC2 Dashboard.
Select the instance you wish to terminate.
Click on the Instance State dropdown menu.
Choose Terminate Instance.
Confirm the action when prompted.


Once terminated, your instance will be stopped and will not incur any further charges. Note that you will lose any data stored on the instance that is not backed up.
Conclusion
Getting started with Linux involves understanding key pairs, security groups, launching instances, and basic linux commands. With these foundational skills, you can confidently manage your instances in the cloud. As you continue your journey, explore more advanced Linux commands and AWS services to enhance your cloud computing experience.
Feel free to leave your comments or questions below, and happy cloud computing!
Subscribe to my newsletter
Read articles from Suresh Vadde directly inside your inbox. Subscribe to the newsletter, and don't miss out.
Written by
Suresh Vadde
Suresh Vadde
👋 Hi there! I’m a DevOps & AWS Cloud Enthusiast, passionate about leveraging the latest technologies to streamline development processes and enhance system reliability. 🌟 My journey in the world of DevOps has led me to explore a variety of tools and technologies, including AWS Cloud, Linux, Ansible, and Bash scripting. I’m particularly interested in CI/CD practices, containerization with Docker, and orchestration with Kubernetes. 🔧 I’ve gained hands-on experience with Terraform for infrastructure as code, Jenkins for continuous integration, SonarQube for code quality, and Nexus for artifact management. I’m excited about using these tools to build efficient, automated workflows. 🎓 Certifications: AWS Certified Solutions Architect – Associate AWS Certified Cloud Practitioner HashiCorp Certified: Terraform Associate (003) 🚀 I’m always eager to learn and share knowledge, so feel free to connect with me here on Hashnode or check out my latest articles and insights into the ever-evolving DevOps landscape!