Configuring NGINX as a Web Server, a Load Balancer and a Reverse Proxy
 Jubril Edun
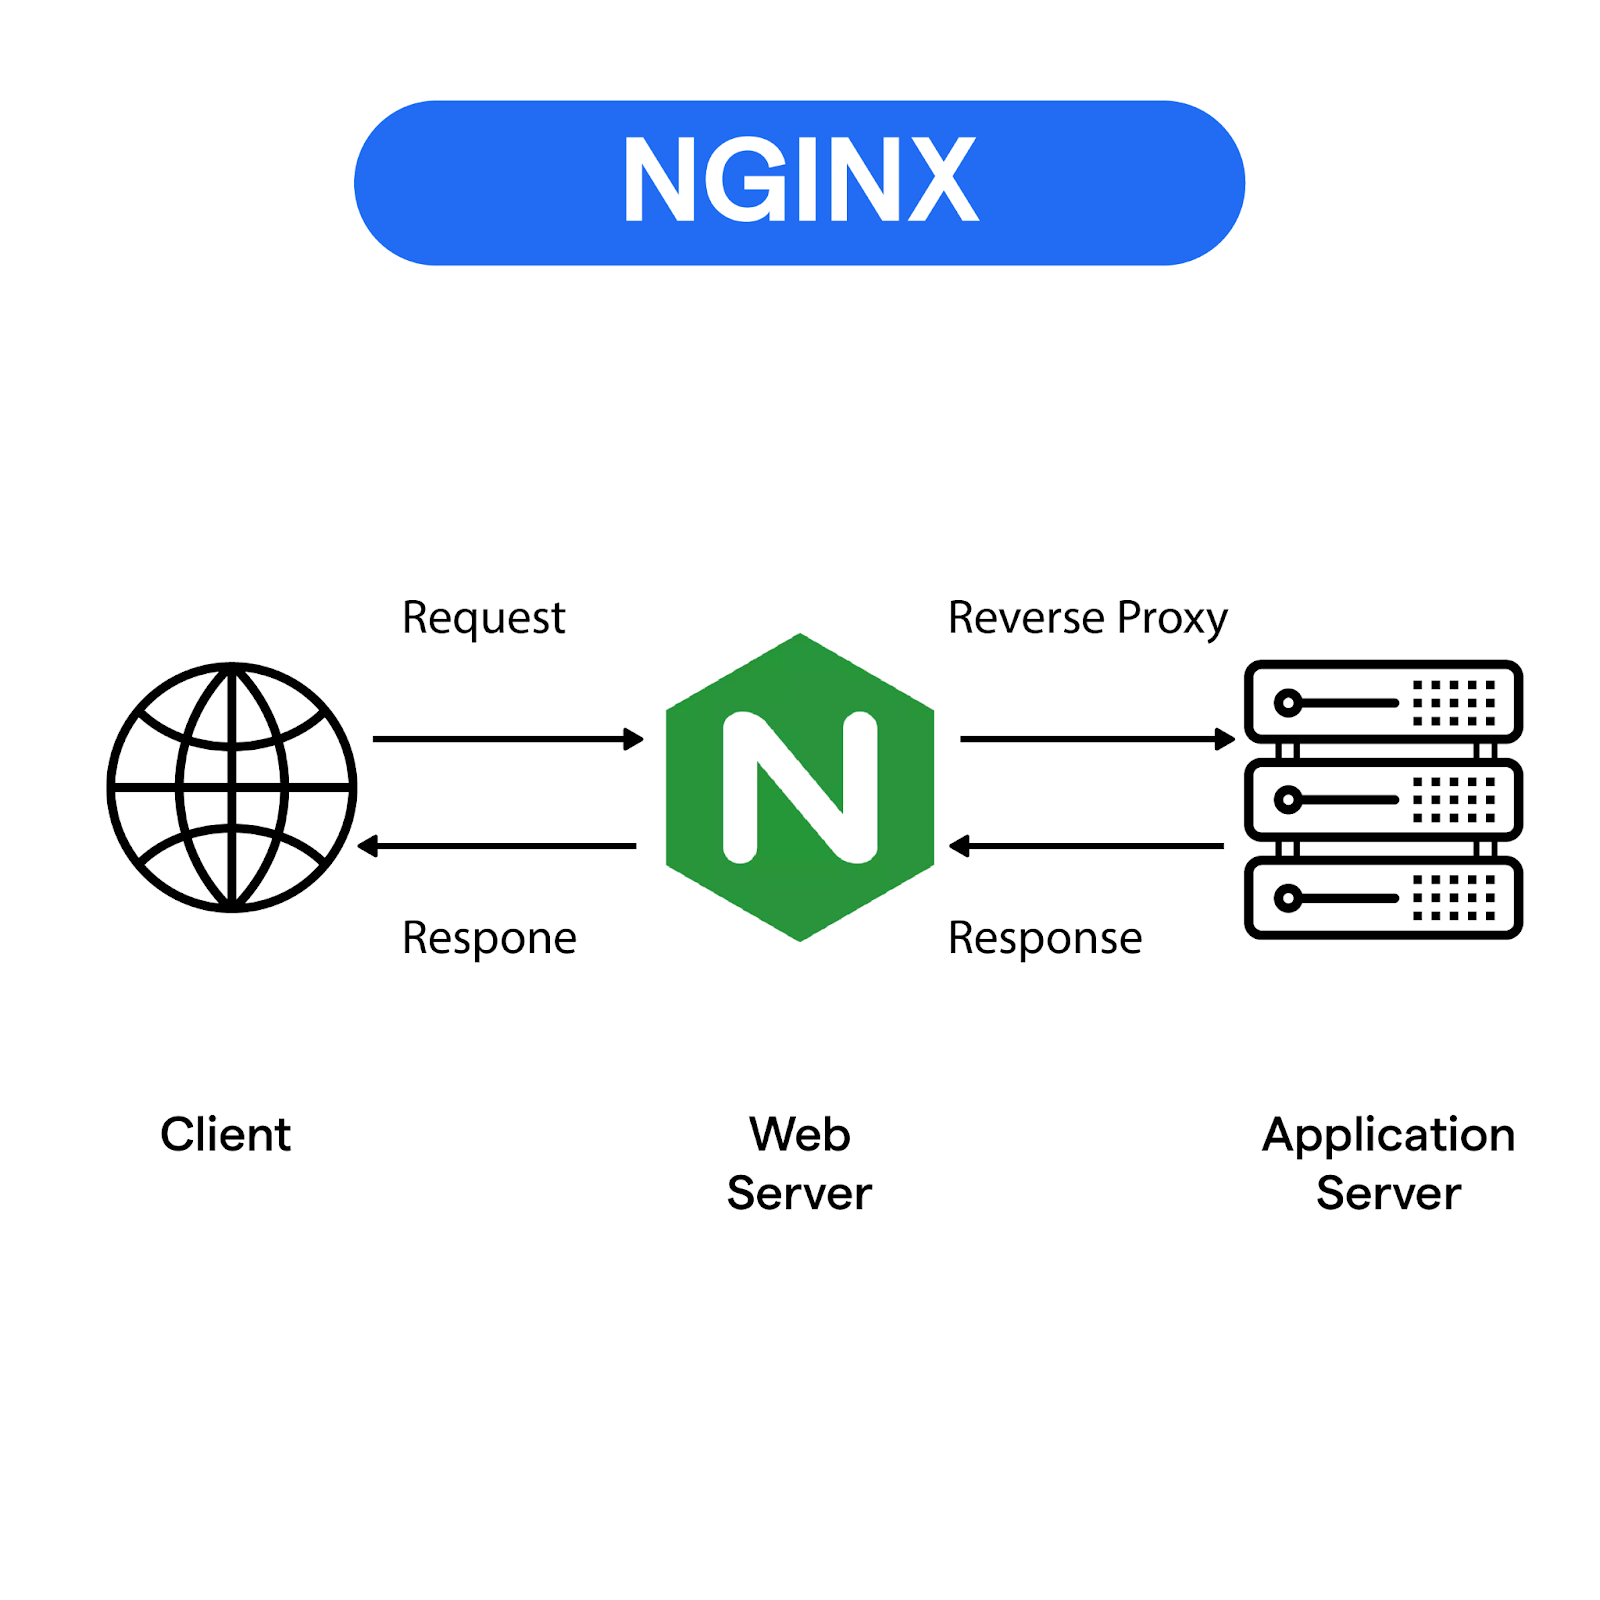
In this simple hands-on, we’ll be configuring Nginx as a Web Server serving static web contents, as a Load Balancer distributing requests to three backend node.js applications and as a Reverse Proxy proxying requests from one port to another.
Nginx : Brief Introduction
Nginx pronounced “engine-x” is an open-source web server that also functions as a reverse proxy, load balancer, and HTTP cache.
Nginx acts as an intermediary between users and backend servers. It handles incoming requests from users, processes them as needed, and forwards these requests to the appropriate backend servers for further processing.
It’s key features and use cases include: High Concurrency Handling, Low Resource Consumption, Reverse Proxy, Load Balancing, SSL/TLS Termination/Offloading, Caching, API Gateway etc.
Nginx makes use of configuration files that consists of directives(key-value pairs) and contexts(block of code containing directives and contexts)
Nginx as a Web Server
For this practice, we’ll be making use of a vagrant VM running Ubuntu 20.04
Step 1: Update apt software repo and download nginx

Step 2: Confirm nginx status

Step 3: Create sample html static files

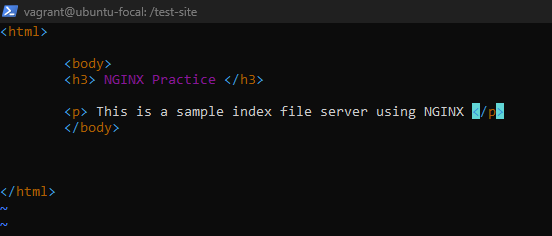
Step 4: Create and Configure an nginx config file
confirm this directive “include /etc/nginx/conf.d/*.conf;” exists under the http context in the main nginx configuration file at /etc/nginx/nginx.conf

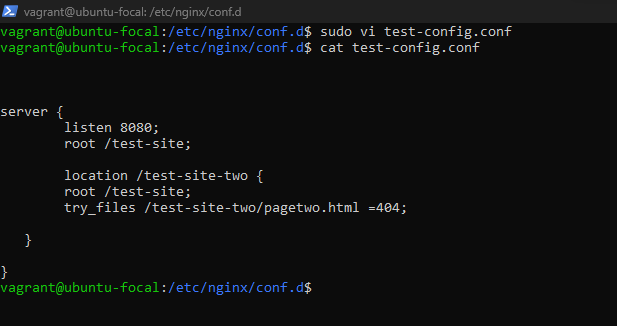
“server” context block defines a virtual server that can handle request on a specific port for a specific set of domains.
“listen” directive specifies the port number on which the virtual server should listen for incoming connections.
“root” directive defines the base directory where nginx should look for files to serve.
“location” context allows you to define specific rules for handling requests to particular URLs or paths within the virtual server.
“try_files” directive specifies a list of files or directories that Nginx should try to find when a request is received. If the first file or directory is found, it will be served. If not, Nginx will try the next one in the list.
Step 5: reload the nginx service and confirm IP address of your server.

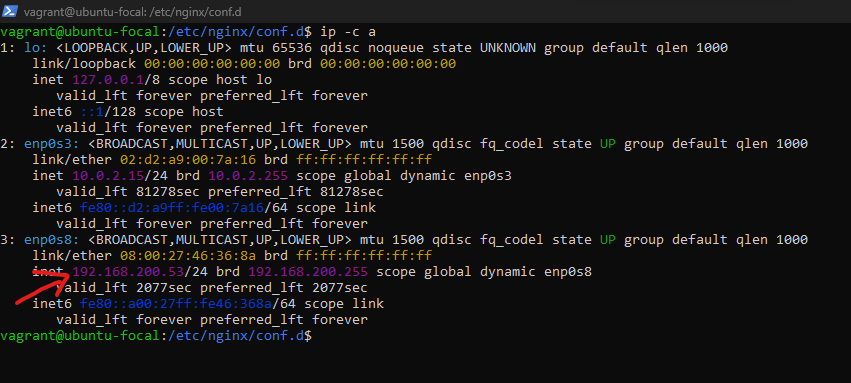
Step 6: Confirm webpages is running using server’s ip and port number
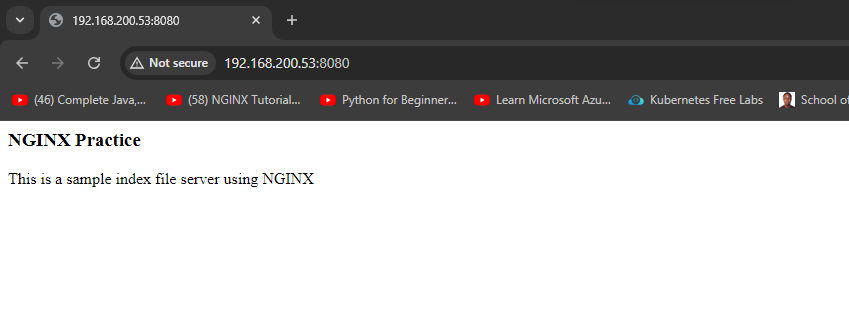
Nginx as a Load Balancer
for this practice, we’ll use three simple node.js applications and pm2 server to manage the node.js applications
Step 1: Create sample node.js applications
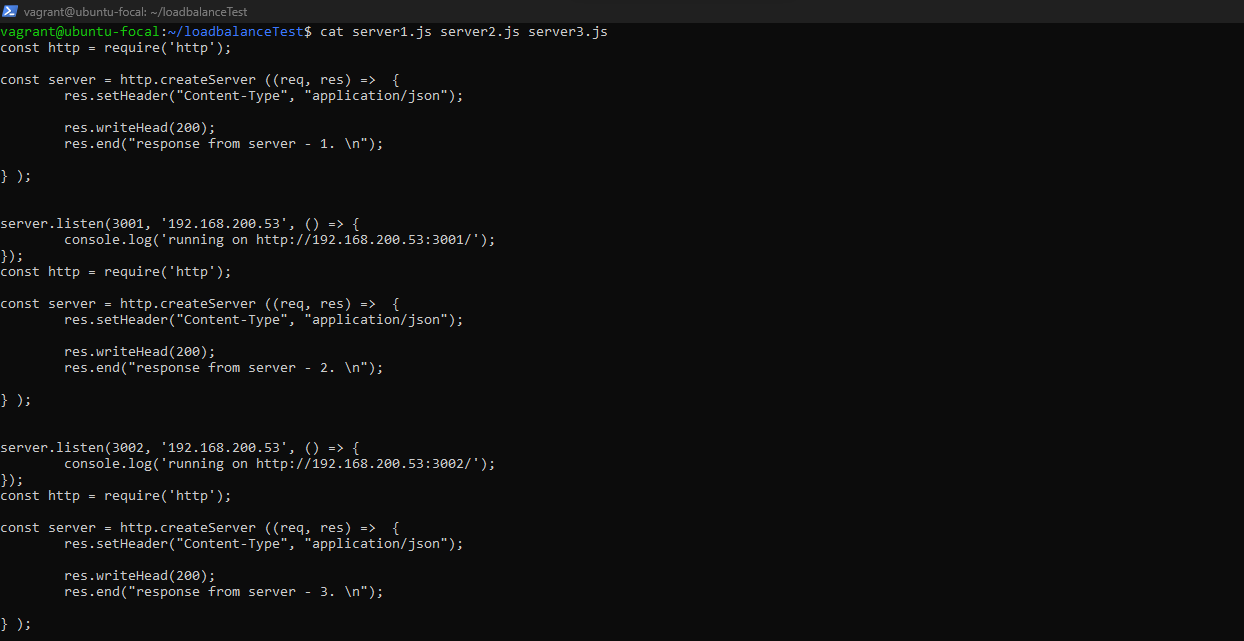
Step2: Start the node.js applications with pm2. pm2 is installed using npm


Step3: Create and Configure the nginx load balancer config file:
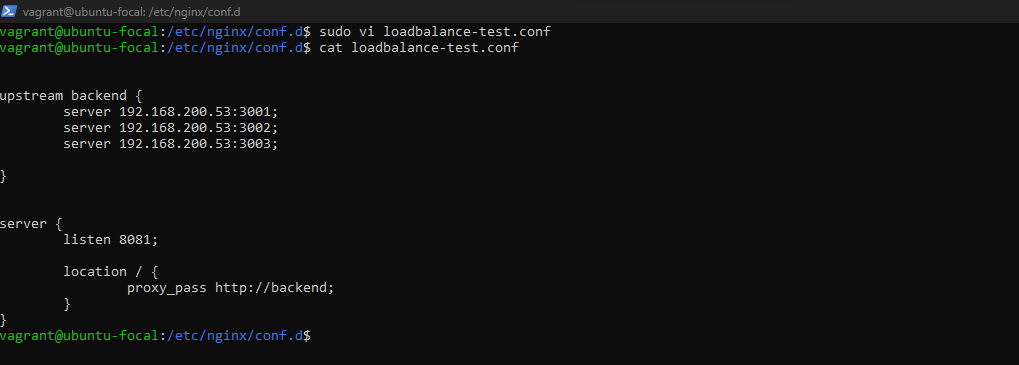
- “upstream” directive is used to define a group of servers that can be referenced collectively. It allows you to define a group of backend servers along with optional paramters such as the load balancing method. example of load balancing methods include round robin(default), ip-hash, least connection etc.
Step3: reload the nginx service

Step4: confirm application is running and loadbalancing is working

refresh browser to test loadbalancing

refresh again

Load-balancing is working.
Nginx as a Reverse Proxy
Step1: start sample application

Step 2: Create and Configure the nginx reverse proxy config file
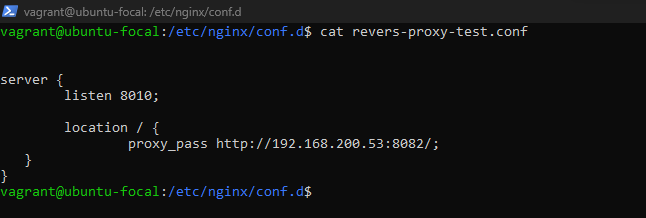
- any request that goes to port 8010 will be proxied to port 8082
Step 3: reload nginx service

Step 4: test configuration
- node.js application configuration (listening on port 8082)
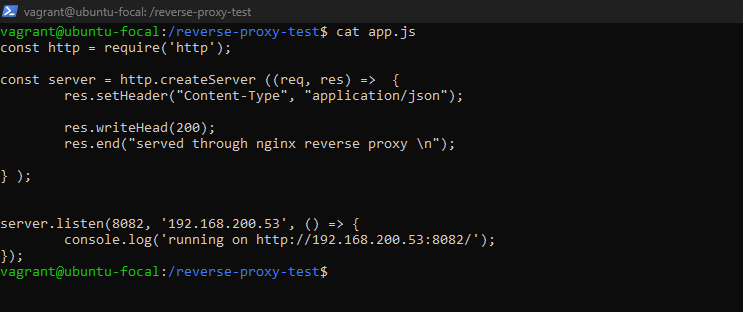
- application reachable on port 8010
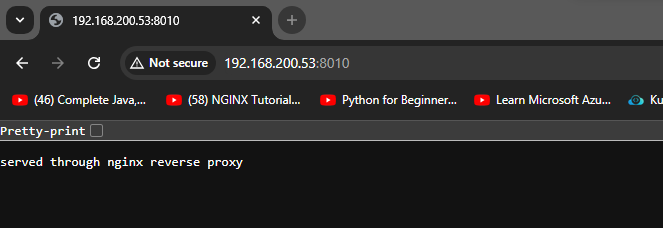
The node.js application is listening on port 8082, but the application can still be reached on port 8010 thanks to the reverse proxy configuration
VOILA!!! QED!!!
Subscribe to my newsletter
Read articles from Jubril Edun directly inside your inbox. Subscribe to the newsletter, and don't miss out.
Written by

Jubril Edun
Jubril Edun
Hi there, My name is Jubril Edun, a tech enthusiast who is on a learning journey into the world of Cloud Engineering, Cybersecurity and beyond. Join me as I document my learning journey.