Mainnet Forking 1: A Beginner's Guide
 YoungAncient
This is a pretty interesting topic and a handy skill every smart contract developer should have. It’s easy, yes, but quite tasking also!
Before we dive in, reading this alongside searching terms on Google would be a waste of time, so let’s break down some terms!
Glossary
Mainnet refers to a real blockchain protocol e.g. Ethereum mainnet, Lisk, Base, Arbitrum, etc.
Testnet refers to a test blockchain protocol e.g. Sepolia, Base Sepolia, Lisk Sepolia, and many more. All real blockchains have testnets which serve as a playground for devs during development.
Local Node in hardhat is a feature that allows developers to run a test development node on localhost, where developers can deploy contracts, run interactions, and many more. It can be run using the command npx hardhat node .
Forking is a popular term in GitHub that refers to copying a repository from one user's account to another. When you fork a repository, you create a copy of the original repository under your own GitHub account, allowing you to make changes independently without affecting the original project.
RPC stands for Remote Procedure Call. The blockchain uses a JSON-RPC specification, a data communication protocol like REST, GraphQL, etc., that enables communication between a client and a server over the blockchain network.
RPC URL is a link provided by a node or a node-as-a-service provider such as Alchemy, Infura, or QuickNode that allows developers to interact with a blockchain network remotely. It serves as a gateway to communicate with the blockchain, enabling users to send requests and retrieve data via Remote Procedure Calls (RPC).
Local is short for the local environment which refers to a laptop, or computer.
Let’s Dive In
Most times, developers when writing smart contracts, deploy to testnets like Sepolia, Lisk-Sepolia, etc for testing purposes before deploying to the mainnet after all checks and audits are completed. But what if there is a case where the contract depends directly on other contracts already deployed, what do we do?
For example, say you wrote contract A which depends on contracts B, C, and D. If you were writing the contracts at the same time, it is possible to deploy all on a testnet (for the sake of testing ) since we are the owners, but in this case, B, C, and D have been deployed by someone else to the mainnet (or a testnet), so the only hope of testing the smart contract is either deploying your contract and being optimistic about its behavior when interacting with the contracts or do mainnet forking!
A real scenario is for instance, we are writing a staking contract that interacts with Uniswap or an NFT-gated event contract for users with Bored Apes NFTs, you agree that both Uniswap and Bored Apes contracts have been deployed, the best way to interact and test such contracts is through mainnet forking.
What is Mainnet forking?
Forking is a term popular in Github, it means copying a person’s repository into one’s GitHub account so that changes can be made. When you fork a person’s repo, you get all the functions, files, folders, etc in the repository.
The same goes for the blockchain!
Mainnet forking can also be referred to as blockchain copying or cloning. It helps to clone any targeted blockchain in a local node and everything within it, but in this case, smart contracts! Isn’t that cool?

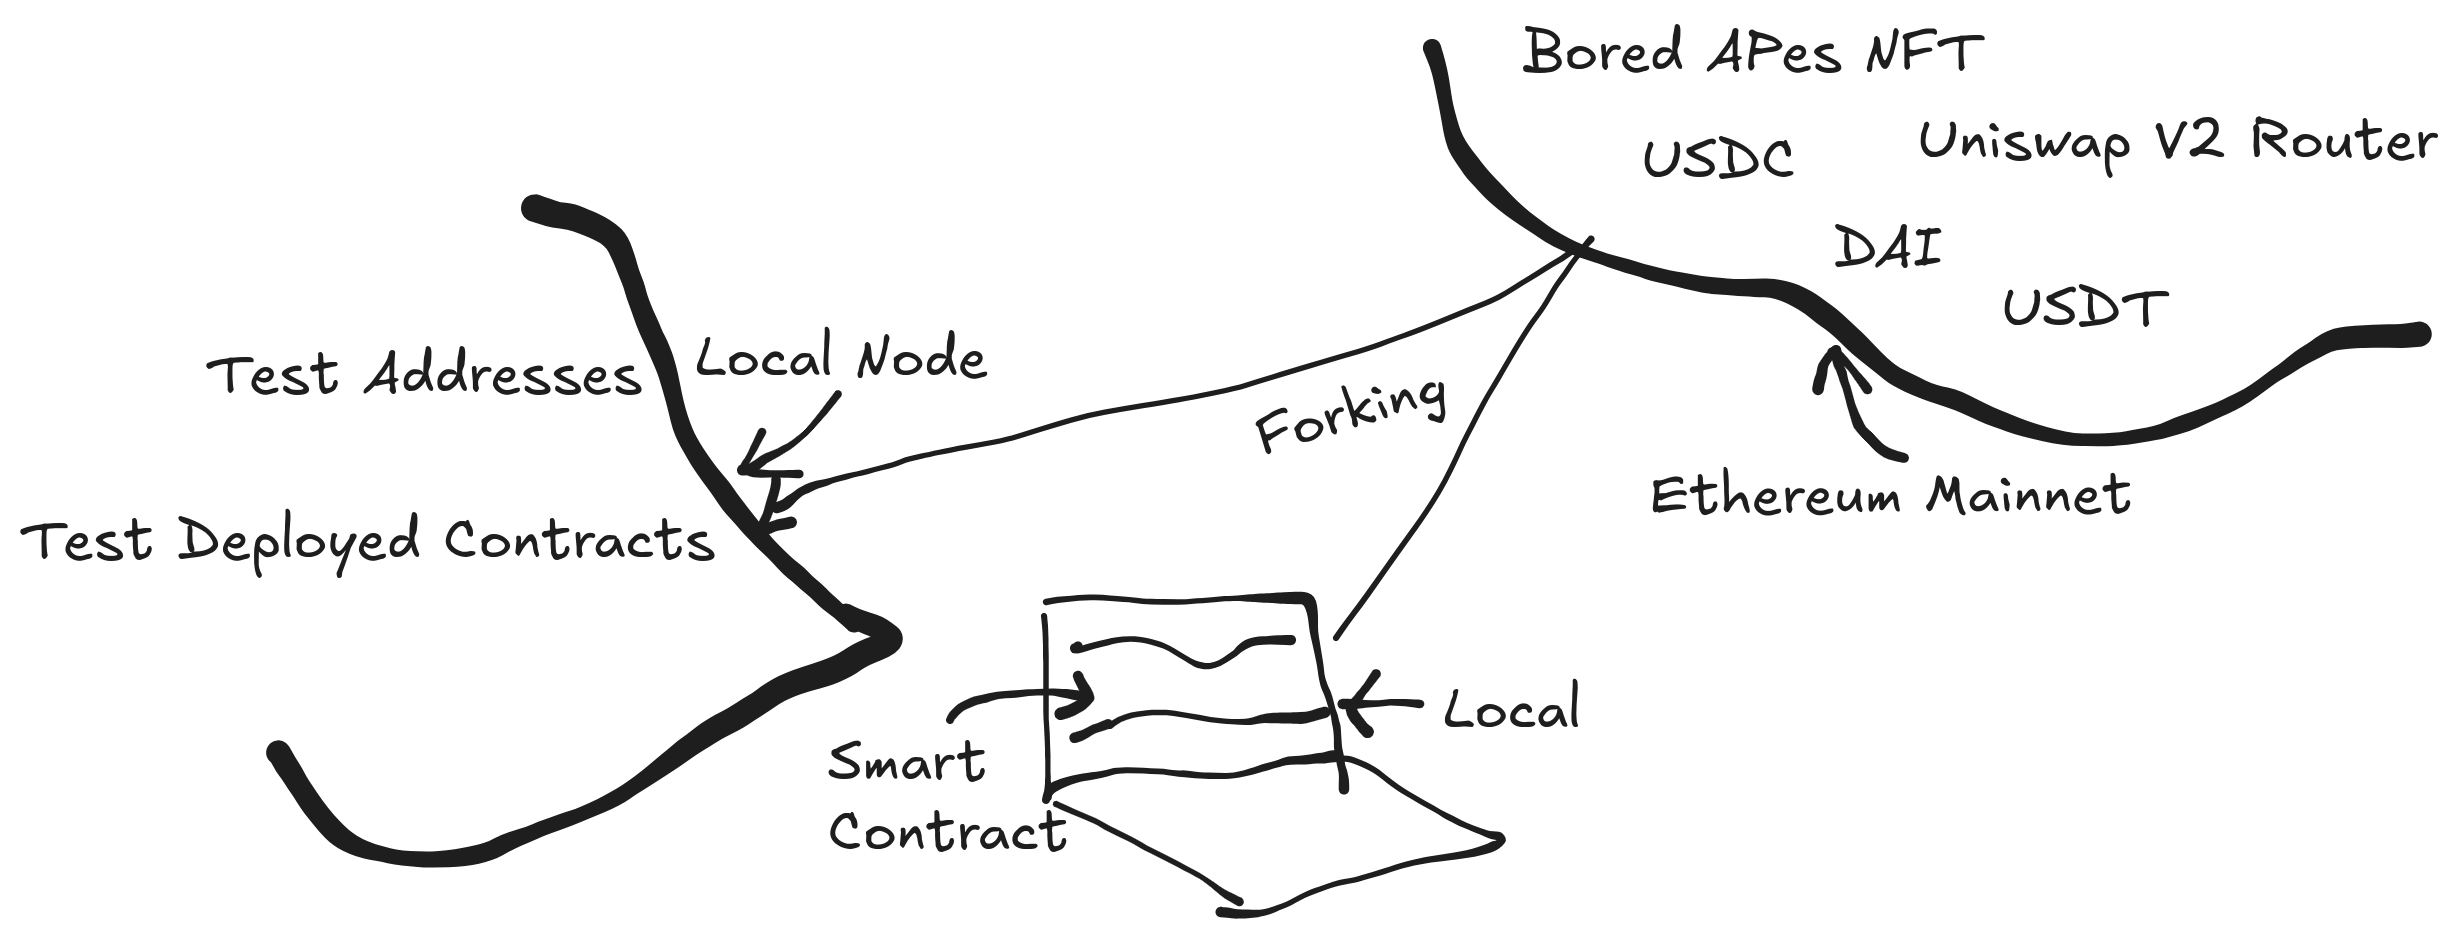
A basic diagram explaining this concept
The smart contract (in your local) depends on the already deployed Uniswap, however, testing is needed before deployment. You might also be working in a team where multiple contracts are being developed, and your contract relies on another team member's contract that has already been deployed on a testnet or mainnet. For testing purposes, you'll need to either deploy your contract to a testnet or fork the testnet to your local and run tests.
Under the Hood!
When you fork a blockchain, your local node is linked to a full or archive node in the target chain, automatically, your local node acts like that node. You can impersonate addresses owning tokens and do many crazy things. The caveat is that whatever you do within the fork does not affect the main forked chain. Say you forked the Ethereum mainnet, impersonated a token owner, and transferred tokens to another account, that transfer only happened in your local node / virtual sandbox / Fork, it never affected the real chain.
But the reverse is the case!
Changes in the forked chain can affect the local fork. Say you were interacting with Uniswap to swap some amounts of tokens A and B, executed by impersonating an account that holds token A. Let’s say a few seconds before the test interaction is run, the account sold all of the token A previously owned, the swap transaction initiated from our forked version would fail because as earlier stated, our local node is copying or acting like a full node which it is connected to.
How to fork?
We will be using hardhat for this brief tutorial. The only tricky thing is writing code to impersonate a signer and interacting with contracts on the forked blockchain, there will be a follow-up article to cover that.
Forking a blockchain can be done with a few steps:
Getting the target blockchain RPC URL from providers like Alchemy, Infura, and many more.
There are 2 ways of using this RPC URL: adding directly to the CLI while running a local node or adding it to the hardhat config file.
Talk is Cheap, Show the Code!
As said above, the RPC URL is gotten first.
// it looks like this
ALCHEMY_MAINNET_API_KEY_URL="https://eth-mainnet.g.alchemy.com...";
Now to use the URL,
Method1 : CLI
Open the terminal and run this command
npx hardhat node --fork <PASTE_YOUR_RPC_LINK>
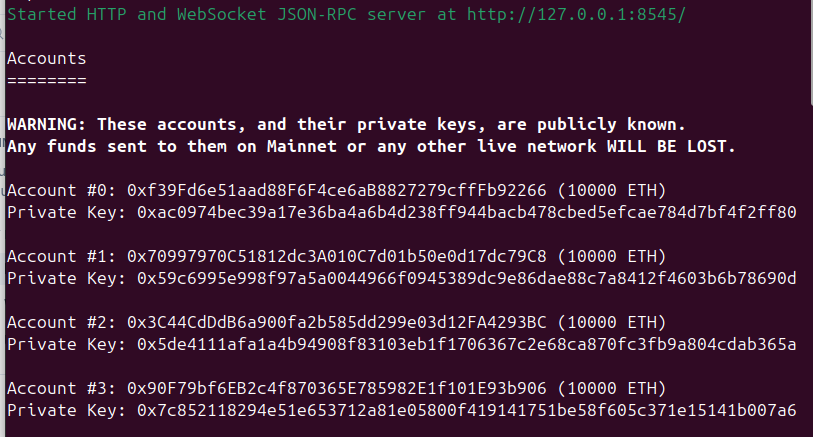
The node is spun up as shown below:

This node is currently connected to the node with the RPC link passed into the CLI. To run an interaction or test script, you need to open another terminal and run it there.
npx hardhat run scripts/mainnet-forking.ts --network localhost
Method2: Using the Config file
To use the RPC URL in the hardhat config file, a proper approach would be to have it in a .env file.
ALCHEMY_MAINNET_API_KEY_URL=<URL_HERE>
To install the dotenv package run the command:
npm install dotenv
The hardhat config file should look like this:
import "@nomicfoundation/hardhat-toolbox"
require("dotenv").config({ path: ".env" });

const ALCHEMY_MAINNET_API_KEY_URL = process.env.ALCHEMY_MAINNET_API_KEY_URL;

module.exports = {
  solidity: "0.8.24",
  networks: {
// add this to the networks obj
    hardhat: {
      forking: {
        url: ALCHEMY_MAINNET_API_KEY_URL,
      }
    }
  },
  lockGasLimit: 200000000000,
  gasPrice: 10000000000,
};
Unlike method1, which starts up the local node, this method only sets up the connection to the forked network when a script (interaction or test) is run.
To run an interaction or test script, we run this
npx hardhat run scripts/mainnet-forking.ts
By default, hardhat goes to the config file, into the forking object, and connects to the specified network via the RPC URL.
Congrats on getting to the bottom of the rabbit hole!
As a follow-up on this article, I would have another for interacting with contracts on forked blockchains. Stay tuned!
Subscribe to my newsletter
Read articles from YoungAncient directly inside your inbox. Subscribe to the newsletter, and don't miss out.
Written by

YoungAncient
YoungAncient
I love building powerful, friendly, and highly interactive user interfaces. I also love problem-solving and for me it is purpose. Nothing gives me joy more than building products/projects that help solve real problems and add meaningful value to businesses, people, and the world.