Day 45 of 90 Days of DevOps Challenge: Deploy WordPress Website on AWS
 Tushar Pant
Table of contents
- Prerequisites
- Step 1: Create an RDS Instance for MySQL
- Step 2: Launch an EC2 Instance
- Step 3: Connect to the EC2 Instance
- Step 4: Install Apache, PHP, and MySQL Client
- Step 5: Start Apache and Enable It
- Step 6: Download and Configure WordPress
- Step 7: Complete WordPress Installation
- Step 8: Secure Your WordPress Site
- Conclusion
Welcome to Day 45 of the 90 Days of DevOps Challenge! Today, we’ll guide you through the process of deploying a WordPress website on AWS. WordPress is the most popular content management system (CMS) in the world, powering over 30% of all websites. It's not just for blogs; WordPress can be used to create e-commerce sites, portfolios, forums, and more.
In this blog, we’ll outline the necessary steps to set up a WordPress website using Amazon Web Services (AWS), which includes launching an EC2 instance, setting up an RDS MySQL database, and installing WordPress.
Prerequisites
Before you start, ensure you have the following:
An AWS account.
Basic understanding of AWS services, particularly EC2 and RDS.
Familiarity with the command line and SSH.
Step 1: Create an RDS Instance for MySQL
WordPress requires a MySQL database to store its data. Here’s how to create a free-tier RDS instance:
Log in to your AWS Management Console.
Navigate to the RDS service.
Click on "Create database".
Choose MySQL as the database engine.
Select the Free tier template.
Configure the DB instance settings:
DB instance identifier:
wordpress-dbMaster username:
adminMaster password: Choose a secure password.
Set DB instance class to
db.t2.micro(free-tier eligible).Choose the VPC and subnet settings. For beginners, the default VPC works well.
In the Connectivity section, ensure Public access is set to
Yes.Under Additional configuration, set the initial database name to
wordpress.Click "Create database".
Once your RDS instance is created, note down the endpoint URL, master username, and password as you will need these later.
Step 2: Launch an EC2 Instance
Next, you’ll need an EC2 instance to host your WordPress application:
Go to the EC2 service in the AWS Management Console.
Click on "Launch Instance".
Choose an Amazon Machine Image (AMI). For WordPress, Amazon Linux 2 or Ubuntu Server are good choices.
Select the t2.micro instance type (free-tier eligible).
Configure the instance details:
Ensure your instance is in the same VPC as your RDS instance.
Enable Auto-assign Public IP to get a public IP address.
Add storage (the default of 8 GB is sufficient for a basic WordPress site).
Add tags (optional).
Configure the security group:
Allow HTTP (port 80) and HTTPS (port 443) traffic.
Allow SSH (port 22) access from your IP address.
Review and launch the instance, creating or selecting a key pair for SSH access.
Step 3: Connect to the EC2 Instance
Once your EC2 instance is running, connect to it using SSH:
Open your terminal.
Use the following command (replace
your-key.pemandec2-public-ip):ssh -i "your-key.pem" ec2-user@ec2-public-ipIf you’re using Ubuntu, the username will be
ubuntuinstead ofec2-user.
Step 4: Install Apache, PHP, and MySQL Client
Now that you are connected to your EC2 instance, install the necessary software:
For Amazon Linux 2:
sudo yum update -y
sudo yum install httpd php php-mysqlnd -y
For Ubuntu:
sudo apt update -y
sudo apt install apache2 php libapache2-mod-php php-mysql -y
Step 5: Start Apache and Enable It
After installing the necessary packages, start the Apache server and enable it to start on boot:
# For Amazon Linux 2
sudo systemctl start httpd
sudo systemctl enable httpd
# For Ubuntu
sudo systemctl start apache2
sudo systemctl enable apache2
Step 6: Download and Configure WordPress
Download MySQL
sudo apt install mysql-client-core-8.0 -yNavigate to the web root directory:
cd /var/www/htmlDownload the latest WordPress package:
sudo wget https://wordpress.org/latest.tar.gzExtract the WordPress files:
sudo tar -xzf latest.tar.gzMove the WordPress files to the web root:
sudo mv wordpress/* .Remove the default index file:
sudo rm index.htmlCreate a WordPress configuration file:
sudo cp wp-config-sample.php wp-config.phpEdit
wp-config.phpto add your database details:sudo nano wp-config.phpUpdate the following lines with your RDS credentials:
 define('DB_NAME', 'wordpress');
 define('DB_USER', 'admin');
 define('DB_PASSWORD', 'your_rds_password');
 define('DB_HOST', 'your_rds_endpoint');
Save the changes and exit the editor.
Step 7: Complete WordPress Installation
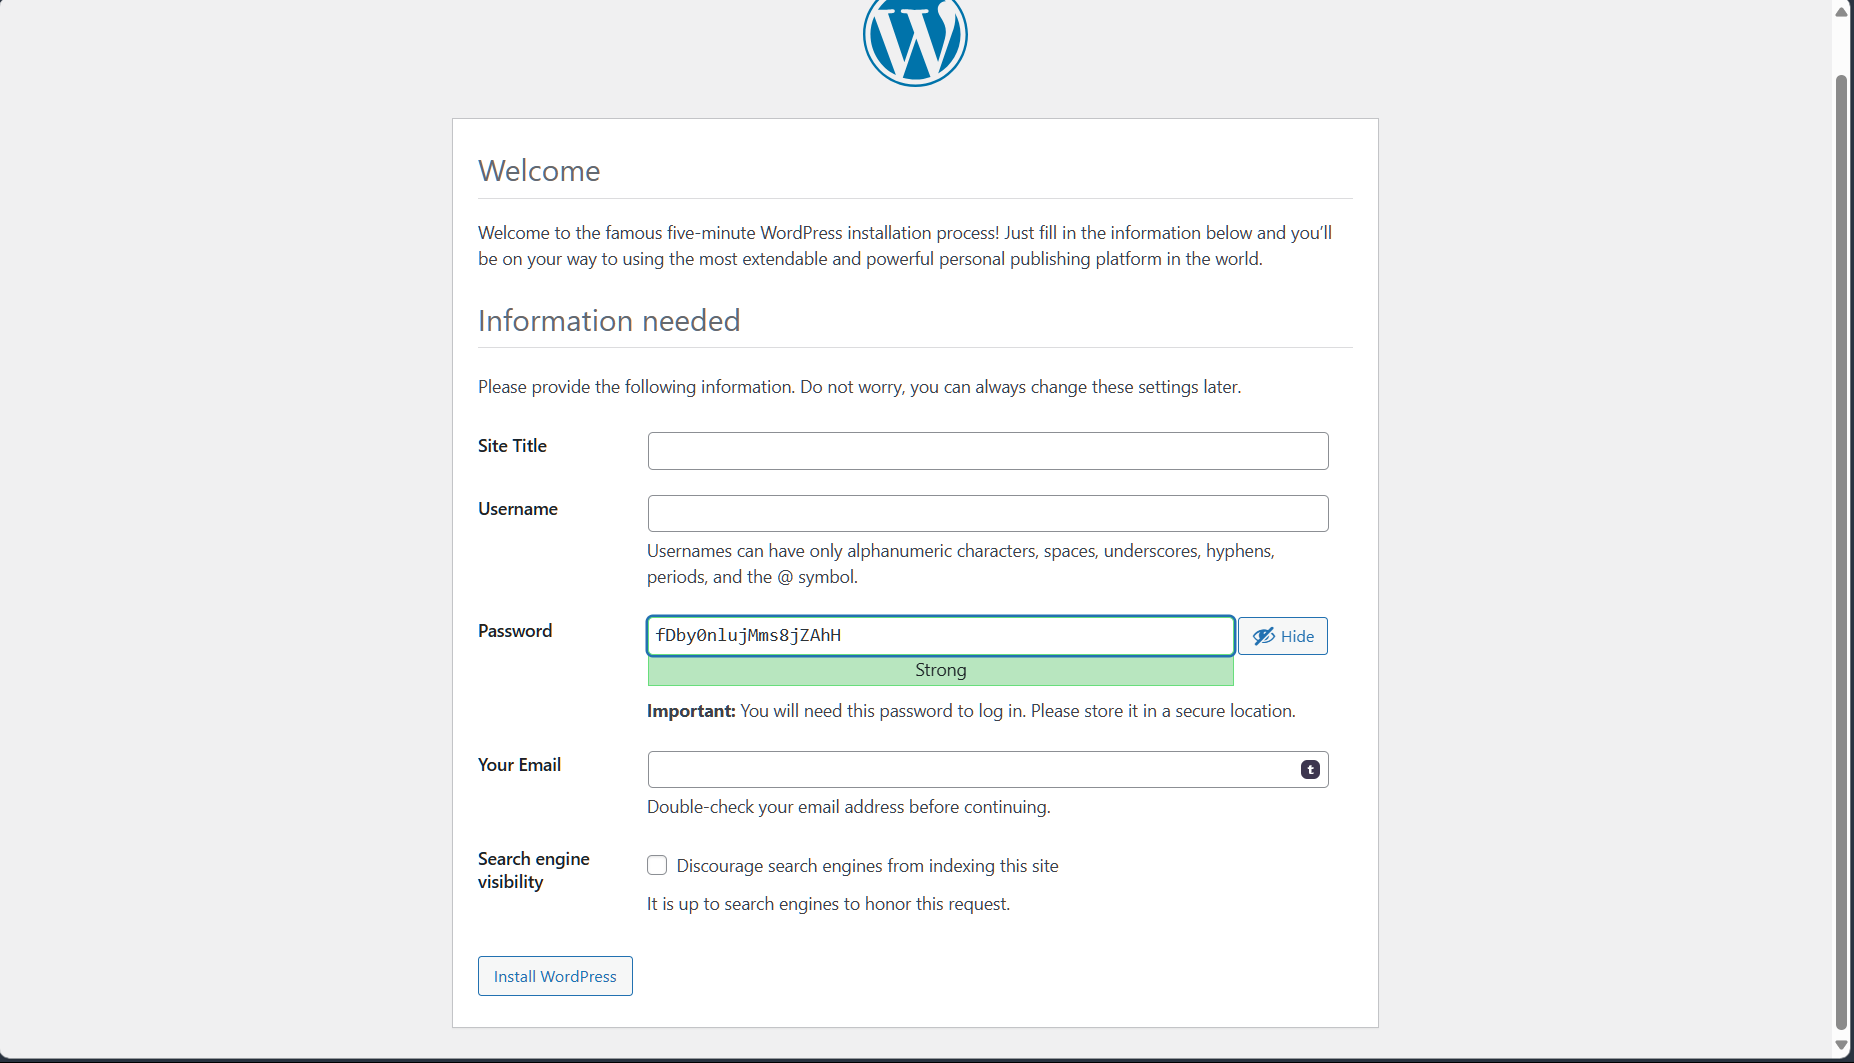
Open your web browser and navigate to your EC2 instance’s public IP address.
You should see the WordPress installation page. Follow the on-screen instructions to set up your site:
Select your preferred language.
Fill in the site title, username, password, and email address.
Click "Install WordPress".
After the installation is complete, log in to your new WordPress site.

Step 8: Secure Your WordPress Site
To enhance security, consider the following best practices:
Use HTTPS: Set up an SSL certificate (consider using AWS Certificate Manager with CloudFront).
Regular Backups: Use plugins or AWS Backup services to ensure data safety.
Update Regularly: Keep WordPress, themes, and plugins updated to the latest versions.
Conclusion
Congratulations! You have successfully deployed a WordPress website on AWS using EC2 and RDS. This setup is scalable and can handle traffic efficiently, making it an ideal solution for hosting your blog or any content-driven site.
As you progress in the 90 Days of DevOps Challenge, remember that AWS offers a wide range of services to enhance your applications. Keep experimenting with different configurations and features to deepen your understanding of cloud technologies. Happy coding!
Subscribe to my newsletter
Read articles from Tushar Pant directly inside your inbox. Subscribe to the newsletter, and don't miss out.
Written by

Tushar Pant
Tushar Pant
Cloud and DevOps Engineer with hands-on expertise in AWS, CI/CD pipelines, Docker, Kubernetes, and Monitoring tools. Adept at building and automating scalable, fault-tolerant cloud infrastructures, and consistently improving system performance, security, and reliability in dynamic environments.