Deploying a Static Website using Docker
 Nihal Shardul
Problem Statement: Create a Dockerized environment for a static website built with HTML, CSS, and JavaScript. The project should include a Dockerfile that utilizes Nginx to serve the website efficiently. Provide instructions for building and running the Docker container, making the website accessible via a specified port. The final deliverable should be a lightweight, functional static website that adheres to basic web design principles.
Solution: In today's digital landscape, the ability to deploy web applications quickly and reliably is crucial for developers. One effective way to achieve this is by using Docker, which allows you to package your application and its dependencies into a lightweight, portable container. In this blog, we will walk through the process of creating and deploying a static website using Docker, focusing on HTML, CSS, and JavaScript.
Why Use Docker for Static Websites?
Docker simplifies the deployment process by ensuring that your application runs the same way in every environment, whether it’s on your local machine, a staging server, or in production. For static websites, Docker offers several benefits:
Consistency: The environment is uniform, reducing "it works on my machine" problems.
Isolation: Your application runs in its own container, independent of other applications.
Ease of Deployment: You can easily share and deploy your containerized application.
Getting Started
Prerequisites
Before we dive in, make sure you have the following installed:
Docker: You can install it from Docker's official website.
Basic knowledge of HTML, CSS, and JavaScript.
AWS account
Step 1: Create Your Project
First, create a project with suitable name for your Static Website. And code it in HTML, CSS and JS. I have already created my project and pushed on github, you can also download it using this link → https://github.com/nihalshardul/portfolio-website
Do clone this repository and update it accordingly.
Step 2: Create the Dockerfile
Next, create a Dockerfile in your project directory. This file will define how your Docker image is built. Here’s a simple Dockerfile to get started:
# Use the official Nginx image as the base image
FROM nginx:alpine

# Set the working directory
WORKDIR /usr/share/nginx/html

# Copy the static website files to the Nginx html directory
COPY . .

# Expose port 80
EXPOSE 80
Once it’s done, name the file as dockerfile/Dockerfile and push it to your git repository.
Step 3: Launch EC2 Instance
Let’s launch EC2 instance on you AWS Account and install Docker on your server.
sudo apt install docker.io
Once docker is installed, clone your git repo. Replace below url with your git repo.
git clone https://github.com/nihalshardul/portfolio-website.git
Step 4: Build the Docker Image
Now that you have your Dockerfile set up, it’s time to build your Docker image. Open your terminal, navigate to your project directory, and run:
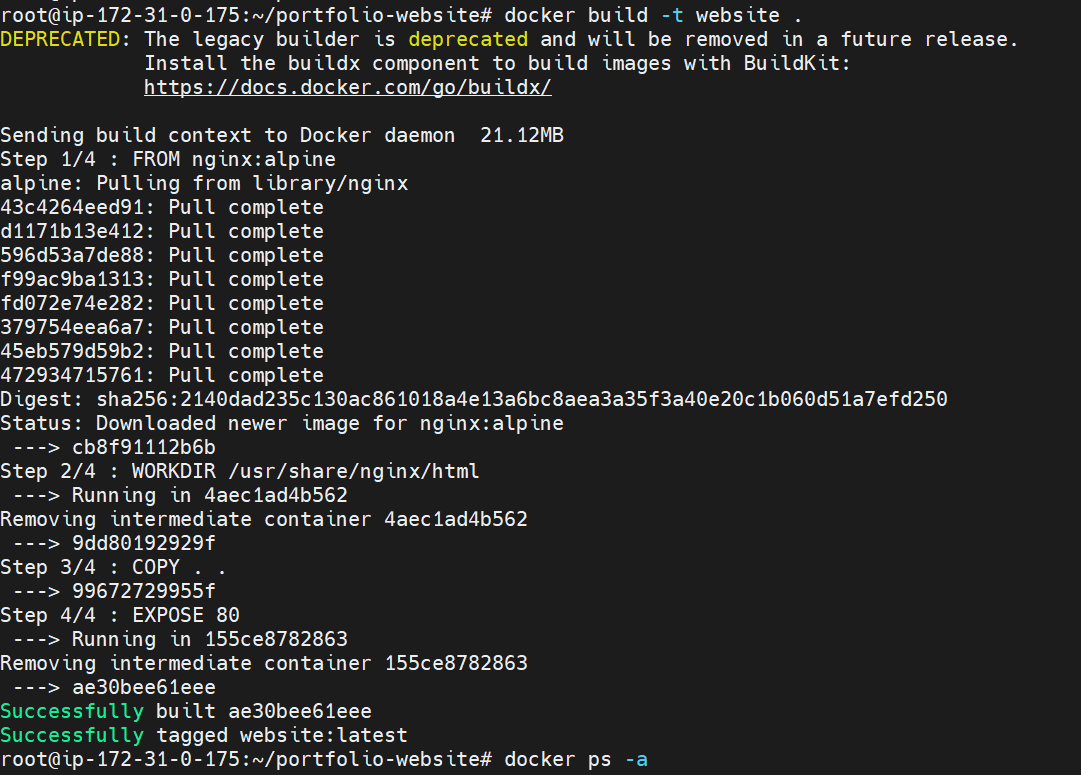
docker build -t website .
This command builds the Docker image with the tag website. It will download all the binaries and libraries required for nginx image. And run command step by step as provided in dockerfile.

Step 5: Run the Docker Container
Once the image is built, you can run it using the following command:
docker run -d -p 80:80 --name nihal-website website
This command runs the container in detached mode (-d) and maps port 80 on your vm machine to port 80 in the container.
Step 6: Access Your Website
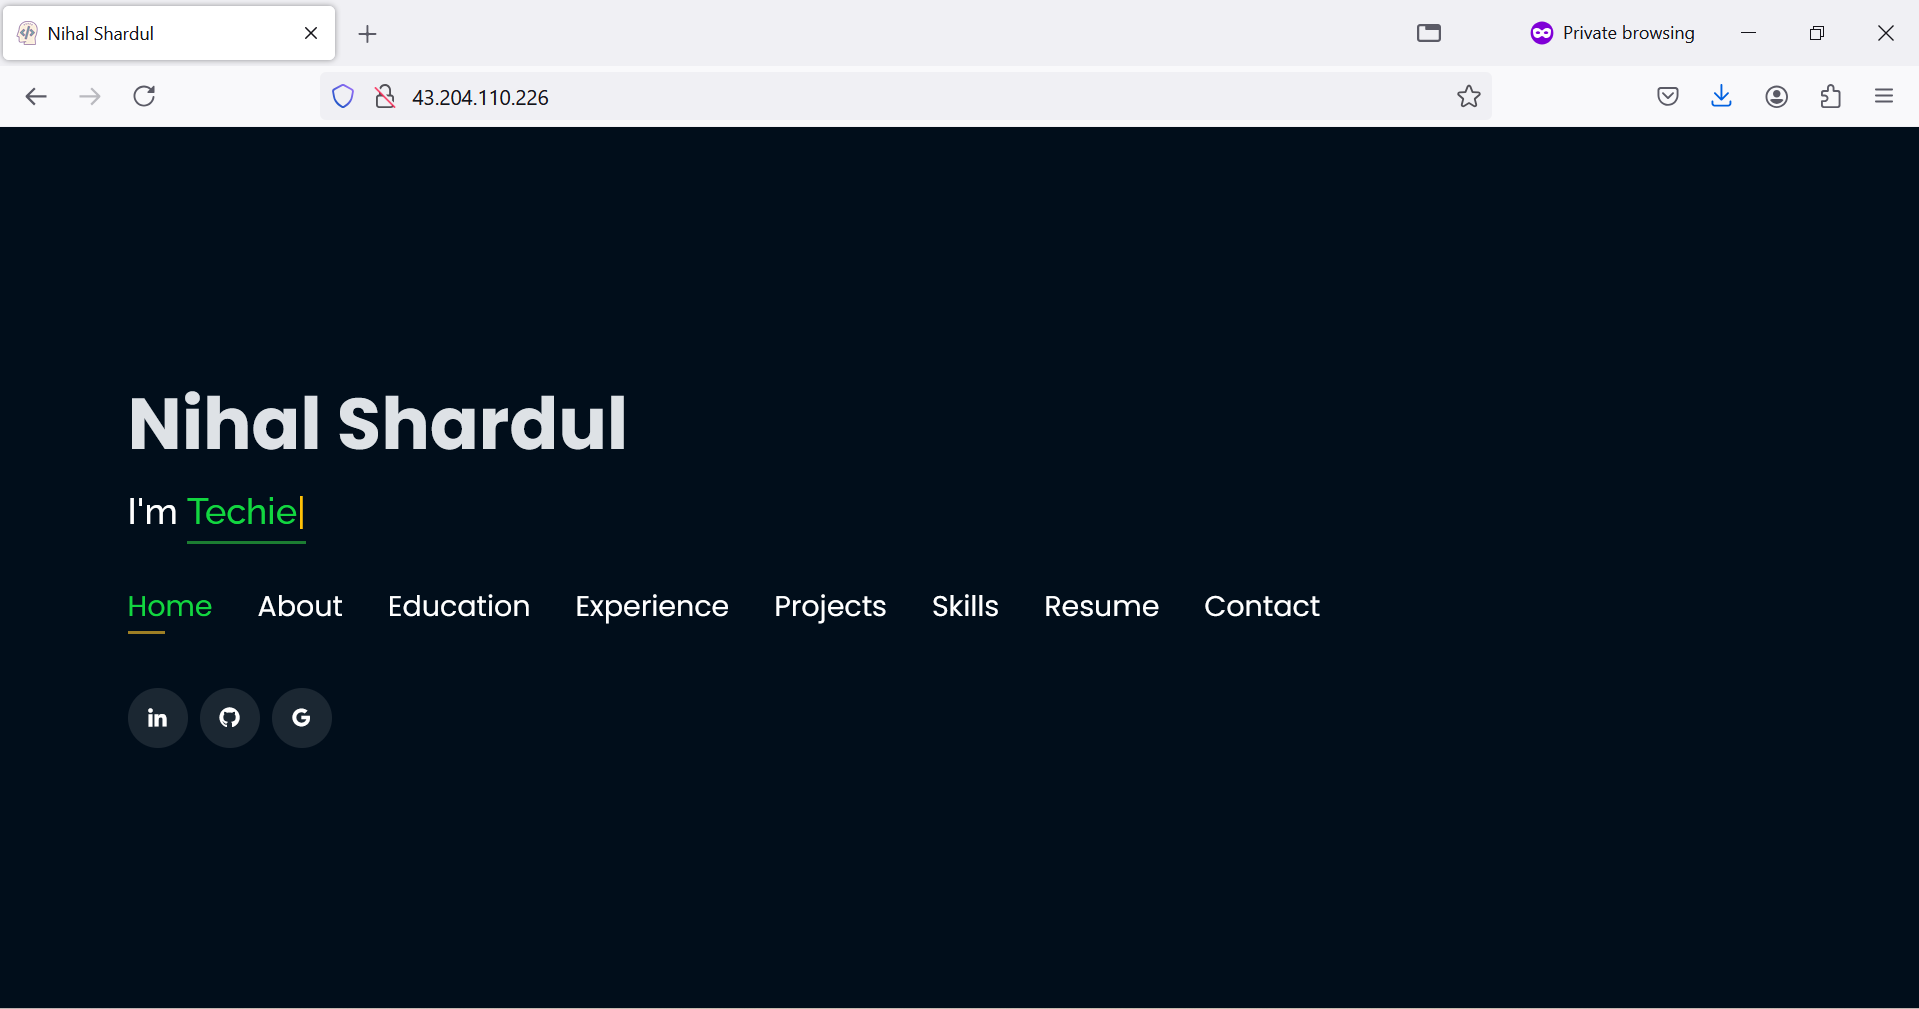
Open your web browser and go to http://<ip/domain>. You should see your static website displayed, confirming that everything is working as expected!

Hooray !!! You’ve successfully created and deployed a static website using Docker. By leveraging containerization, you’ve ensured a consistent environment for your web application, making it easier to deploy and maintain. Docker is a powerful tool that can be used for much more complex applications, but this simple project serves as a great introduction.
Thanks.
Subscribe to my newsletter
Read articles from Nihal Shardul directly inside your inbox. Subscribe to the newsletter, and don't miss out.
Written by

Nihal Shardul
Nihal Shardul
Enthusiast Cloud and Security with expertise in AWS and DevOps. Proficient in Python, Bash, Git, Jenkins, and container orchestration tools like Docker and Kubernetes, I focus on automation and CI/CD practices. I leverage security tools such as NMAP, Nessus, and Metasploit to identify and mitigate vulnerabilities. Passionate about learning and collaboration, I thrive on enhancing cloud security and efficiency. Always eager to advance my skills, I aim to contribute to the tech community.