JavaScript Events Explained: A Beginner's Guide
 Aniket Mogare
Hello friends, I'm back with a new blog on JavaScript events. In this blog, I will cover the concepts I learned this week.
1)Events:
JavaScript Events are actions that happen in the browser. They can be triggered by various user interactions.
2)Ways of adding the Events
a)By Using the Attribute in the HTML Tags
<button class="btn btn-headline" onclick="console.log('hiii')" >Learn More</button>
the we can give the event as an attribute to the html tag
b)In .js File
const btn=document.querySelector(".btn-headline");
 button.onclick=function(){
     console.log("you clicked me!!!!!"); //willl print you clicked me!!!!!
 }
c)EventListerner
This is the standard and most efficient way to use events in JavaScript. It allows us to have Control Over Event Propagation, provides Flexibility, and supports multiple handlers for the same event.
const btn=document.querySelector(".btn-headline");
btn.addEventListener("click",function (){
    console.log("you clicked me !!!!!!!!!");
    console.log(this);
});
The addEventListener() function takes inputs such as the event name, function, and a boolean value. I will discuss the boolean value below, but for now, let's stick to two parameters only.
3)this keyword works Differentlyin EventListener
Case 1) Without Arrow Functions
const btn=document.querySelector(".btn-headline");
btn.addEventListener("click",function (){
    console.log("you clicked me !!!!!!!!!");
    console.log(this); // this will print the button object
});
Output will be:

Case 2) this Inside Arrow Function
Here, this will point one step up; in this case, it will point to the window object.
const btn=document.querySelector(".btn-headline");
btn.addEventListener("click", ()=>{
    console.log("you clicked me !!!!!!!!!");
    console.log(this);
});
Output will be:

3) Event Object
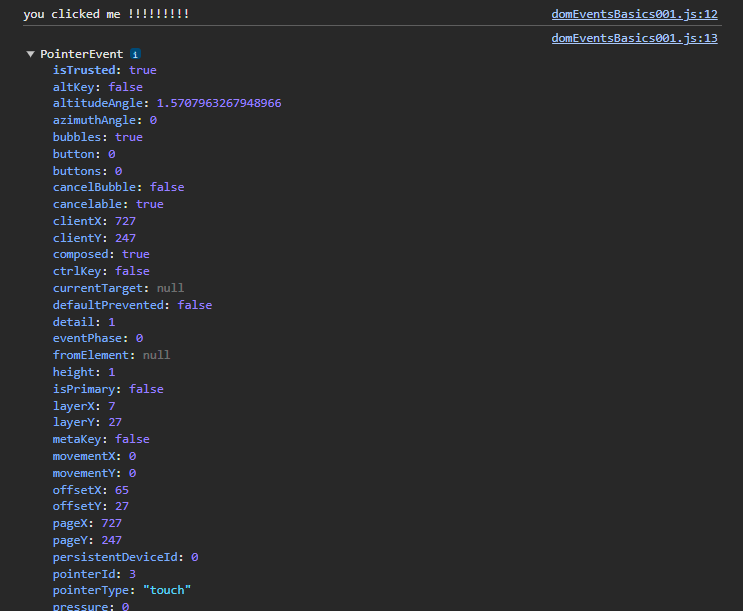
The event object provides crucial information about events. Understanding its properties and methods is key to working with events in JavaScript. For this, we just need to pass a parameter to the function in addEventListener() input parameters.
const btn=document.querySelector(".btn-headline");
btn.addEventListener("click", (event)=>{
    console.log("you clicked me !!!!!!!!!");
    console.dir(event);
}
Output:

Here, we will get the event object through which we can manipulate our HTML code.
const allButtons=document.querySelectorAll(".buttons button");
allButtons.forEach((button)=>{
    button.addEventListener("click",(e)=>{
            let num=0;
            for(let i=0;i<=100000000000;i++){
                num+=i;
            }
            console.log(e.currentTarget.textContent, num);// targeting current element
    })
});
That's all for this week's blog. I am also planning to write an additional blog about event loops, web APIs, callback queues, event bubbling, and event capturing. Stay tuned as I am about to finish my basics of JavaScript and will be starting some interesting projects soon. I know all these topics are already covered millions of times on the internet, but that's how things work; you always need to start from the basics.
Subscribe to my newsletter
Read articles from Aniket Mogare directly inside your inbox. Subscribe to the newsletter, and don't miss out.
Written by
