Day 46 of 90 Days of DevOps Challenge: Set Up CloudWatch Alarms and SNS Topic in AWS
 Tushar Pant
Table of contents
Welcome back to the 90 Days of DevOps Challenge! Today, we're focusing on a crucial aspect of managing your AWS resources: monitoring and notifications. Understanding your AWS billing is vital to avoid unexpected charges, especially when you're working within the free tier limits. Today’s tasks will guide you through setting up a CloudWatch alarm to monitor your AWS billing and configuring Amazon Simple Notification Service (SNS) to receive alerts.
Understanding Amazon CloudWatch and SNS
Before we jump into the tasks, let's discuss what Amazon CloudWatch and SNS are, and why they're essential for AWS resource management.
Amazon CloudWatch
Amazon CloudWatch is a monitoring and observability service for AWS cloud resources and applications. It allows you to collect and track metrics, set alarms, and automatically react to changes in your AWS resources. With CloudWatch, you can monitor the performance of your applications, track operational health, and gain insights into your AWS environment.
Some of the key features of CloudWatch include:
Real-time monitoring: Track resource utilization, application performance, and operational health in real-time.
Custom metrics: Create and track custom metrics tailored to your specific applications.
Alerts: Set up alarms that trigger notifications based on specific thresholds.
Amazon Simple Notification Service (SNS)
Amazon Simple Notification Service (SNS) is a fully managed messaging service that allows you to send notifications and messages to a large number of recipients. It is commonly used to send alerts, notifications, and updates via email, SMS, or application endpoints. SNS can also be integrated with other AWS services like CloudWatch for automated notifications.
Key features of SNS include:
Topic-based messaging: Create topics to categorize messages and send notifications to multiple subscribers.
Multiple protocols: Send messages via email, SMS, or application endpoints.
Scalability: Automatically handle the scaling of notifications to a large number of subscribers.
By combining CloudWatch with SNS, you can create a robust monitoring system that alerts you when specific conditions are met, helping you manage costs and resources effectively.
Task: Create a CloudWatch Alarm for Billing
Step 1: Create an SNS Topic
Log in to the AWS Management Console:
- Go to the AWS Management Console and search for SNS in the services search bar.
Create a New Topic:
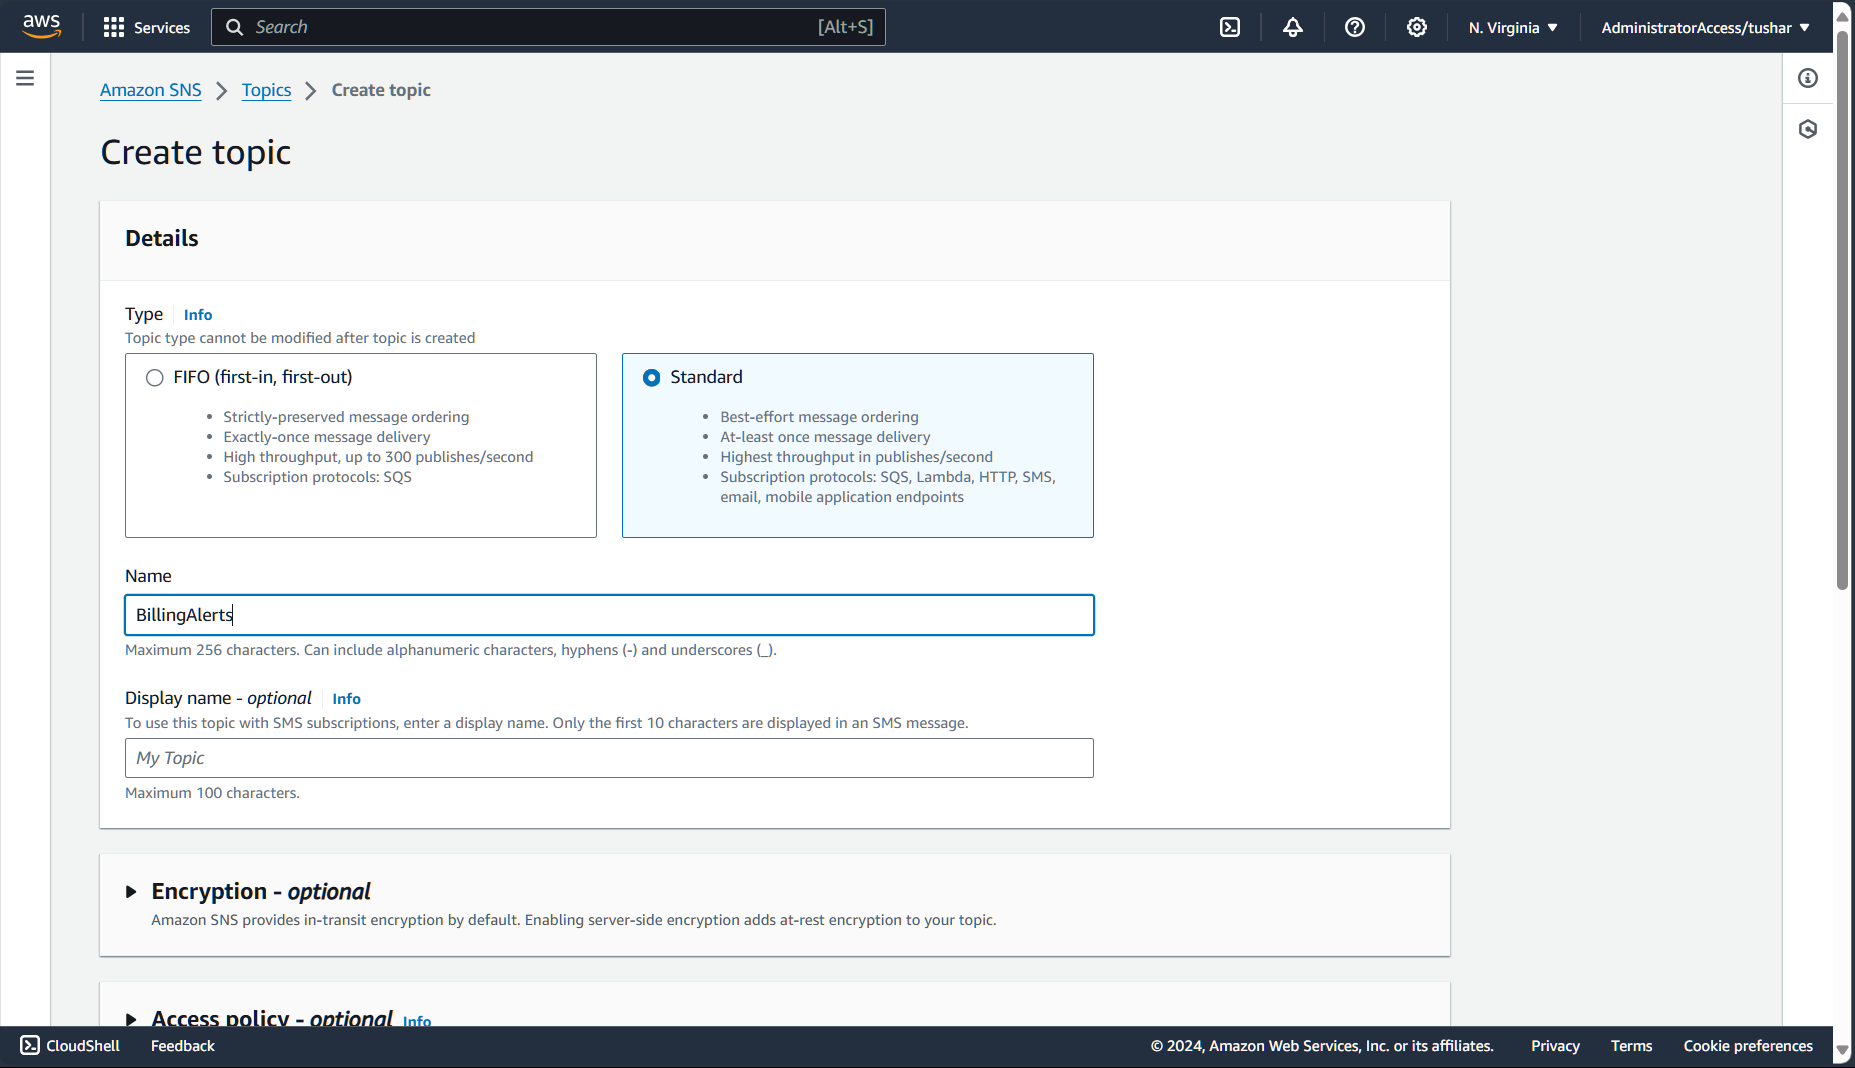
Click on "Topics" in the left-hand navigation panel.
Click on "Create topic."
Select "Standard" as the type of topic.
For "Name," enter a suitable name like
BillingAlerts.Click "Create topic."
Subscribe to the Topic:
Once your topic is created, click on it to open its details.
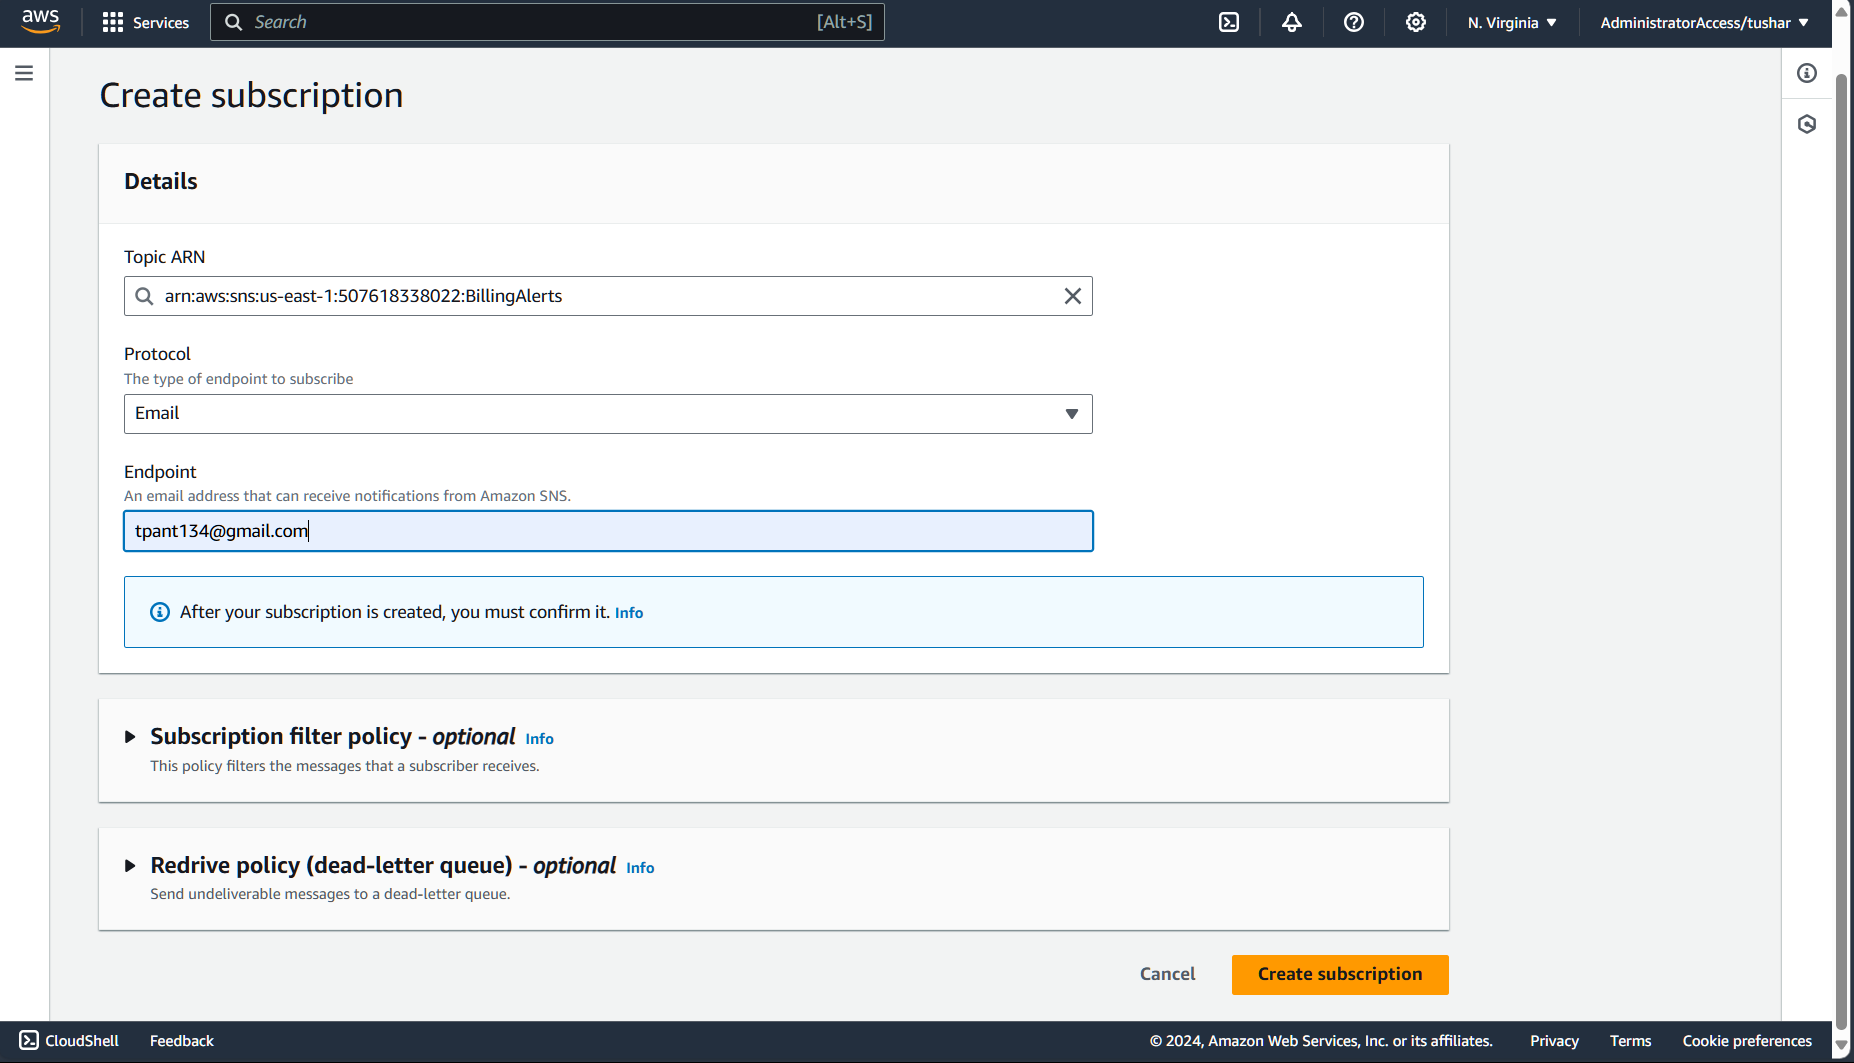
Click on "Create subscription."
For "Protocol," select "Email."
For "Endpoint," enter your email address where you want to receive billing alerts.
Click "Create subscription."
Confirm the Subscription:
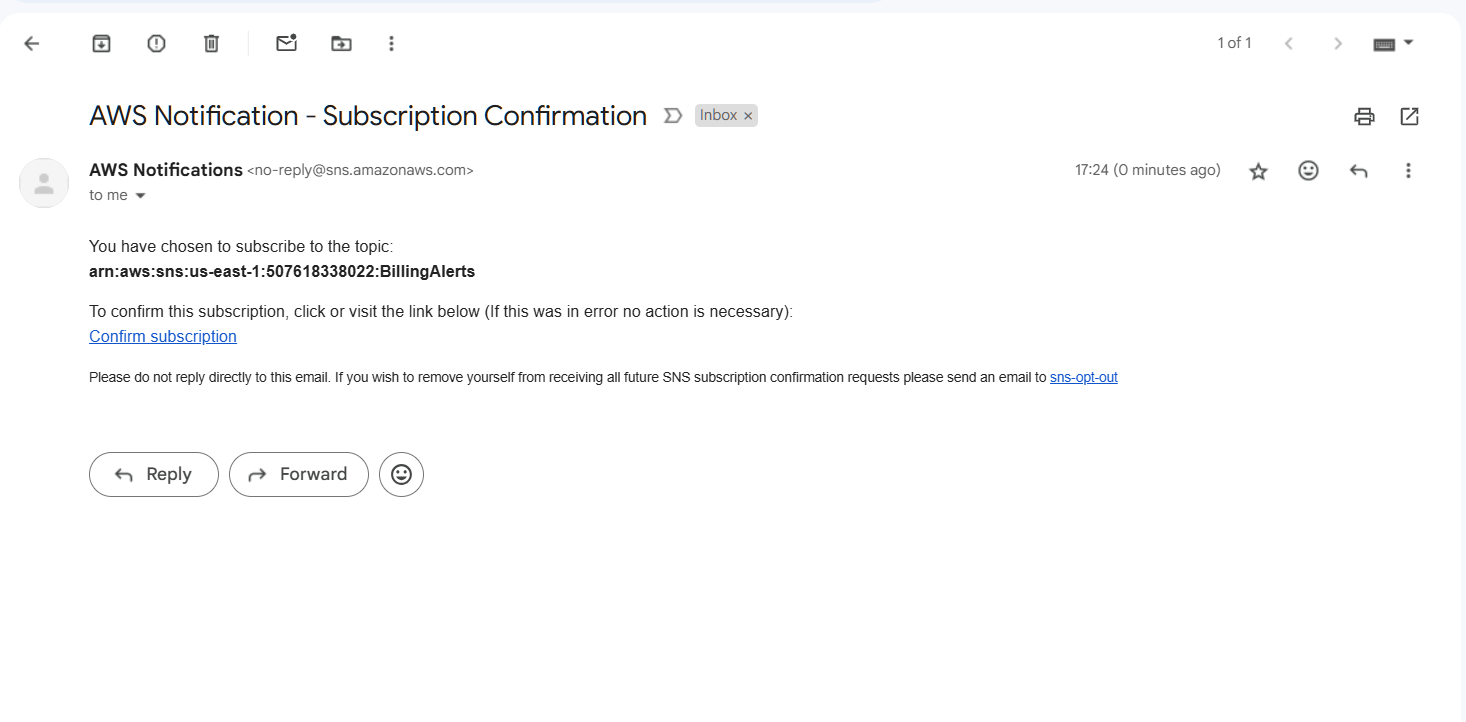
Check your email inbox for a confirmation message from AWS SNS. Click on the confirmation link to activate your subscription.
Step 2: Create a CloudWatch Alarm for Billing
Go to CloudWatch:
- In the AWS Management Console, search for CloudWatch and click on it.
Access Alarms:
In the CloudWatch console, click on "Alarms" in the left-hand navigation panel.
Click on "Create alarm."
Select Metric:
Click on "Select metric."
Under the "Browse" tab, click on "Billing."
Choose the "TotalEstimatedCharge" metric for your account.
Configure Alarm Conditions:
Click on the "Select metric" button next to the
TotalEstimatedChargemetric.In the "Create Alarm" page, set the following:
Threshold type: Static
Whenever TotalEstimatedCharge is...: Greater than
Threshold: Enter
2(this means you will be notified when your estimated charge exceeds $2).
Set Actions:
Under "Notification," choose the SNS topic you created earlier (
BillingAlerts).Set the "Alarm state trigger" to "In Alarm."
Add Name and Description:
Give your alarm a name, such as
BillingAlarm_$2.You can also add a description if you like.
Review and Create Alarm:
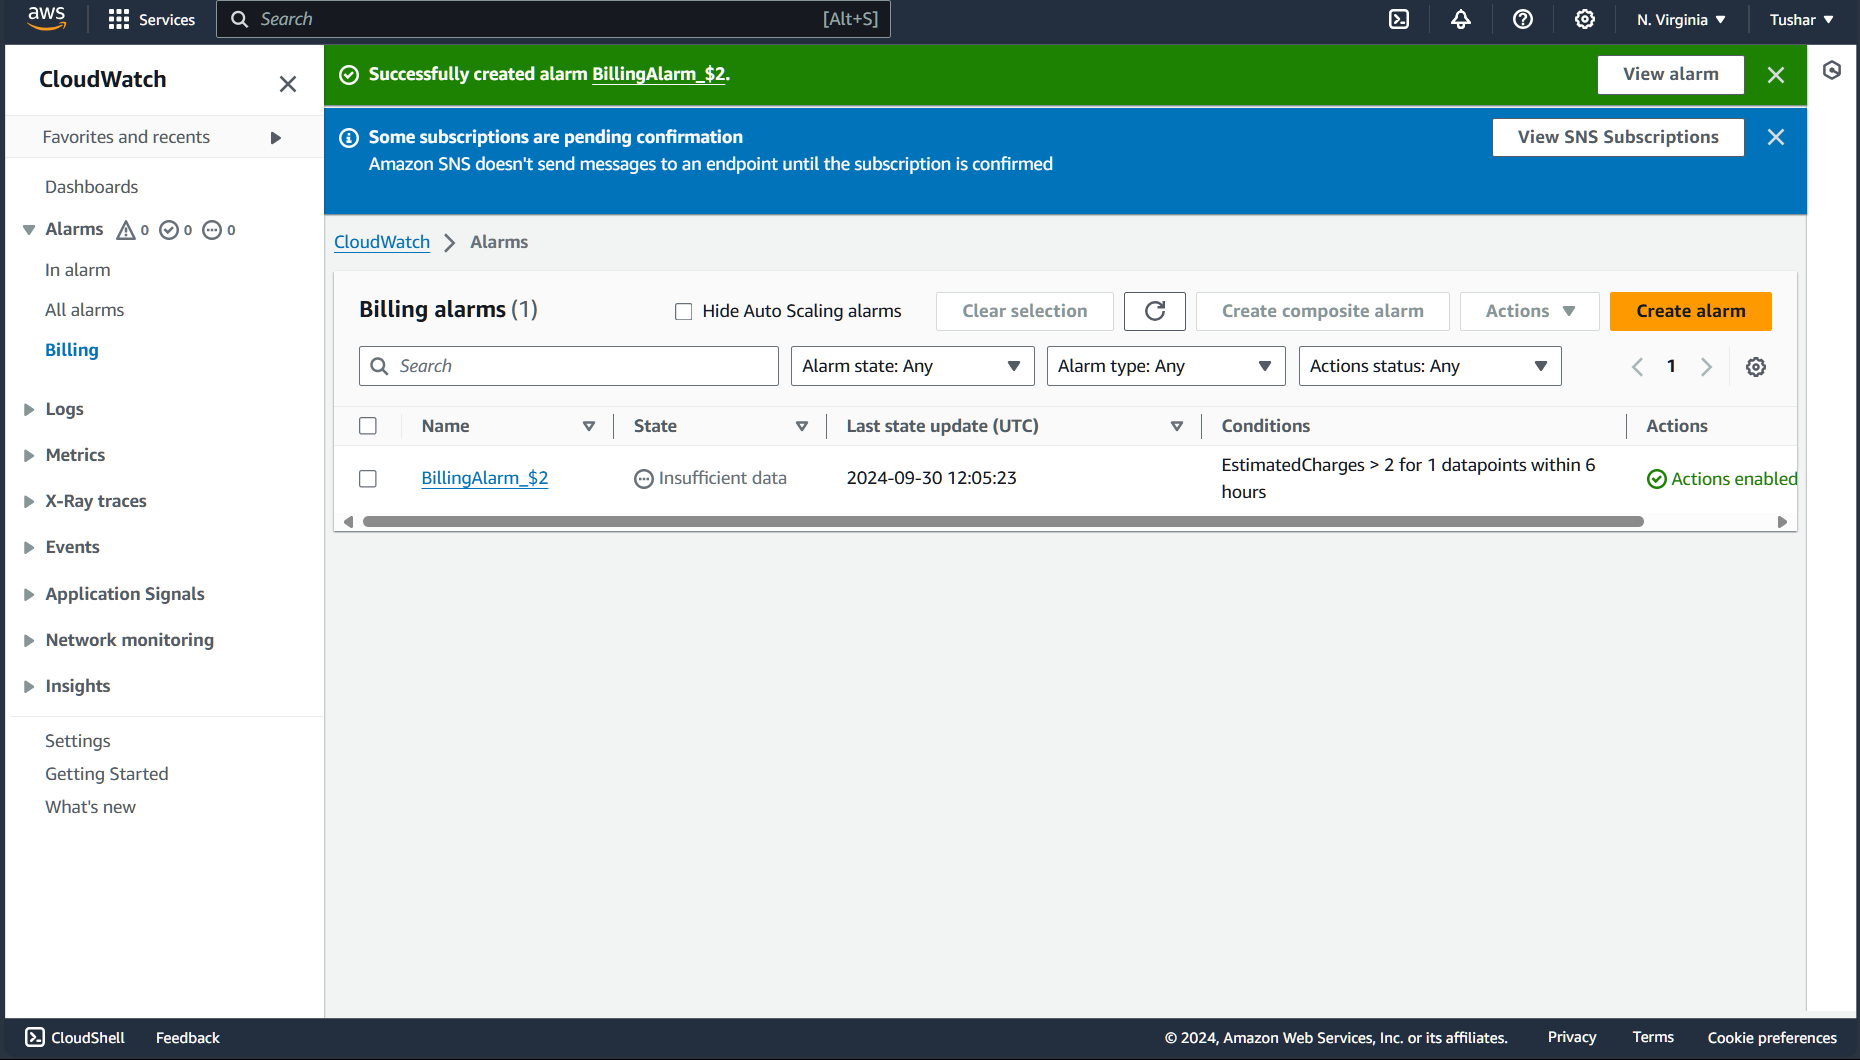
Review all settings, and click "Create alarm."
Step 3: Verify Alarm and Notifications
Once the alarm is created, CloudWatch will monitor your billing. When the estimated charge exceeds $2, you should receive an email notification via the SNS topic you subscribed to.
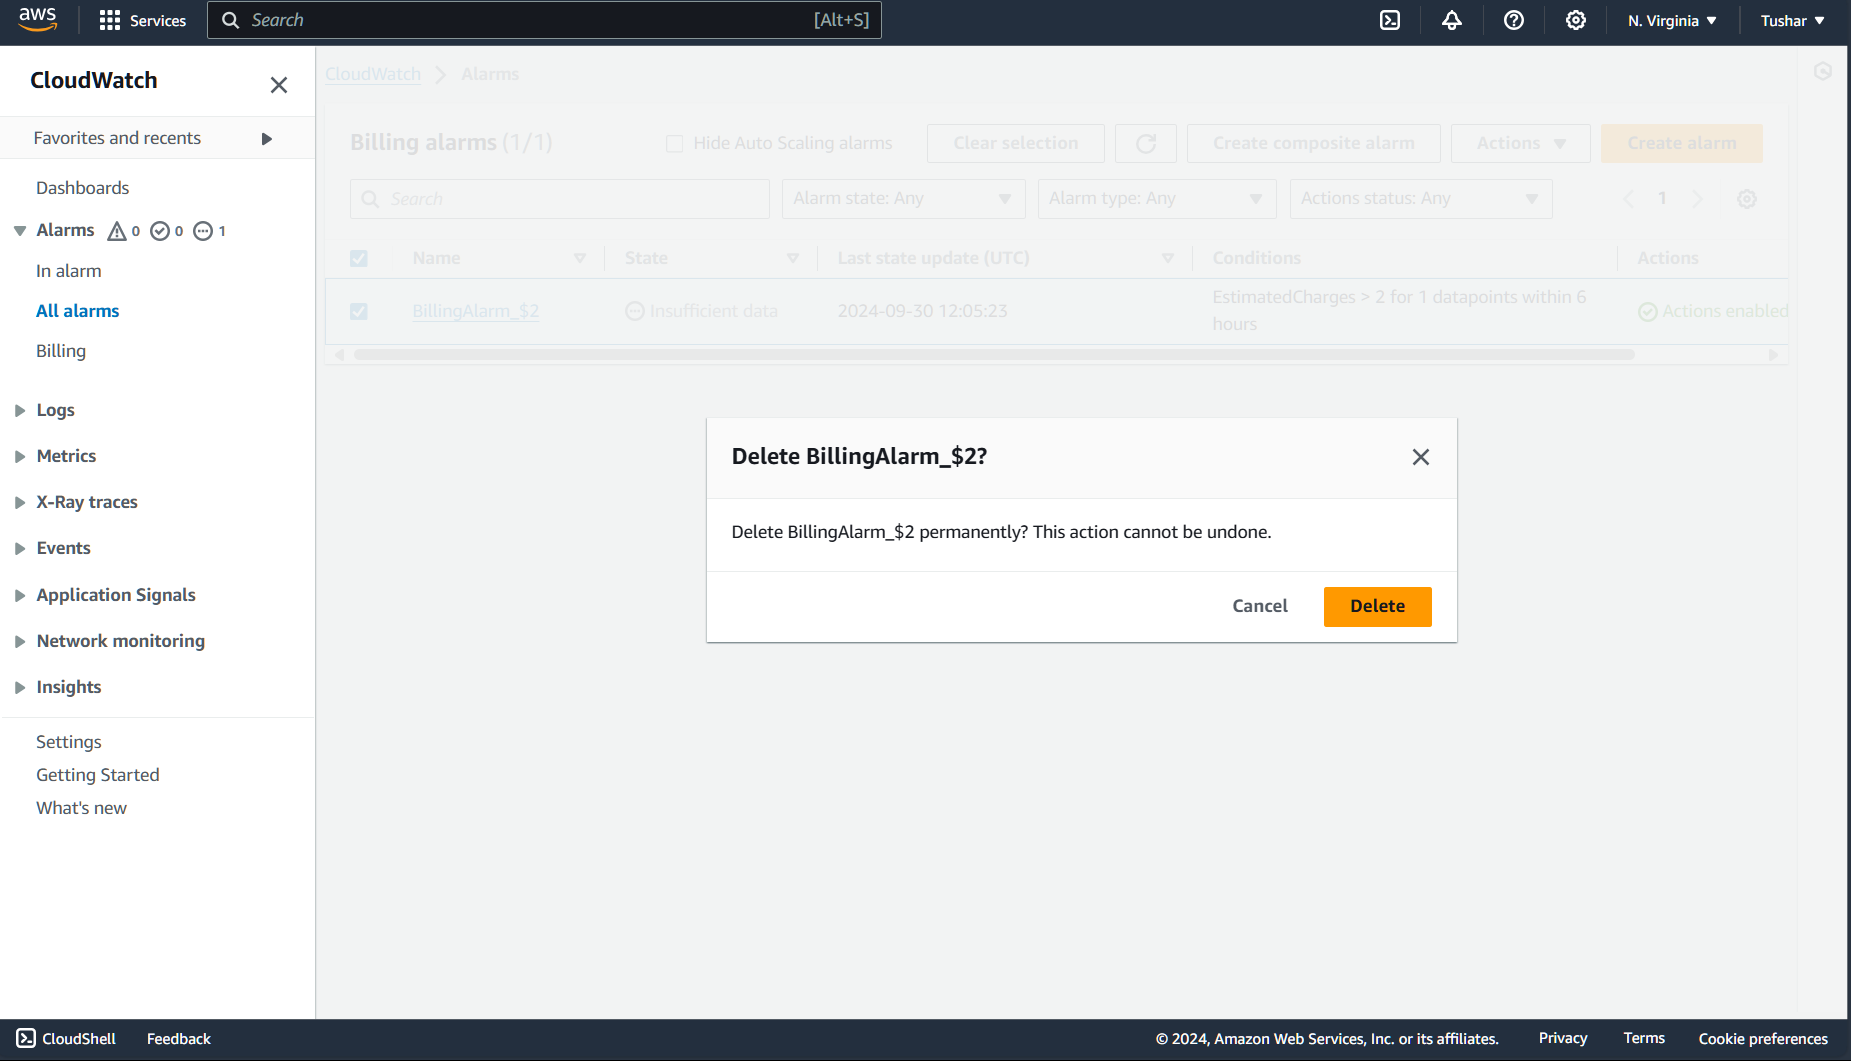
Step 4: Delete Your Billing Alarm
Once you've verified that your CloudWatch alarm is working (and before it triggers an actual alert!), it’s a good practice to delete the alarm if you no longer wish to keep it. Here’s how to do it:
Go Back to CloudWatch:
- In the AWS Management Console, navigate back to the CloudWatch service.
Access Alarms:
- Click on "Alarms" in the left-hand navigation panel.
Select the Alarm:
Find the alarm you created (
BillingAlarm_$2) in the list.Check the checkbox next to it.
Delete the Alarm:
Click on the "Actions" button and select "Delete."
Confirm the deletion.
Conclusion
Congratulations on completing Day 46 of the 90 Days of DevOps Challenge! Today, you learned how to set up a CloudWatch alarm to monitor your AWS billing and send notifications via SNS. By implementing this monitoring system, you can stay informed about your spending and avoid unexpected charges.
Understanding your AWS costs is critical, especially when you're experimenting with various services. Setting up alerts helps you maintain control over your AWS environment and budget effectively.
In the upcoming tasks, we will continue exploring more features and services within AWS, enhancing your cloud skills further. Keep up the great work, and let’s look forward to the next challenge together!
Subscribe to my newsletter
Read articles from Tushar Pant directly inside your inbox. Subscribe to the newsletter, and don't miss out.
Written by

Tushar Pant
Tushar Pant
Cloud and DevOps Engineer with hands-on expertise in AWS, CI/CD pipelines, Docker, Kubernetes, and Monitoring tools. Adept at building and automating scalable, fault-tolerant cloud infrastructures, and consistently improving system performance, security, and reliability in dynamic environments.