Quick Guide: Launch Your First AWS EC2 Instance in Just 60 Seconds
 Syed Dadapeer
Introduction
💻 Traditional Way: Buying a Physical Computer
In the past, if you needed a server or computer for your business or project, you had to:
🏬 Buy hardware: Go to a store and purchase a physical machine.
🛠️ Set it up: Install the operating system, configure settings, and connect it to your network.
🔧 Maintain it: Ensure it's running smoothly (fix issues, apply updates, etc.).
🛠 Example: Imagine you needed a powerful computer to host a website. You’d buy a physical machine, keep it in your office or home, and handle all the maintenance yourself.
☁️ AWS EC2: A Virtual Server in the Cloud
With AWS (Amazon Web Services), you can skip the hassle of buying and maintaining physical hardware. Instead, you can "rent" virtual servers—called EC2 instances—from Amazon, which are located in their global data centers.
- EC2 (Elastic Compute Cloud) = A virtual server you can customize and use without worrying about the hardware.
💡 Why AWS EC2?
⚡ Flexibility: Scale up or down depending on your needs. Add more power when you need it!
💰 Cost-Effective: Pay only for the time you use the instance. No need for large upfront costs for hardware.
🚀 Speed: Launch a new server in minutes, compared to the days or weeks it might take to order, set up, and configure physical hardware.
Global Reach: AWS has data centers worldwide, so you can choose where your server is located. This is great for reducing latency or following data privacy regulations.
🛡️ Hassle-Free Maintenance: AWS takes care of all the backend stuff—like hardware failures or updates—so you don’t have to!
AWS is like your one-stop shop for renting virtual computers, ready to go with just a few clicks! 🖥️💨
Prerequisites
Before we dive in, make sure you have:
An AWS account (you can sign up for free if you don’t have one).
A basic understanding of cloud computing concepts (not mandatory, but helpful).
Step 1: Log into AWS Management Console 🖥️
Go to AWS Management Console.
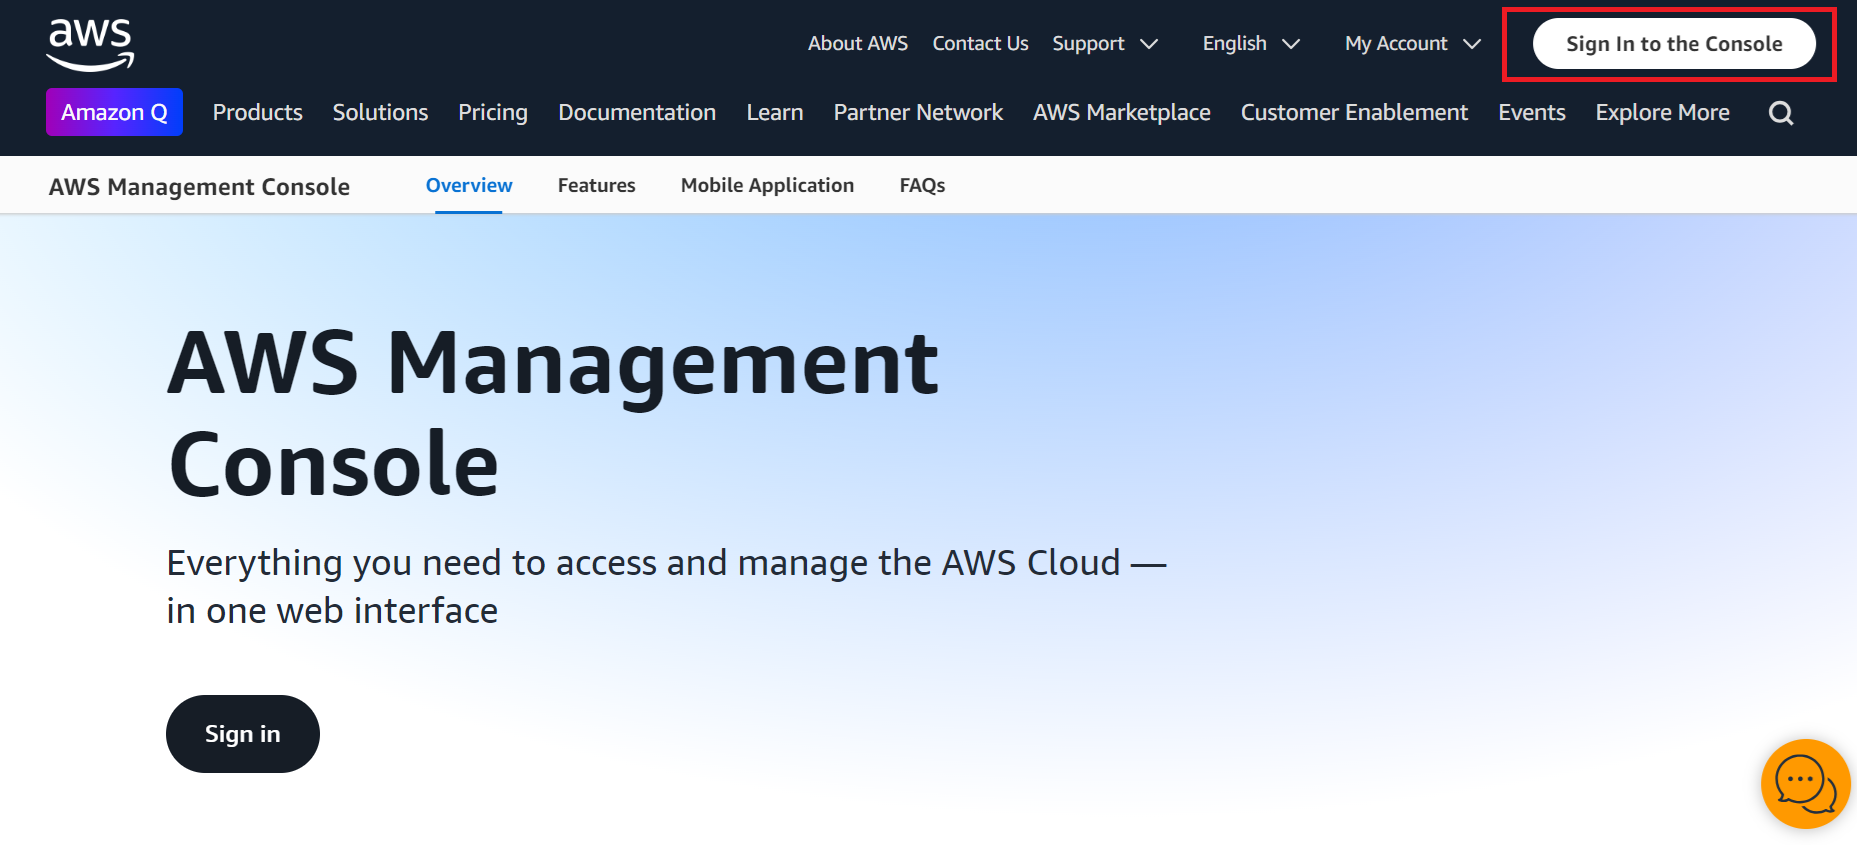
Log in using your AWS account credentials.
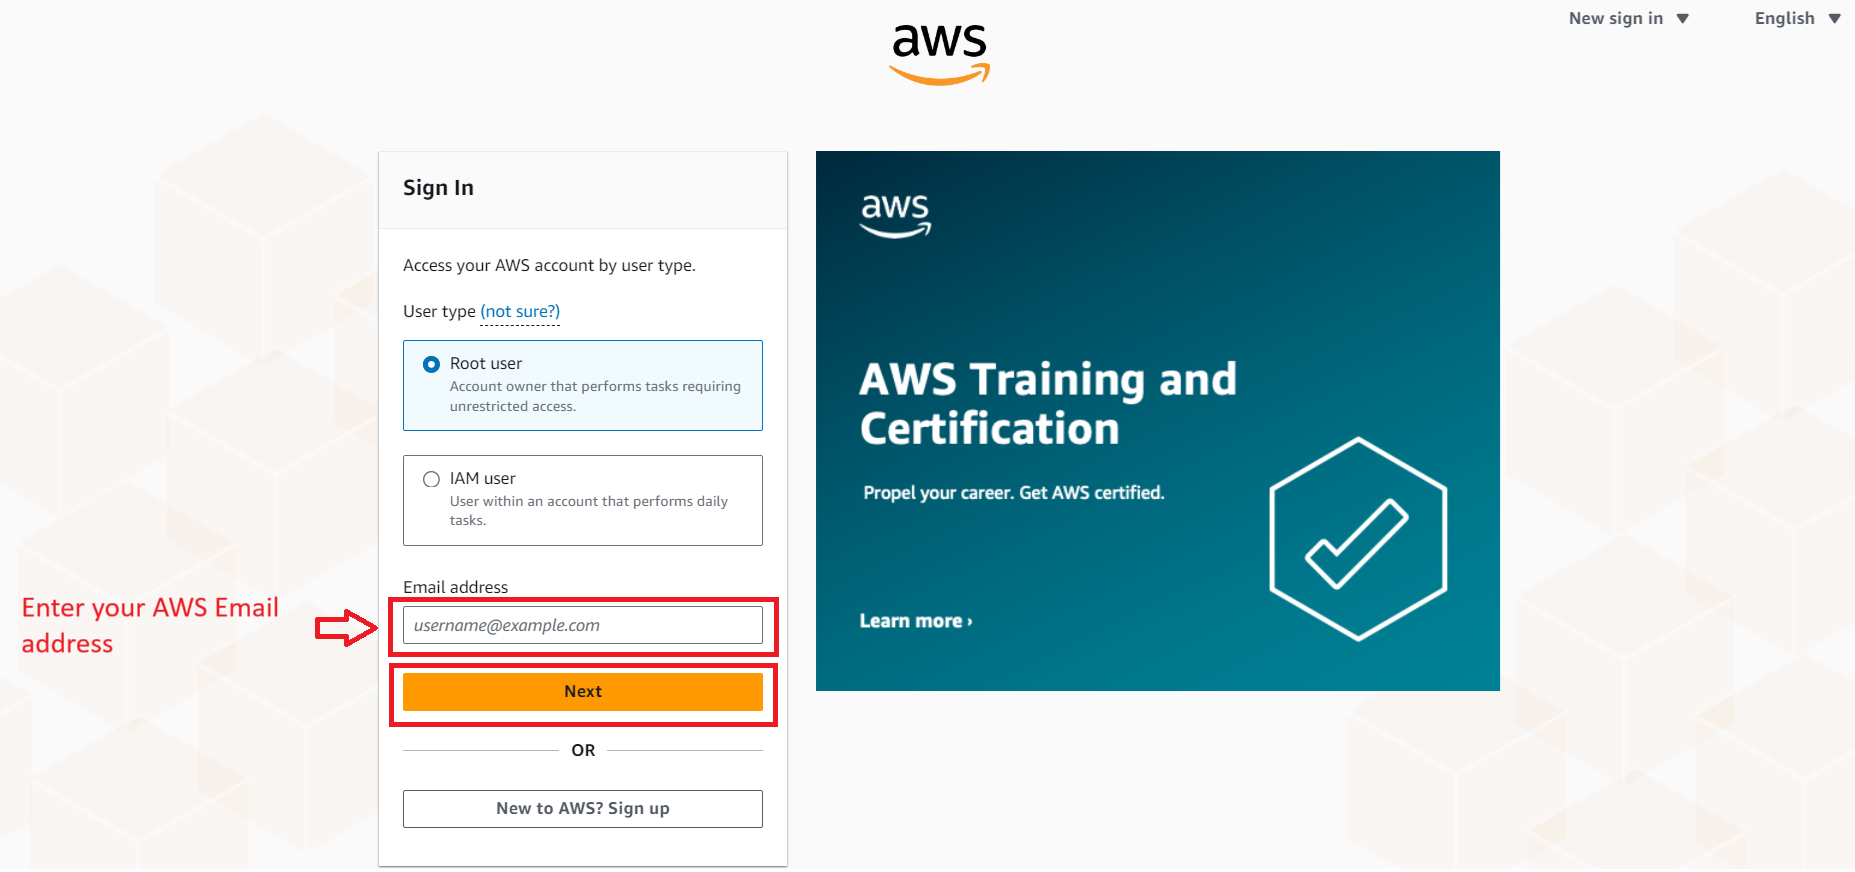
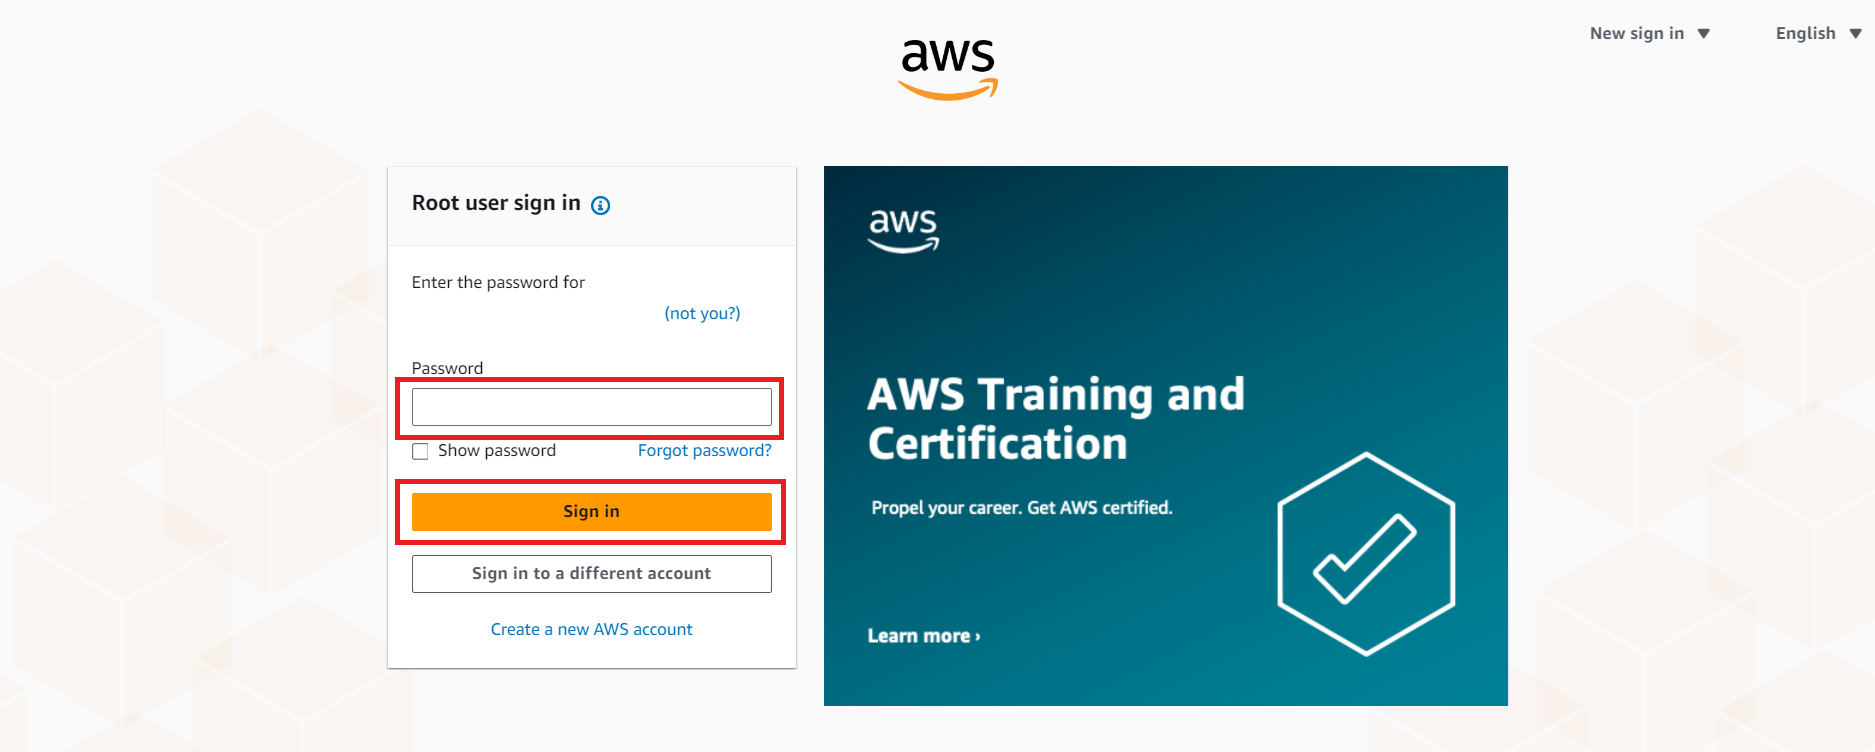
Once you're logged in, you'll see a dashboard full of services.
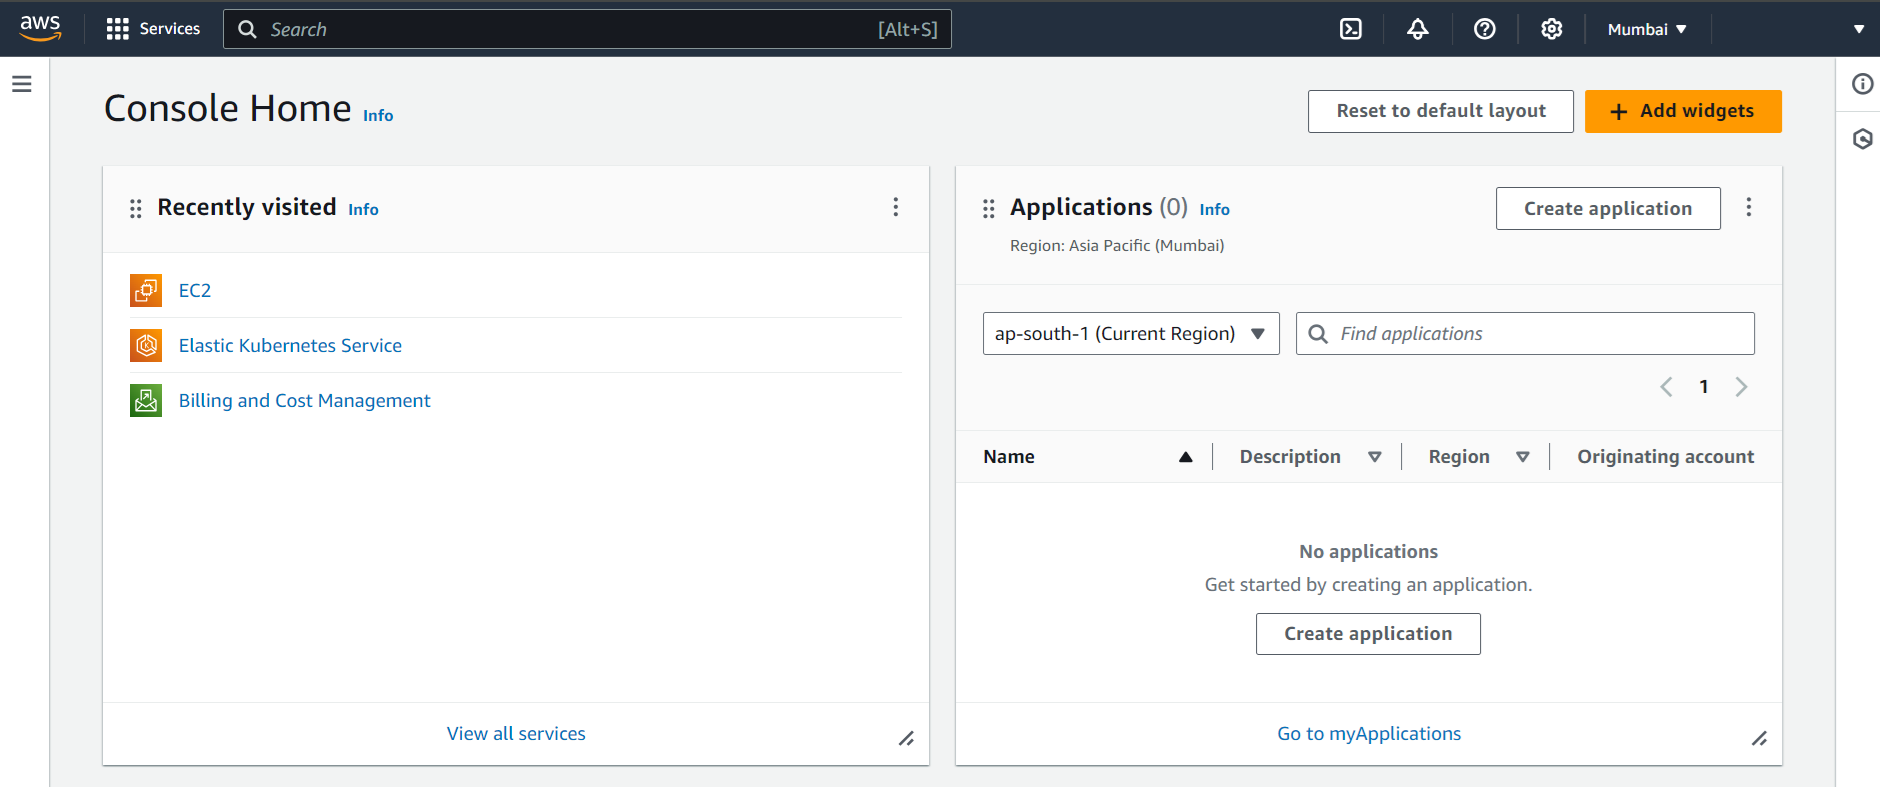
Step 2: Navigate to EC2 Dashboard 🚀
In the search bar at the top, type “EC2” and select it from the dropdown menu.
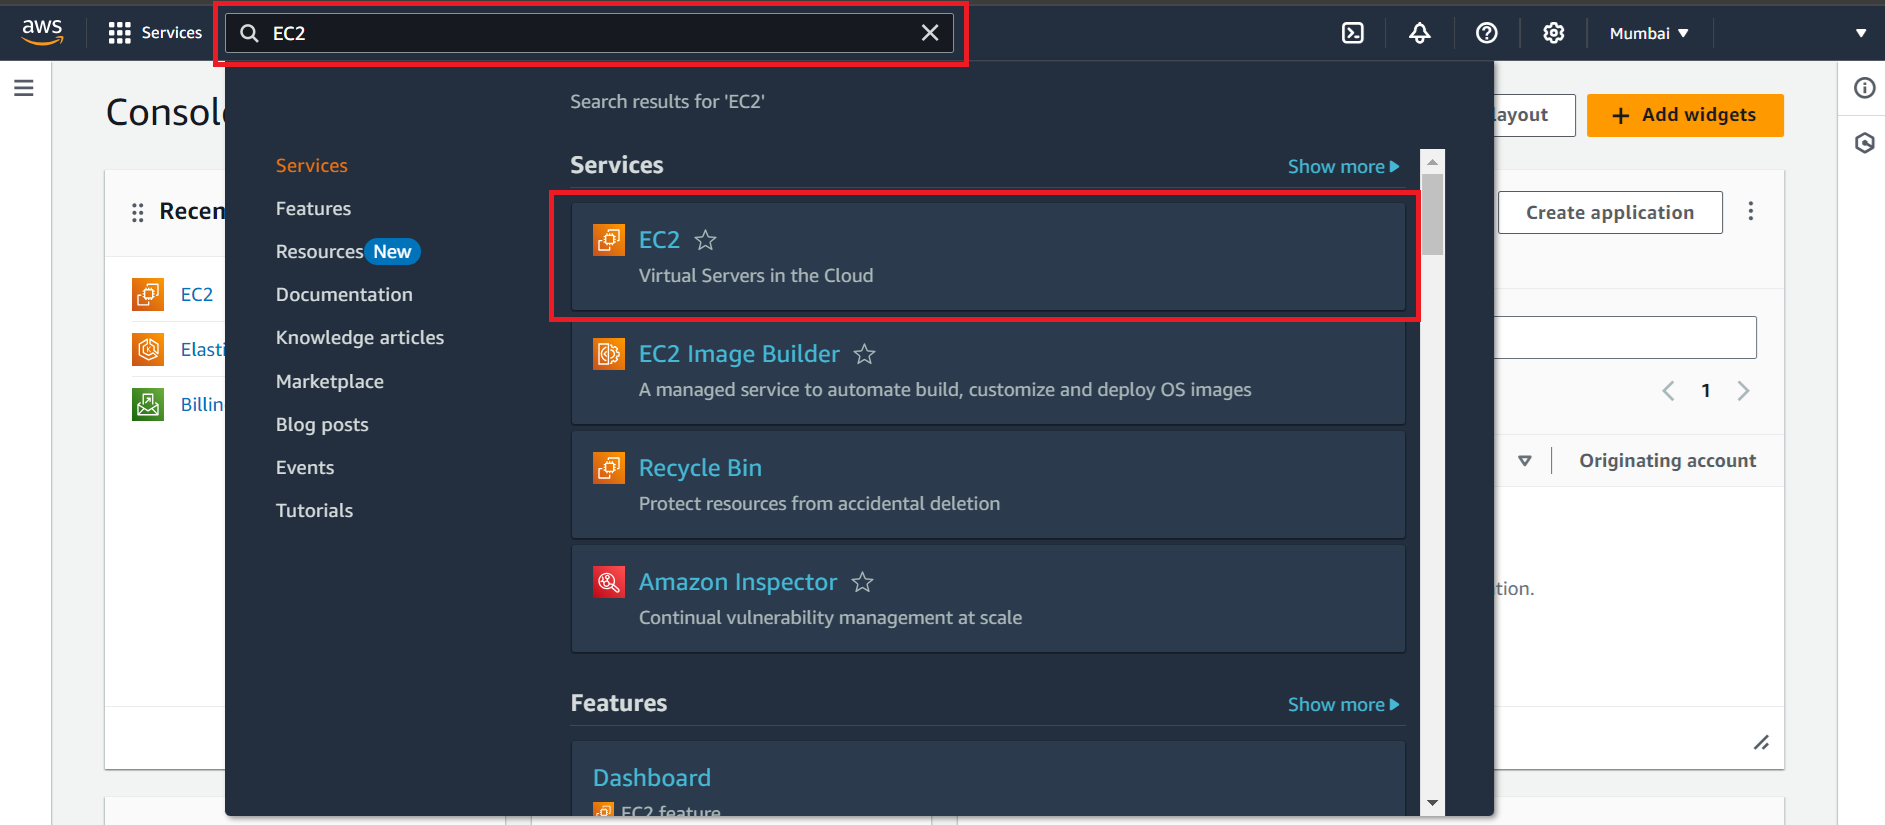
You’ll land on the EC2 Dashboard, where you can manage your instances.
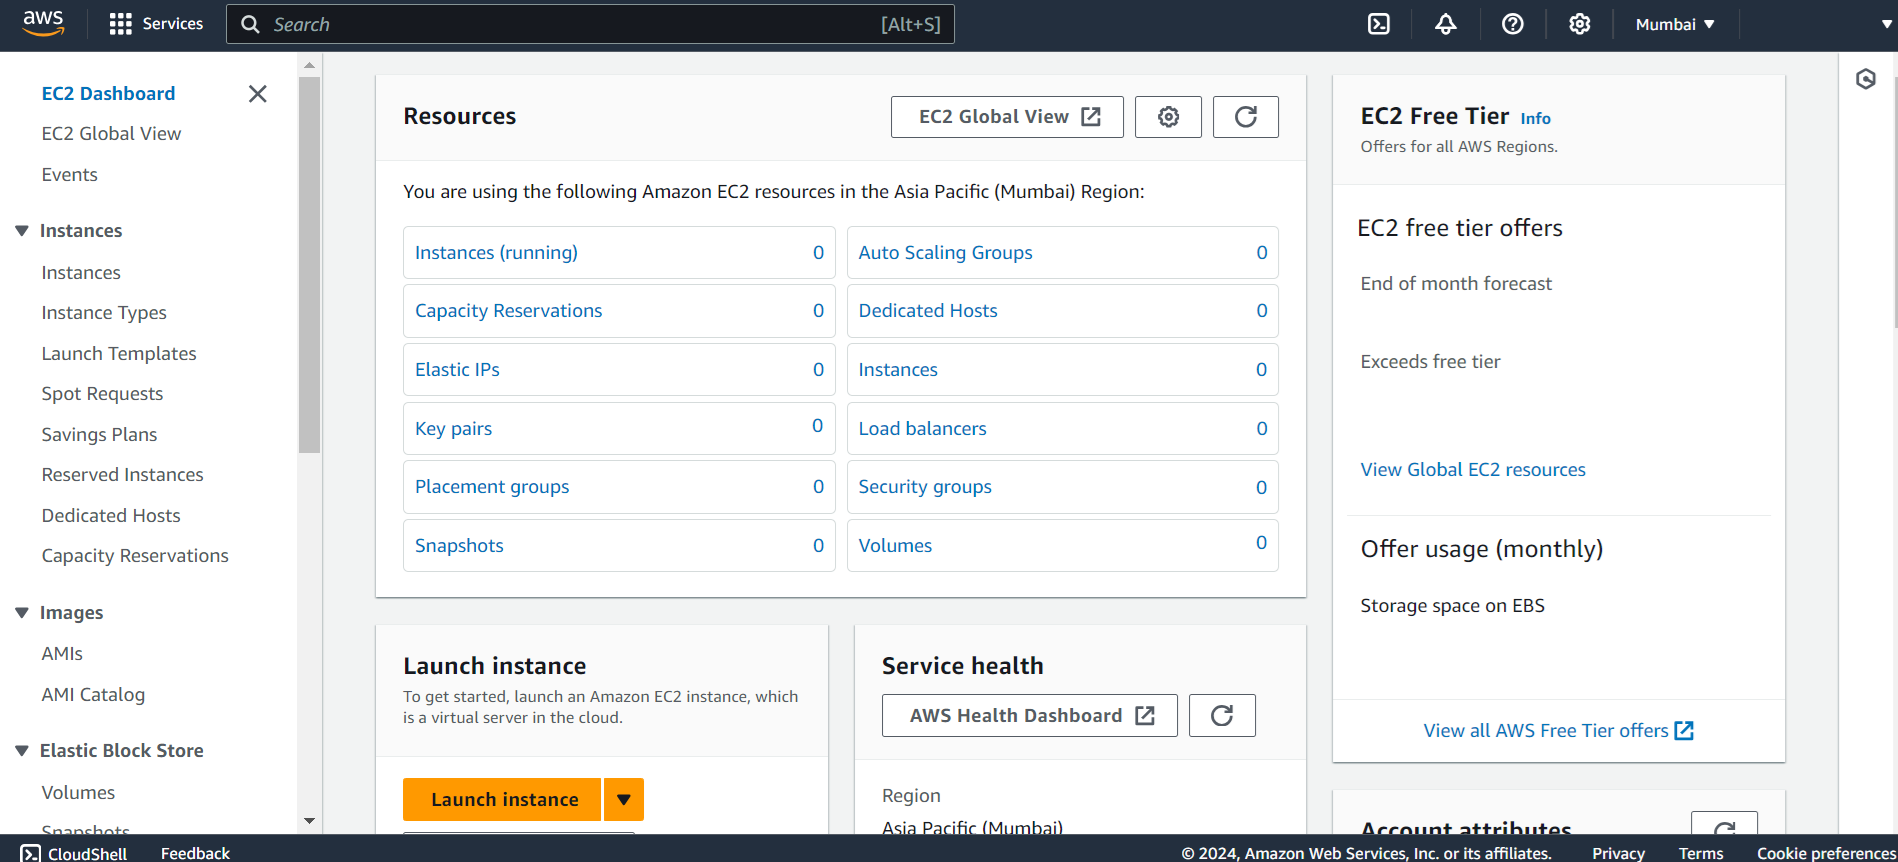
Step 3: Launch Instance 🛠️
Click on the “Launch Instance” button.
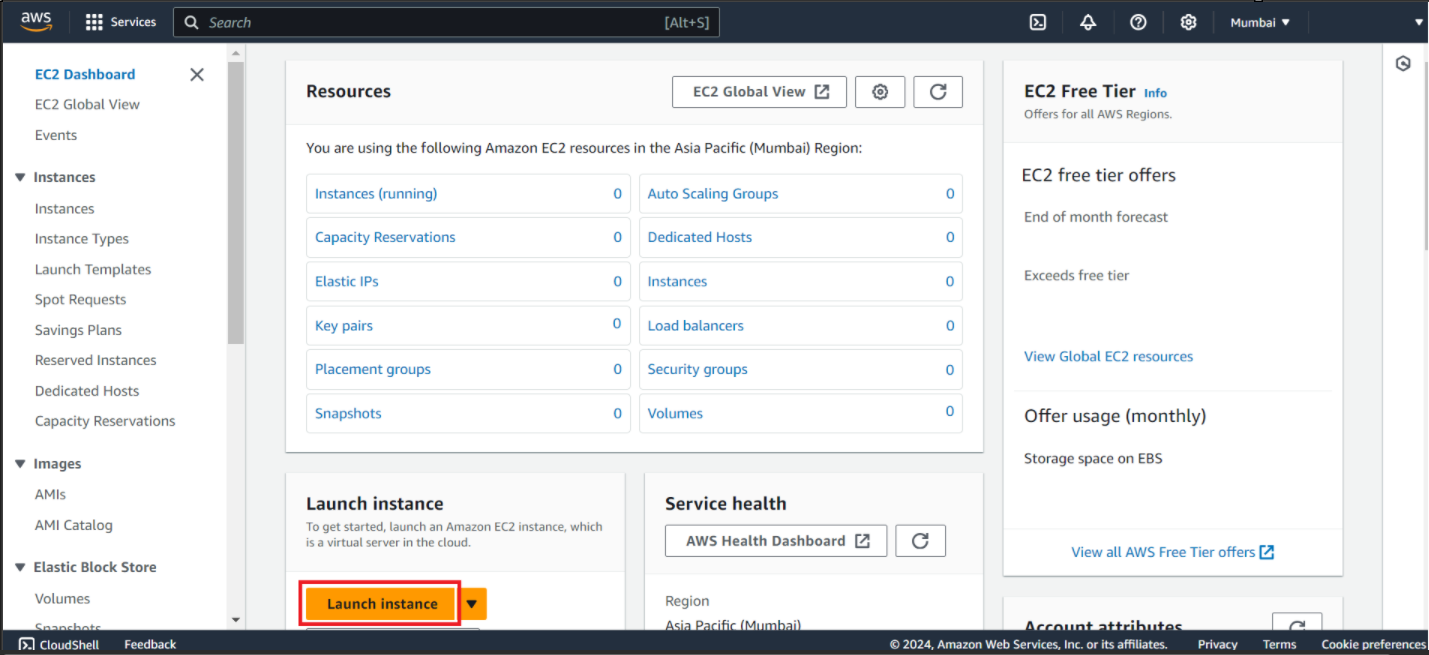
This will open the launch wizard, which will guide you through the setup process.
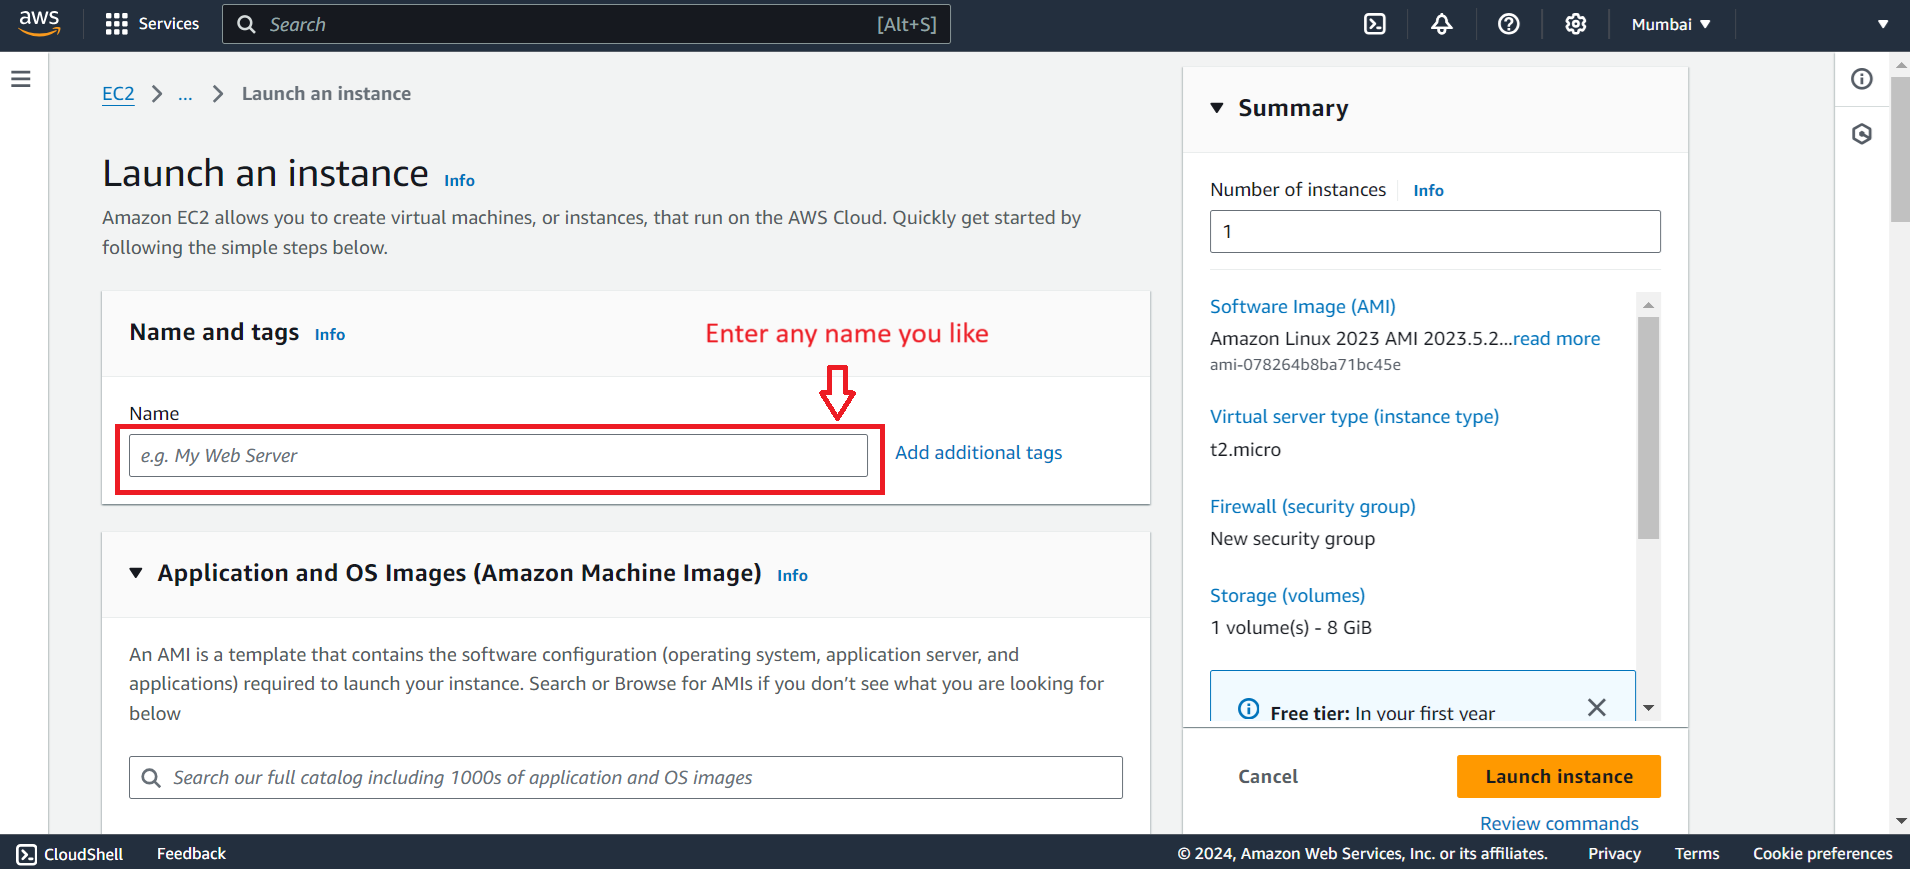
Step 4: Choose an Amazon Machine Image (AMI) 🌐
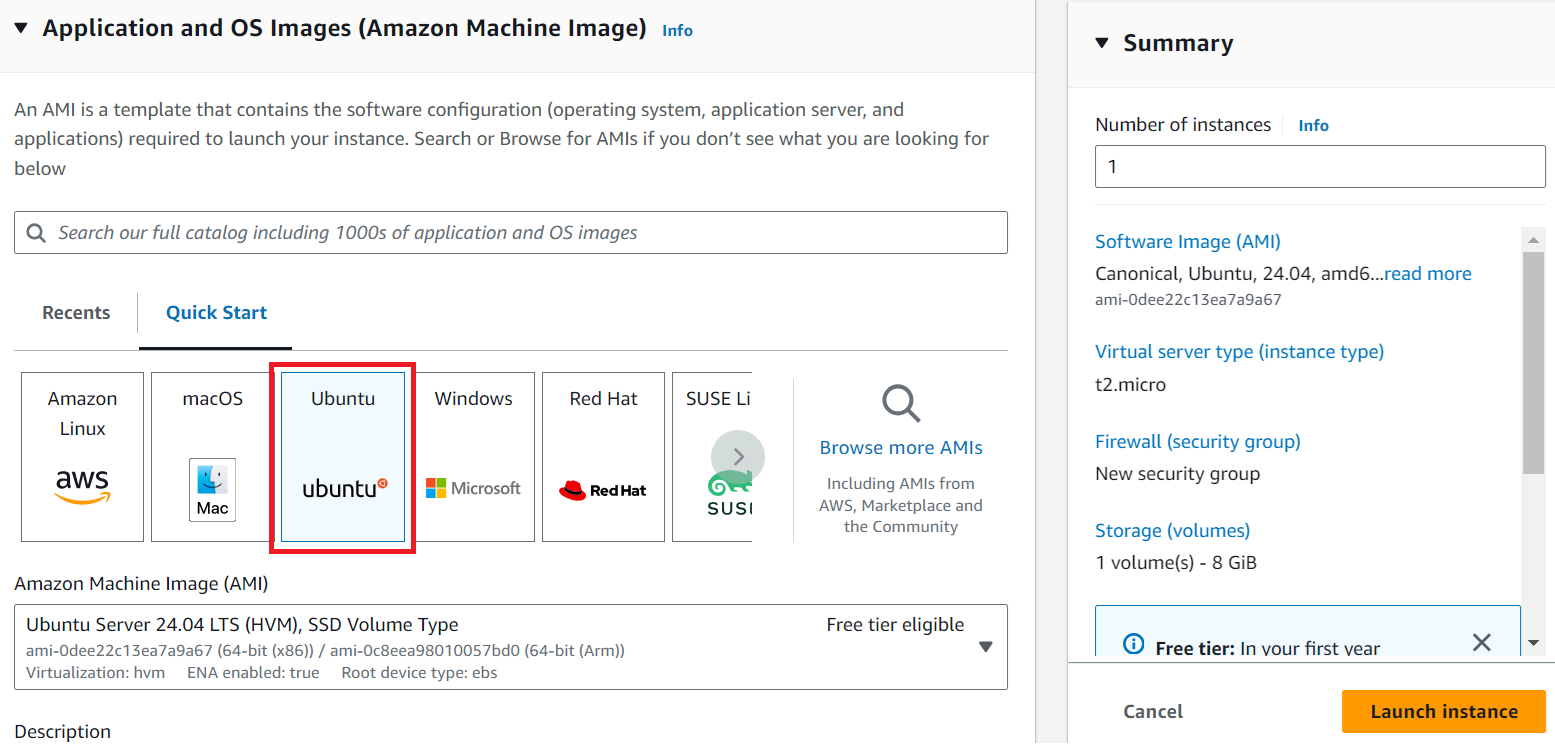
Here, you'll find a variety of pre-configured templates. Choose an AMI that suits your needs. For beginners, selecting Amazon Linux 2 AMI or Ubuntu Server is a good choice.
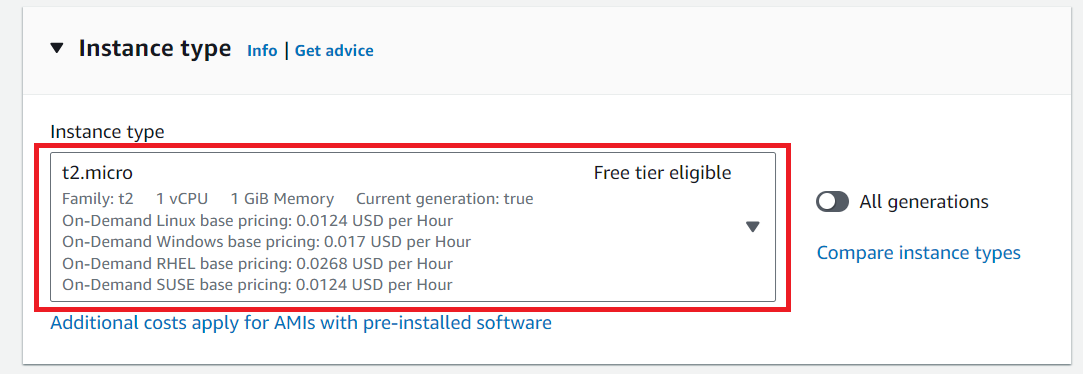
Step 5: Choose an Instance Type 💻
You'll see a list of instance types. For starters, select the t2.micro instance type (this is eligible for the AWS Free Tier).
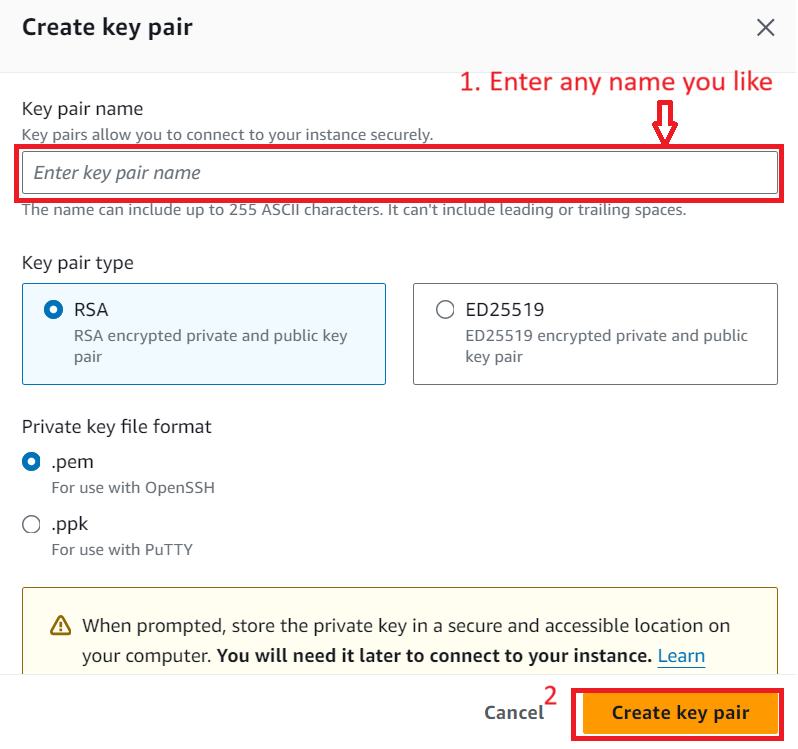
Step 6: Create a key pair 🔐
Select an existing key pair or create a new one. Create a new key pair if you don’t have one. Download the key pair (it’s a .pem file) and store it securely!
🚨 ⚠️ Warning
Do not choose to Proceed without a key pair (Not recommended). If you launch your instance without a key pair, then you can't connect to it.

Step 7: Network Settings🛜
Configure network settings like VPC, subnet, and firewalls (security groups) to manage traffic from specific IP addresses, protocols, and ports. You can create a new security group or select an existing one. For beginners, it's recommended to keep the default settings and make sure you tick SSH, HTTP (port 80), and HTTPS (port 443) if you intend to host a website.
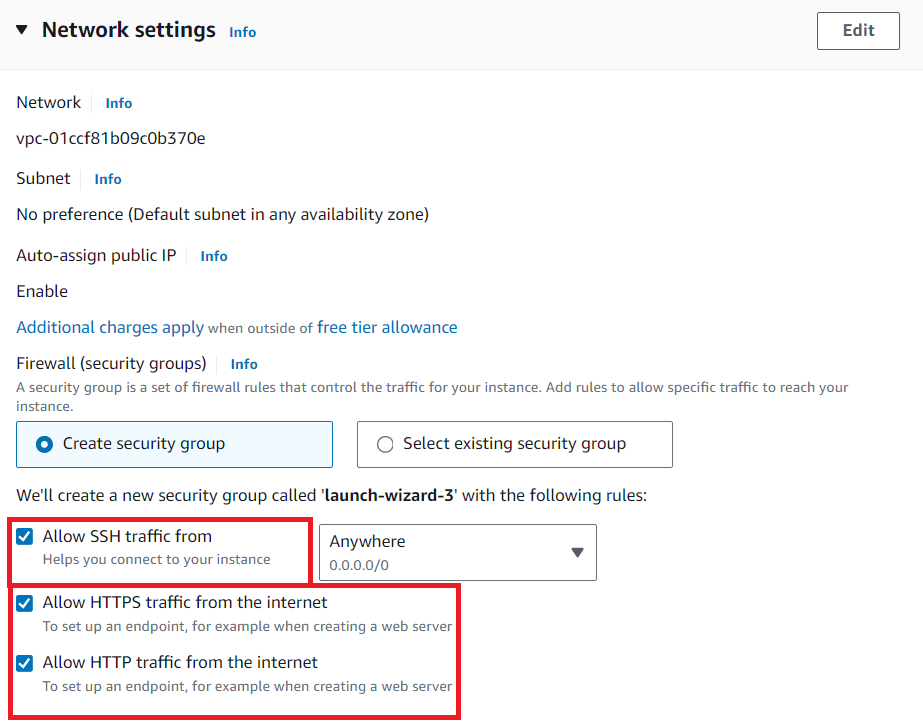
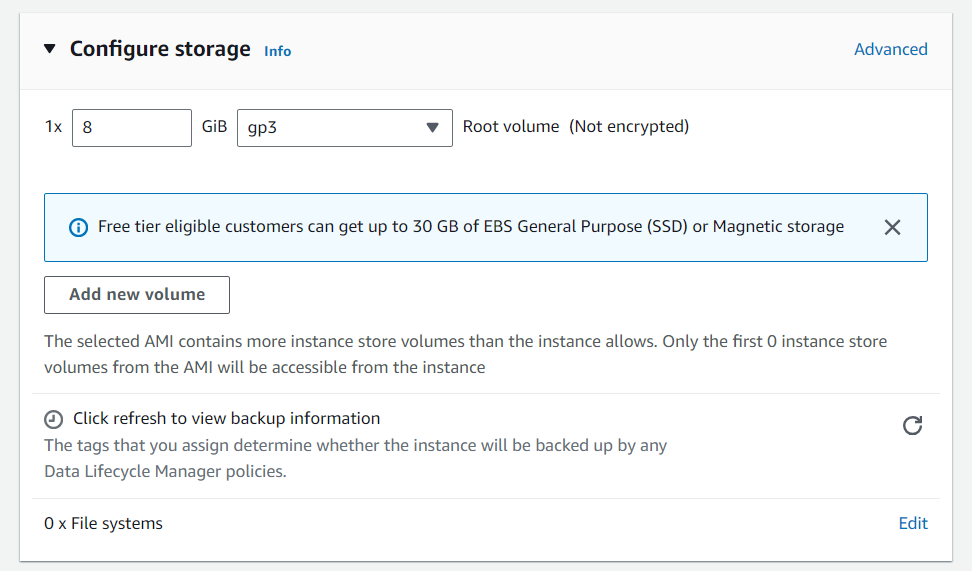
Step 8: Configure Storage 📦
You can adjust the size of your storage volume. The default value is usually sufficient, but you can increase it if you need more space.
Step 9: Configure Additional details (Optional)✨
- Beginners can usually leave the additional details at the default settings, but adjustments can be made if needed.
Step 10: Review and Launch 🚀
Review your configuration & Enter the Number of instances you want to create.
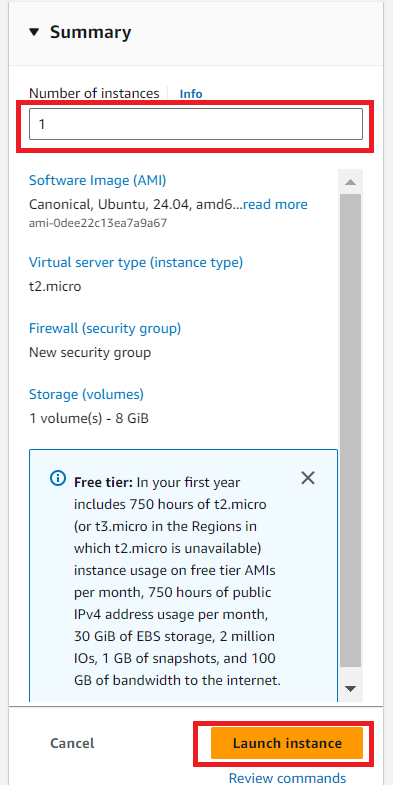
And then click “Launch Instances.”
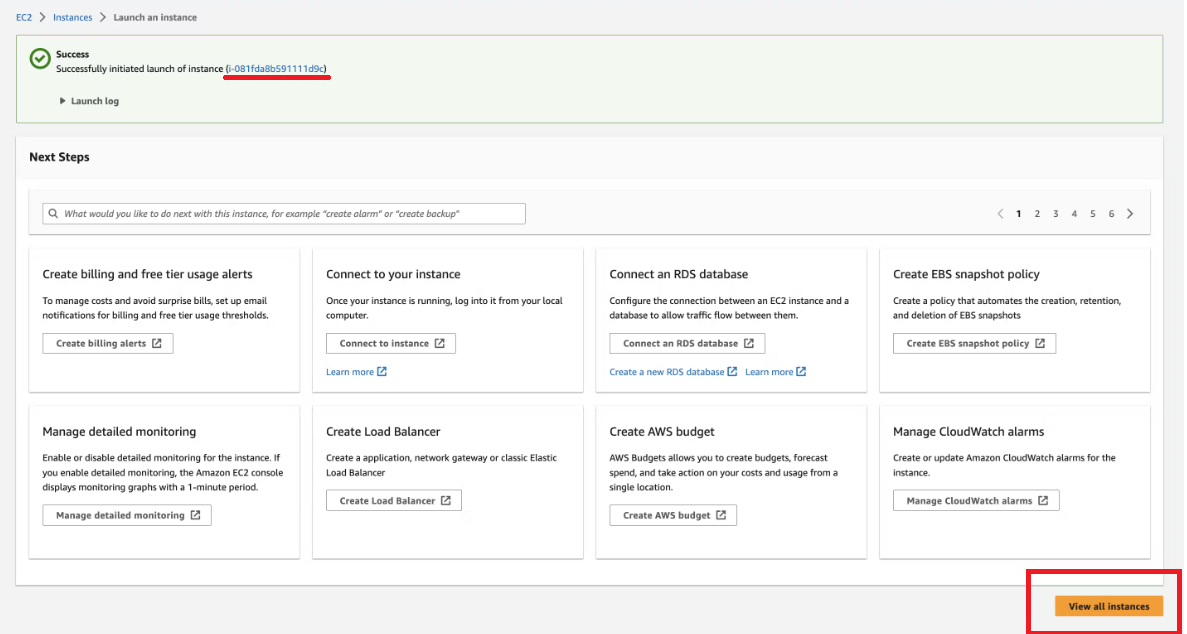
After clicking the "Launch Instances" button, a new page will confirm that your instance was successfully created.
Click on the instance ID or "View all instances" on the page to see the instance we just created.
Step 11: Access Your EC2 Instance 🔑
There are several ways to access EC2 instances:
Method 1: Connect using EC2 Instance Connect
Supported Linux distributions:
Amazon Linux 2 (any version)
Ubuntu 16.04 or later
Select your instance and click on the Connect button.

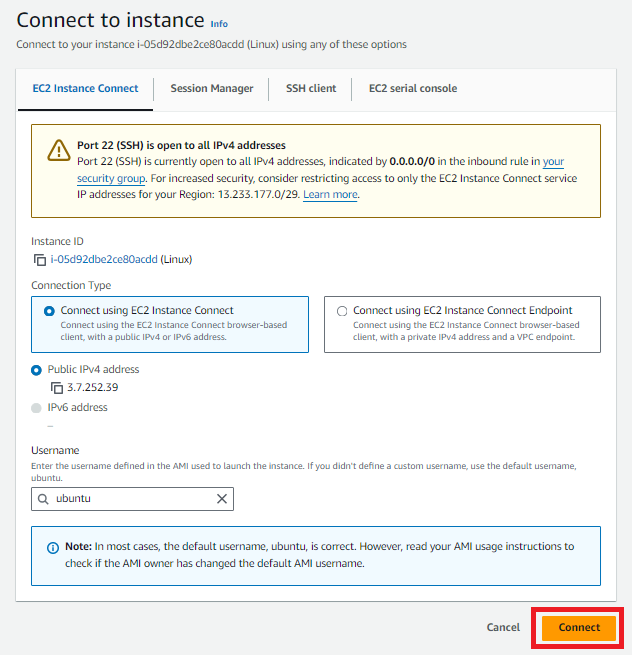
It will connect through your browser.

Method 2: Connect to EC2 instance using PuTTY/any terminal
Once your instance is running, go to the “Instances” section in the EC2 dashboard.
Select your instance and copy its Public IP address.
Open a terminal (or Command Prompt) and use the following command to connect to your instance (replace
<path_to_your_key>and<public_ip>):ssh -i <path_to_your_key> ec2-user@<public_ip>
Conclusion 🎉
Congratulations! You’ve successfully launched your first EC2 instance. From here, you can install software, host applications, or simply explore the capabilities of cloud computing.
Feel free to share your experience or any questions you might have in the comments below! Happy cloud computing! ☁️✨
Subscribe to my newsletter
Read articles from Syed Dadapeer directly inside your inbox. Subscribe to the newsletter, and don't miss out.
Written by

Syed Dadapeer
Syed Dadapeer
Hi, I'm Syed Dadapeer! I'm an experienced 𝐂𝐢𝐭𝐫𝐢𝐱 𝐀𝐝𝐦𝐢𝐧𝐢𝐬𝐭𝐫𝐚𝐭𝐨𝐫 and 𝐒𝐲𝐬𝐭𝐞𝐦 𝐄𝐧𝐠𝐢𝐧𝐞𝐞𝐫 with over 2.5 years of IT experience, focusing on troubleshooting complex issues, cloud computing, virtualization, and Citrix products. I'm also 𝐑𝐞𝐝 𝐇𝐚𝐭 𝐜𝐞𝐫𝐭𝐢𝐟𝐢𝐞𝐝! 💡 I’m passionate about learning new technologies and applying them to real-world challenges. I’m also exploring the exciting fields of 𝐀𝐫𝐭𝐢𝐟𝐢𝐜𝐢𝐚𝐥 𝐈𝐧𝐭𝐞𝐥𝐥𝐢𝐠𝐞𝐧𝐜𝐞, 𝐂𝐥𝐨𝐮𝐝 𝐂𝐨𝐦𝐩𝐮𝐭𝐢𝐧𝐠, and 𝐃𝐞𝐯𝐎𝐩𝐬.♾️ 🚀 Let’s connect! I’m always open to new opportunities and collaborations. Feel free to reach out via 𝐋𝐢𝐧𝐤𝐞𝐝𝐈𝐧 or at 𝐬𝐝𝐚𝐝𝐮2206@𝐠𝐦𝐚𝐢𝐥.𝐜𝐨𝐦.