Setting up MongoDB Replica set with Docker compose
 Taiwo Ogunola
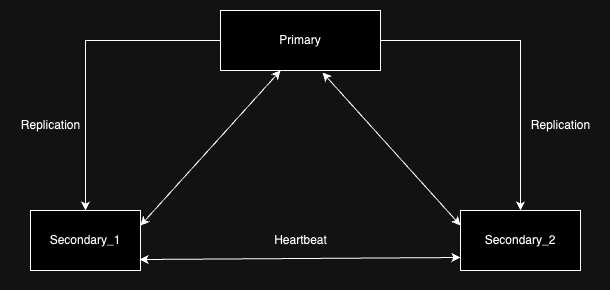
A replica set in MongoDB is a group of mongod processes that maintain the same data set. Replica sets provide redundancy and high data availability, with multiple copies of data on different database servers, ensuring your database remains accessible even if some nodes fail.
A replica set contains several data bearing nodes and optionally one arbiter node. Of the data bearing nodes:
Only one member is considered the primary node. It is the only member responsible for handling write operations.
Other nodes are the secondary nodes, which provides read operation to clients.
A secondary can become a primary. If the current primary is unavailable, the replica set holds an election to select a new primary from the secondaries.
Besides offering high data availability and fault tolerance, replica sets also simplify working with multi-document transactions. A database transaction is a series of one or more operations treated as a single unit, ensuring data integrity by either completing all operations successfully or rolling back to the previous state if any operation fails.
In this tutorial, we will create a replica set with 3 nodes for our local environment, which you can manage and deploy yourself. You can also check out MongoDB Atlas; their free tier includes a replica set with a single node already set up. I often use it for staging and production environments.
Docker compose setup
Make sure you have Docker installed on your machine.
Create a docker-compose.yml file in the root directory of your project:
services:
  rs0_mongo1:
    container_name: rs0_mongo1
    image: mongo:8.0
    volumes:
      - rs0_mongo1_data:/data/db
      - rs0_mongo1_config:/data/configdb
      - ./scripts/mongo-rs-init.sh:/scripts/mongo-rs-init.sh
      - ./mongo_rs_keyfile:/etc/mongodb/pki/keyfile
    environment:
      MONGO_INITDB_ROOT_USERNAME: rootuser
      MONGO_INITDB_ROOT_PASSWORD: use_a_strong_password
    ports:
      - '23456:23456'
    networks:
      - rs0-mongo-network
    command:
      [
        'mongod',
        '--replSet',
        'rs0',
        '--bind_ip_all',
        '--keyFile',
        '/etc/mongodb/pki/keyfile',
        '--port',
        '23456',
      ]

  rs0_mongo2:
    container_name: rs0_mongo2
    image: mongo:8.0
    volumes:
      - rs0_mongo2_data:/data/db
      - rs0_mongo2_config:/data/configdb
      - ./mongo_rs_keyfile:/etc/mongodb/pki/keyfile
    environment:
      MONGO_INITDB_ROOT_USERNAME: rootuser
      MONGO_INITDB_ROOT_PASSWORD: use_a_strong_password
    ports:
      - '23457:23457'
    networks:
      - rs0-mongo-network
    command:
      [
        'mongod',
        '--replSet',
        'rs0',
        '--bind_ip_all',
        '--keyFile',
        '/etc/mongodb/pki/keyfile',
        '--port',
        '23457',
      ]

  rs0_mongo3:
    container_name: rs0_mongo3
    image: mongo:8.0
    volumes:
      - rs0_mongo3_data:/data/db
      - rs0_mongo3_config:/data/configdb
      - ./mongo_rs_keyfile:/etc/mongodb/pki/keyfile
    environment:
      MONGO_INITDB_ROOT_USERNAME: rootuser
      MONGO_INITDB_ROOT_PASSWORD: use_a_strong_password
    ports:
      - '23458:23458'
    networks:
      - rs0-mongo-network
    command:
      [
        'mongod',
        '--replSet',
        'rs0',
        '--bind_ip_all',
        '--keyFile',
        '/etc/mongodb/pki/keyfile',
        '--port',
        '23458',
      ]

networks:
  rs0-mongo-network:
    driver: bridge

volumes:
  rs0_mongo1_data:
  rs0_mongo2_data:
  rs0_mongo3_data:
  rs0_mongo1_config:
  rs0_mongo2_config:
  rs0_mongo3_config:
In our command section:
We are using some really random ports different from the default
27017, this is useful if you have multiple instances of mongodb running on your machine.--replSet rs0sets up a replica set named "rs0".--bind_ip_alltells MongoDB to bind to all IP addresses on the host machine. It allows connections to the database from any IP address.--keyFile /etc/mongodb/pki/keyfilesets the path to a key file for MongoDB instances to authenticate with each other in the replica set. We will create this file later.--port: This sets the TCP (Transmission Control Protocol) port on which the MongoDB instance will listen for client connections.
Next, let’s make our life much easier by setting up some scripts.
Inside ./scripts folder, let’s create mongo-rs-keyfile.sh script that will be response for generating some random strings:
#!/bin/bash

# Set variables
KEYFILE_NAME="mongo_rs_keyfile"
KEYFILE_PATH="${PWD}/${KEYFILE_NAME}"

# Generate the keyfile
openssl rand -base64 756 > "${KEYFILE_PATH}"

# Set permissions
chmod 0400 "${KEYFILE_PATH}"

# Get the current user and group
CURRENT_USER=$(id -un)
CURRENT_GROUP=$(id -gn)

# Change ownership to current user and group
chown "${CURRENT_USER}:${CURRENT_GROUP}" "${KEYFILE_PATH}"

echo "Keyfile created successfully at ${KEYFILE_PATH}"
echo "Owner: $(ls -l "${KEYFILE_PATH}" | awk '{print $3":"$4}')"
echo "Permissions: $(ls -l "${KEYFILE_PATH}" | awk '{print $1}')"
Create a mongo-rs-init.sh file that would be responsible to initiating out rs0 replica set after individual node containers have been running:
#!/bin/bash

mongosh -u rootuser -p use_a_strong_password --host rs0_mongo1:23456 <<EOF
var config = {
    "_id": "rs0",
    "members": [
        {
            "_id": 1,
            "host": "rs0_mongo1:23456",
            "priority": 2
        },
        {
            "_id": 2,
            "host": "rs0_mongo2:23457",
            "priority": 1
        },
        {
            "_id": 3,
            "host": "rs0_mongo3:23458",
            "priority": 1
        }
    ]
};
rs.initiate(config);
rs.status();
EOF
And create a start-db.sh that would be responsible for spinning up the database:
#!/bin/bash

# Stop and remove existing containers
docker compose down -v

# Start the services
docker compose up -d

echo "Waiting for MongoDB instances to start..."
sleep 10

# Initialize the replica set
docker exec rs0_mongo1 /scripts/mongo-rs-init.sh
Make all the scripts executable by running the following in your terminal:
$ chmod +x ./scripts/mongo-rs-init.sh
$ chmod +x ./scripts/mongo-rs-keyfile.sh
$ chmod +x ./scripts/start-db.sh
Finally, run your start-db.sh scripts:
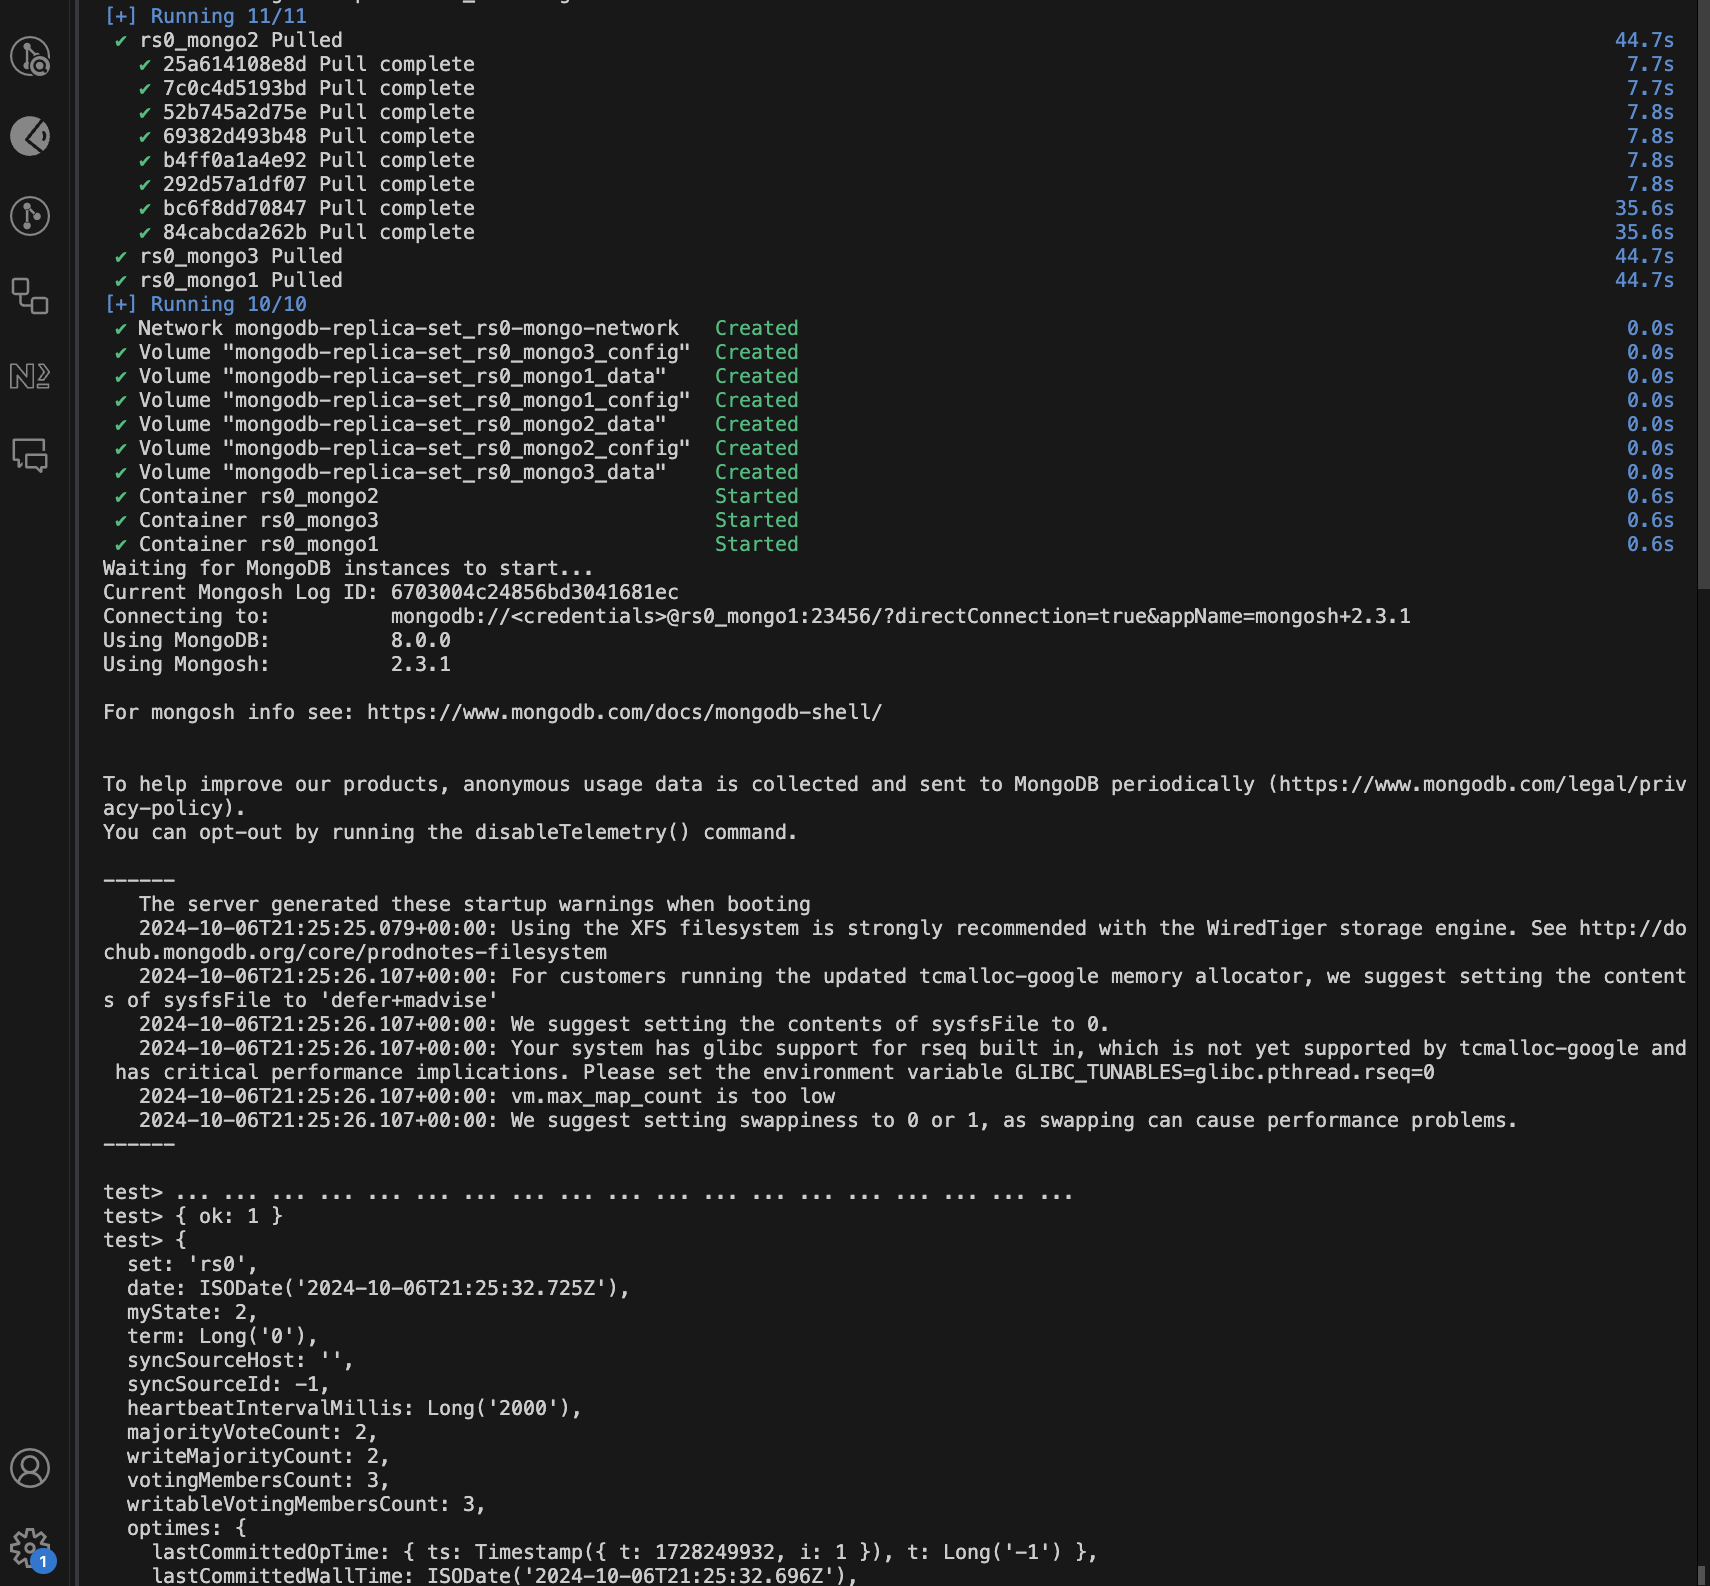
$ ./scripts/start-db.sh
This would pull all the images and spin up the database:

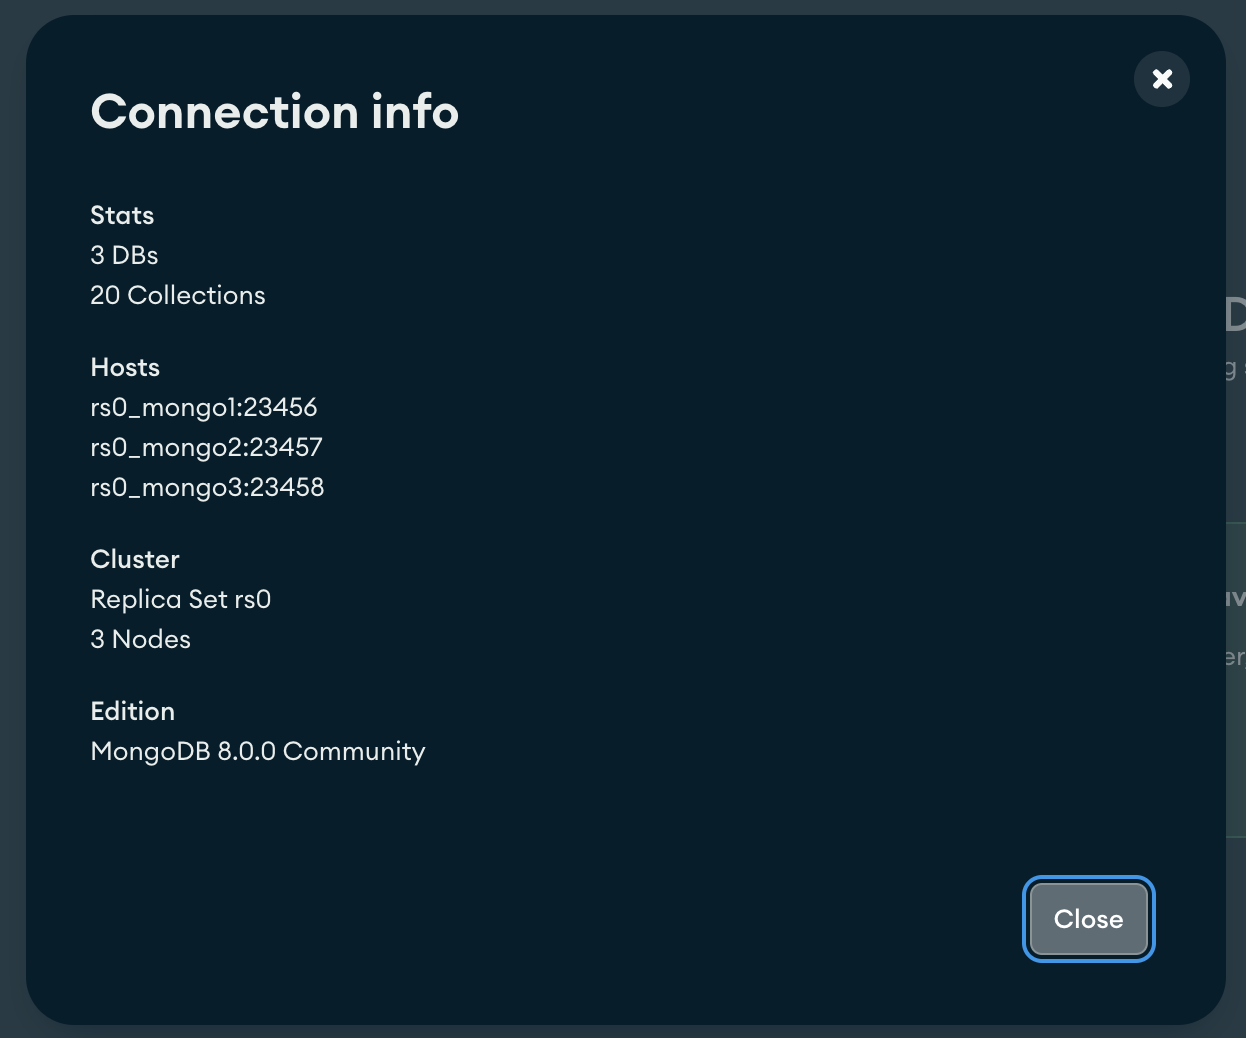
You can try connecting to the database with the URI. You can use MongoDB Compass or any database GUI client:
mongodb://rootuser:use_a_strong_password@localhost:23456,localhost:23457,localhost:23458/?replicaSet=rs0
This will give you some errors because during the replica set initiation, we used the container_name instead of each container’s IP address.

We can fix this by telling our machine how to resolve those container names.
First, open your hosts file with VSCode, Vim, or any other code editor (with VSCode, use code /etc/hosts). Then, add the following entries at the end of the file:
127.0.0.1 rs0_mongo1
127.0.0.1 rs0_mongo2
127.0.0.1 rs0_mongo3
Save the file. Now, when your application tries to connect to rs0_mongo1, rs0_mongo2, and rs0_mongo3, your OS translates that to 127.0.0.1 (localhost).

Wrapping up
In conclusion, setting up a MongoDB replica set using Docker Compose is a powerful way to ensure high availability and data redundancy in your database environment. By following the steps outlined in this tutorial, you can create a robust local setup with multiple nodes, allowing for seamless failover and data integrity. This setup not only enhances your understanding of MongoDB's capabilities but also prepares you for deploying similar configurations in production environments. Whether you're using MongoDB locally or leveraging MongoDB Atlas for more extensive deployments, mastering replica sets is a valuable skill for any developer or database administrator.
You can find all the code in this Github repo.
Subscribe to my newsletter
Read articles from Taiwo Ogunola directly inside your inbox. Subscribe to the newsletter, and don't miss out.
Written by

Taiwo Ogunola
Taiwo Ogunola
With over 5 years of experience in delivering technical solutions, I specialize in web page performance, scalability, and developer experience. My passion lies in crafting elegant solutions to complex problems, leveraging a diverse expertise in web technologies.