Step-by-Step Guide to Handling Multiple GitHub Accounts Using githubuser.sh
 Prakash Nayak
1. Deleting Existing GitHub User and GPG Key Configurations
Before setting up switchable accounts, it's essential to remove any previous GitHub user configurations and GPG keys that may cause conflicts.
Steps:
Remove Global GitHub User Configurations:
Open a terminal and run the following commands to delete existing user configuration:
  git config --global --unset user.name
  git config --global --unset user.email
  git config --global --unset user.signingkey
  git config --global --unset commit.gpgSign
List GPG Keys:
Run this command to list all GPG keys on your system:
gpg --list-secret-keys --keyid-format LONG
Delete Old GPG Keys (if necessary):
Find the GPG key IDs you wish to delete (e.g.,
73CEDBB8).Delete the keys using:
  gpg --delete-secret-keys <KEY_ID>
  gpg --delete-key <KEY_ID>
Confirm Deletion:
Ensure that no old configurations exist by running:
git config --global --list
2. Generate New GPG Keys for Multiple GitHub Accounts
You’ll need to generate two separate GPG keys, one for each GitHub account. Here's how to do that for each account:
Steps:
Generate GPG Key for GitHub1 (Main Account):
Run the following command:
gpg --full-generate-keyChoose RSA and RSA (4096 bits).
Select a key that never expires.
0Use your GitHub1 account details:
Name:
githubusername1Email:
github1@gmail.com
Select
OkayLeave the passphrase emptyEnterConfirm Protection Not needed (since you don’t want to be prompted on each push).
Generate GPG Key for GitHub2 (Side Account):
Run the same command again:
gpg --full-generate-keyChoose RSA and RSA (4096 bits).
Select a key that never expires.
0Use the details for GitHub2:
Name:
githubusername2Email:
github2@protonmail.com
Select
OkayLeave the passphrase emptyEnterConfirm Protection Not needed (since you don’t want to be prompted on each push).
List Your GPG Keys:
Run the following to list both GPG keys:
gpg --list-secret-keys --keyid-format LONGYou will see output like:
  pub   rsa4096 2024-10-08 [SC]
        C3E0A1B4F98D67CBF2A81D6B543A2B18A92E7D45
  uid           [ultimate] githubusername1 <github1@gmail.com>
  sub   rsa4096 2024-10-08 [E]

  pub   rsa4096 2024-10-08 [SC]
        7A5BC9D0139F47C8E34DF8A1A67913E295D10A28
  uid           [ultimate] githubusername2 <github2@protonmail.com>
  sub   rsa4096 2024-10-08 [E]
Export and Add Your GPG Keys to GitHub:
For each GPG key, export the public key and add it to the respective GitHub account:
GitHub1:
gpg --armor --export C3E0A1B4F98D67CBF2A81D6B543A2B18A92E7D45Copy the output and add it to GitHub1’s account under
Settings > SSH and GPG keys.GitHub2:
gpg --armor --export 7A5BC9D0139F47C8E34DF8A1A67913E295D10A28Copy the output and add it to GitHub1’s account under Settings > SSH and GPG keys.
3. Configuring Git to Use the Correct GPG Key for Each Account
Now that you have two GPG keys, configure Git to use them for the respective accounts.
Steps:
Set Global Config for GitHub1 (Main Account):
Run the following commands to set the global Git configuration:
  git config --global user.name "githubusername1"
  git config --global user.email "github1@gmail.com"
  git config --global user.signingkey C3E0A1B4F98D67CBF2A81D6B543A2B18A92E7D45
  git config --global commit.gpgSign true
Set Local Config for GitHub2 (Side Account):
For repositories where you want to use GitHub2, navigate to the repository and set the local configuration:
  git config user.name "githubusername2"
  git config user.email "github2@protonmail.com"
  git config user.signingkey 7A5BC9D0139F47C8E34DF8A1A67913E295D10A28
  git config commit.gpgSign true
4. Automating GitHub Account Switching with githubuser.sh
To make switching between accounts easier, you can create a simple shell script (githubuser.sh) that allows you to quickly switch between your GitHub profiles.
Steps:
Create the Script (
githubuser.sh):Create a new file called
githubuser.shand add the following content:#!/bin/bash if [ "$1" == "main" ]; then git config --global user.name "githubusername1" git config --global user.email "github1@gmail.com" git config --global user.signingkey C3E0A1B4F98D67CBF2A81D6B543A2B18A92E7D45 echo "Switched to GitHub1: githubusername1" elif [ "$1" == "side" ]; then git config --global user.name "githubusername2" git config --global user.email "github2@protonmail.com" git config --global user.signingkey 7A5BC9D0139F47C8E34DF8A1A67913E295D10A28 echo "Switched to GitHub2: githubusername2" else echo "Usage: githubuser.sh [main|side]" fi
Make the Script Executable:
Make the script executable by running:
chmod +x githubuser.sh
Add the Script to Your System PATH:
Place the script in a directory like
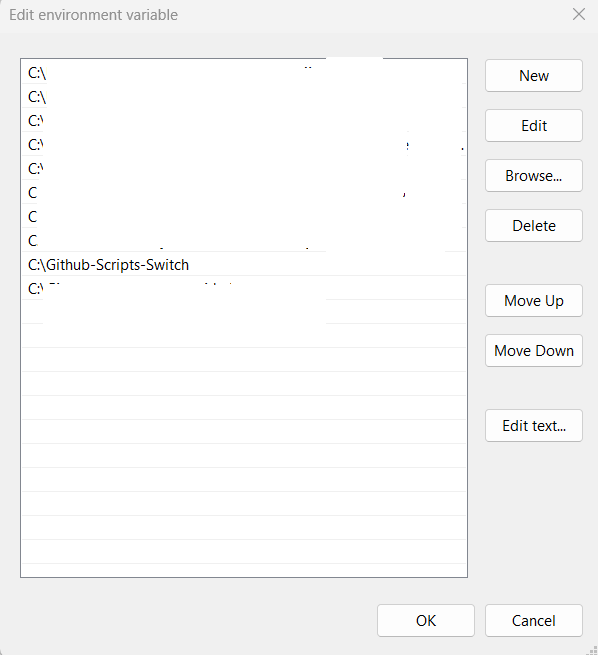
/usr/local/bin(on macOS/Linux) or add it to thePATHin Windows so that it can be accessed globally.

5. Switching Between GitHub Accounts
You can now easily switch between your GitHub accounts by running the script:
For GitHub1:
githubuser.sh mainFor GitHub2:
githubuser.sh side
These commands will automatically update your Git configuration to use the correct user details and GPG key for signing commits.
Subscribe to my newsletter
Read articles from Prakash Nayak directly inside your inbox. Subscribe to the newsletter, and don't miss out.
Written by
