Connecting to Your Amazon EC2 Instance: A Step-by-Step Guide
 sravani punreddy
Table of contents
- What is EC2 Instance Connect?
- Prerequisites
- Step-by-Step Guide to Connect via EC2 Instance Connect
- What Happens After You Connect?
- Step 1: Clear the Terminal (Optional)
- Step 2: Update the System
- Step 3: Install NGINX
- Sep 4: Navigate to the Web Directory
- Sep 5: Create a New Web Page using NGINX
- Step 3: Save and Exit Vim

In my previous post, I discussed how to create an Amazon EC2 instance. Now, I’ll walk you through a streamlined method to connect to your instance using EC2 Instance Connect. This feature simplifies the process of connecting to your instances without the need to manage SSH keys manually.
What is EC2 Instance Connect?
EC2 Instance Connect allows you to securely connect to your EC2 instances using a browser-based SSH client. This eliminates the need for a local SSH client and simplifies key management, especially for temporary connections.
Prerequisites
Before connecting, ensure the following:
EC2 Instance Running: Your instance should be in a running state.
Instance Type: EC2 Instance Connect is supported on Amazon Linux 2 and Ubuntu 20.04 and later instances.
Step-by-Step Guide to Connect via EC2 Instance Connect
Step 1: Open the EC2 Console
Log in to the AWS Management Console.
Navigate to the EC2 Dashboard.
Step 2: Select Your Instance
- In the EC2 console, click on Instances in the left-hand menu.
Locate and select the instance you wish to connect to.
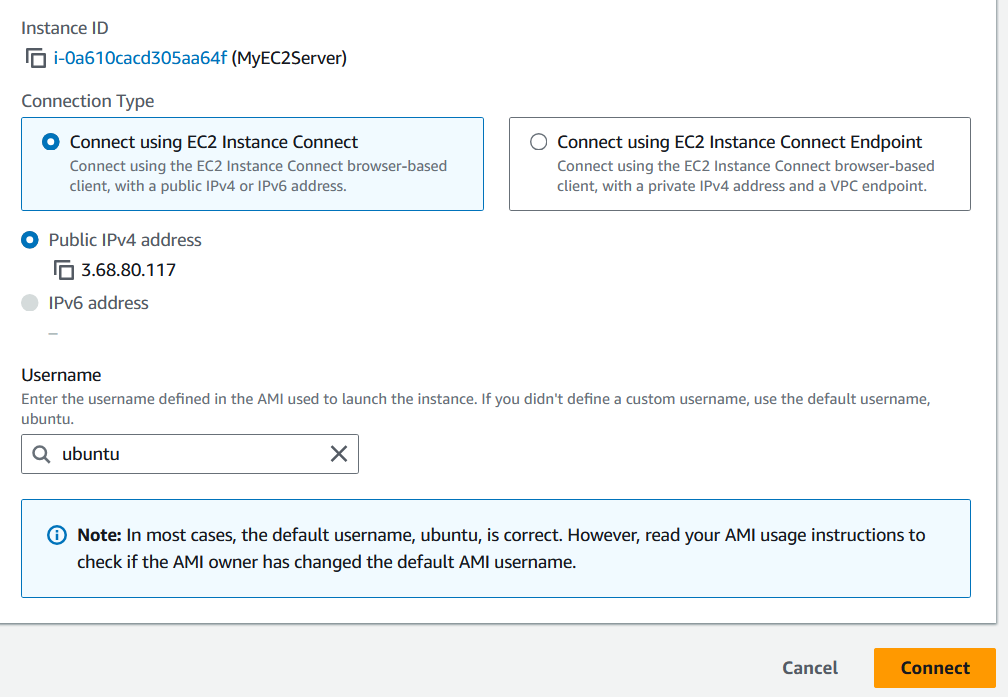
Step 3: Connect Using EC2 Instance Connect
- With your instance selected, click on the Connect button at the top of the instance details page.

- In the Connect to instance dialog, select the EC2 Instance Connect tab.
Step 4: Configure Connection Settings
User Name: Choose the appropriate username based on your instance type. Common usernames include:
For Amazon Linux 2:
ec2-userFor Ubuntu:
ubuntuFor CentOS:
centos
Connect: Click the Connect button.

What Happens After You Connect?
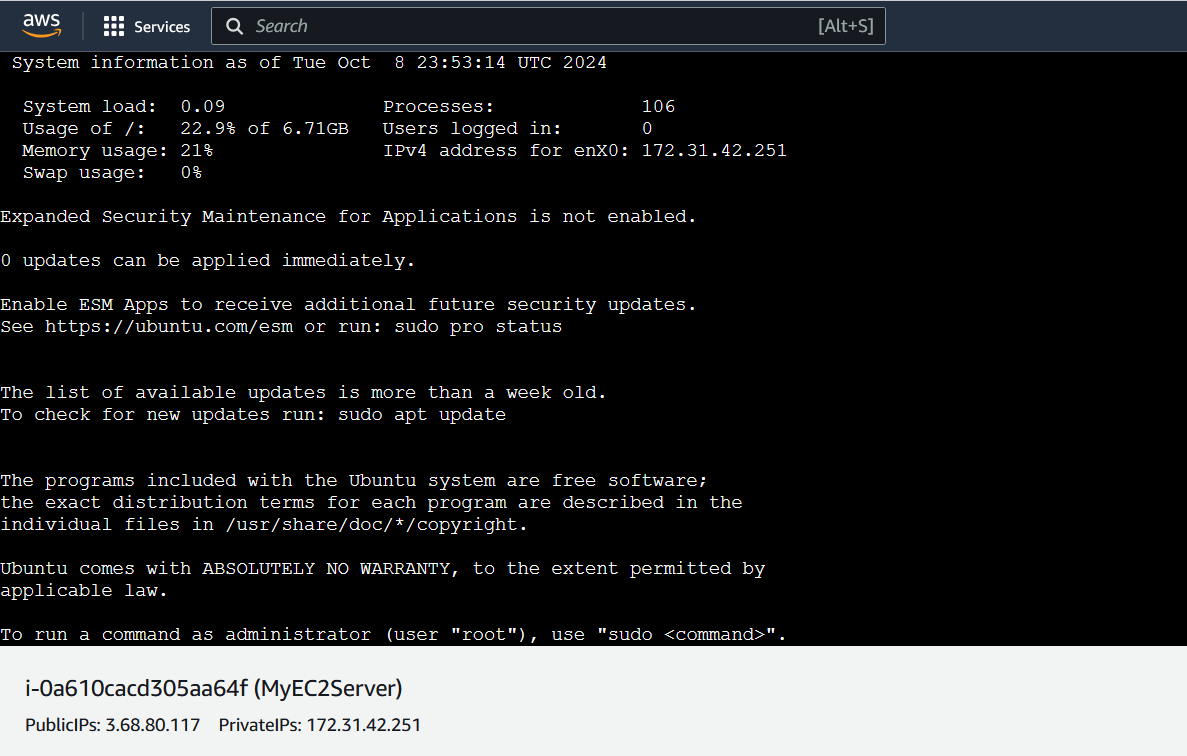
Once you’re connected to your Ubuntu instance via the browser-based terminal, you can start running commands to configure and manage your server. Let’s walk through some basic commands you can execute to get your instance ready for use.

Step 1: Clear the Terminal (Optional)
When you first connect, your terminal may display a lot of information. To start with a clean slate, you can clear the terminal by using the clear command:
clear
Step 2: Update the System
Before installing any new software, it’s a good practice to update your system to ensure you have the latest security patches and software updates. Run the following command:
sudo apt-get update
Step 3: Install NGINX
Now that your package list is updated, you can install NGINX, a powerful web server used to serve websites and handle web traffic efficiently.
To install NGINX, run the following command:
sudo apt-get install nginx
Sep 4: Navigate to the Web Directory
Once NGINX is installed, the default web directory where NGINX serves web content is located in /var/www/html. Let’s navigate to this directory:
In your terminal, type the following command to change to the NGINX default directory:
cd /var/www/html
Sep 5: Create a New Web Page using NGINX
Now, let’s create your own HTML file using the nginx
Open a new file in Vim by running:
vim index.html- Press
ito enter Insert Mode in Vim, allowing you to start typing. Add the following simple HTML code to display a heading on your web page:
- Press
    <h1> Welcome to My First NGINX Web Page </h1>
    <p> This is sample HTML example served by NGINX on an Ubuntu EC2 instance </p>
Step 3: Save and Exit Vim
After typing the content, press
Escto exit Insert Mode.Type
:wqto save the file and exit Vim.If it dont allow to read then go back and give sudo vim index.html and sudo systemctl restart nginx.
Copy the Public IP address and paste in new Open new browser by adding colon 80 web page is running i.e.,

That’s it! You’ve just created your first web page on an Ubuntu EC2 instance running NGINX. By following these simple steps, you can now create and serve your own HTML content directly from the cloud.
Here are some common port numbers and their uses:
Port 22:
Service: SSH (Secure Shell)
Usage: Remote login and command-line access to servers securely.
Port 80:
Service: HTTP (HyperText Transfer Protocol)
Usage: Default port for serving unencrypted web pages over the internet.
Port 443:
Service: HTTPS (HTTP Secure)
Usage: Default port for serving encrypted web pages using SSL/TLS.
Port 25:
Service: SMTP (Simple Mail Transfer Protocol)
Usage: Used for sending emails.
Port 21:
Service: FTP (File Transfer Protocol)
Usage: Used for transferring files between systems.
Port 53:
Service: DNS (Domain Name System)
Usage: Resolves domain names to IP addresses.
Port 3306:
Service: MySQL Database
Usage: Default port for MySQL database connections.
Port 1433:
Service: Microsoft SQL Server
Usage: Default port for MS SQL Server database connections.
Port 8080:
Service: HTTP Alternative
Usage: Often used as an alternative HTTP port for development or testing environments.
Port 3389:
Service: RDP (Remote Desktop Protocol)
Usage: Used for remote desktop connections to Windows servers.
These are some of the key port numbers used for different services in networking and system administration.
Subscribe to my newsletter
Read articles from sravani punreddy directly inside your inbox. Subscribe to the newsletter, and don't miss out.
Written by
