Kubernetes DevOps Project Using ArgoCD
 Harshit Sahu
Table of contents
- Project:
- Description:
- Key Technologies:
- STEPS TO RUN THIS PROJECT: -
- 1. Launch an AWS Instance and Access it through Putty
- 2. Install Docker
- 3. Creating and Managing Kubernetes Cluster with Kind
- 4. Installing kubectl
- 5. Managing Docker and Kubernetes Pods
- 6. Installing Argo CD
- 7. Argo CD Initial Admin Password
- 8. Cloning and Running the Example Voting App
- 9. Installing Kubernetes Dashboard
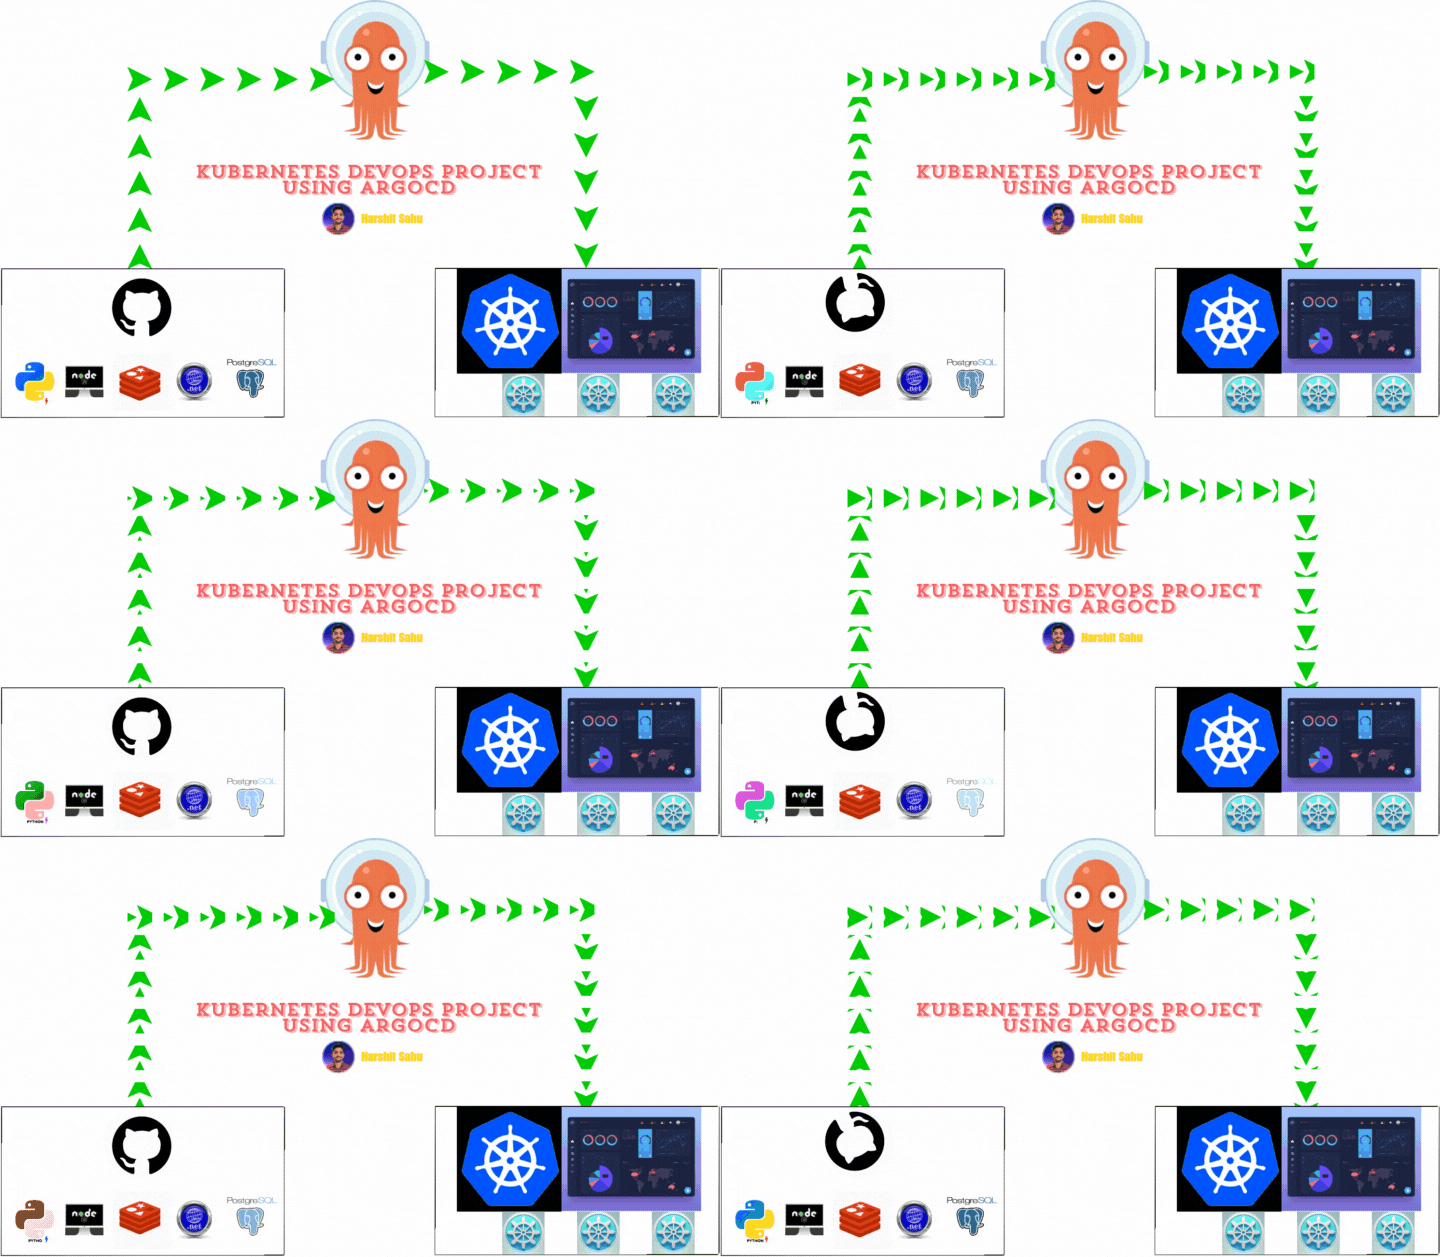
Project:
Automated Deployment of Scalable Applications on AWS EC2 with Kubernetes and Argo CD
Description:
Led the deployment of scalable applications on AWS EC2 using Kubernetes and Argo CD for streamlined management and continuous integration. Orchestrated deployments via Kubernetes dashboard, ensuring efficient resource utilization and seamless scaling.
Key Technologies:
AWS EC2: Infrastructure hosting for Kubernetes clusters.
Kubernetes Dashboard: User-friendly interface for managing containerized applications.
Argo CD: Continuous Delivery tool for automated application deployments.
STEPS TO RUN THIS PROJECT: -
1. Launch an AWS Instance and Access it through Putty
Instance Details:
Name - ArgoCD-Project
AMI - Ubuntu Server 24.04 LTS (HVM), EBS General Purpose (SSD) Volume Type
Instance Type - t2.medium
Configure Storage - 15GB
2. Install Docker
- Run the command for Installing Docker
# Add Docker's official GPG key:
sudo apt-get update
sudo apt-get install ca-certificates curl
sudo install -m 0755 -d /etc/apt/keyrings
sudo curl -fsSL https://download.docker.com/linux/ubuntu/gpg -o /etc/apt/keyrings/docker.asc
sudo chmod a+r /etc/apt/keyrings/docker.asc

# Add the repository to Apt sources:
echo \
  "deb [arch=$(dpkg --print-architecture) signed-by=/etc/apt/keyrings/docker.asc] https://download.docker.com/linux/ubuntu \
  $(. /etc/os-release && echo "$VERSION_CODENAME") stable" | \
  sudo tee /etc/apt/sources.list.d/docker.list > /dev/null
sudo apt-get update
sudo apt-get install docker-ce docker-ce-cli containerd.io docker-buildx-plugin docker-compose-plugin
sudo usermod -aG docker $USER && newgrp docker
- Check Docker Version
sudo docker --version
3. Creating and Managing Kubernetes Cluster with Kind
Create a bash script
install_kind.shfor installing kind#!/bin/bash # For AMD64 / x86_64 [ $(uname -m) = x86_64 ] && curl -Lo ./kind https://kind.sigs.k8s.io/dl/v0.20.0/kind-linux-amd64 chmod +x ./kind sudo cp ./kind /usr/local/bin/kind rm -rf kindGive Executable permission to file
chmod +x install_kind.shRun the Script
./install_kind.sh
Check kind version by this command:
kind —versionCreate a
config.ymlfor installing cluster in Dockerkind: Cluster apiVersion: kind.x-k8s.io/v1alpha4 nodes: - role: control-plane image: kindest/node:v1.30.0 - role: worker image: kindest/node:v1.30.0 - role: worker image: kindest/node:v1.30.0Create a 3-node Kubernetes cluster using Kind:
kind create cluster --config=config.yml --name my-cluster
Check kind is working
kind get clusters
4. Installing kubectl
Install kubectl using
install_kubectl.shscript#!/bin/bash # Variables VERSION="v1.30.0" URL="https://dl.k8s.io/release/${VERSION}/bin/linux/amd64/kubectl" INSTALL_DIR="/usr/local/bin" # Download and install kubectl curl -LO "$URL" chmod +x kubectl sudo mv kubectl $INSTALL_DIR/ kubectl version --client # Clean up rm -f kubectl echo "kubectl installation complete."Give Exectuable permission to file and Run it
  chmod +x install_kubectl.sh
  ./install_kubectl.sh
Check cluster information:
  kubectl cluster-info
  kubectl get nodes
5. Managing Docker and Kubernetes Pods
Check Docker containers running:
docker ps
List all Kubernetes pods in all namespaces:
kubectl get pods -A
6. Installing Argo CD
Create a namespace for Argo CD:
kubectl create namespace argocd
Apply the Argo CD manifest:
kubectl apply -n argocd -f https://raw.githubusercontent.com/argoproj/argo-cd/stable/manifests/install.yamlCheck pods in Argo CD namespace:
kubectl get pods -n argocd
Check services in Argo CD namespace:
kubectl get svc -n argocd
Expose Argo CD server using NodePort:
kubectl patch svc argocd-server -n argocd -p '{"spec": {"type": "NodePort"}}'
Forward ports to access Argo CD server:
kubectl port-forward -n argocd service/argocd-server 8443:443 --address 0.0.0.0 &
Note: - Enable port 8443 on AWS Instance Security Groups
Copy and paste the <public-ip:8443> in browser
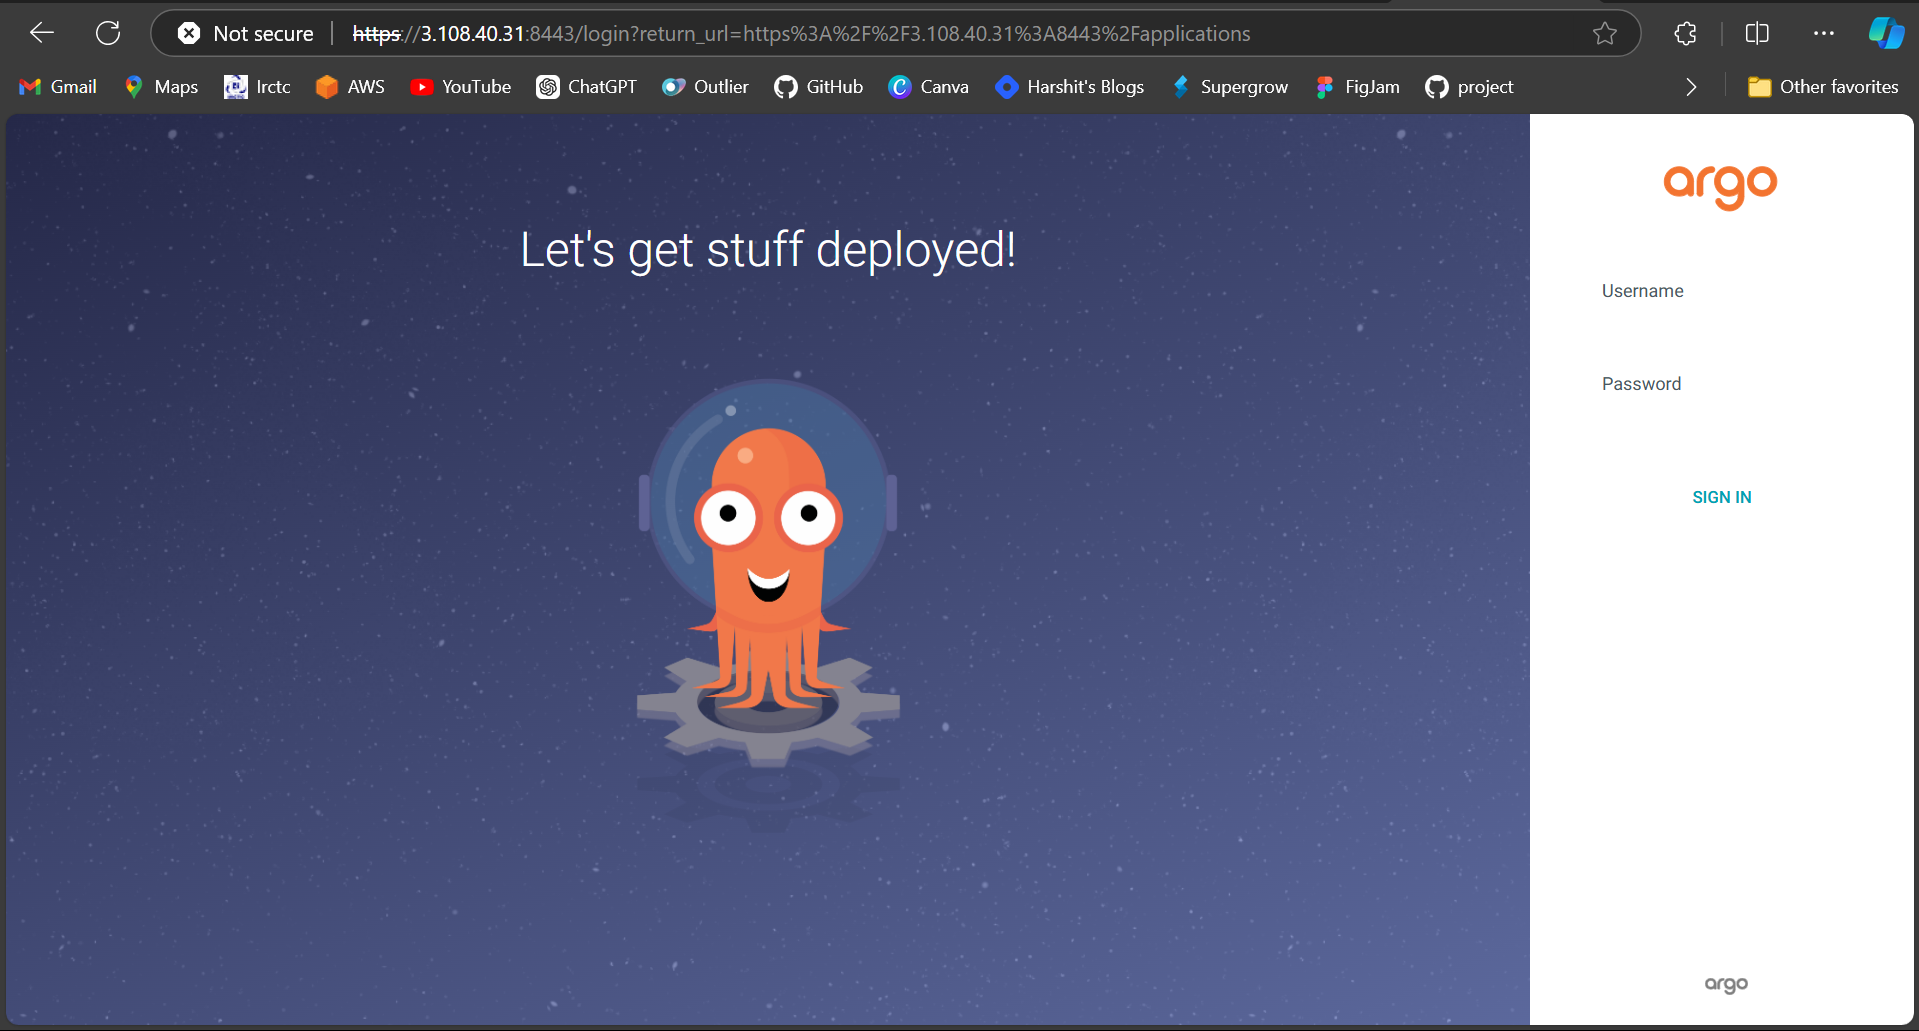
7. Argo CD Initial Admin Password
Username - admin
Password - follow the below step to get password
Retrieve Argo CD admin password:
kubectl get secret -n argocd argocd-initial-admin-secret -o jsonpath="{.data.password}" | base64 -d && echo
8. Cloning and Running the Example Voting App
Clone the voting app repository:
  git clone https://github.com/harshitsahu2311/Voting-app-kubernetes-Project.git
  cd Voting-app-kubernetes-Project/
Create Deployment in ArgoCD application
Click on new app
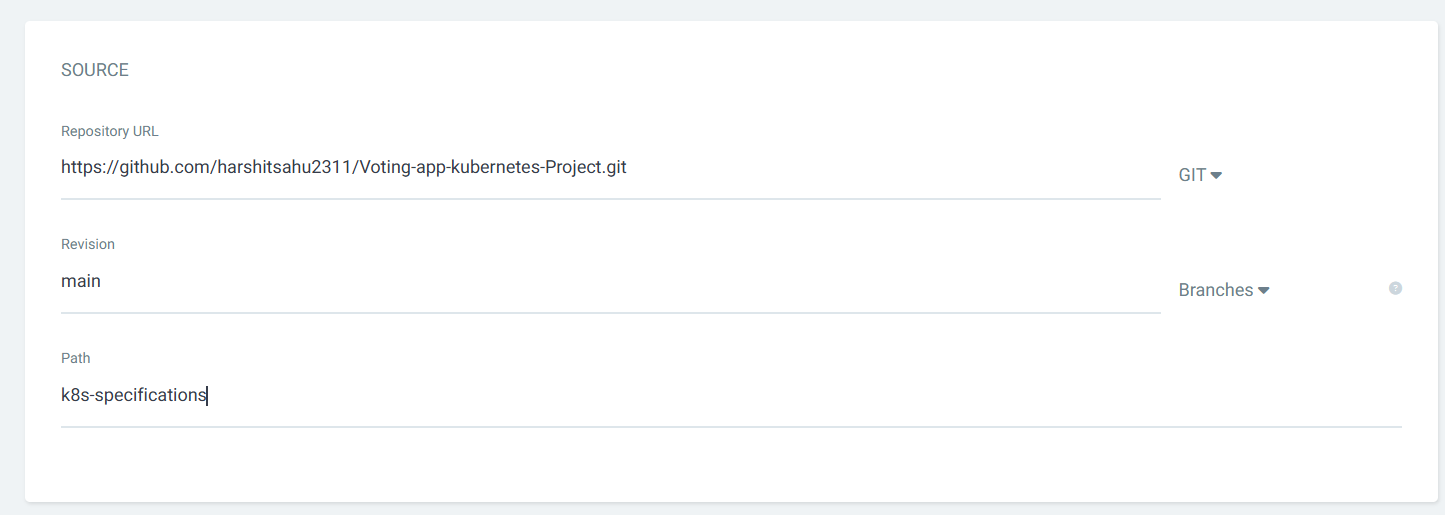
Create a project:
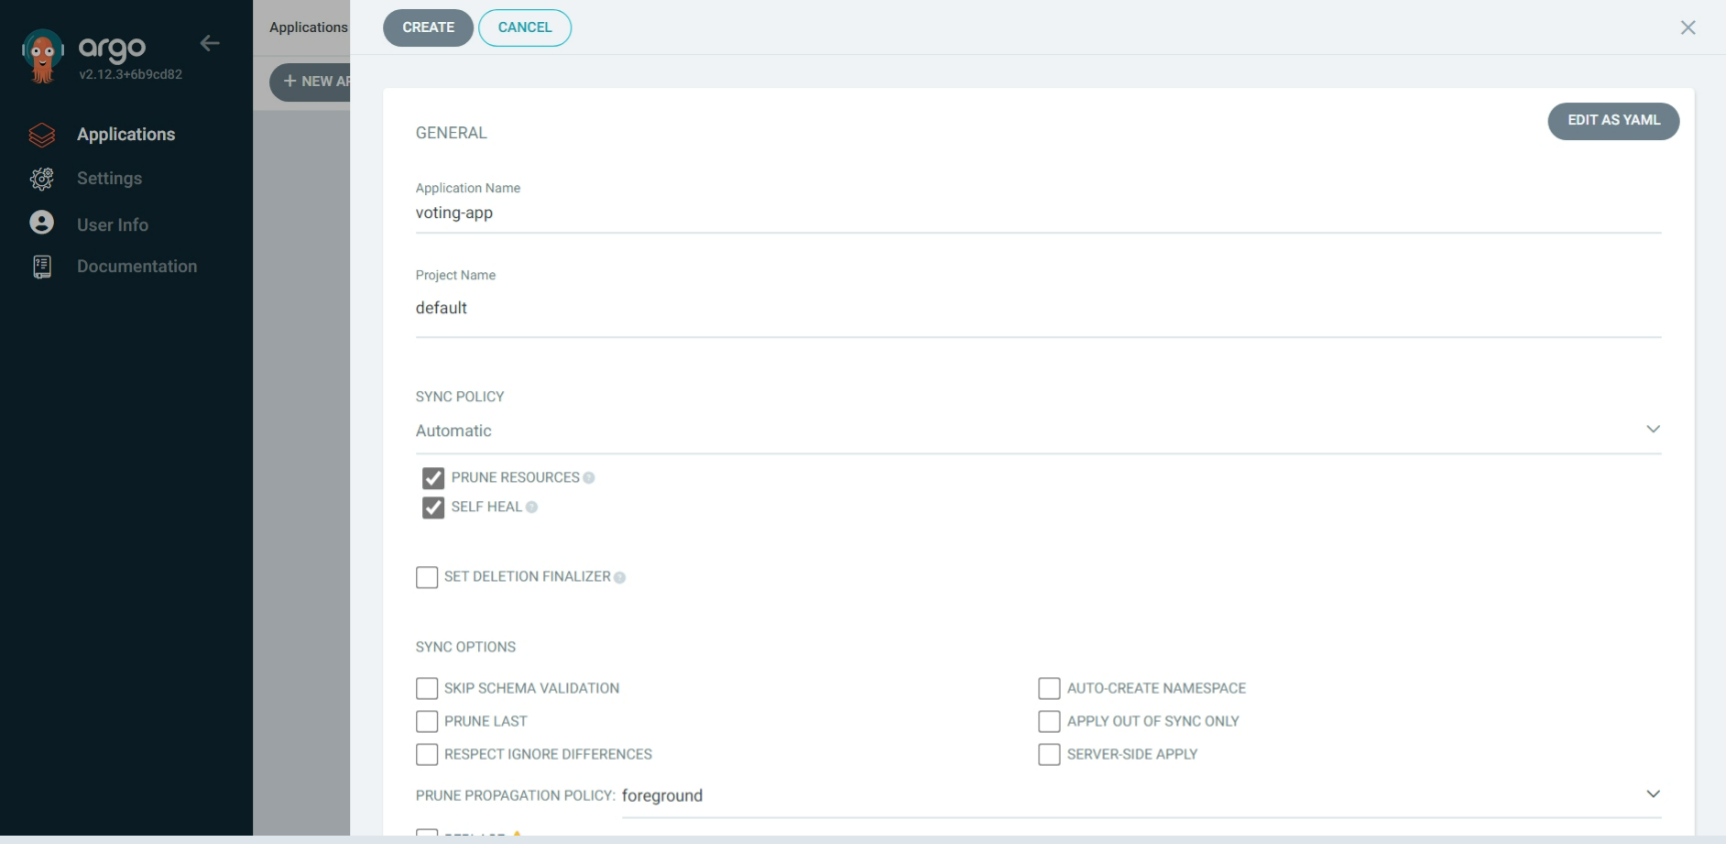
Configure you GitHub
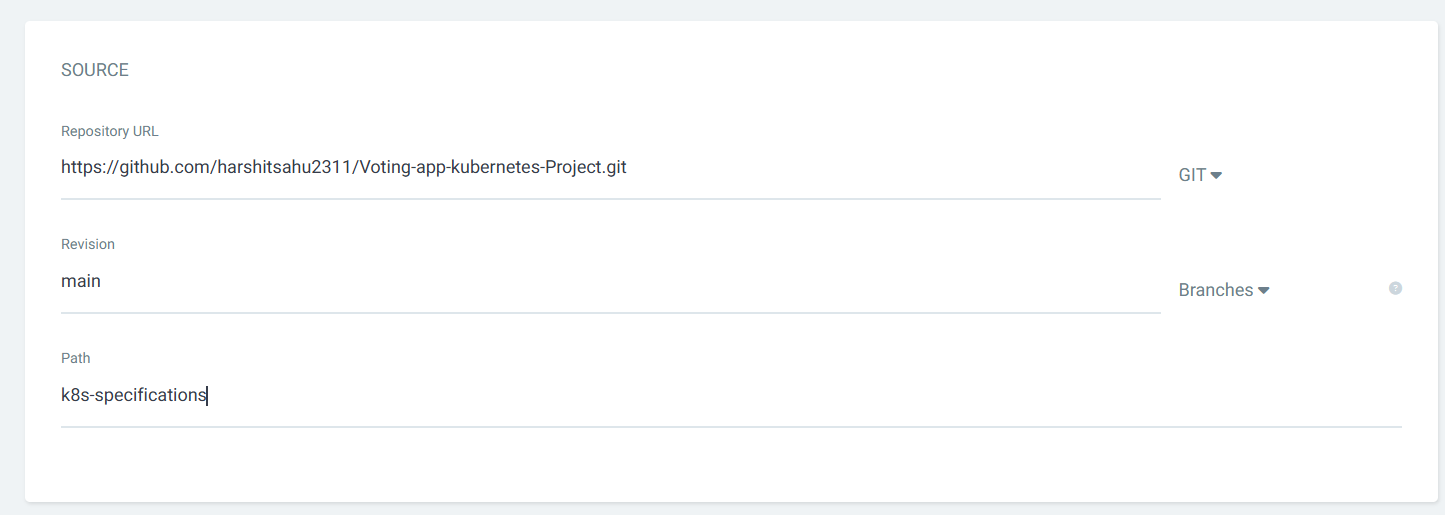
Configure your Kubernetes cluster

Click on Create
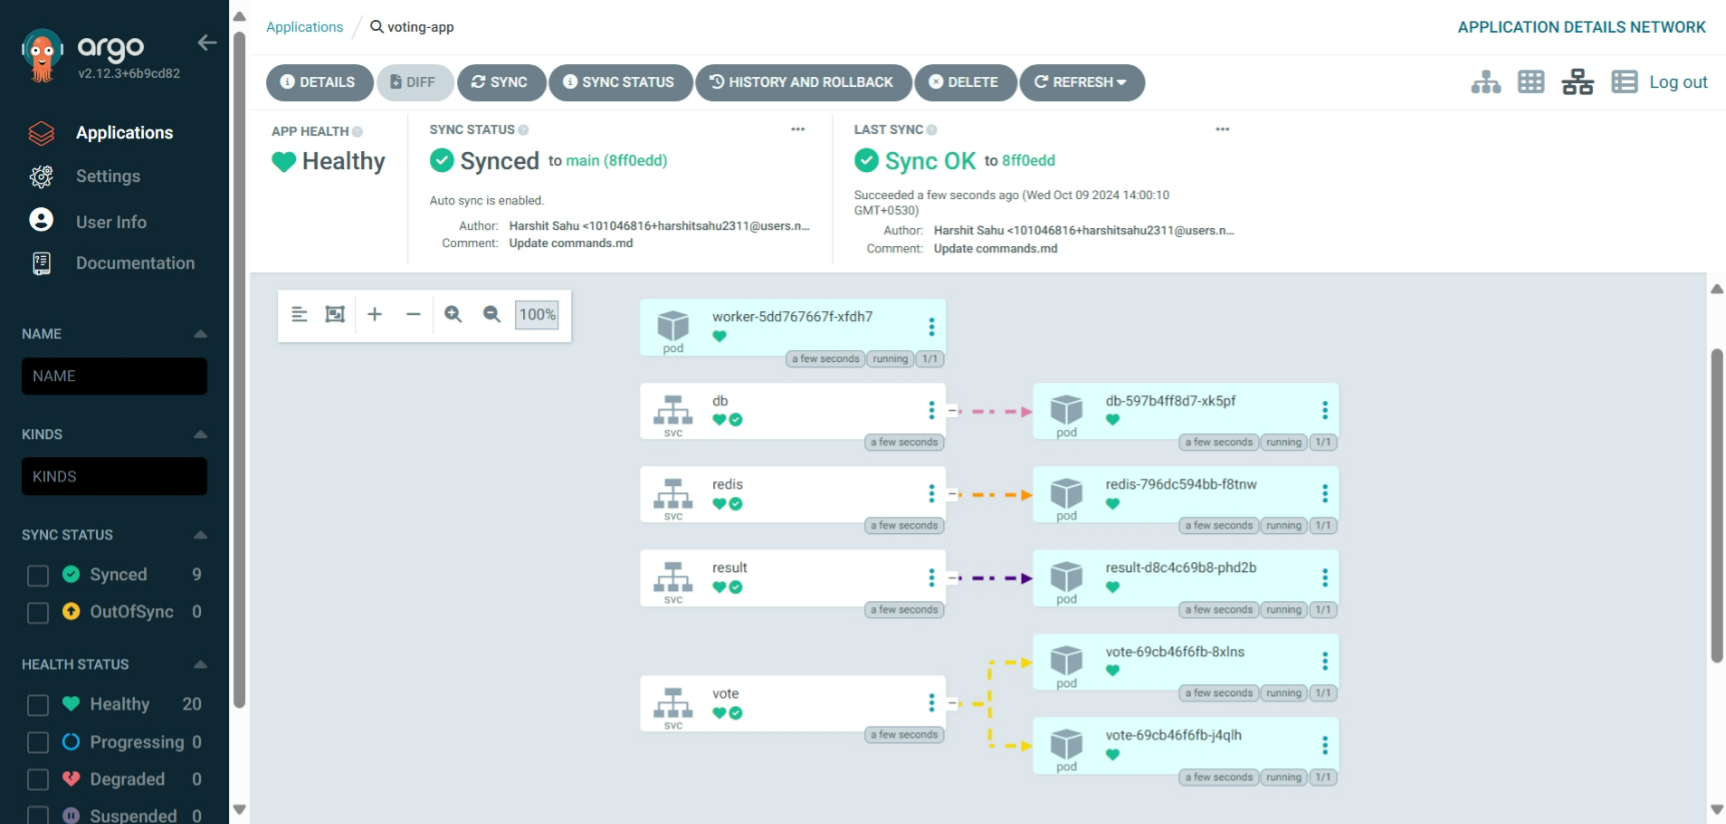
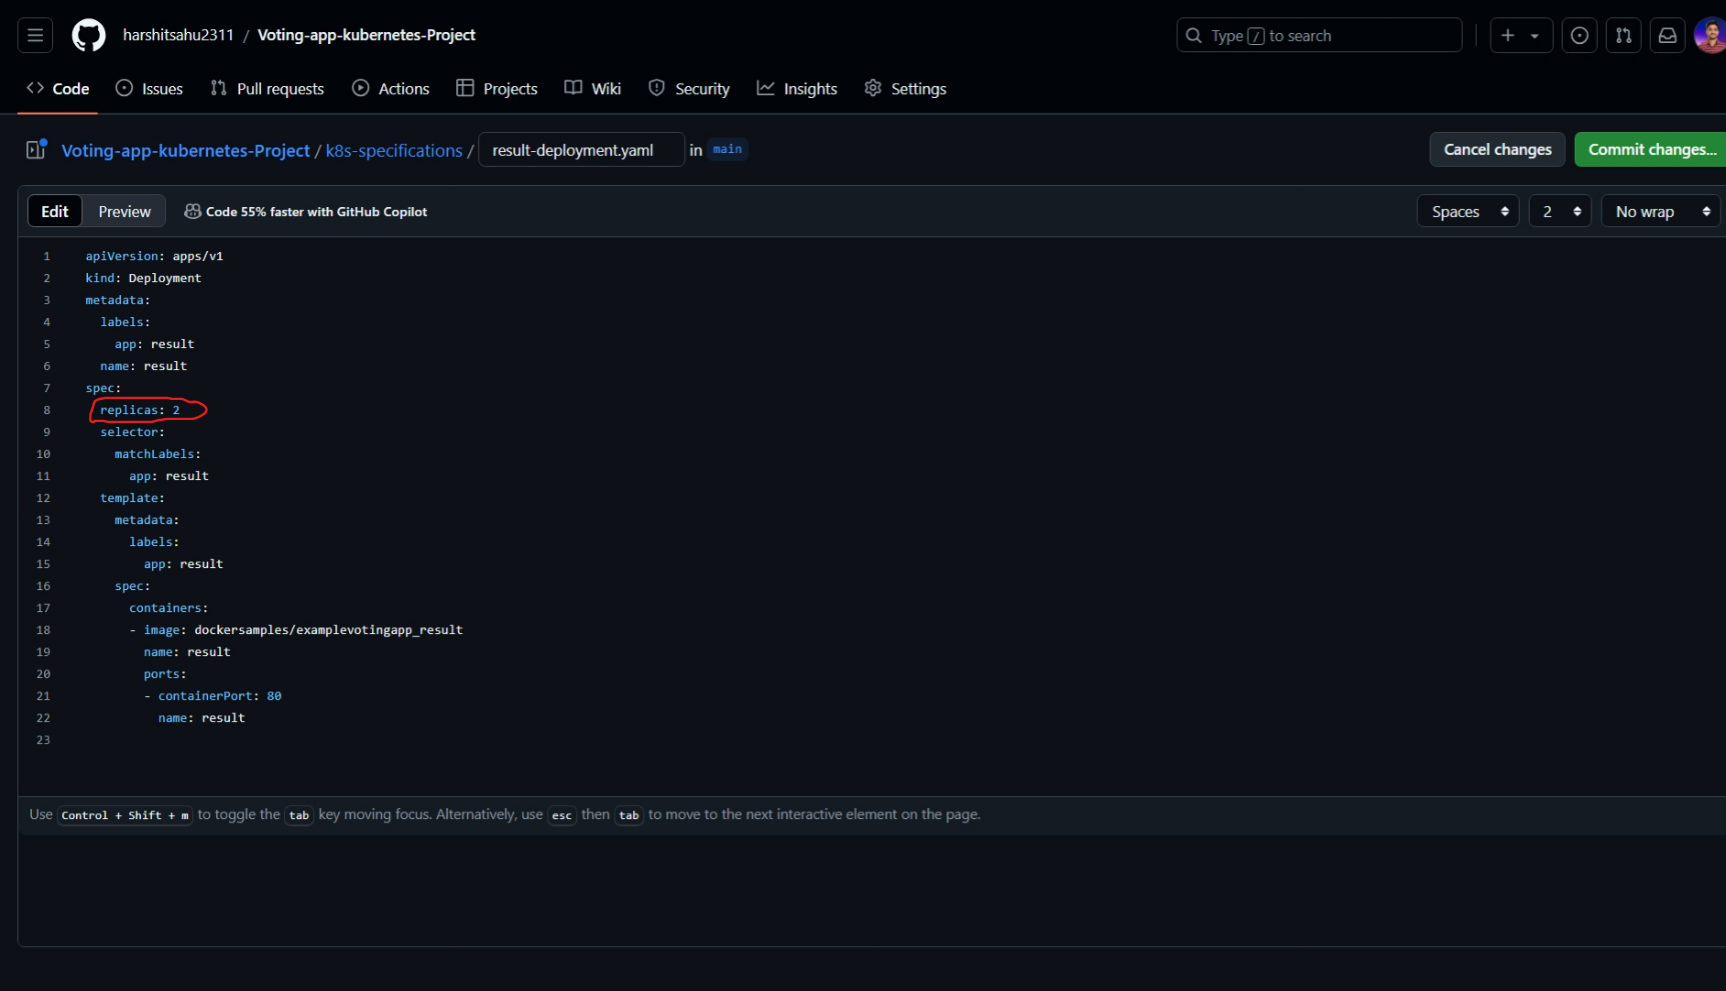
Make some changes in the deployment file and check whether it is changing or not here
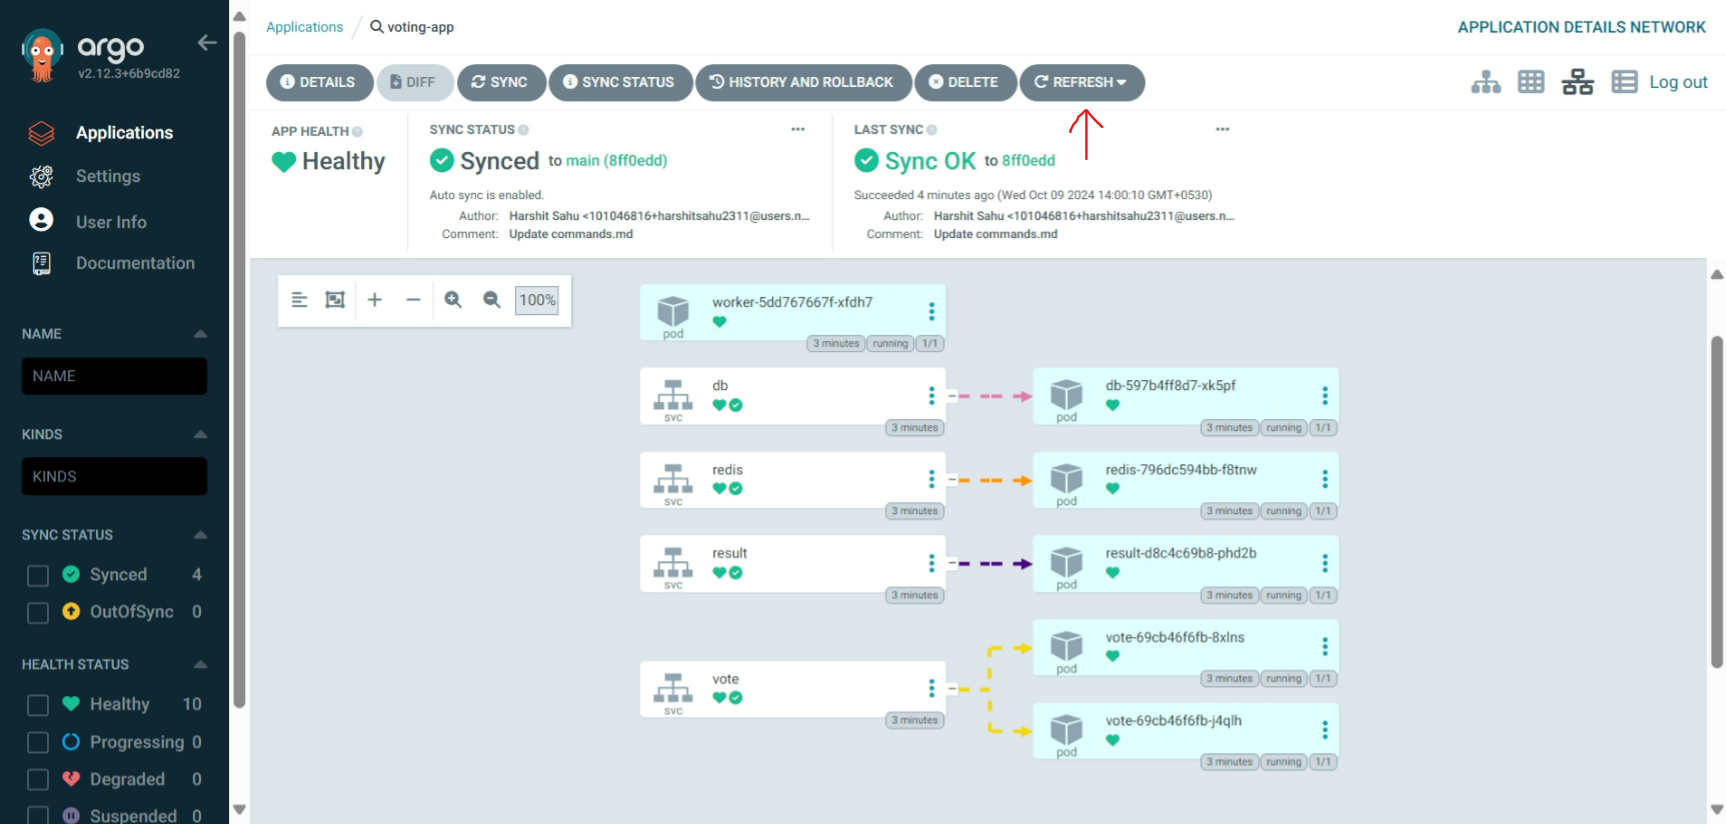
BOOM!
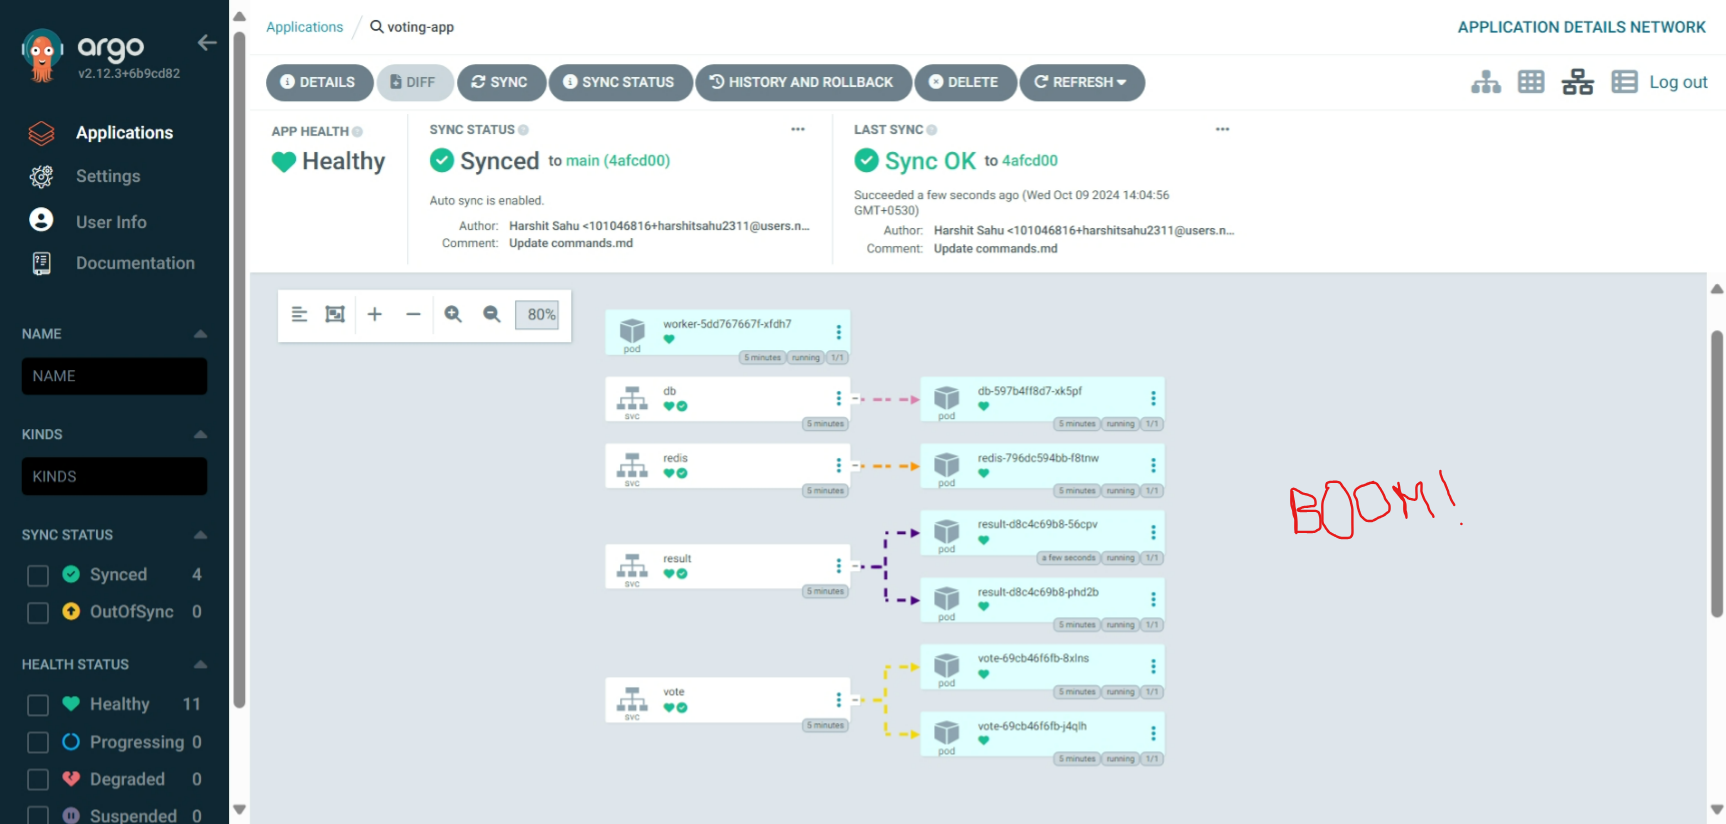
Check on terminal also that pods and services are running
  kubectl get pods
  kubectl get svc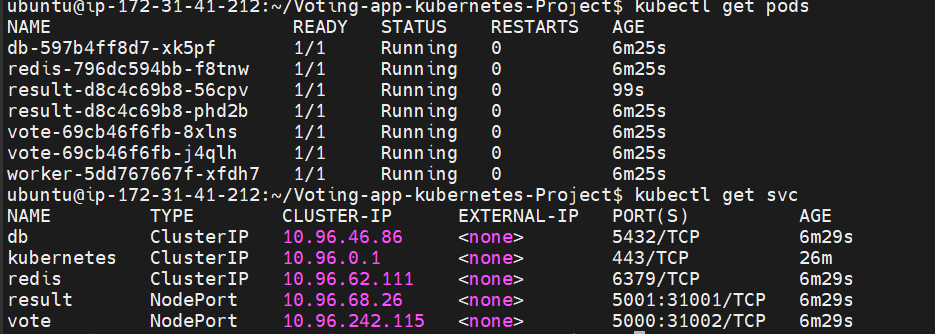
Forward local ports for accessing the voting and result apps:
  kubectl port-forward service/vote 5000:5000 --address=0.0.0.0 &
  kubectl port-forward service/result 5001:5001 --address=0.0.0.0 &
On port 5000 Vote-app Service is running:
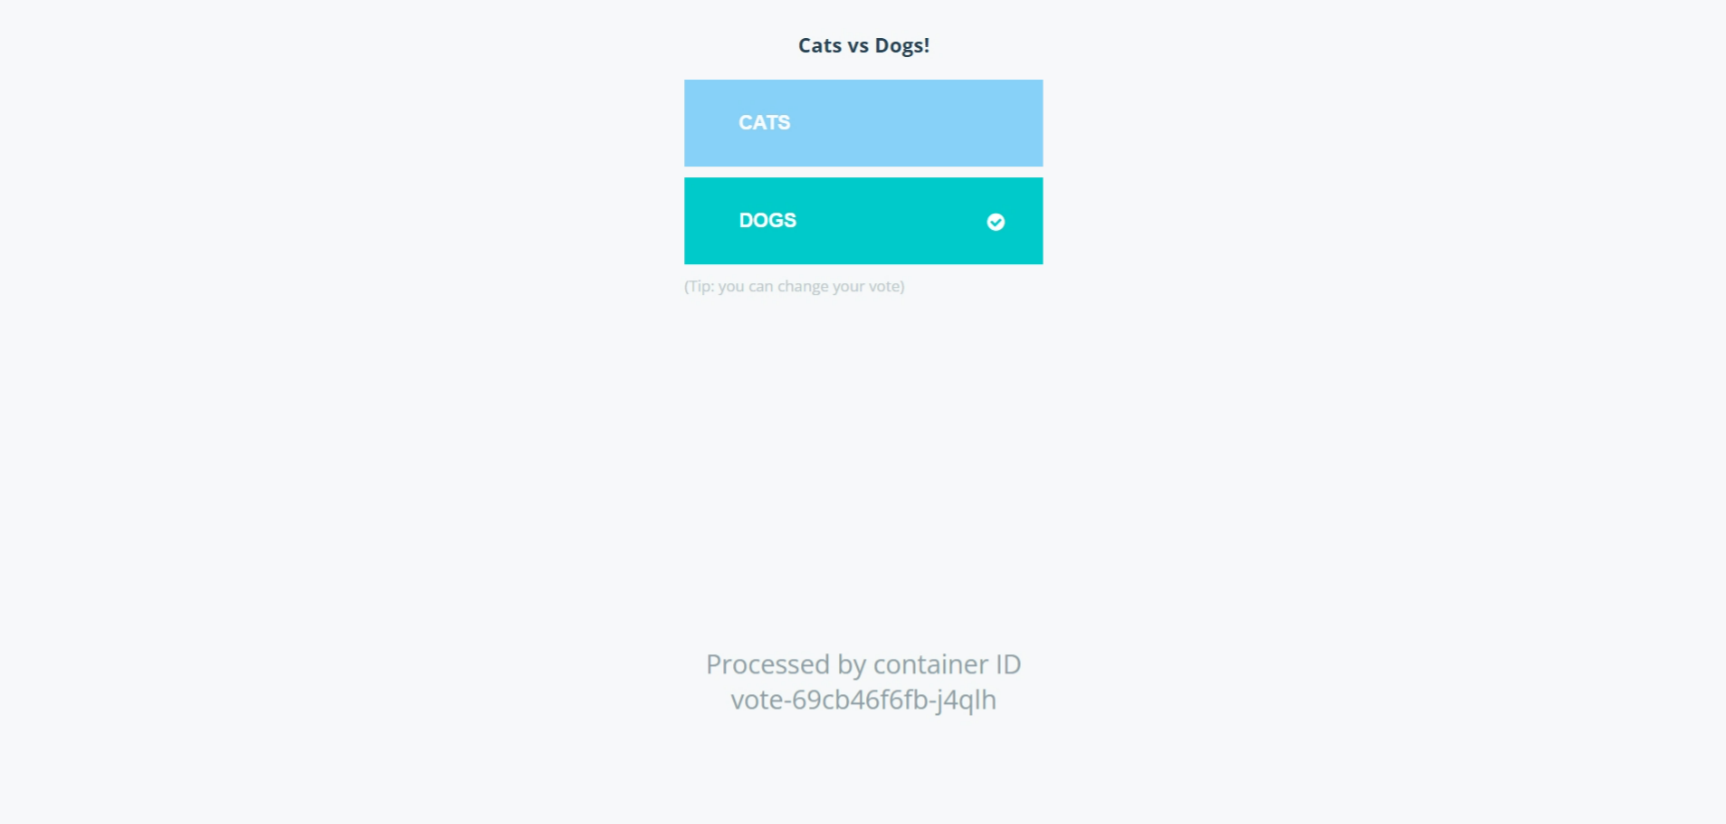
On port 5001 Result-app Service is running:
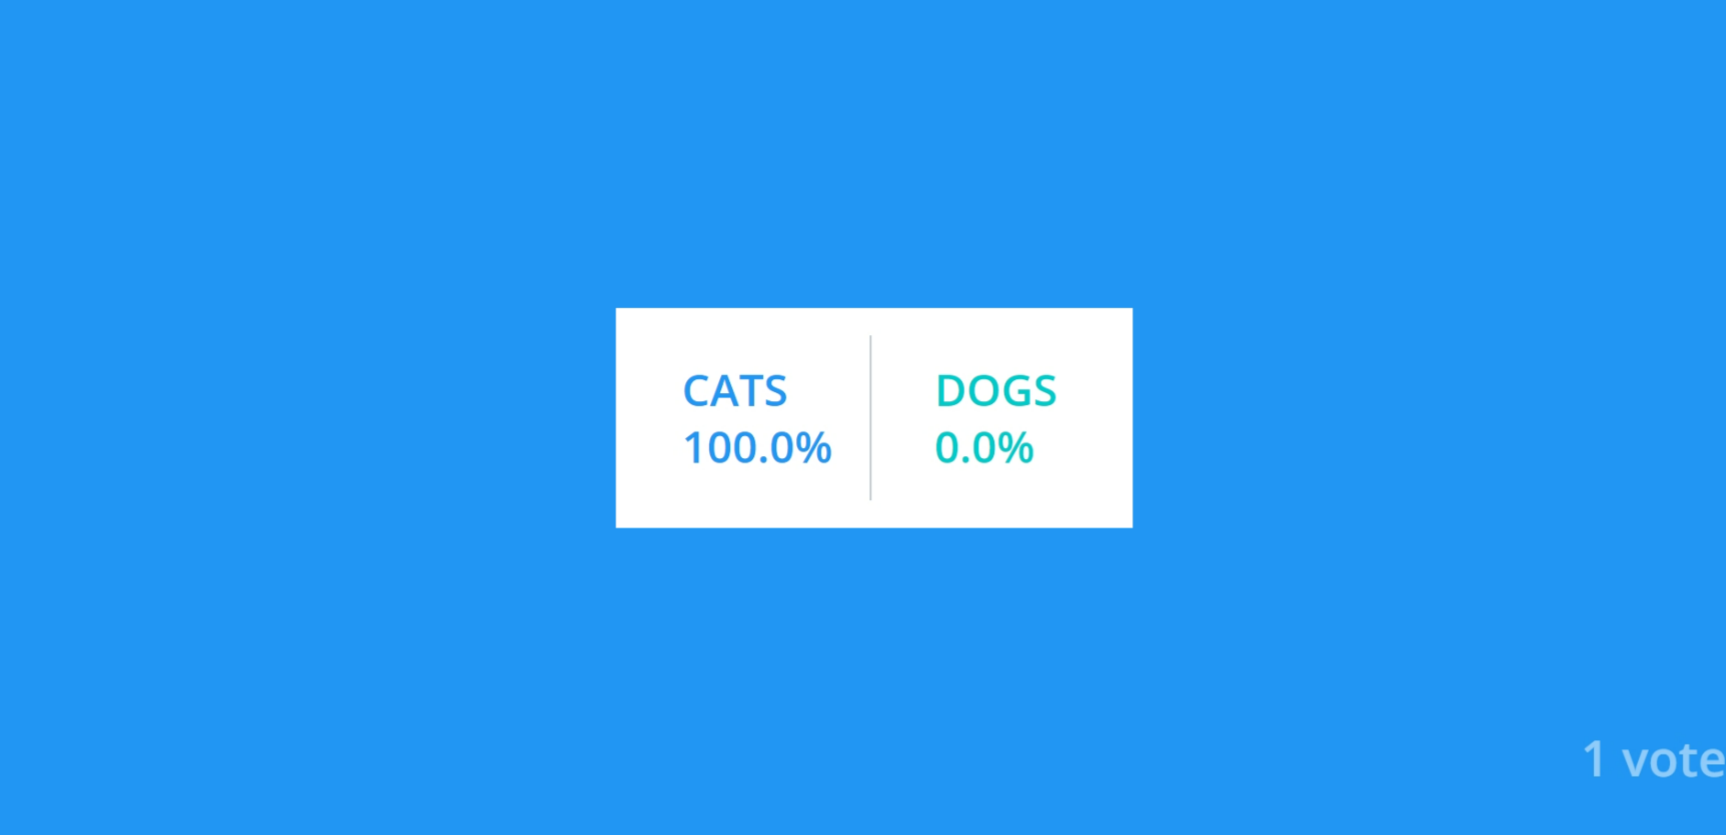
9. Installing Kubernetes Dashboard
Deploy Kubernetes dashboard:
kubectl apply -f https://raw.githubusercontent.com/kubernetes/dashboard/v2.7.0/aio/deploy/recommended.yaml
Create a manifest
dashboard-adminuser.ymlfor creation ofadmin-user:apiVersion: v1 kind: ServiceAccount metadata: name: admin-user namespace: kubernetes-dashboard --- apiVersion: rbac.authorization.k8s.io/v1 kind: ClusterRoleBinding metadata: name: admin-user roleRef: apiGroup: rbac.authorization.k8s.io kind: ClusterRole name: cluster-admin subjects: - kind: ServiceAccount name: admin-user namespace: kubernetes-dashboardRun the manifest file:
kubectl apply -f dashboard-adminuser.yml
Check the
admin-userService:kubectl get svc -n kubernetes-dashboard
Forward local ports for accessing the Kubernetes dashboard:
kubectl port-forward -n kubernetes-dashboard svc/kubernetes-dashboard 8080:443 --address 0.0.0.0 &Open the port 8080 in instance security and access it

If you get this run
https://public-ip:8080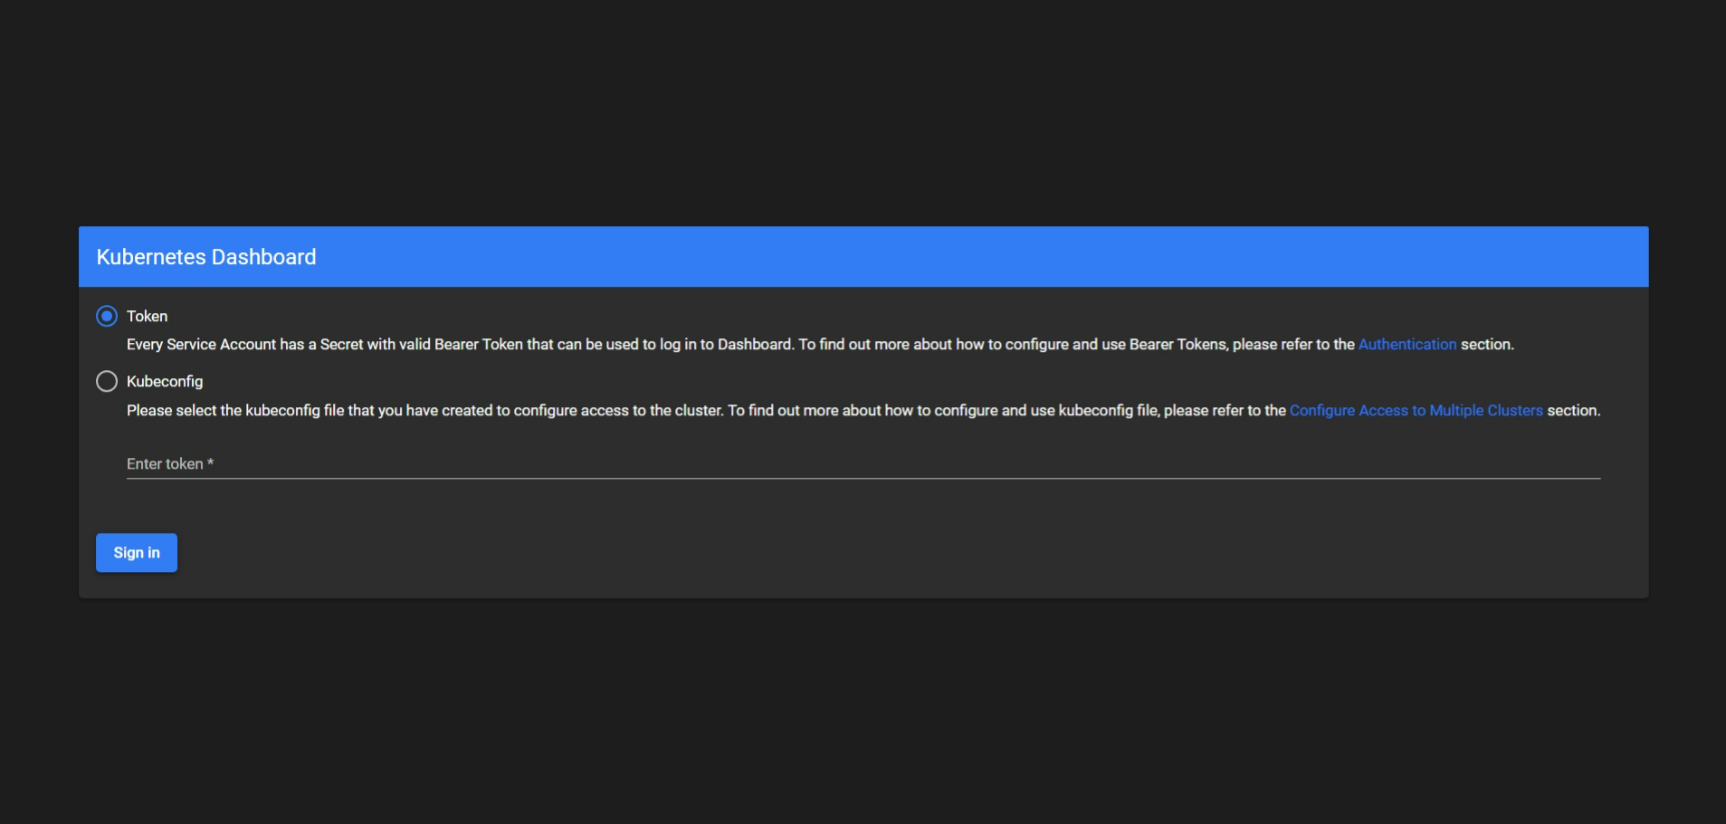
Now you need a token to access the Kubernetes monitoring dashboard
Create a token for dashboard access:
kubectl -n kubernetes-dashboard create token admin-user
Copy the Token and Paste
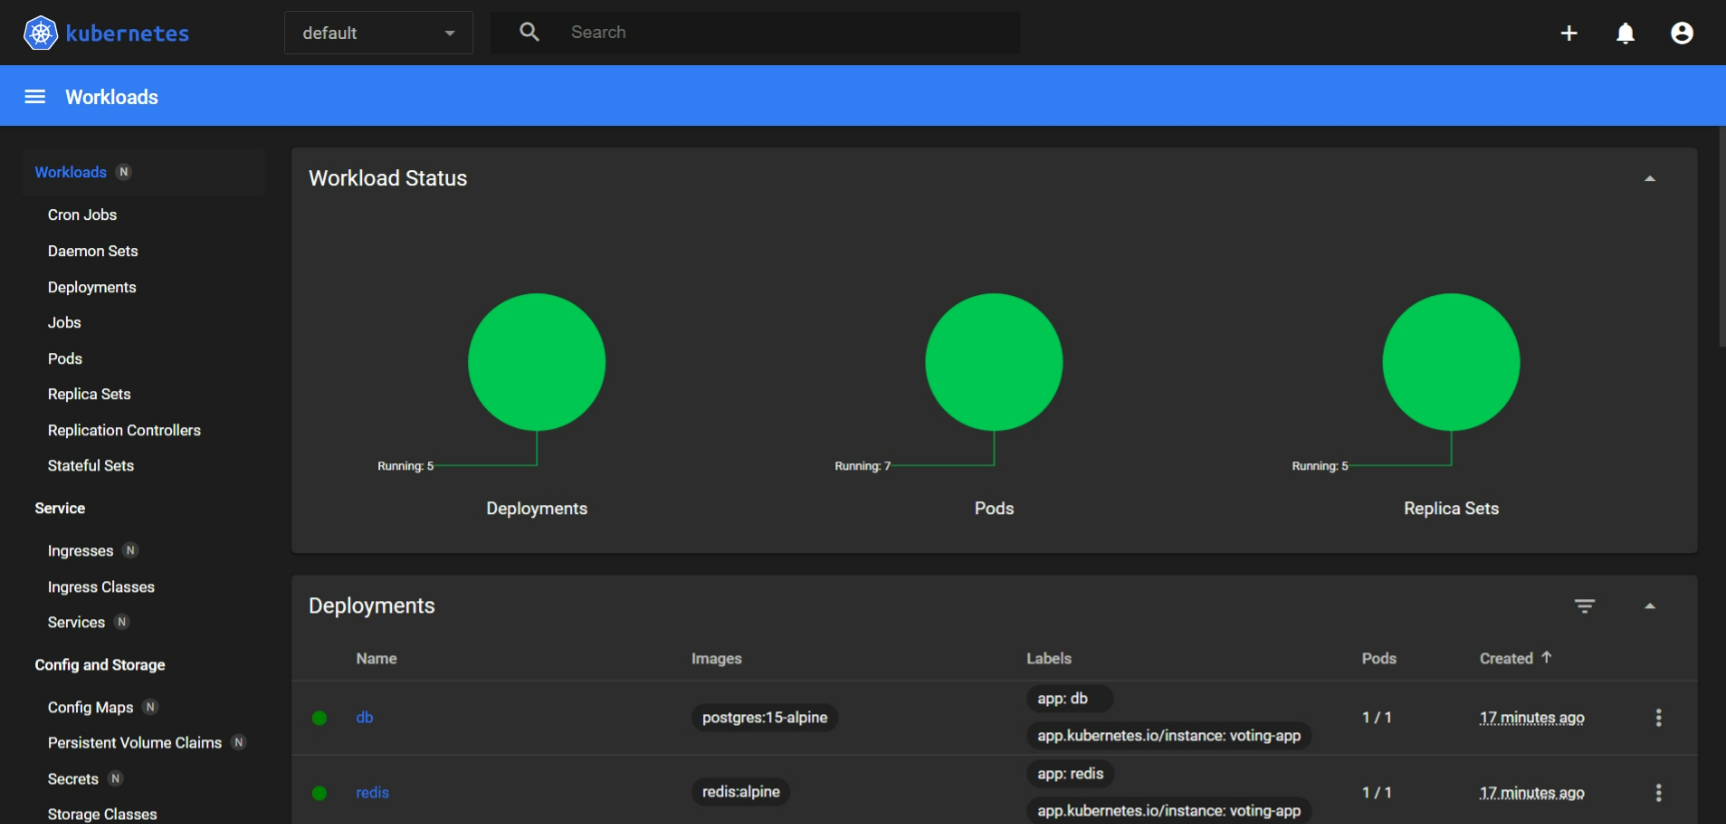
Congratulations!! You have successfully deployed the Kubernetes cluster in kind and you can monitor it also with the help of Kubernetes dashboard.

For more projects and DevOps related tasks and work just mail me on my Email ID.
Email id - harshitsahu6088@gmail.com
Subscribe to my newsletter
Read articles from Harshit Sahu directly inside your inbox. Subscribe to the newsletter, and don't miss out.
Written by

Harshit Sahu
Harshit Sahu
Enthusiastic about DevOps tools like Docker, Kubernetes, Maven, Nagios, Chef, and Ansible and currently learning and gaining experience by doing some hands-on projects on these tools. Also, started learning about AWS and GCP (Cloud Computing Platforms).