Learning Nessus Essentials
 Isael Melendez
When we start in the cybersecurity field, principally studying to obtain CompTIA Security+ and more closely to Vulnerability Scanning Tools in theory, you may remember the name “ NESSUS”. I’m pretty sure you remembered it.
So, What’s NESSUS? Why is it so famous?
Nessus is a widely known vulnerability scanning tool that identifies security weaknesses in computer systems, networks, and applications. It is famous for its comprehensive scanning capabilities, user-friendly interface, and regular updates covering many vulnerabilities. Nessus helps security professionals detect potential threats, including misconfigurations, outdated software, and open ports, making it a critical tool for ensuring robust network security. Its efficiency and reliability have made it a popular choice in cybersecurity assessments worldwide.
In this small lab, we will work with Nessus Essentials, a FREE version of the enterprise vulnerability scanning platform Nessus. We’ll be installing the tool in a Kali Linux VM.
Steps to follow:
Nessus Installation
Nessus GUI sample
Scanning with Nessus
NESSUS INSTALLATION
To start, we must visit https://www.tenable.com/products/nessus/nessus-essentials and register to obtain an activation code. When ready to download, you’ll see the Download button, but first, you must select your system and click Download. As you may observe, we’re downloading the version to Kali Linux.
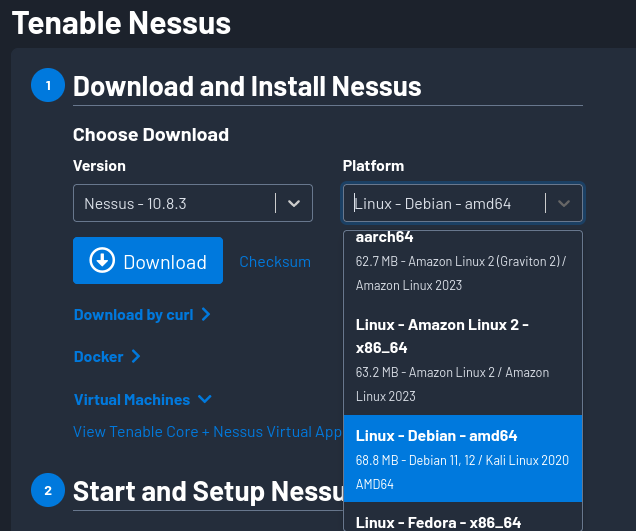
When the download is completed, proceed to the terminal to install Nessus using the command sudo dpkg -i <Nessus . deb File Name>, remember to run the command as super user.
Next, you will run Nessus Services using the command service nessusd start. Completing this step, you will go to your browser and visit https://kali:8834/ - this is the local web GUI for Nessus, maybe you need to add an exception and confirm it. Later you will use the code received when you tried to download or you can subscribe in this step.
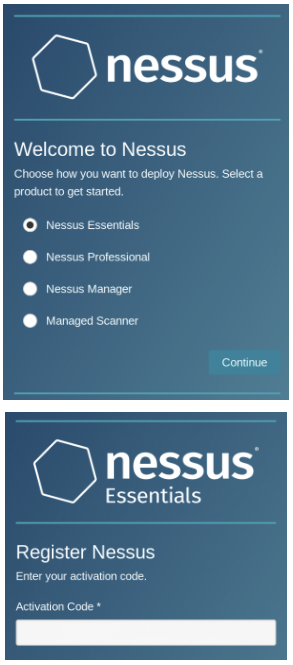
NESSUS GUI SAMPLE
Set up your user and pass. Once’s done you will be presented with the dashboard.
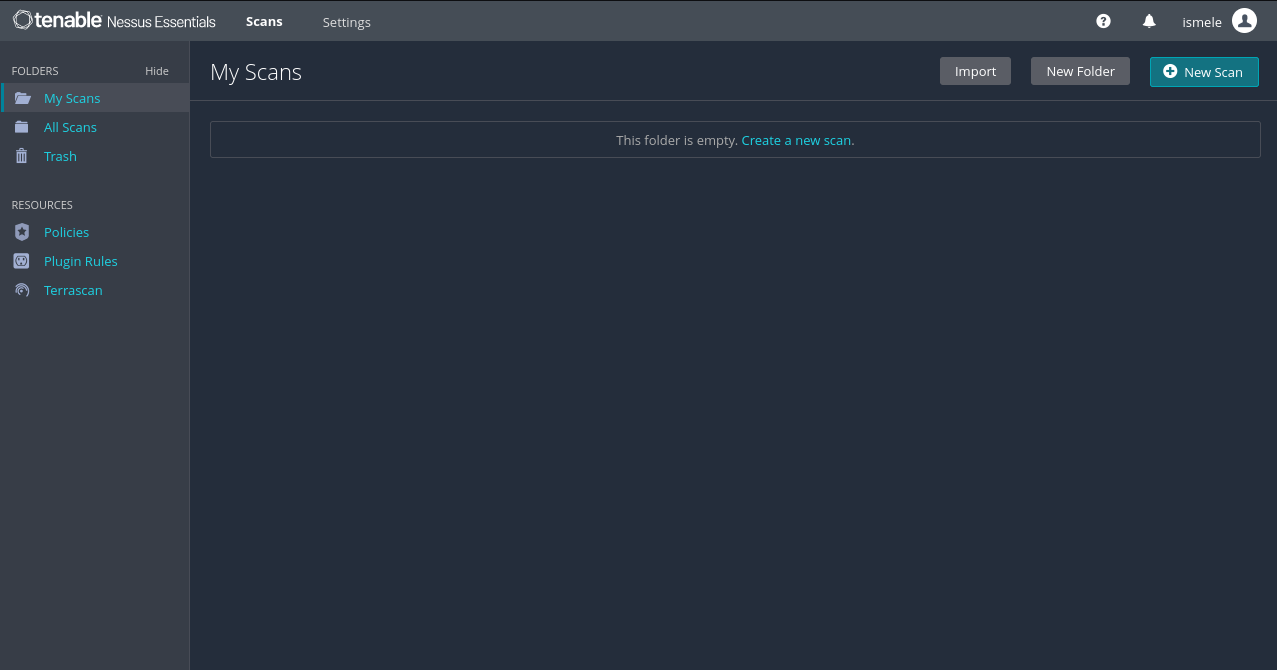
From here we can launch scans, create policies, review plugins, and more.
My Scans – Any scans that have been conducted by the currently signed-in user. This includes completed, scheduled, pending, and failed scans.
All Scans – Any scans that have been conducted by any users within an organization. This includes completed, scheduled, pending, and failed scans.
Trash – Once you’ve got a scan template, you can send it to the Trash, so that it is no longer in the “My Scans” or “All Scans” tabs.
Policies – Scans are conducted using a target and a policy, which is a list of settings and plugins that you use. Different plugins will identify and test different things.
Plugin Rules – Plugins are the part of Nessus that conducts the scanning and enumeration. Using different ones will provide different results, so this is where you can fine-tune the scan to look for specific security issues.
Scanners – Scanners are different hosts that can perform enumeration. This is useful if there are multiple V-LANs or physical networks that need to be scanned, and the hosts can’t communicate directly. In our case, we only have one, the local scanner running in our VM.
Scanning With Nessus
On your scan screen, you may go to New Scan in your top right corner, at first this screen will be blank because you have not conducted any scan. Nessus will present you with some predefined templates and the most common vulnerabilities.

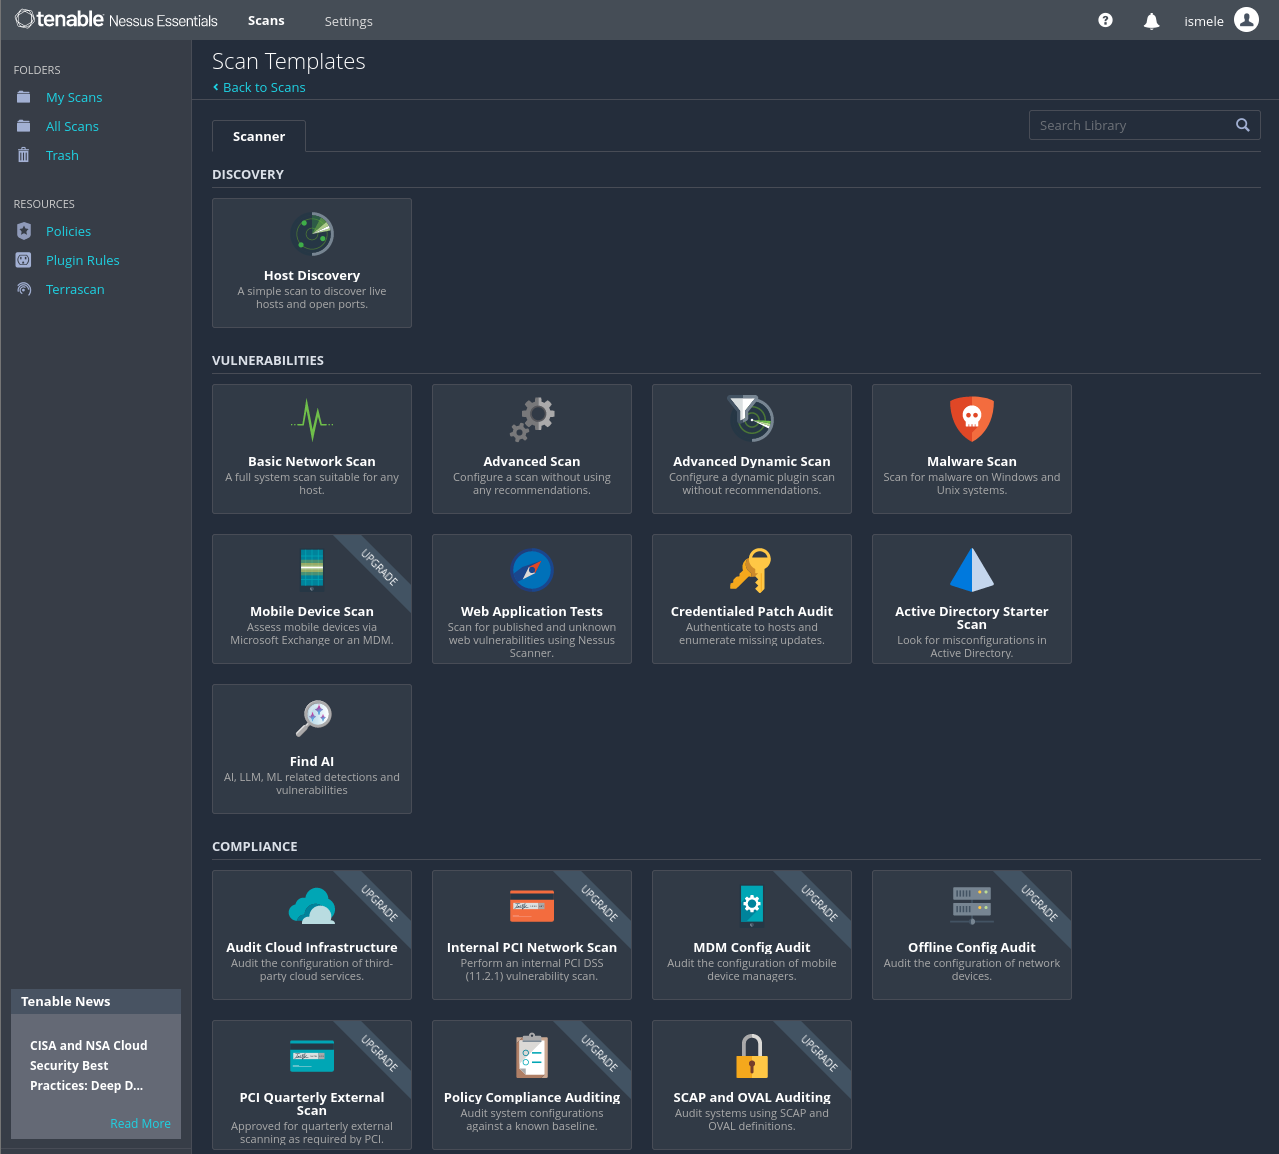
To start the scanning task, we are going to click on Basic Network Scann, you will have this window where you’re going to set up the scanning network scope including, after setting up the information you will save it.
Name ( enter a name to recognize the scanning you want to conduct )
Description ( Scanning scope )
Folder
Targets
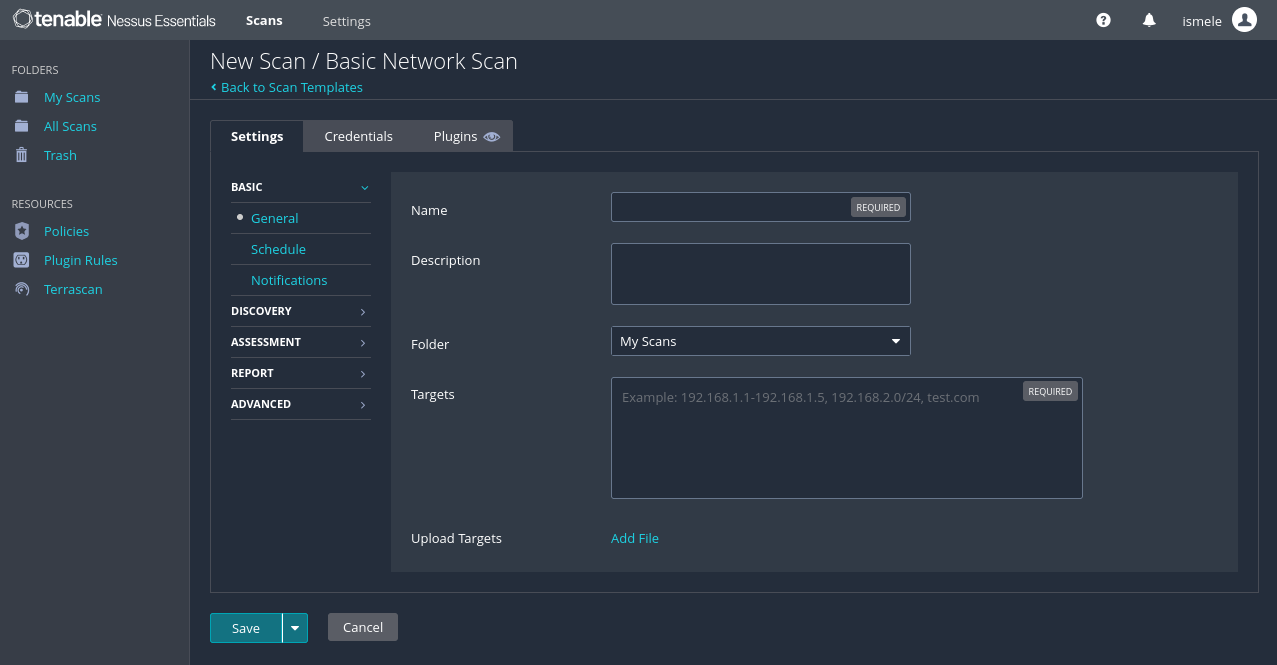
It is important to know, that saving the scan does not start the scan, it’s merely like saving the configuration previously presented. To start the scan you must click on the launch bottom ( play icon).

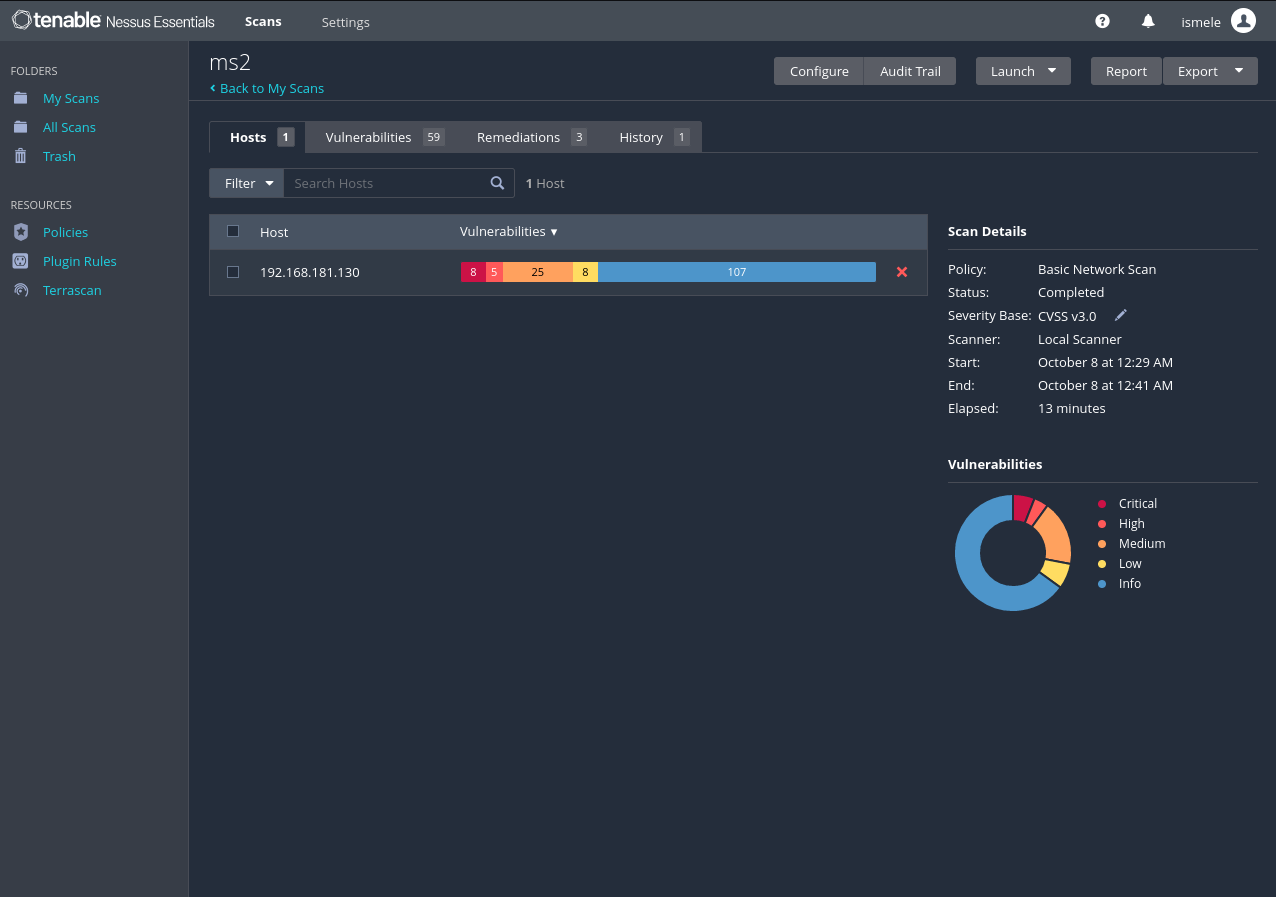
You may observe how the tool scans the presented configured network and when was finished you may click on the name of the scan to observe the vulnerabilities listed on the scanned IP. You can review it, this scan provides a highly detailed description of the problems and recommendations for the solution. For this lab testing, we scanned METASPLOITABLE S2 VM.
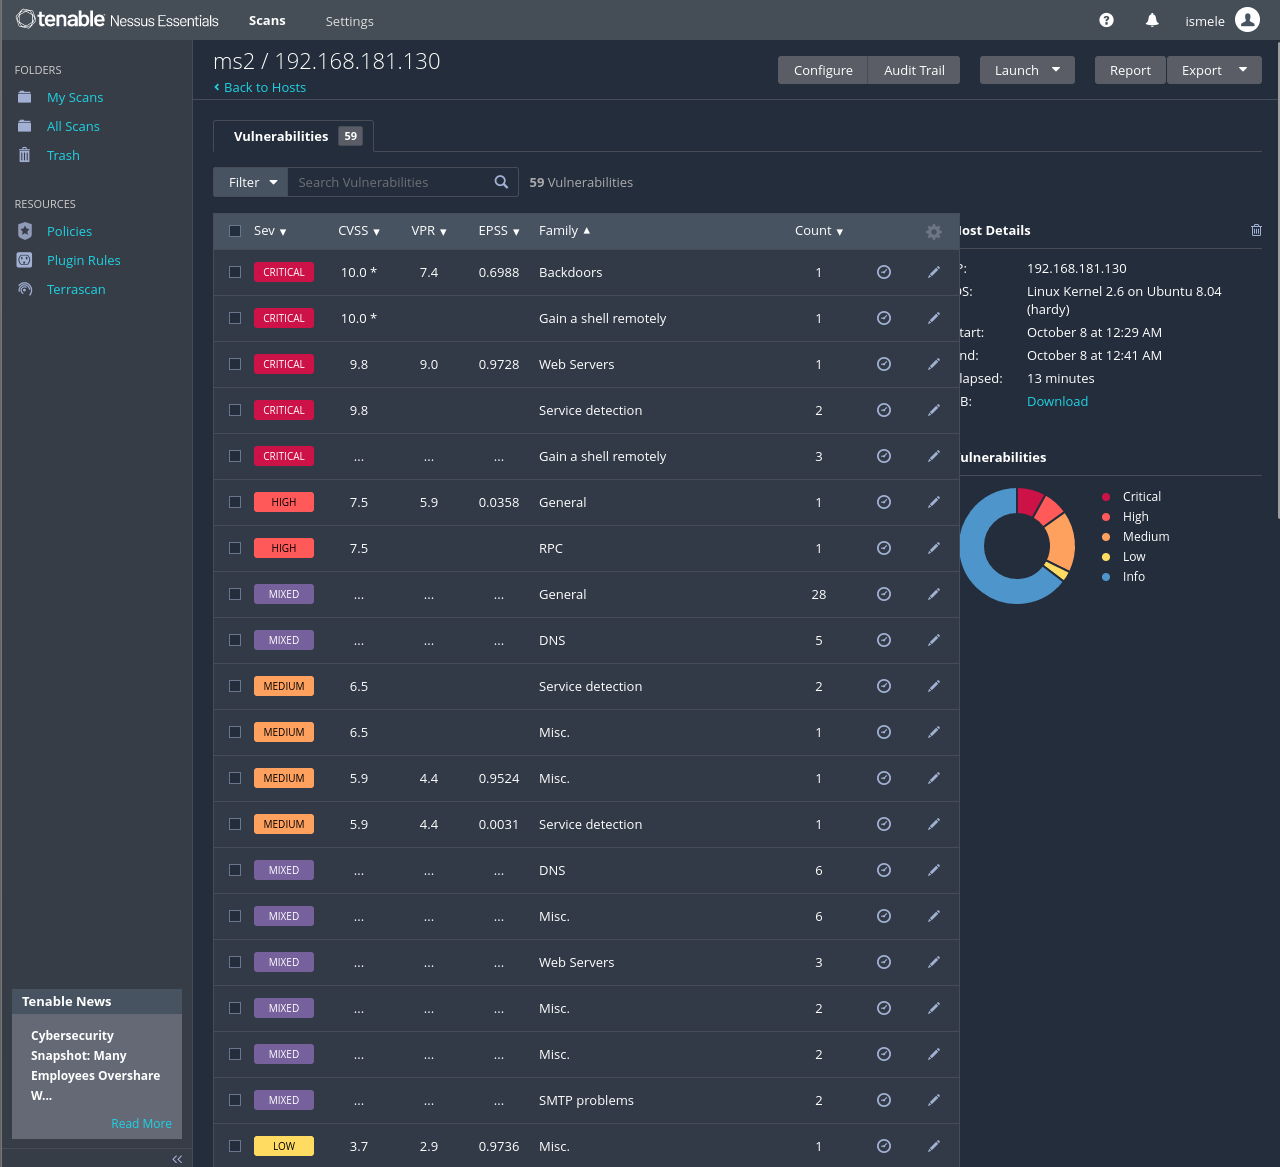
When you click above the scanned host, you may observe the description of those vulnerabilities and the grade they have, like Critical, High, Medium, Low, or Info. Clicking inside you may find a better description of each vulnerability.
Clicking above the host you will have each vulnerability description separated by considerations like Severity, CVSS, VPR, EPSS, Family, Count, etc.
If you click above any vulnerability, you encounter at your left a description, a solution, and some links to read more about it. Also, there’s an output with some important information about the process.
At your right, there are Pluging Details including severity, ID, version, Type, Family, and Modified date. Is like a better understandable description of the vulnerability.
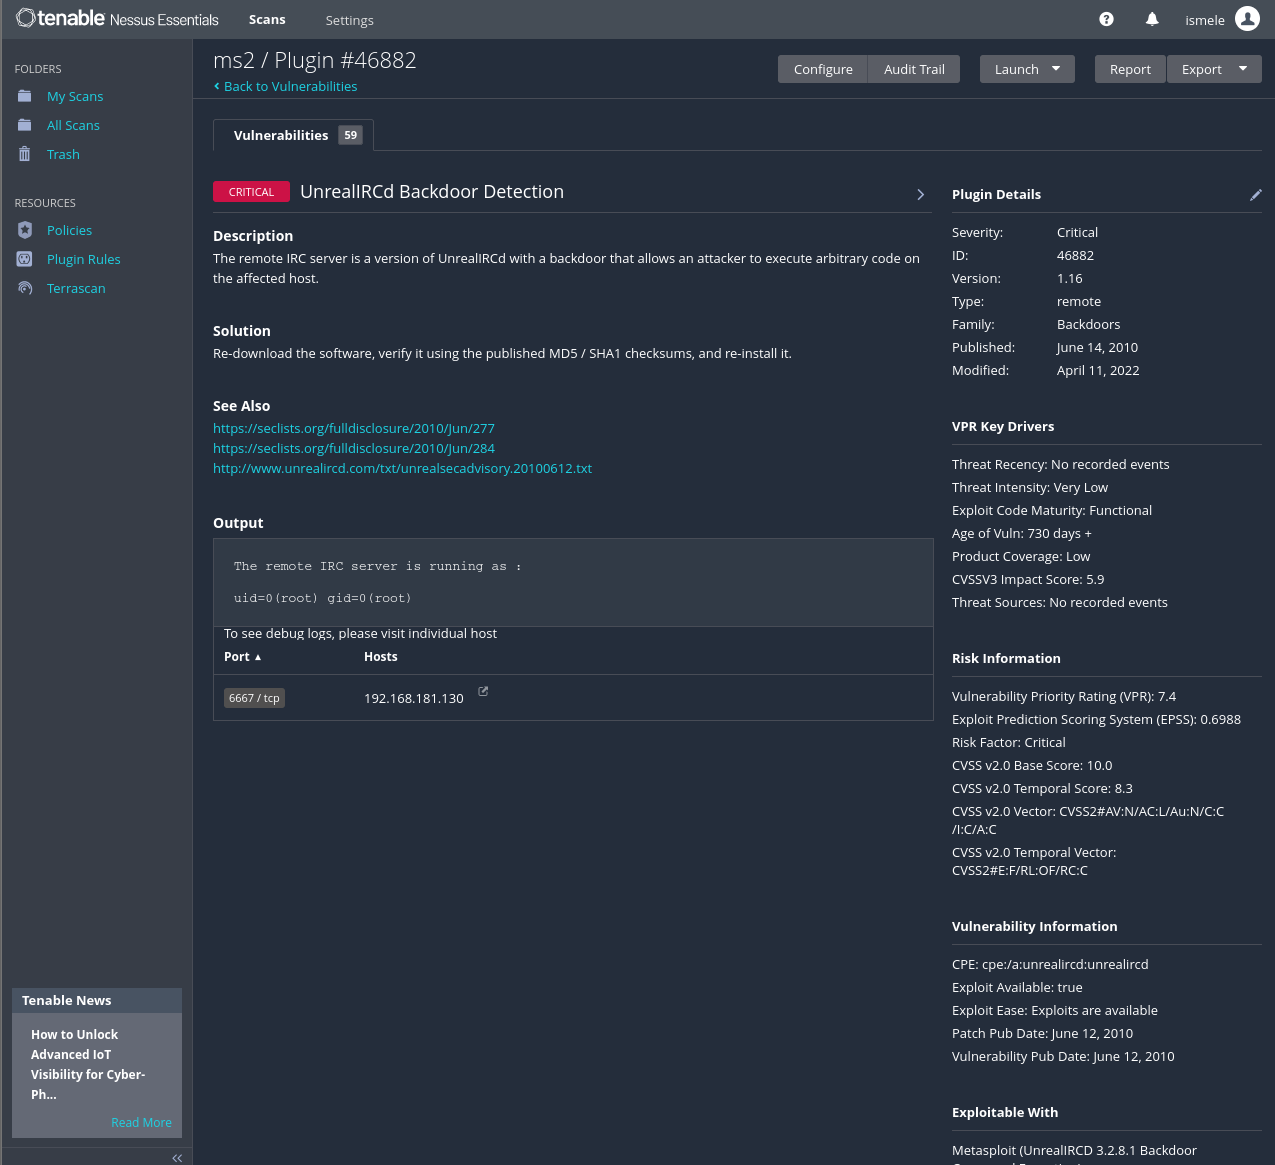
If you want to keep saving the scanned, you may export the complete resume in a PDF or other eligible format. Just click on the Export button at the top right.
I hope this small Lab or guide helps you to see at first hand Nessus Tool, and understand a small part of the program and functionalities. This is a nice tool to have and know how to work with, lots of functionalities.
If you have any questions, leave a comment and we can grow together.
Subscribe to my newsletter
Read articles from Isael Melendez directly inside your inbox. Subscribe to the newsletter, and don't miss out.
Written by

Isael Melendez
Isael Melendez
Tech enthusiast , always learning IT field. ♦Cybersecurity Analyst and Cloud Computing student @ MDC | Banking Specialist ♦CodePath Intermediate Intern.