How to Run a ServiceNow MID Server on Apple Silicon Macs
 Reece Poulsen
Today, I spent more time than I'd like to admit trying to get a MID Server running on my Apple Silicon Mac. About a year ago, some of my co-workers wrote a blog post, Installing a MID Server on a Mac, which was crucial in helping me get started. However, I had to take a few extra steps to complete the process. So, in an attempt to preserve some knowledge and hopefully help someone else, I thought I would share some of my notes in addition to their original post.
Running a ServiceNow MID Server on an Apple Silicon Mac isn’t officially supported. However, since MacOS is Linux-based, the Linux version of the MID Server is technically compatible. With the help of a JDK, a Tanuki Java Service Wrapper, and a little bit of extra config it is possible. This guide walks you through the entire process step by step.
glide-xanadu-07-02-2024__patch0-07-16-2024). If your instance is on a different release then version numbers for the installed components may change but the idea is generally the same. (Updates have been made to this blog post for the Yokohama release)Download the Necessary Files
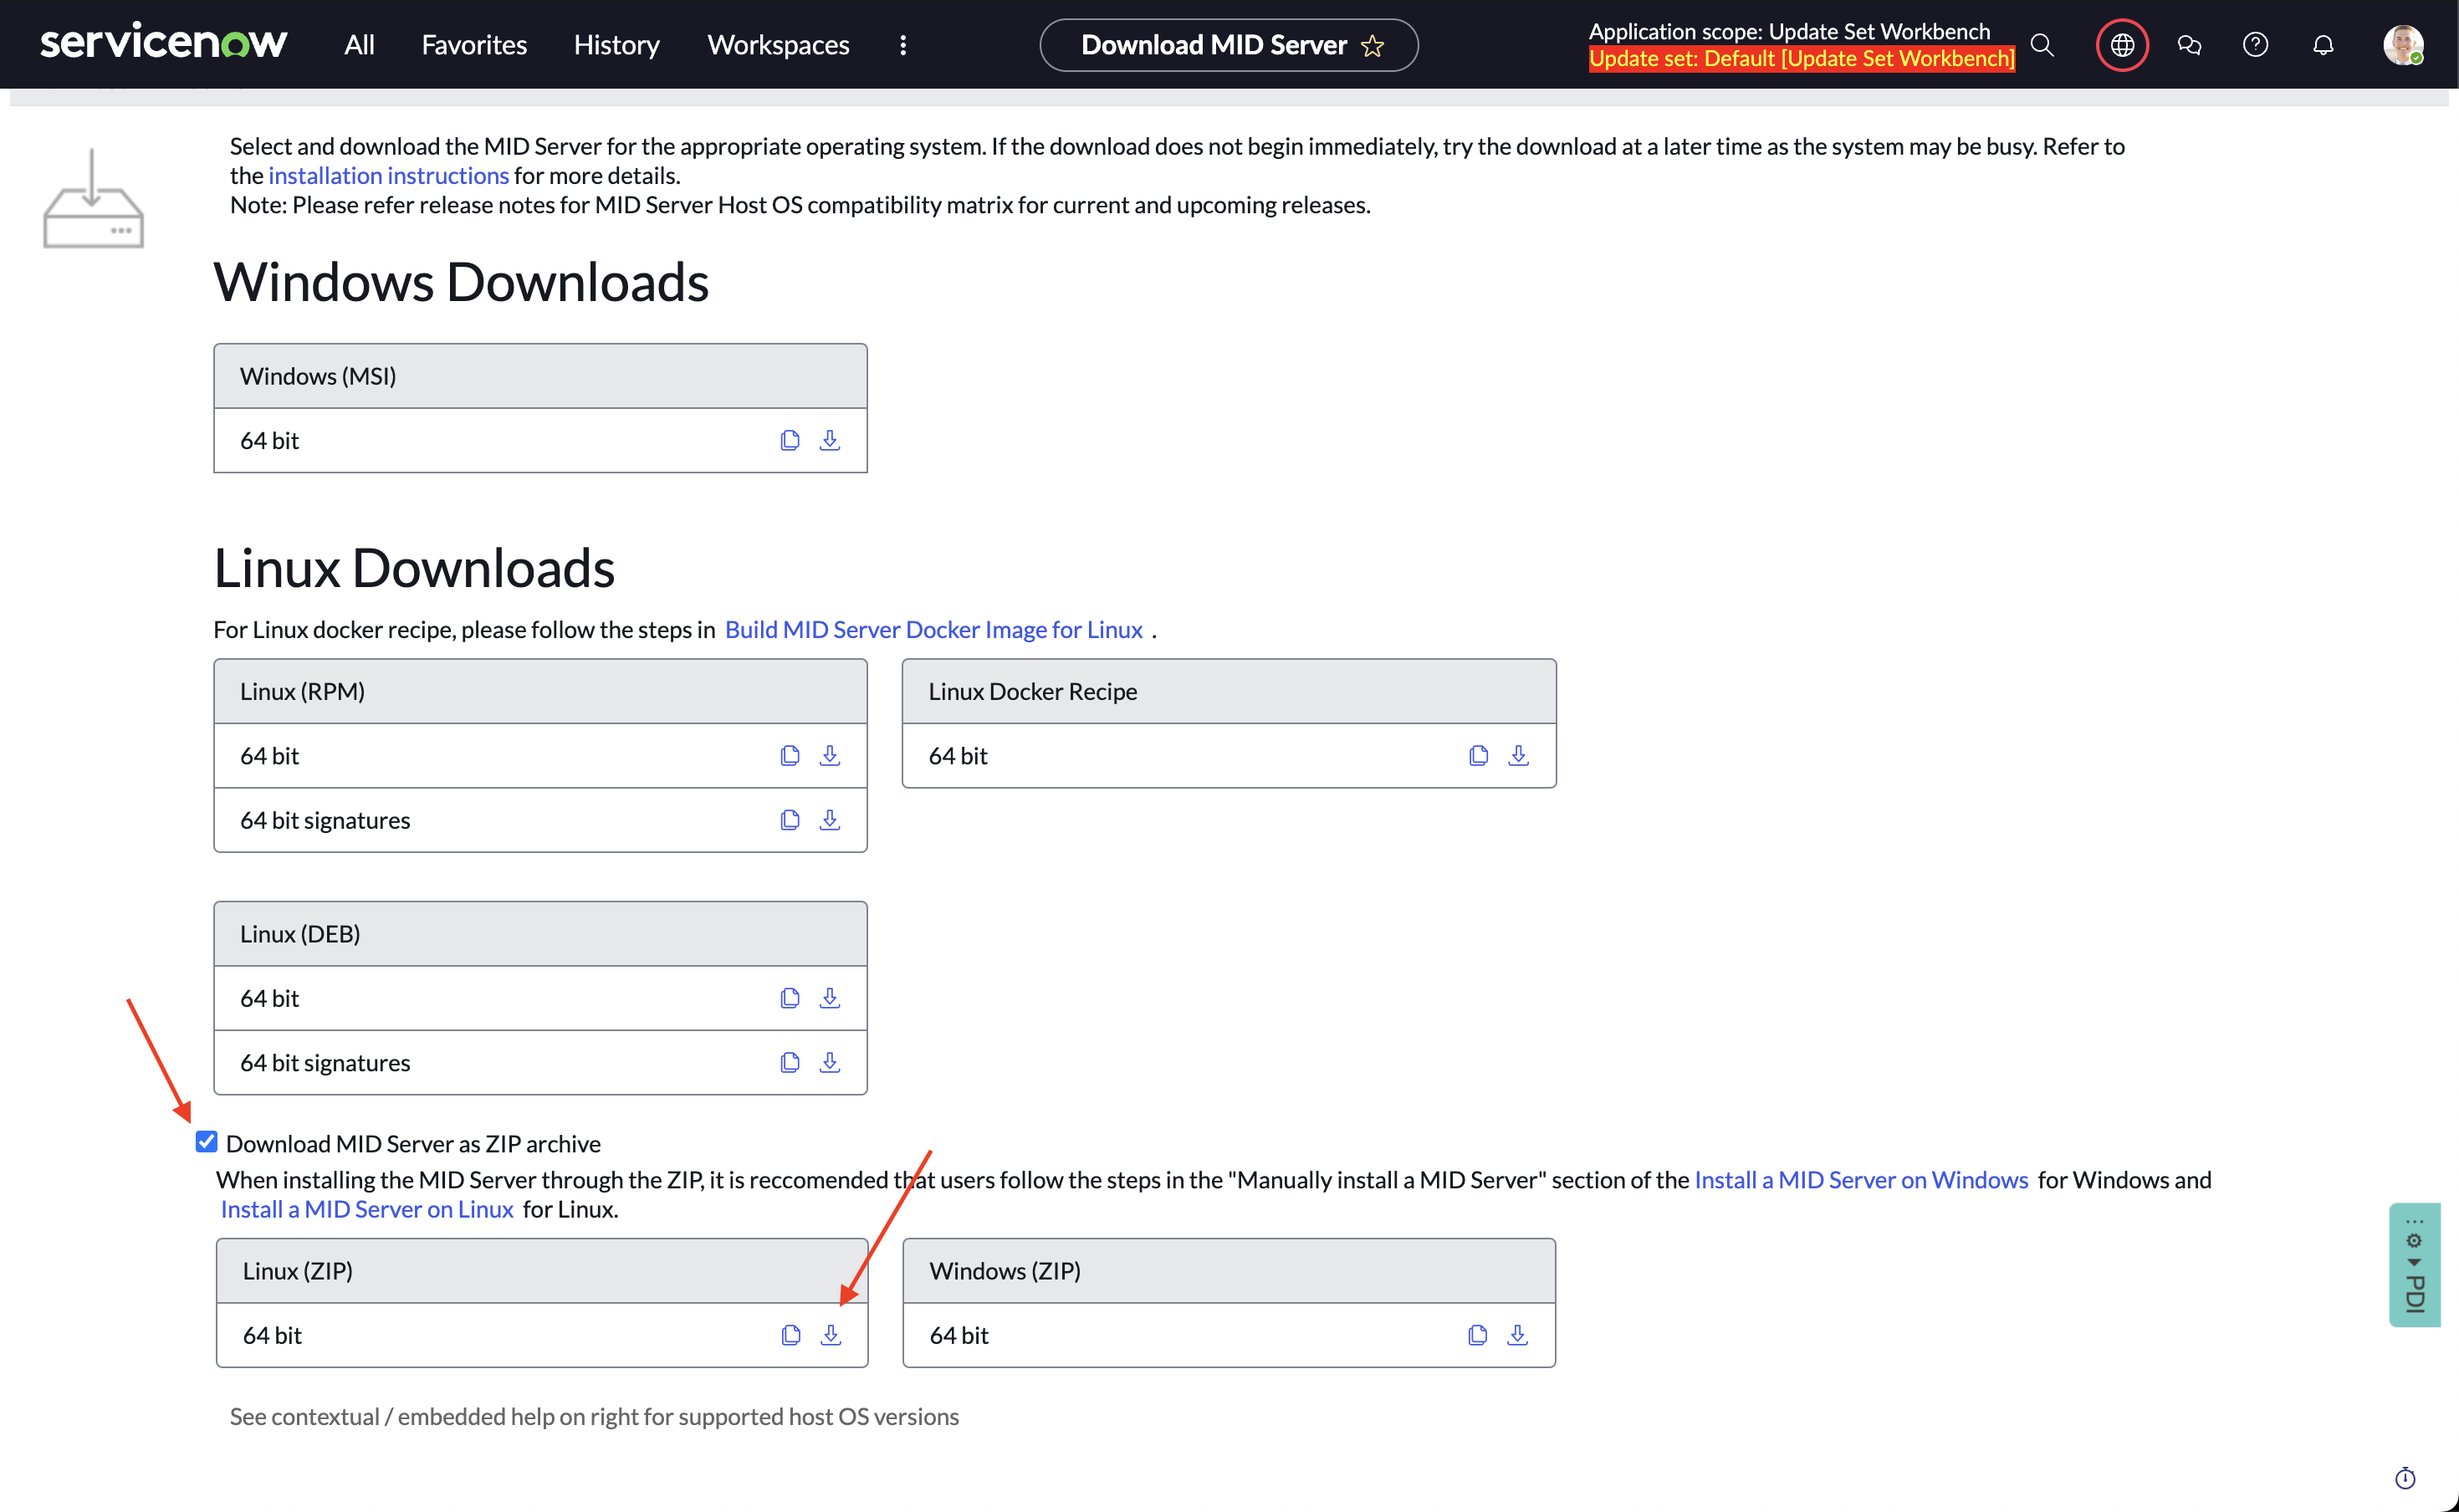
In your ServiceNow instance, navigate to MID Servers > Downloads to download the Linux 64 bit zip file
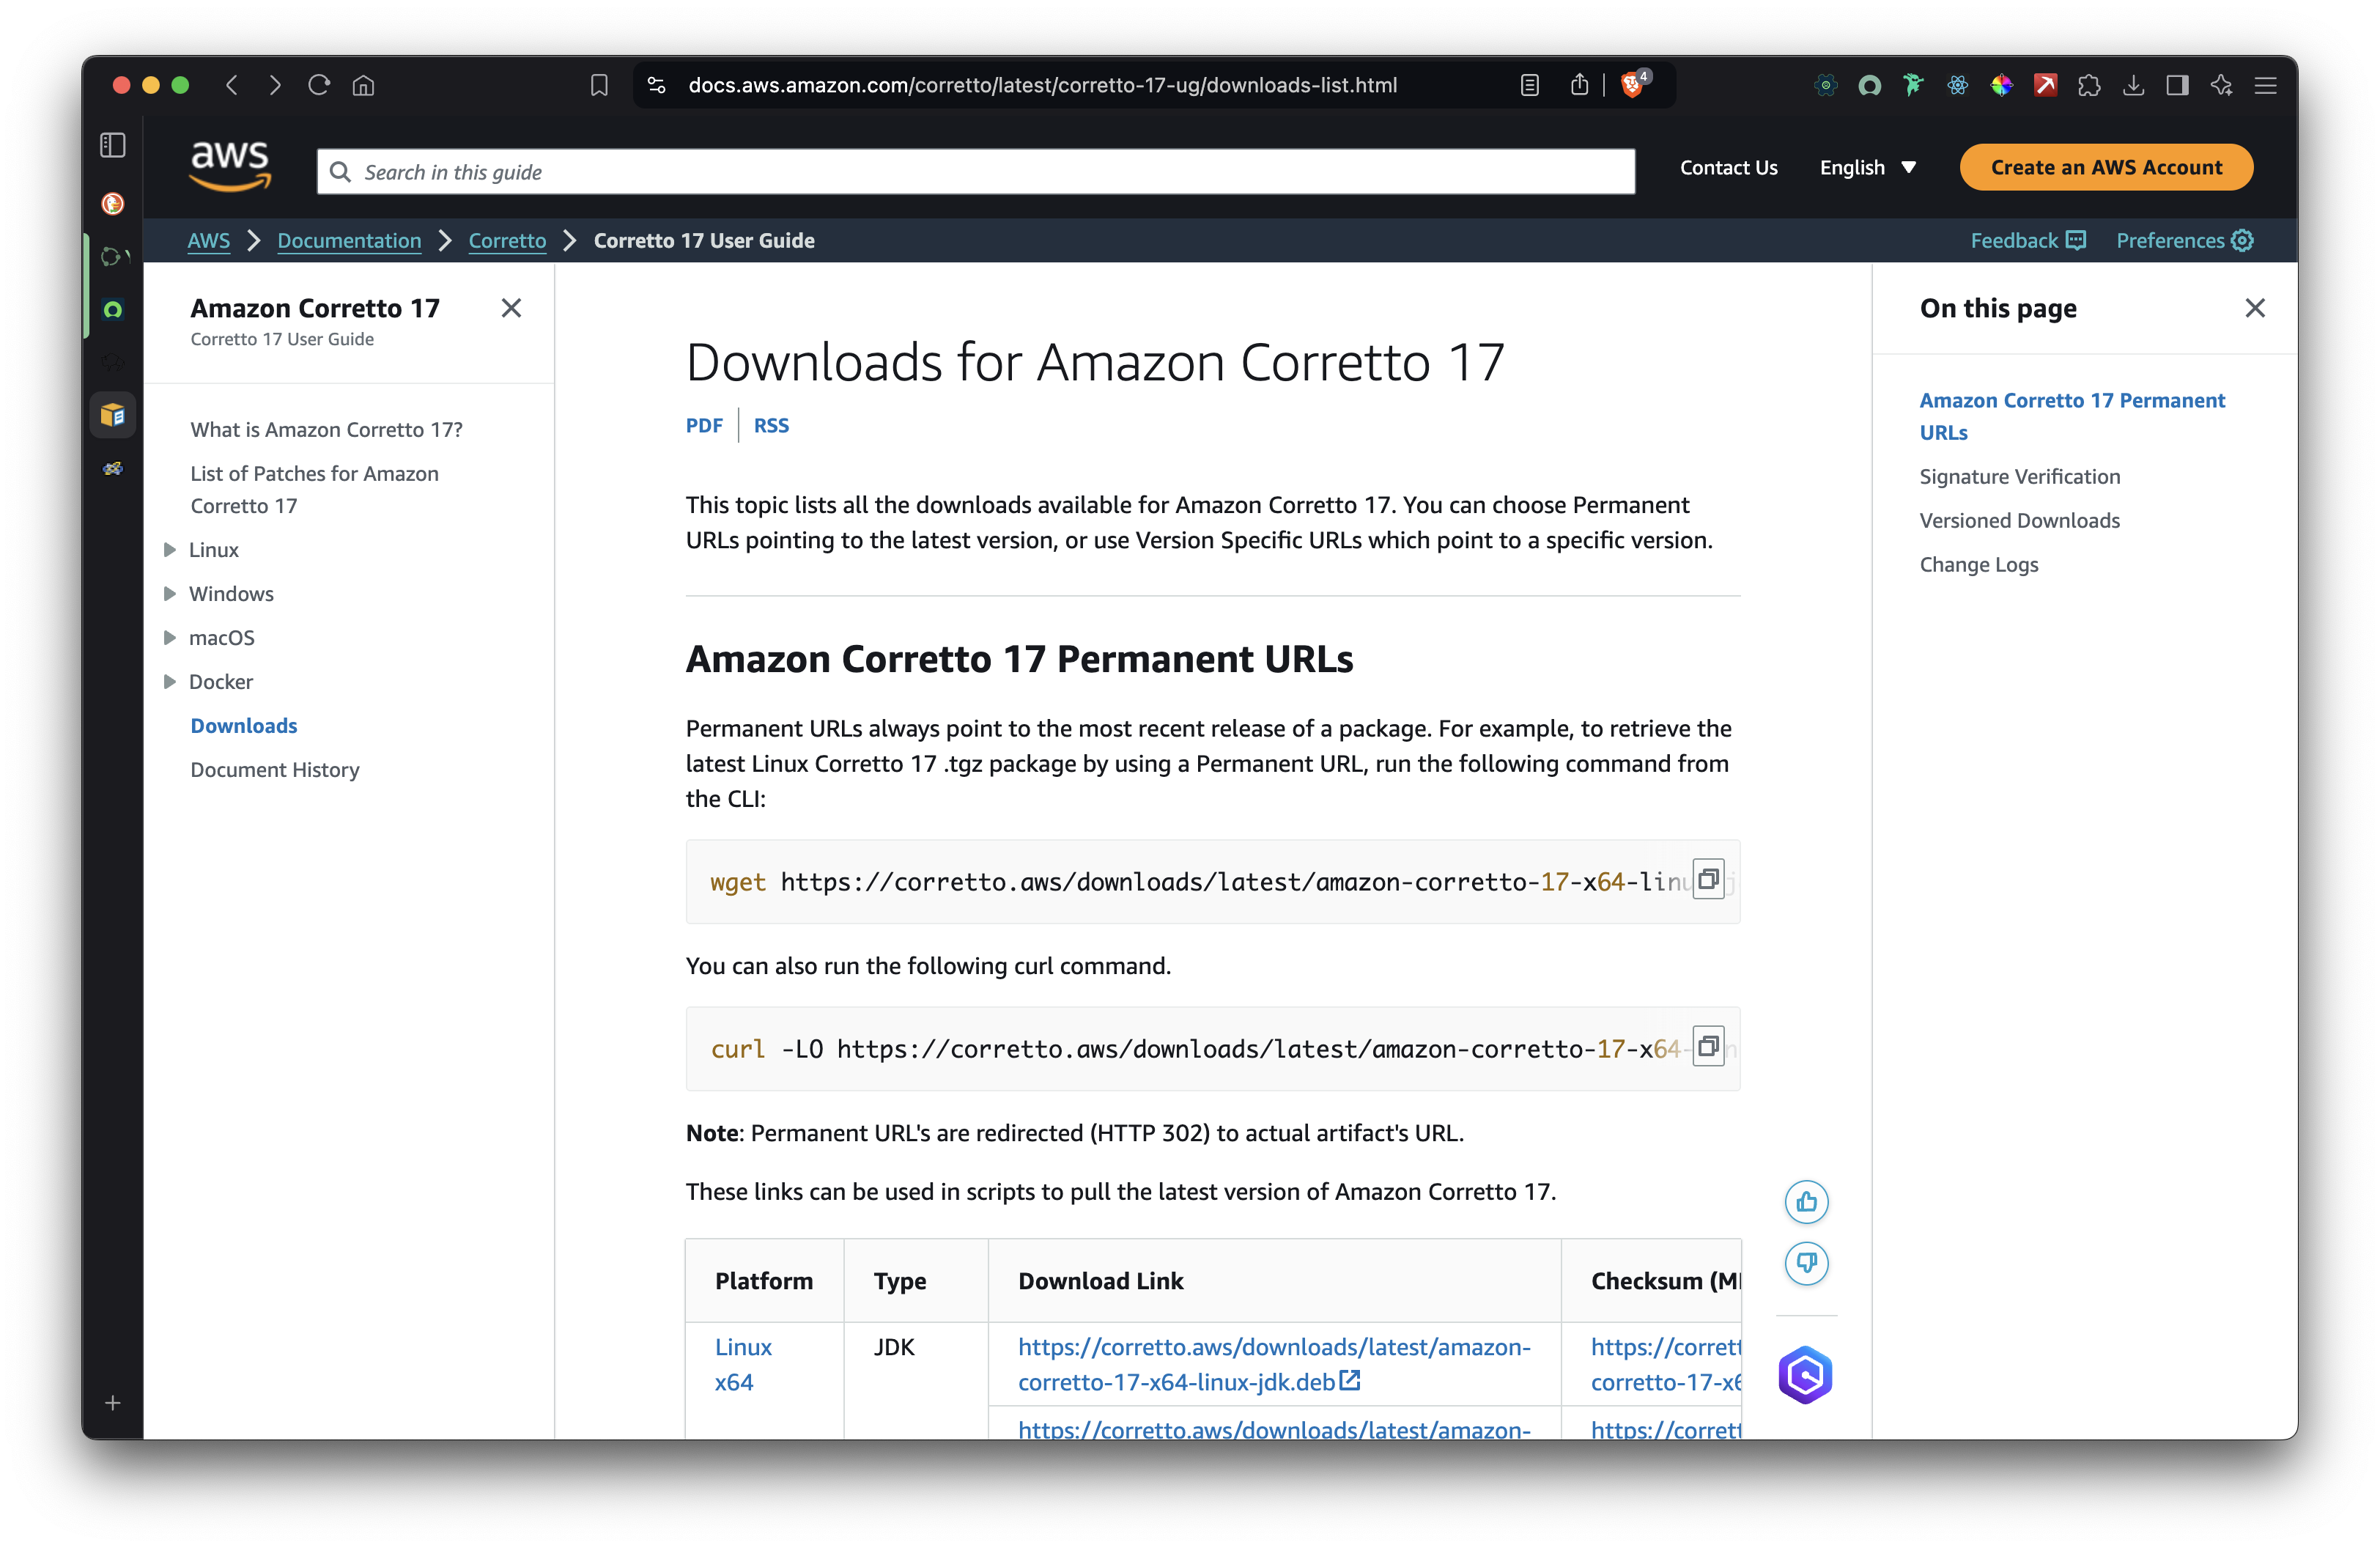
Download the Amazon Corretto 17 JDK for Apple Silicon arm64 tar zip here: https://corretto.aws/downloads/latest/amazon-corretto-17-aarch64-macos-jdk.tar.gz
What is Amazon Corretto?
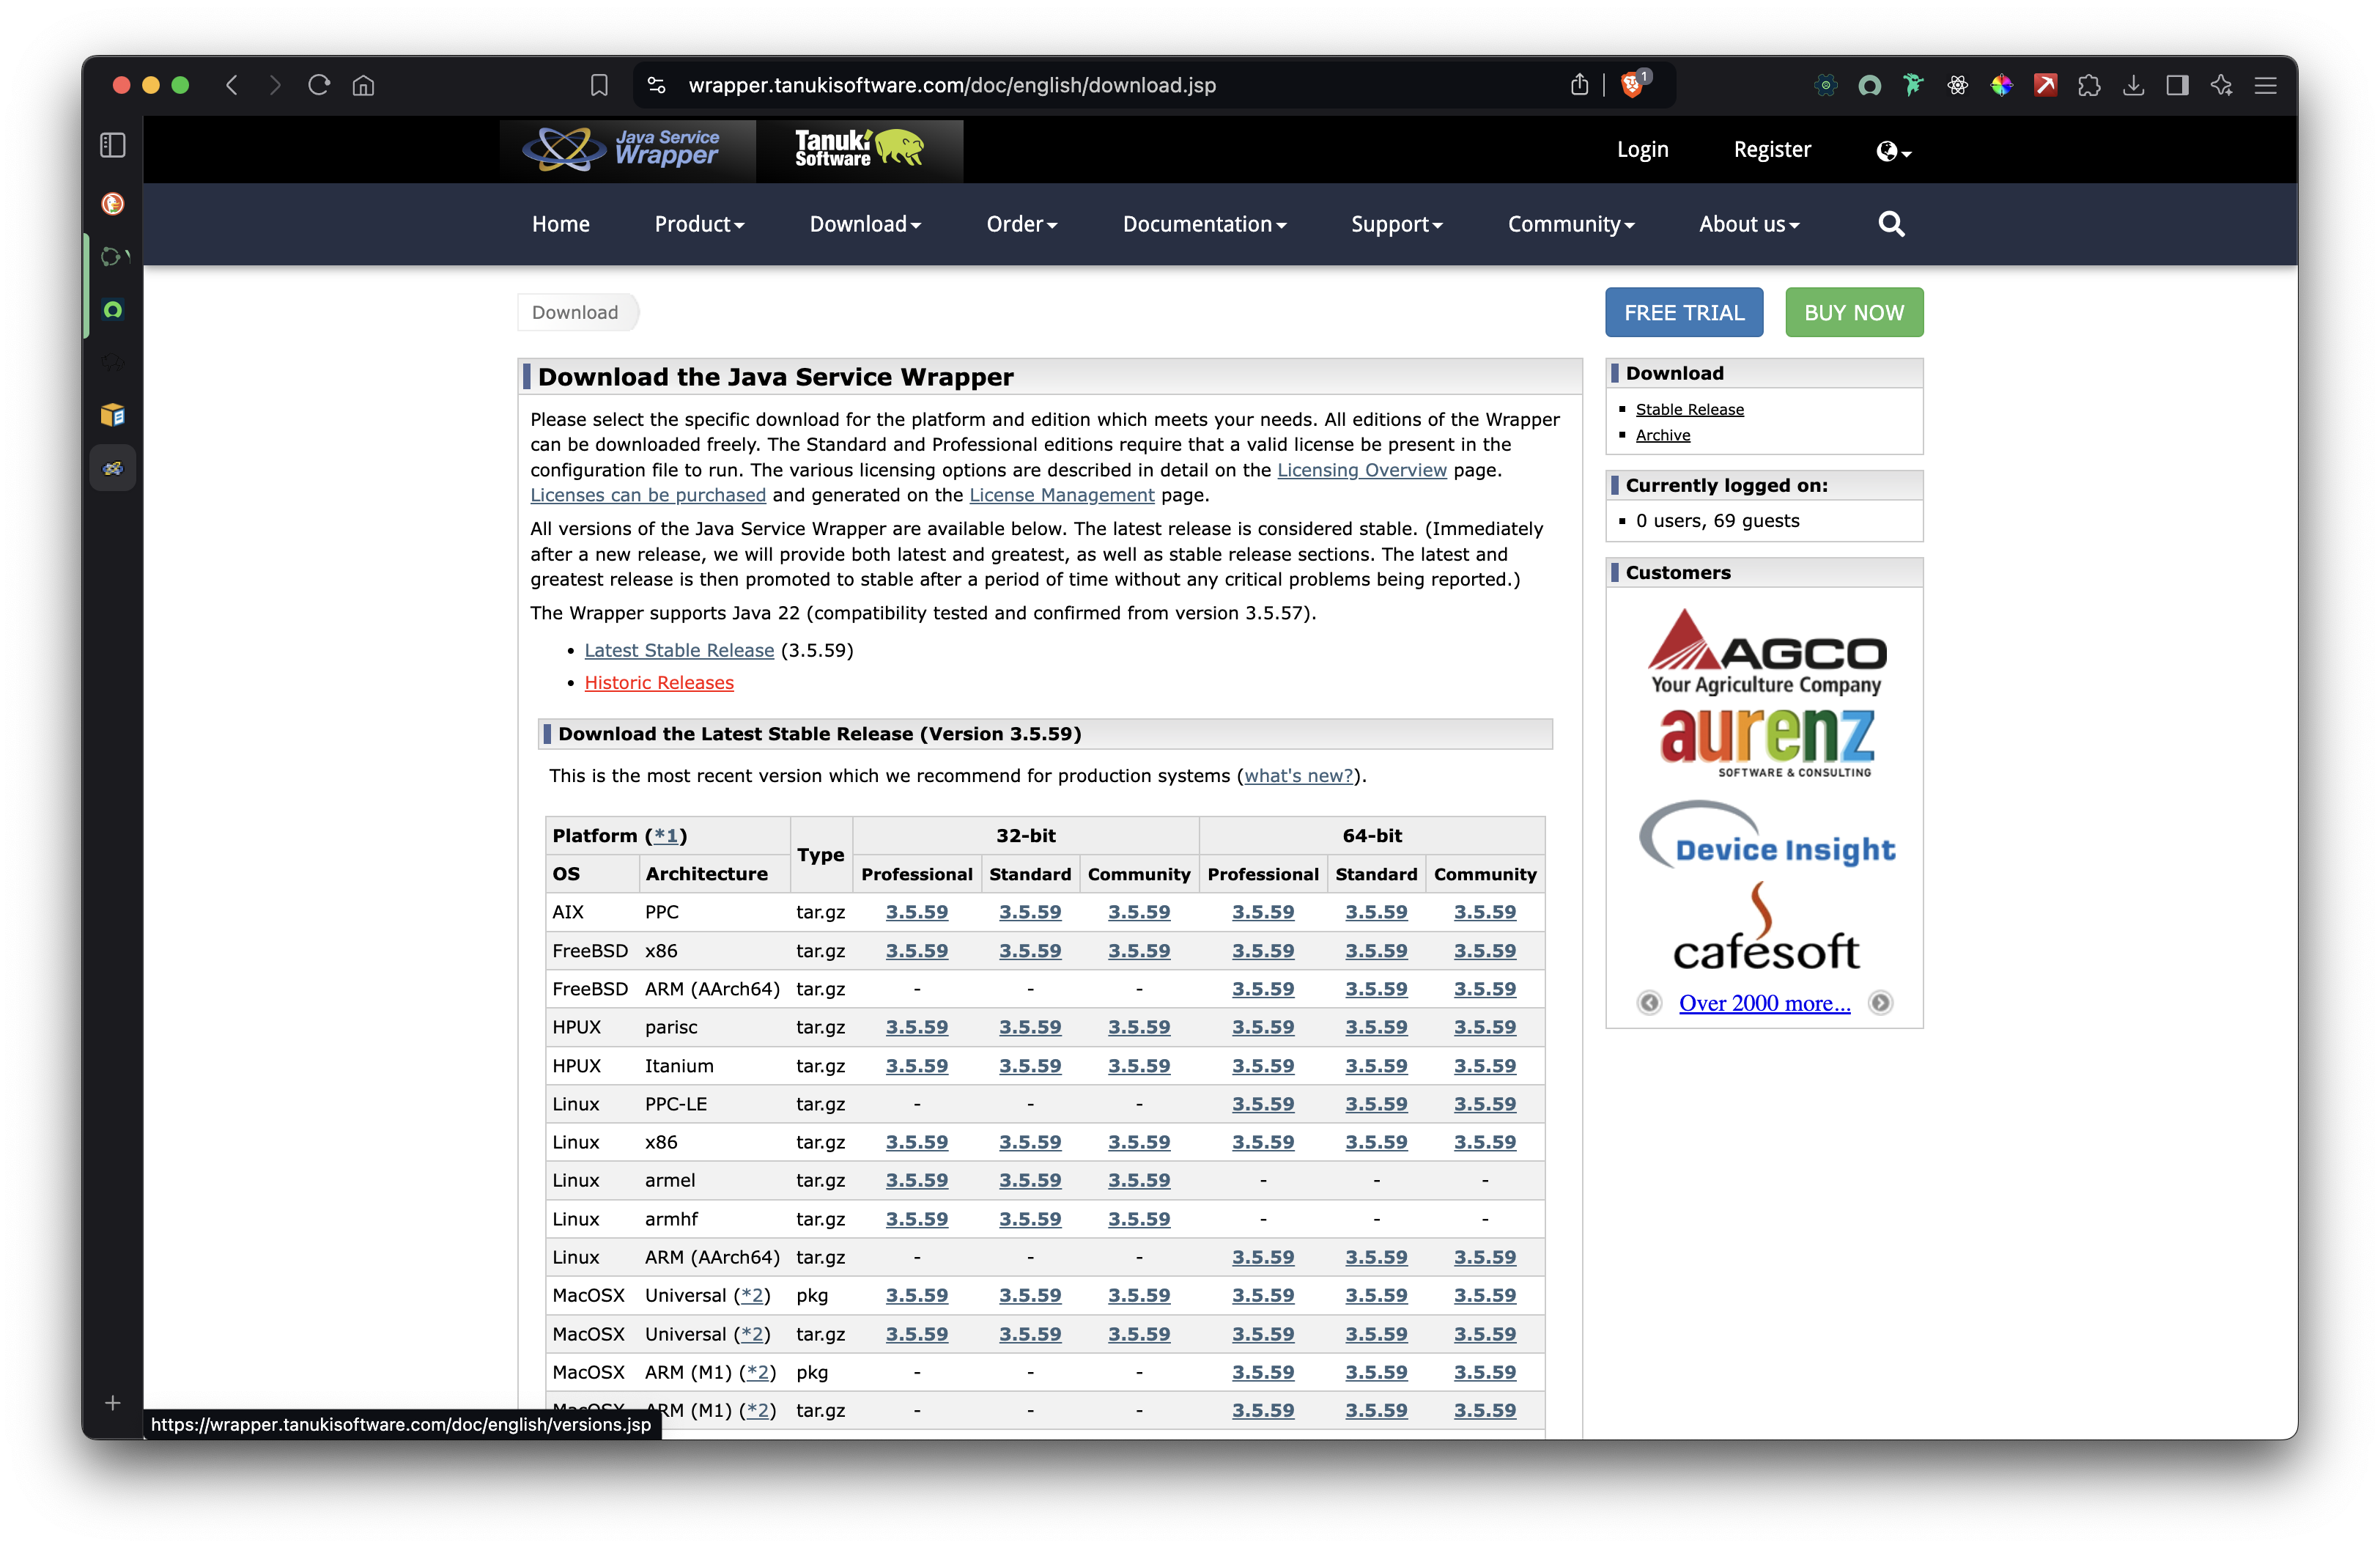
Download the Tanuki Java Service Wrapper version 3.5.51 for Apple Silicon arm64 tar zip file here: https://download.tanukisoftware.com/wrapper/3.5.51/wrapper-macosx-arm-64-3.5.51.tar.gz
What is the Tanuki Java Service Wrapper?
Once all of these files are downloaded, make sure to extract them into a folder that you won’t lose because we will be coming back to them later
Move Files into the MID Server
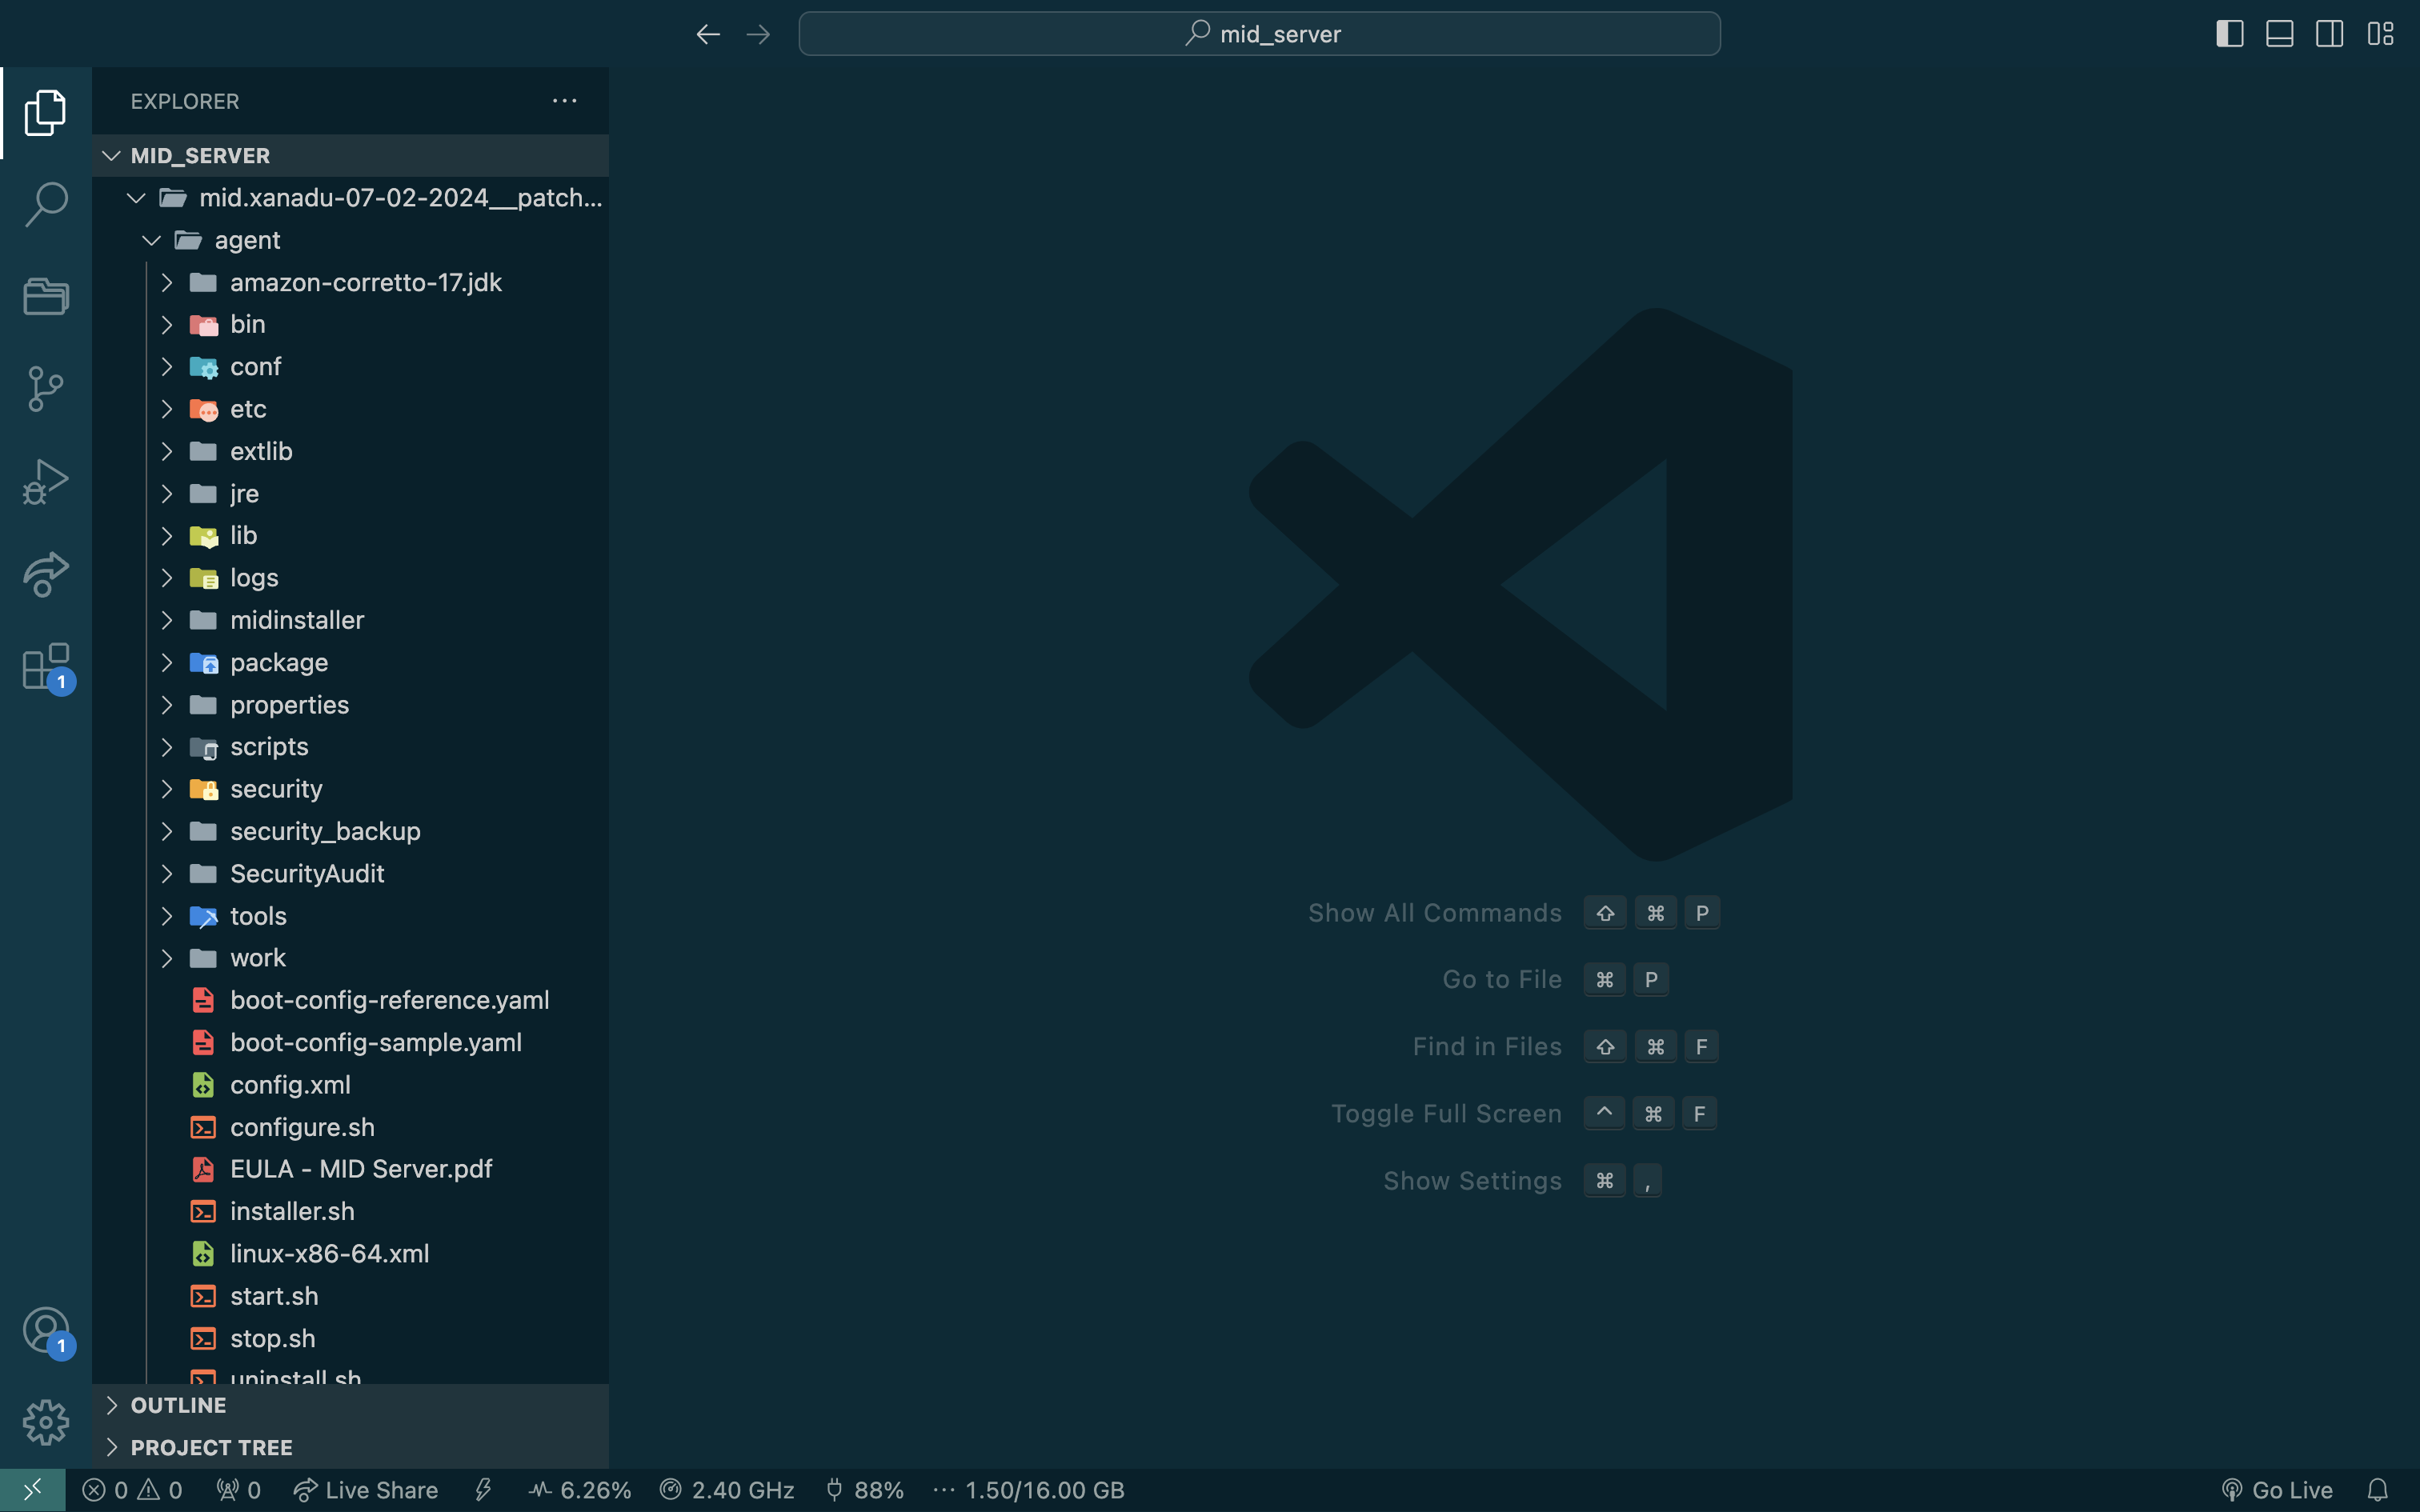
JDK
Open the MID Server folder in Finder and navigate to the
agentdirectoryCreate a new folder called
amazon-corretto-17.jdkIn a second Finder window, open the unzipped Amazon Corretto 17 tar folder that you downloaded earlier
Navigate to
Contents/Homedirectory in the Amazon Corretto 17 tar and move all of its contents to the newly createdamazon-corretto-17.jdkfolder in the MID Server
Service Wrapper
Open the unzipped Tanuki Service Wrapper tar folder that you downloaded earlier
Open the
binfolderRename the
wrapperfile in this folder towrapper-macosx-arm-64Move this file to the MID Server’s
binfolder (mid_server_folder/agent/bin)Go back to the Tanuki Service Wrapper tar folder
Open the
libfolderRename the
libwrapper.dylibfile in this folder tolibwrapper-macosx-arm-64.dylibMove this file to the MID Server’s
libfolder (mid_server_folder/agent/lib)
Modify the MID Server Config
In the MID Server folder navigate to the
agent/confdirectory and open thewrapper-jvm.conffile and replaceset.SN_JVM_ARCH=x86-64withset.SNC_JVM_ARCH=arm-64. This changes the MID Server’s JVM architecture to use arm instead of x86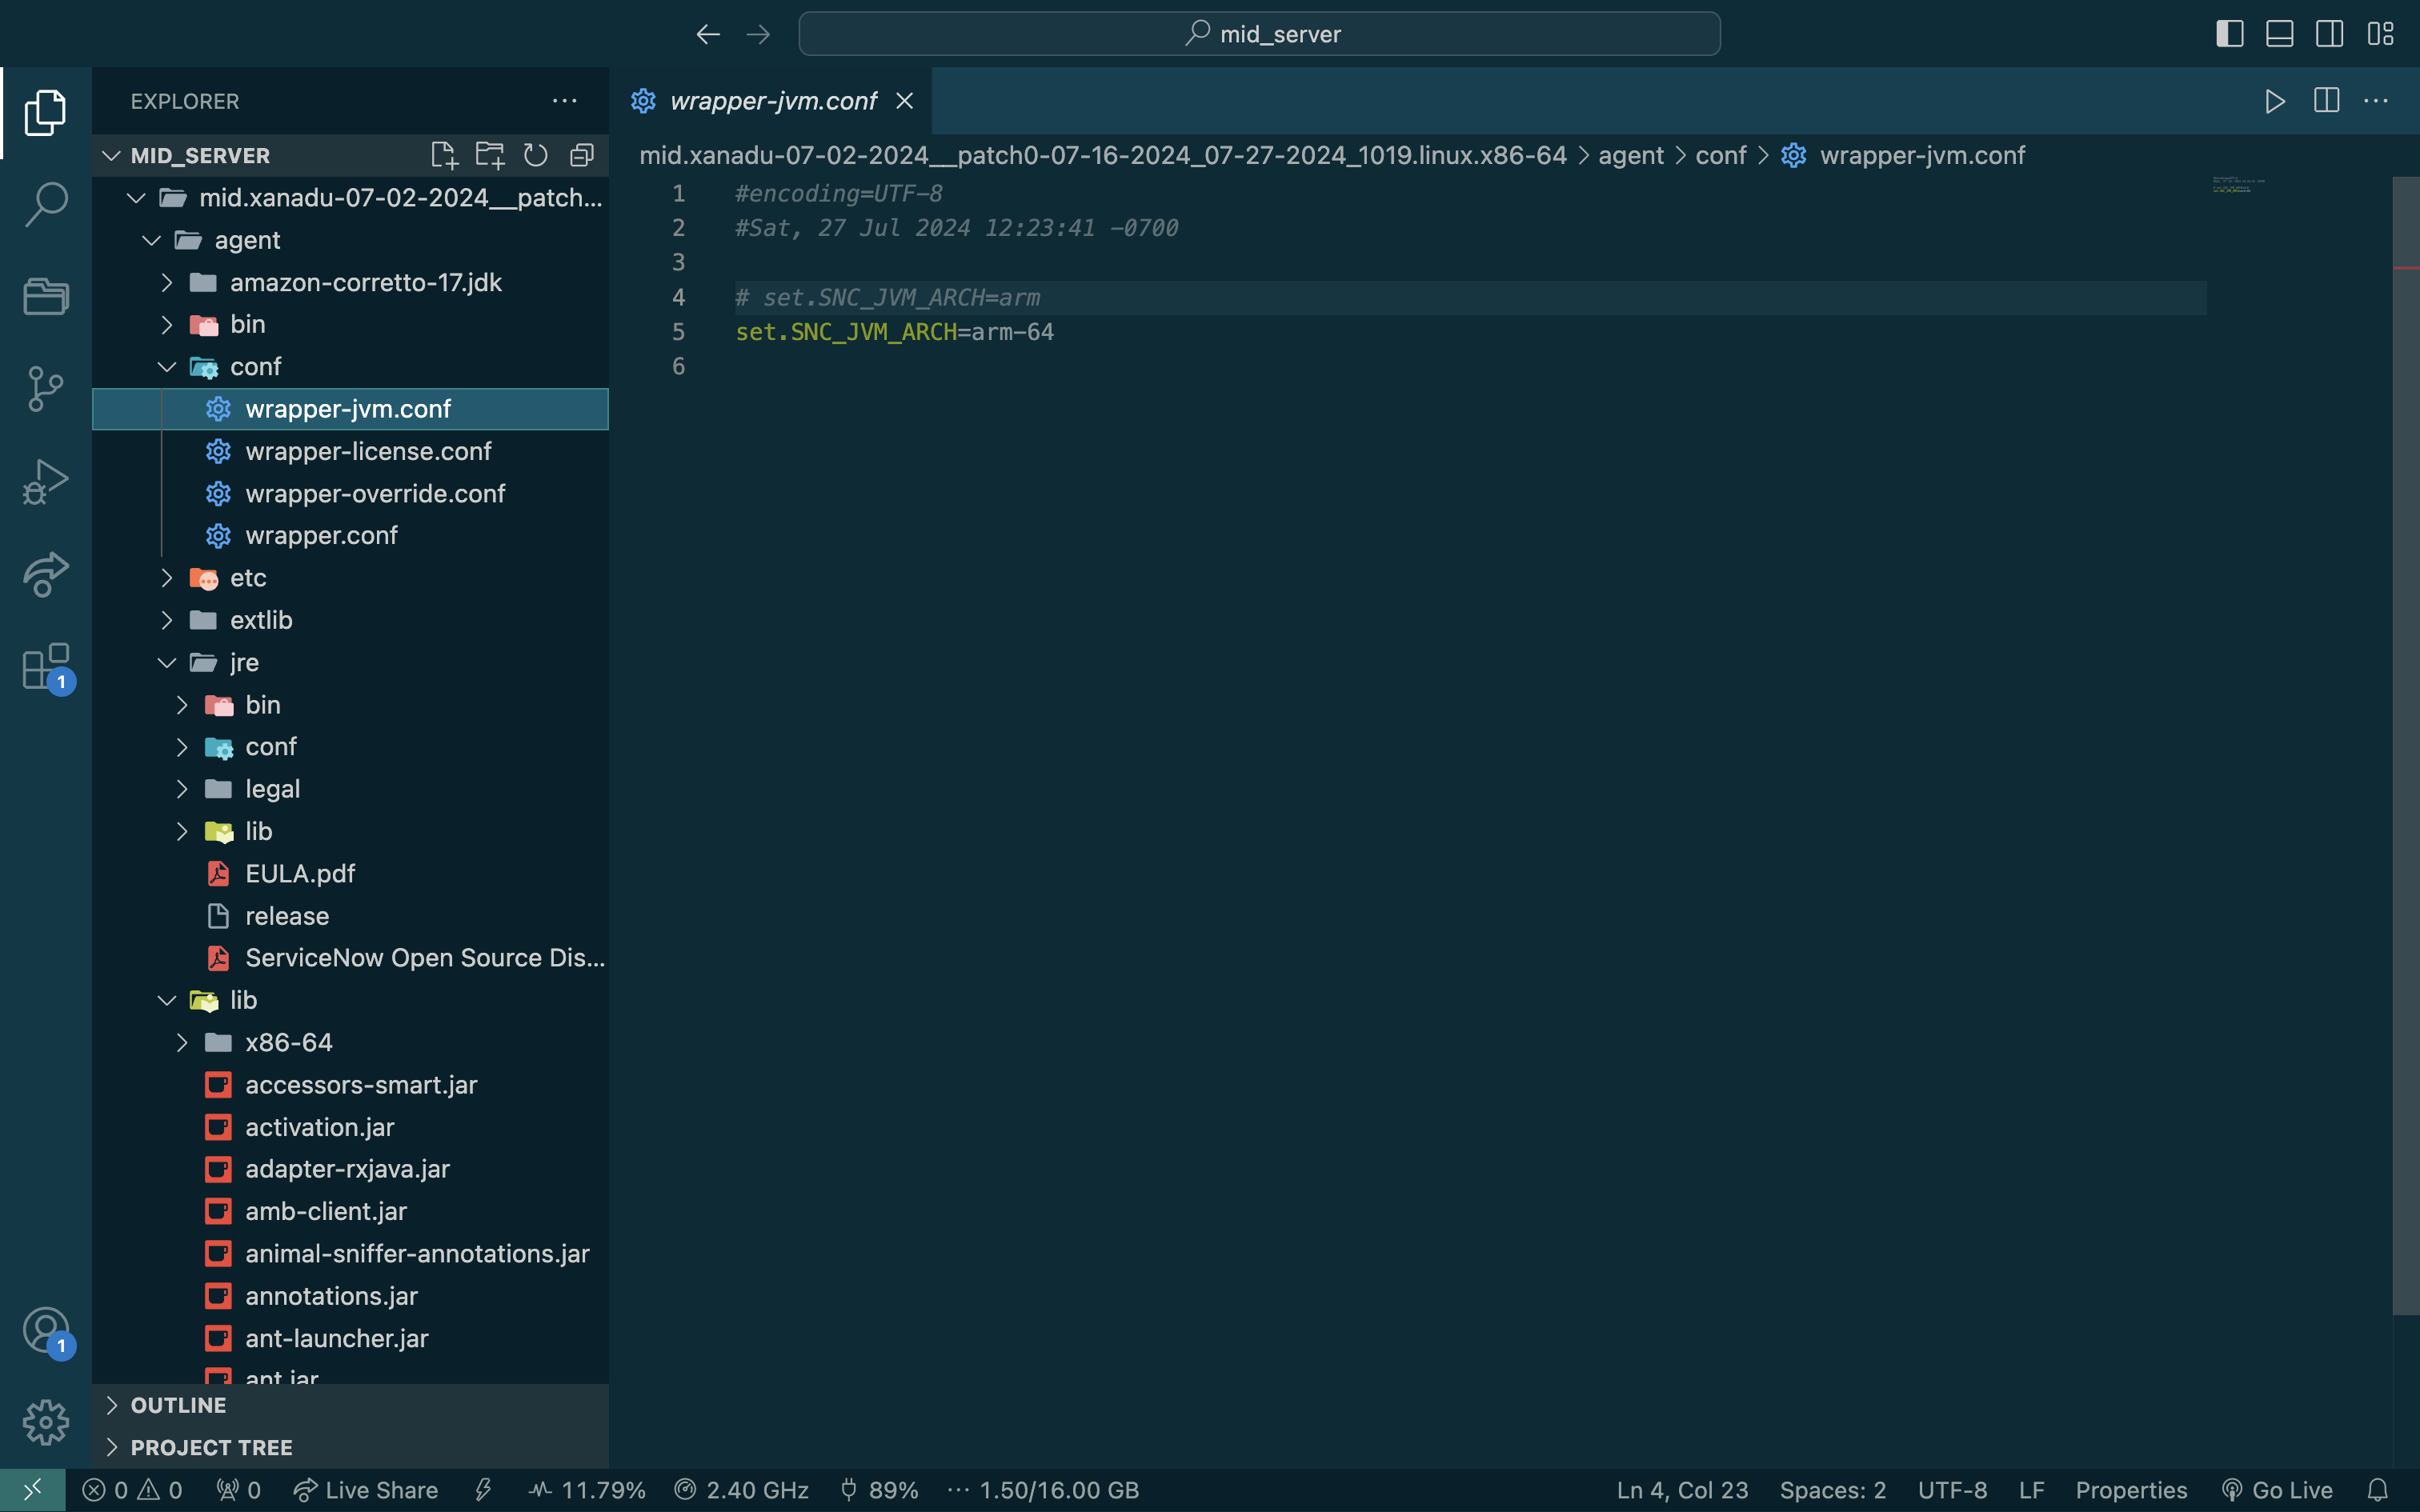
In the same MID Server folder from the previous step,
agent/conf, open thewrapper-override.conffile and scroll down theExternal JREsection. Add this line:wrapper.java.command=amazon-corretto-17.jdk/bin/javaThis tells the MID Server to run its Java commands through the Amazon Corretto 17 JDK rather than the version of Java that you may or may not have installed on your local machine.
In that same file and section add another line:
wrapper.java.additional.148=-Djdk.lang.Process.launchMechanism=POSIX_SPAWN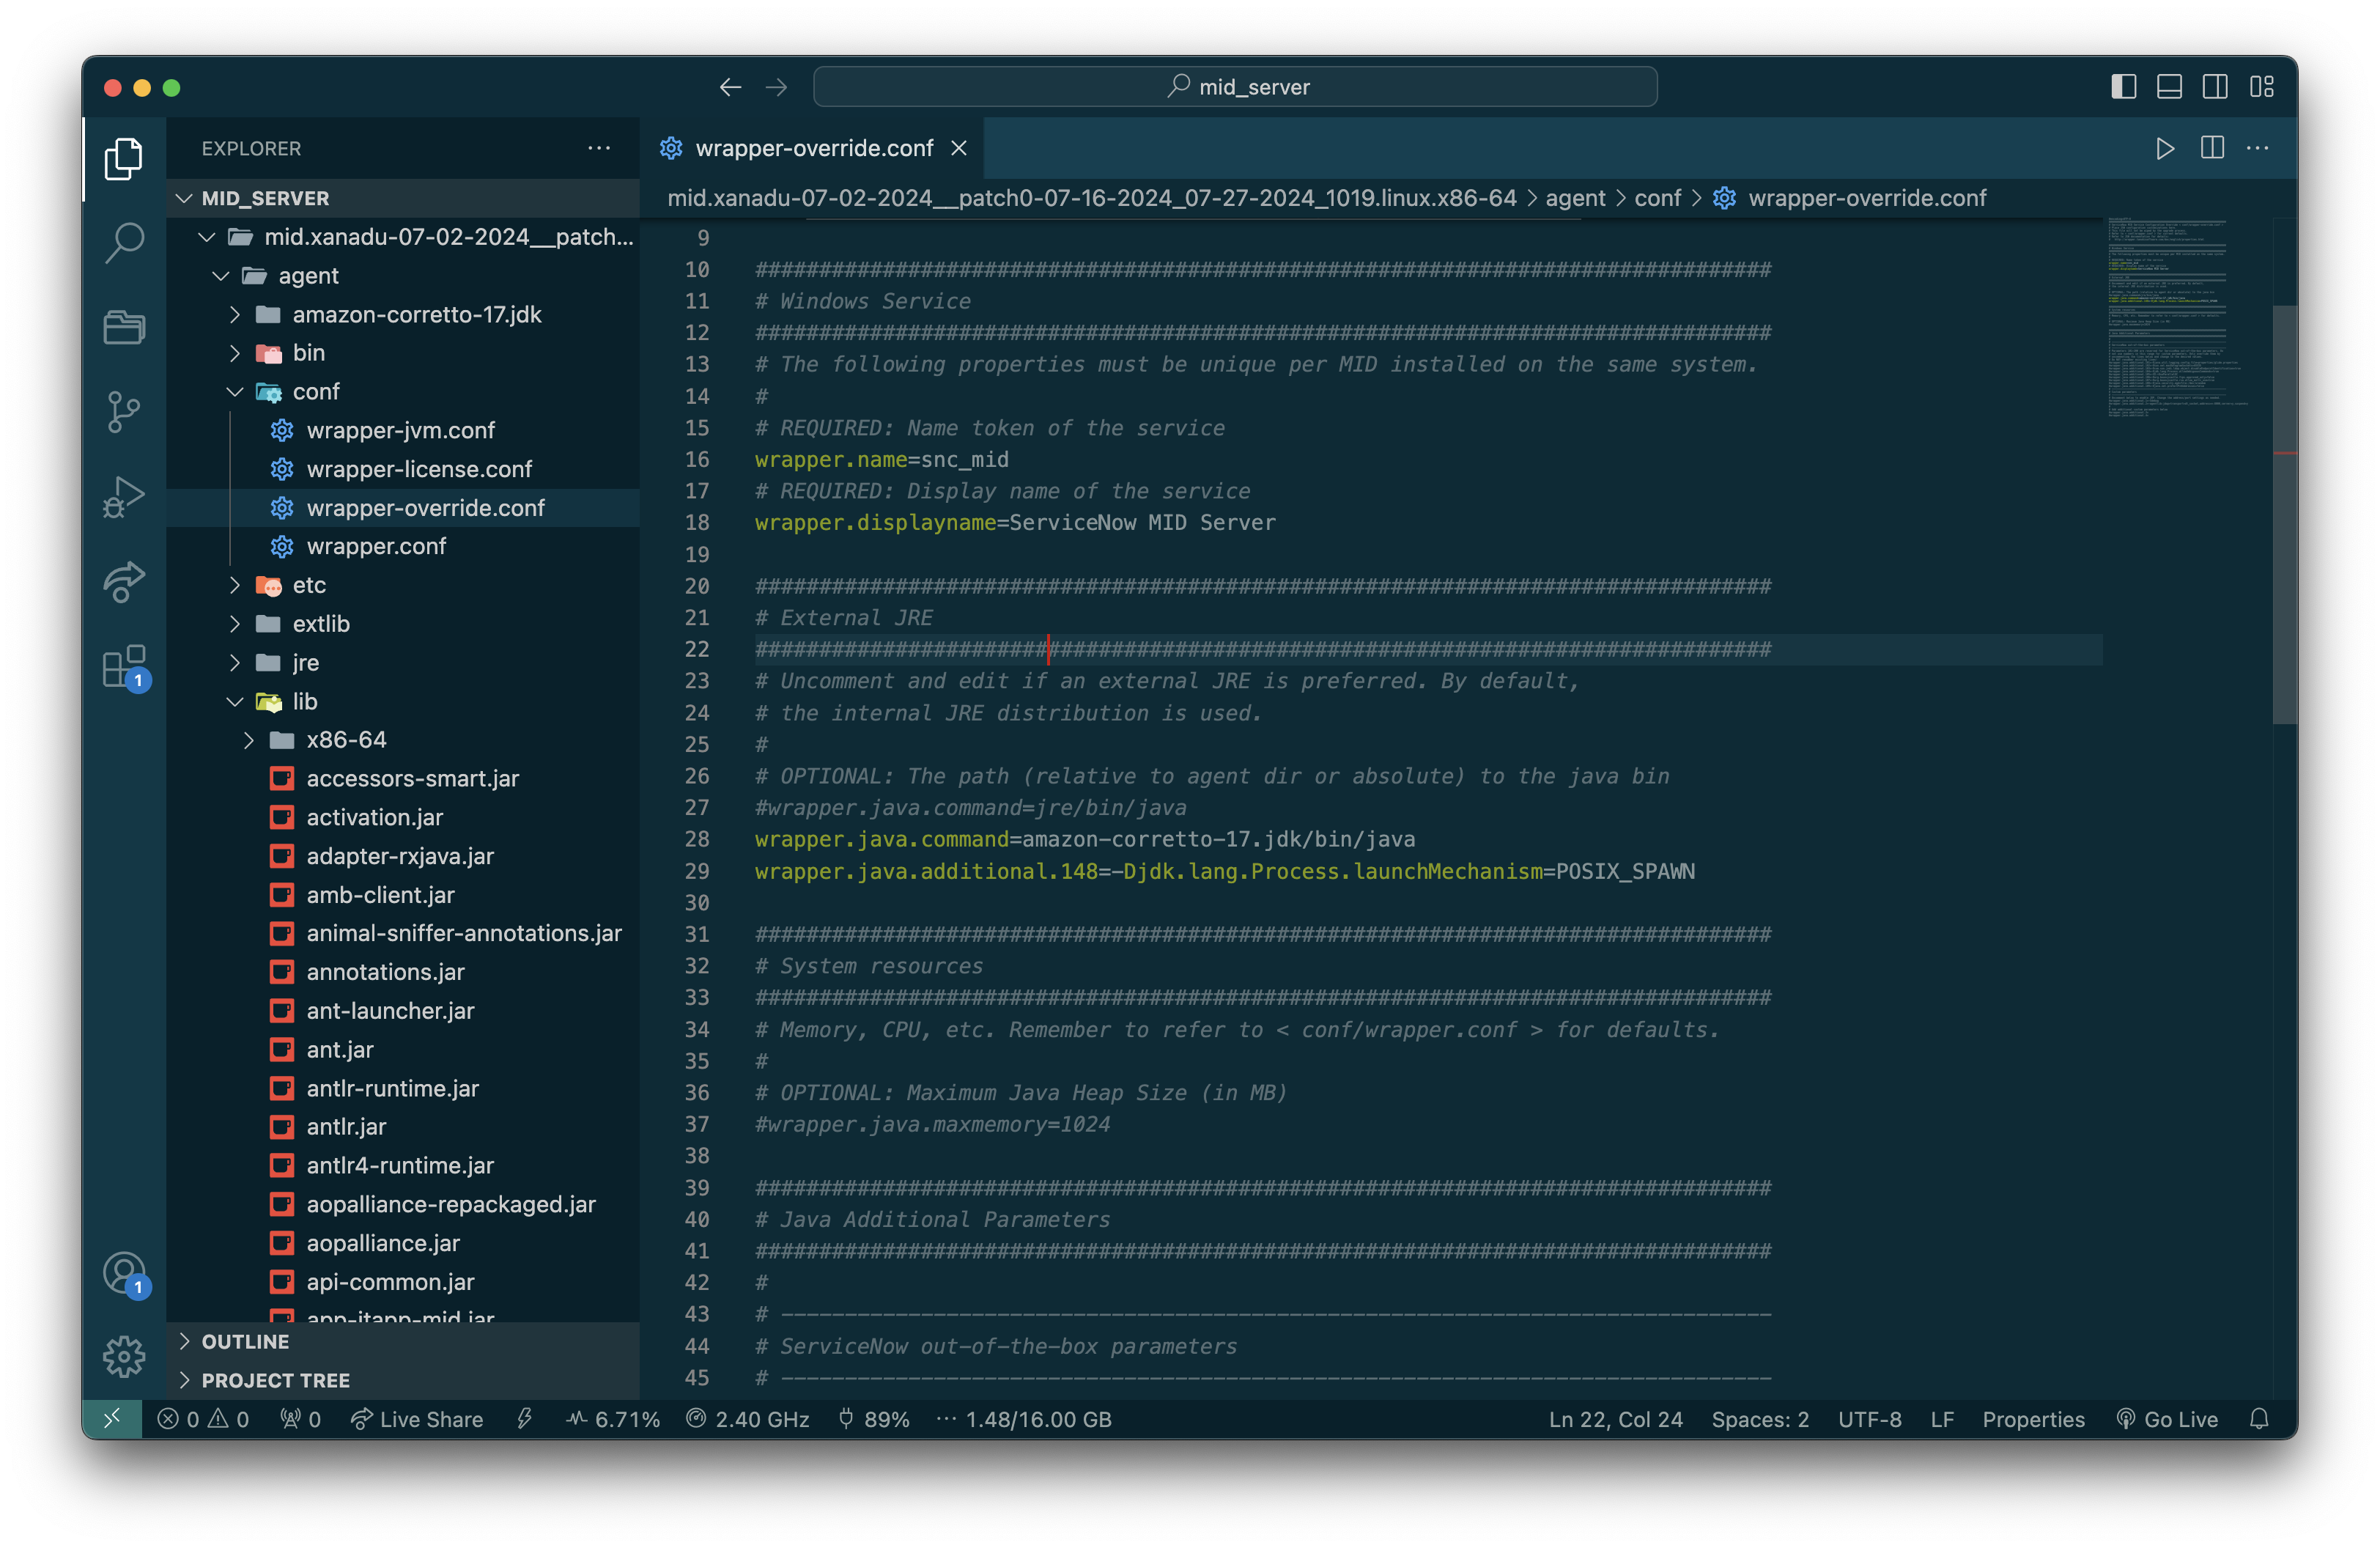
This sets the process launch mechanism to use the new
posix_spawnmethod rather than the older and unsupportedvfork💡The.148in this line is just an index number, if you open theagent/conf/wrapper.conffile you will see around line 114 this textwrapper.java.additional.129=-Djdk.lang.Process.launchMechanism=vfork. Since we are adding contents to thewrapper-override.confit overrides the values in the original config but only if it has a higher index. The index in the original config is.129hence the index of.148in the wrapper override file.❗IMPORTANT: Don’t forget the-in front ofDjdk.lang.Pro...its a flag so it has to have a dash in front of it to be a valid Java command!
Create and Configure a MID Server User
Create a new user in ServiceNow for this MID Server. It should have a username, first name, last name, and password (save the credentials, you will need them in the next steps)
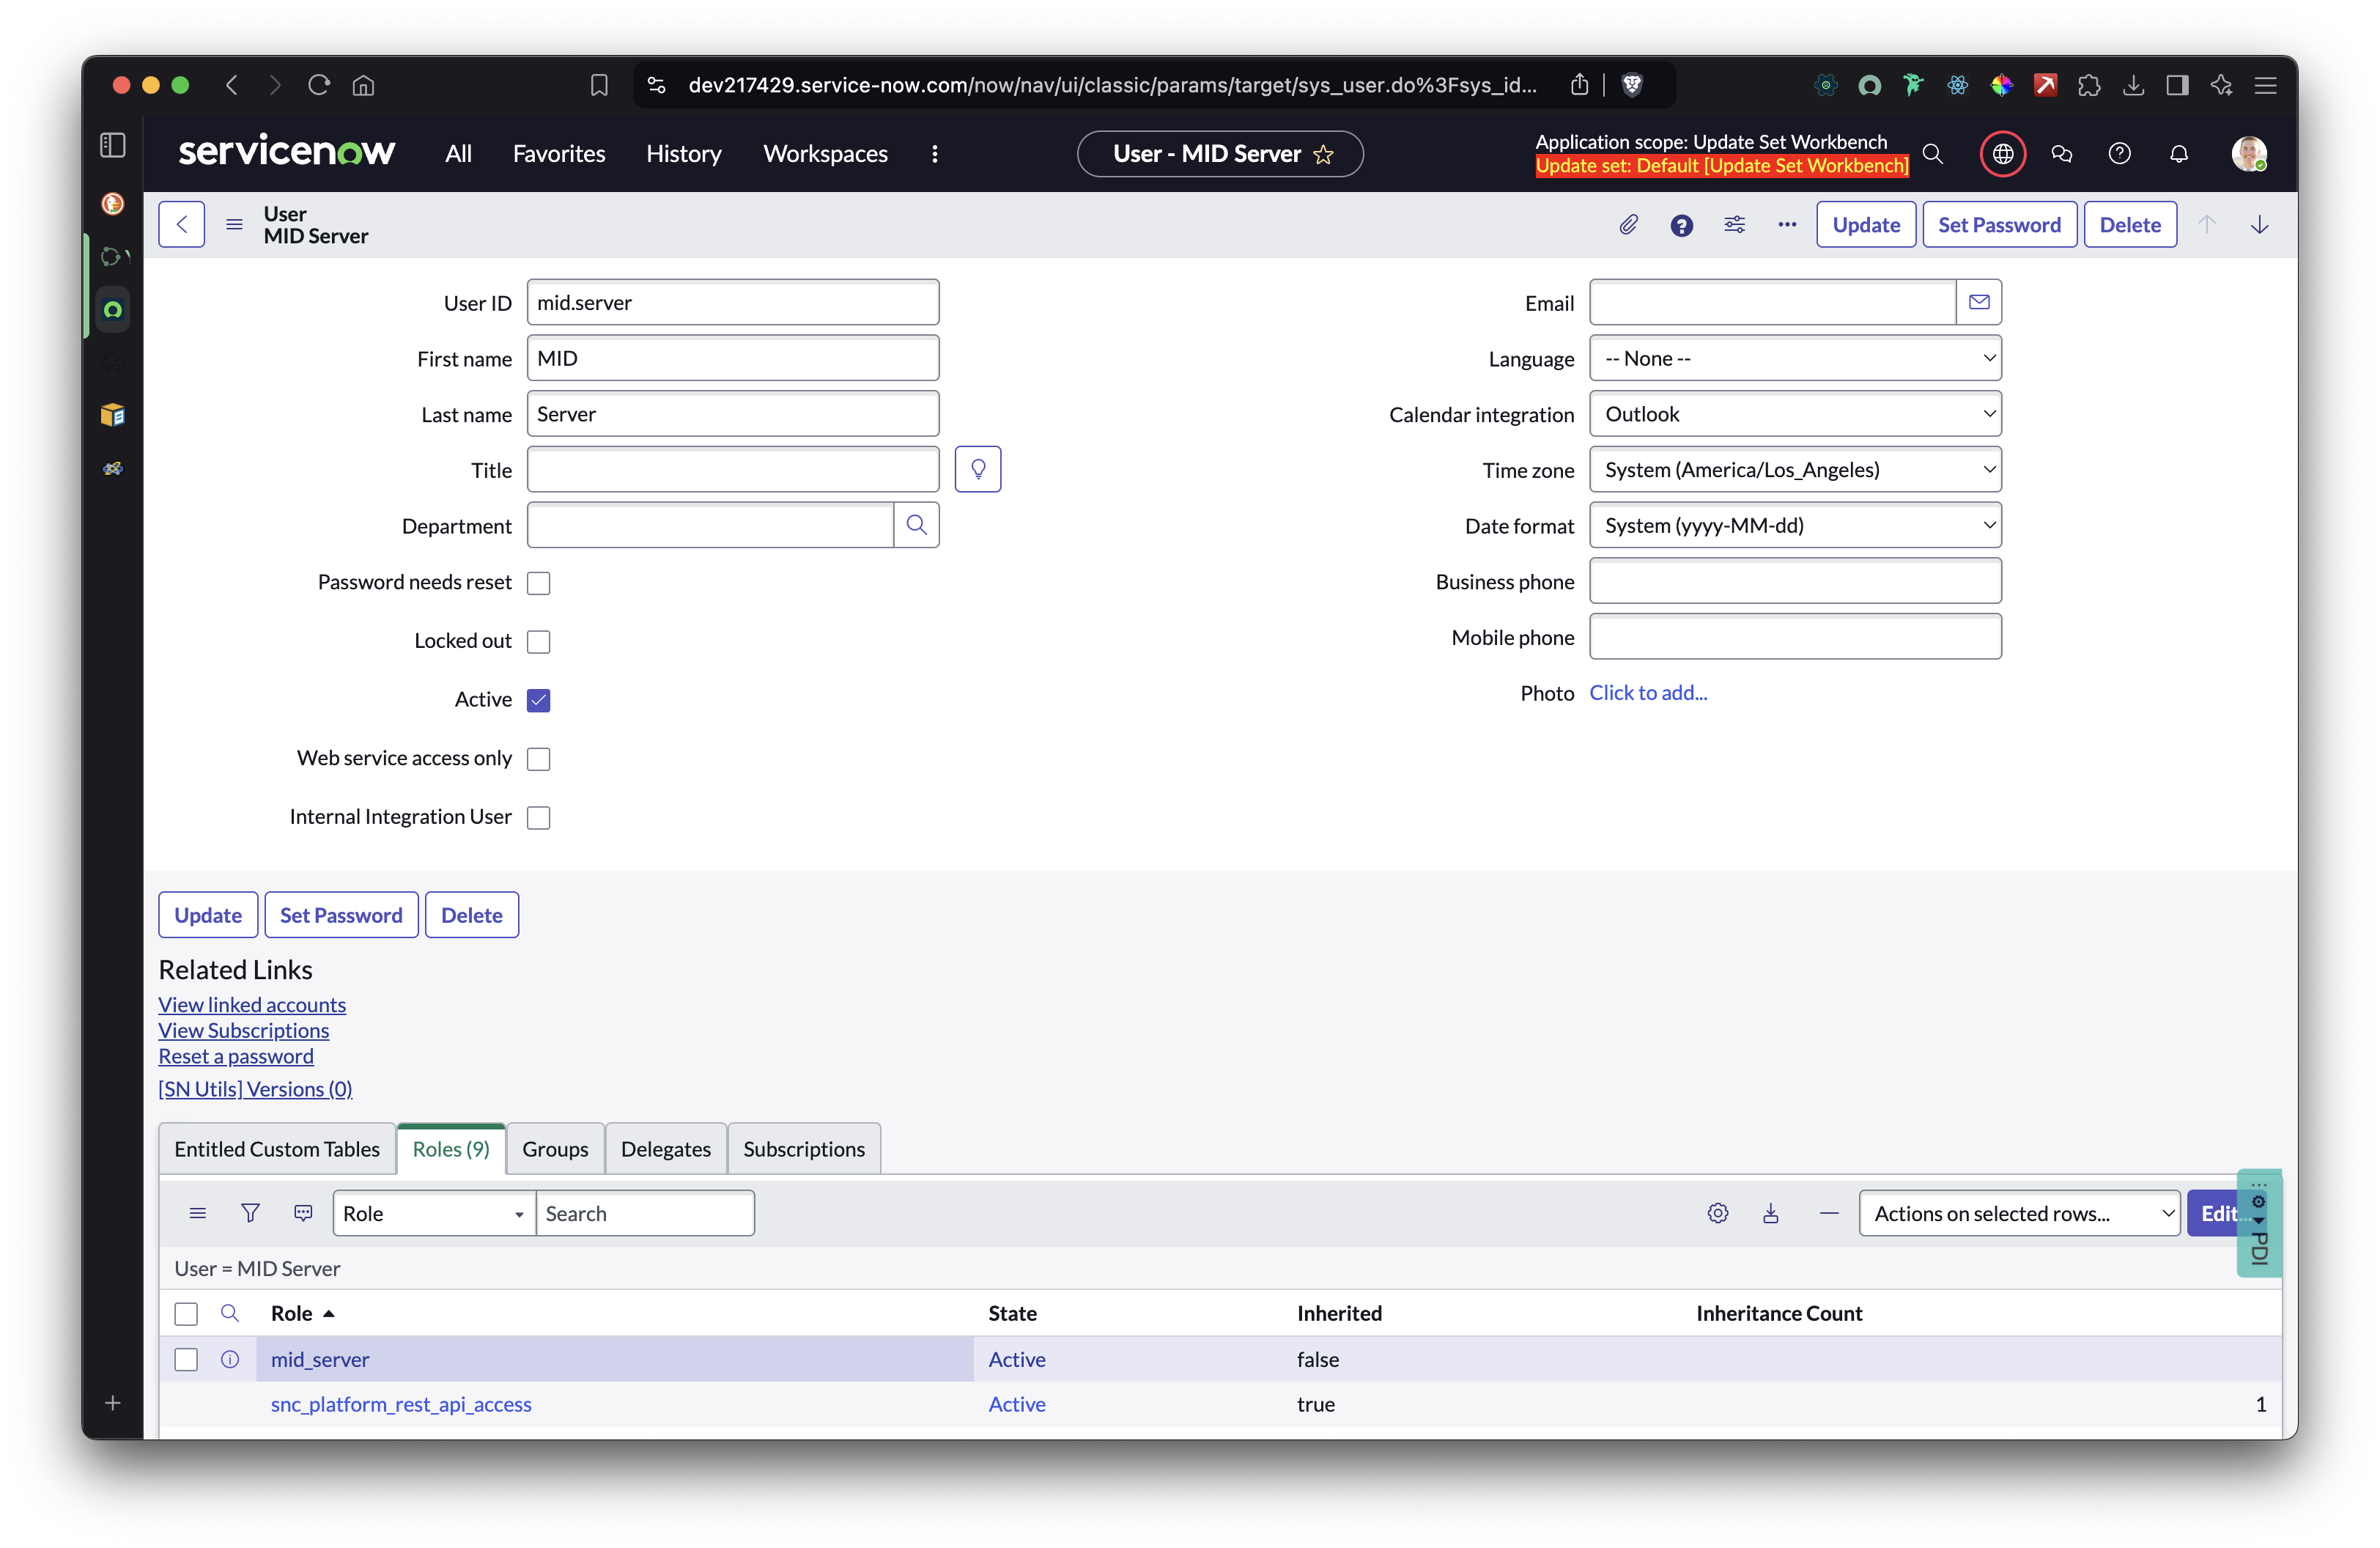
Assign the
mid_serverrole to this newly created userConfigure the MID Server to run as your newly created MID Server user
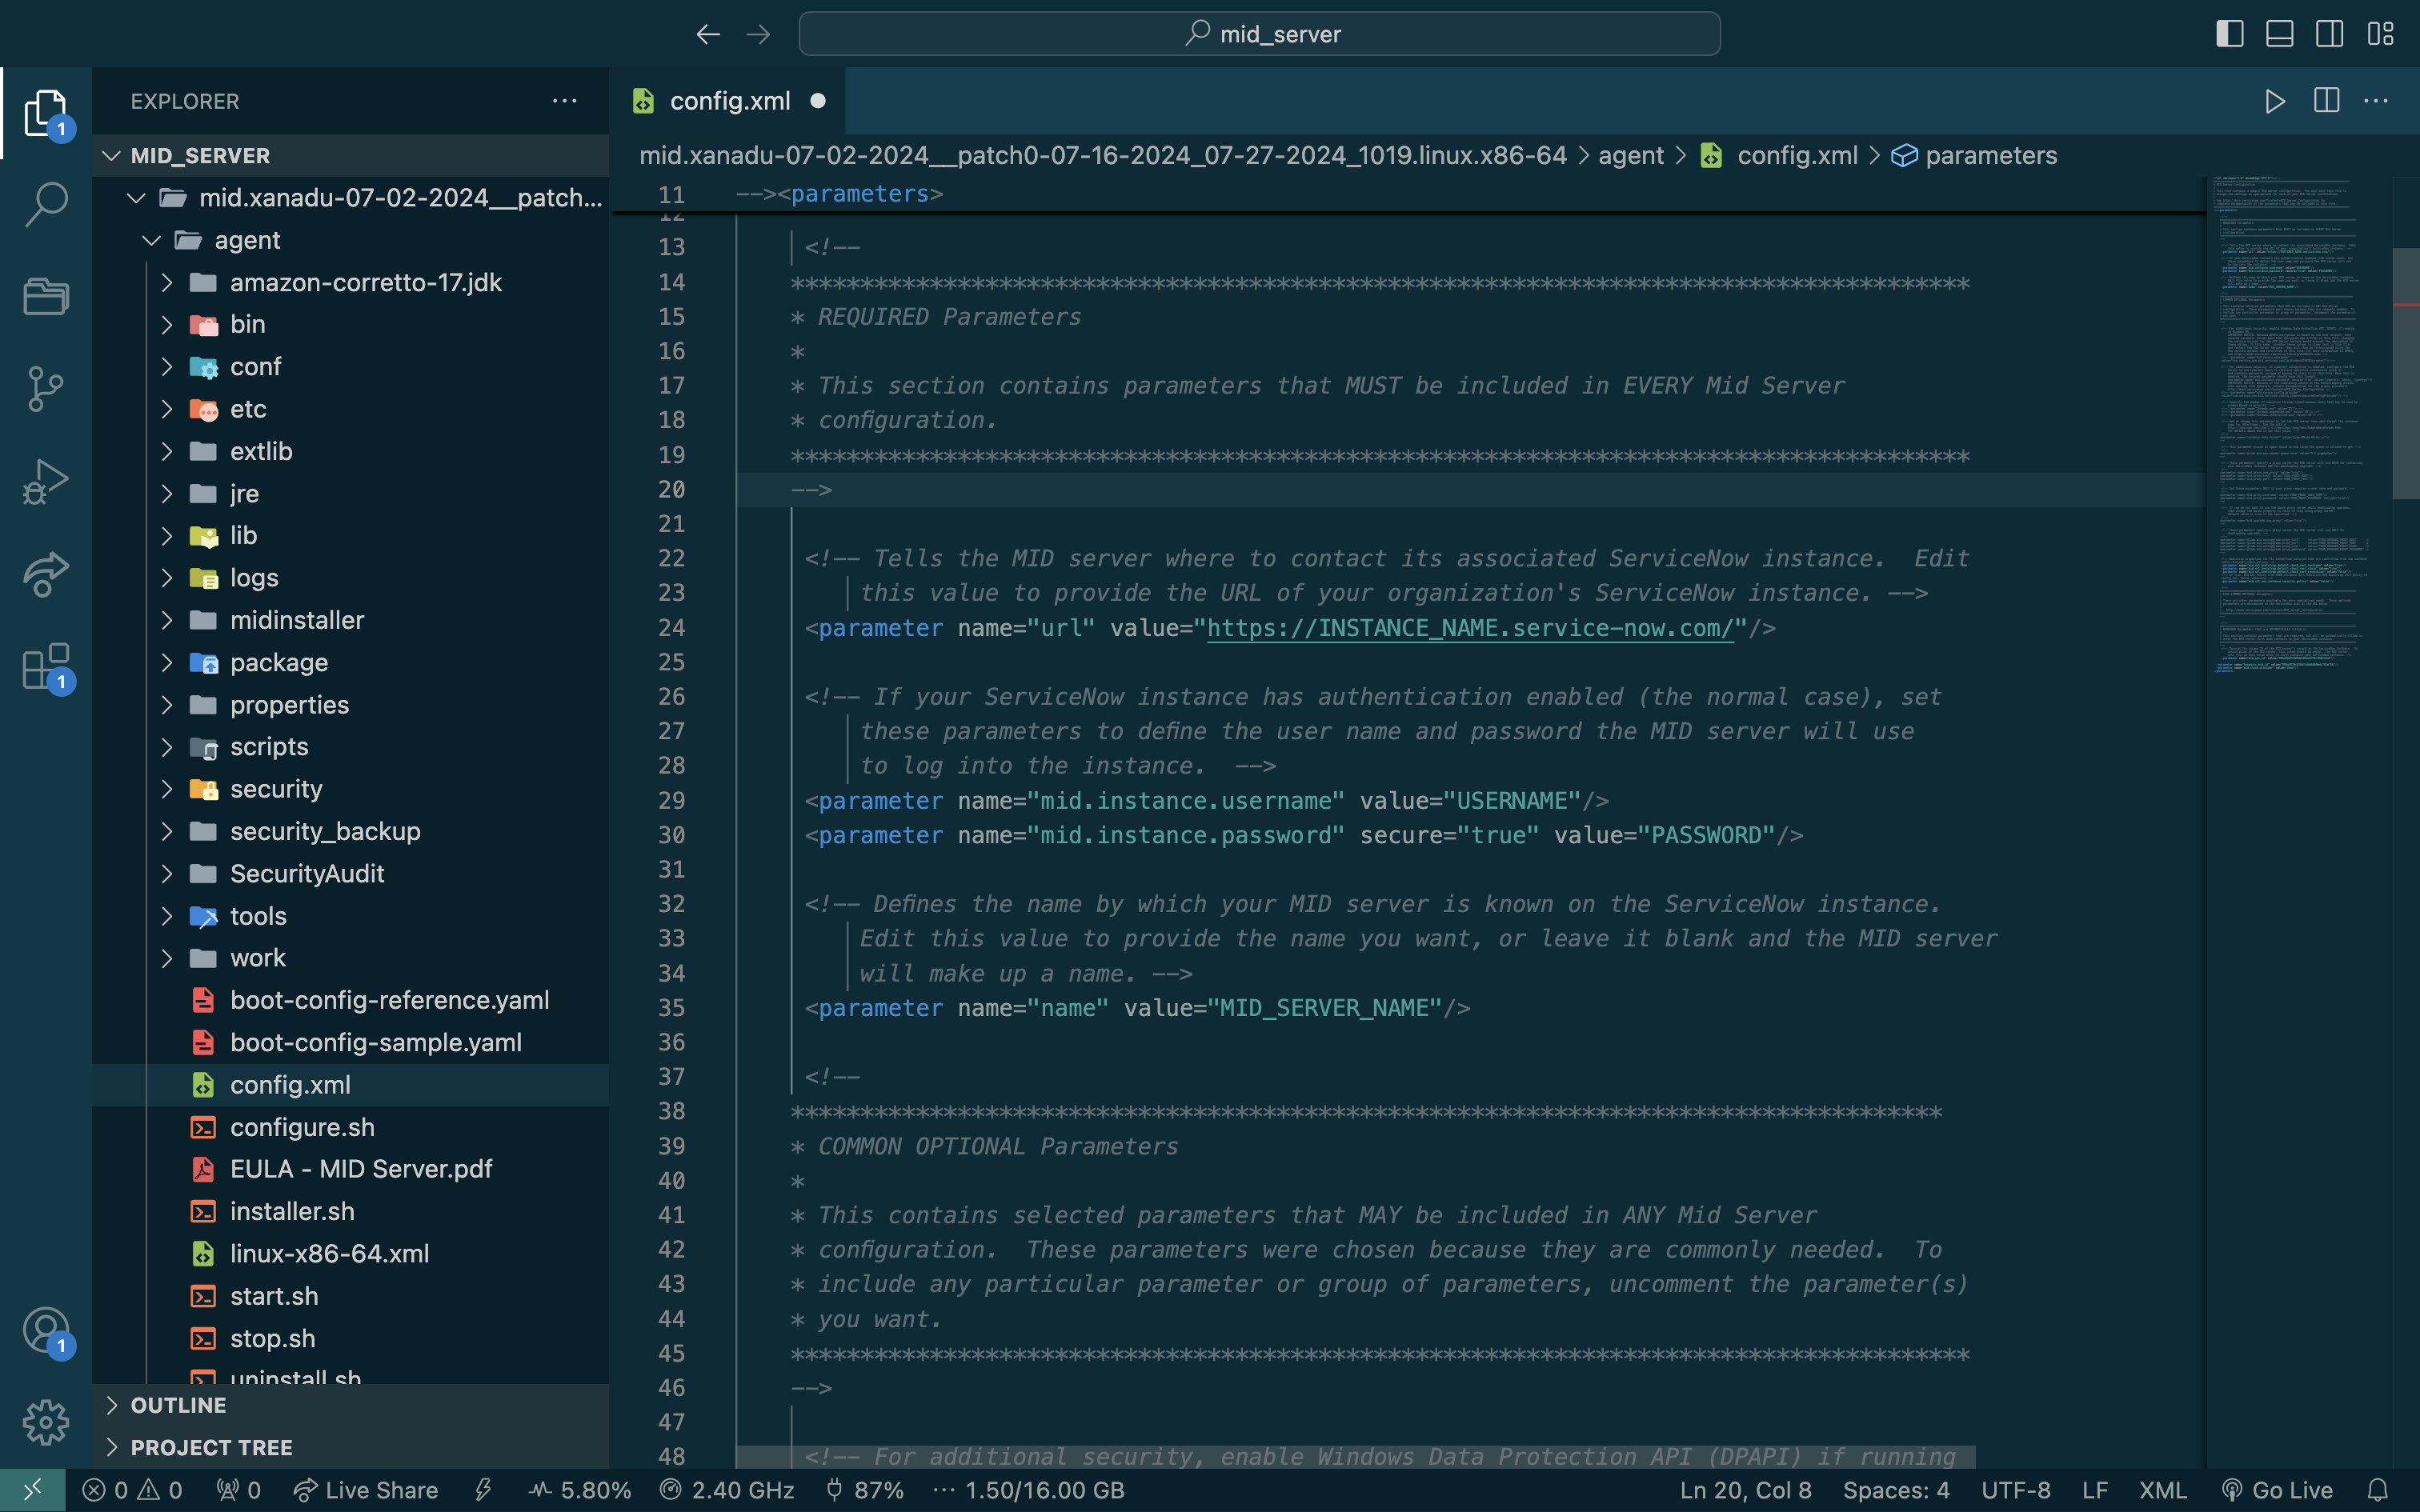
Navigate to
agentin the MID Server folder and open theconfig.xmlfileChange the url, username, password, and name elements to reflect your instance and MID Server user
Run the MID Server
In your terminal, navigate to agent in the MID Server folder and run this command (you should only have to run this once so make sure that you do it in the right directory):
sudo xattr -dr com.apple.quarantine .Yes the period is important! This command prevents Apple’s security settings from blocking the JDK from running.
Navigate to
agentin the MID Server directory and runsudo ./start.shThis command should start your MID Server
Validate the MID Server by going to
MID Servers > ServersIn your ServiceNow instance and click the validate button. It should go down for a minute and then come back up once the validation is done.(Optional) If you need to stop your MID Server you can do so by running this command in the
agentfolder of your MID Server directorysudo ./stop.sh
Conclusion
If everything went well, your MID Server should be up and running 🎉! Keep in mind that the details of this guide might vary depending on the ServiceNow family release your instance is using. I hope this works for you as it did for me, and if not, I hope it points you in the right direction!
Subscribe to my newsletter
Read articles from Reece Poulsen directly inside your inbox. Subscribe to the newsletter, and don't miss out.
Written by

Reece Poulsen
Reece Poulsen
Back in my freshman year of college, I was introduced to the world of programming, and it immediately caught my attention. The idea of creating something new with just a little learning and a couple of lines of code fascinated me—it was like discovering a whole new universe of possibilities! Ever since that moment, I've been on a continuous journey to expand my programming knowledge and skills. Now I'm a relatively new software developer on the ServiceNow platform, and I'm eager to explore its potential. Through this blog, I hope to share some of the things I'm learning along the way. Let's dive into the world of ServiceNow together and uncover the tricks and insights that can make a difference for us as developers!