Building and Deploying Docker Images to AWS ECR with Jenkins
 Nihal Shardul
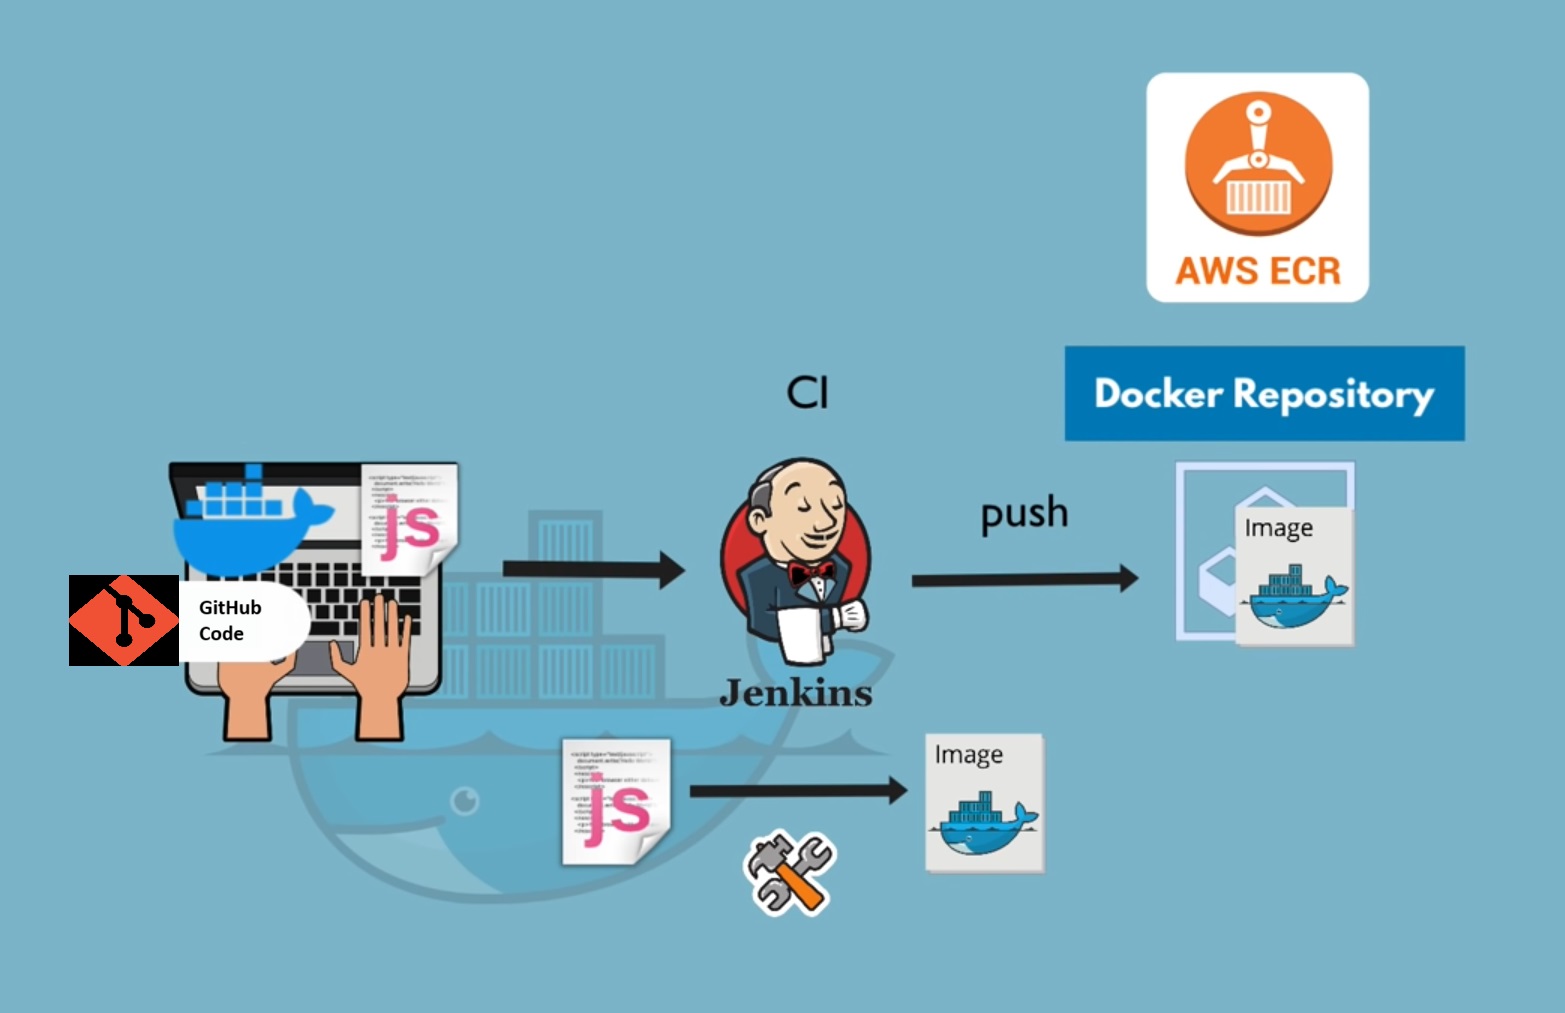
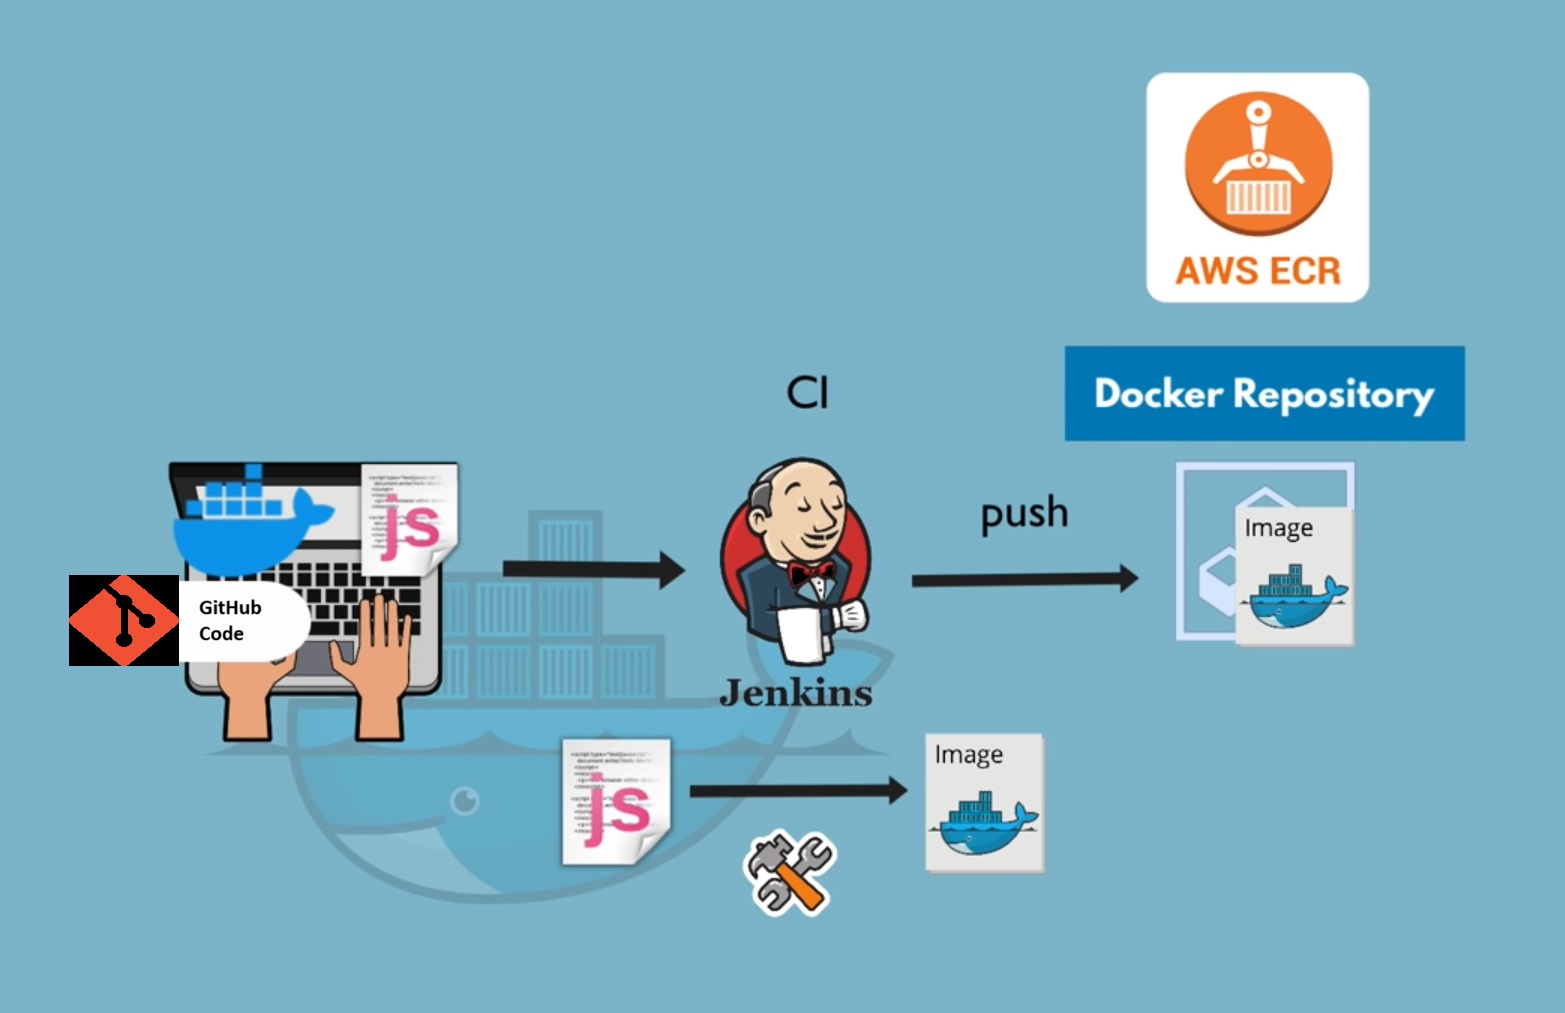
Problem Statement: A Company, maintaining data privacy is a top priority, necessitating the use of private registries for storing Docker images. We require a solution to streamline the storage and management of Docker images in AWS ECR, ensuring they remain secure and private. Establishing an automated CI/CD pipeline for this purpose will enhance our operational efficiency and safeguard our proprietary information.
Solution:
In this blog, we'll explore how to create a Jenkins pipeline that builds a Docker image and pushes it to Amazon Elastic Container Registry (ECR).
Prerequisites
Before diving into the implementation, ensure you have the following set up:
Jenkins Installed: A Jenkins server should be up and running on your local machine or server.
AWS Account: Create an AWS account if you don’t already have one.
AWS CLI: Install and configure the AWS Command Line Interface (CLI) on your Jenkins server.
Docker Installed: Ensure Docker is installed and running on your Jenkins server.
IAM Permissions: Set up IAM permissions to allow Jenkins to push images to ECR.
Installation Steps
Launch an EC2 instance in AWS Account and login as root user to follow below steps.
Step 1: Install Jenkins
sudo wget -O /usr/share/keyrings/jenkins-keyring.asc \
  https://pkg.jenkins.io/debian-stable/jenkins.io-2023.key
echo "deb [signed-by=/usr/share/keyrings/jenkins-keyring.asc]" \
  https://pkg.jenkins.io/debian-stable binary/ | sudo tee \
  /etc/apt/sources.list.d/jenkins.list > /dev/null
sudo apt-get update
sudo apt-get install jenkins
Step 2: Install Java
sudo apt update
sudo apt install fontconfig openjdk-17-jre
java -version

Step 3: Install Docker
apt install docker.io
install docker using above command and check if it installed using docker ps .
Step 4: Permission for Jenkins
usermod -aG sudo,docker jenkins
visudo  # Create new entry as jenkins ALL:(ALL:ALL) NOPASSWD:ALL
We need to add jenkins in sudo and docker group, as it will require permission to do root user task and create docker images.
Next we will add entry in /etc/sudoers file using visudo, so that jenkins user will not be asked for password for root activity.
Step 5: Setup Jenkins
Now we will start jenkins and set it up.
systemctl enable jenkins.service
systemctl start jenkins.service
Now, On browser we will type <ip>:8080 and set up jenkins.
cat /var/lib/jenkins/secrets/initialAdminPassword
Enter above command and retrieve password from this file. Once done, Install suggested Plugins and set up Admin user.
Step 6: Install and Configure AWS CLI
Install aws cli using below command,
apt install awscli
Once done, we will configure aws cli as,

As, we will be attaching IAM Role to EC2 instance, so that we will not share user Access Key and Secret Key.
Step 7: Create and Attach IAM Role to EC2 Instance
Now, we will create IAM Role using below steps,
IAM → Roles → Create Role → Role Name → Apply to(EC2) → Policy (Create new policy with FULL ECR permission) → Save
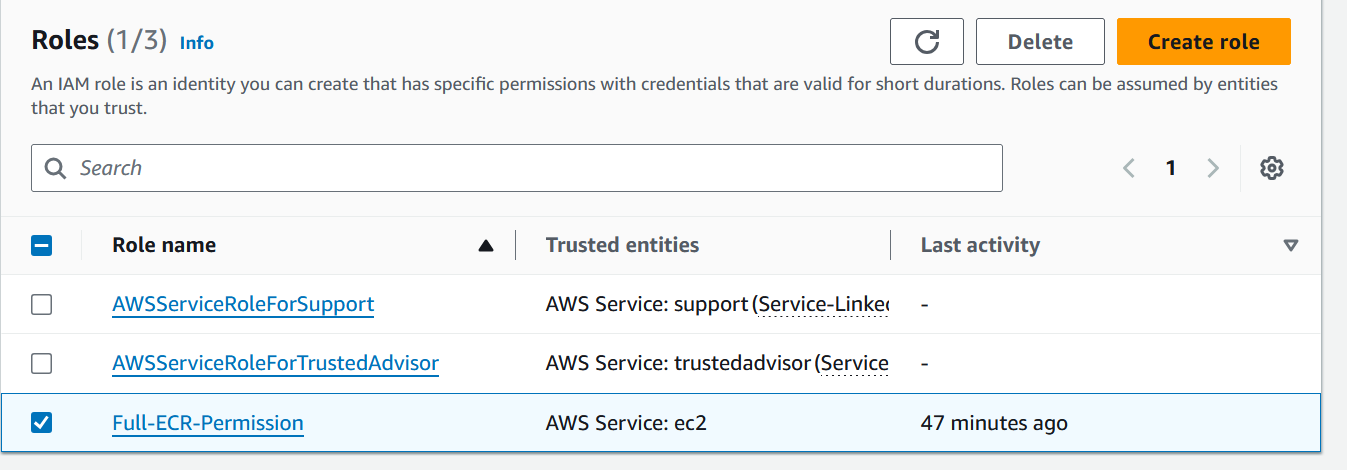
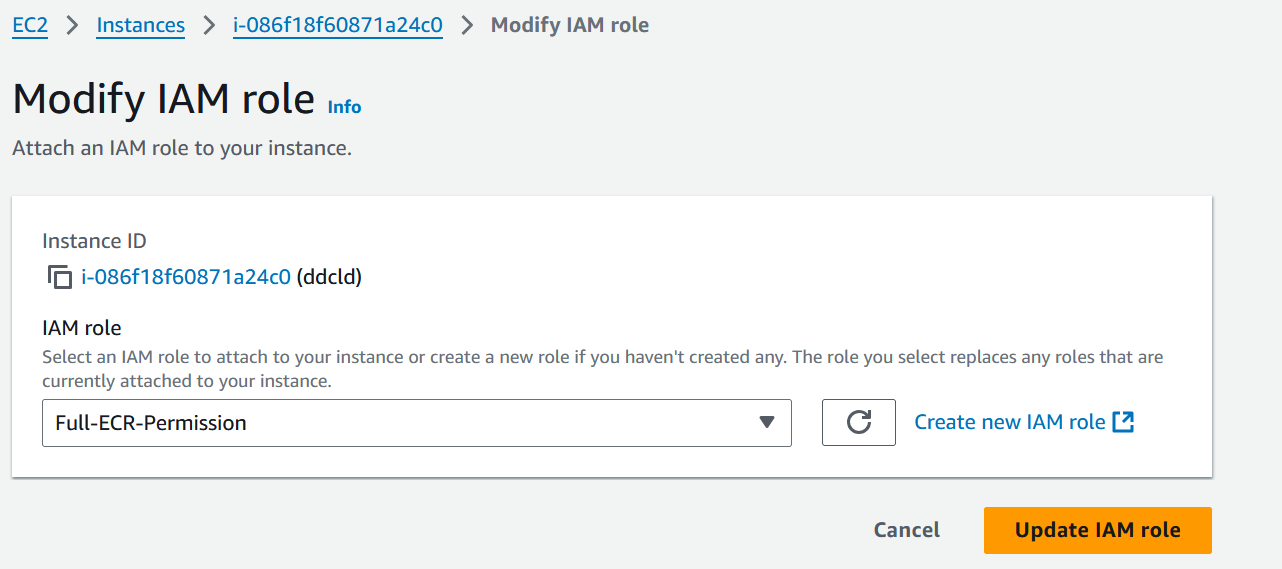
Once done, we will attach this IAM Role to EC2 using below step,
Instance → Action → Security → Modify IAM role → Select IAM Role → Update IAM Role.

Step 7: Create ECR
Create ECR using below steps,
AWS ECR → Create → Repository Name → Create
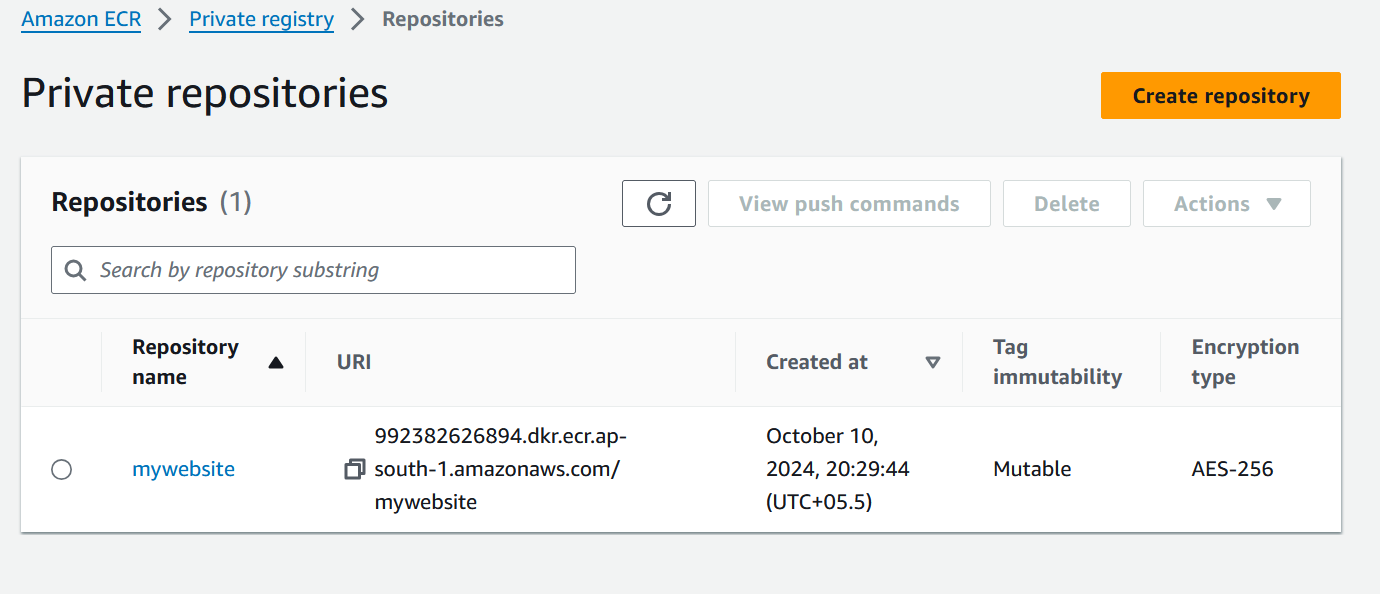
We use Amazon ECR because as it is more focus on Private Repository and provides High availability. Where as Docker Registry is more focus on Public Repository and don’t know when it gets down. Where as, both support Private and Public repository.
Step 8: Create Pipeline
To effectively utilize AWS ECR, we needed to automate our image management processes. We decided to implement a Jenkins pipeline that would streamline the building, versioning, and deployment of our Docker images to ECR. Here’s a high-level overview of our pipeline setup:
* Pipeline Stages Overview
Git Checkout: Automatically pulls the latest code from our Git repository.
Find Dockerfile: Checks for the presence of a Dockerfile to ensure the build process can proceed.
Versioning: Reads and increments the version of the Docker image to maintain clear version control.
Build: Constructs the Docker image using the Dockerfile.
Login to ECR: Authenticates with AWS ECR to allow image uploads.
Push to ECR: Tags and pushes the Docker image to our private ECR repository
* Jenkins Pipeline Code Example
Here’s a simplified version of our Jenkins pipeline code:
pipeline {
    agent any

    environment {
        GIT_BRANCH = 'image-layout-fix'
        GIT_REPO = 'https://github.com/nihalshardul/portfolio-website.git'
        VERSION_FILE = 'version.txt'
        REGION = 'ap-south-1'
        AWS_REPO = '992382626894.dkr.ecr.ap-south-1.amazonaws.com'
    }

    stages {
        stage('Commit Changes') {
            steps {
                echo 'Changes Commited !!!'
            }
        }
        stage('Git CheckOut') {
            steps {
                git branch: "${GIT_BRANCH}", changelog: false, poll: false, url: "${GIT_REPO}"
            }
        }
        stage('Find Dockerfile') {
            steps {
                script{
                    if (fileExists ('dockerfile')) {
                        echo "Dockerfile Exists !!!"
                    } else {
                        echo "Dockerfile not present."
                    }
                }
            }
        }

        stage('Versioning') {
            steps {
                script {
                    //def version = 1
                    if (fileExists(VERSION_FILE)) {
                        version = readFile(VERSION_FILE).trim().toInteger() + 1
                    }
                    writeFile file: VERSION_FILE, text: version.toString()
                    env.IMAGE_NAME = "${JOB_NAME}:${version}"
                    echo "Image Name: ${env.IMAGE_NAME}"
                }
            }
        }


        stage('Build') {
            steps {
                script {
                    try {
                        sh "docker build -t ${IMAGE_NAME} ."
                    } catch (Exception e) {
                        error "Docker build failed: ${e.message}"
                    }
                }
            }
        }

        stage('Login to ECR') {
            steps {
                script{
                    sh 'aws ecr get-login-password --region ${REGION} | docker login --username AWS --password-stdin ${AWS_REPO}'
                }
            }
        }

        stage('Push to ECR') {
            steps {
                script{
                    try{
                        sh "docker tag ${IMAGE_NAME} ${AWS_REPO}/${IMAGE_NAME}"
                        sh "docker push ${AWS_REPO}/${IMAGE_NAME}"
                    } catch (Exception e) {
                        error "Failed to push image to ECR: ${e.message}"
                    }
                }
            }
        }
    }
}
Please replace environment variables as required. Also, Download Pipeline: Stage View plugin as it give stage view presentation and let you know at what stage your pipeline got failed. I have failed my pipeline multiple times, but it’s good practice to get hands on!!!
Once you create and configure pipeline, now its time to Build. Click on Build Now and it will follow the stages.
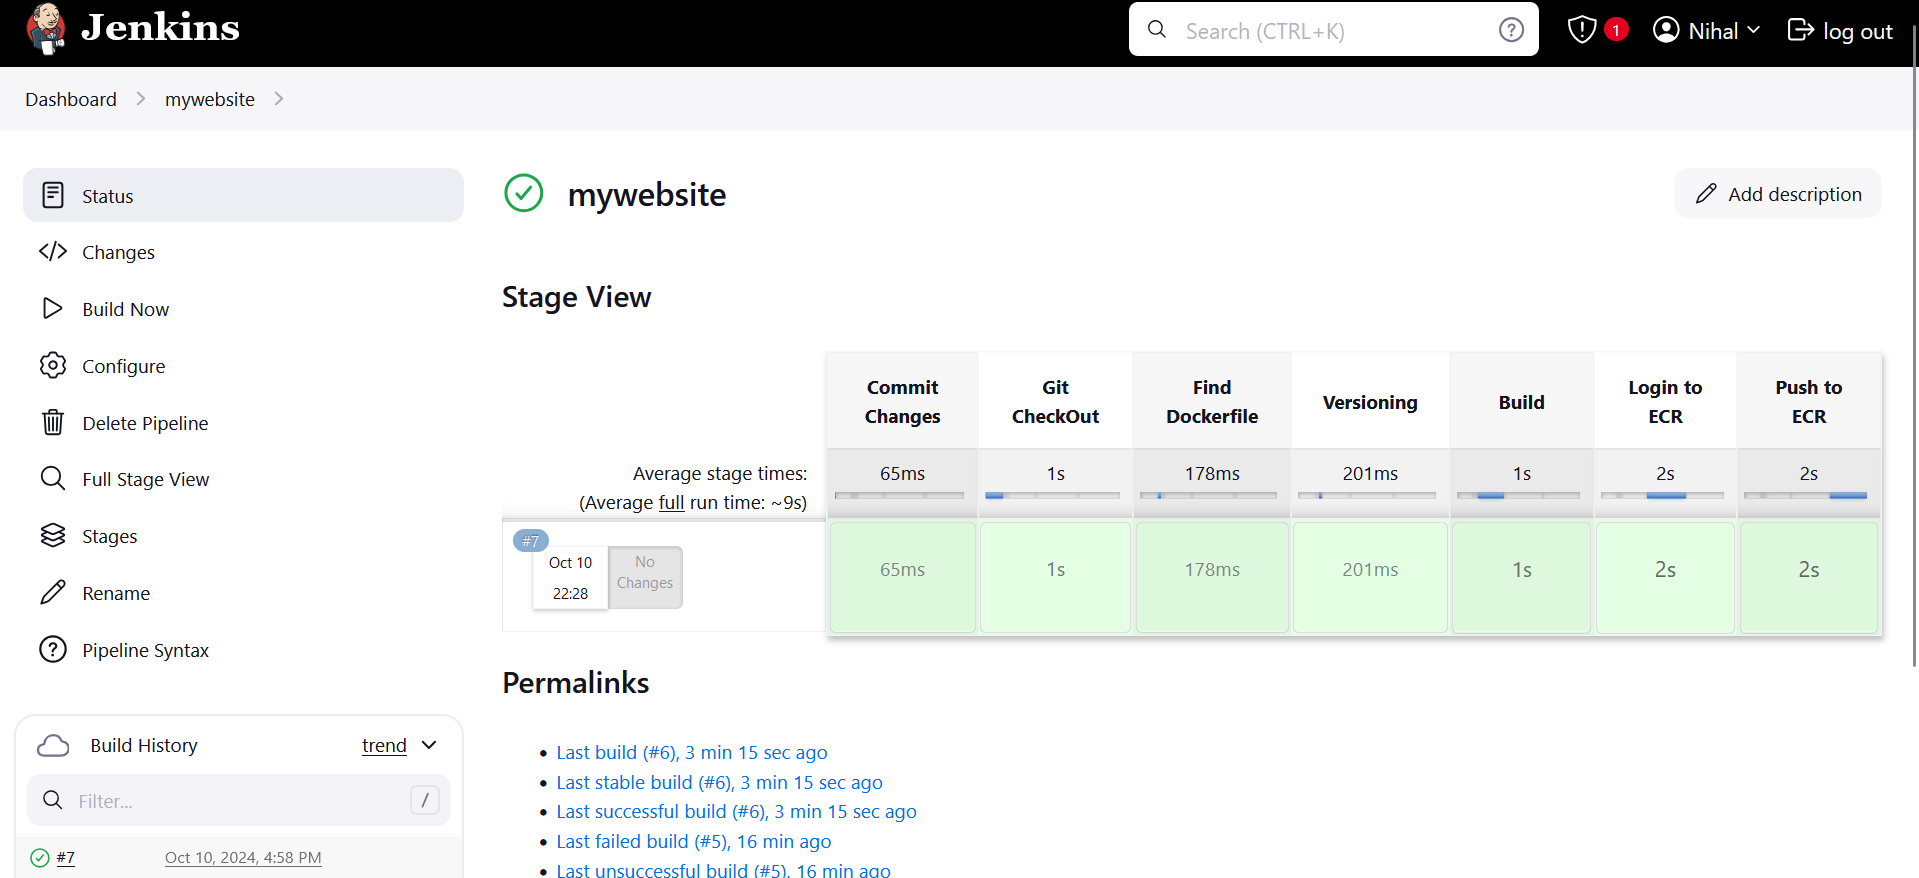
Once you see all stages as green, you have successfully created pipeline and deployed your image to AWS ECR.
Check on AWS ECR as well,
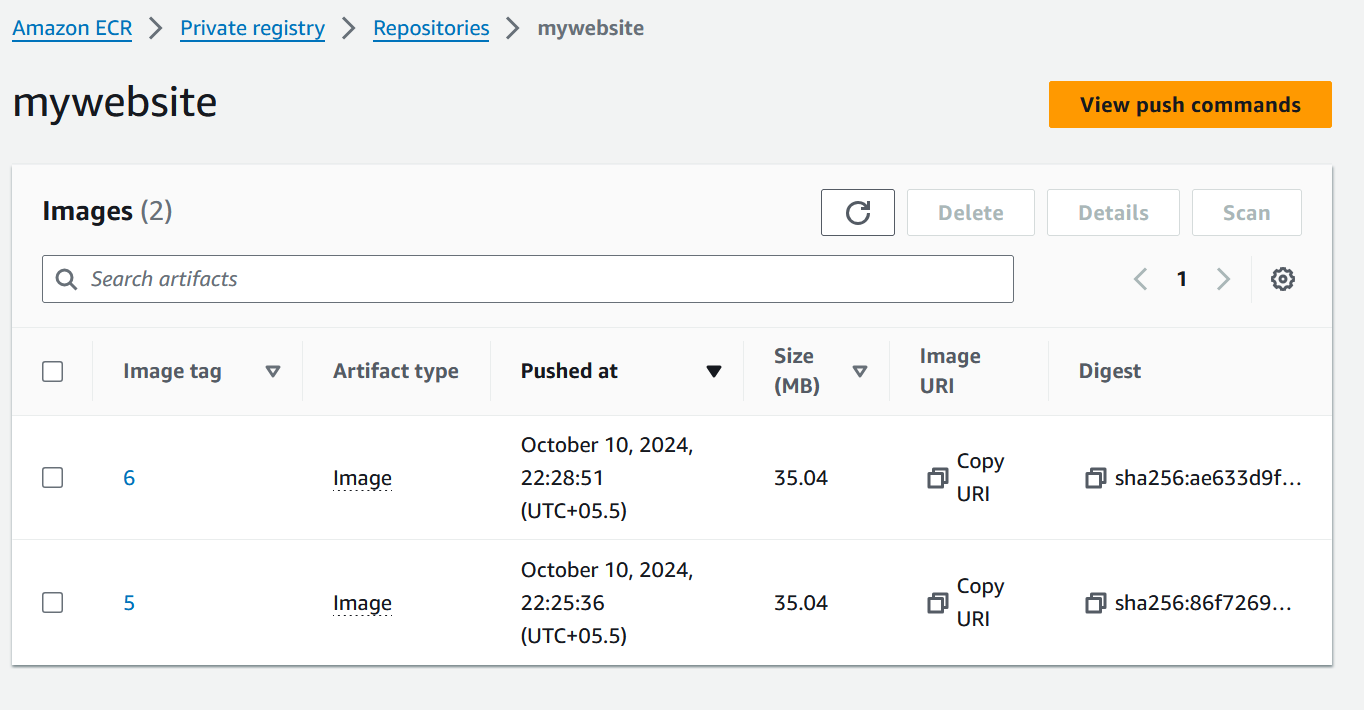
Yes, our build got successfully pushed on our Private Registry.
Hooray !!! We have successfully Created a CI/CD pipeline which Build and Deploy our Docker Images to AWS ECR with Jenkins.
Thanks.
Subscribe to my newsletter
Read articles from Nihal Shardul directly inside your inbox. Subscribe to the newsletter, and don't miss out.
Written by

Nihal Shardul
Nihal Shardul
Enthusiast Cloud and Security with expertise in AWS and DevOps. Proficient in Python, Bash, Git, Jenkins, and container orchestration tools like Docker and Kubernetes, I focus on automation and CI/CD practices. I leverage security tools such as NMAP, Nessus, and Metasploit to identify and mitigate vulnerabilities. Passionate about learning and collaboration, I thrive on enhancing cloud security and efficiency. Always eager to advance my skills, I aim to contribute to the tech community.