Step-by-Step Guide to Building Your First Laravel 11 Project
 Aman jain
In this article, we will explore how to set up a Laravel application using the command line interface.
Laravel 11 was officially released on March 12th, 2024, with support for bug fixes ensured until September 3rd, 2025, and security fixes until March 12th, 2026. This structured support timeline is a feature I truly value about the Laravel ecosystem. It offers a solid, predictable two-year support window, allowing developers to concentrate on developing and sustaining applications without the relentless pressure of frequent version updates. With Laravel, you can work confidently, assured that your application will remain relevant and stable.
Introduction: Discover the Magic of Laravel: A Beginner's Journey
One of the most well-liked PHP frameworks for web development is Laravel, which has a simple and attractive syntax. Creating your first project with Laravel can be an exciting experience if you're new to the framework. You can follow along with the steps to get started with this guide.
Prerequisites: Gear Up: Essential Tools and Knowledge for Laravel 11.
Basic Knowledge of PHP
Setting up a local development environment like Xampp/Wamp/Mamp
Latest Composer installed
PHP 8.2 or 8.3 installed
A code editor of your choice, I prefer Cursor IDE
Step 1 - Installing Laravel: Kickstart Your Laravel Adventure: Installation Made Easy
In this step, we will learn how to install Laravel in our system.
Let’s jump into the exciting part—installing Laravel! Here’s how to get Laravel up and running in a few steps.
composer global require laravel/installer
Step 2 - Create a New Laravel Project: Crafting Your First Laravel Masterpiece: Project Creation Unveiled
After installing the composer and Laravel, we are ready to create a new Laravel Application.
So most of the developers create a new application using command.
laravel new project-name
OR
composer create-project --prefer-dist laravel/laravel my_first_project
However, in this article, we will understand how we can create a new Laravel application in different ways.
So first we will run the command.
laravel new
When we will hit this command then we will get something like this.
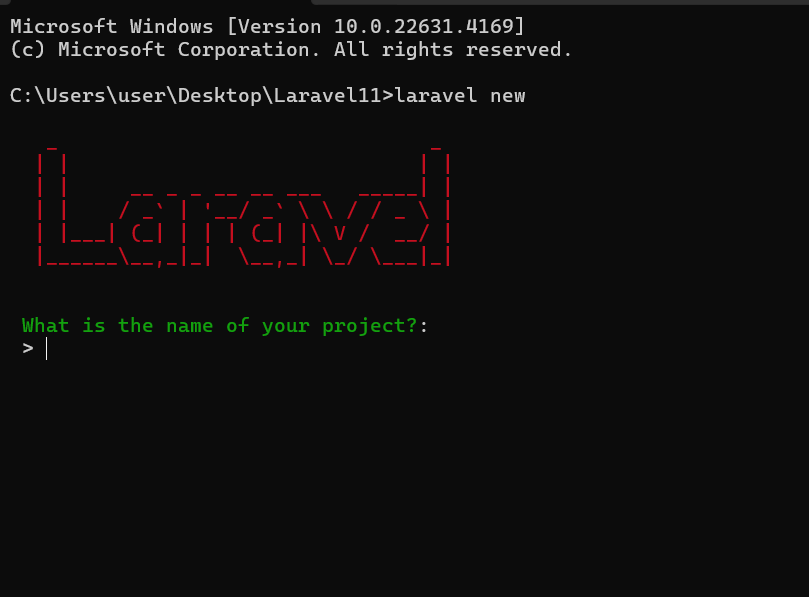
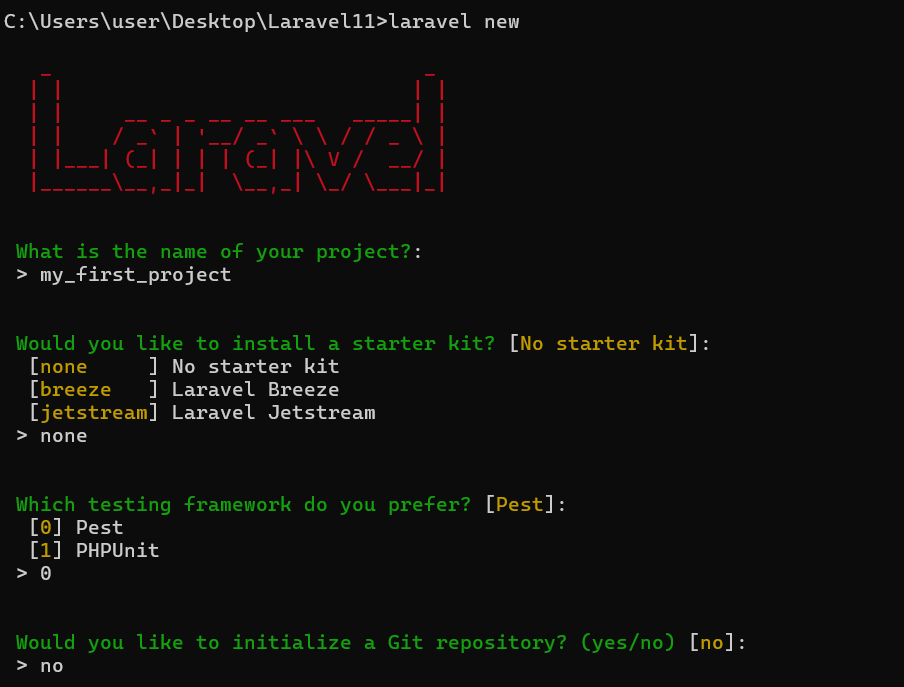
In the above image, We need to give the project Name. For Example, I am giving my_first_project and need to give some other details also like choosing a starter kit You can refer below image.
Step 3 - Navigate to Your Project Folder: Dive Into Your Project: Navigating the Laravel Landscape
After the installation is complete, navigate to your project folder using the cd my_first_project command: In my case.
cd my_first_project
// to change directory
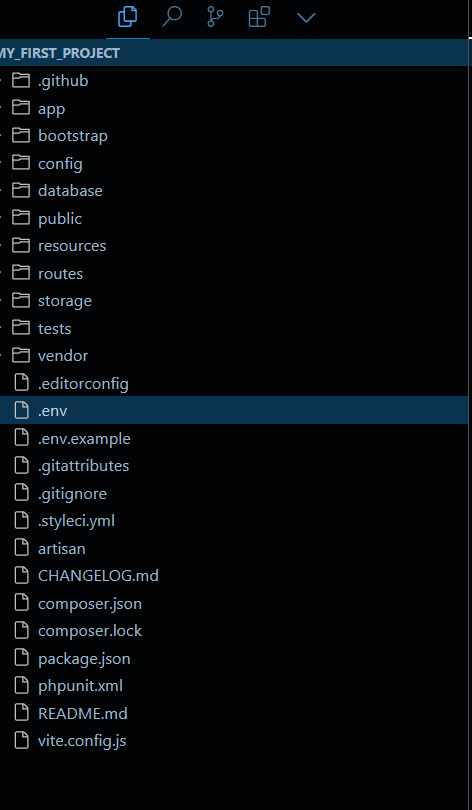
Now this is our Laravel Application Structure and we need to do some configuration.
Step 4: Configure Your Environment File: Fine-Tune Your Setup: Mastering the .env Configuration
Laravel uses a .env file to manage environment variables. Open the .env file and configure your database settings. So now we need to config our env file :
DB_CONNECTION=mysql
DB_HOST=127.0.0.1
DB_PORT=3306
DB_DATABASE=my_first_project
DB_USERNAME=root
DB_PASSWORD=

/* Actual Syntax
DB_CONNECTION=mysql
DB_HOST=127.0.0.1
DB_PORT=3306
DB_DATABASE=your_database_name
DB_USERNAME=your_database_username
DB_PASSWORD=your_database_password
/*
In the code example above, the DB_CONNECTION is set to MySQL. However, in Laravel 11, the default DB_CONNECTION is set to SQLite. During the installation process, I was prompted to select a database, and I chose MySQL, which is why MySQL is displayed in the DB_CONNECTION.
Step 5: Set Up Database Migration: Seamless Data Management: Harnessing Laravel's Migration Power
After configuring the .env file, the next step is to create or migrate the database tables. Laravel provides a robust migration system to manage your database structure. To create and execute migrations, use the following commands:
php artisan migrate
After running the above command, you will see an output similar to this.

Step 6: Run the Laravel Development Server: Bring Your Project to Life: Launching the Laravel Server
Fire up the development server and watch your Laravel application come to life! Just run the following command:
php artisan serve
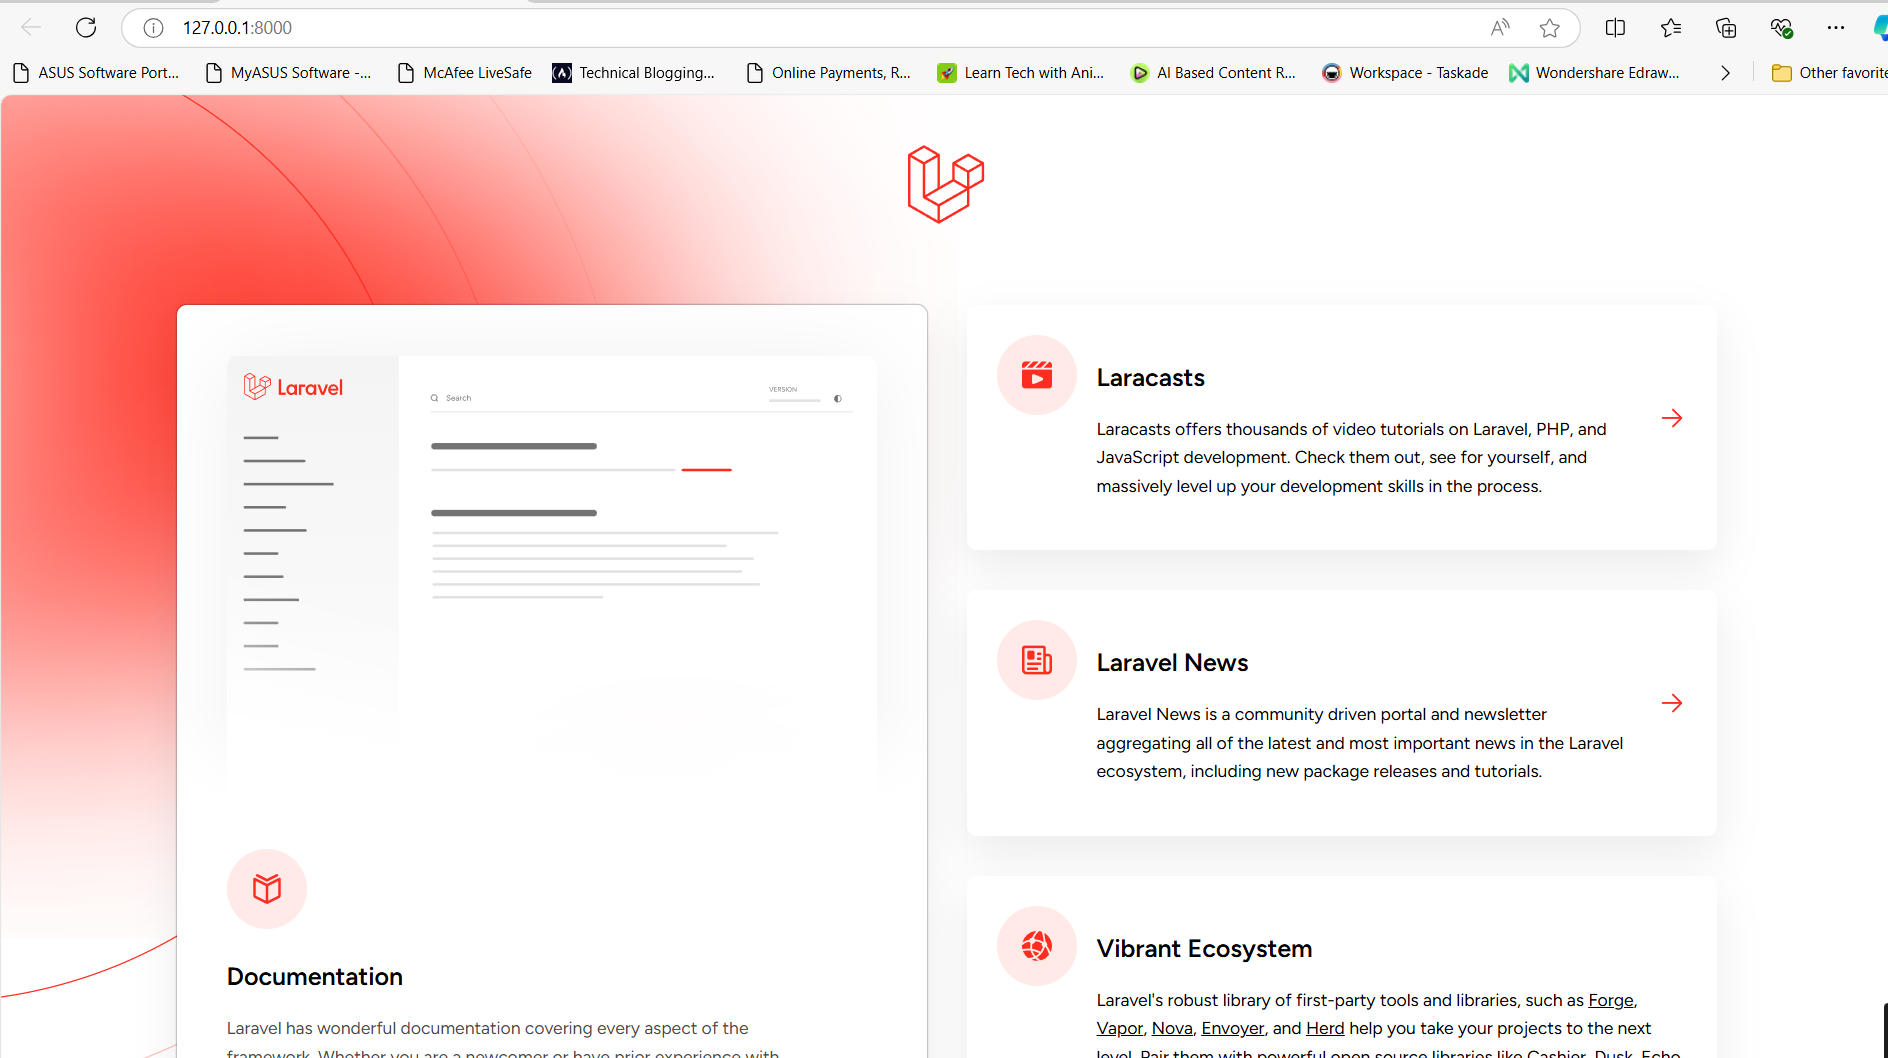
Once you run this command, your server will burst into action, and your Laravel application will be up and running, just like the image below shows. Hooray!
Conclusion: Celebrate Your Success: Embrace the World of Laravel Development
Congratulations on creating your first Laravel 11 project! By following this guide, you've successfully navigated through the installation process, set up your environment, configured your database, and launched your application. Laravel's elegant syntax and robust features make it a powerful tool for web development, and you're now equipped to explore its capabilities further. As you continue to develop your application, remember that Laravel's extensive documentation and supportive community are valuable resources. Enjoy building and enhancing your projects with confidence and creativity. Now that you've built your first Laravel application, consider exploring additional features such as routing, middleware, and Eloquent ORM to enhance your skills further.!

Subscribe to my newsletter
Read articles from Aman jain directly inside your inbox. Subscribe to the newsletter, and don't miss out.
Written by
Aman jain
Aman jain
I'm a developer who shares advanced insights and expertise through technology-related articles. Passionate about creating innovative solutions and staying up-to-date with the latest tech trends. Let's connect and explore the world of technology together!