Building a REST API with AWS Lambda and API Gateway: A Beginner's Tutorial
 Keerthi Ravilla Subramanyam
In this article, we will explore the fundamentals of creating a well-designed API, which can streamline communication between different software systems, enabling seamless interactions and data sharing. We will utilize two key AWS services in this process: AWS Lambda and API Gateway. Let’s dive in and learn how to build a basic API step-by-step.
Key concepts
API (Application Programming Interface): An API allows different software applications to communicate. Think of it as a bridge that connects different systems, enabling them to exchange data and requests.
AWS Lambda is a serverless computing service that allows you to run code without provisioning or managing servers. You can simply upload your code, and Lambda handles everything needed to run and scale your application. This setup lets developers focus on writing code instead of managing infrastructure, making it perfect for today's fast-paced development environments.
- API Gateway serves as a powerful interface for your Lambda functions, enabling you to create, publish, and manage RESTful APIs. It acts as a "front door" for applications to access backend services, facilitating secure and scalable communication between users and the backend logic.
How It Works
Making a Request: When a user enters the API URL in their web browser, API Gateway receives the request.
Processing the Request: API Gateway then activates our Lambda function to run the code that generates the greeting message.
Returning the Response: The message is sent back to API Gateway, which then delivers it to the user’s browser.

To illustrate these concepts, we will create a REST API that responds to GET requests with a simple greeting message. The backend logic will be powered by an AWS Lambda function, while API Gateway will serve as the interface for users to interact with this function via HTTP. By the end of this article, you will have a fully operational API that can act as a backend for various applications, providing valuable insights into modern application development. Now, let’s explore the hands-on part of this process.
Prerequisites
Before we begin, ensure you have:
An active AWS account.
Basic knowledge of AWS services.
Familiarity with the AWS Management Console.
Step 1: Create Your Lambda Function
Sign in to the AWS Management Console and navigate to the Lambda service.
Create a Function:
Click on the Create function
Choose an Author from scratch
Enter the function name:
SampleFunction.Select Python 3.9 as the runtime.
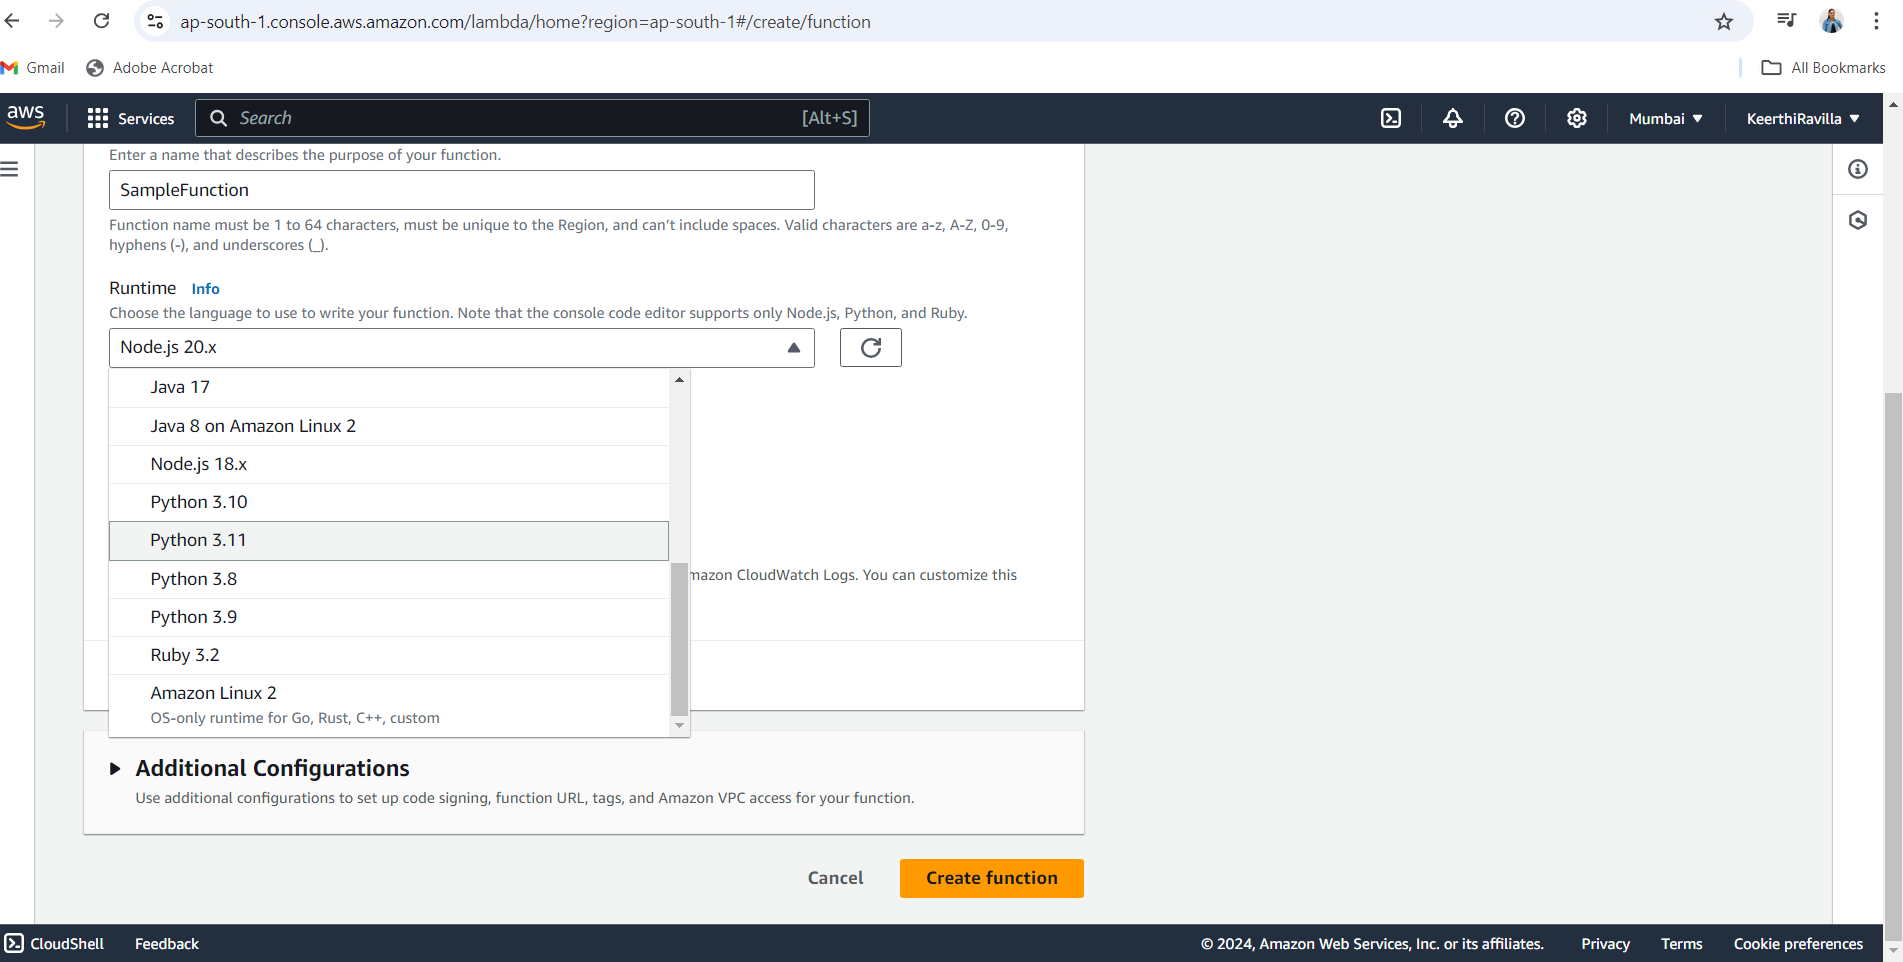
Click the Create function.
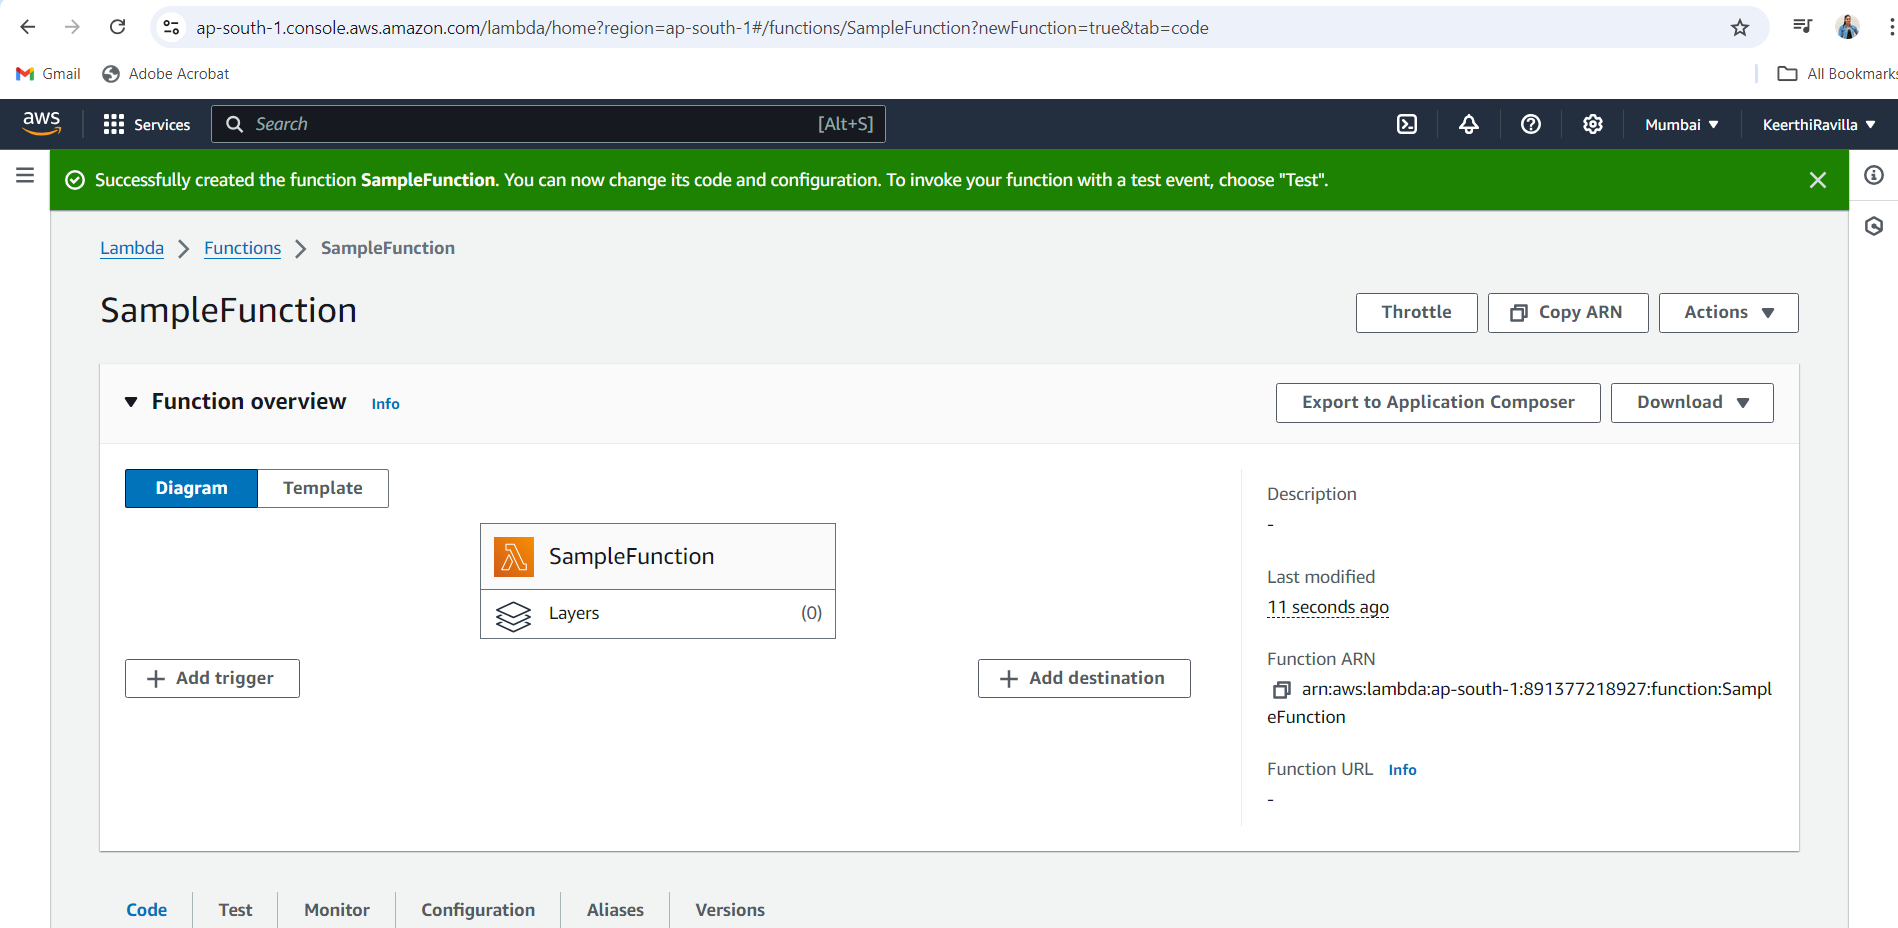
Write Your Lambda Code:
In the code editor, replace the default code with the following:
  def lambda_handler(event, context):
      return {
          'statusCode': 200,
          'body': 'Hello from SampleFunction!'
      }
Click Deploy to save your changes.
Test your code: (Optional)
Click on the Test button, that is right next to deploy button.
Configure a new test event. You can use the default values or create a simple test event like this:
  {
      "key1": "value1",
      "key2": "value2",
      "key3": "value3"
  }
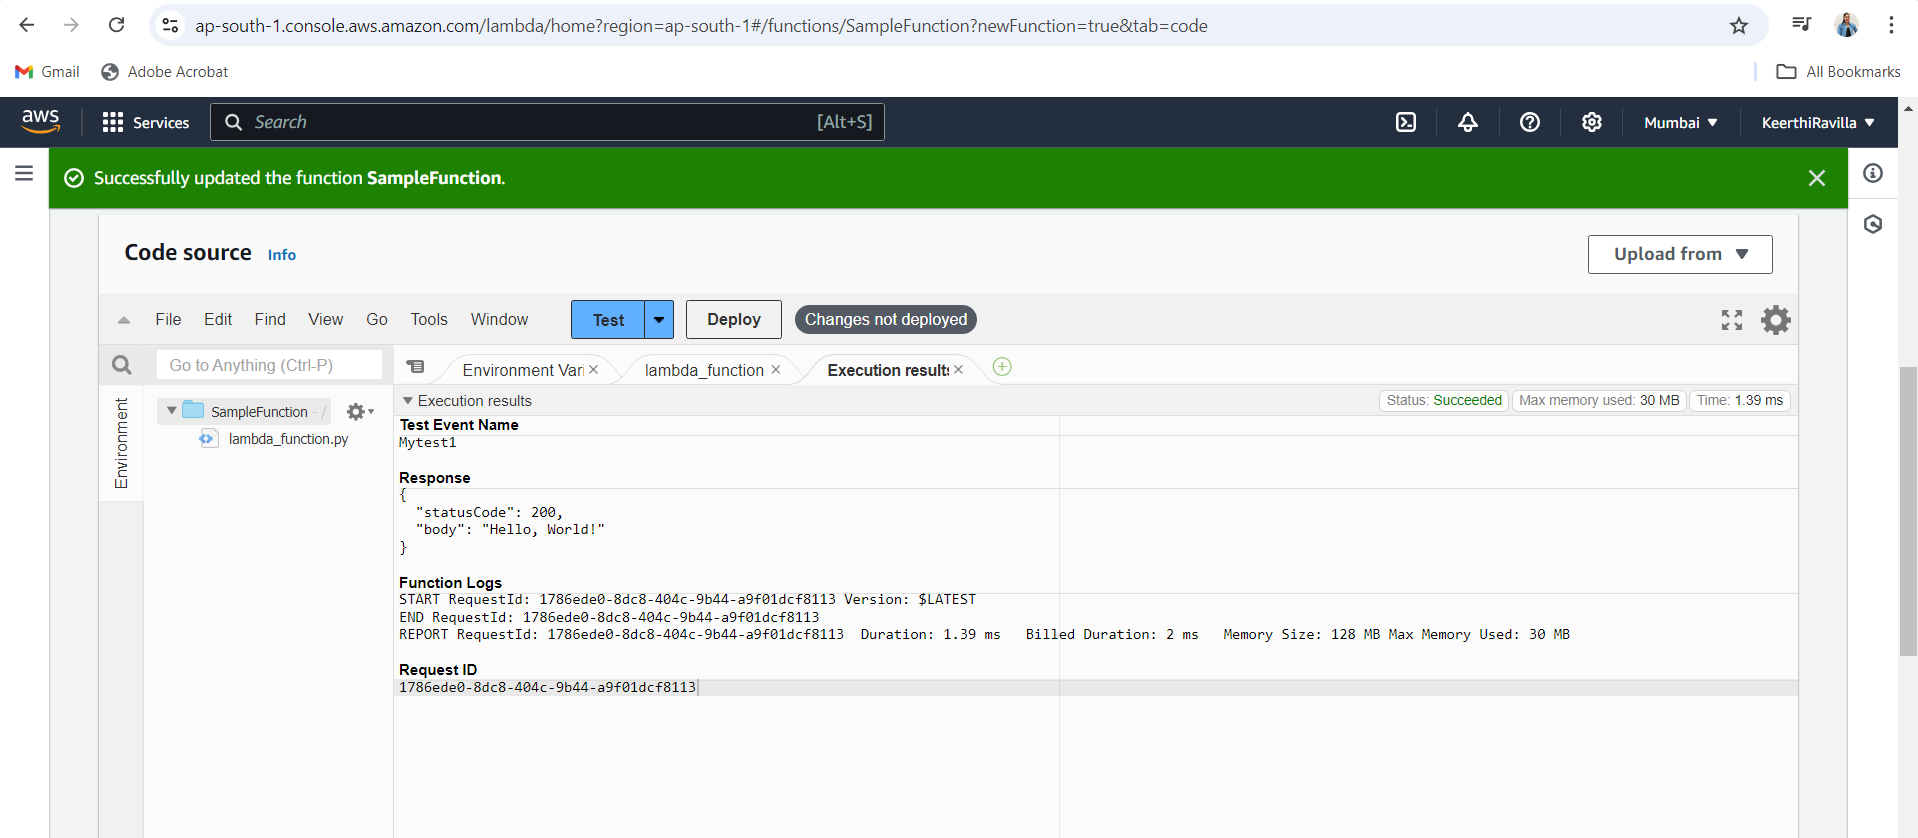
Click Test again to invoke your function with the test event.
You should receive a response similar to the following:
Step 2: Create the API Gateway
Access the API Gateway:
- In the AWS Management Console, search for and select API Gateway
Create API:
Click on Create API
Select REST API and choose New API
Enter the API name:
MyAPI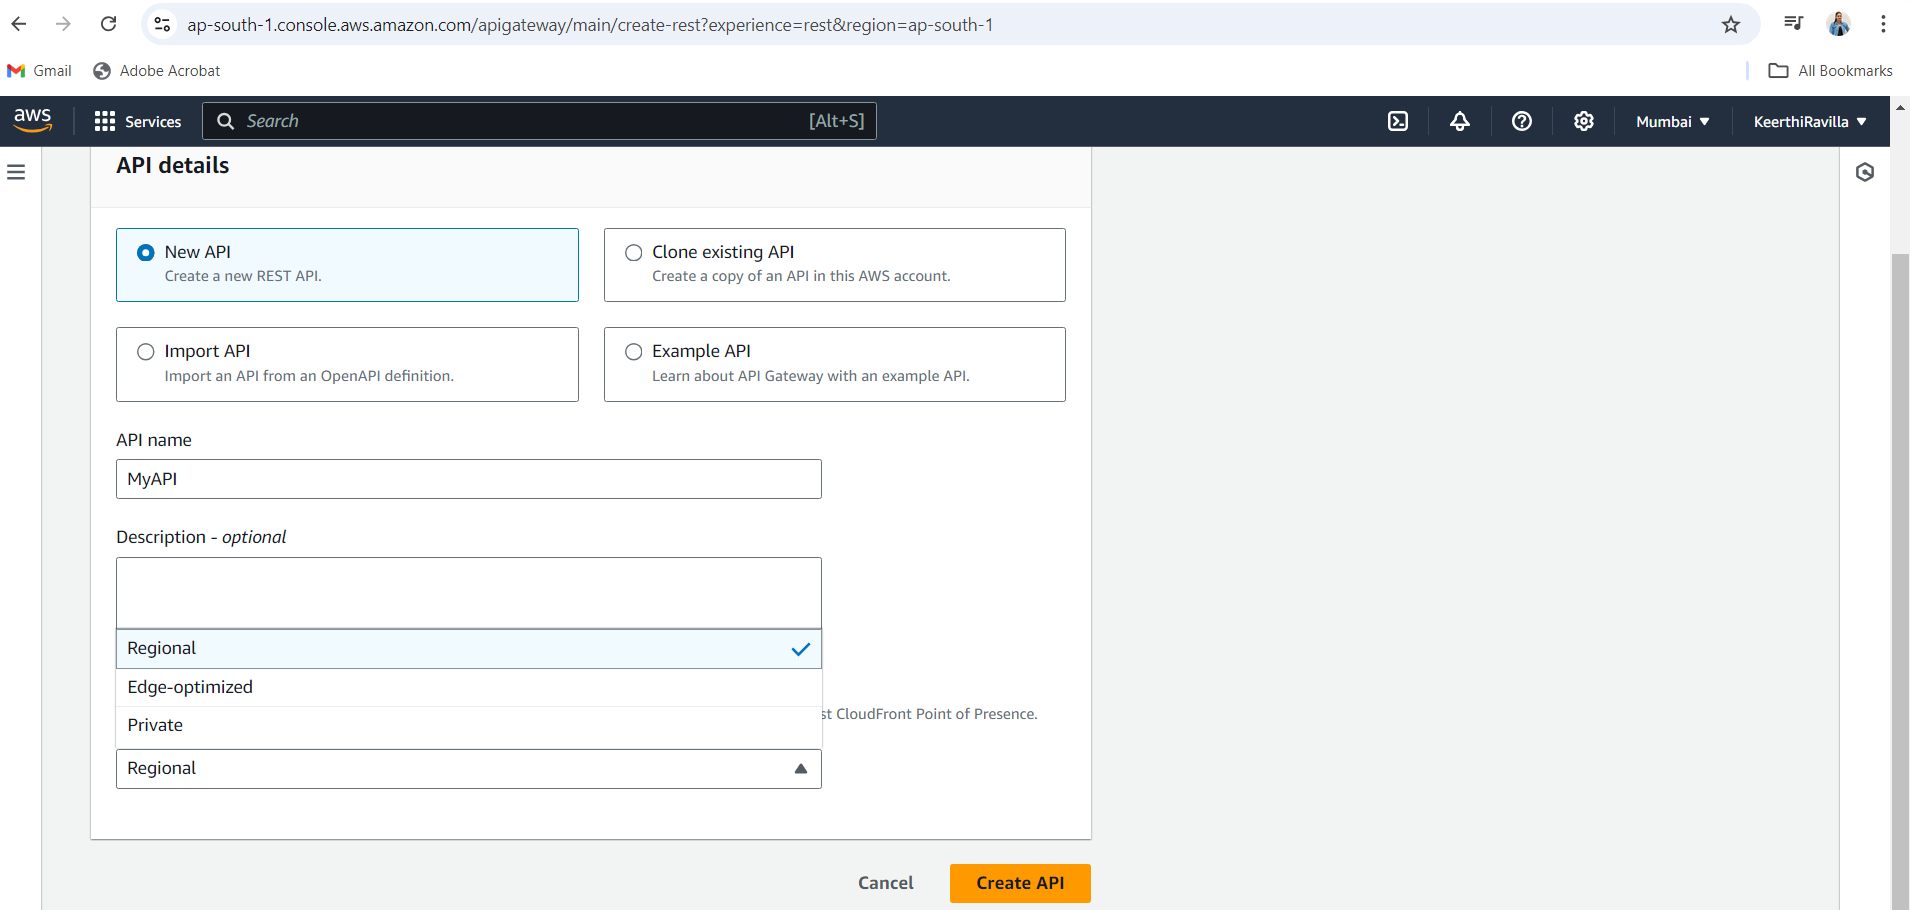
Select Regional for the endpoint type and click Create API.
Step 3: Configure the Method and Stage
Create a Method:
In the Resources section, click on Create Method.
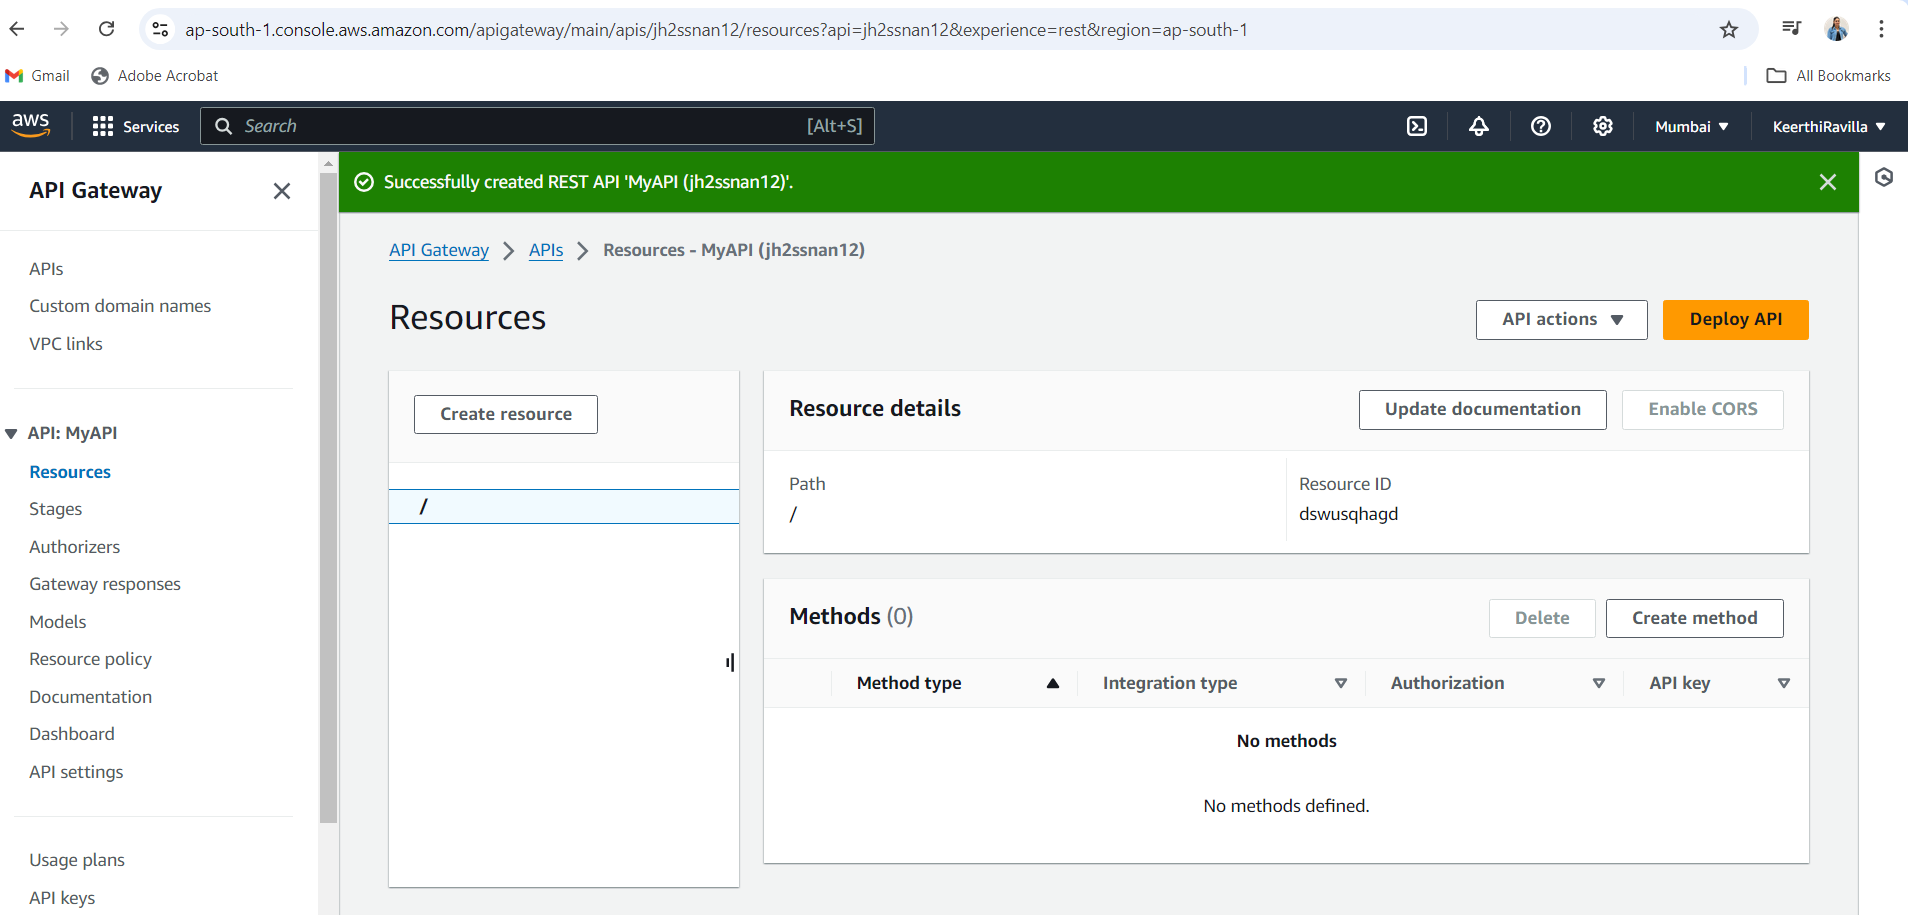
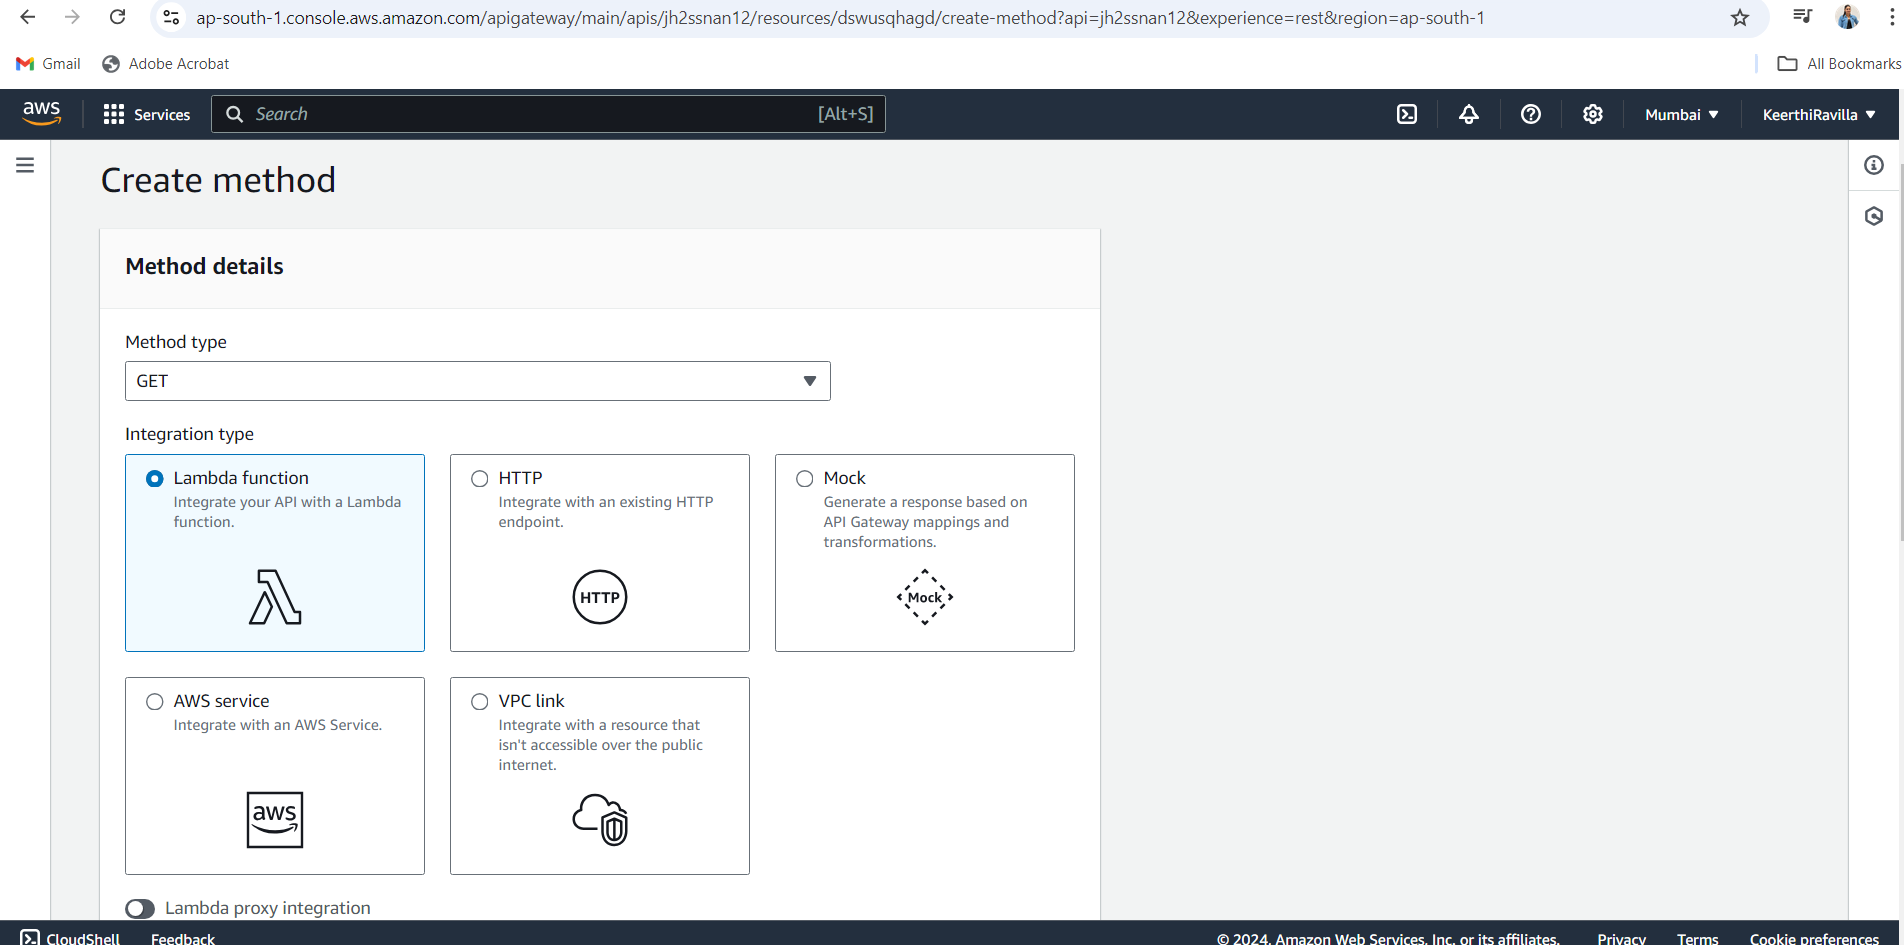
Select GET from the dropdown.

Integrate with Lambda:
In the integration type, select Lambda Function.
Choose the region where your Lambda function is located
select your lambda function from the dropdown box.
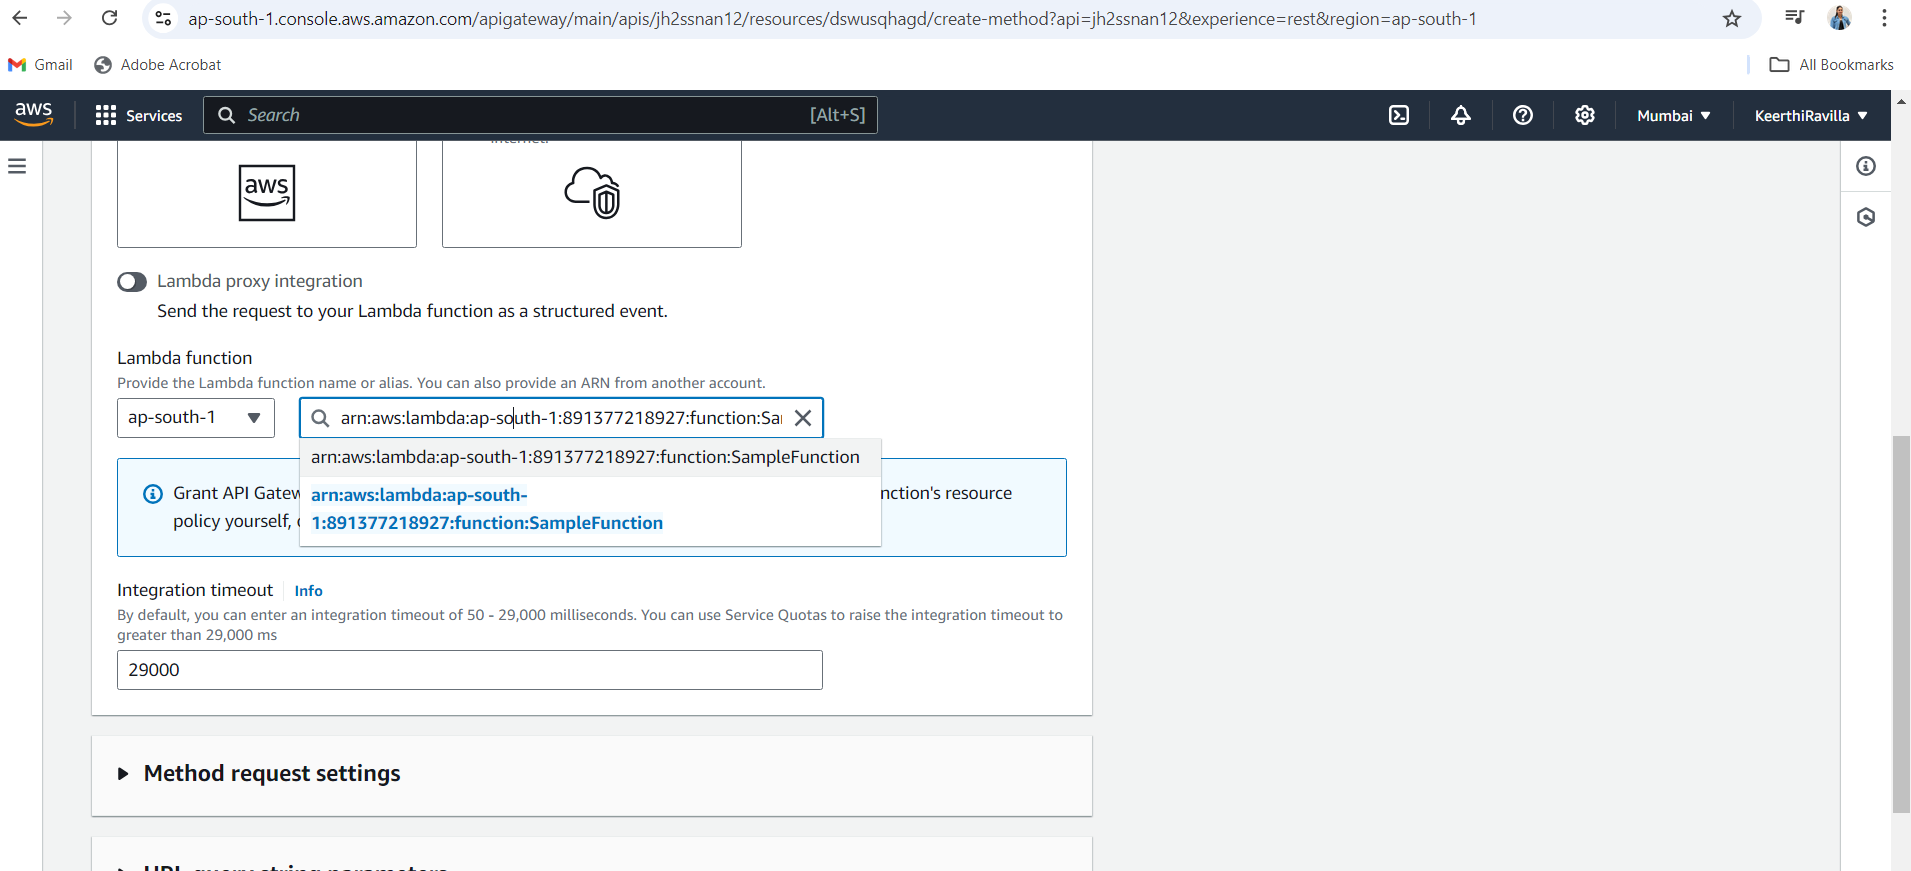
Click Save and confirm the permission prompt to allow API Gateway to invoke your Lambda function.
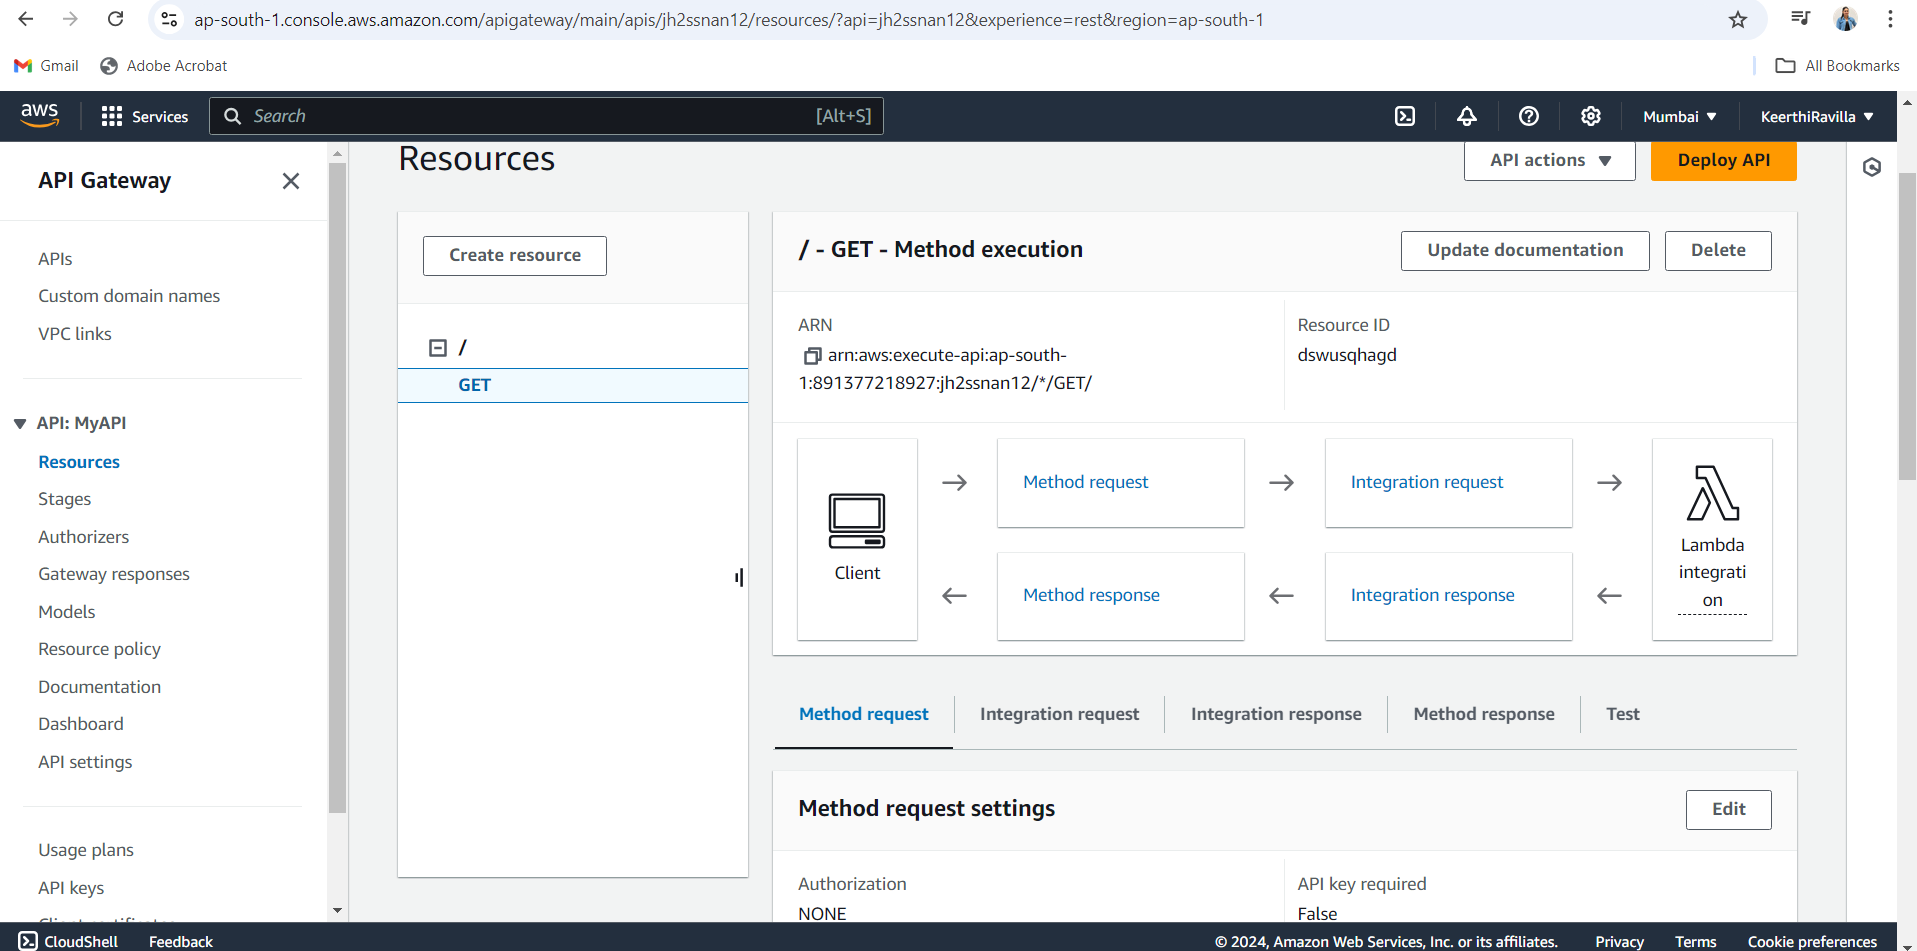
Deploy the API:
Click on Deploy API.
In the Deploy API dialog, choose [New Stage].
Enter the stage name:
devand add a description if desired.Click Deploy.
Retrieve the Invoke URL
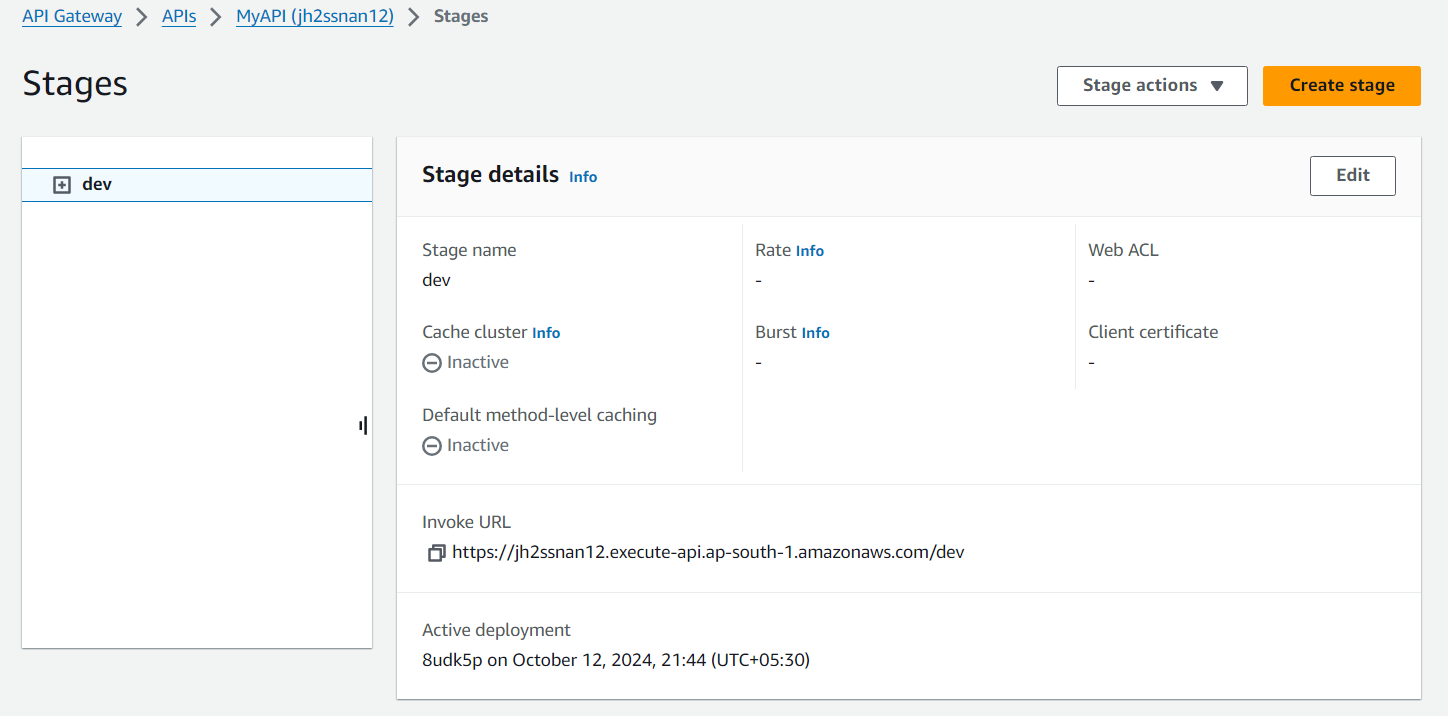
- After deployment, note the Invoke URL displayed. This URL will be used to access your API.
Step 6: Test Your API
Using a Web Browser:
Open a web browser and paste the Invoke URL followed by
/dev(e.g.,https://{your_invoke_url}/dev).Press Enter to send a GET request.

Using Postman or Curl:
Use a tool like Postman or a command-line tool like
curlto test your API.Send a GET request to the Invoke URL:
GET {your_invoke_url}/hello
Verify the Response:
You should receive a response similar to the following:
  {
    "statusCode": 200,
    "body": "Hello from SampleFunction!"
  }
This response confirms that your API is functioning correctly.
Warning: To avoid unnecessary charges, remember to delete your Lambda function and API resources when you’re finished experimenting.
Congratulations!🎉.You have successfully created a REST API using AWS Lambda and API Gateway. This tutorial covered the essential steps to set up your serverless API, including creating a Lambda function, setting up API Gateway, and deploying your API for public access.
This foundational experience opens the door to building more complex applications, such as incorporating databases and enhancing security. As you continue exploring AWS, consider diving into additional services to expand your skill set.
Thank you for following this AWS series, stay tuned for more insights and articles to enhance your cloud computing knowledge!
Subscribe to my newsletter
Read articles from Keerthi Ravilla Subramanyam directly inside your inbox. Subscribe to the newsletter, and don't miss out.
Written by

Keerthi Ravilla Subramanyam
Keerthi Ravilla Subramanyam
Hi, I'm Keerthi Ravilla Subramanyam, a passionate tech enthusiast with a Master's in Computer Science. I love diving deep into topics like Data Structures, Algorithms, and Machine Learning. With a background in cloud engineering and experience working with AWS and Python, I enjoy solving complex problems and sharing what I learn along the way. On this blog, you’ll find articles focused on breaking down DSA concepts, exploring AI, and practical coding tips for aspiring developers. I’m also on a journey to apply my skills in real-world projects like predictive maintenance and data analysis. Follow along for insightful discussions, tutorials, and code snippets to sharpen your technical skills.