Building a Full-Stack Payment System with Razorpay
 Mohit Supolia
Introduction
In today’s world, integrating a payment gateway into your web application is a must for any business that wants to accept payments online. Razorpay is one of the most popular payment gateways in India, providing an easy way to collect payments securely and efficiently. In this tutorial, we’ll walk through the steps to build a full-stack payment system with Razorpay, covering both frontend and backend development.
Prerequisites
Before we begin, ensure you have the following:
Basic understanding of frontend (React.js) and backend (Node.js/Express) development.
Installed Node.js and npm.
A code editor like VS Code.
Step 1: Setting Up the Backend (Node.js + Express)
In this step, we will set up a Node.js backend using Express to handle payment requests and integrate Razorpay’s payment gateway.
1.1 Creating Razorpay API Keys
Before writing any backend code, you’ll need your Razorpay API keys to authenticate requests.
Follow these steps to create your Razorpay keys:
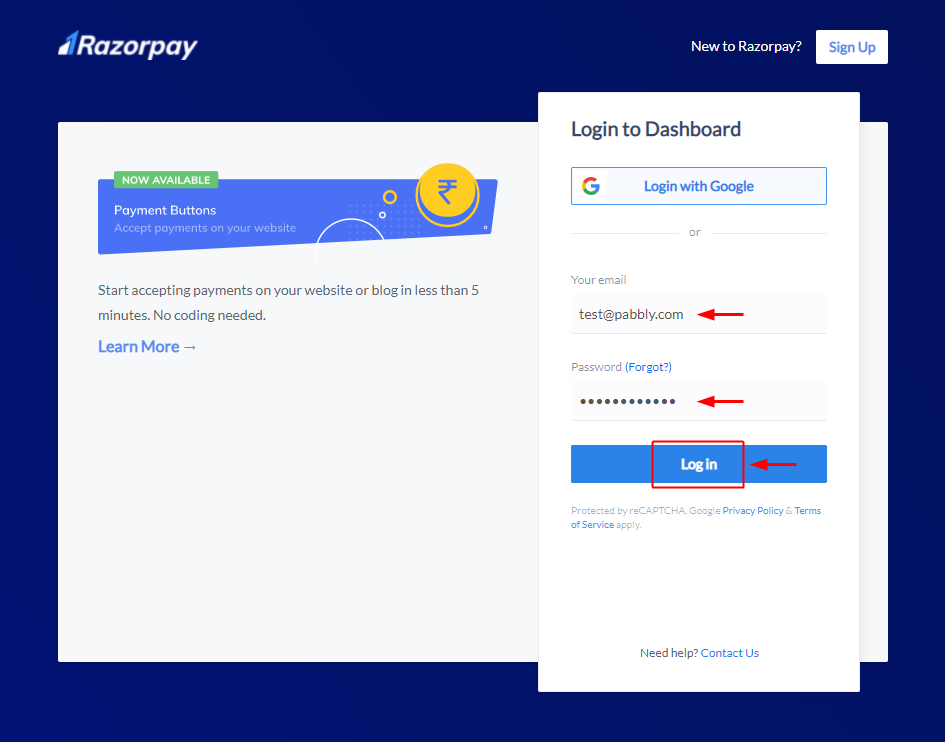
- Sign Up or Log In: Head over to Razorpay's website and Sign up or Log in to your account. Once you're logged in, you'll be taken to the Razorpay dashboard.

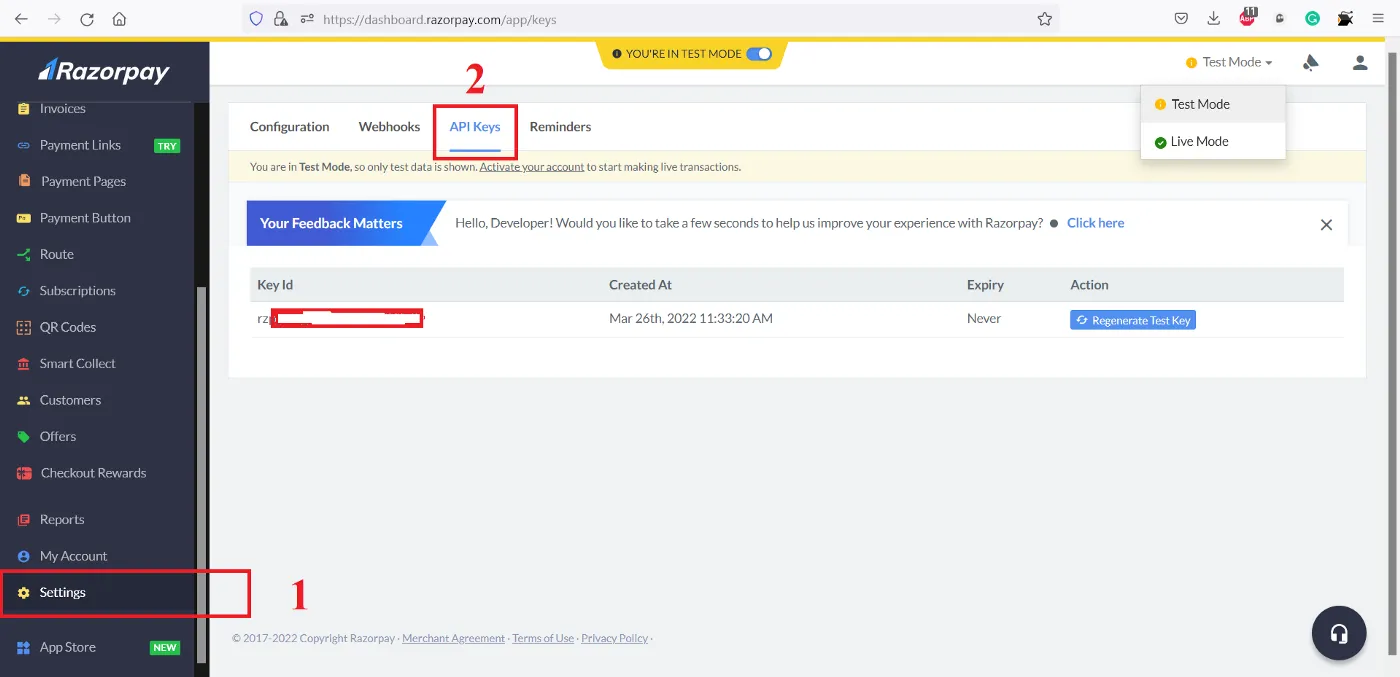
- Navigate to API Keys: On the sidebar of the Razorpay dashboard, click on Settings. Under the Developer Settings, you’ll find the API Keys section.

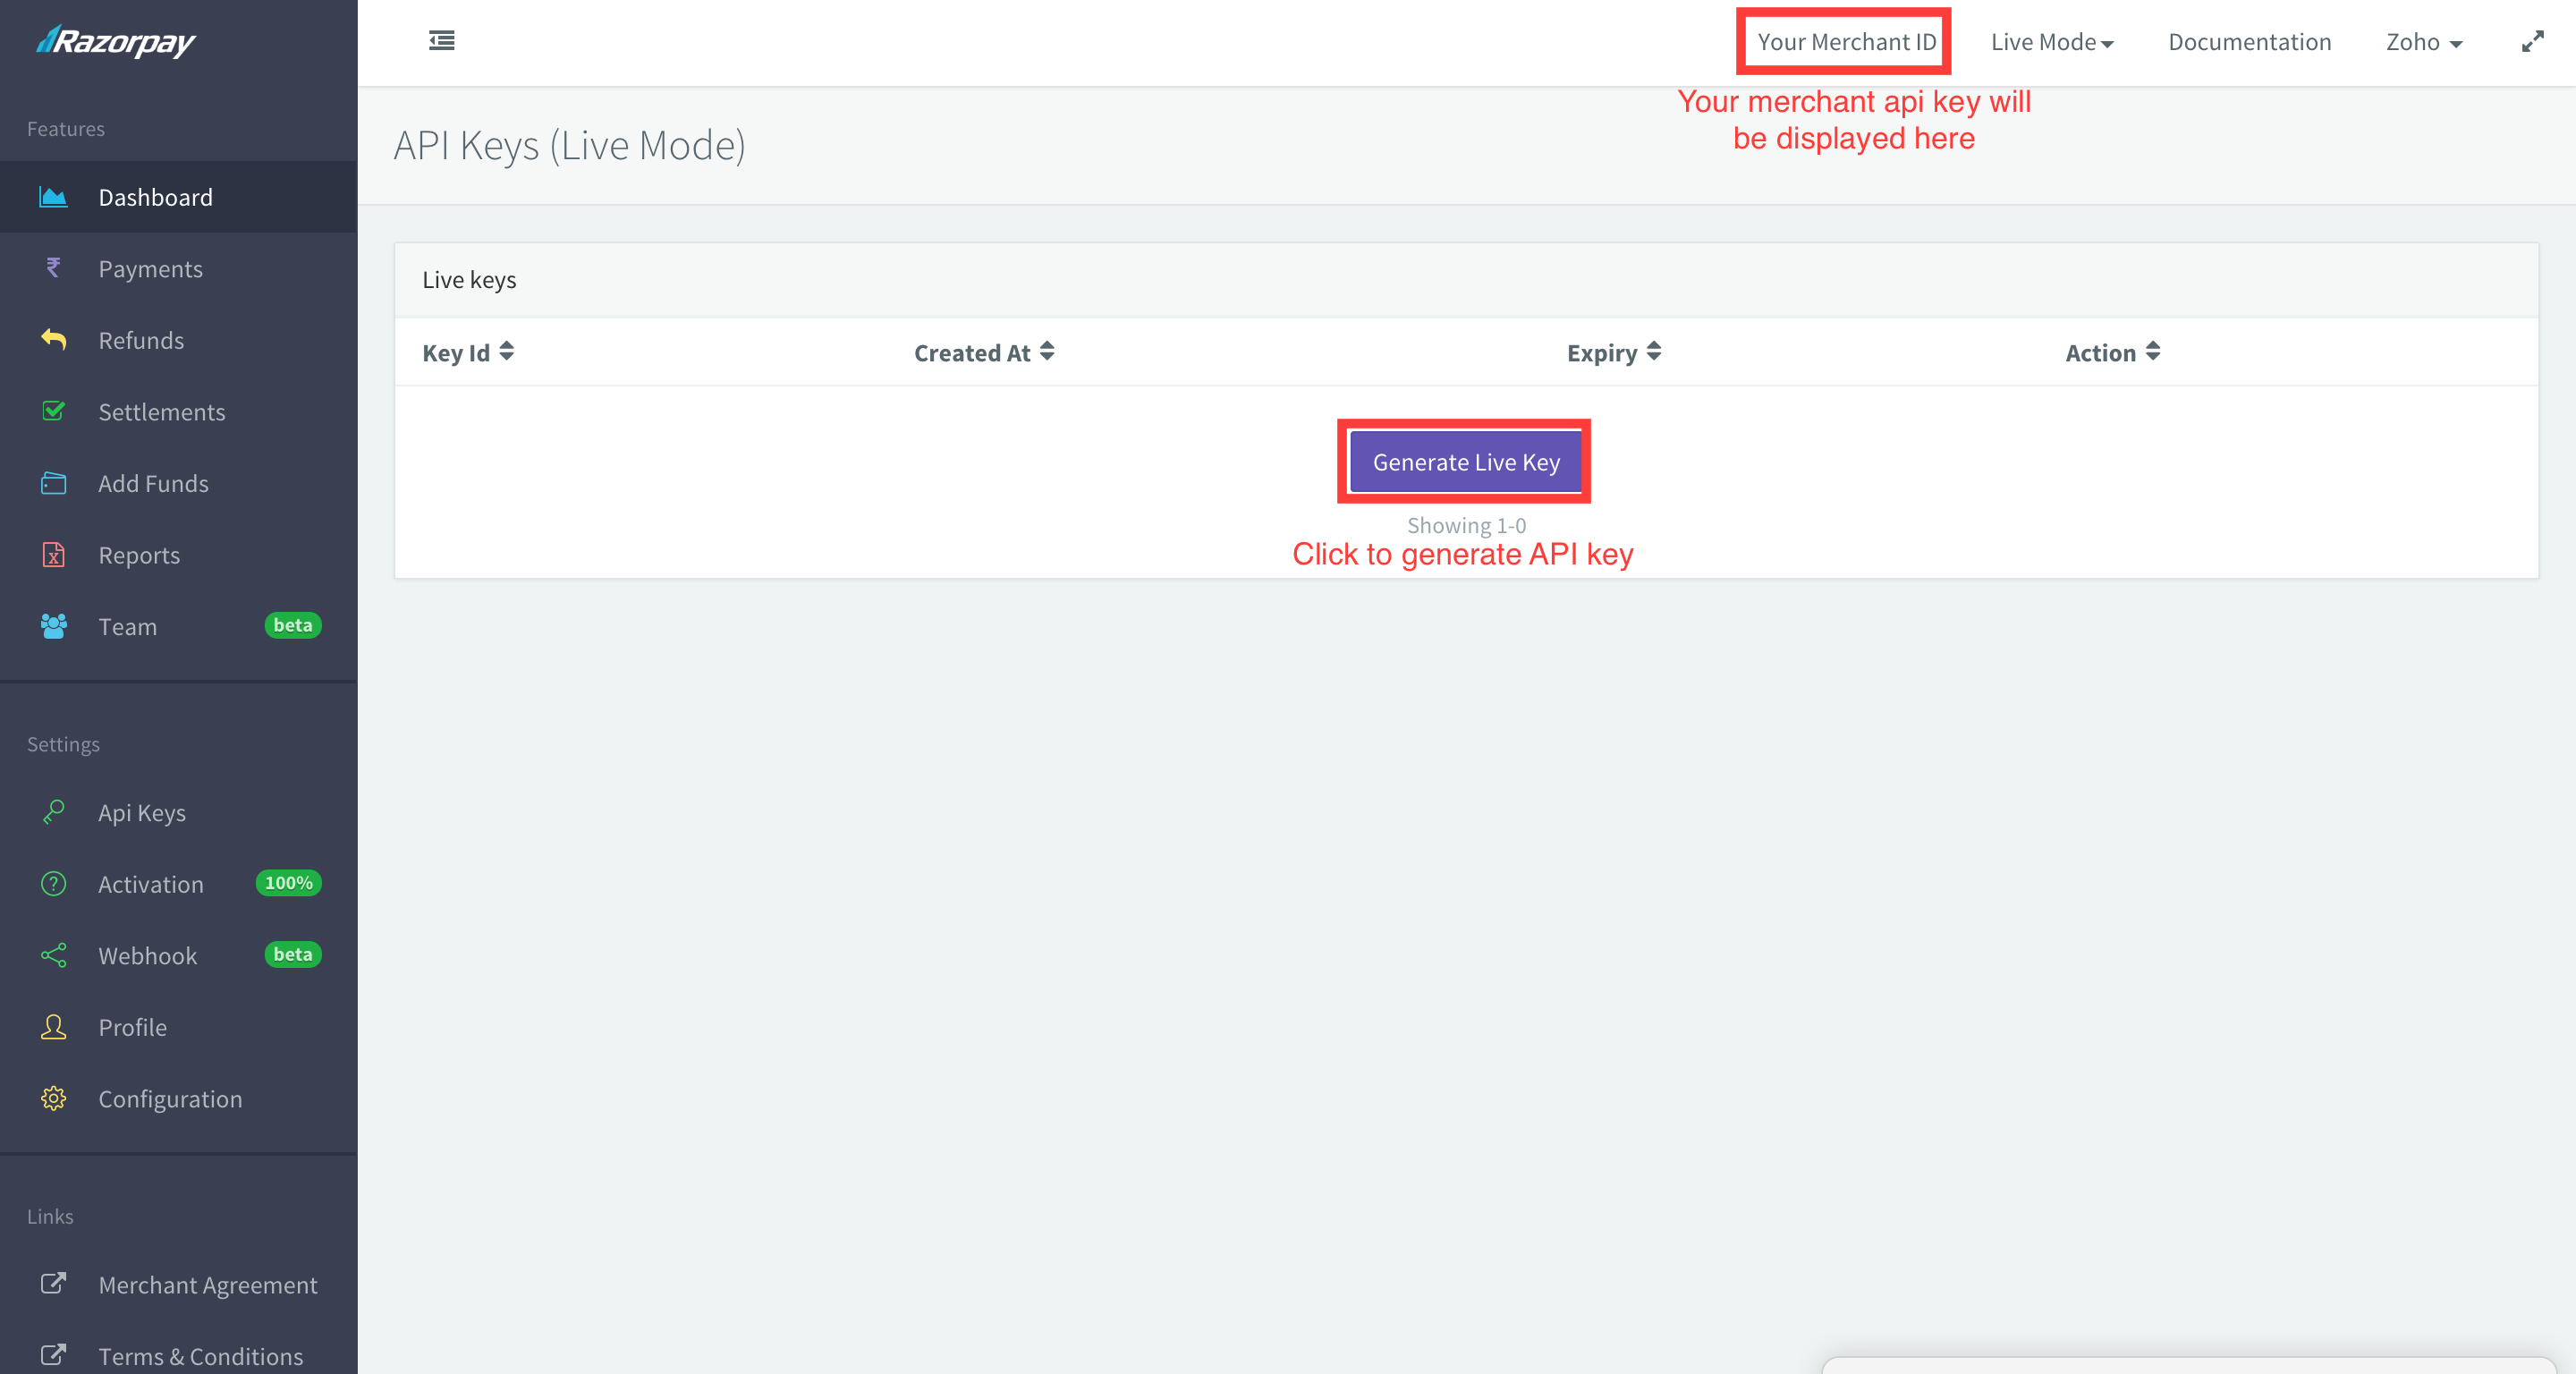
- Generate API Keys: Click on Generate Key to create your
key_idandkey_secret. A modal will pop up displaying your Key ID and Secret Key. Copy and store these keys safely, as you won’t be able to view the secret key again after closing the modal.

Note: These keys are necessary to authenticate and authorize your Razorpay API requests. Do not expose these keys on the client side; keep them secure in your backend.
1.2 Set Up the Backend Project
- Initialize the Project:
mkdir razorpay-fullstack
cd razorpay-fullstack
npm init -y
- Install Dependencies:
npm install express body-parser cors razorpay dotenv
- Create the Server: Create an
index.jsfile for your server setup and add the following code:
const express = require('express');
const Razorpay = require('razorpay');
const dotenv = require('dotenv');

dotenv.config();
const app = express();
app.use(express.json());

// Razorpay instance
const razorpay = new Razorpay({
    key_id: process.env.RAZORPAY_KEY_ID,
    key_secret: process.env.RAZORPAY_KEY_SECRET
});

// Payment route
app.post('/create-order', async (req, res) => {
    const options = {
        amount: req.body.amount * 100, // convert to paisa
        currency: 'INR',
        receipt: 'receipt_order_123',
    };

    try {
        const order = await razorpay.orders.create(options);
        res.status(200).json(order);
    } catch (error) {
        res.status(500).json({ message: 'Something went wrong' });
    }
});

const PORT = process.env.PORT || 5000;
app.listen(PORT, () => console.log(`Server running on port ${PORT}`));
- Set Up Environment Variables: Create a
.envfile at the root of your project:
RAZORPAY_KEY_ID=your_key_id
RAZORPAY_KEY_SECRET=your_key_secret
Step 2: Setting Up the Frontend (React.js)
Now, let's move to the frontend part where the user can initiate the payment.
- Create a React App: If you don't already have a React app set up, you can create one using Vite or Create React App:
npx create-react-app razorpay-frontend
- Create a payment form: In your
App.jsor a component likePayment.js, add a form to capture payment details:
import React, { useState } from 'react';

const PaymentForm = () => {
    const [amount, setAmount] = useState(0);

    const handlePayment = async () => {
        const response = await fetch('http://localhost:5000/create-order', {
            method: 'POST',
            headers: {
                'Content-Type': 'application/json'
            },
            body: JSON.stringify({ amount })
        });

        const order = await response.json();

        const options = {
            key: 'YOUR_RAZORPAY_KEY_ID',
            amount: order.amount,
            currency: 'INR',
            name: 'Your Company',
            description: 'Test Transaction',
            order_id: order.id,
            handler: function (response) {
                alert(`Payment successful! Payment ID: ${response.razorpay_payment_id}`);
            },
            prefill: {
                name: 'John Doe',
                email: 'johndoe@example.com',
                contact: '9999999999'
            },
        };

        const rzp = new window.Razorpay(options);
        rzp.open();
    };

    return (
        <div>
            <h1>Pay with Razorpay</h1>
            <input
                type="number"
                value={amount}
                onChange={(e) => setAmount(e.target.value)}
                placeholder="Enter Amount"
            />
            <button onClick={handlePayment}>Pay Now</button>
        </div>
    );
};

export default PaymentForm;
Step 3: Integrating Razorpay SDK
For the frontend, you need to include Razorpay's script. Add the following line in the <head> section of your index.html file:
<script src="https://checkout.razorpay.com/v1/checkout.js"></script>
Step 4: Running the Application
Once everything is set up, you can run the backend and frontend servers:
- Run the backend server:
node index.js
- Run the frontend app:
npm start
Now, you should be able to enter an amount in your React app, click "Pay Now," and initiate a payment through Razorpay.
Handling Payment Success and Failure
You can enhance the payment flow by handling success and failure cases. Razorpay provides callback handlers (like handler in the Razorpay options) where you can implement logic for what happens after a payment is successful or fails.
Security Considerations
Always ensure that sensitive data like API keys are stored securely in environment variables, and never expose them on the frontend. Additionally, consider using HTTPS to secure your API requests in production.
Conclusion
By following these steps, you have successfully integrated a payment system using Razorpay into a full-stack application. This guide covered everything from backend setup with Node.js to handling payments on the frontend with React. With Razorpay’s robust API and flexible options, you can further customize the payment experience to suit your business needs.
Subscribe to my newsletter
Read articles from Mohit Supolia directly inside your inbox. Subscribe to the newsletter, and don't miss out.
Written by

Mohit Supolia
Mohit Supolia
Passionate Developer | Problem Solver | Lifelong Learner I'm a software developer who loves solving problems and building apps that work well. I enjoy learning new tools, writing clean code, and sharing tips about coding. Whether it's designing the front-end or working on the back-end, I'm always excited to explore new things in tech. Follow my journey as I share easy-to-understand tutorials, coding tips, and thoughts on the latest trends in development.