Getting Started with AWS IAM: Managing Users and Permissions
 Chishtiya Shaikh
When it comes to securing your AWS environment, AWS Identity and Access Management (IAM)
is your first line of defense. Whether you're launching your personal cloud project 🛠️ or managing an entire organization’s AWS infrastructure 🏢, IAM empowers you to control access with precision 🔒. With IAM, you can ensure that only the right people have the right level of access to your valuable AWS resources.
In this step-by-step guide, we’ll walk you through the essential IAM processes, including setting up an AWS account 📝, creating users 👥, and assigning permissions 🔑—so you can confidently secure your cloud environment from the start.
🌟 Step 1: Creating Your AWS Account
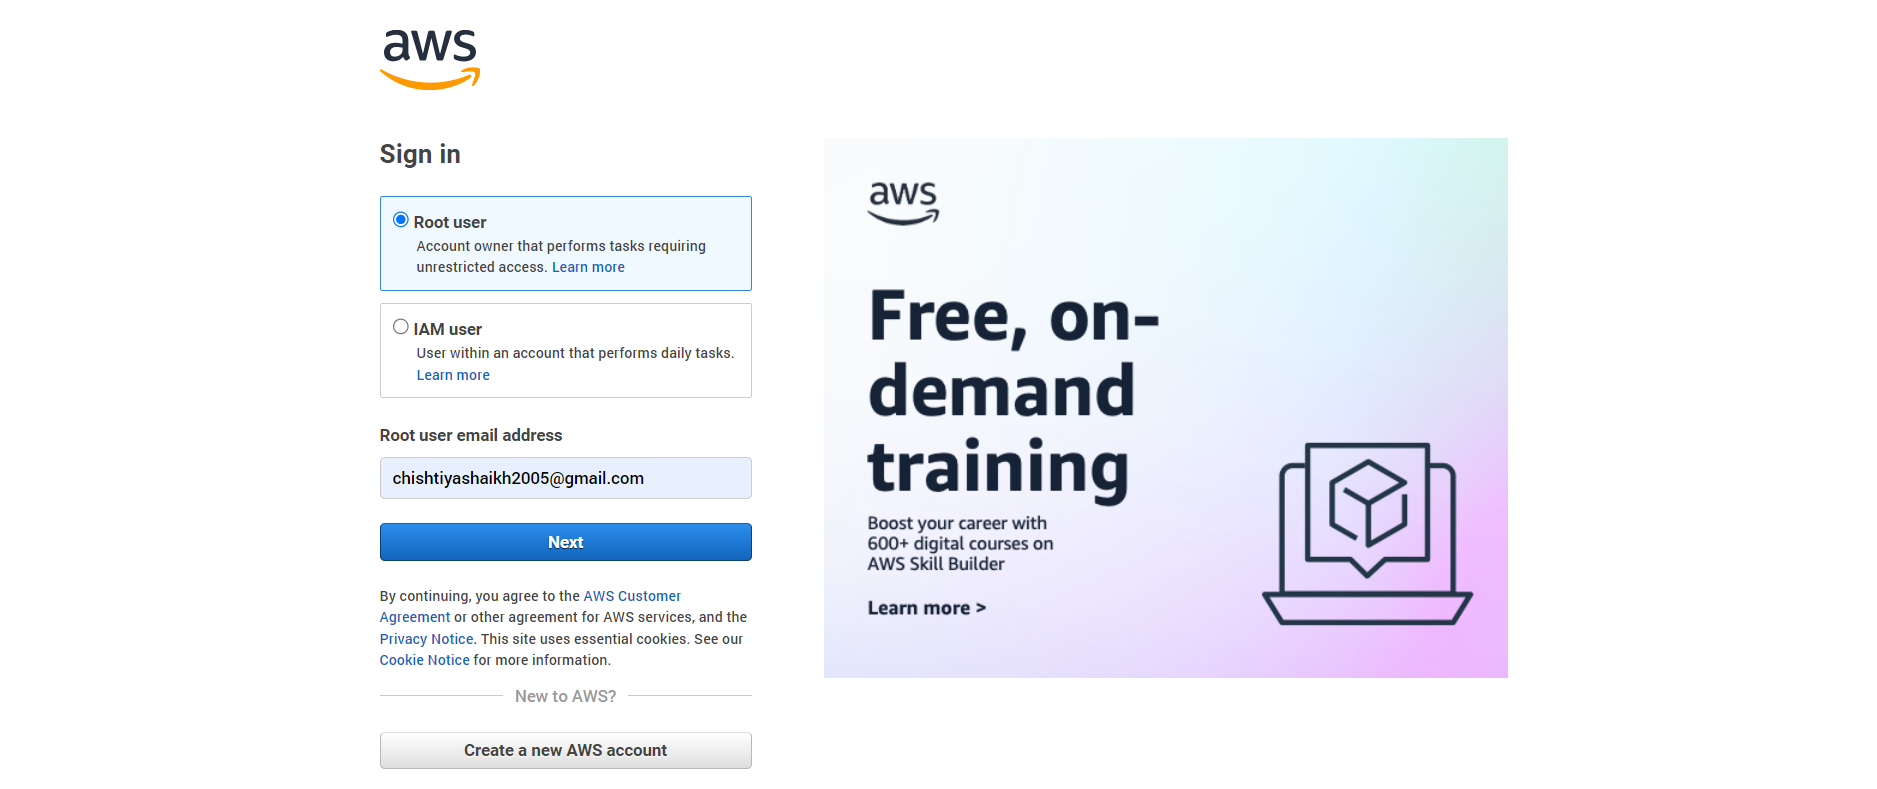
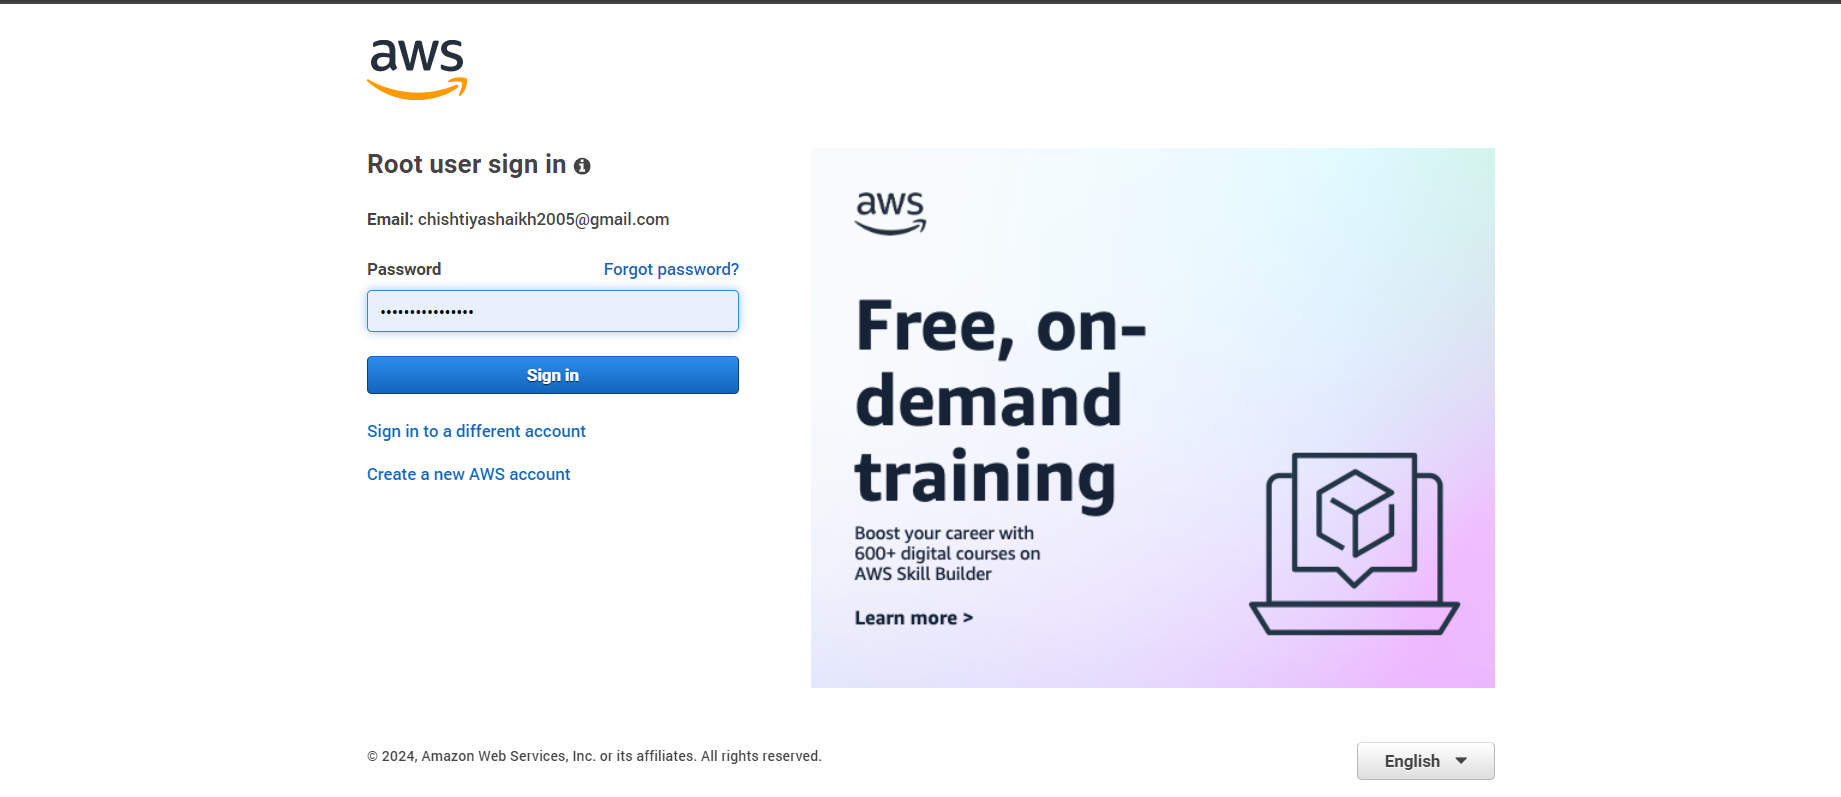
First things first, let’s get you started with an AWS account! 🎉 Head over to the AWS Sign-in page and under Root user, simply enter your Gmail address ✉️ and click Next.
This account will be your primary management hub, where you’ll manage all IAM activities 🔑. Important tip: Keep this account for management tasks only—avoid using it for day-to-day operations to keep your system secure! ⚠️
Step 2: AWS Console Overview
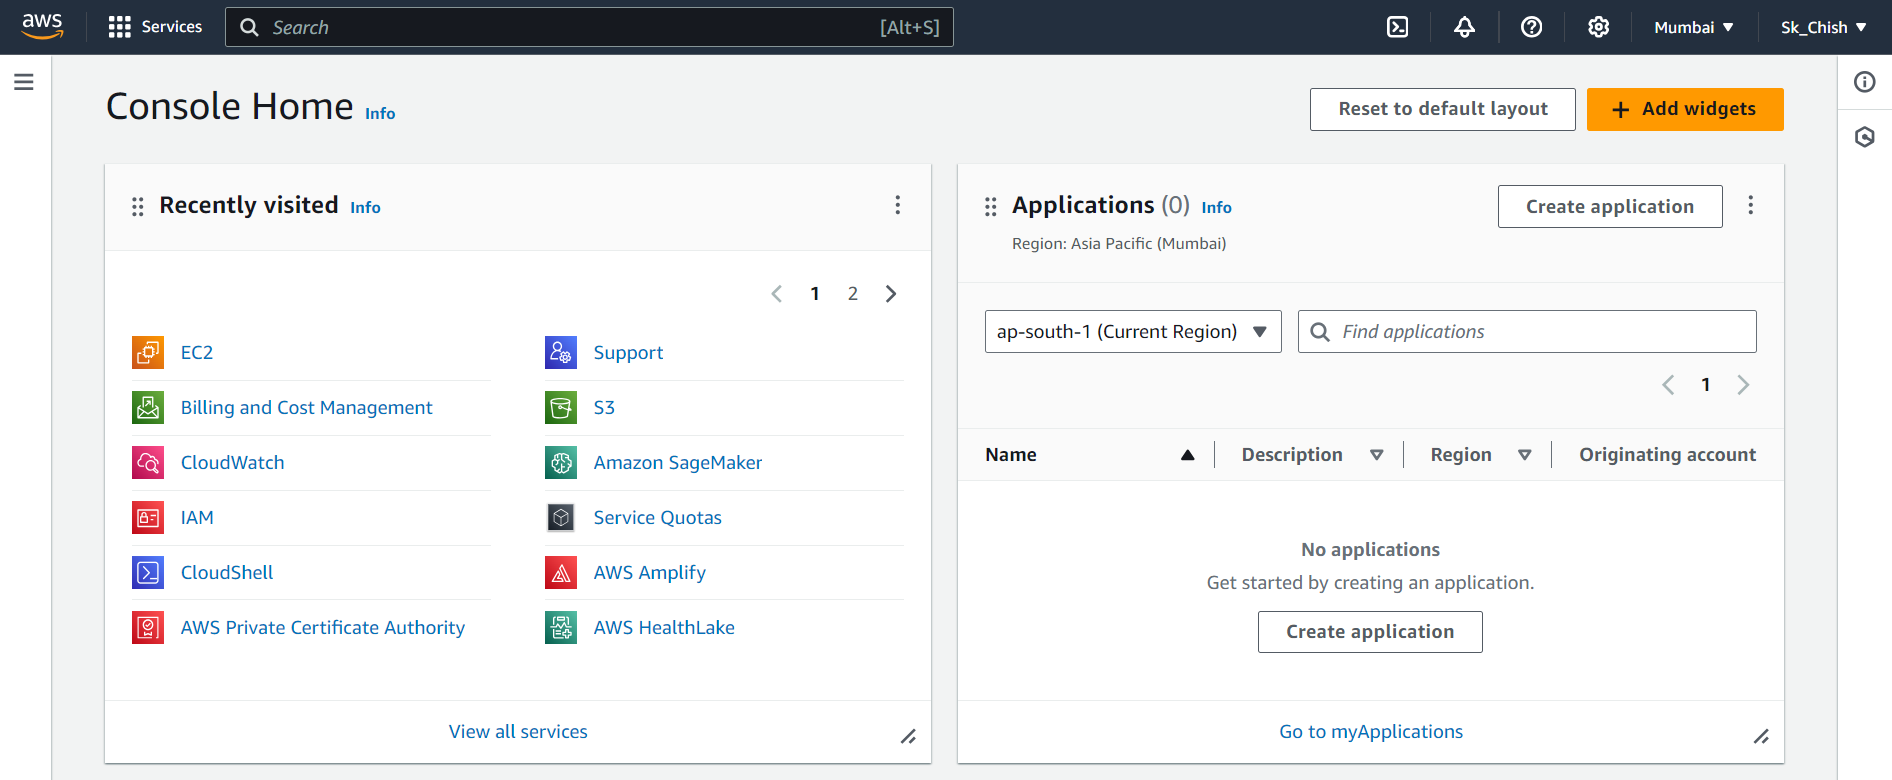
After logging in, welcome to the AWS Management Console! This is your central hub for accessing all AWS services, including EC2, S3, CloudWatch, and of course, IAM.
While we’ll focus on IAM in this guide, don’t hesitate to explore other services when you have time! 🌐
Step3: Navigating to the IAM Service
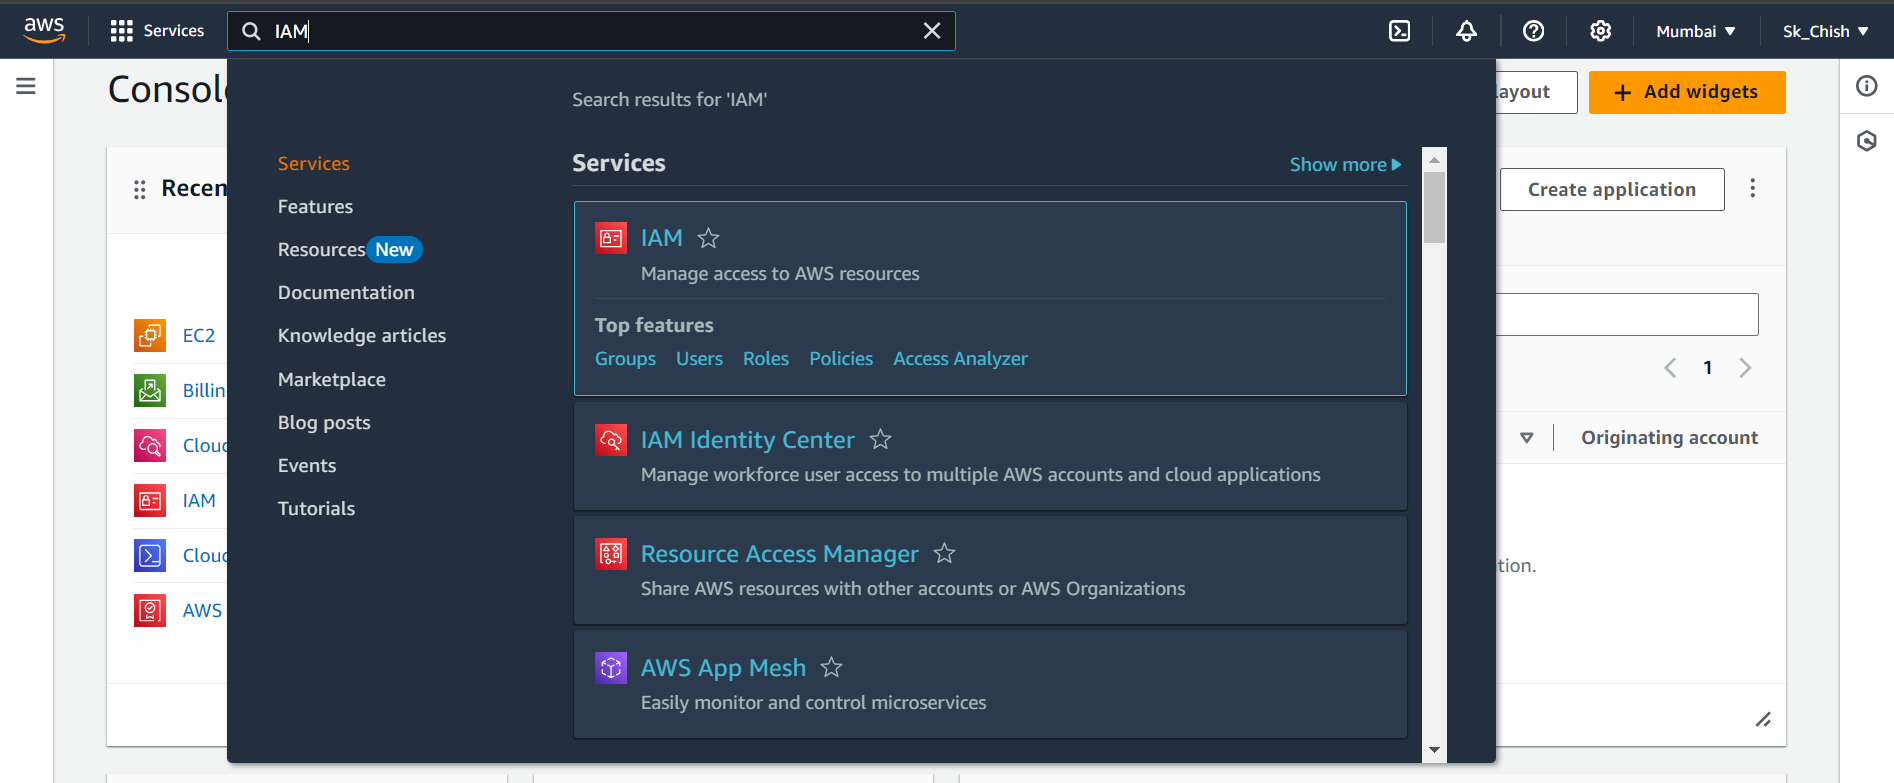
To start managing users, simply type IAM in the search bar at the top of the AWS Console and select the IAM service. Here, you'll find tools to create and manage users, groups, roles, and permissions—all essential for keeping your AWS environment secure!
🏷️ Step 4: Setting an Account Alias
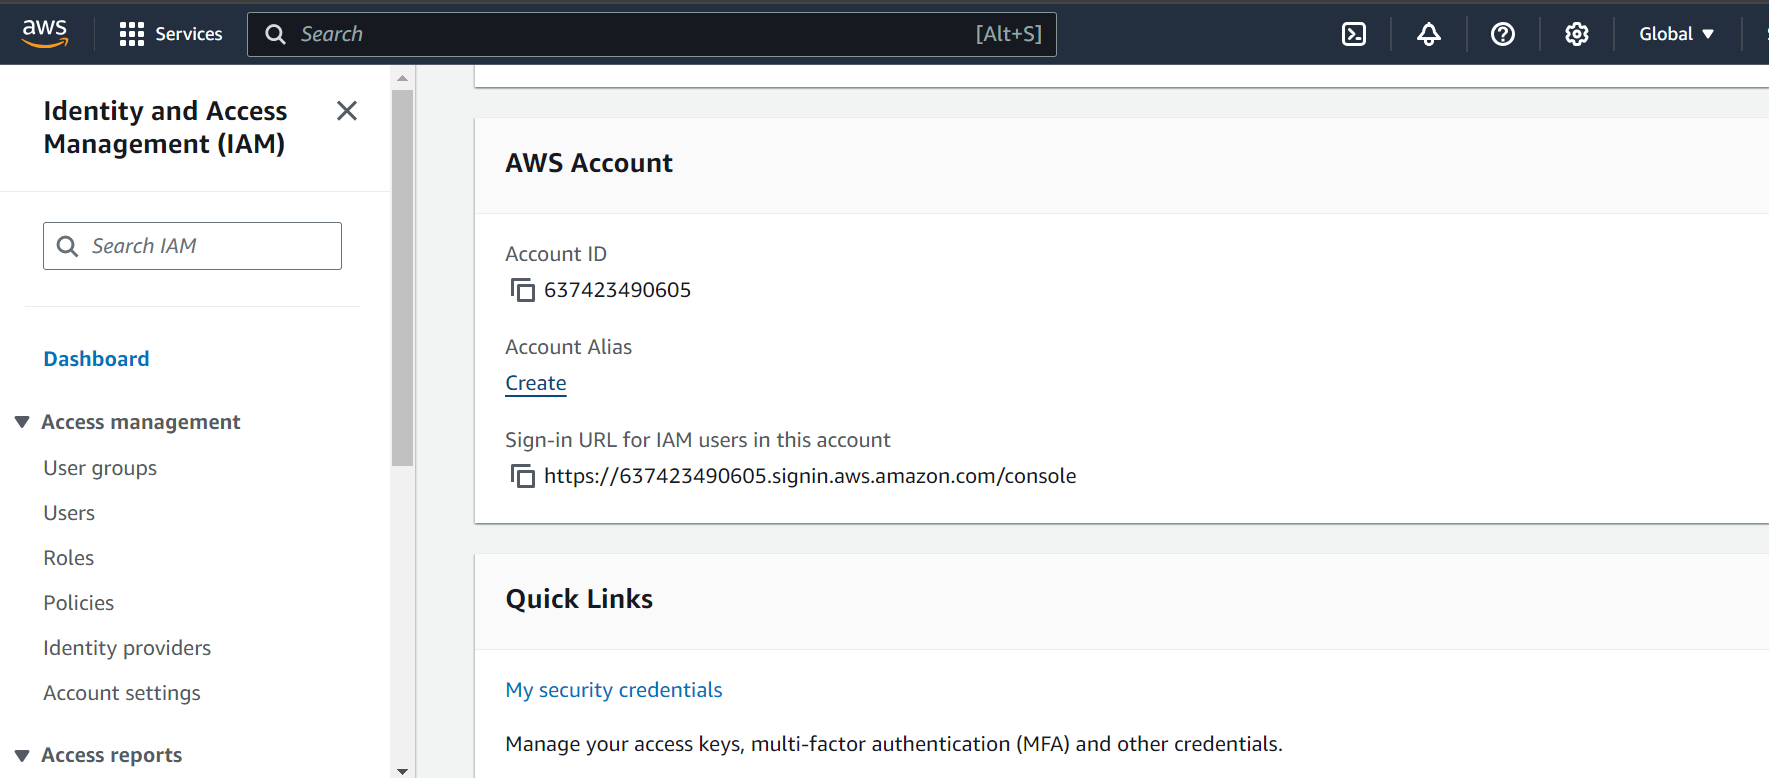
An account alias simplifies access to your AWS account by allowing you to use an easy-to-remember name instead of a long account ID.
Go to the IAM dashboard.
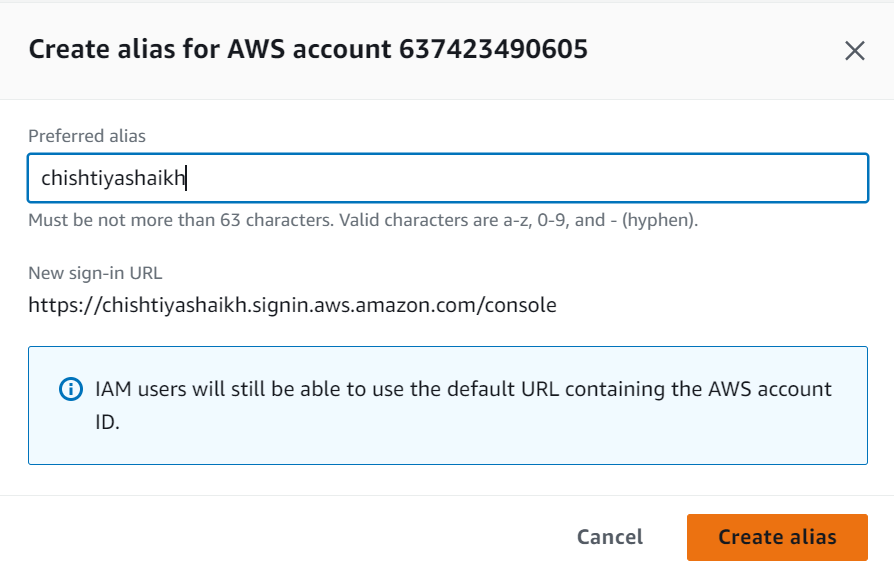
Click on Account Alias and enter your preferred alias
(e.g., chishtiyashaikh).
Your new sign-in URL will be:
https://chishtiyashaikh.signin.aws.amazon.com/console 🔗
👤 Step 5: Creating an IAM User
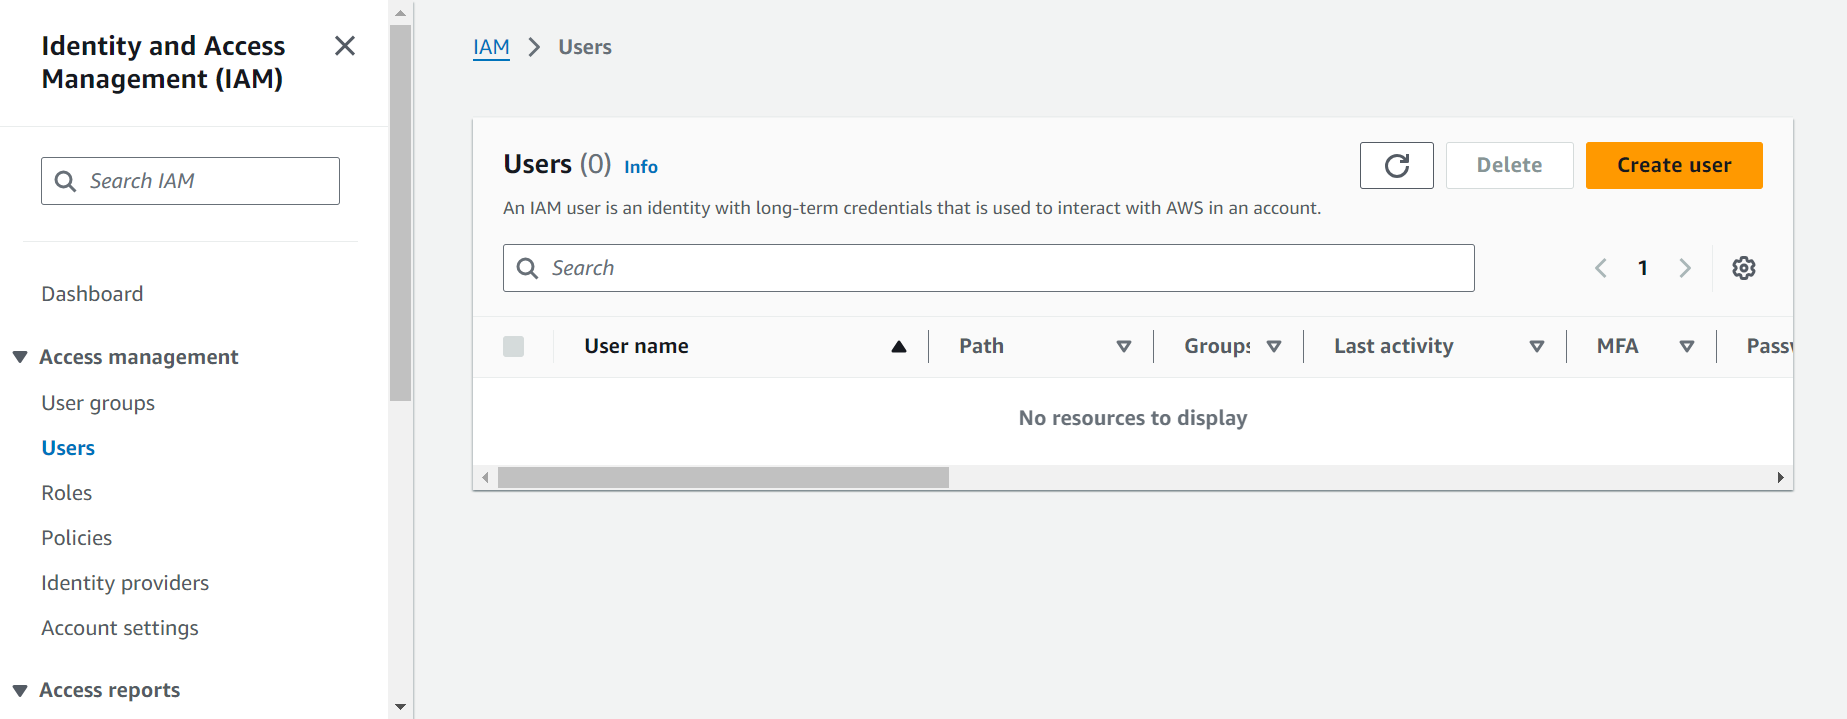
Let’s create a new IAM user!
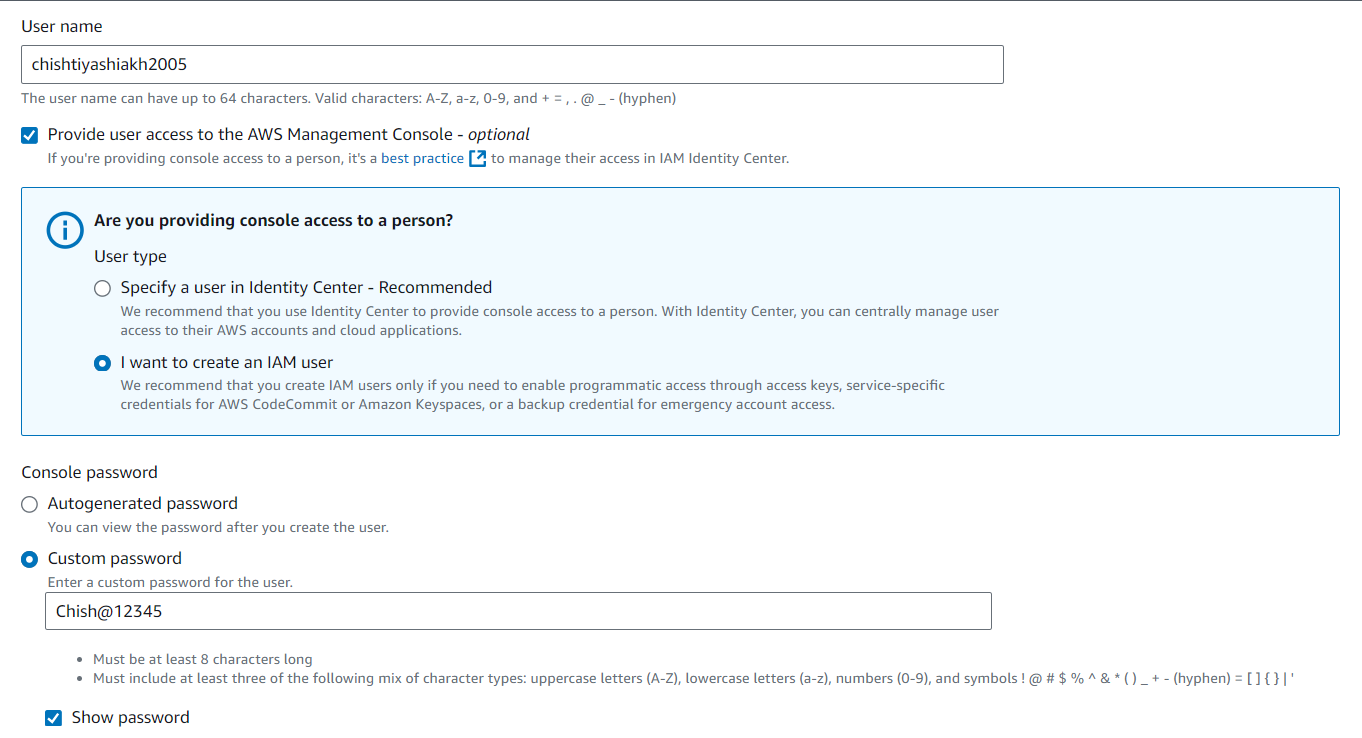
In the IAM dashboard, click on Create User.
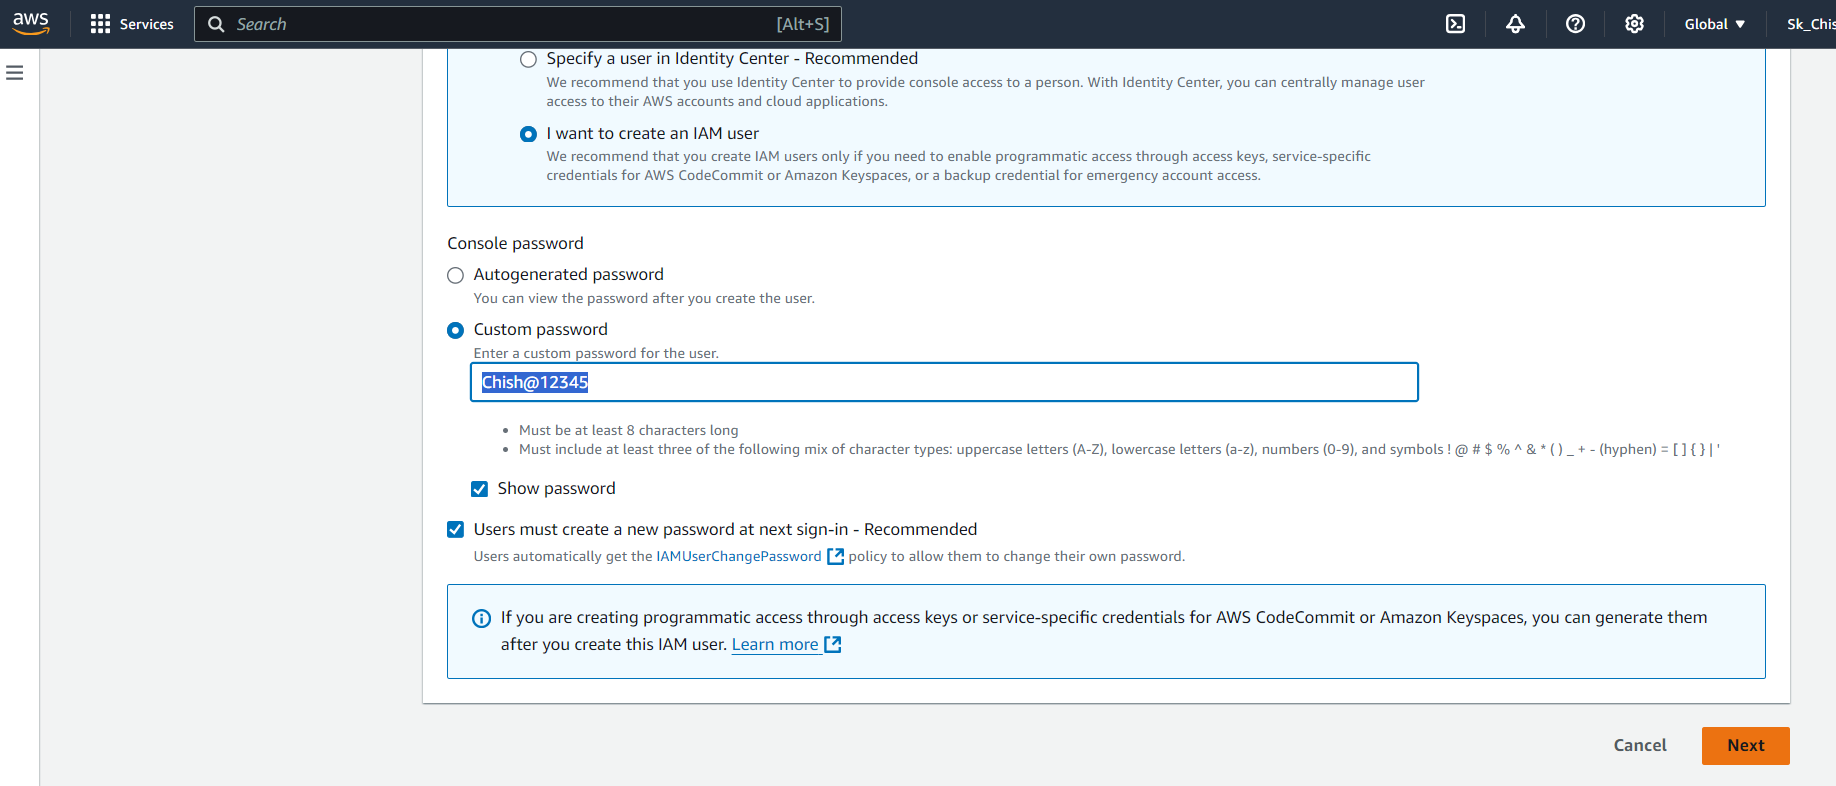
Choose to either auto-generate a password or set a custom password.
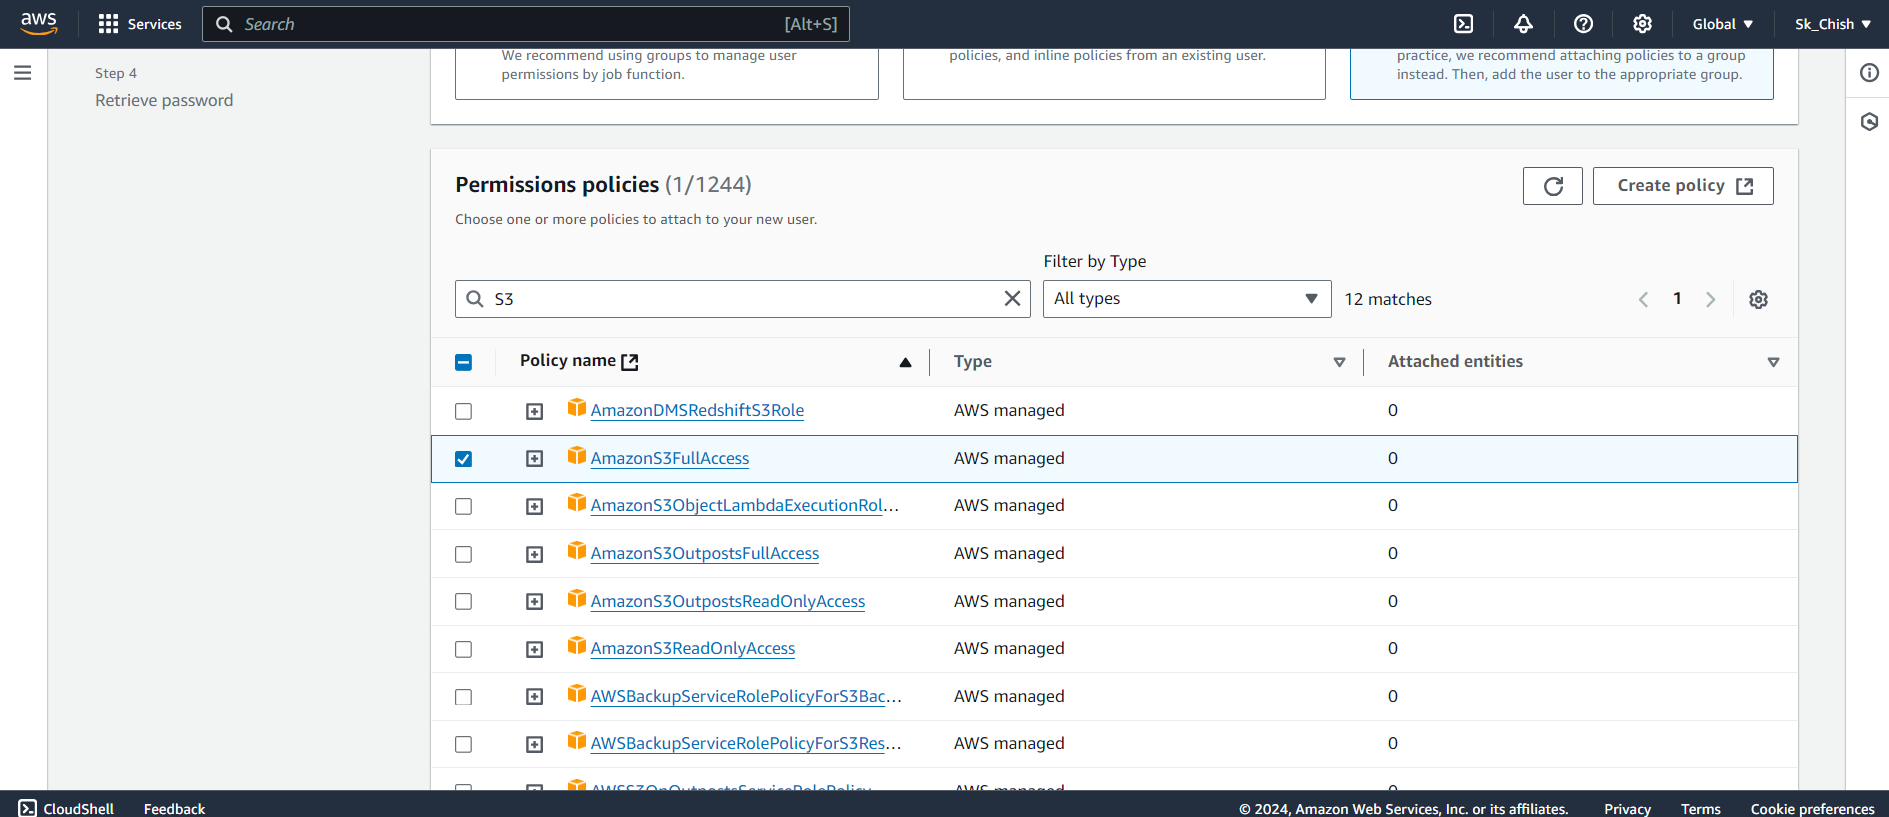
For this example, we'll grant the user S3 Full Access.
Step 6: Assigning Permissions
When creating a user, you need to assign the right permissions. Follow these steps:
Choose Attach policies directly.
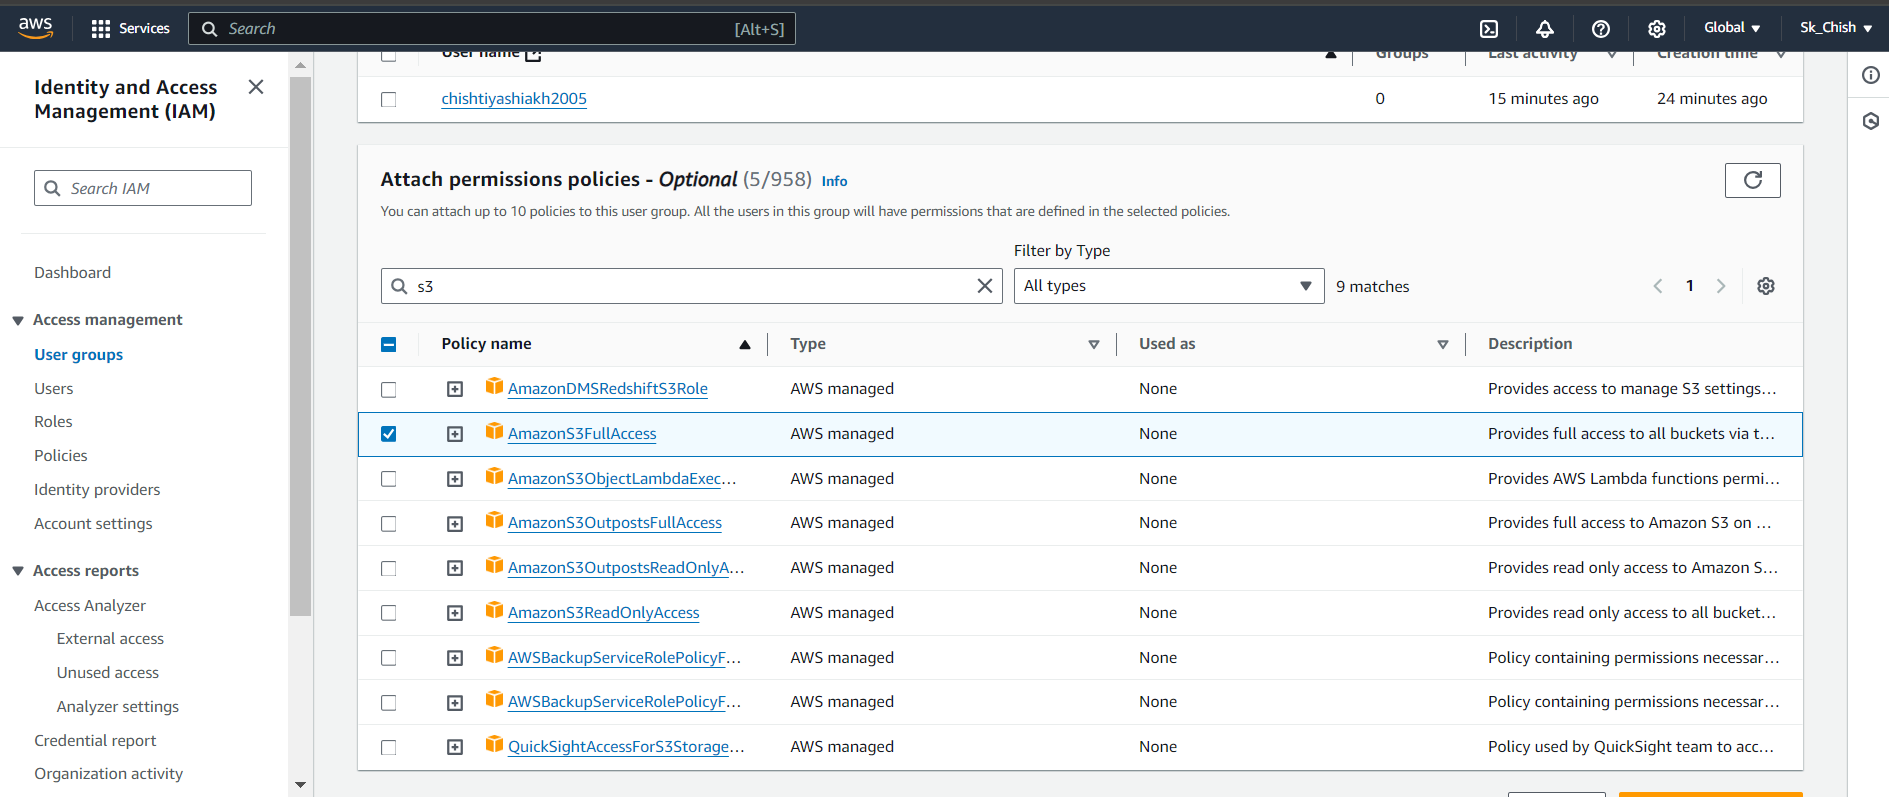
Select Amazon S3 Full Access to allow the user to manage S3 buckets and files.
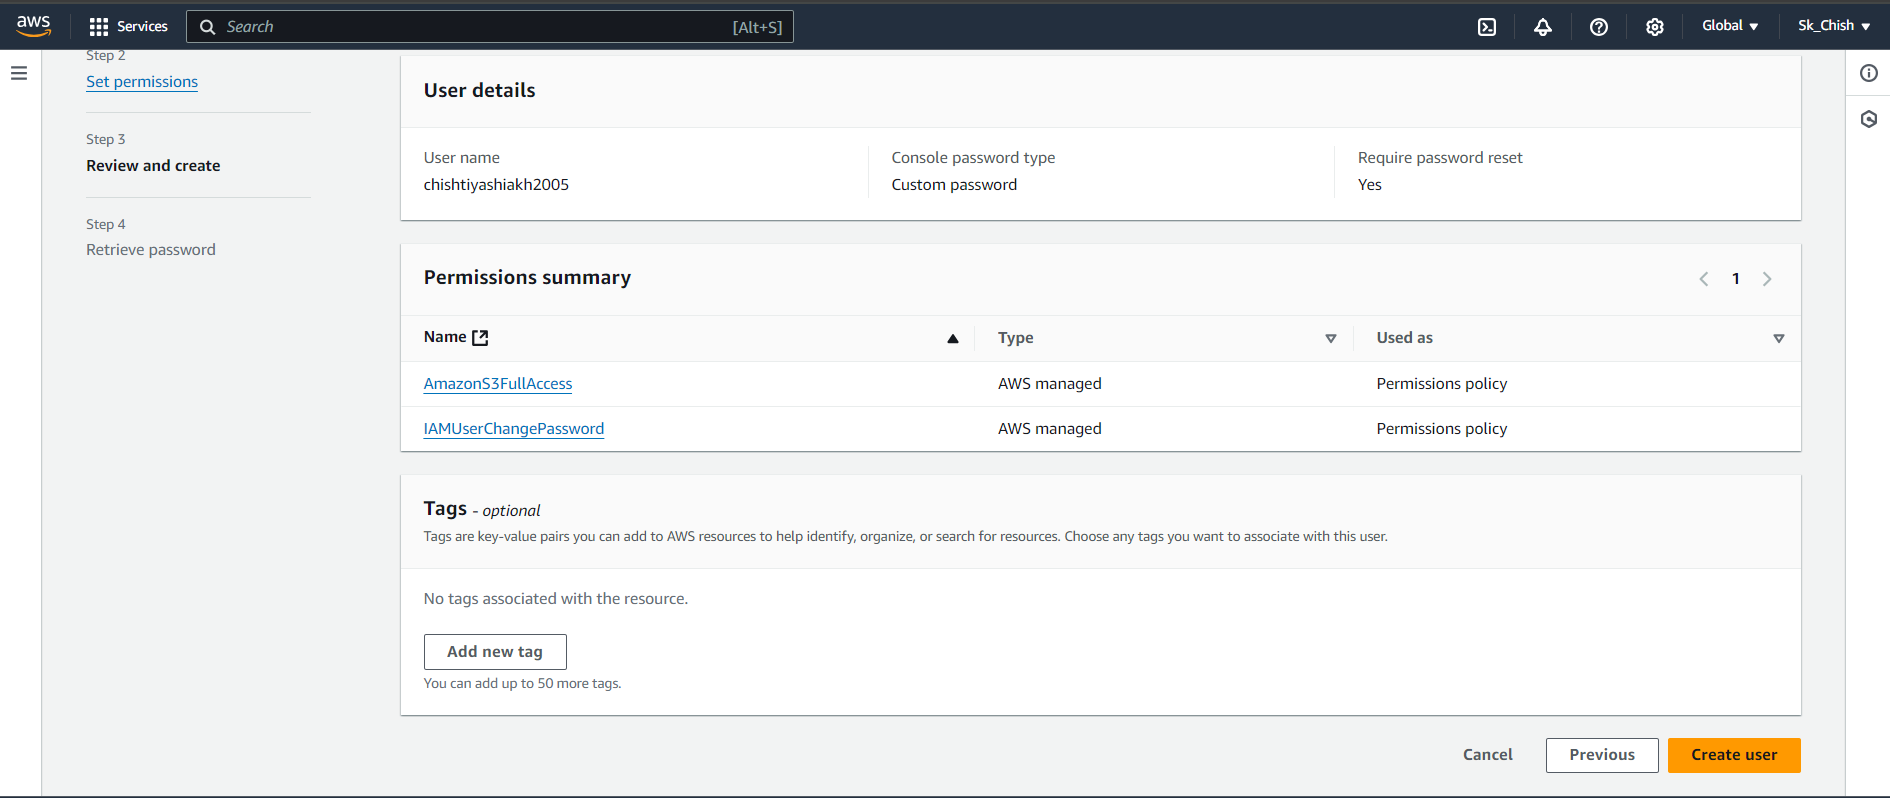
Review the configuration and click Create User.
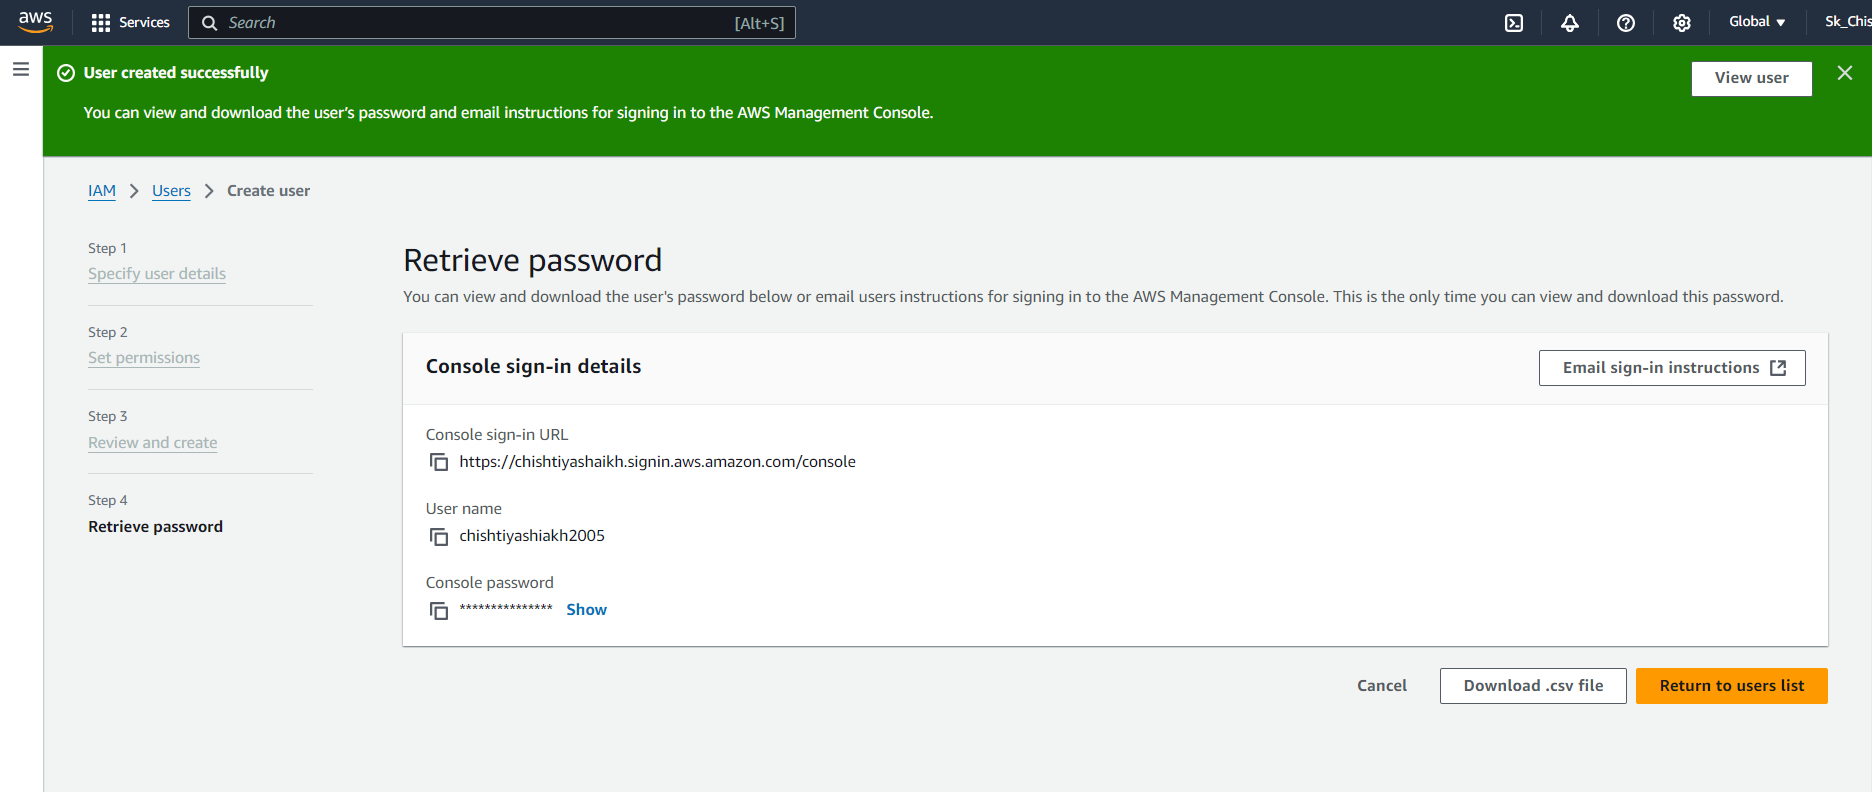
Step 7: IAM User Sign-In
Once the user is created, you will receive the user’s sign-in URL, username, and password. Open a new browser window and enter the sign-in URL, prompting the IAM user to log in.

Step 8: Changing the Password
On their first login, the IAM user will be asked to change their password for security purposes. Enter the temporary password, set a new one, and click Confirm Password Change.
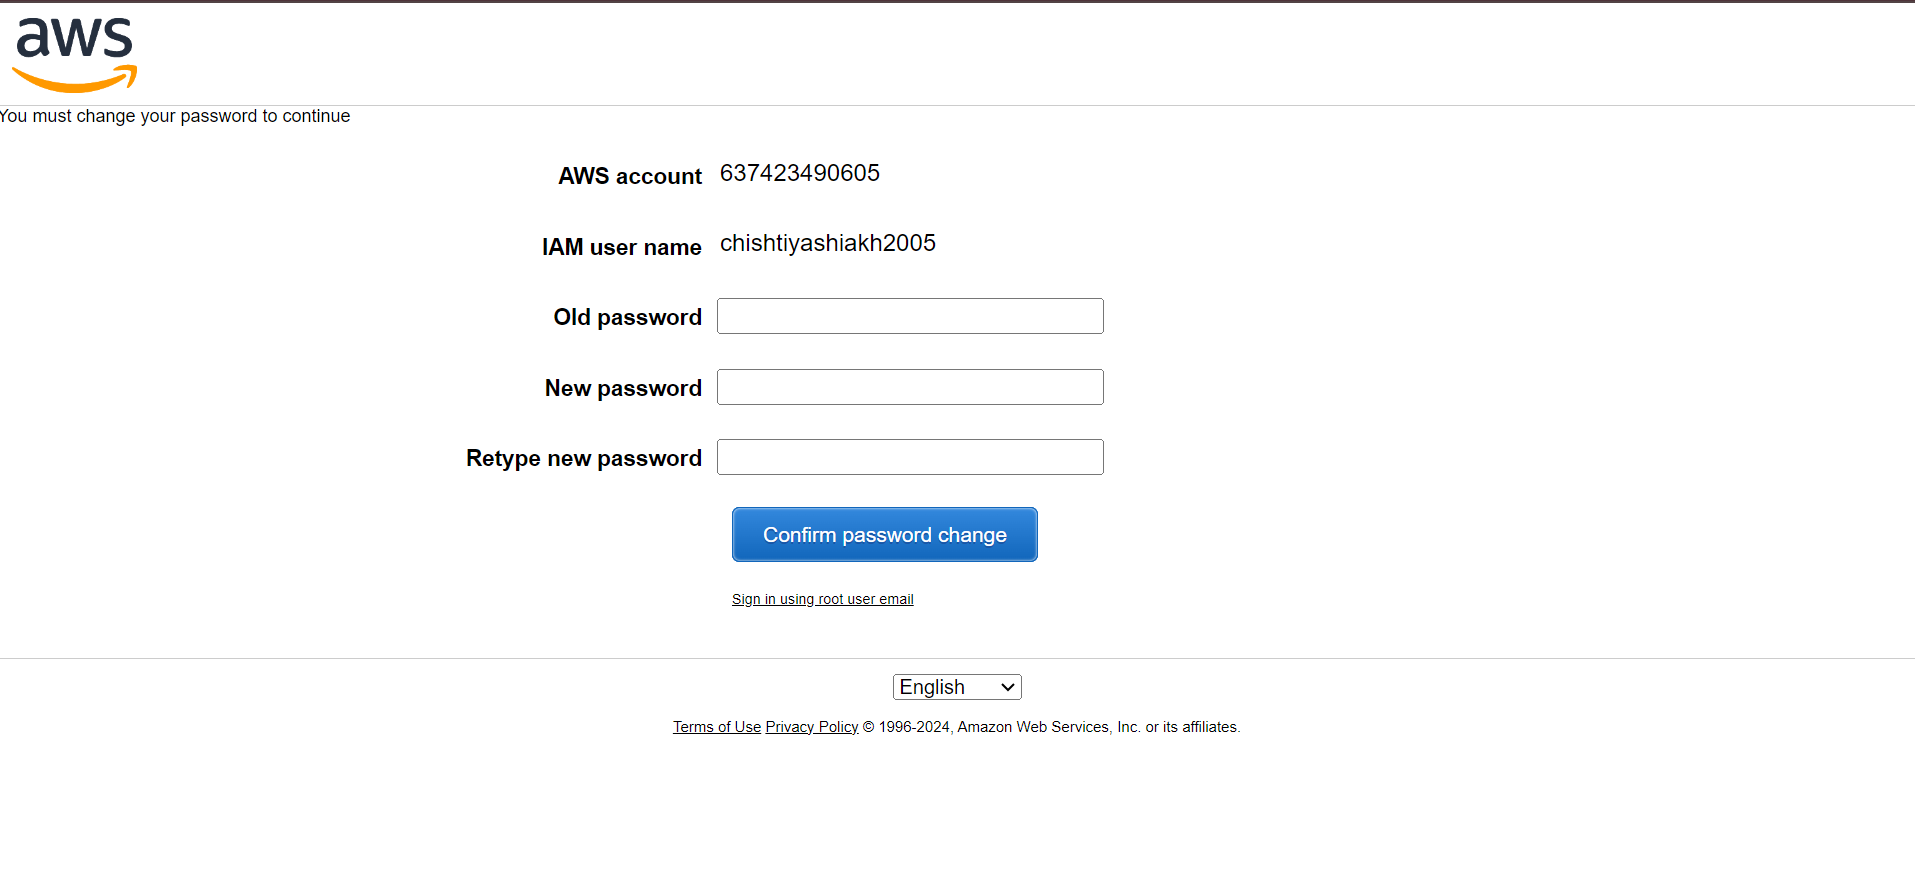
Step 9: Verifying Access
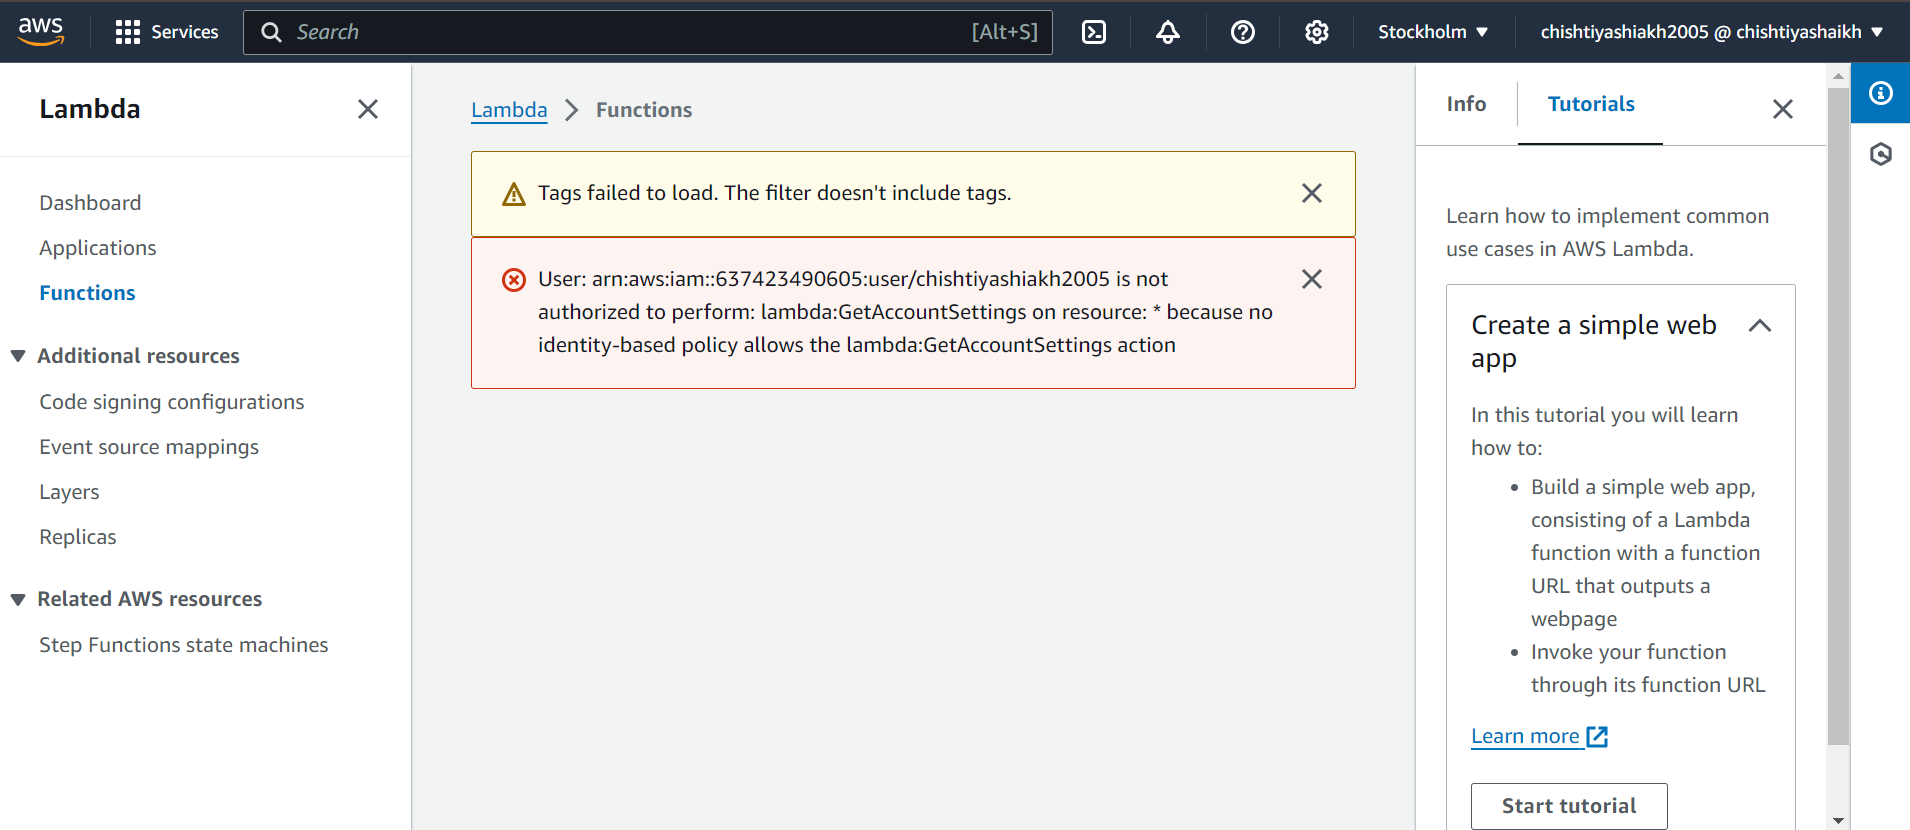
After logging in, the IAM user will now have access to only the services and resources granted to them (in this case, S3 Full Access). You can always modify permissions later if needed.
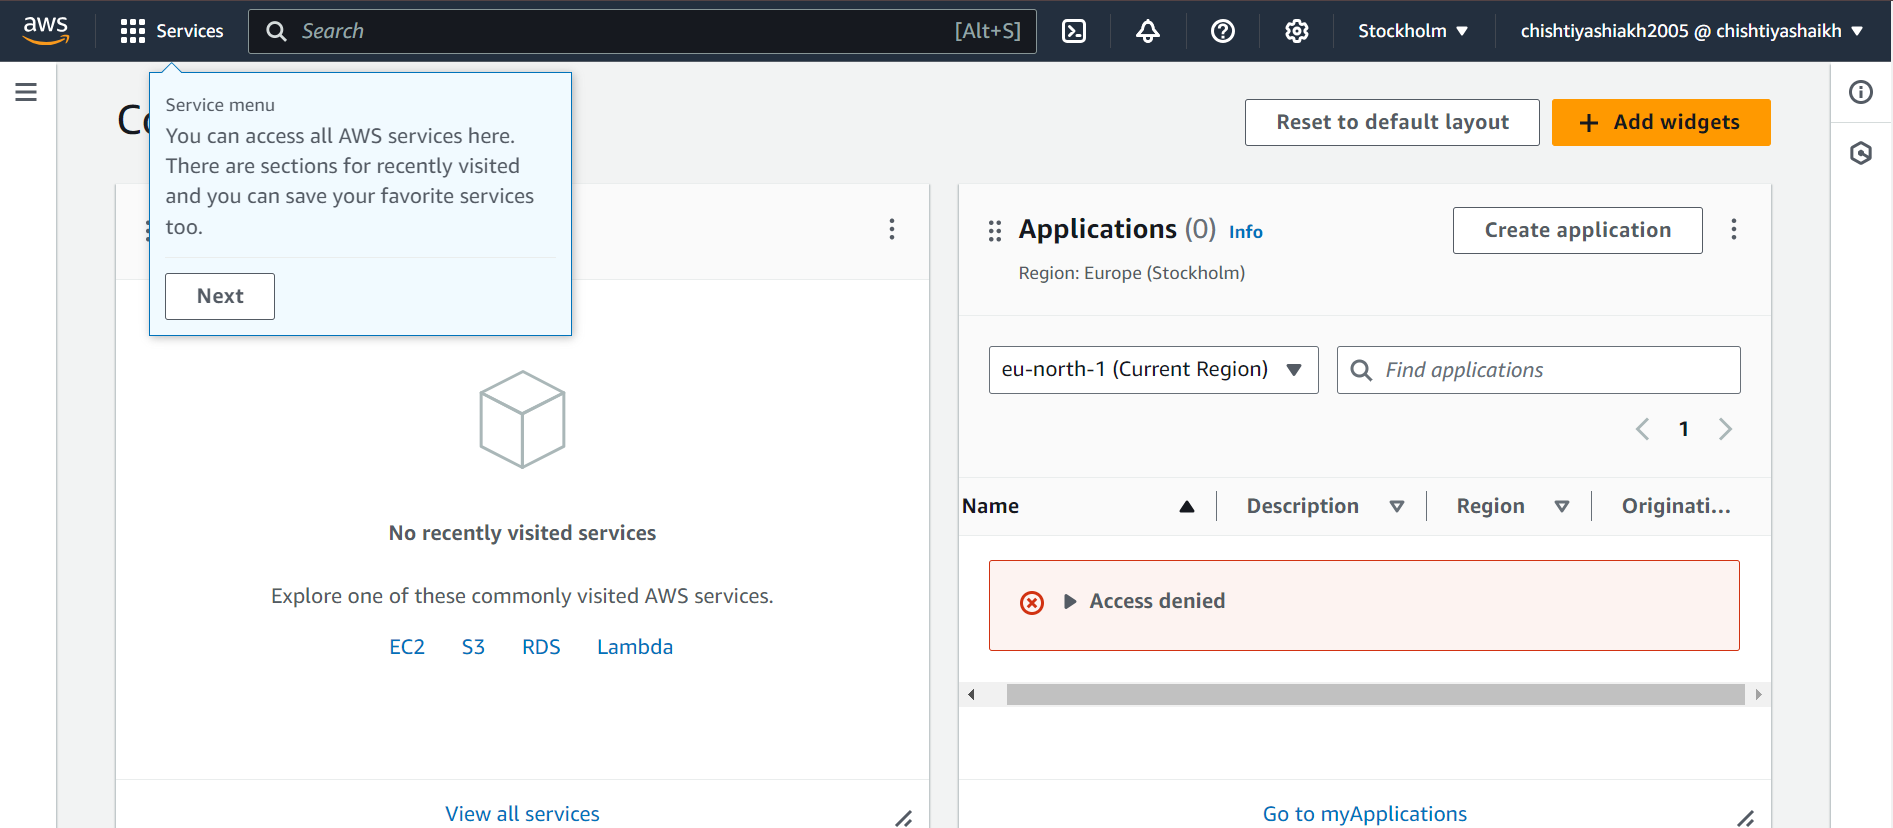
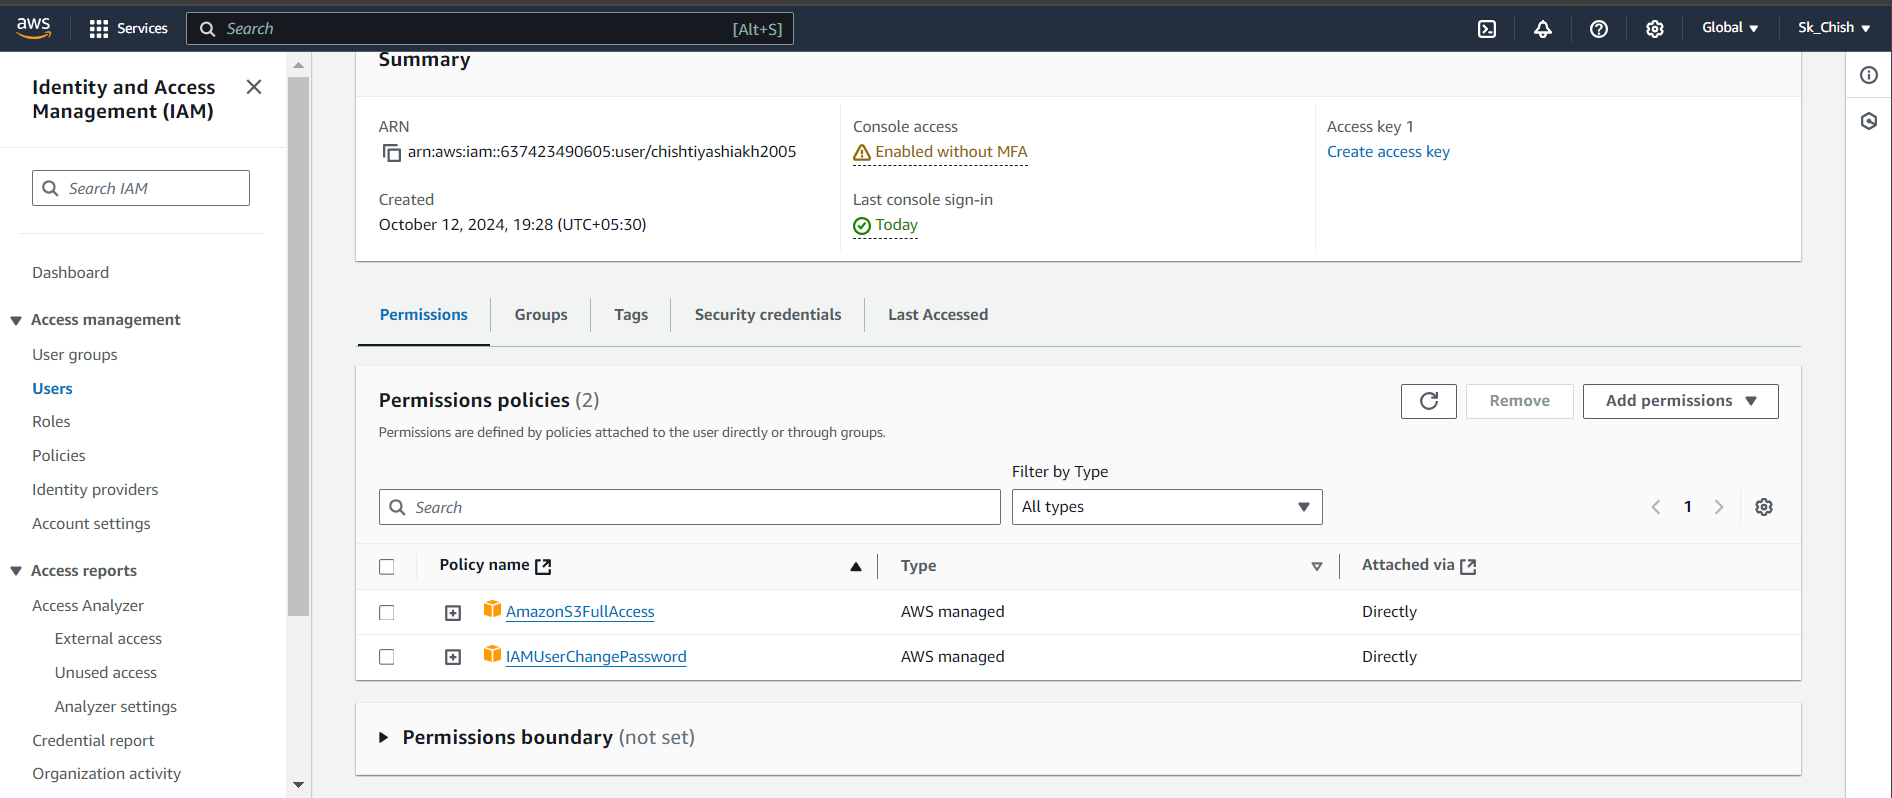
Step 10: Adding More Permissions
You can continue managing the user by adding more permissions, depending on what tasks the user needs to perform. For example, if the user requires access to AWS Lambda, you can add the AWSLambda_FullAccess policy in the IAM console. Simply click Add Permissions and select the policies you need to assign.
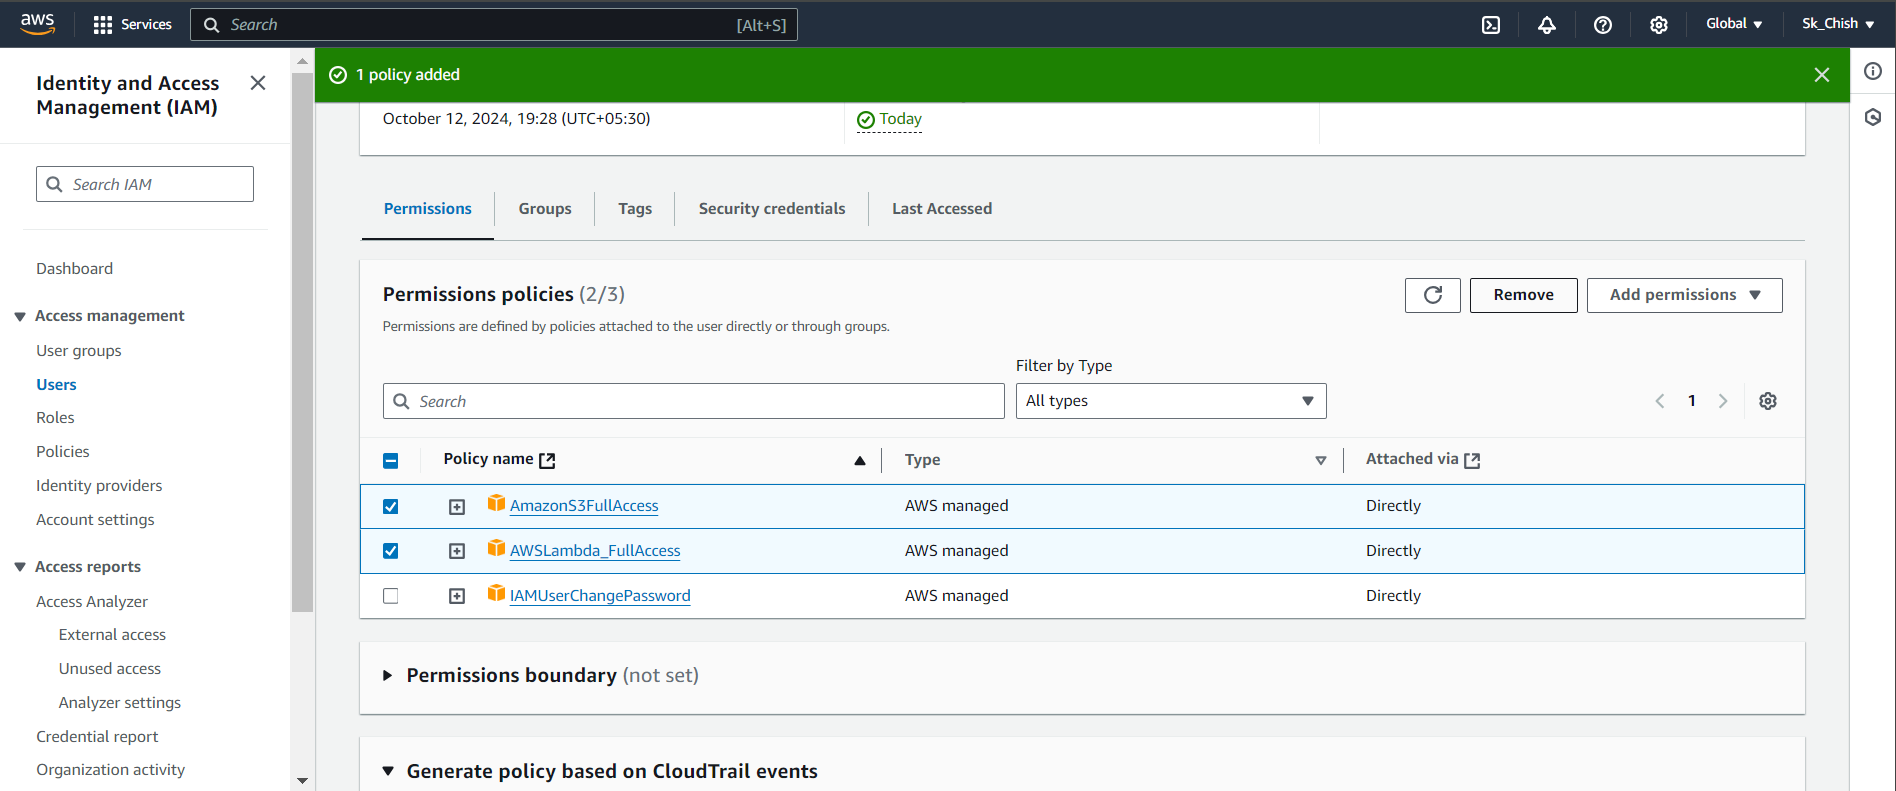
However, directly attaching policies to individual users can be limiting because there is a restriction on the number of policies you can attach. This is where user groups come in.
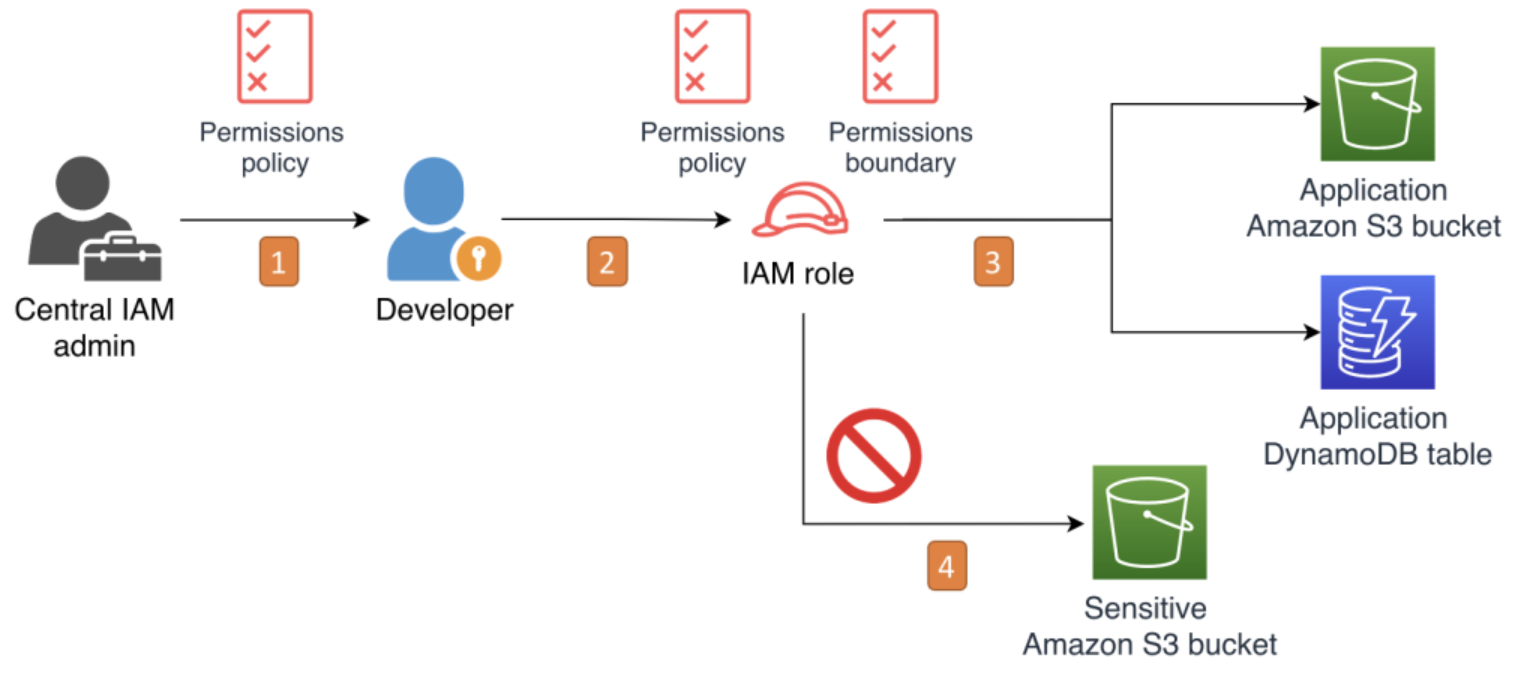
The maximum length of a permission boundary in AWS Identity and Access Management (IAM) is 6,144 characters. The minimum length is 20 characters
Managed policies
You can attach up to 10 managed policies to an IAM role. The default limit is 10, but you can request an increase to 20.
🏷️ Step 11: Creating User Groups
Simplify permission management by creating user groups:
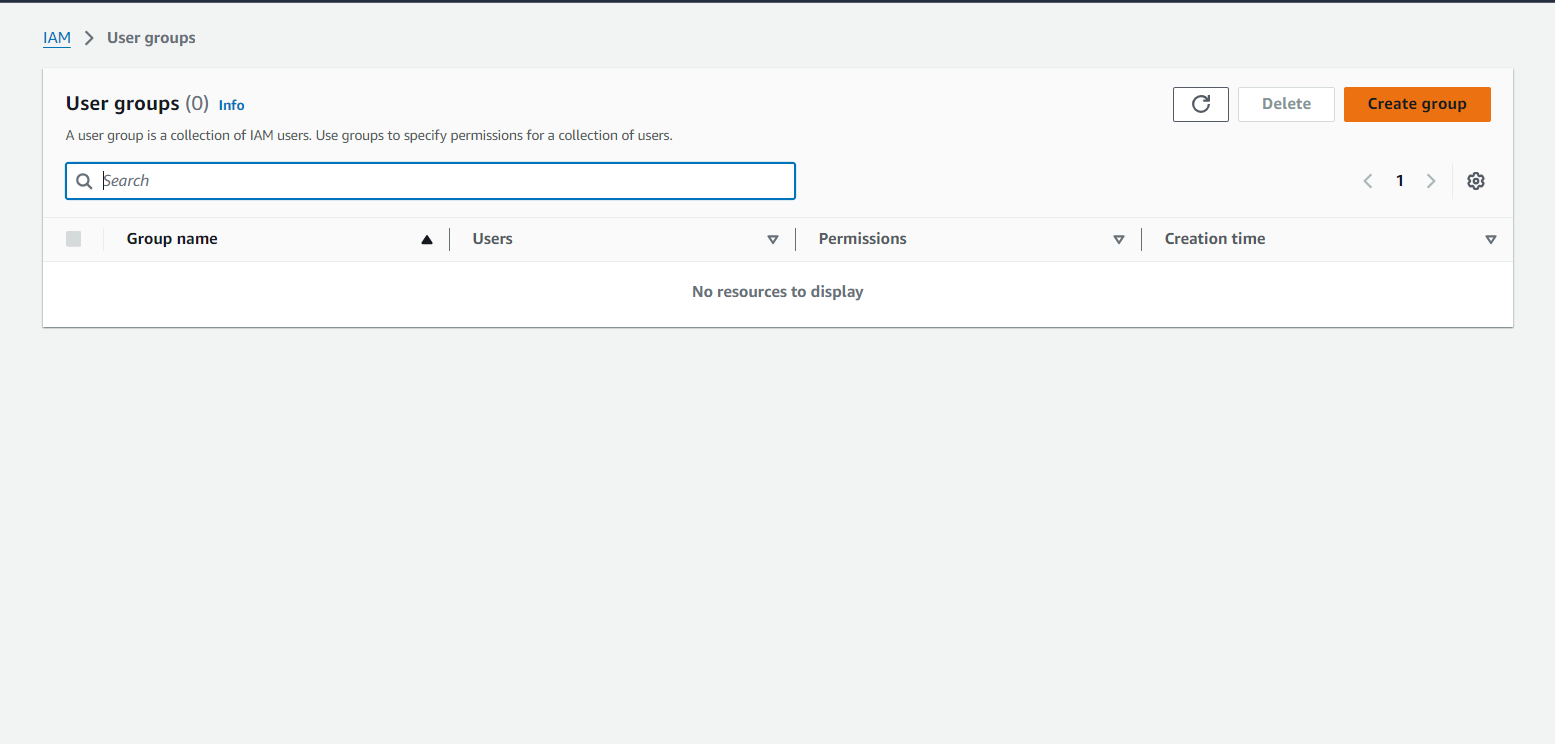
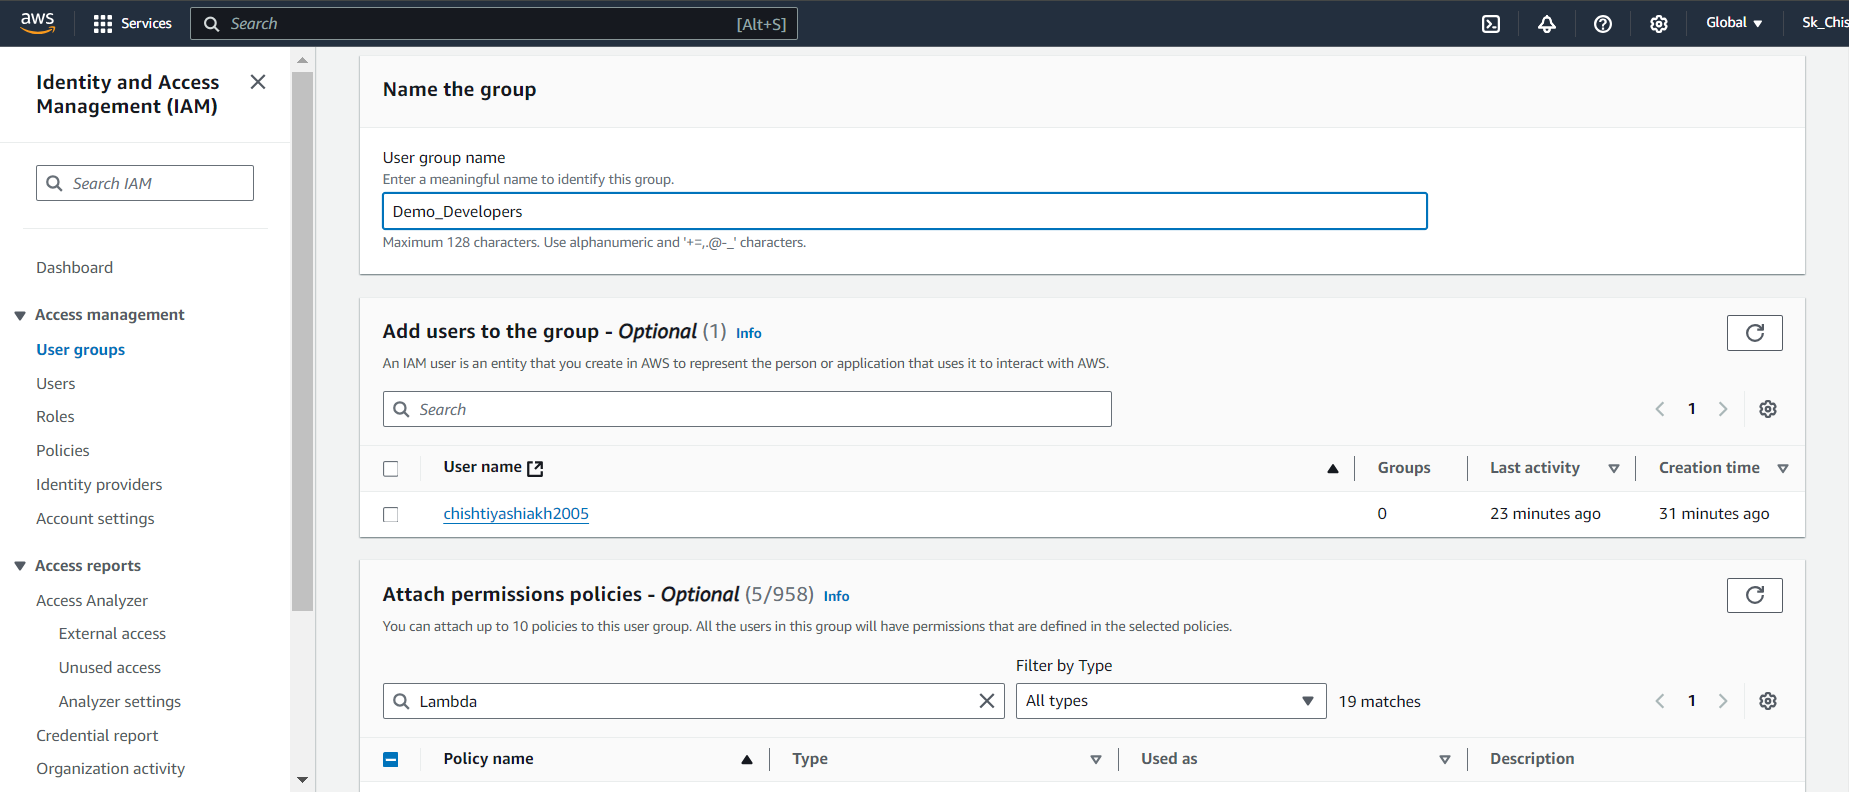
In the IAM Dashboard, go to User Groups and click Create Group.
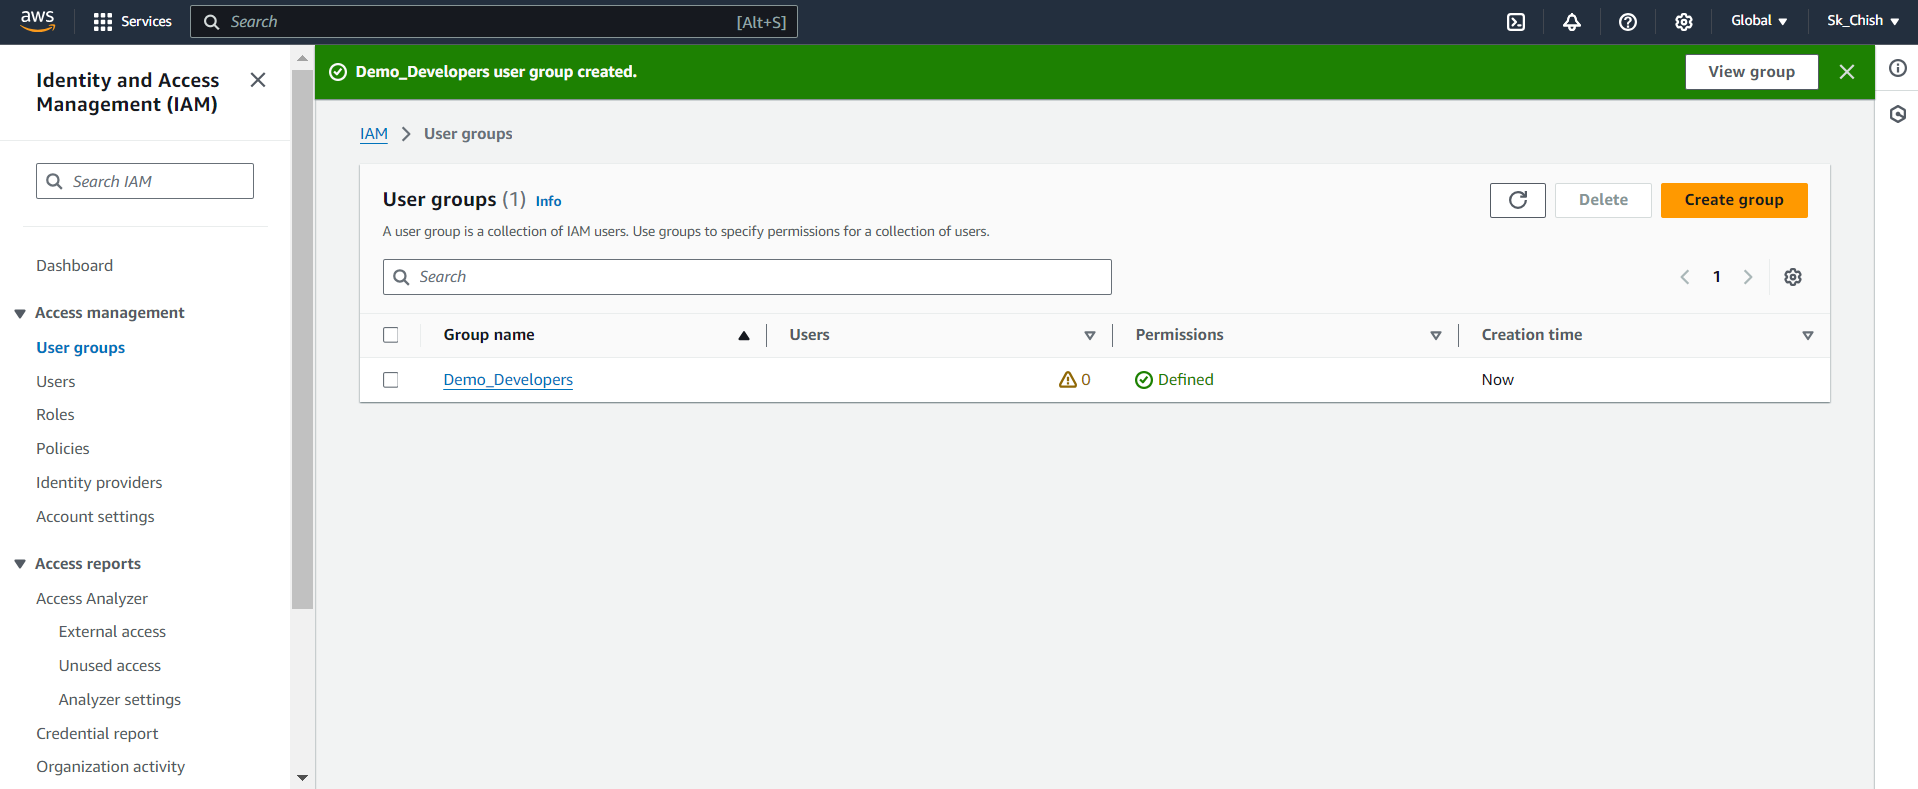
Give the group a clear name, like Demo_Developers, based on the users' roles.
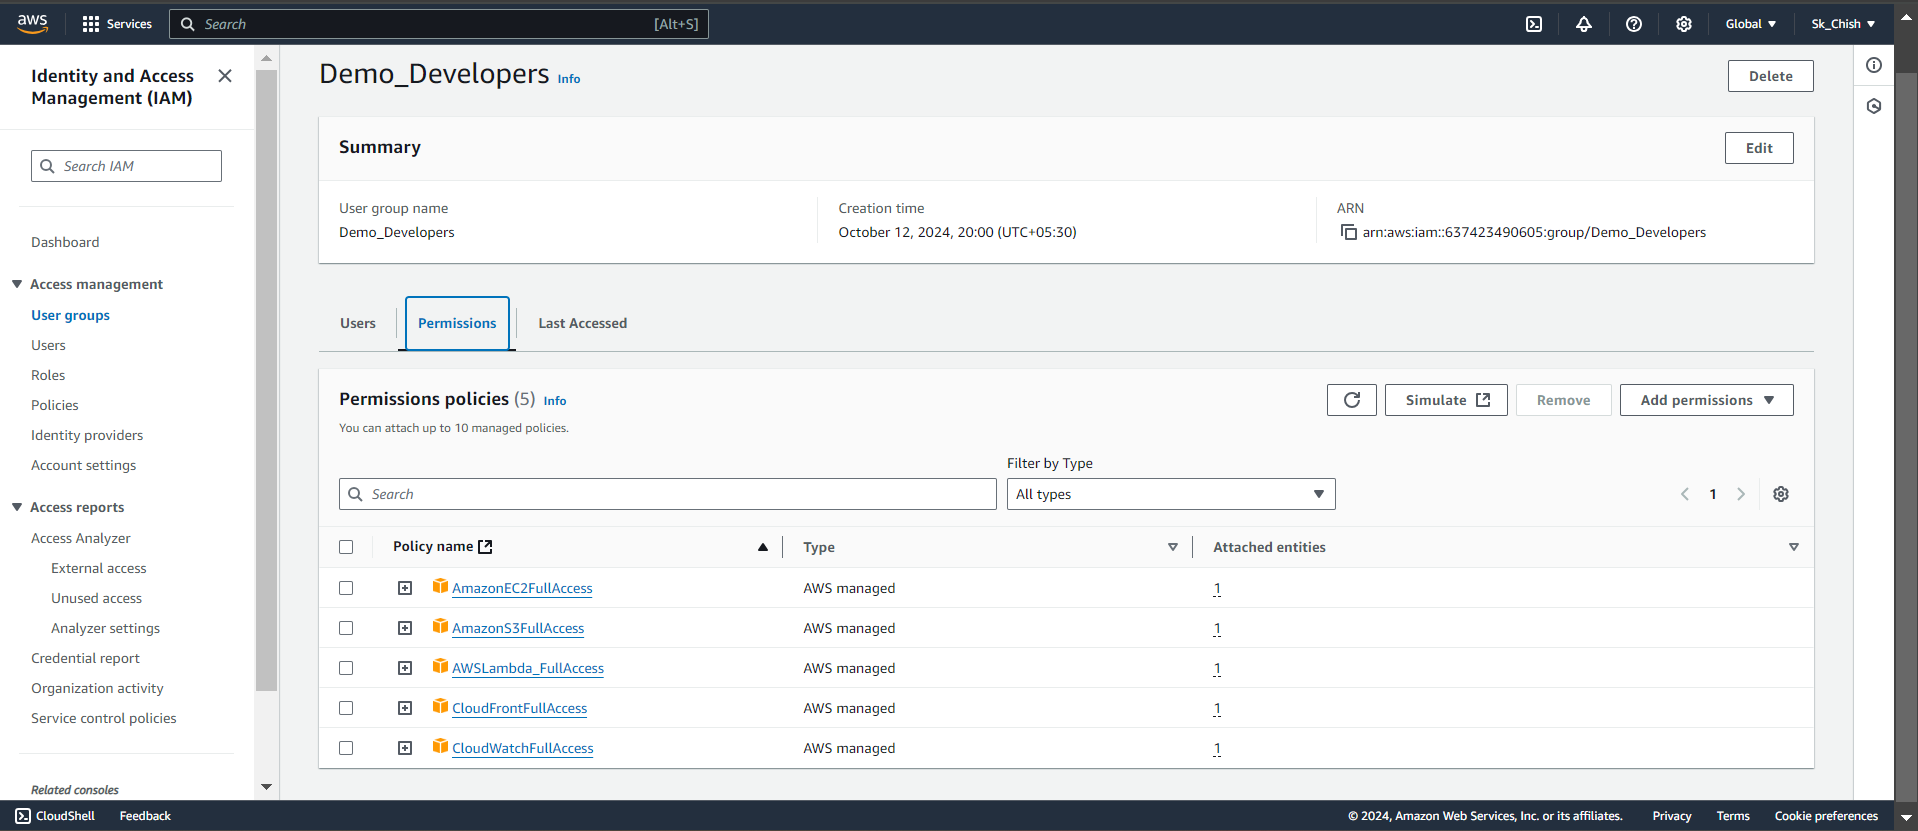
Attach the required permission policies (e.g., AmazonS3FullAccess, AWSLambda_FullAccess).
Once created, you’ll see the list of attached policies for that group.
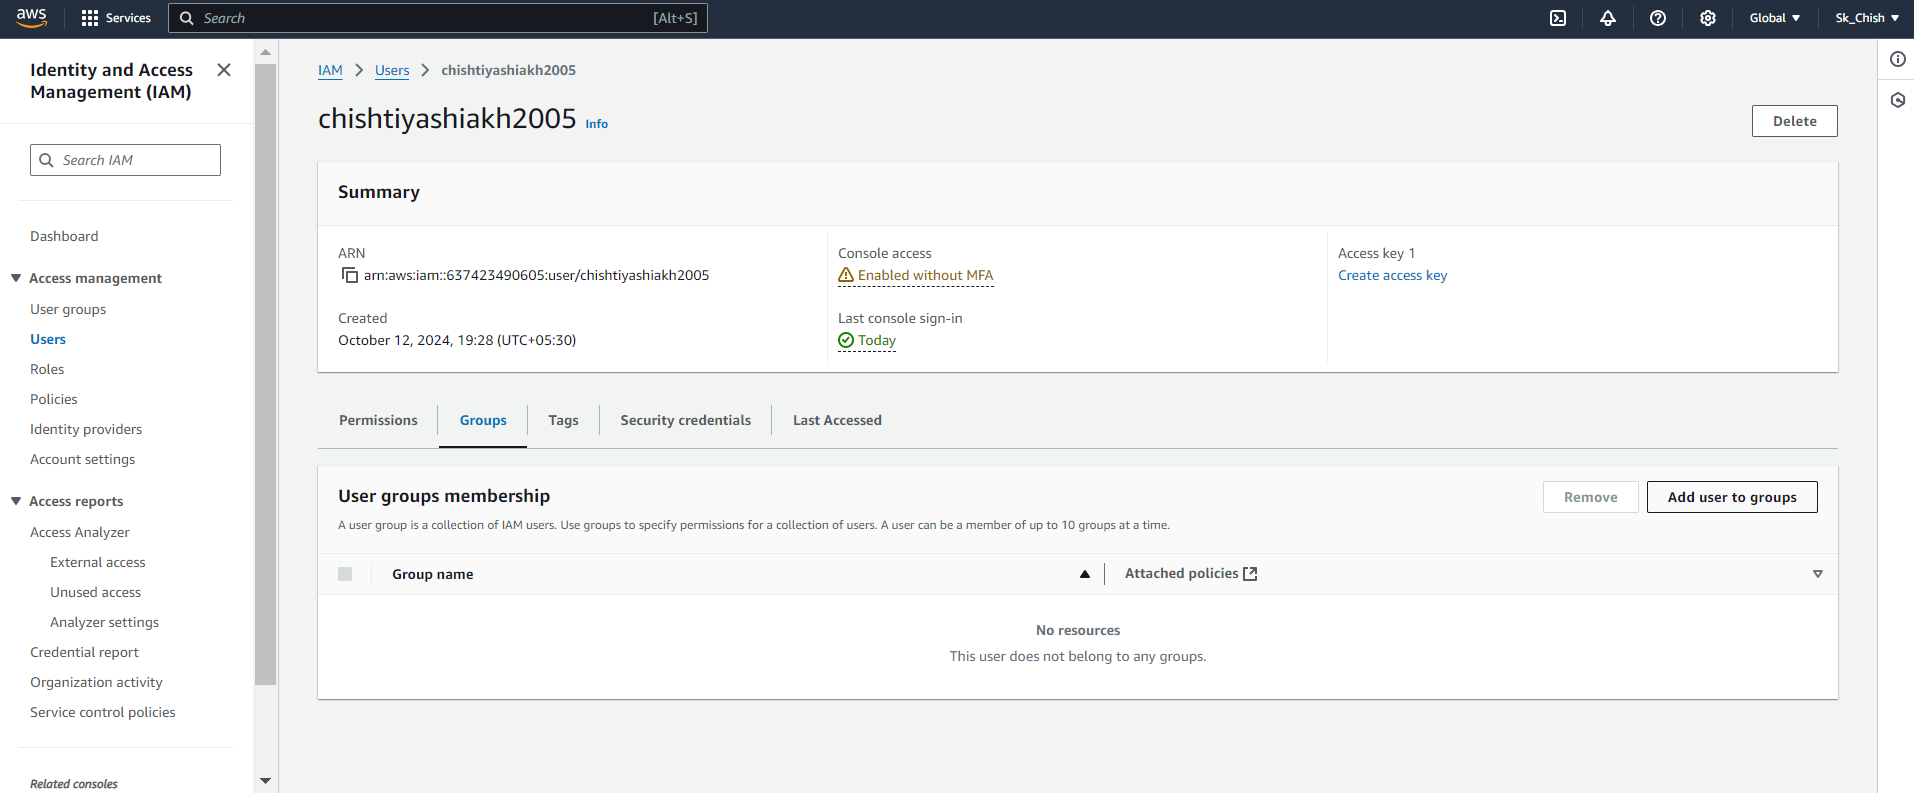
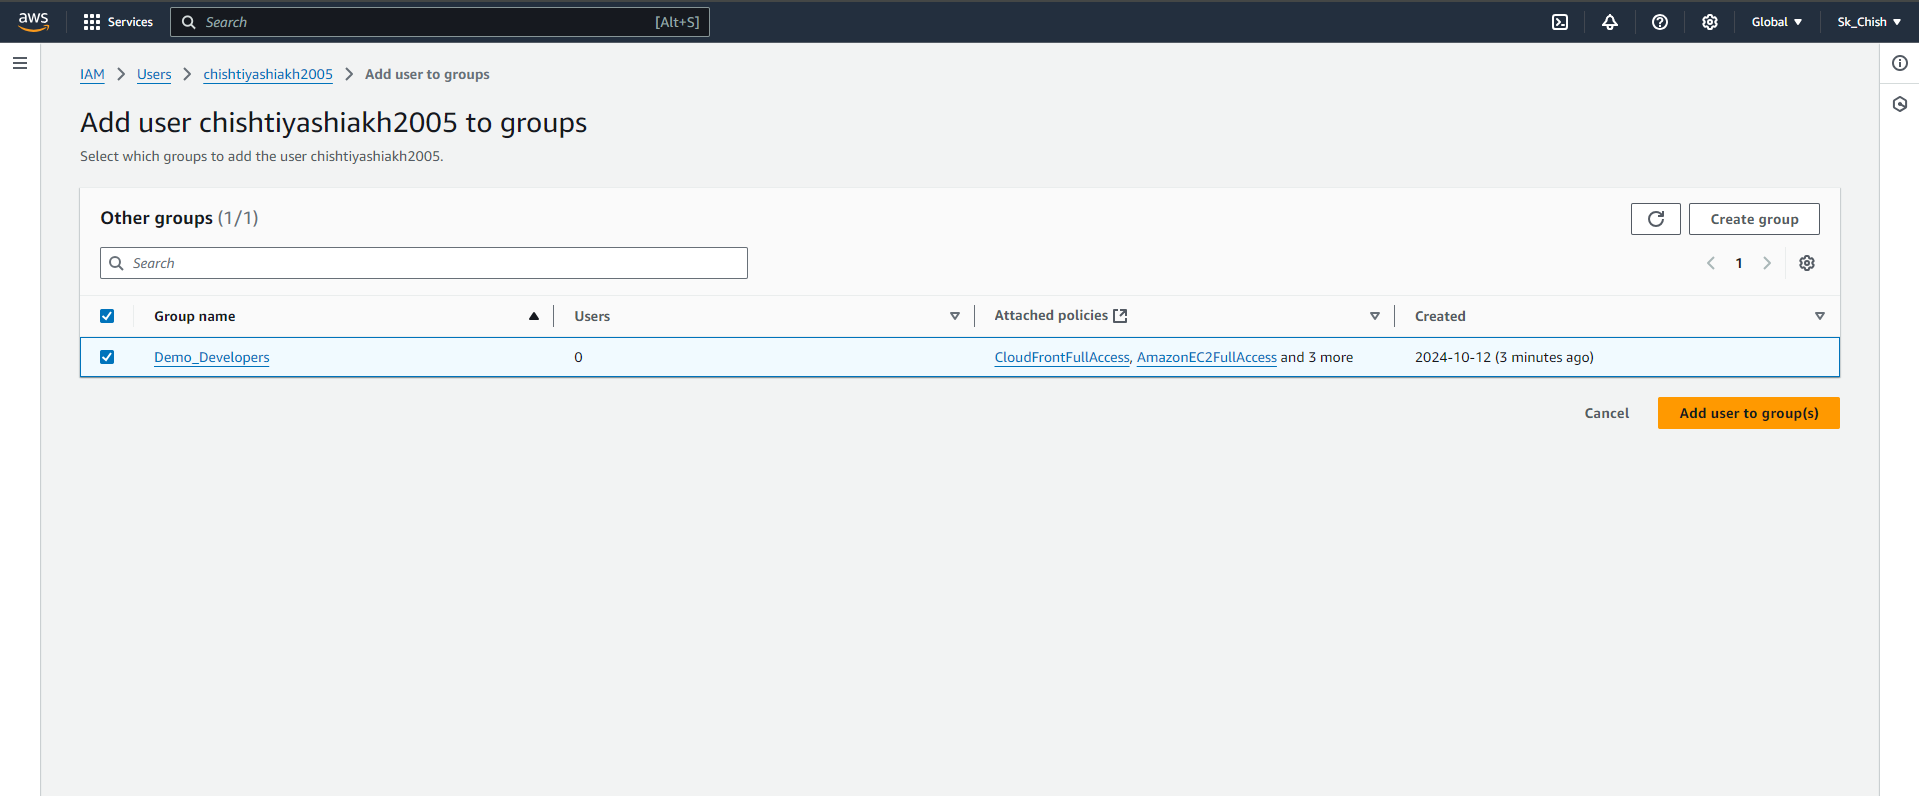
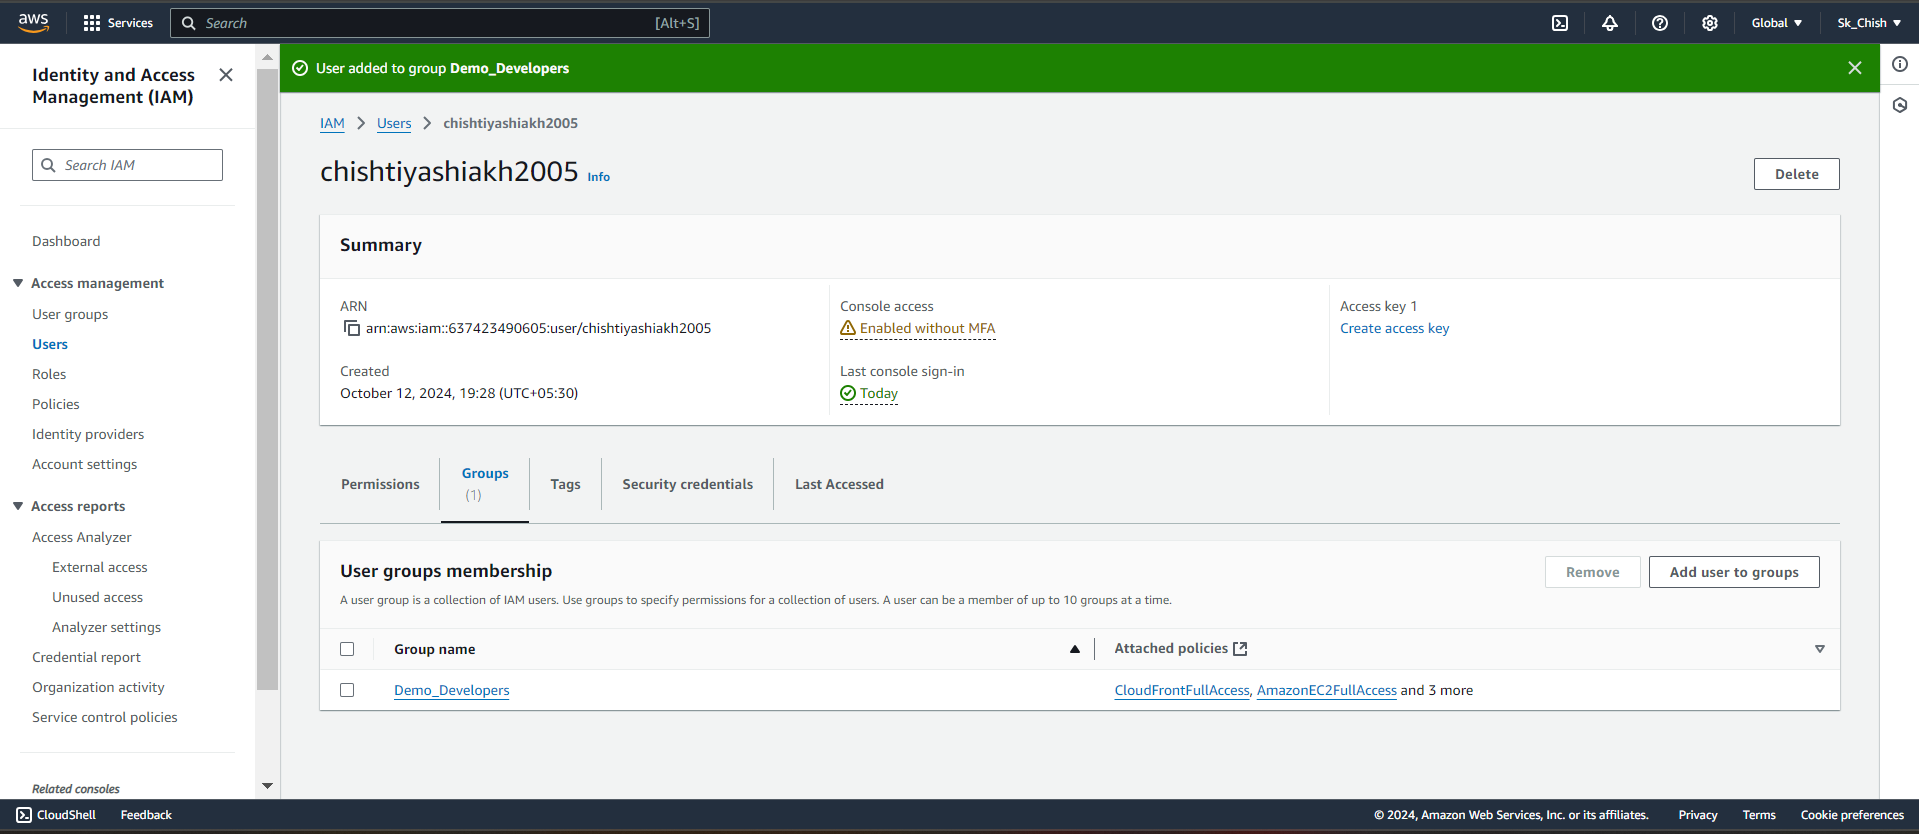
👥 Step 12: Adding Users to a Group
Now that your group is ready, let’s add users to it:
In the IAM dashboard, go to User Groups and select the group.
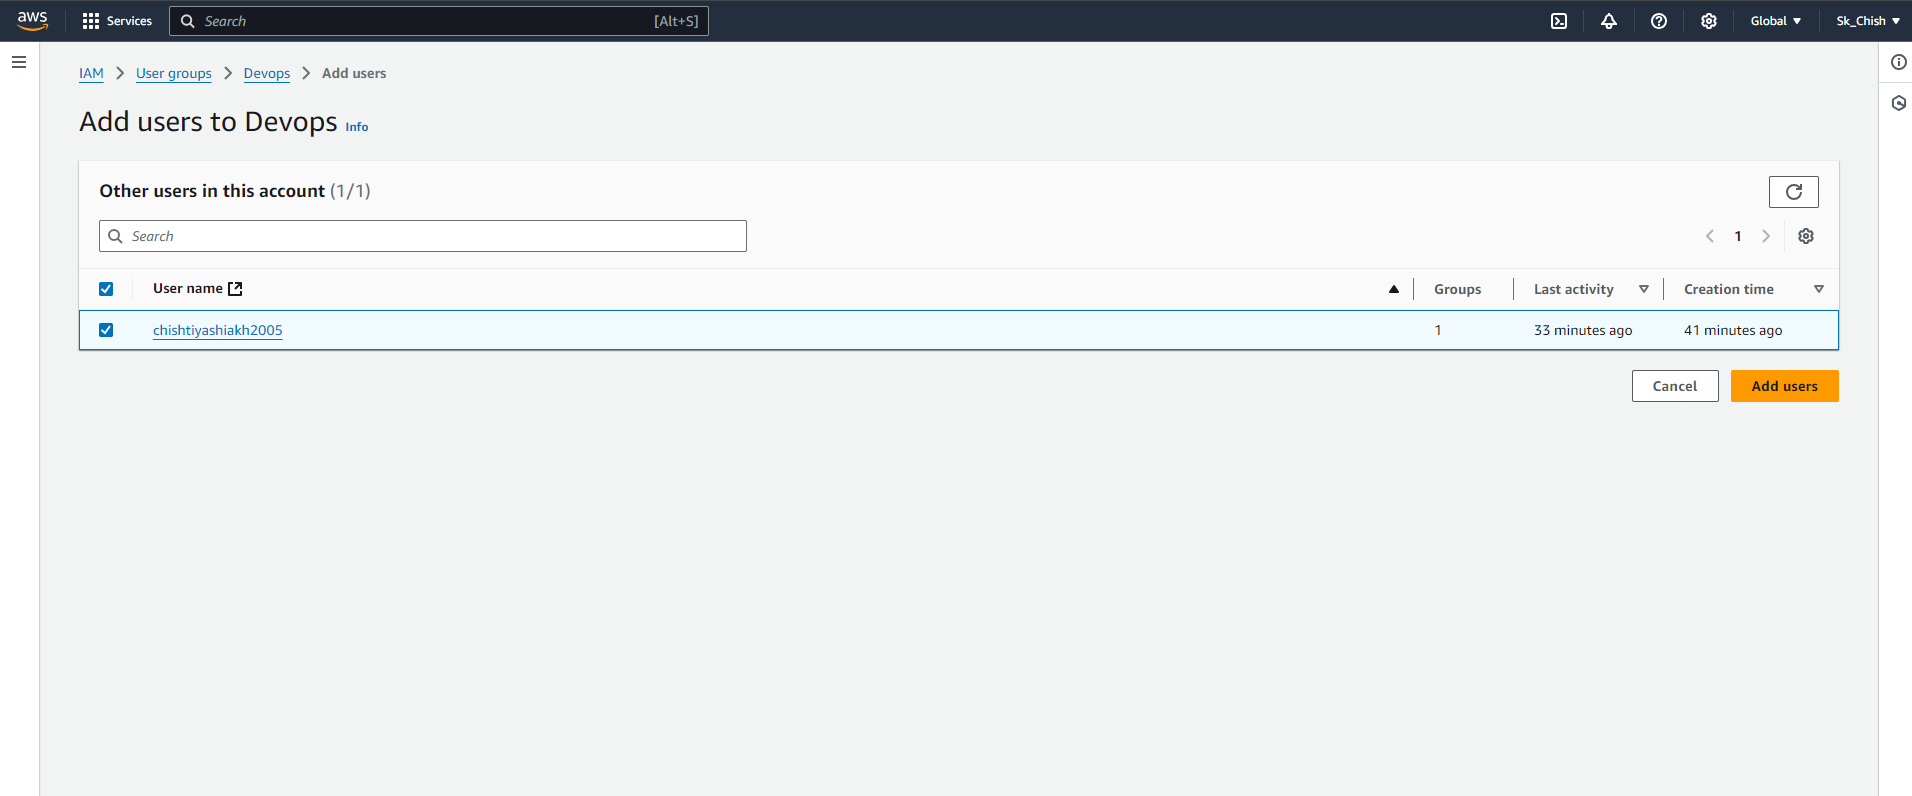
Click Add User and choose the users to add.
Once added, these users will inherit all the permissions assigned to the group automatically. 🚀
🔄 Step 13: Managing Multiple Groups and Users
With IAM, you can assign users to multiple groups for flexible access control:
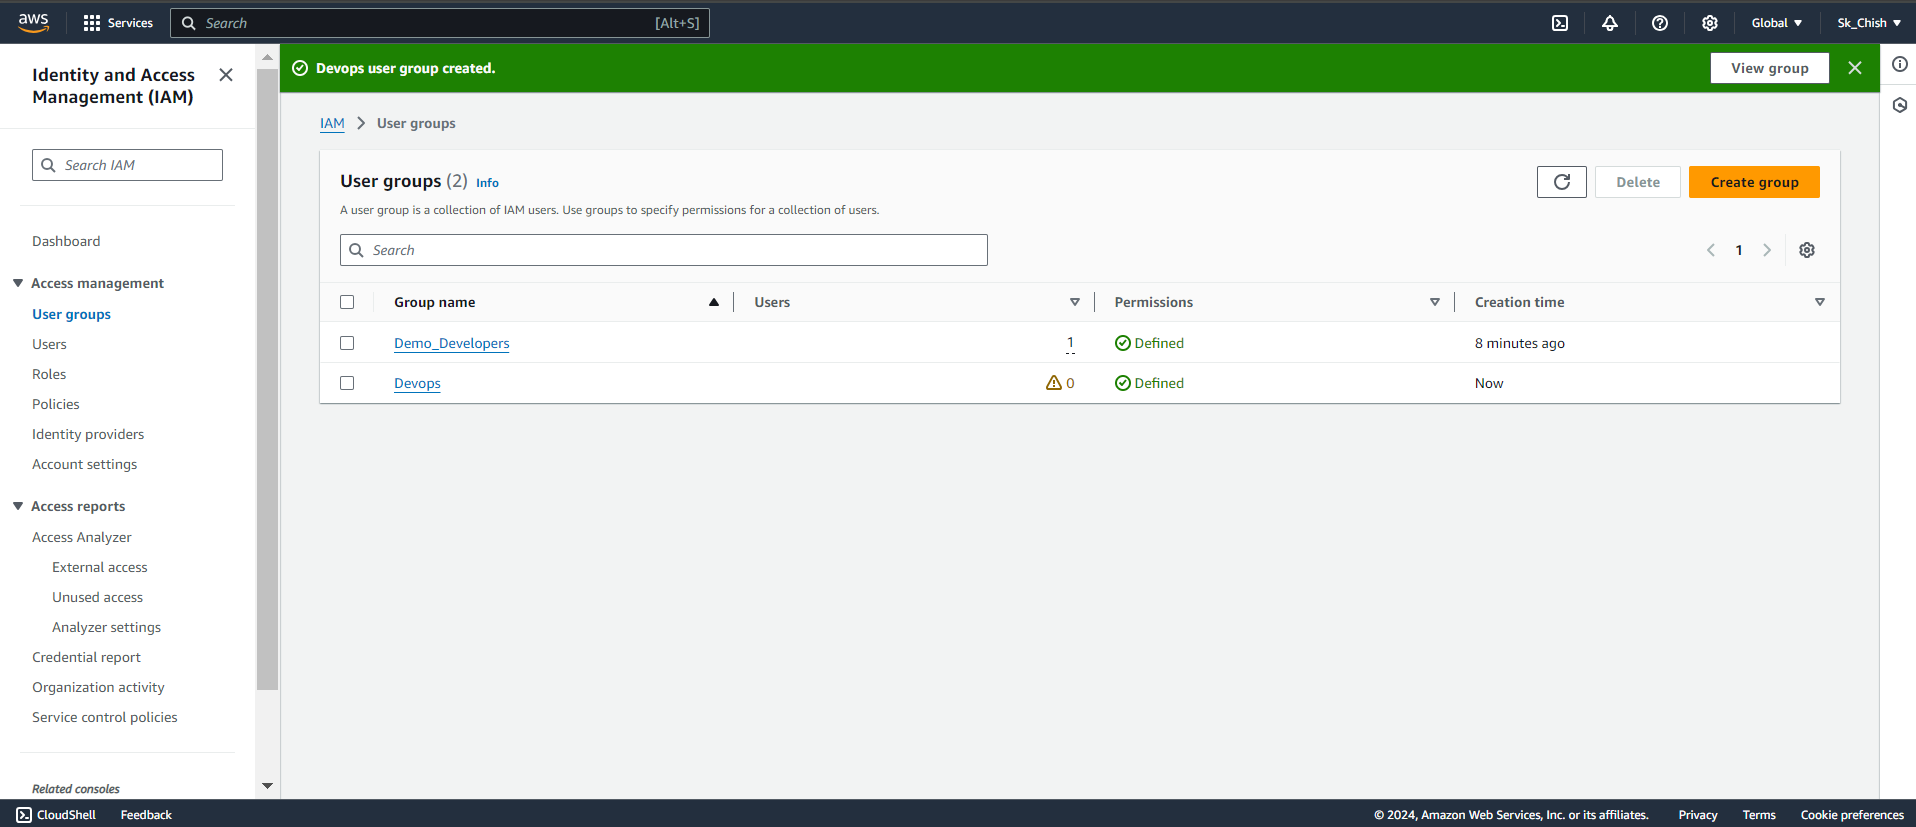
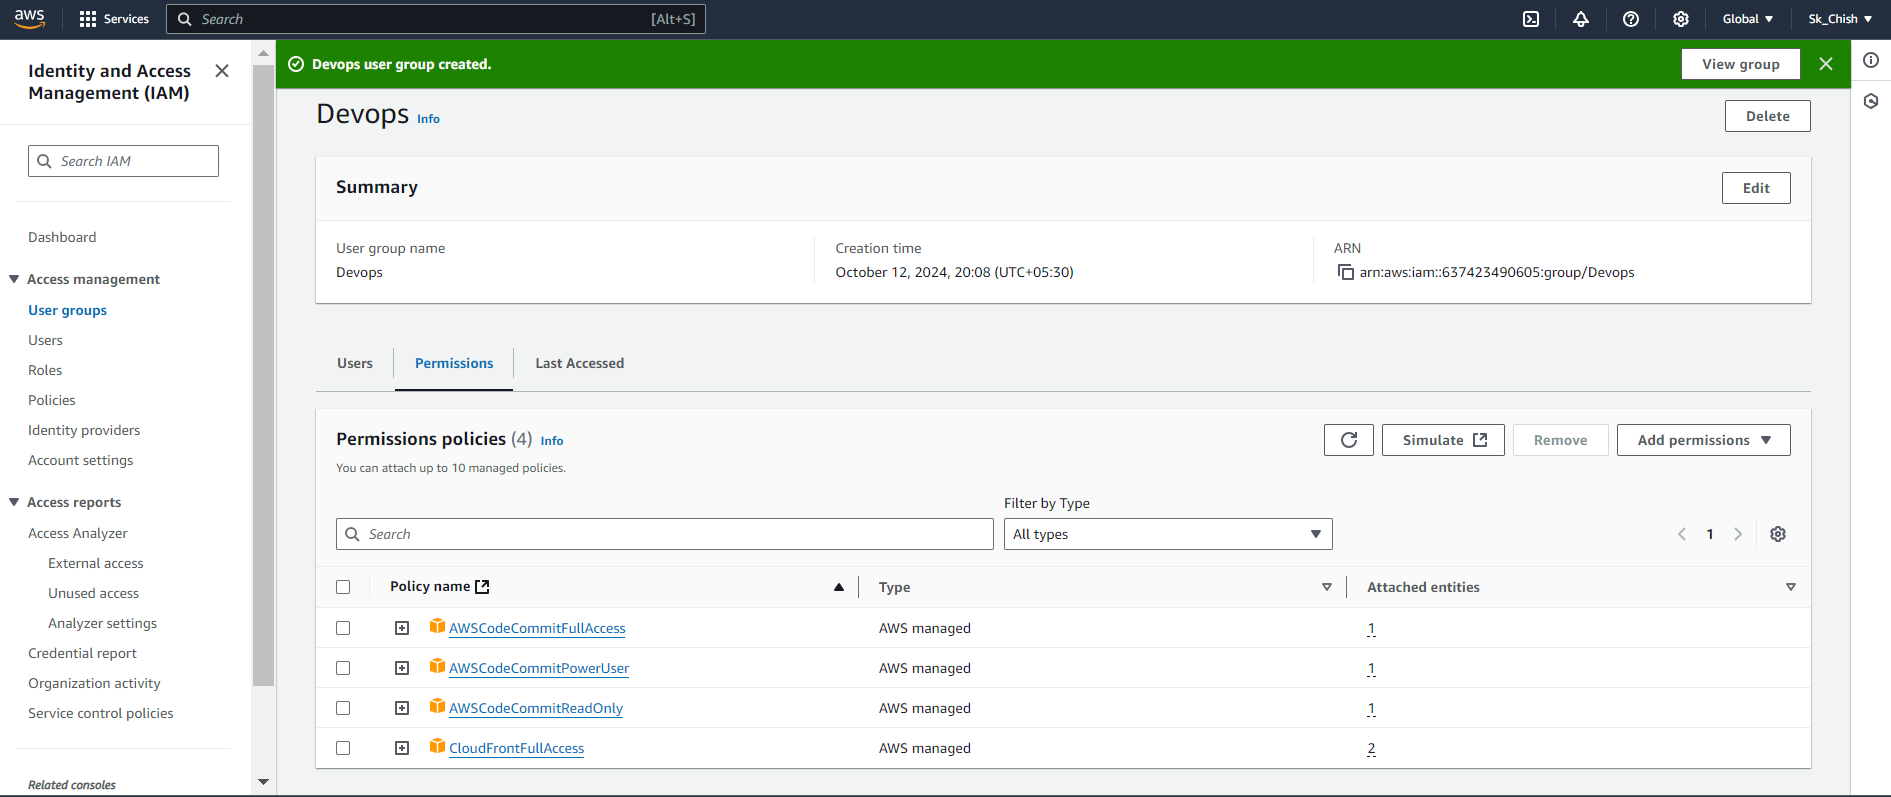
Create another group, like DevOps, with EC2 and CloudWatch permissions.
Add a user to both Demo_Developers and DevOps groups.
The user will inherit permissions from both groups, offering greater flexibility in managing access. 🔐
🔍 Step 14: Viewing Permissions and User Group Details
After assigning users to groups, you can easily view all permissions and details in the Permissions tab of the IAM dashboard. Here, you'll see the policies attached to each group and the users within them, helping you efficiently monitor and manage access control. 📊
Conclusion: Mastering AWS IAM for Scalable Access Control
AWS IAM is an indispensable tool for efficiently managing user access and permissions within the cloud. While assigning policies directly to individual users can work in small-scale scenarios, leveraging user groups offers a more scalable and structured approach—especially in larger environments.
By following the steps in this guide, you’ve learned how to create users, assign permissions, and manage groups, giving you the tools to streamline access control across your AWS infrastructure.
Remember, IAM is a robust service with even more advanced features to explore, offering endless possibilities for enhancing the security and management of your AWS resources. 🔒✨
Subscribe to my newsletter
Read articles from Chishtiya Shaikh directly inside your inbox. Subscribe to the newsletter, and don't miss out.
Written by

Chishtiya Shaikh
Chishtiya Shaikh
Hello amazing folks!! I am Chishtiya Shaikh ✨👋 Developer and tech enthusiast focused on cloud computing with AWS. I share insights to inspire and help the tech community. Always learning and exploring new technologies.