Step-by-Step Guide to Connect AWS Instances in Private Subnets
 Dennish Bhattarai
In this article, I will guide you through how you can get access to an EC2 instance hosted in an AWS private subnet.
What is a Private Subnet?
Well, the private subnet is a part of the cloud network that is a fully isolated environment that has no external access to the internet. As said above, the resources are hosted in a private subnet and are only accessible internally within a network or by the use of NAT Gateways or VPN Connection.
Typically, private subnets are employed to house sensitive or backend infrastructure, including databases, application servers, and internal services, that should not be exposed to the public internet for security and compliance reasons. This configuration guarantees enhanced access control and mitigates the likelihood of unauthorised access from outside the network.
Access EC2 Instance Launched in a Private Subnet
If you are wondering how you can create your private subnet, and launch an EC2 instance then do not worry I have got you fully covered. You can check my previous blog to get started. You may check it out by clicking here.
Once, you have gone through all those steps then we are finally ready to connect one of our instances launched in a private subnet.
As we have launched two instances (Public-1A, and Public-1B) we will be making Public-1A our Bastion Host to connect or log into the private instance.
What is Bastion Host?
A bastion host is a specialised server that serves as a gateway for accessing servers or resources within a private network. It is typically located within a VPC subnet. It functions as a secure gateway for administrators to establish connections to servers that lack direct internet access.
Let’s get started now!!
As we are using one of our instances hosted in a public subnet, we need its public IP and the key pair that we used initially when we launched it. Keep those things handy and open up your favourite terminal to kick off.
I have my key pair in the Downloads Folder I suggest you change the directory where your key pair file is stored as this would make your life easier.
cd Downloads
ls
scp -i AWSKeyPair.pem AWSKeyPair.pem ubuntu@44.202.78.221:/home/ubuntu
Once the above step is completed, you may log into your Bastion Host.
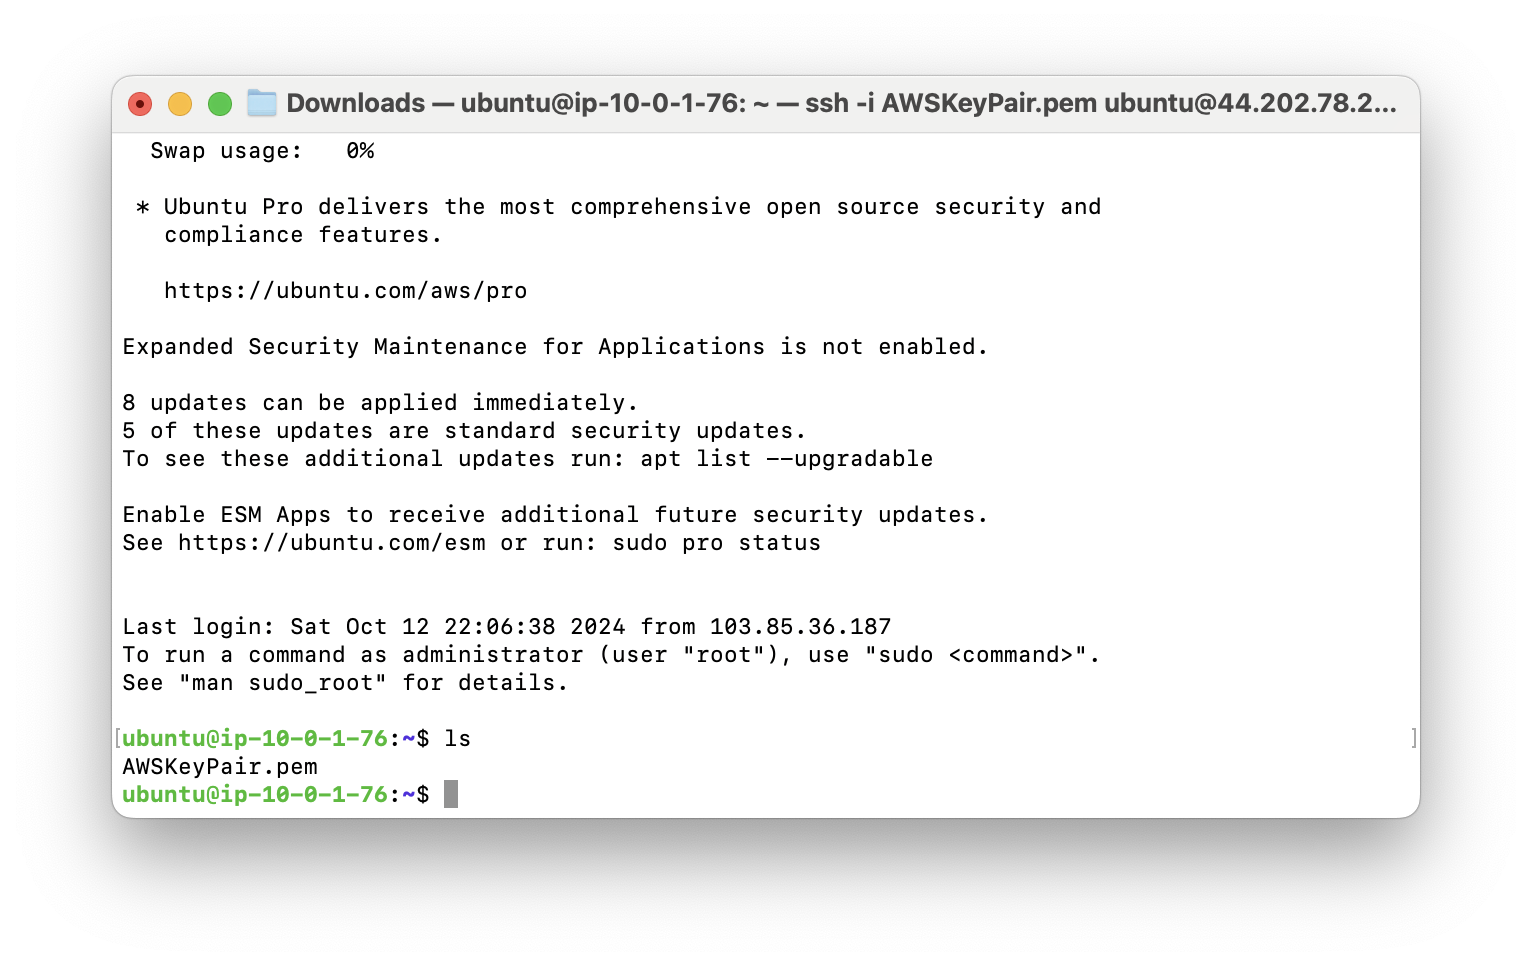
ssh -i AWSKeyPair.pem ubuntu@44.202.78.221

Once you are logged in and run the ls command, your keypair should be uploaded to your Bastion Host.
Awesome right? Now we are logged in to the Bastion Host we will try to log in to our instance hosted in a private subnet using the private IP.
It is going to be the same command as we did before to login but here we will change the IP. Copy your private instance IP and ssh again to log in using Bastion Host.
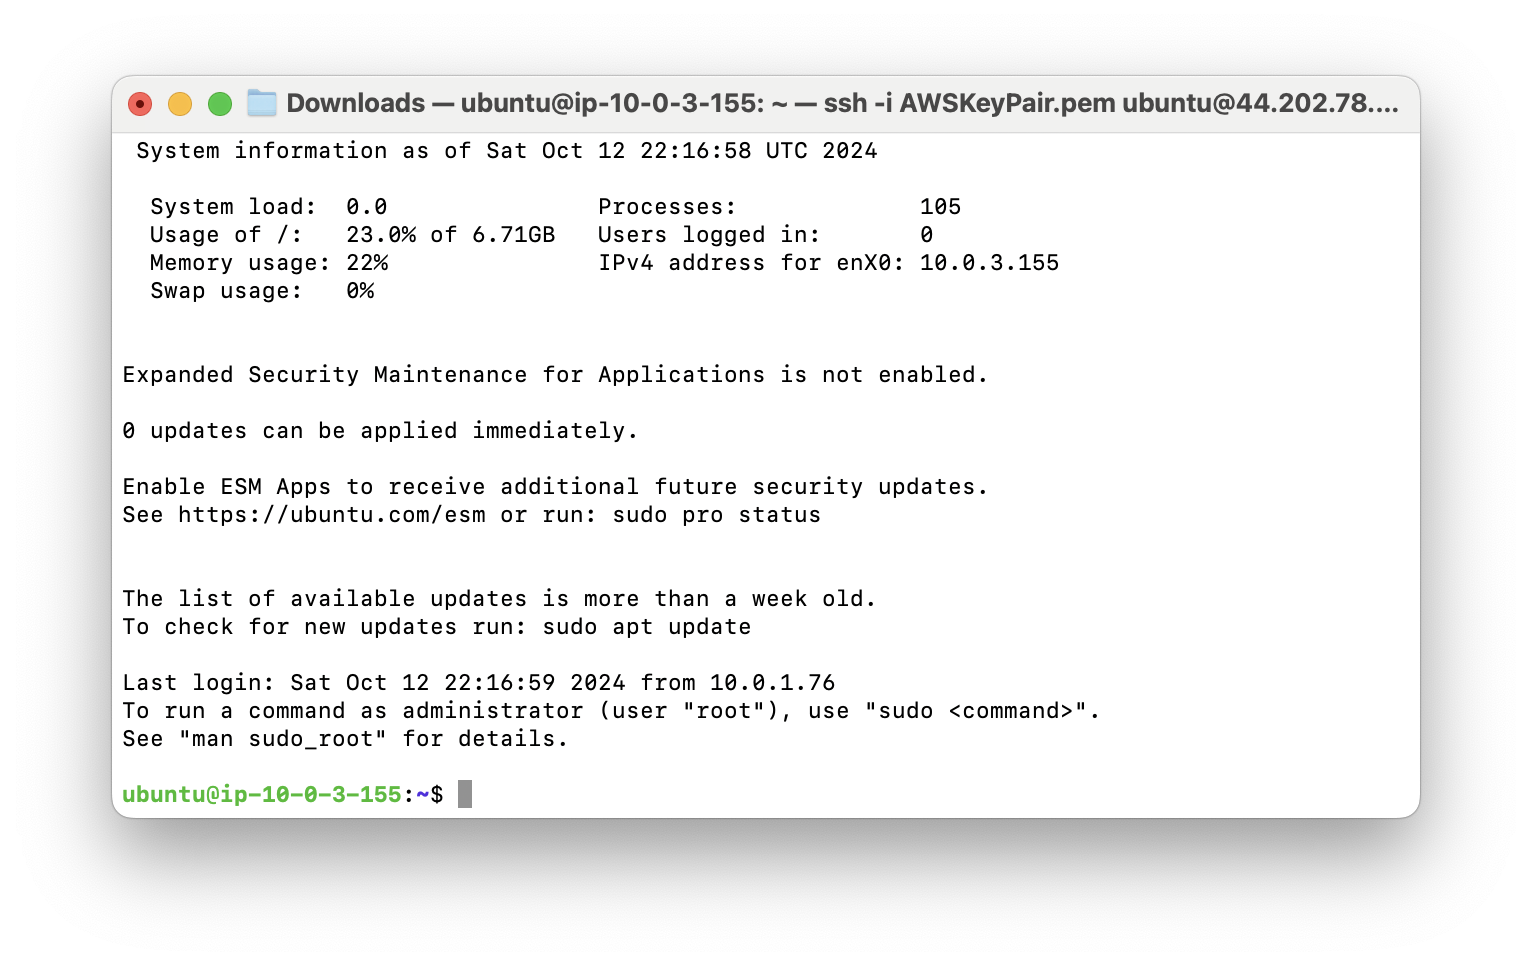
ssh -i AWSKeyPair.pem ubuntu@10.0.3.155

Yay, we are logged in to our private instance using Bastion Host.
Conclusion
Utilising a bastion host to establish a connection to a private instance is an efficient method of improving the security of your infrastructure. You can restrict direct access to your private instances while maintaining efficient connectivity by utilising the bastion host. This configuration facilitates the administration of secure access controls and reduces exposure to potential threats. By properly configuring a bastion host, you guarantee that your environment is safeguarded without compromising operational efficiency.
Subscribe to my newsletter
Read articles from Dennish Bhattarai directly inside your inbox. Subscribe to the newsletter, and don't miss out.
Written by
