#8: How to Set Up AWS Global Accelerator for Cross-Region Support
 Shivprasad Waghmare
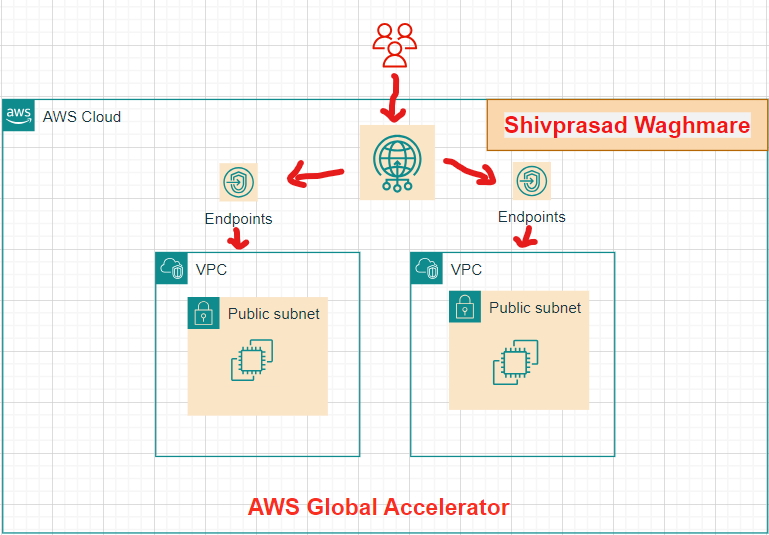
In this guide, we will launch two EC2 instances in different AWS regions—Singapore (ap-southeast-1) and Oregon (us-west-2)—and configure NGINX web servers with customized welcome pages for each region. Then, we'll set up AWS Global Accelerator to route traffic to the closest region based on user location. You might get charged while performing the demo.
Table of Contents:
Step 1: Launch EC2 Instances in Singapore and Oregon Regions
To begin, we will launch two EC2 instances in Singapore and Oregon AWS regions.
Go to the EC2 Dashboard:
- In the AWS Management Console, navigate to EC2.
Launch EC2 Instances:
For Singapore: Select ap-southeast-1 (Singapore) as the region.
For Oregon: Select us-west-2 (Oregon) as the region.
Choose Ubuntu 22.04:
- When selecting an AMI, choose Ubuntu Server 22.04 LTS.
Instance Type:
- Choose t2.micro.
Configure Security Group:
- Ensure the security group allows inbound traffic for HTTP (Port 80) and SSH (Port 22).
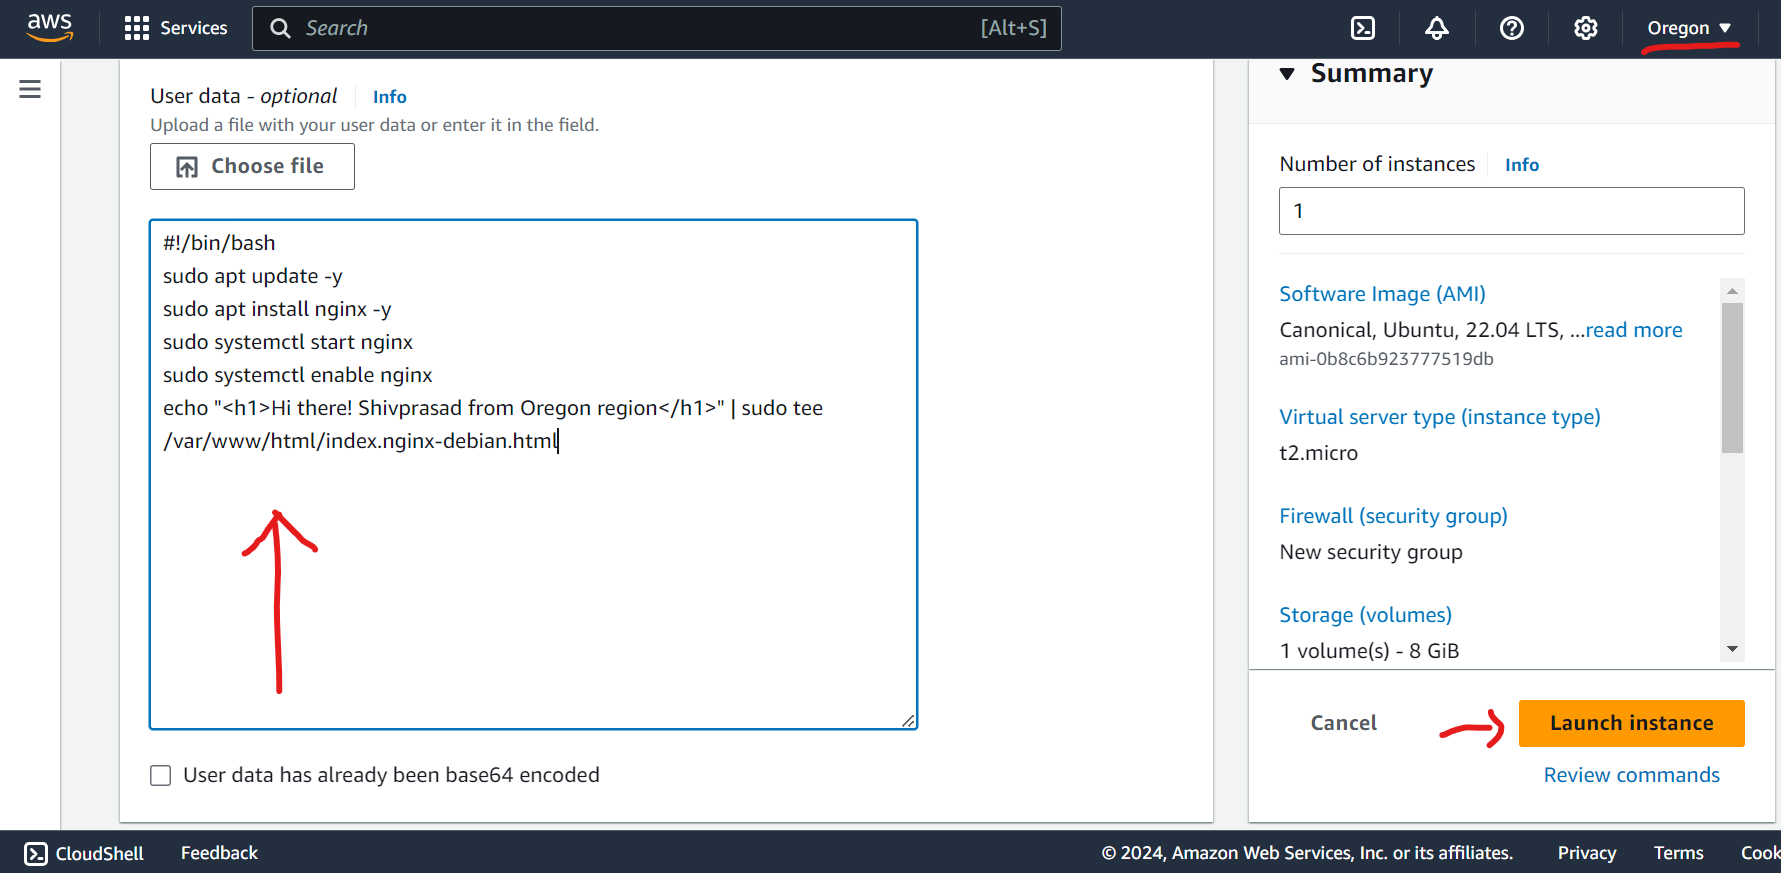
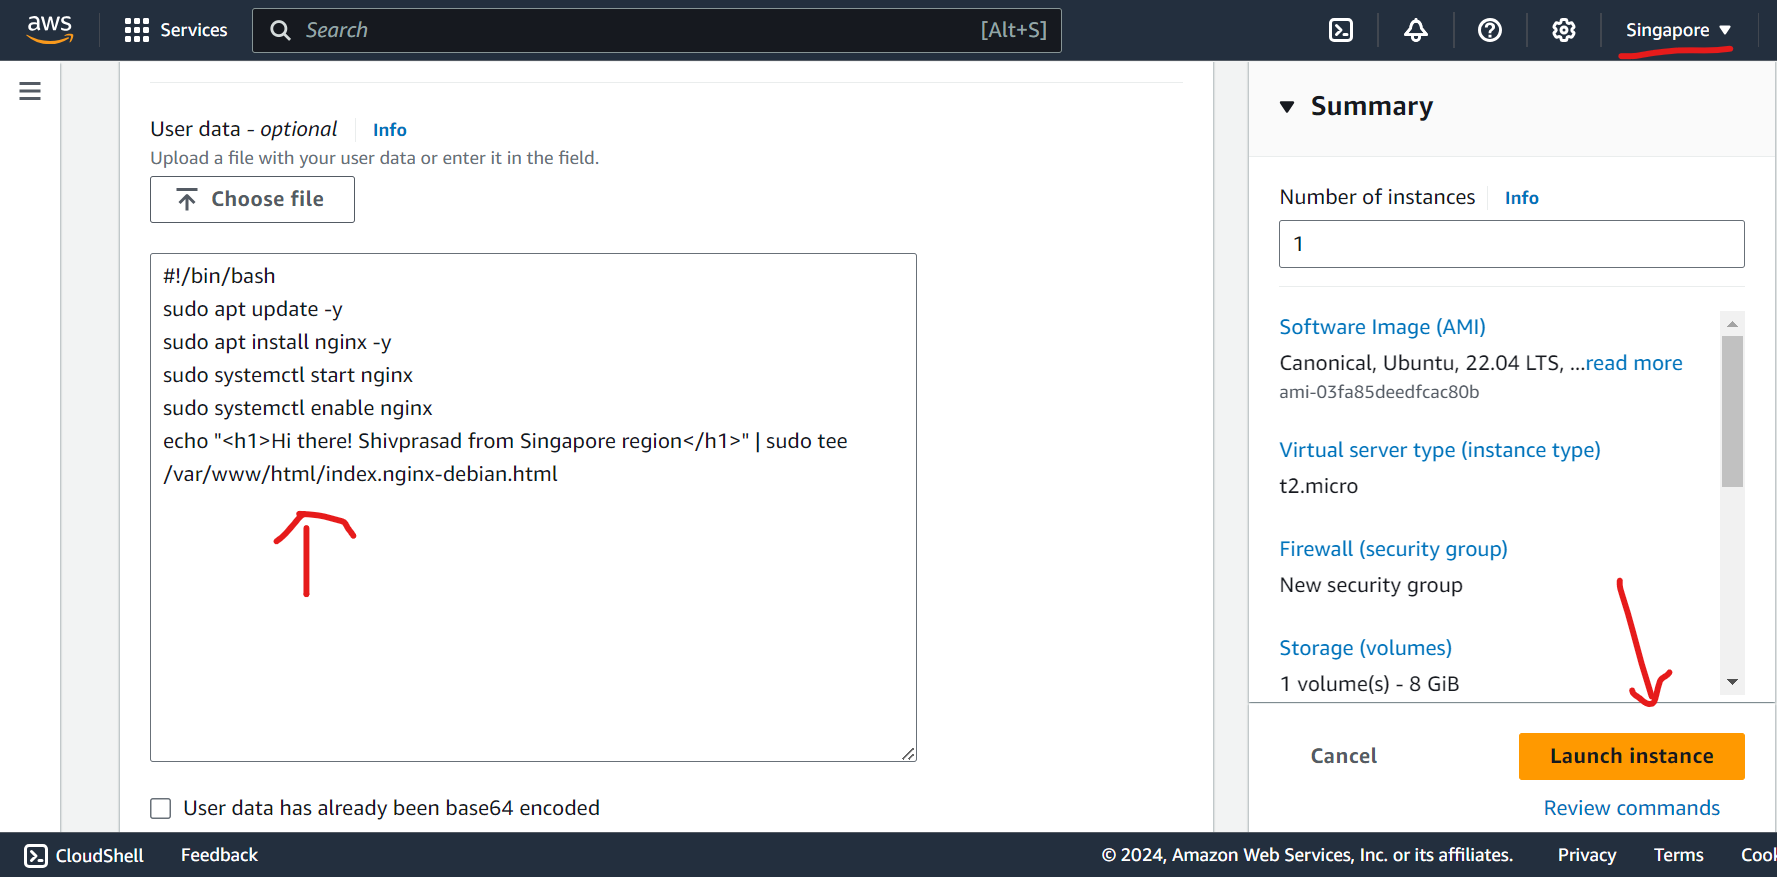
Add User Data:
In the Advanced Details section, add the user data script for each region. This will install NGINX and customize the welcome page during the instance launch.
User Data Script for Singapore Region (Ubuntu 22.04)
  #!/bin/bash
  sudo apt update -y
  sudo apt install nginx -y
  sudo systemctl start nginx
  sudo systemctl enable nginx
  echo "<h1>Hi there! Shivprasad from Singapore region</h1>" | sudo tee /var/www/html/index.nginx-debian.html
User Data Script for Oregon Region (Ubuntu 22.04)
  #!/bin/bash
  sudo apt update -y
  sudo apt install nginx -y
  sudo systemctl start nginx
  sudo systemctl enable nginx
  echo "<h1>Hi there! Shivprasad from Oregon region</h1>" | sudo tee /var/www/html/index.nginx-debian.html
Launch the Instances and Download the Key Pair.
Step 2: Configure AWS Global Accelerator
Once the EC2 instances are up and running, we will configure AWS Global Accelerator to route user traffic to the closest web server.
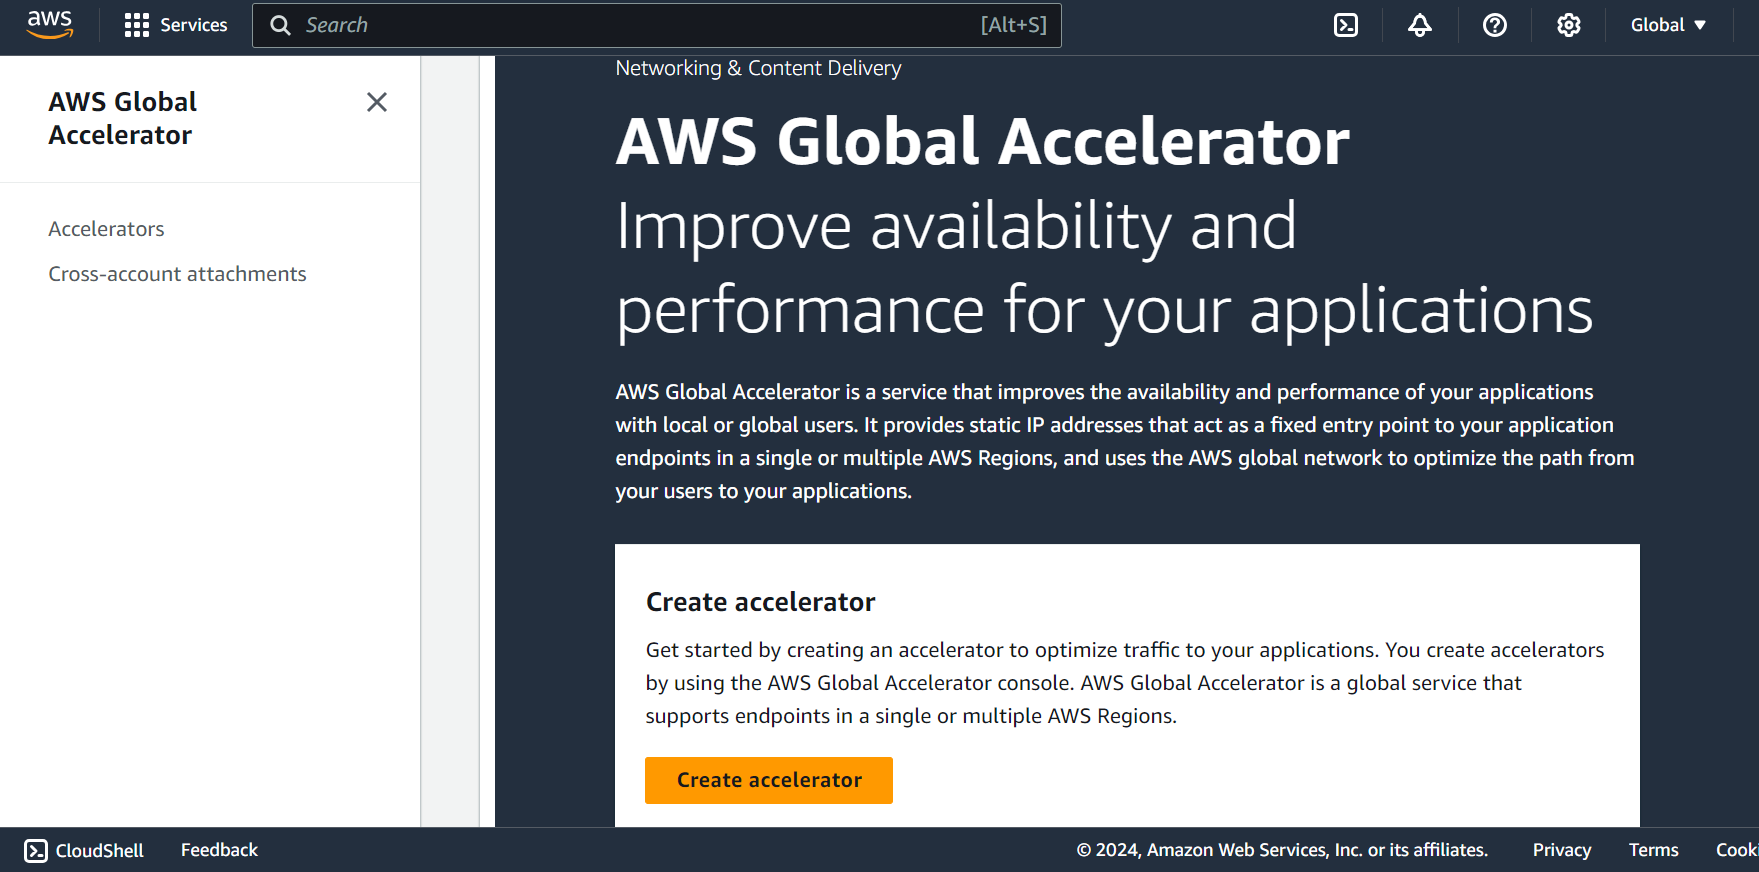
Open the AWS Global Accelerator Console:
- Go to the AWS Global Accelerator Console and click Create Accelerator.
Configure the Accelerator:
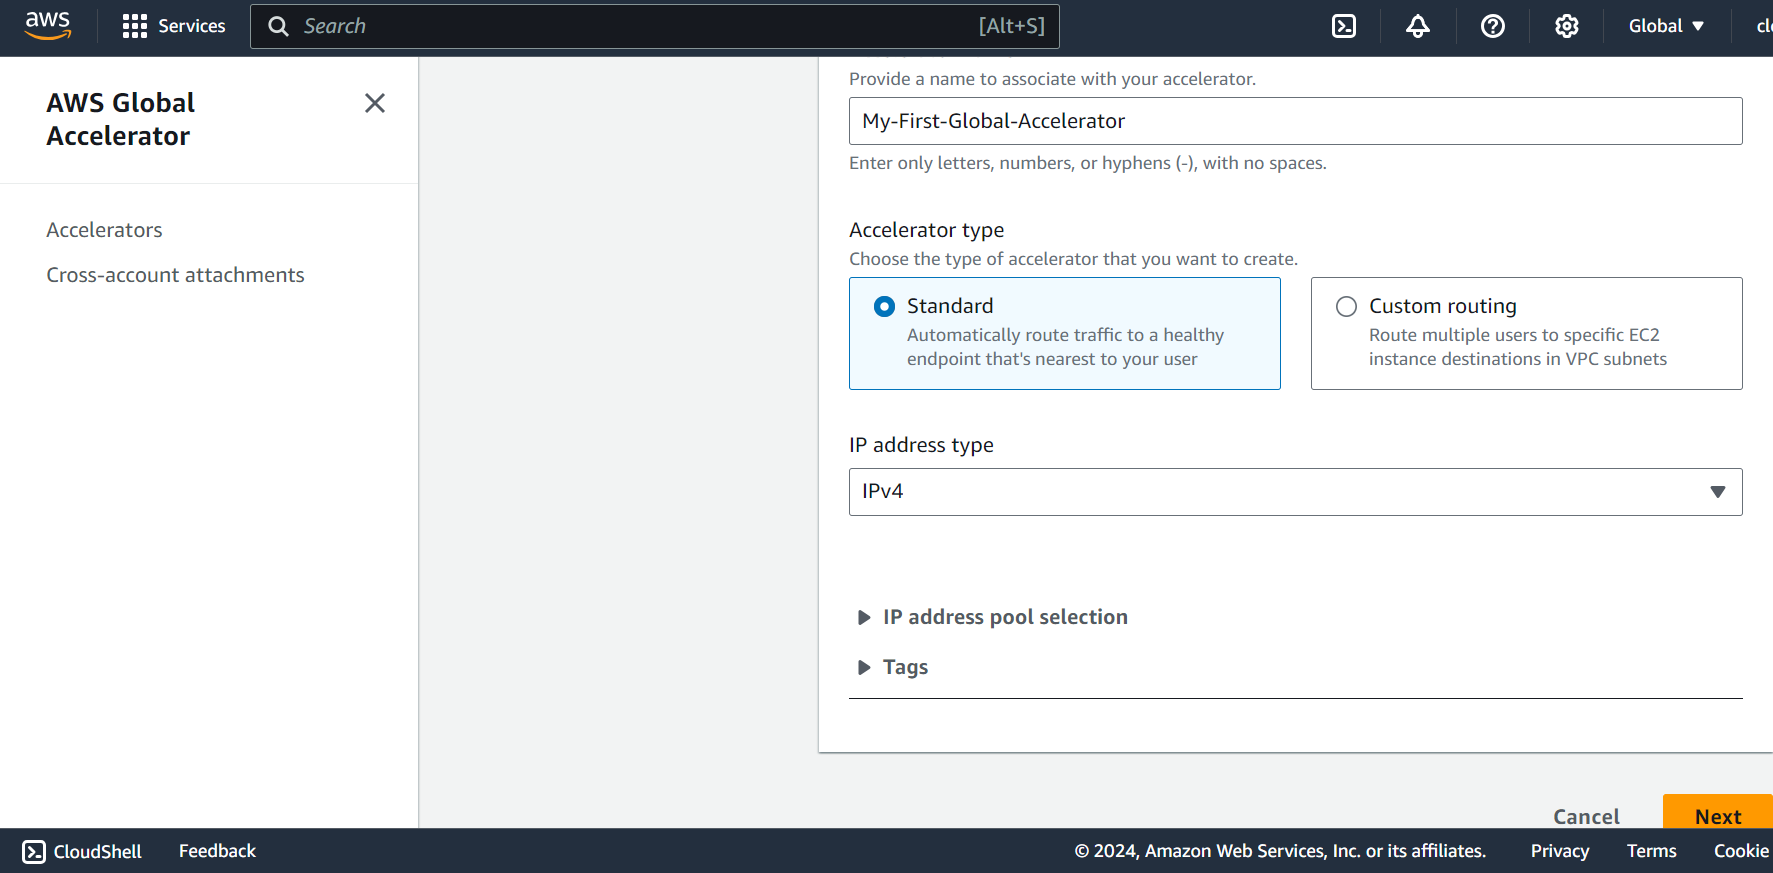
Name: Enter a name like
My-First-Global-Accelerator.IP Address Type: Choose IPv4.
Accelerator Type: Select Standard.
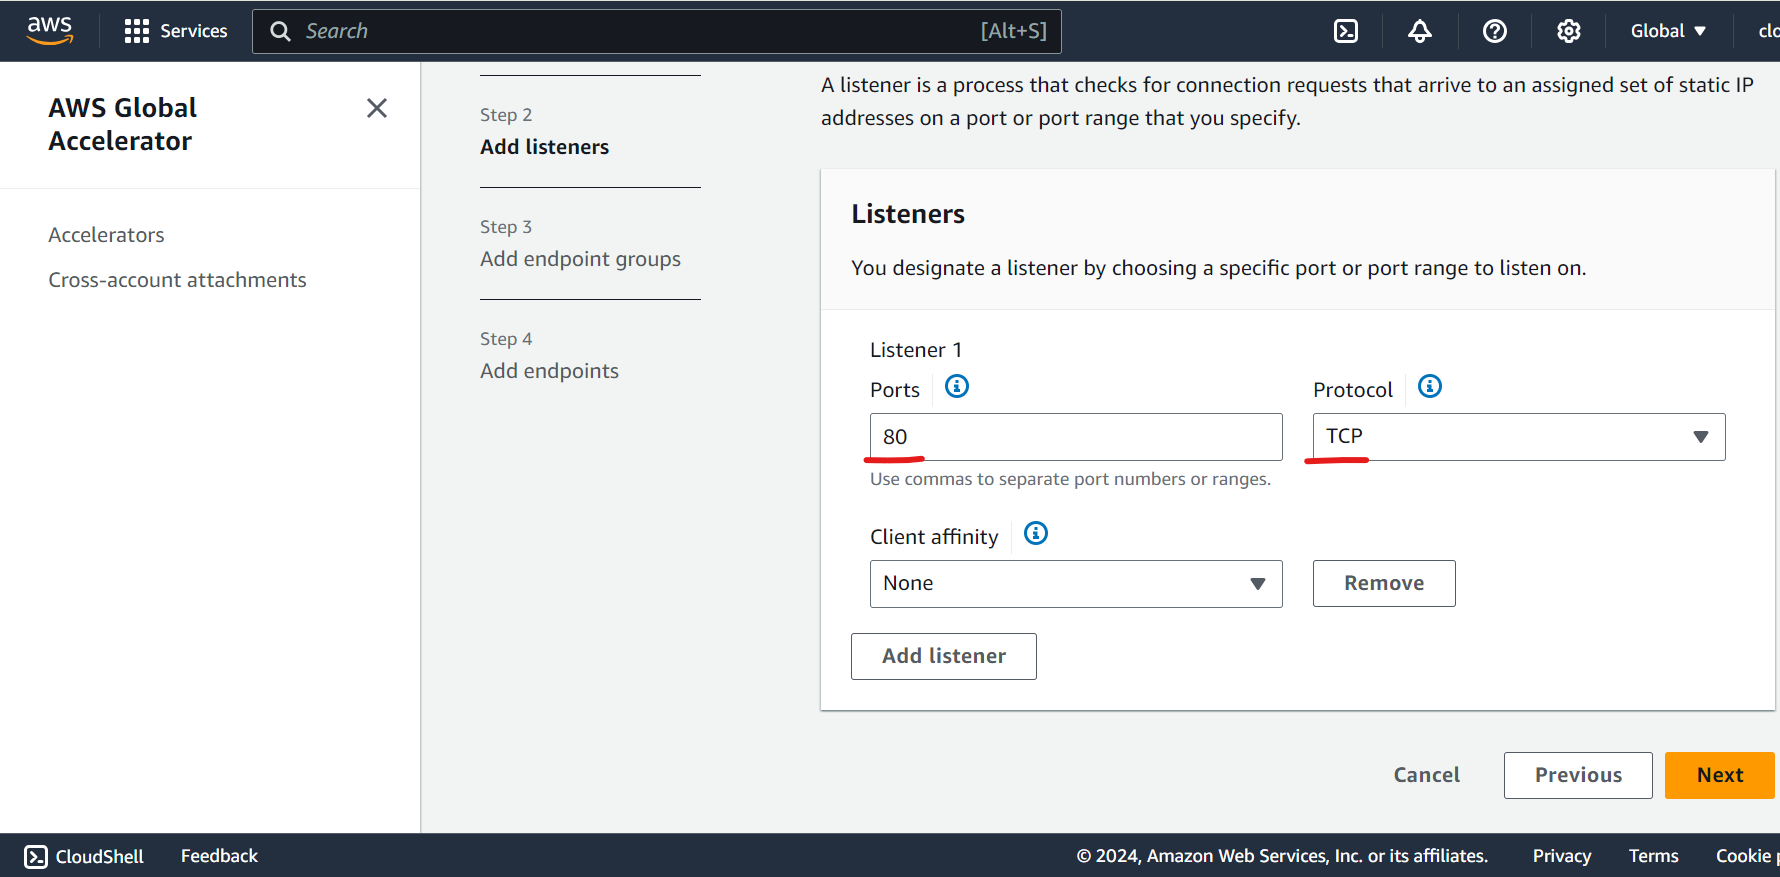
Configure Listener:
Add a listener for TCP on Port 80 to handle HTTP traffic.
Click Next.
Configure Endpoint groups -
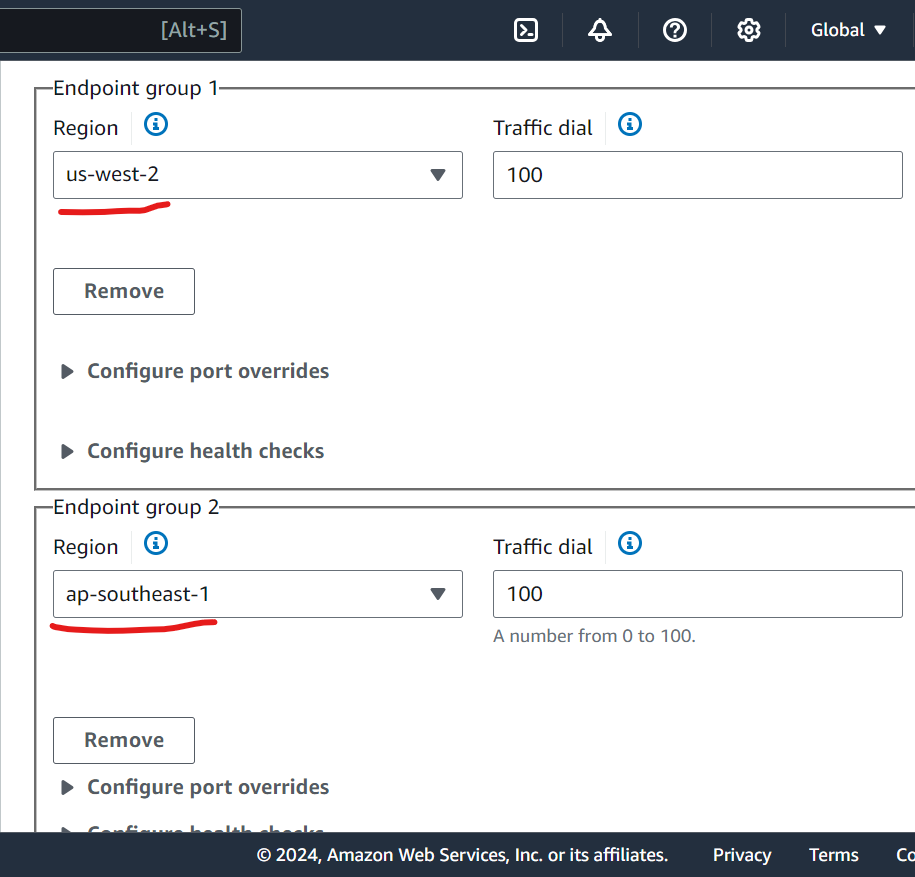
Add EC2 Instances as Endpoints:
In the Endpoint Groups, select the Singapore and Oregon regions.
For each region, choose the corresponding EC2 instance you created earlier.
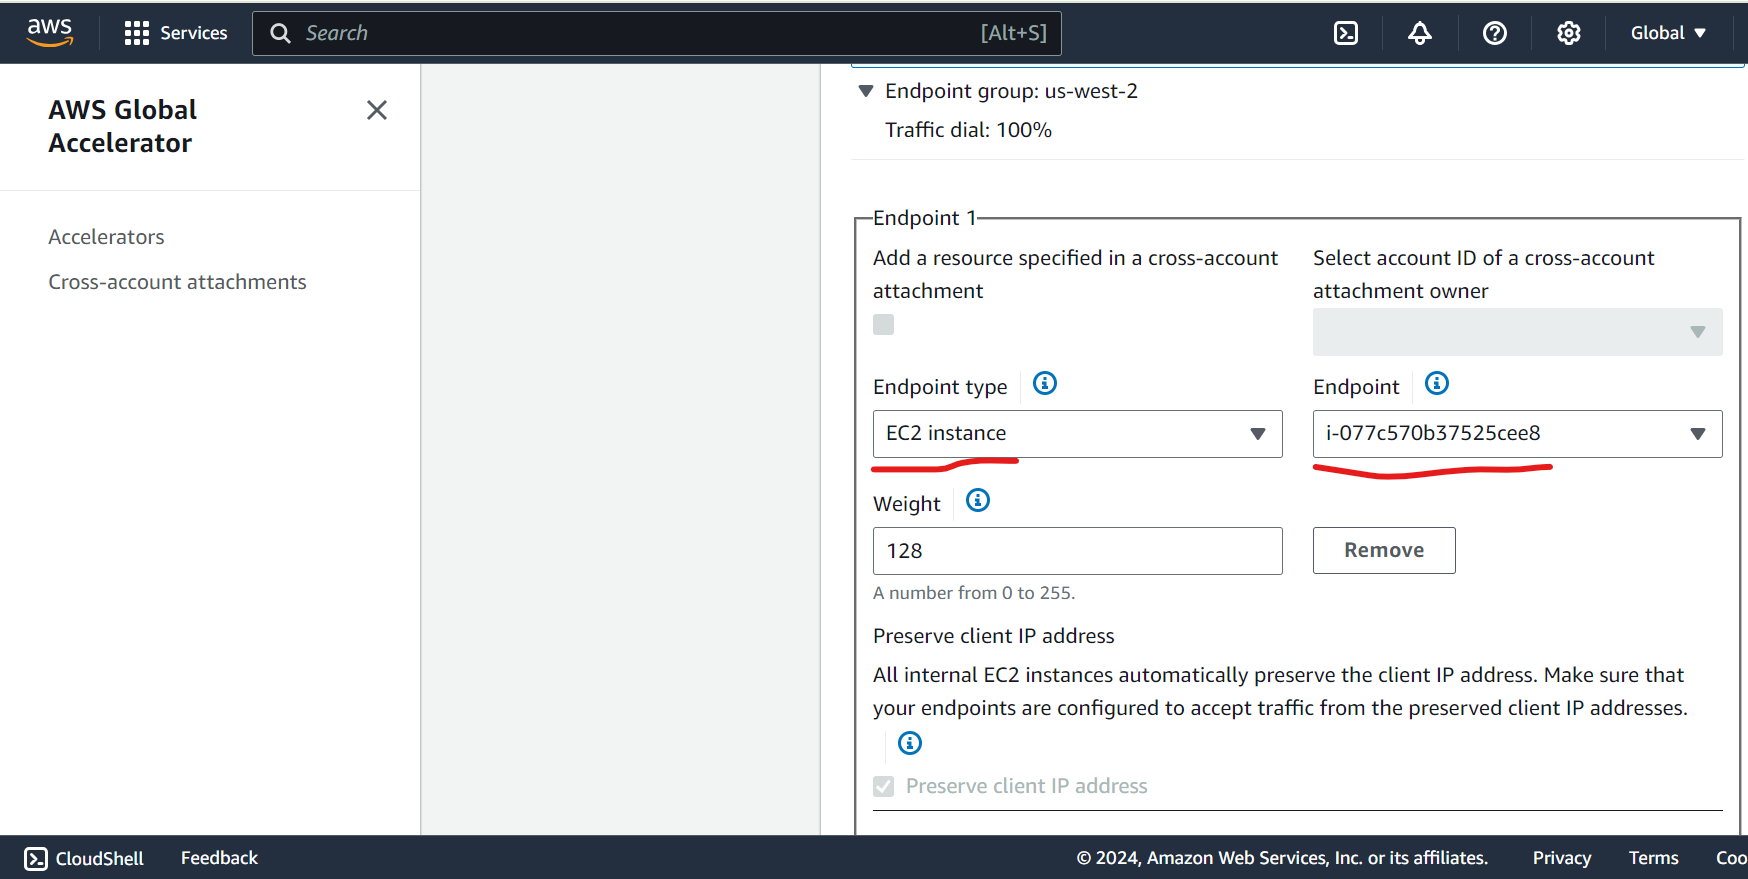
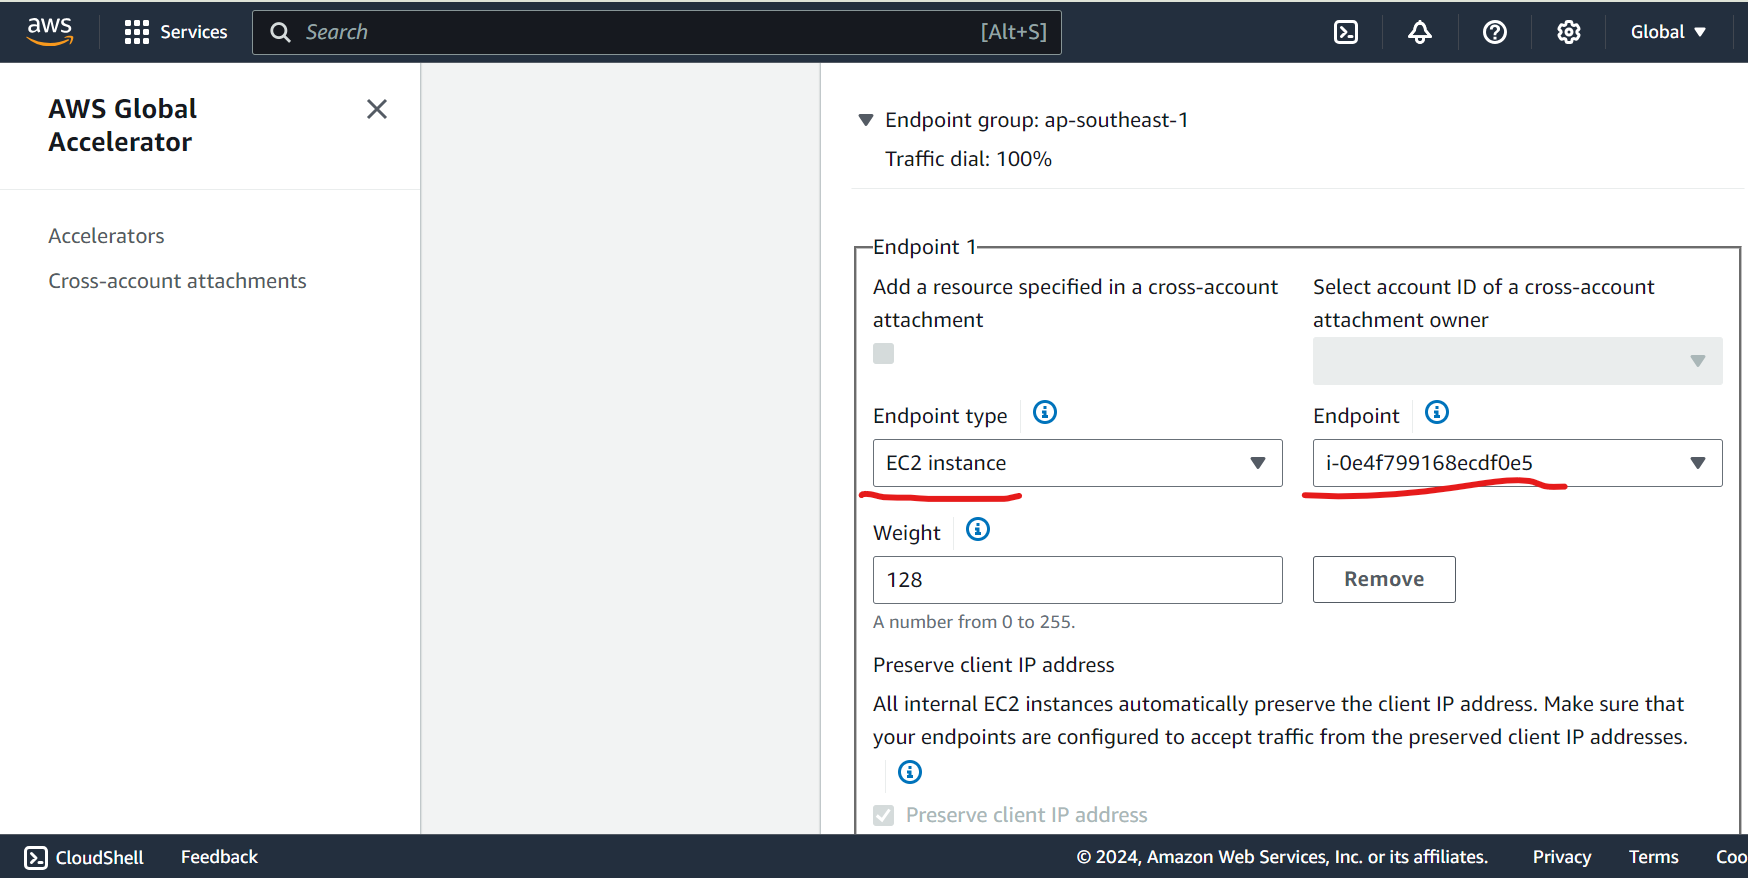
Set Up Health Checks:
- AWS Global Accelerator performs health checks to route traffic only to healthy instances.
Create the Accelerator:
Click Create Accelerator. It will take a few minutes to deploy.
You’ll be given two static IP addresses that serve as the global entry points to your application.
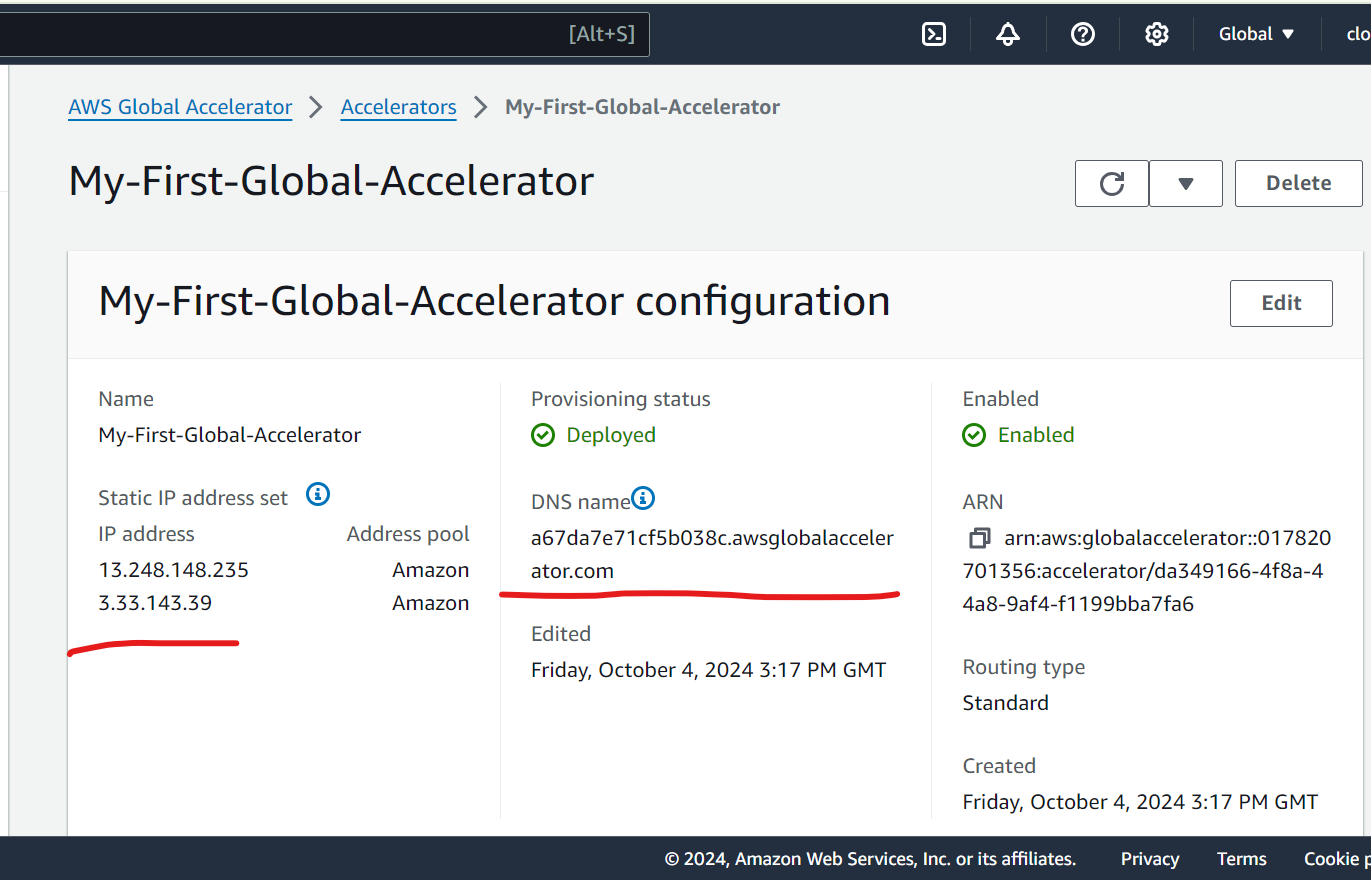
Step 3: Test AWS Global Accelerator:-
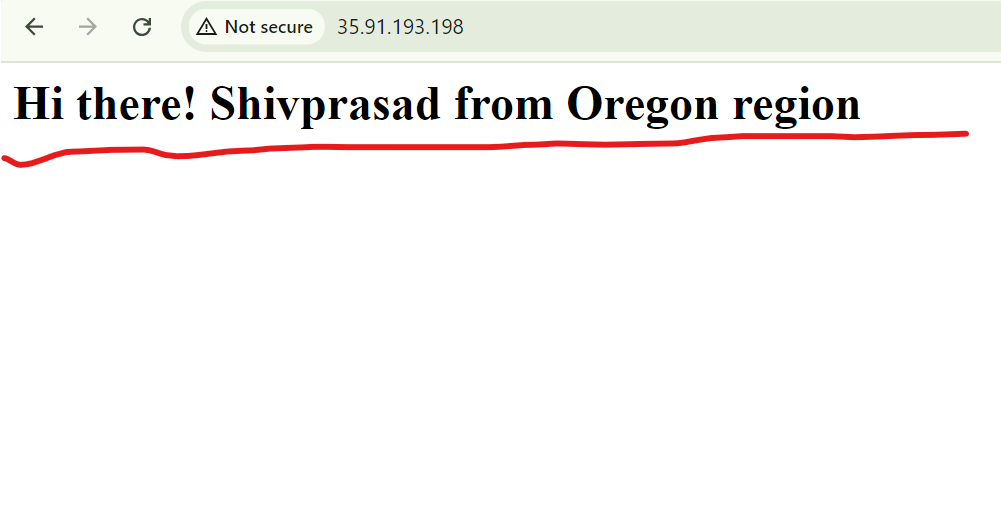
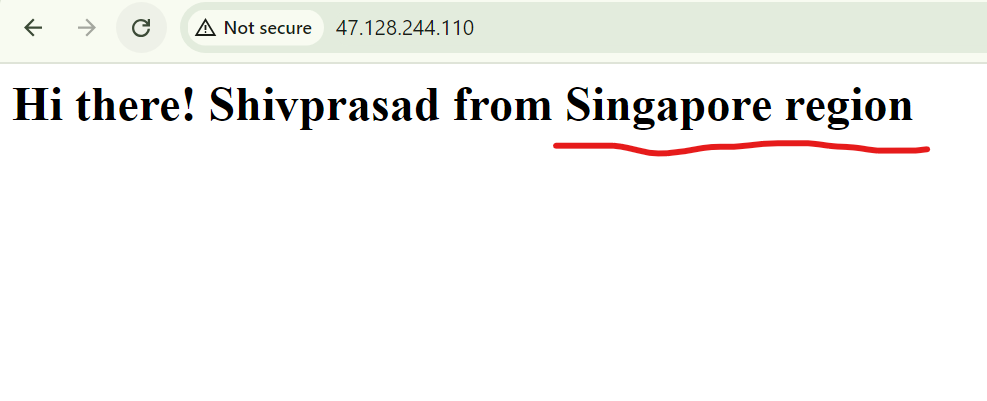
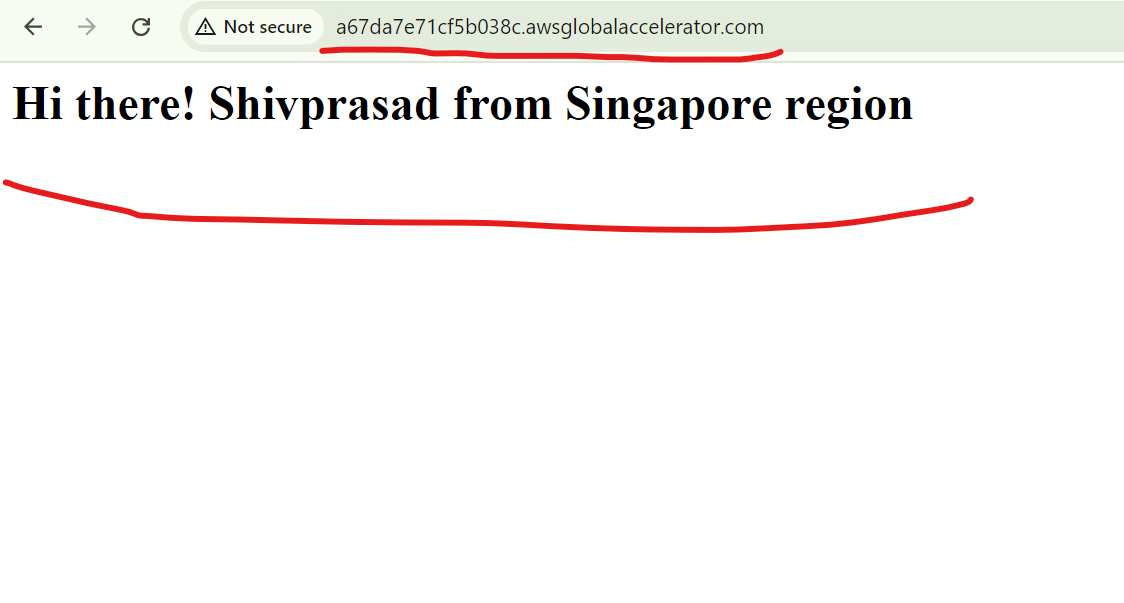
Since I’m in Pune- India the traffic gets re-directed through the most nearest ie. Singapore region. This way you can test global accelerator. Additionally you can test by configuring VPN at your end as well.
Cleanup -
Delete EC2 instances.
Disable And delete Global Accelerator.
Key Takeaways
Automated Setup with User Data: Using user data scripts, we automated the installation of NGINX and customized the welcome pages for each EC2 instance, saving time during deployment.
Cross-Region Deployment: We deployed EC2 instances in two regions (Singapore and Oregon) to demonstrate how AWS services can be leveraged for a globally distributed infrastructure.
Low Latency and High Availability: AWS Global Accelerator provides a global entry point to our application, ensuring low latency by routing users to the closest region.
Failover and Resilience: With AWS Global Accelerator, traffic is automatically rerouted to the healthy EC2 instance if one region goes down, improving the fault tolerance of your application.
Scalable Architecture: The setup can easily be scaled by adding more regions or instances to the Global Accelerator, providing a more robust and globally accessible architecture.
Custom Domain Integration: You can map your Global Accelerator to a custom domain, providing users with a friendly URL and making the solution production-ready.
By implementing this setup, you've learned how to optimize global traffic routing using AWS services for higher availability and better performance.
#AWS #GlobalAccelerator #AWSNetworking #MultiRegion #LowLatency #WebServers #EC2 #Nginx #CloudInfrastructure #Failover #HighAvailability #CloudComputing #AWSCloud #WebPerformance #DevOps #ScalableArchitecture #InfrastructureAsCode
Subscribe to my newsletter
Read articles from Shivprasad Waghmare directly inside your inbox. Subscribe to the newsletter, and don't miss out.
Written by

Shivprasad Waghmare
Shivprasad Waghmare
"Accidental AWS/DevOps Engineer | AWS Community Builder | 7+ Years of Experience | Exploring AWS, Kubernetes, Terraform, Docker, Jenkins | Passionate about automating cloud infrastructure | Let’s explore the world of DevOps together!"