Step-by-Step Guide to Deploying Strapi on Fly.io
 Richard Westmoreland
Strapi
Strapi is a free, open-source content management system (CMS) built with Node.js. It is a "headless" CMS, meaning it doesn't come with a pre-built front-end user interface. Instead, Strapi offers a REST API and several SDKs that let you access your content using any front-end framework you choose.
Fly.io
Fly.io is a cloud platform designed for developers. Fly machines are hardware-virtualized containers that run on Fly's infrastructure. They can be launched instantly and run for as long as you need them. These machines can start quickly enough to handle a single API request or be set up to run for weeks.
The simplest and quickest way to deploy to a Fly.io machine is to have a Dockerfile in your project. This allows Fly.io to build an image for your project and then deploy that image to Fly.
Strapi installation
We’re going to first install Strapi onto our local machine. You will need Docker to follow along with the rest of this tutorial. I’m on a Macbook, so I use Docker desktop.
Database
Strapi supports the following databases and their respective versions:
| Database | Recommended | Minimum |
| MySQL | 8.0 | 8.0 |
| MariaDB | 10.6 | 10.5 |
| PostgreSQL | 14.0 | 12.0 |
| SQLite | 3 | 3 |
I’m a Postgres person, so let’s get started with that. Once you have Docker Desktop installed and running, open up a terminal and run:
docker run --name strapi-database -e POSTGRES_PASSWORD=postgres -p 5432:5432 -d postgres:14
This will start a Postgres container on port 5432.
Create a new Strapi project
npx create-strapi@latest
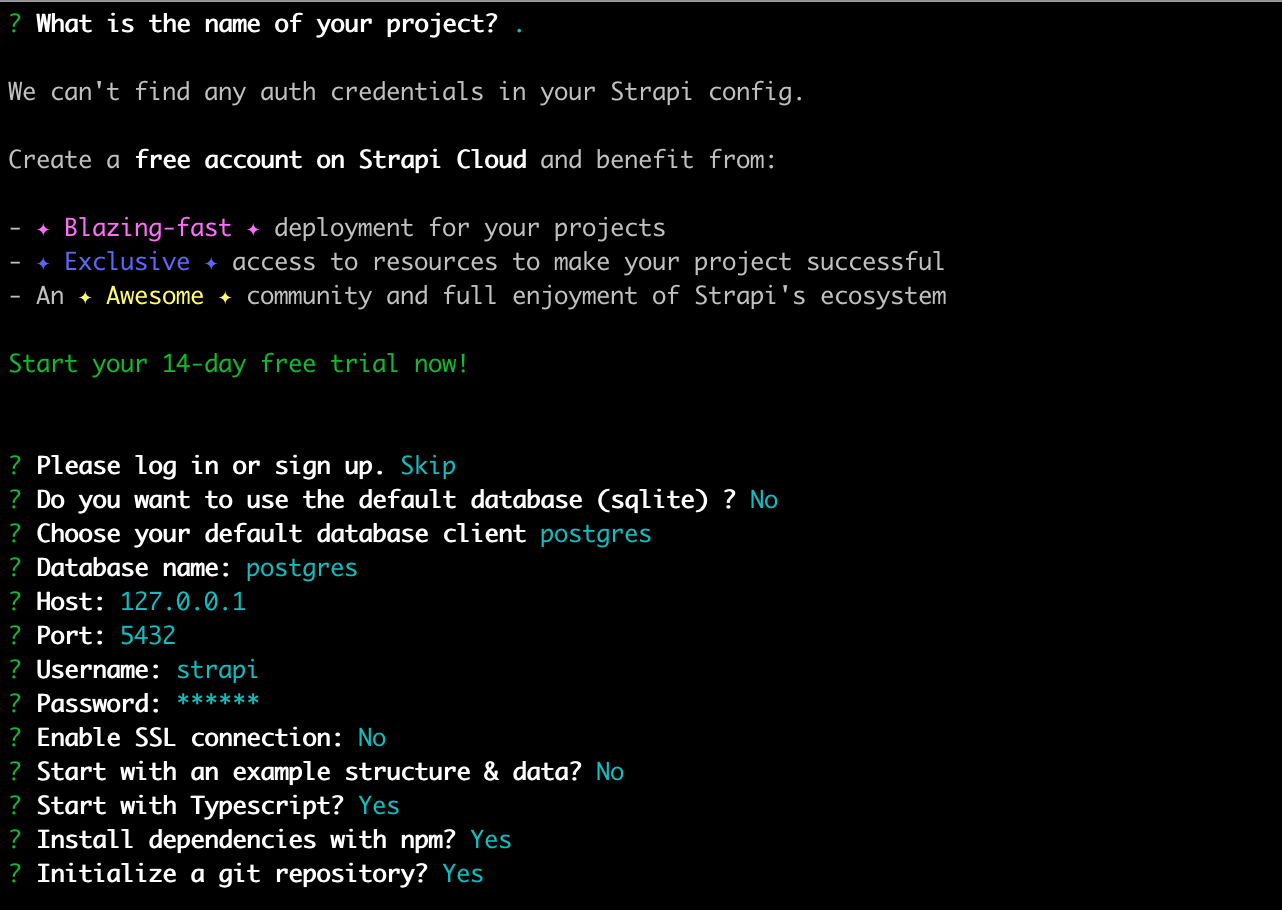
You will be asked several questions after you run this command. For this tutorial, you should select Skip for the cloud account creation, choose postgres as your database, set the DB name to postgres and I chose the username postgres and password postgres to keep things simple.
Running Strapi for development
To start the Strapi application:
npm run develop
The Strapi application will open a browser tab at http://localhost:1337. You’ll be asked to fill out a form which will be the creation of your first admin account within Strapi.
Strapi and Docker
Strapi does not provide any “official” Docker images, but they do supply Dockerfiles in their docs so that you can create your own images.
Create a Dockerfile.prod file within the root of your Strapi project.
touch Dockerfile.prod
Here’s a Dockerfile for a production environment:
# ./Dockerfile.prod

# Creating multi-stage build for production
FROM node:18-alpine as build
RUN apk update && apk add --no-cache build-base gcc autoconf automake zlib-dev libpng-dev vips-dev git > /dev/null 2>&1
ARG NODE_ENV=production
ENV NODE_ENV=${NODE_ENV}

WORKDIR /opt/
COPY package.json package-lock.json ./
RUN npm install -g node-gyp
RUN npm config set fetch-retry-maxtimeout 600000 -g && npm install --only=production
ENV PATH=/opt/node_modules/.bin:$PATH
WORKDIR /opt/app
COPY . .
RUN npm run build

# Creating final production image
FROM node:18-alpine
RUN apk add --no-cache vips-dev
ARG NODE_ENV=production
ENV NODE_ENV=${NODE_ENV}
WORKDIR /opt/
COPY --from=build /opt/node_modules ./node_modules
WORKDIR /opt/app
COPY --from=build /opt/app ./
ENV PATH=/opt/node_modules/.bin:$PATH

RUN chown -R node:node /opt/app
USER node
EXPOSE 1337
CMD ["npm", "run", "start"]
We’ll use this Dockerfile later when we deploy to Fly.io
Fly.io setup
Create a Fy.io account
If you don’t have one already, create an account at Fly.io.
Install the flyctl CLI on your machine
The official flyctl docs can be found here.
I’m on a Mac so I used homebrew to install the CLI
brew install flyctl
From within your Strapi project root, run the following command:
flyctl launch --build-only
—-build-only flag ensures that we don’t deploy this app immediately after creation. We need to provide Fly.io with secrets (env variables) before deploying.You’ll be asked if you want to tweak the settings before proceeding. Choose y.

You’ll need a 2GB machine minimum for the image to build. Fly will also detect that you need Postgres. This is the easiest way to get Postgres connected to your Fly app. Fly.io will automatically add the correct Postgres connection variables to your secrets. Here’s my configuration:
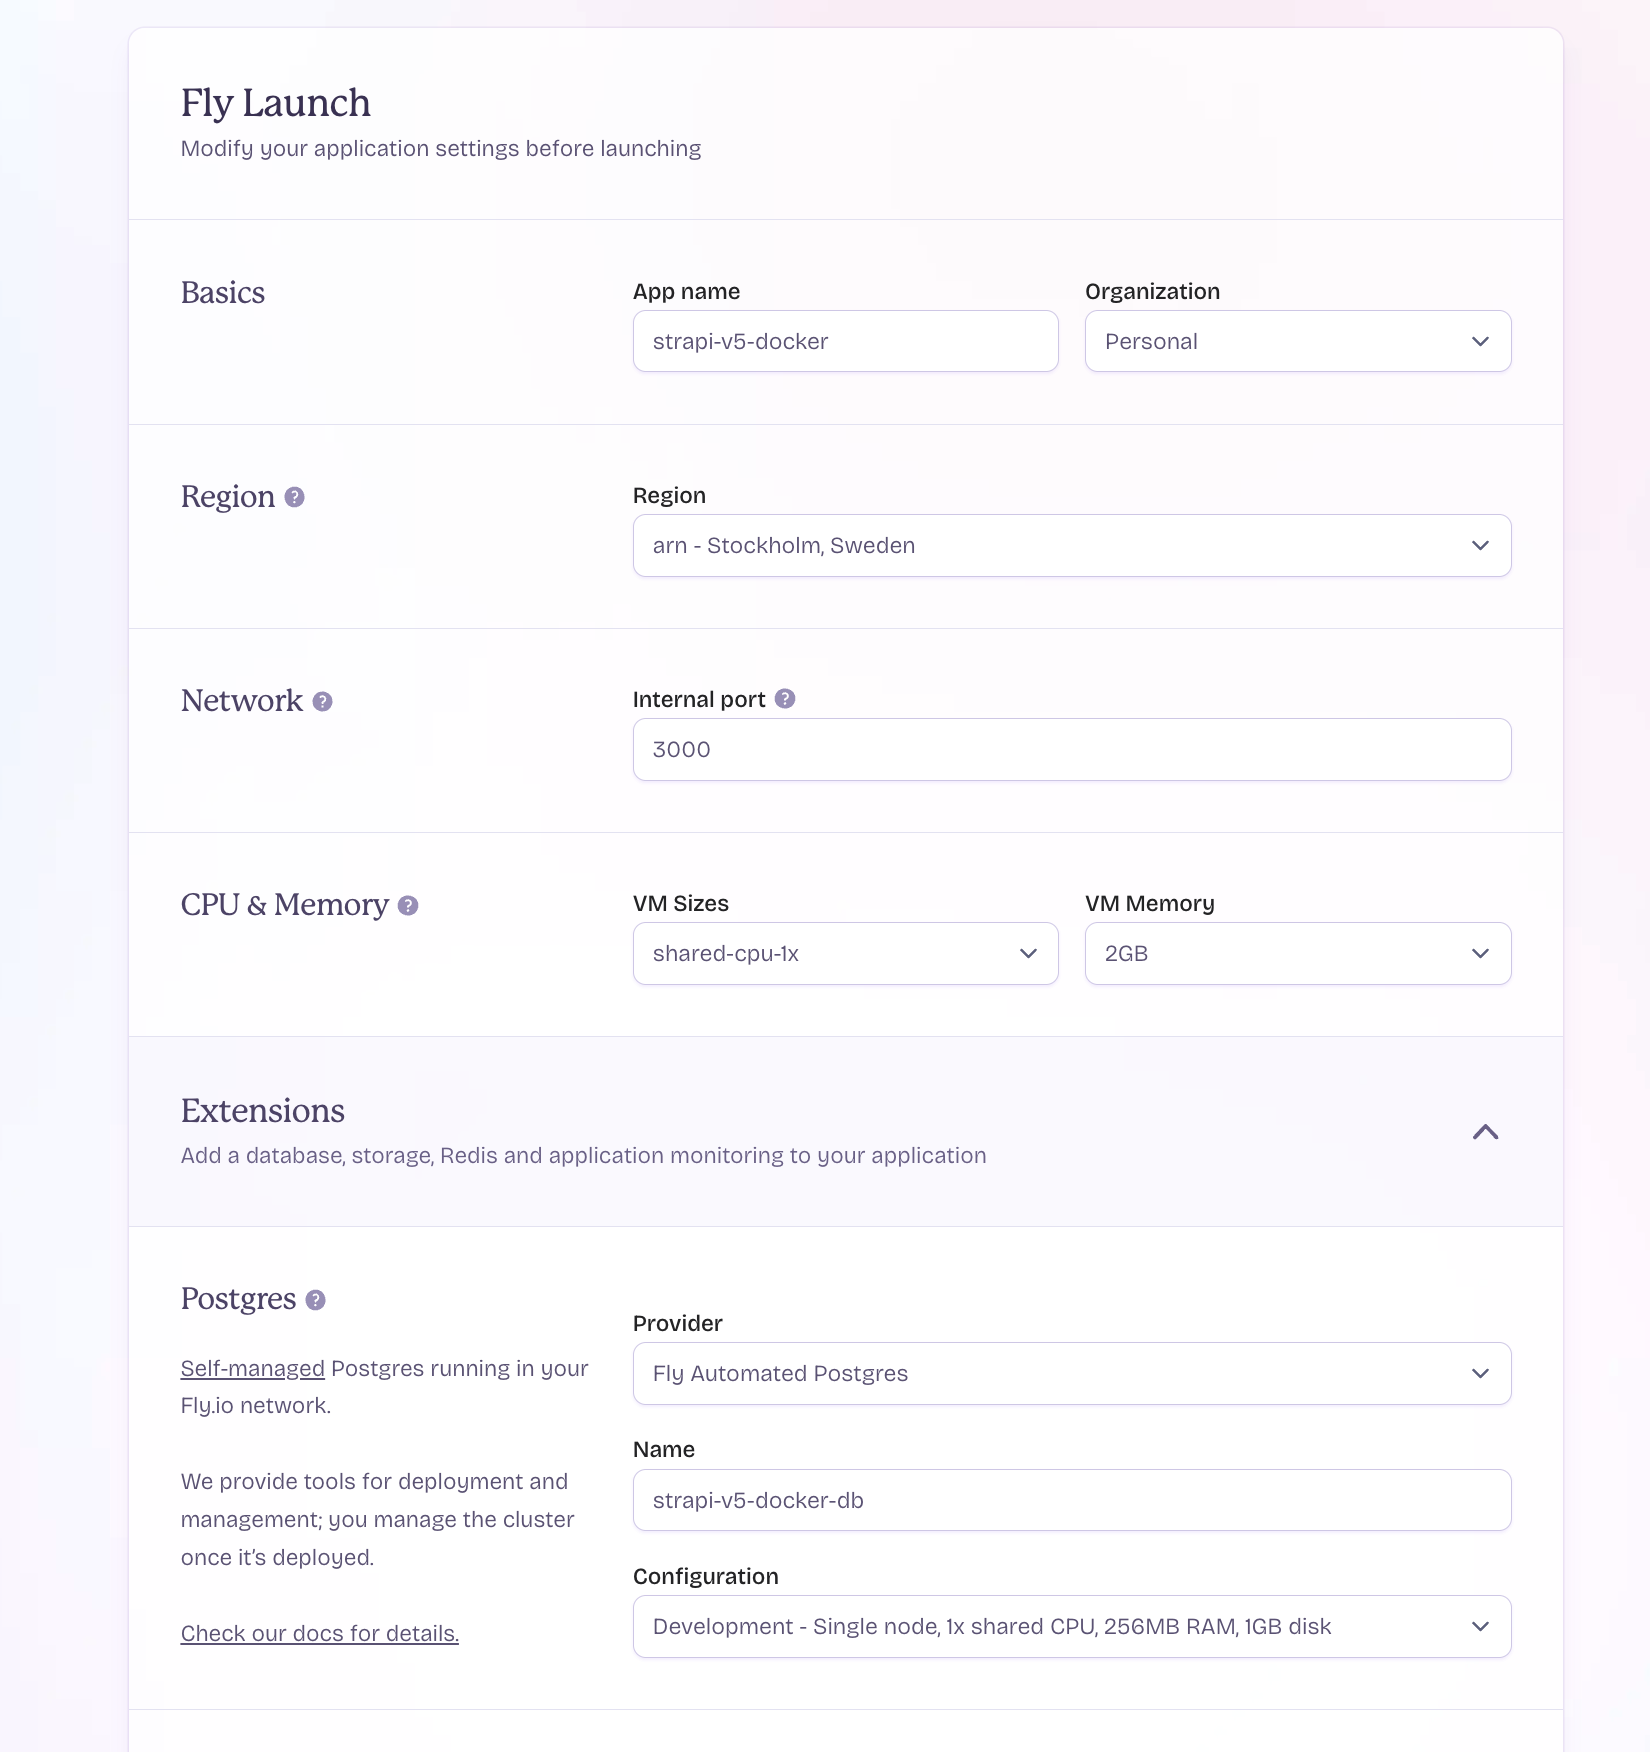
A fly.toml file will be created in your file system. We need to modify this by adding a line under the http_service config. This will tell Fly.io that our Strapi app needs to run on port 1337 internally.
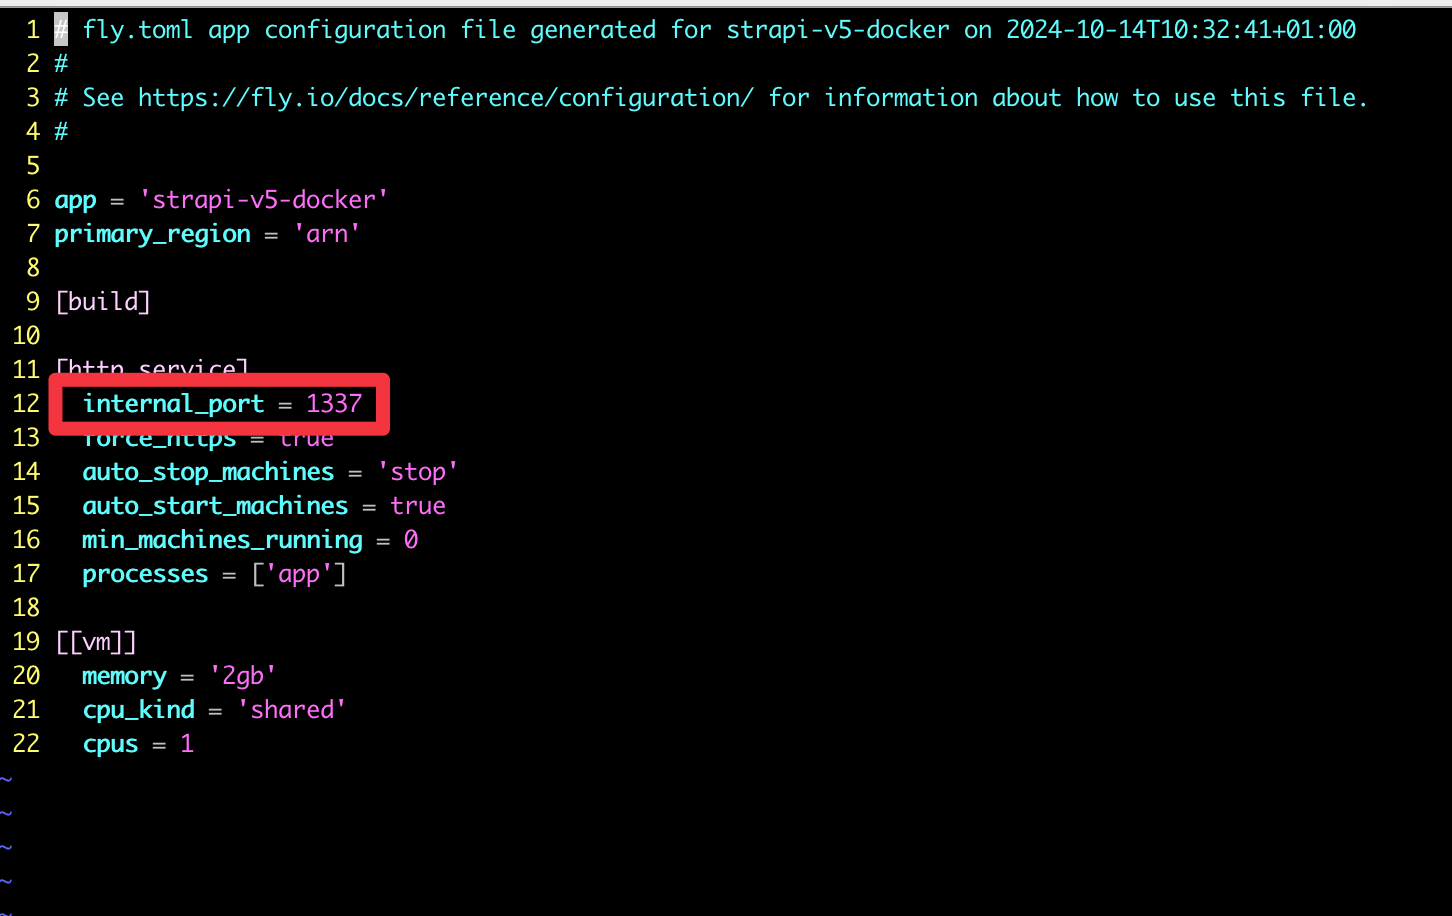
After you confirm these settings, Fly.io will build your image and set up a machine/app for you. You’ll then be able to see your app within the dashboard.
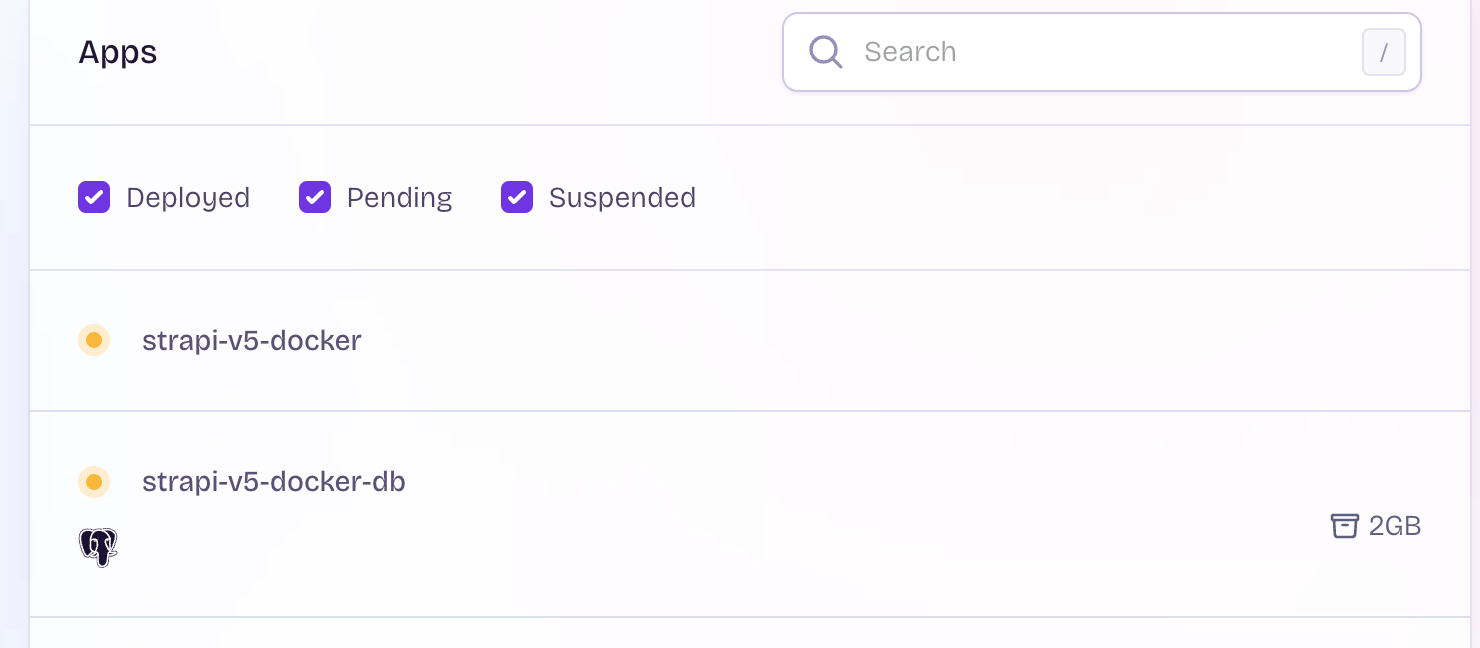
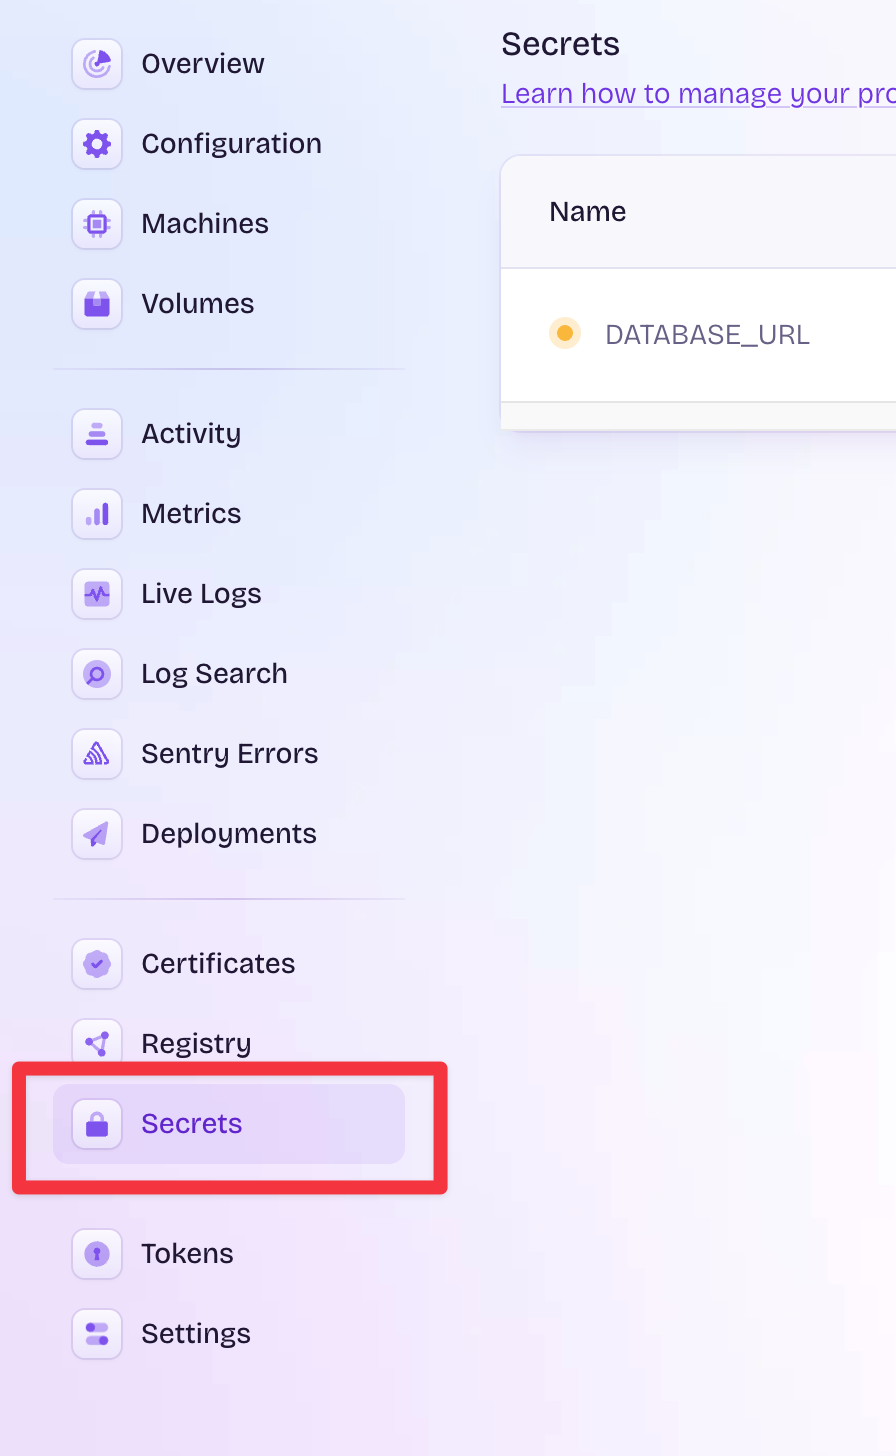
Select your app from the list in the dashboard (not the database). Then select Secrets.
Copy all secrets from your .env file in your Strapi project to secrets. Of course, change any of them that you’d like to be “prod” vs “dev” secrets.
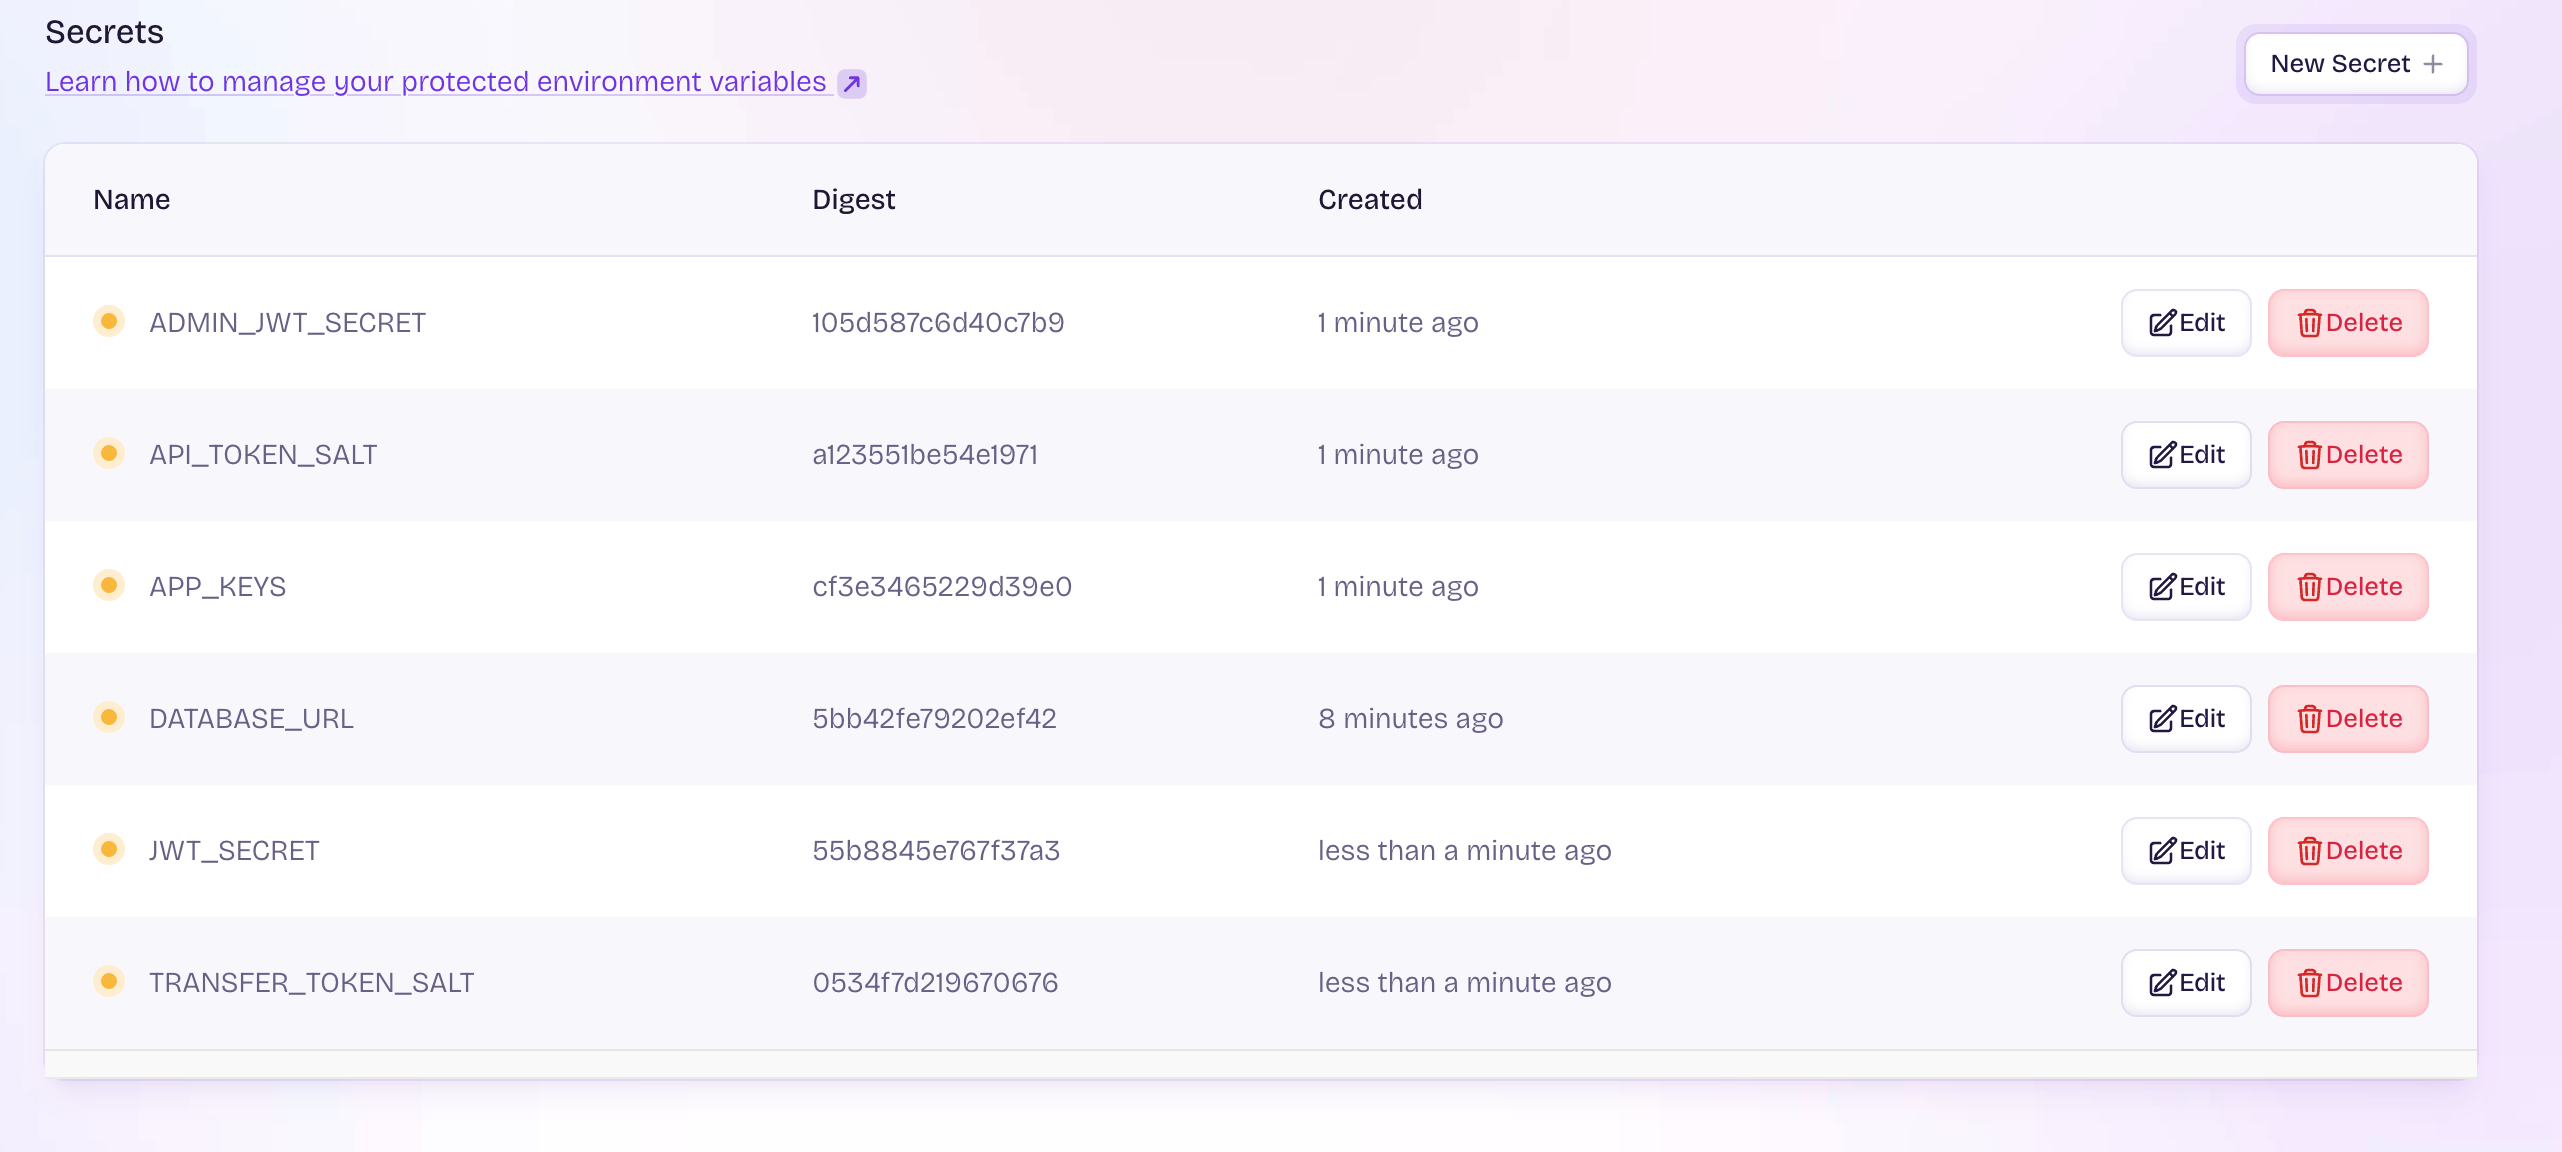
DATABASE_CLIENT. This needs to be set to inform Strapi as to which database you’re using.Now you should be able to deploy your Strapi image to Fly.io.
flyctl deploy --dockerfile Dockerfile.prod
Watch Fly.io build your Docker image.
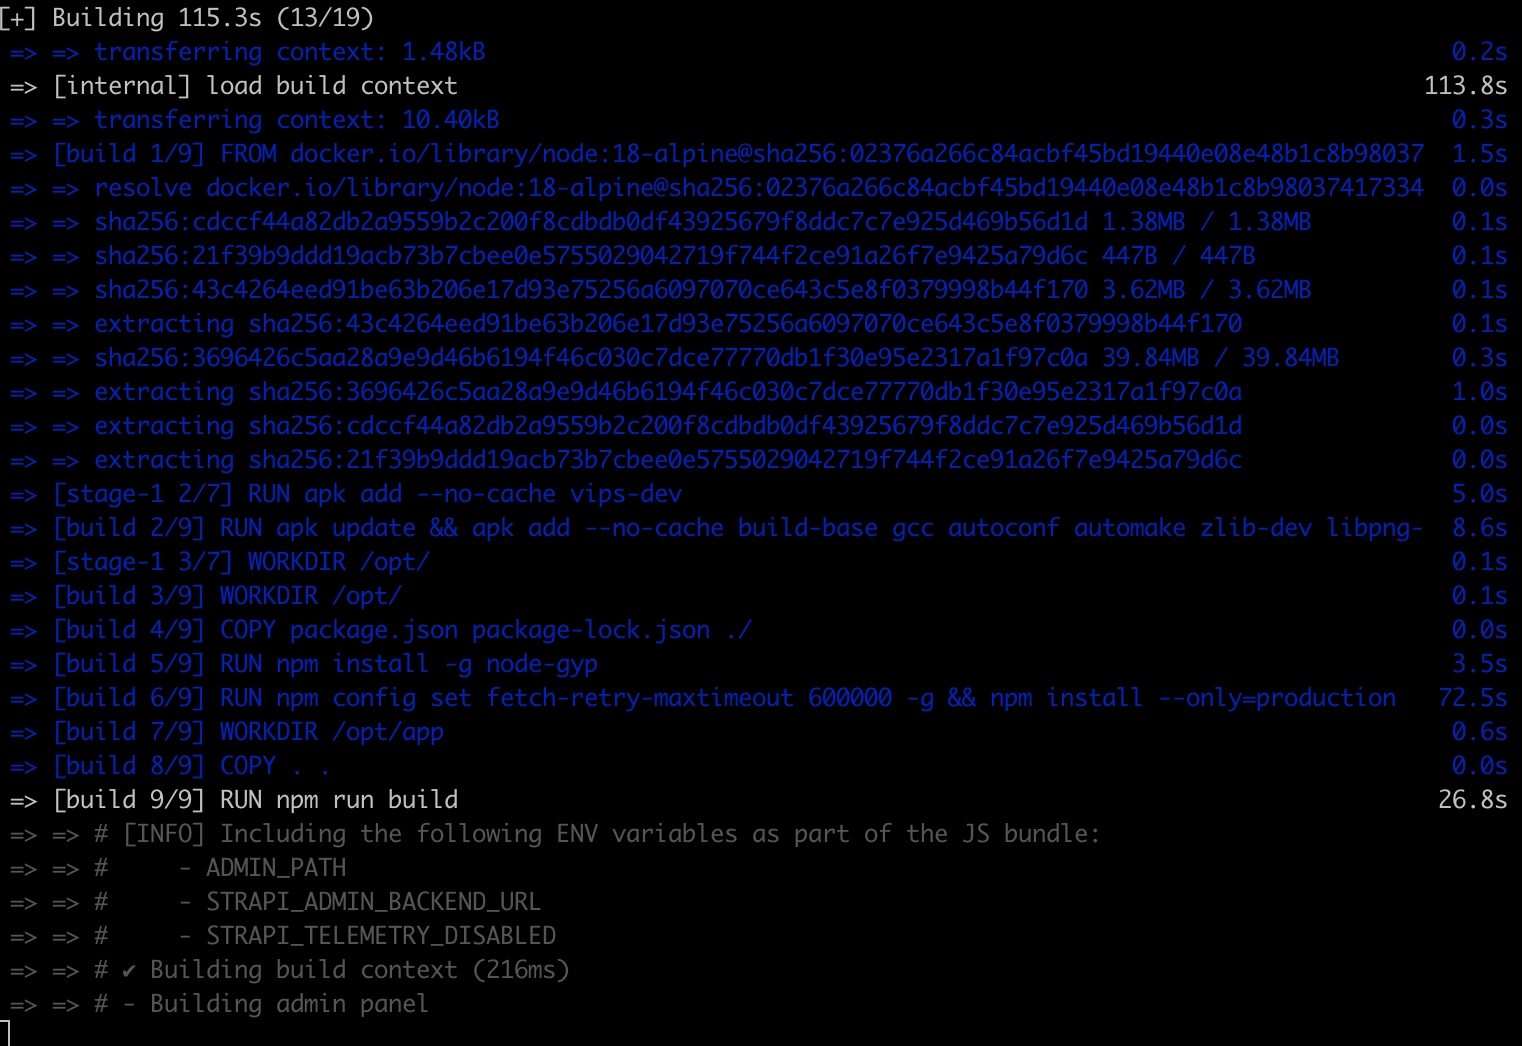
Once finished, Fly.io will inform you that your app is available at the specified URL.

Visit the provided link and you’ll see your Strapi app is live on the internet!
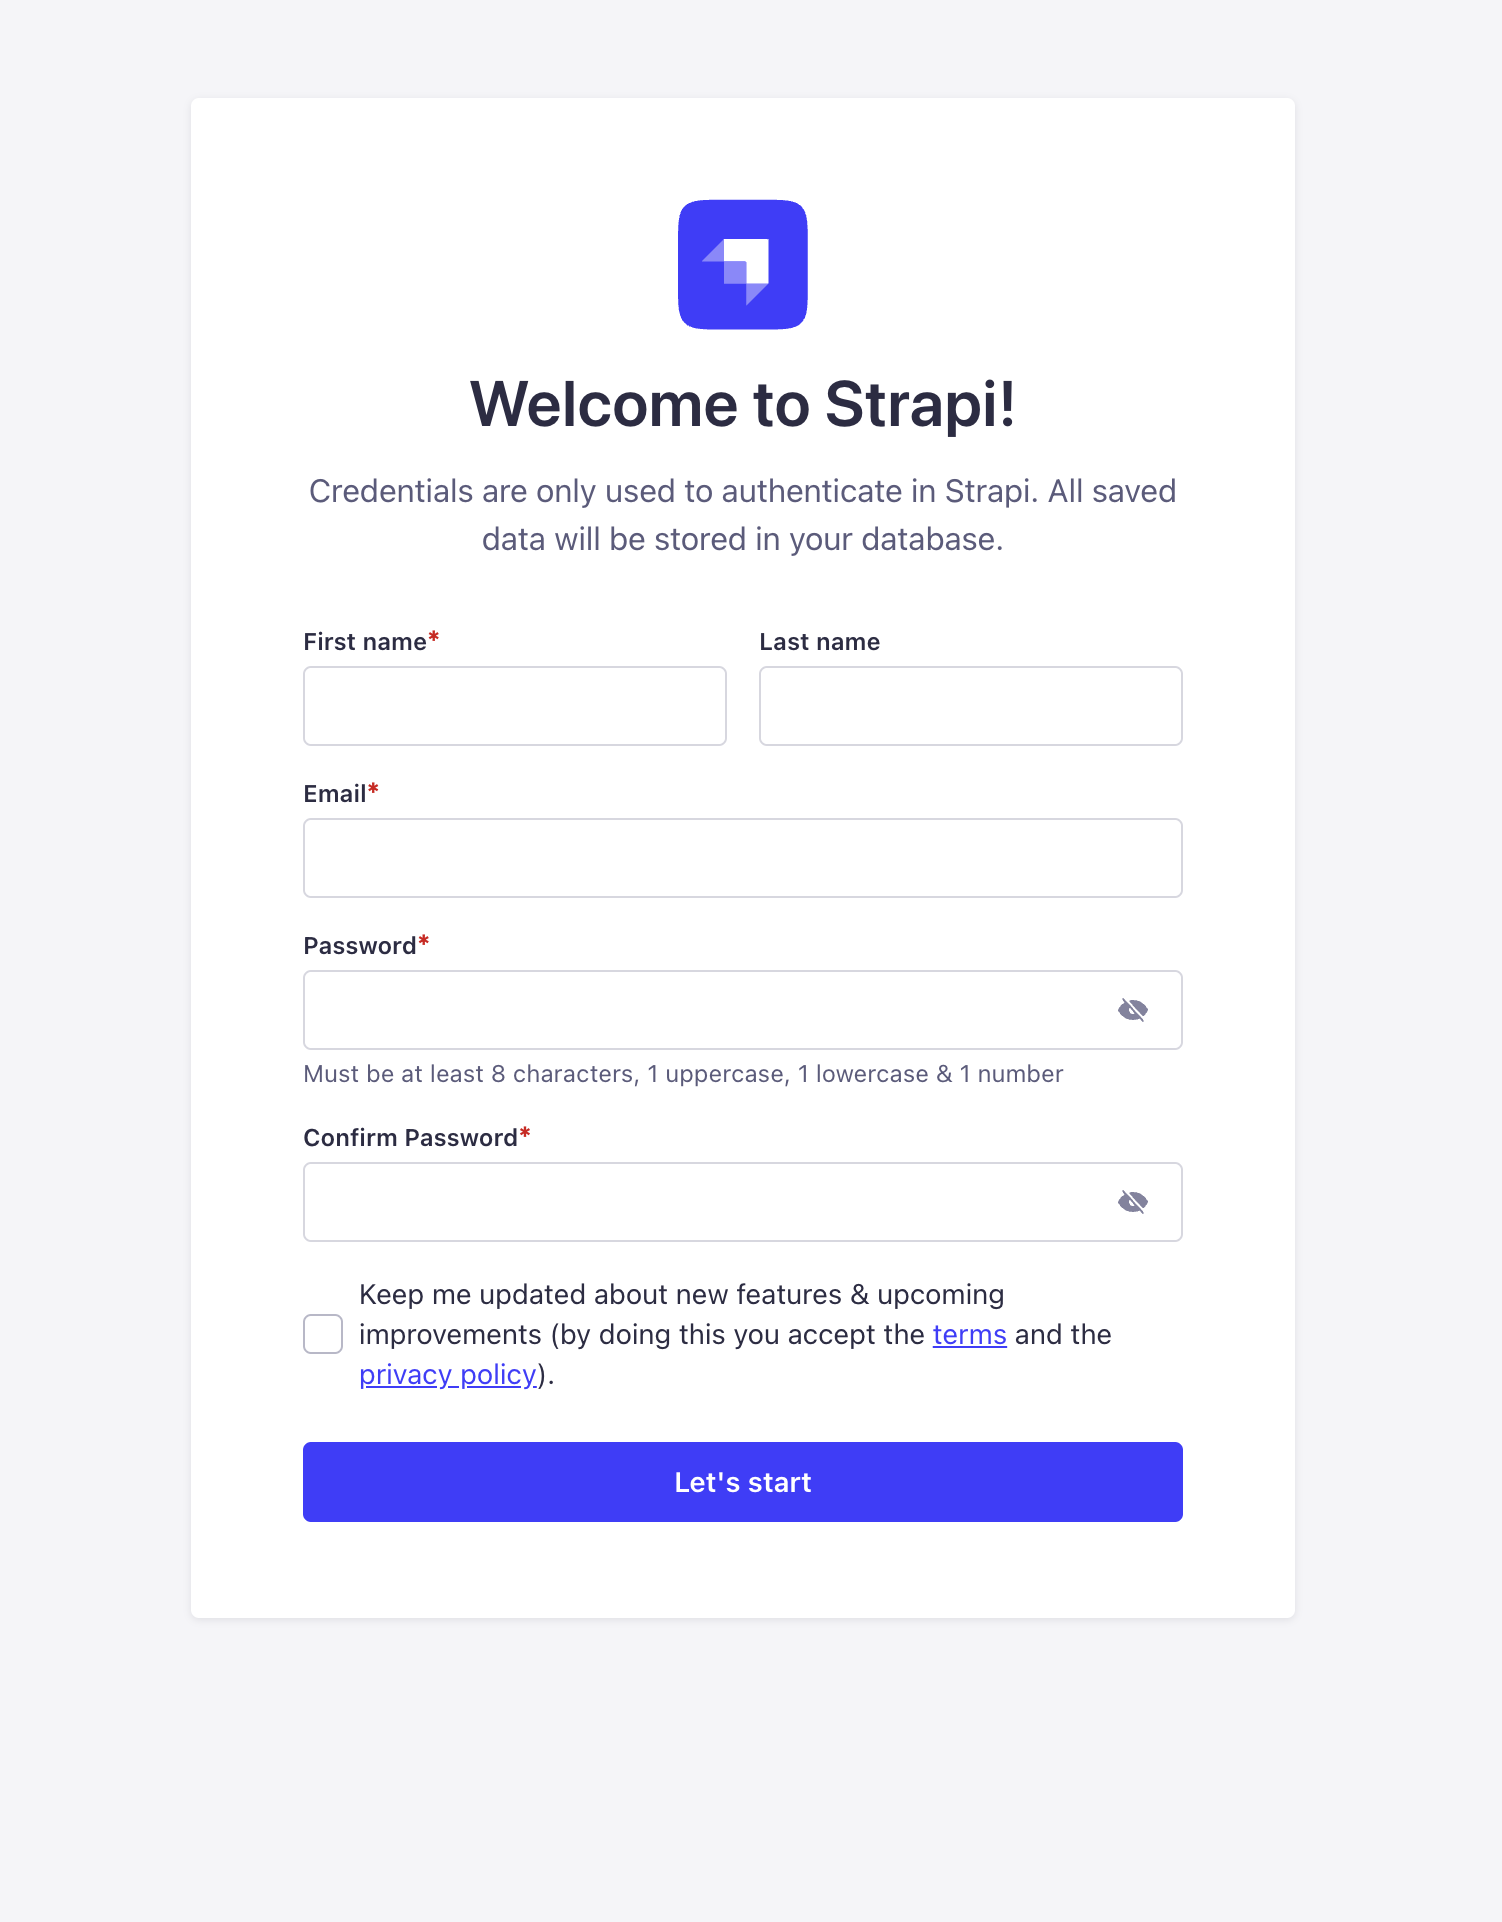
Congrats! You’ve deployed Strapi to fly.io
If you have any questions, or if I’ve missed anything, please leave a comment. Also, please subscribe so you don’t miss out on any updates.
Get the code for this project here:
Subscribe to my newsletter
Read articles from Richard Westmoreland directly inside your inbox. Subscribe to the newsletter, and don't miss out.
Written by

Richard Westmoreland
Richard Westmoreland
I'm a developer who grew up in Houston, TX. I've done a lot of things in my life and have finally found that software and development is truly what makes me happy. I've been a musician, a teacher, a flight attendant, and airline pilot, and now a full stack software engineer. I get to learn about new tech every day. And I'm here to share it all with you.