Deploying a Custom Website on Google Cloud Run with Docker
 Gauri Agrawal
Step 1: Clone the Git Repository
Open Google Cloud Shell.
Create a directory
mkdir my-app
cd my-app
Clone your Git repository inside my-app:
git clone [REPO-URL]Navigate to the project directory:
cd [REPO-DIRECTORY]
Step 2: Create the Nginx Configuration File (nginx.conf)
In your project directory (my-app/50projects50days/3d-boxes-background), create a custom Nginx configuration file if needed:
Create the
nginx.conffile inside which website you want to deploy:touch nginx.confAdd the following content to your
nginx.conffile:server { listen 8080; server_name localhost; location / { root /usr/share/nginx/html; index index.html; } }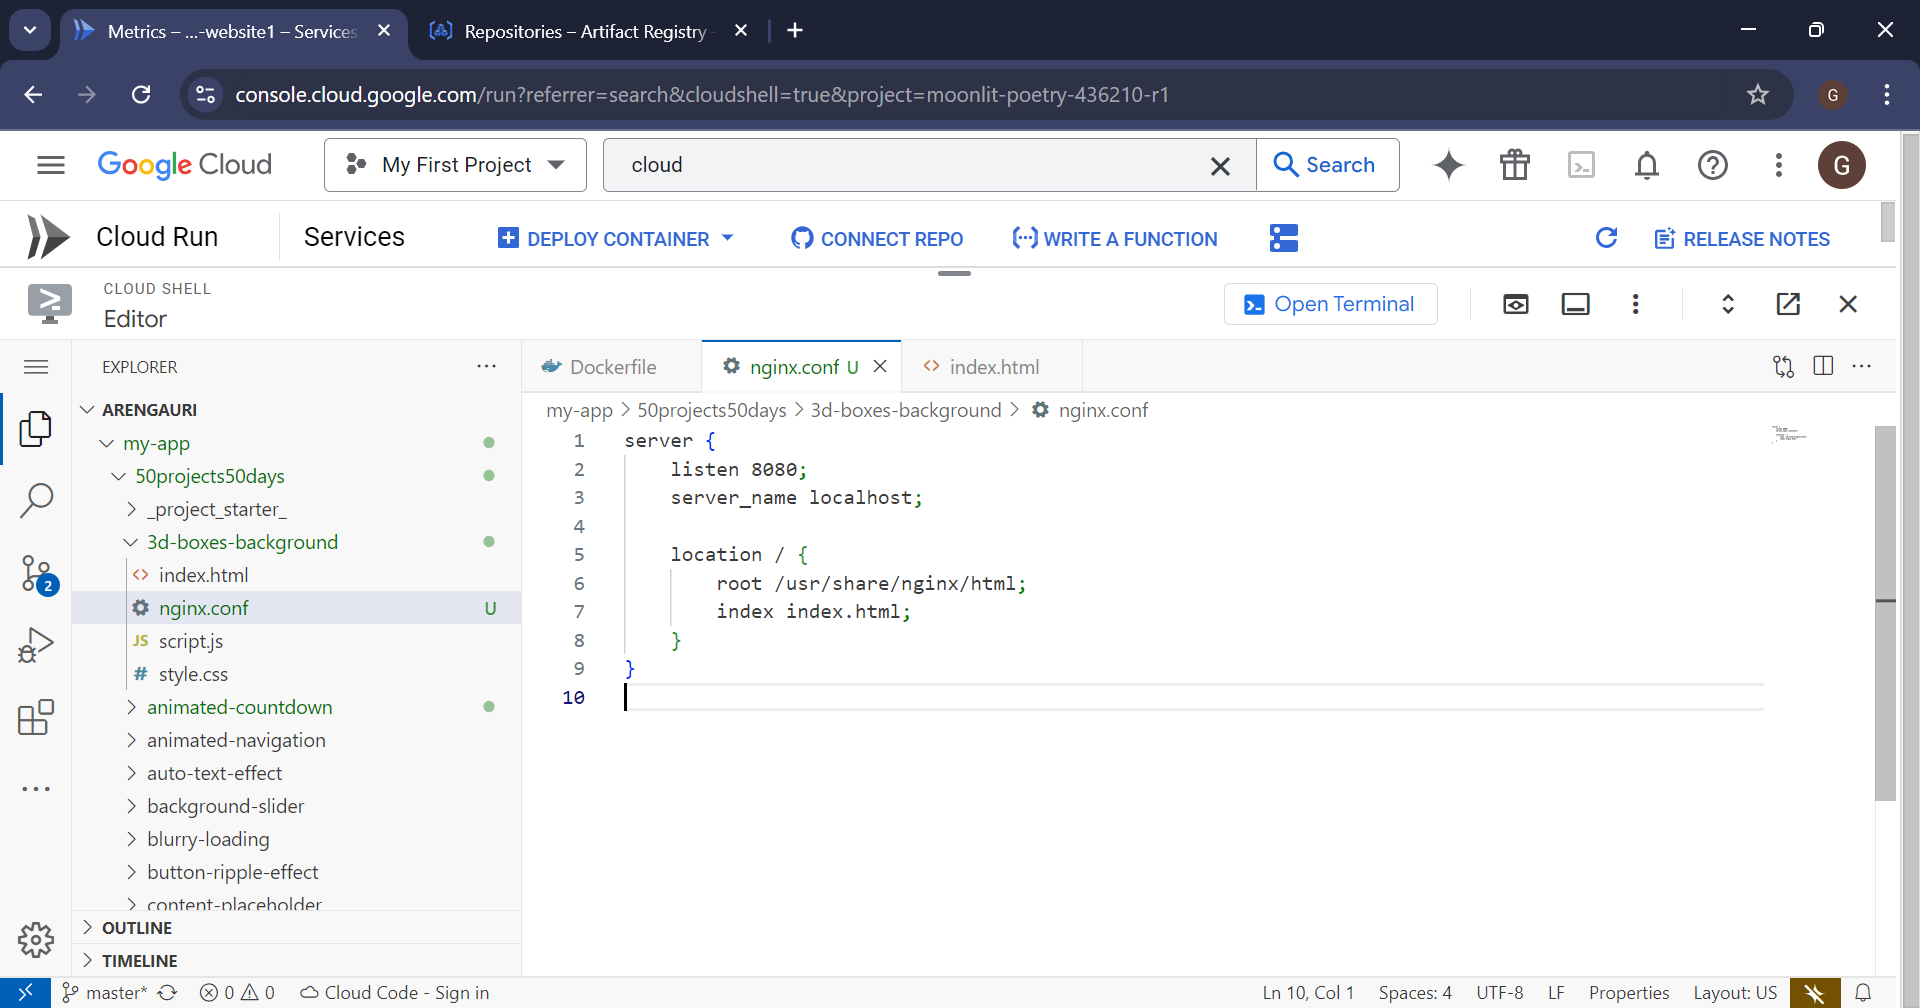
This configuration tells Nginx to serve the static files in
/usr/share/nginx/html(where your website files will be located) and to useindex.htmlas the main file.
Step 3: Create a Dockerfile
Navigate to my-app
Create a
Dockerfileinside my-app:touch DockerfileAdd the following content to the
Dockerfile:# Base image FROM nginx:alpine # Copy the website files to the Nginx default directory COPY 50projects50days/3d-boxes-background/ /usr/share/nginx/html # Copy the custom Nginx config file COPY 50projects50days/3d-boxes-background/nginx.conf /etc/nginx/conf.d/default.conf # Expose port 8080 for Cloud Run EXPOSE 8080 # Start Nginx server CMD ["nginx", "-g", "daemon off;"]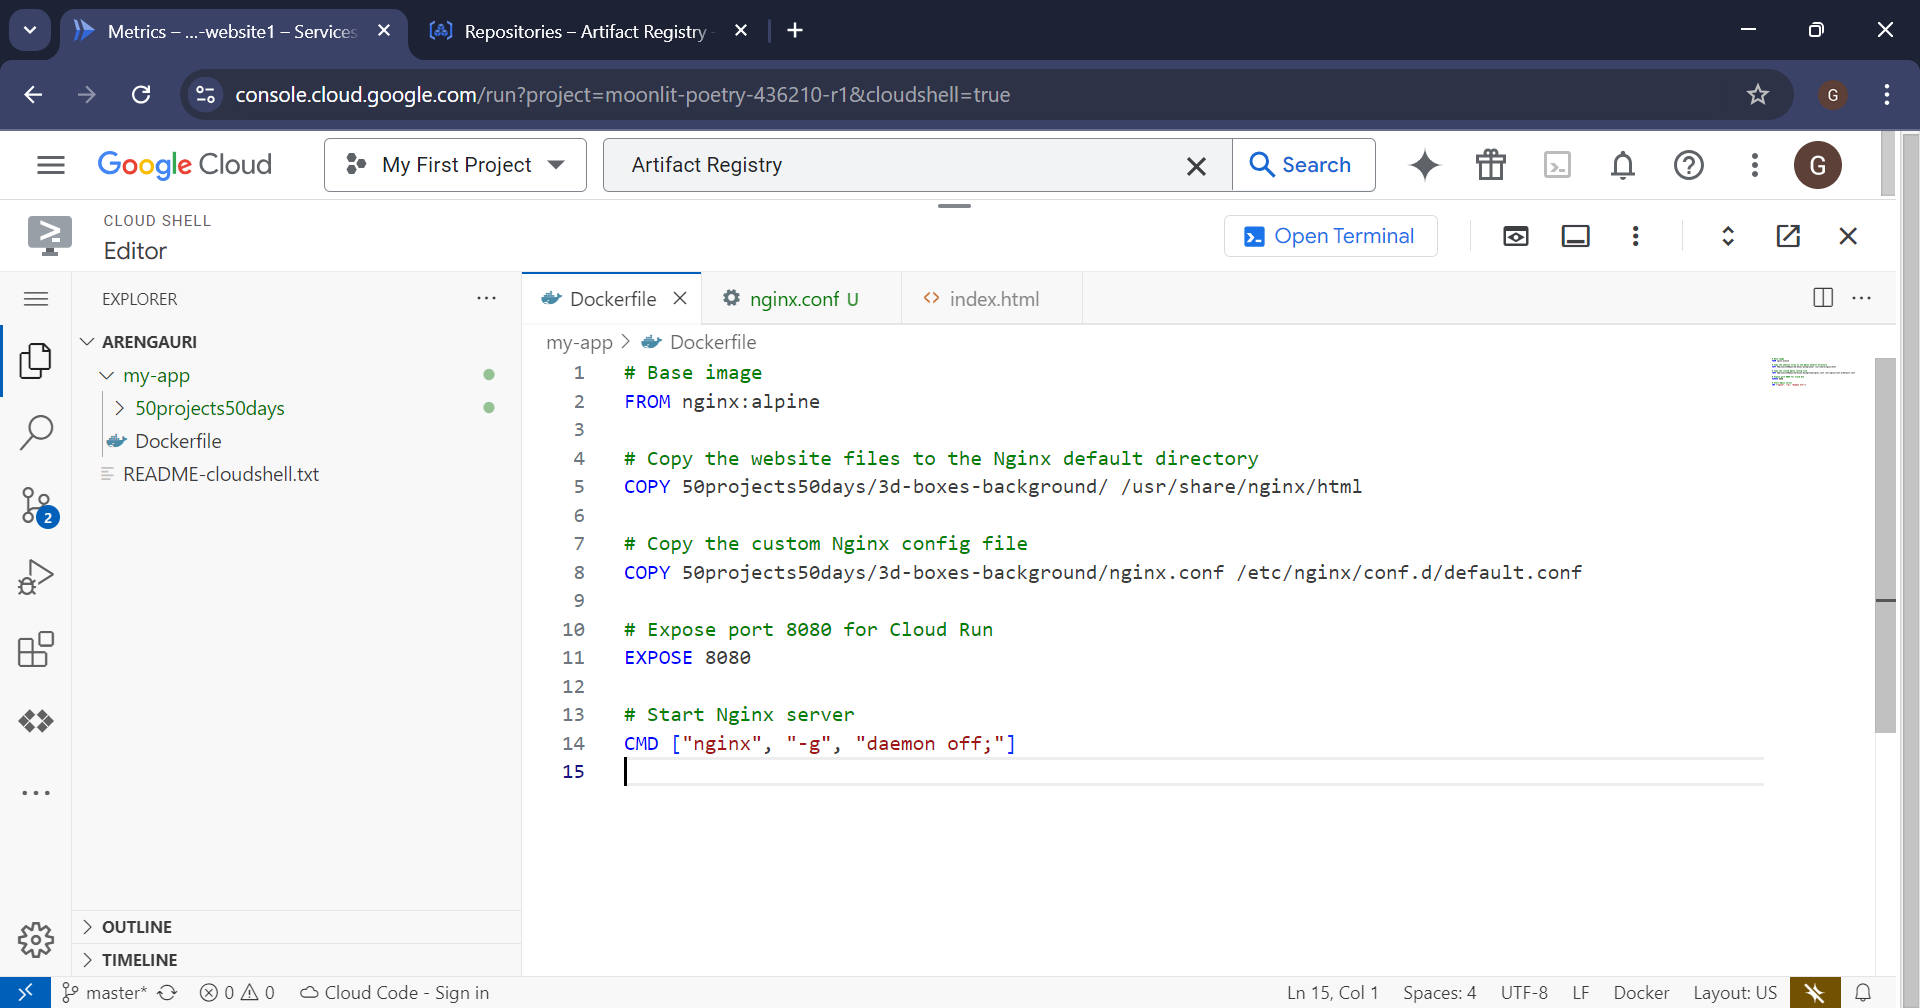
Confirm Directory Structure: Before proceeding, check that the
Dockerfileand50projects50daysdirectory are in the current folder. Run:lsYou should see both the
Dockerfileand the50projects50daysfolder in the output.
Step 4: Build the Docker Image
Now that the Dockerfile and nginx.conf are set up, build the Docker image:
docker build -t my-custom-website .
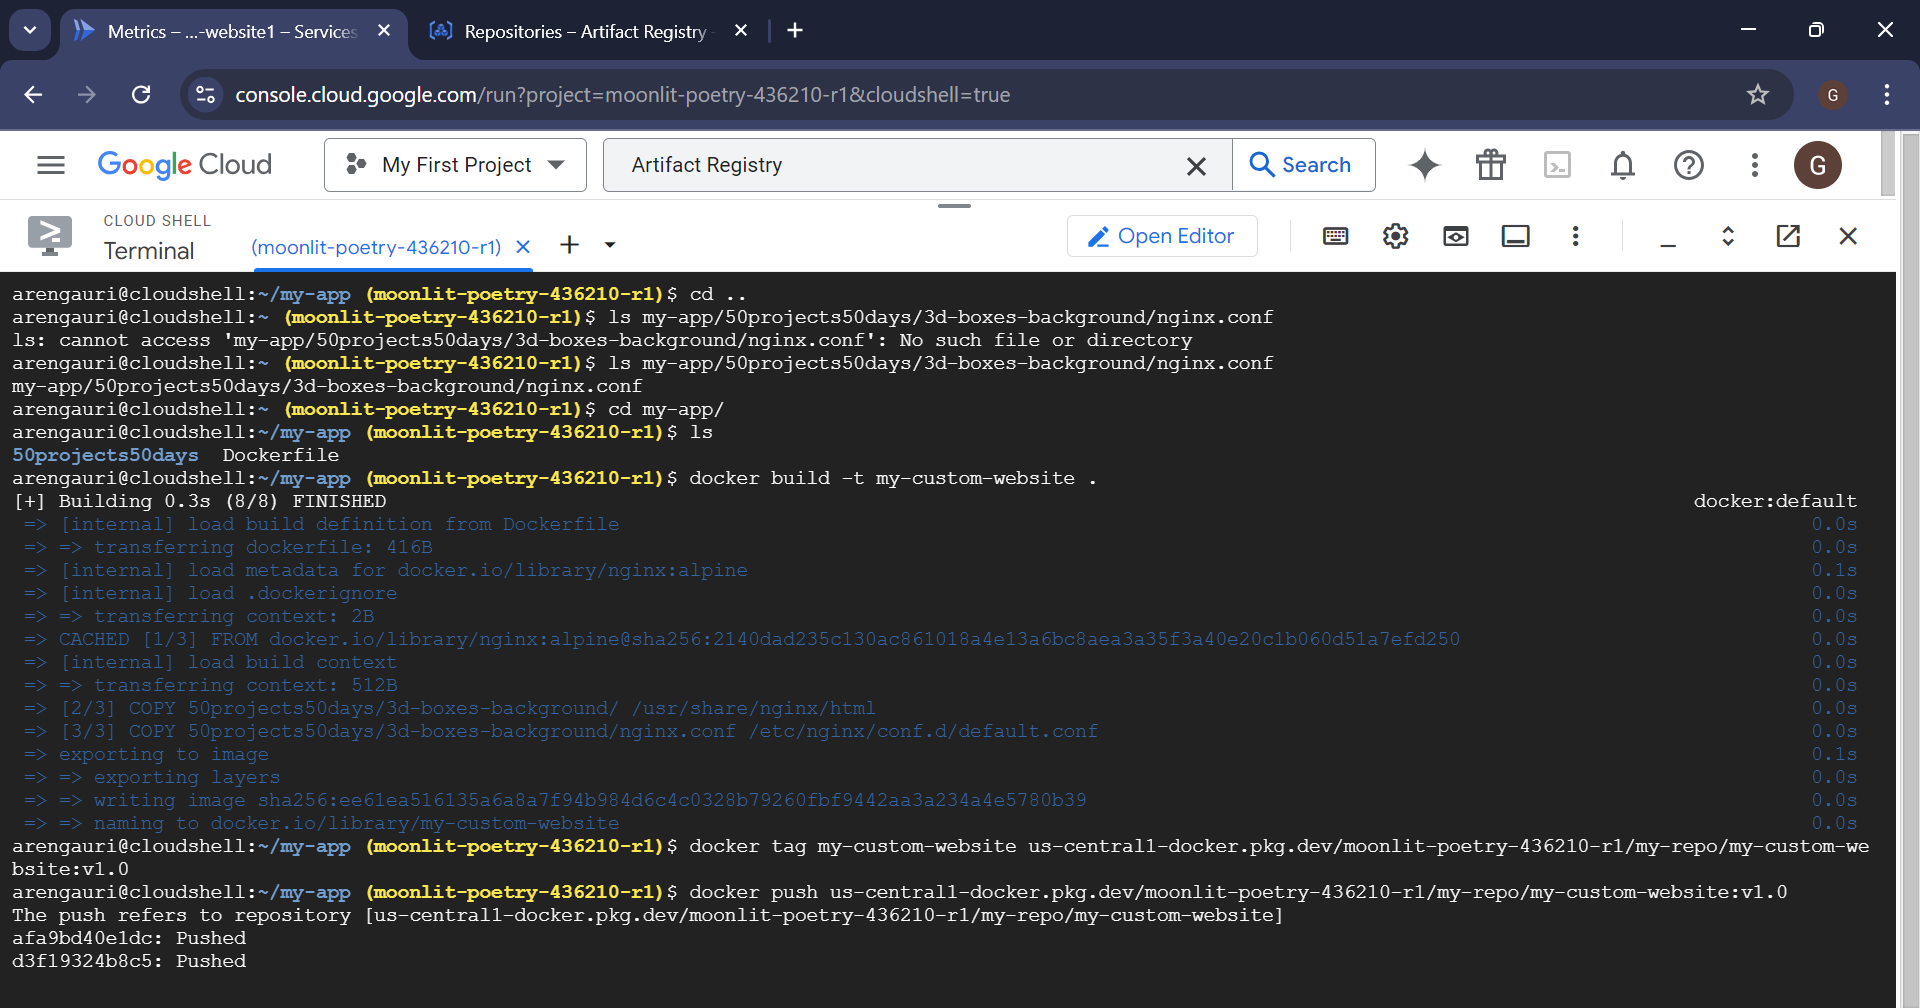
Step 5: Tag and Push Docker Image to Artifact Registry
5.1 Enable Artifact Registry
If you haven’t enabled Artifact Registry:
gcloud services enable artifactregistry.googleapis.com
5.2 Create a Repository in Artifact Registry
If you haven’t already created a Docker repository in Artifact Registry:
gcloud artifacts repositories create [REPOSITORY] \
    --repository-format=docker \
    --location=[REGION] \
    --description="Docker repository"
You can create a repo manually also:
Search Artifact Registry
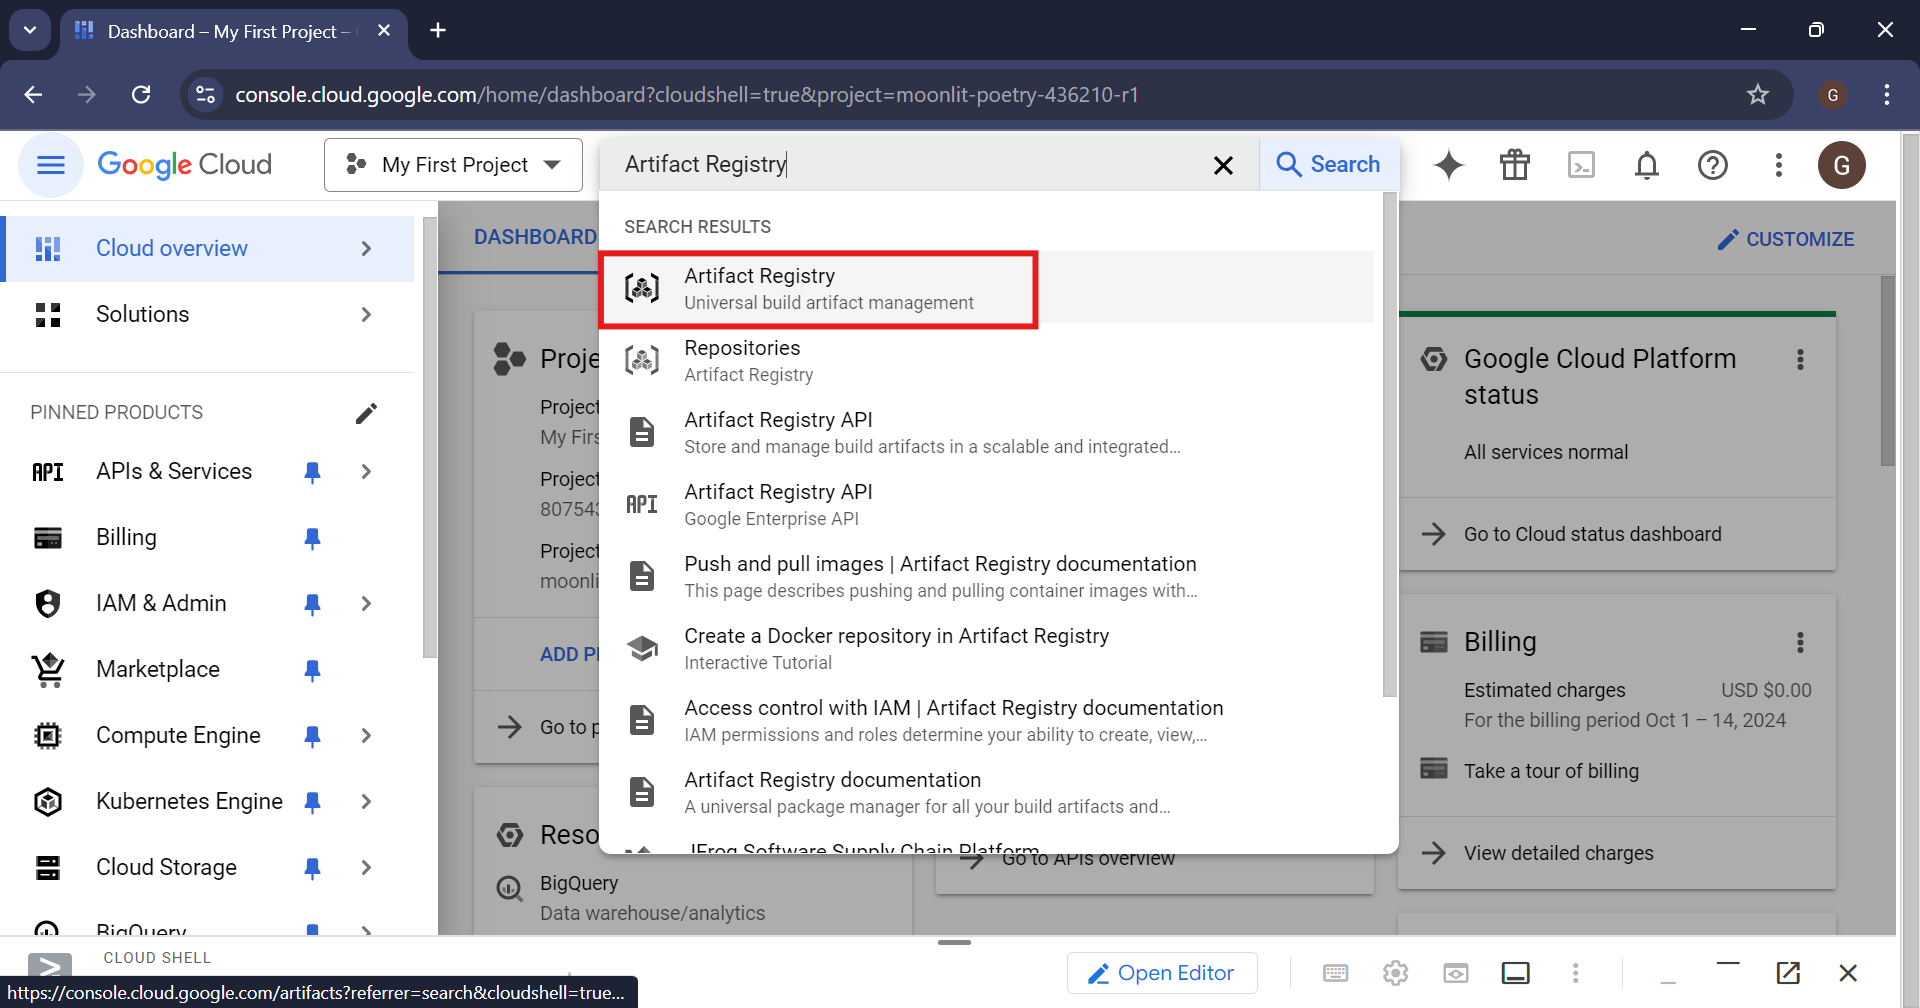
Click on ‘+’ icon
Select the format, name the repo, select the region and click on create
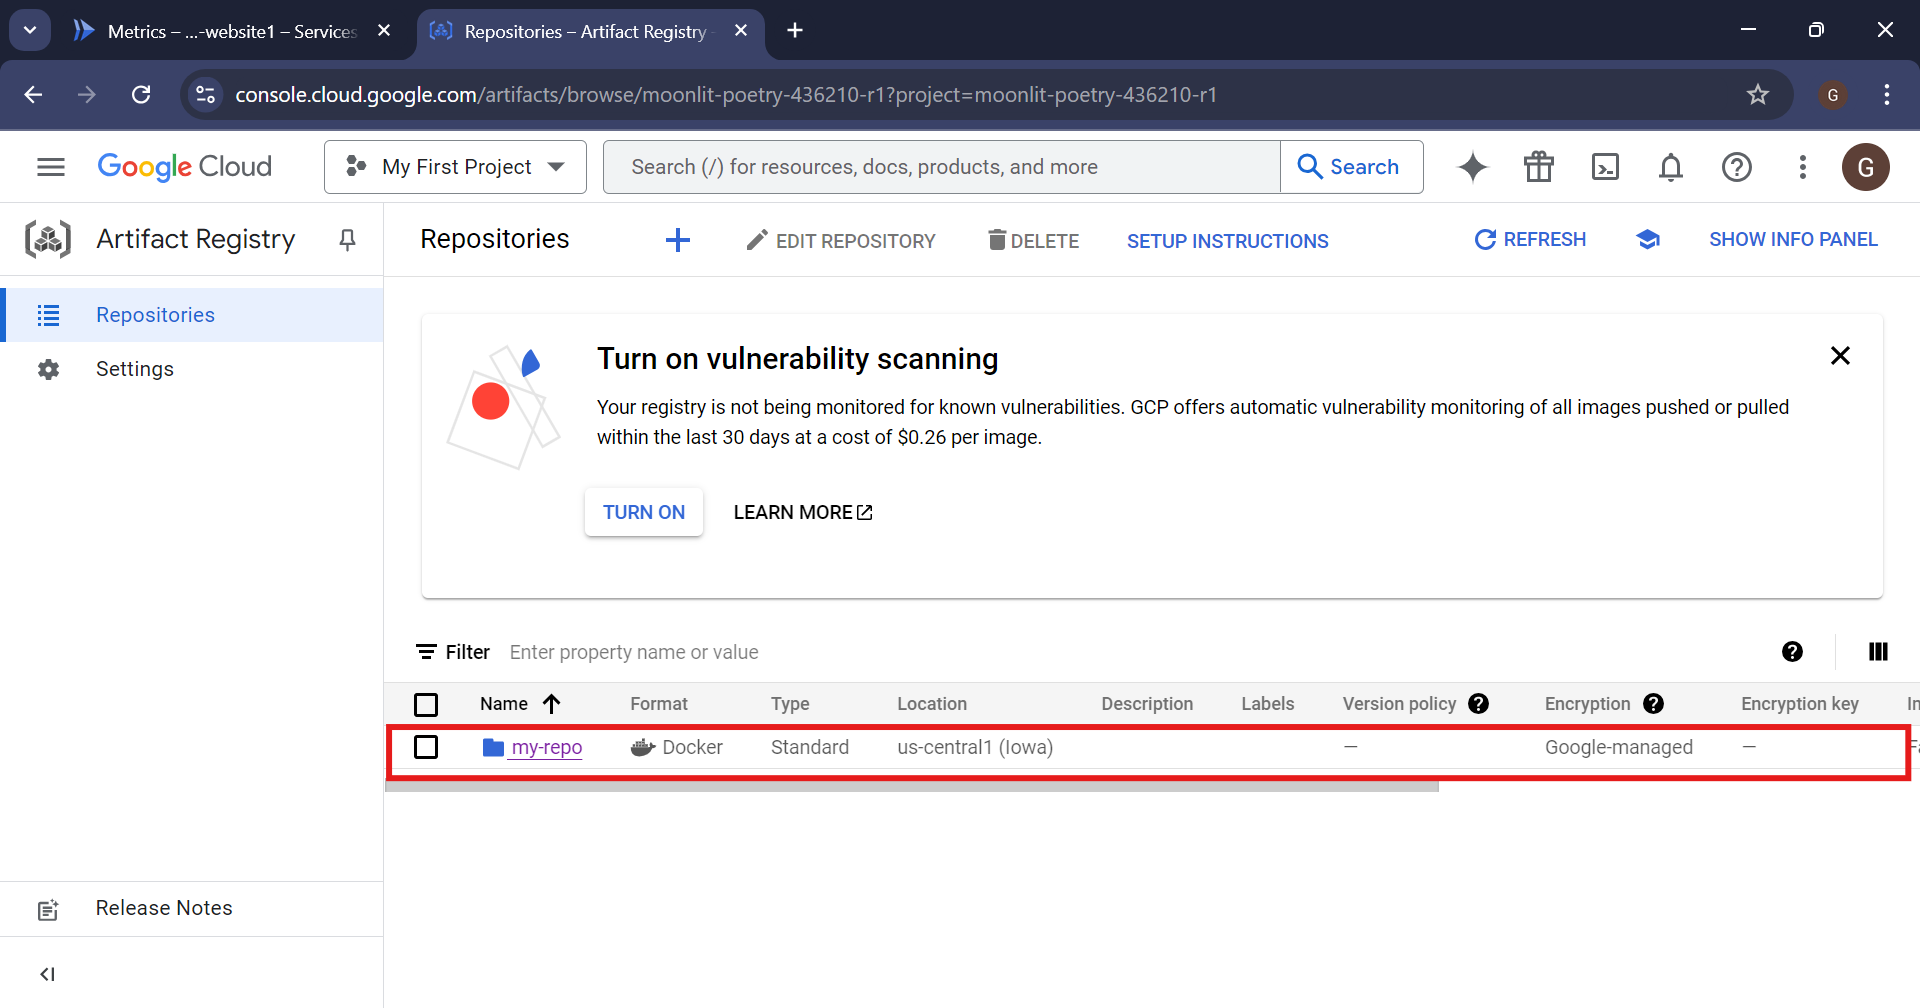
5.3 Tag Your Docker Image
Tag the Docker image for pushing to Artifact Registry:
docker tag my-custom-website [REGION]-docker.pkg.dev/[PROJECT-ID]/[REPOSITORY]/my-custom-website:v1.0
docker tag my-custom-website us-central1-docker.pkg.dev/moonlit-poetry-436210-r1/my-repo/my-custom-website:v1.0
5.4 Push the Image to Artifact Registry
Push your Docker image:
docker push [REGION]-docker.pkg.dev/[PROJECT-ID]/[REPOSITORY]/my-custom-website:v1.0
docker push us-central1-docker.pkg.dev/moonlit-poetry-436210-r1/my-repo/my-custom-website:v1.0
Step 6: Deploy to Cloud Run
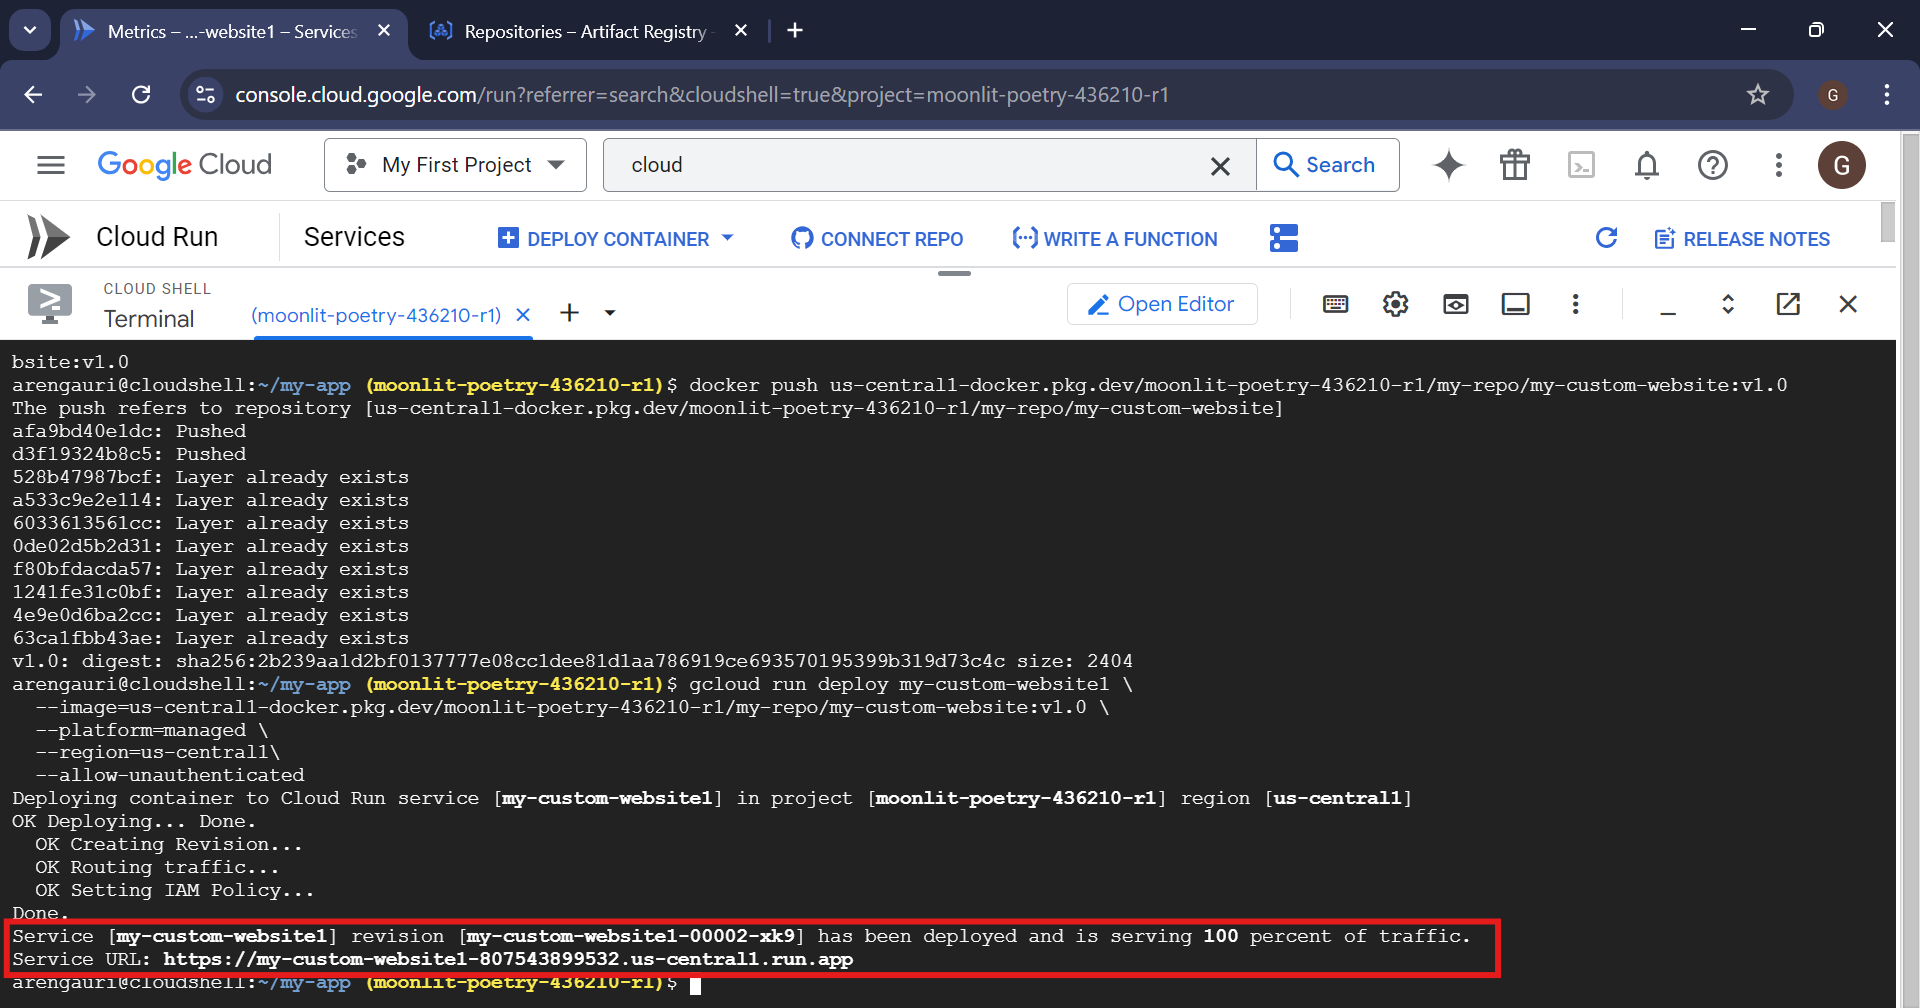
Once the image is pushed to Artifact Registry, deploy it to Cloud Run:
gcloud run deploy my-custom-website \
  --image=[REGION]-docker.pkg.dev/[PROJECT-ID]/[REPOSITORY]/my-custom-website:v1.0 \
  --platform=managed \
  --region=[REGION] \
  --allow-unauthenticated
[SERVICE-NAME]: Name of your Cloud Run service (e.g.,
my-custom-website).[PROJECT-ID]: Your GCP project ID.
[REGION]: The region where you want to deploy the service.
[REPOSITORY]: Name of your Docker repository.
gcloud run deploy my-custom-website1
--image=us-central1-docker.pkg.dev/moonlit-poetry-436210-r1/my-repo/my-custom-website:v1.0
--platform=managed
--region=us-central1
--allow-unauthenticated
Step 7: Access the Cloud Run Service
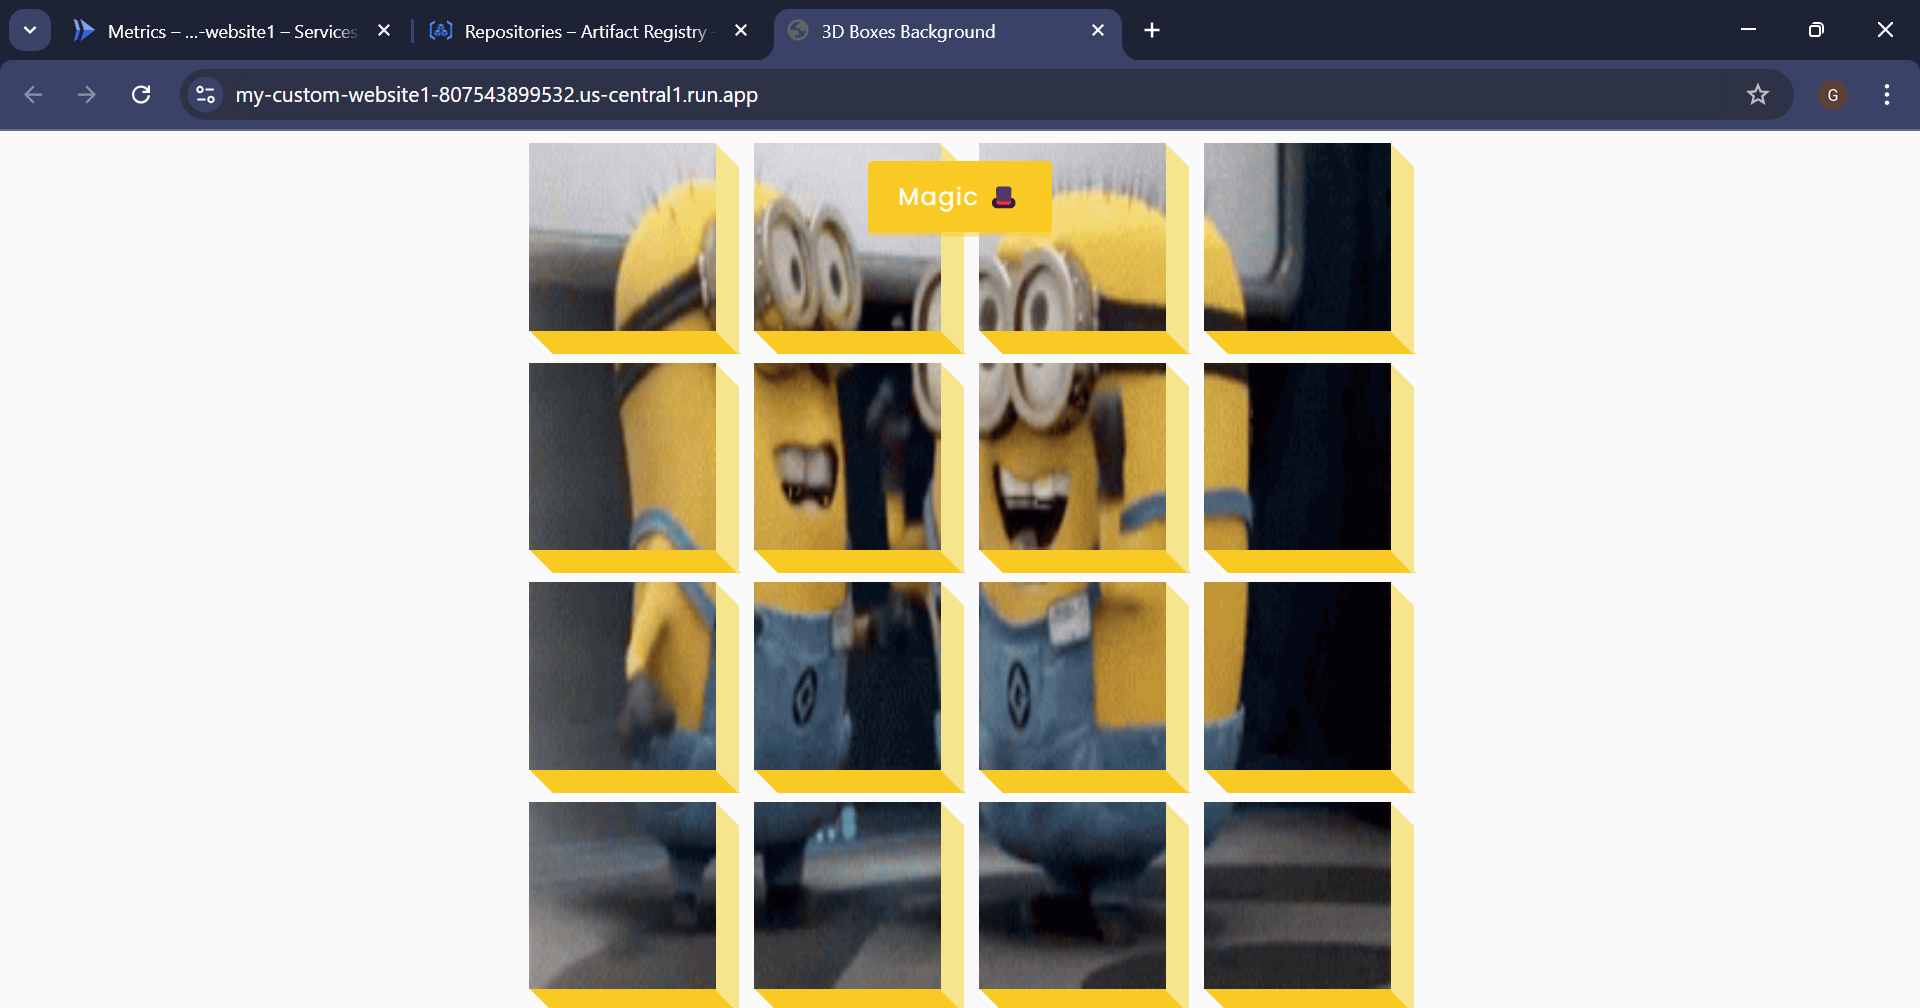
Once deployed, Cloud Run will provide a URL for your service. You can access your website using this URL.
Click on Service URL
Directory Structure
Your project directory should look like this:
your-root-directory/
├── my-app/
│   └── 50projects50days/
│       ├── 3d-boxes-background/
│       │   ├── index.html           # Your main website file
│       │   └── nginx.conf           # Your custom Nginx configuration file (optional)
│       └── Dockerfile                # Your Dockerfile
Step 8: Check Logs if Something Goes Wrong
If the deployment fails or the site doesn’t load correctly, check the Cloud Run logs to diagnose the issue:
gcloud logs read --limit 50 --project=[PROJECT-ID]
Summary
Clone the Git repo to Cloud Shell.
Create an Nginx configuration file (
nginx.conf) if needed.Create a Dockerfile to containerize your website.
Build and tag your Docker image.
Push the image to Google Artifact Registry.
Deploy the image to Cloud Run.
Access your website using the provided URL.
This process will help you deploy a custom website to Cloud Run.
Deploying your custom website on Google Cloud Run with Docker makes hosting easy and scalable. With Nginx, you can efficiently serve your site in the cloud. Give it a try, and stay tuned for more tips and tutorials!
Subscribe to my newsletter
Read articles from Gauri Agrawal directly inside your inbox. Subscribe to the newsletter, and don't miss out.
Written by
