Zabbix Installation in Docker and AWS Integration Guide
 Sarthak Tyagi
Introduction
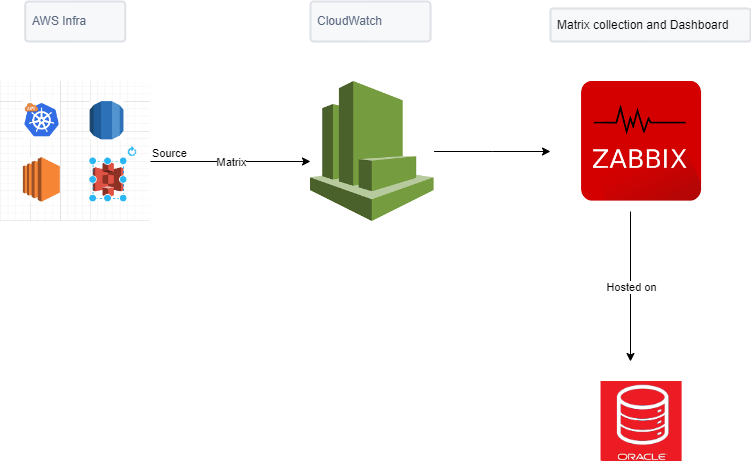
This guide will walk you through the process of installing Zabbix using Docker Compose and integrating it with AWS services.

Prerequisites
Latest Docker and Docker Compose installed on your machine.
AWS account with necessary permissions.
Use t2.medium processor
Step 1: CREATE AWS IAM
1.1: Create IAM User
Sign in to the AWS Management Console.
Navigate to the IAM service.
Create a new IAM user with programmatic access.
Attach policies granting access to the necessary AWS resources (e.g., CloudWatch, EC2).
   {
       "Version": "2012-10-17",
       "Statement": [
           {
               "Action": [
                   "cloudwatch:DescribeAlarms",
                   "cloudwatch:GetMetricData",
                   "ec2:DescribeInstances",
                   "ec2:DescribeVolumes",
                   "ec2:DescribeRegions",
                   "rds:DescribeEvents",
                   "rds:DescribeDBInstances",
                   "ecs:DescribeClusters",
                   "ecs:ListServices",
                   "ecs:ListTasks",
                   "ecs:ListClusters",
                   "s3:ListAllMyBuckets",
                   "s3:GetBucketLocation",
                   "elasticloadbalancing:DescribeLoadBalancers",
                   "elasticloadbalancing:DescribeTargetGroups",
                   "ec2:DescribeSecurityGroups",
                   "lambda:ListFunctions"
               ],
               "Effect": "Allow",
               "Resource": "*"
           }
       ]
   }
Installation zabbix
These compose files are added as examples; they are overloaded. For example, they contain proxies with both MySQL and SQLite3 support.
To obtain Docker compose files provided by Zabbix, clone the repository:
git clone https://github.com/zabbix/zabbix-docker.git
Switch to the required version:
git checkout 7.0.1
Now go the the directory
vim .env and then change the starting 6 line
# Zabbix images
ZABBIX_ALPINE_IMAGE_TAG=alpine-7.0.1
ZABBIX_CENTOS_IMAGE_TAG=centos-7.0.1
ZABBIX_OL_IMAGE_TAG=ol-7.0.1
ZABBIX_UBUNTU_IMAGE_TAG=ubuntu-7.0.1
ZABBIX_RHEL_IMAGE_TAG=rhel-7.0.1
ZABBIX_LOCAL_IMAGE_TAG_POSTFIX=-local
Compose configuration files and create and start containers:
docker compose -f ./docker-compose_v3_alpine_mysql_latest.yaml up
Go to http://localhost or use http://publicip
user - Admin and password - zabbix
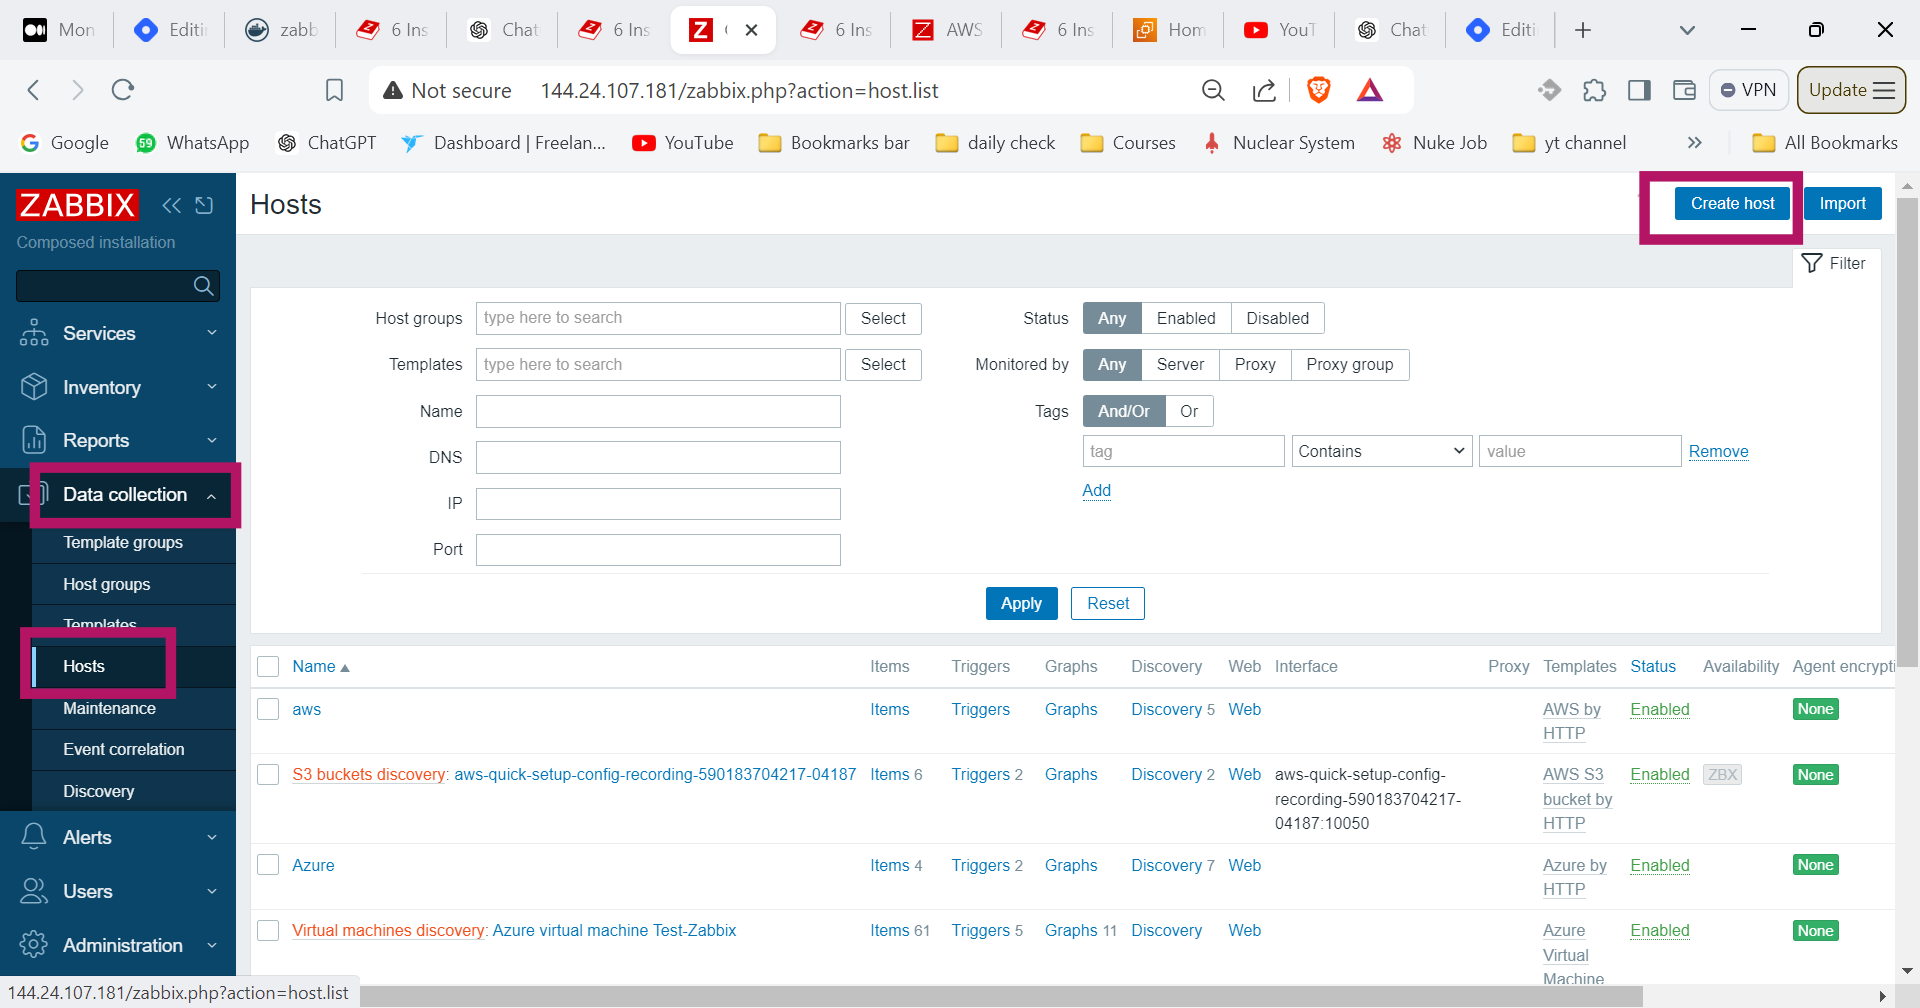
Click on Data collection
Click on Host
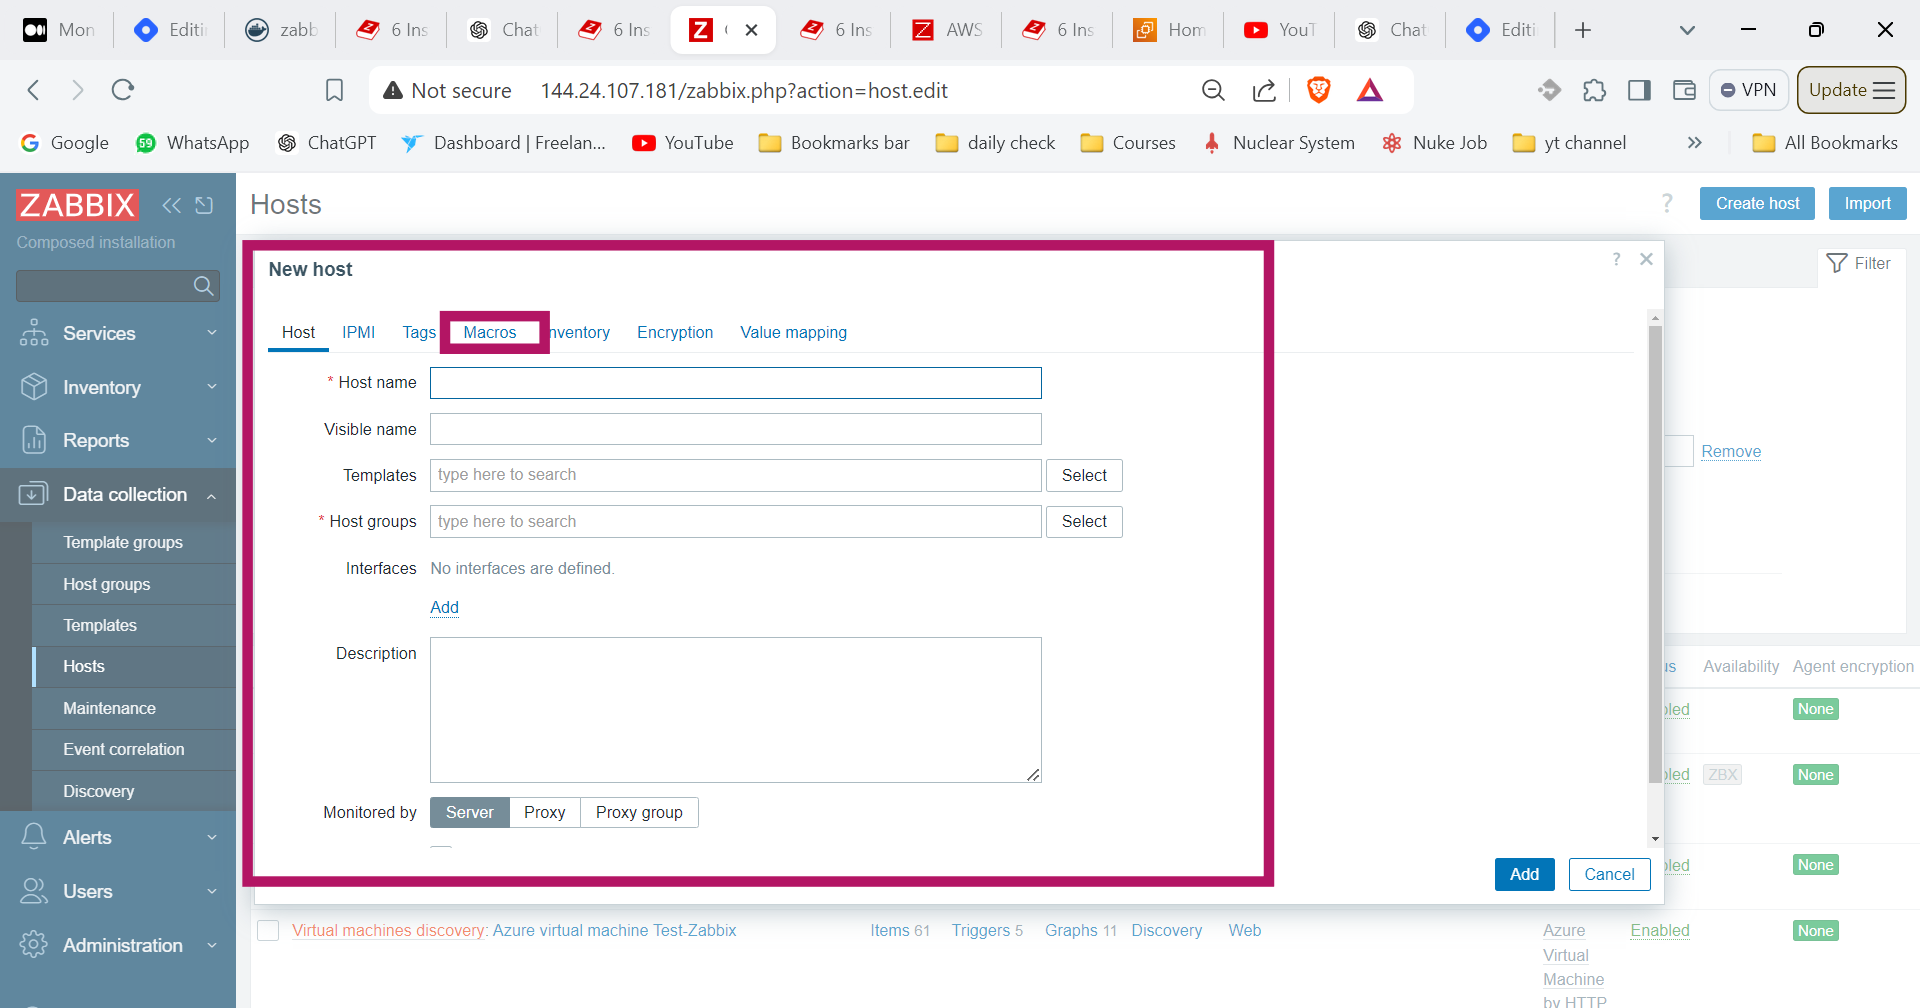
Create Host

Fill the details
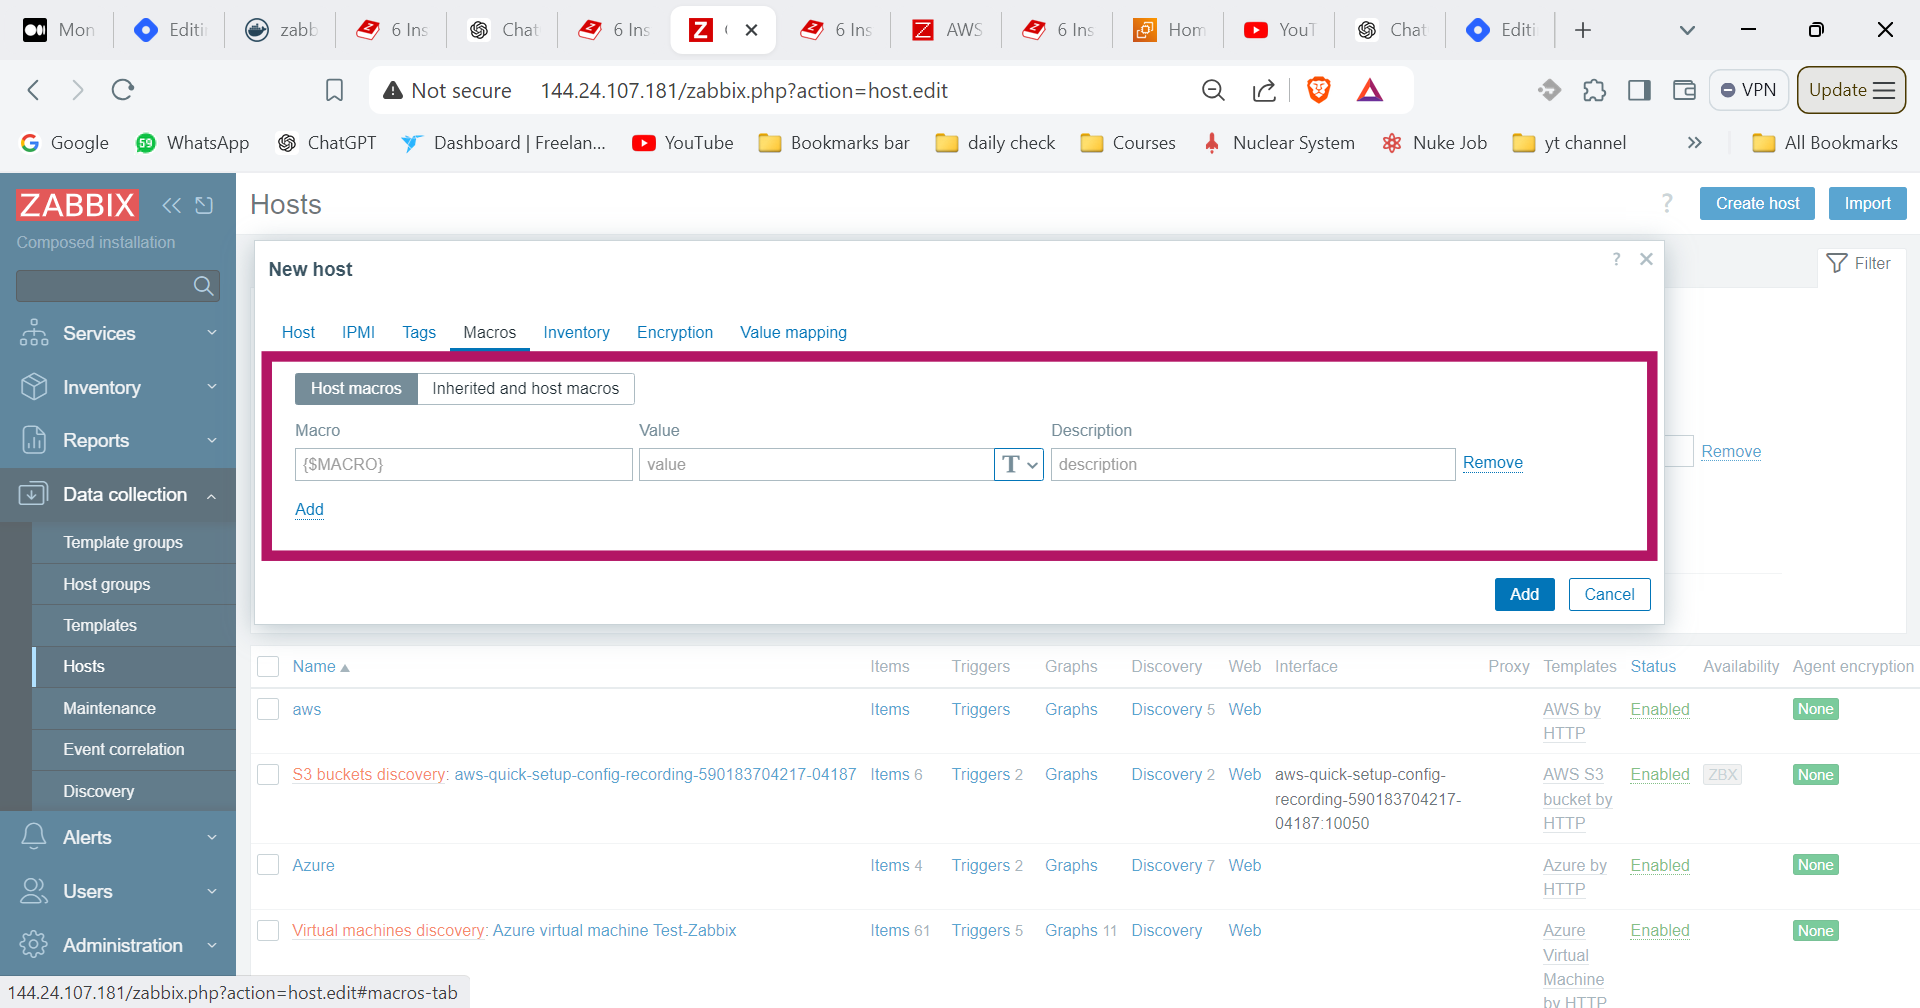
Then Click on Macros

Enter Access Key and Secret key here
{$AWS.AUTH_TYPE}
{$AWS.ACCESS.KEY.ID}
{$AWS.SECRET.ACCESS.KEY}
{$AWS.REQUEST.REGION}

If it’s not working with ubuntu linux then Use Amazon linux it will work and increate instance size t2.medium
Subscribe to my newsletter
Read articles from Sarthak Tyagi directly inside your inbox. Subscribe to the newsletter, and don't miss out.
Written by
