Storage Account Configuration
 Setutsi Valerie Dean Okon
Let’s consider this request: Vema’s IT department needs to prototype various storage scenarios and train new personnel within the unit. Since no backup or data restoration is required, the team desires a straightforward setup that can be easily modified.
In this task, we will explore the following terms: Naming, Redundancy, Network Access, Secure Transfer, and Transport Layer Security.
Step 1: Let’s create a resource group
In the Azure portal, search for and select Resource groups.
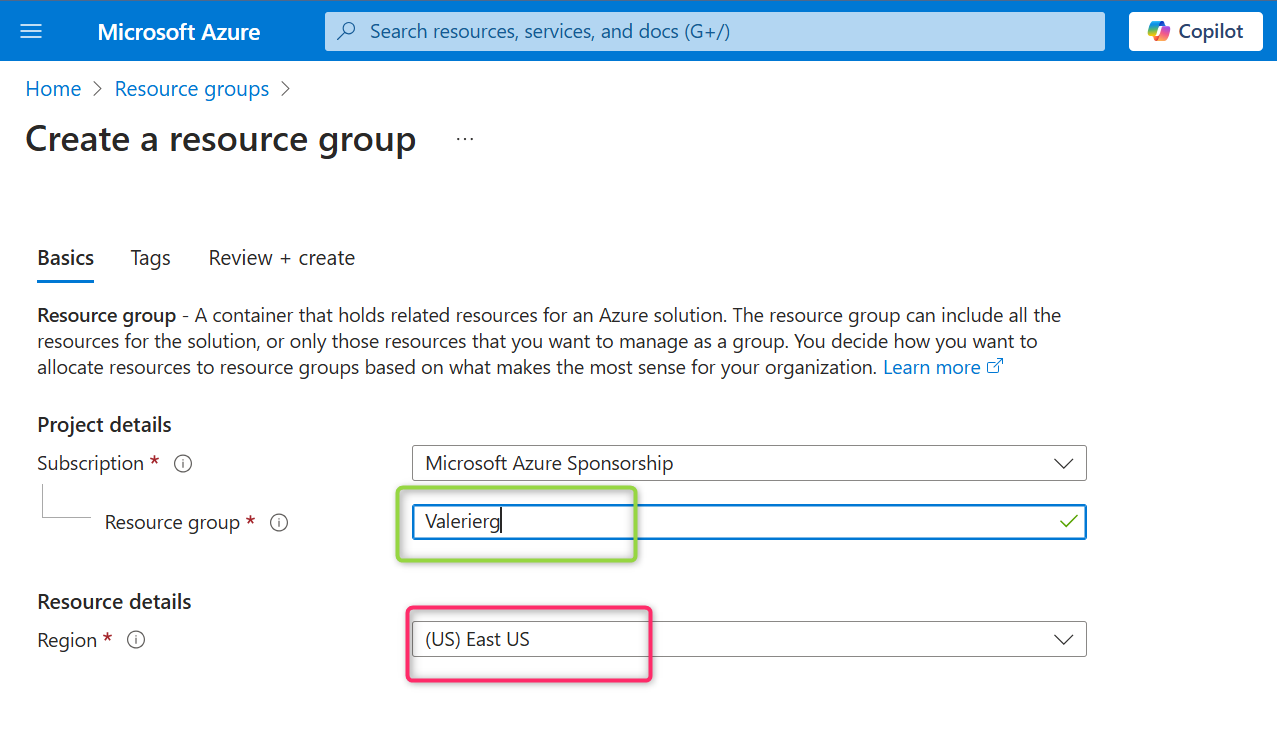
Select + Create. Give your resource group a name. For this case study, let’s name the resource group ‘Valerierg’ as seen below. Please take note of the selected region as we would use it throughout this project.
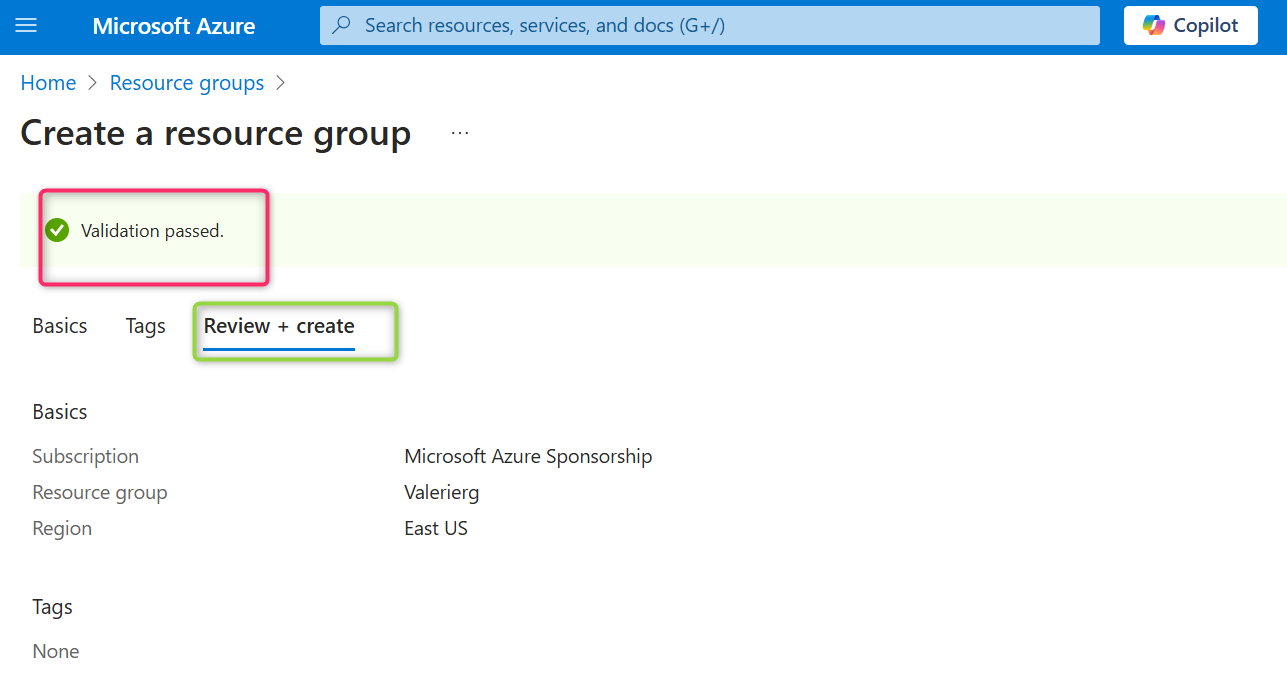
Select Review and create to validate the resource group. After passing the validation, select Create to deploy the resource group.
Step 2: Let’s create and deploy a storage account to support testing and training.
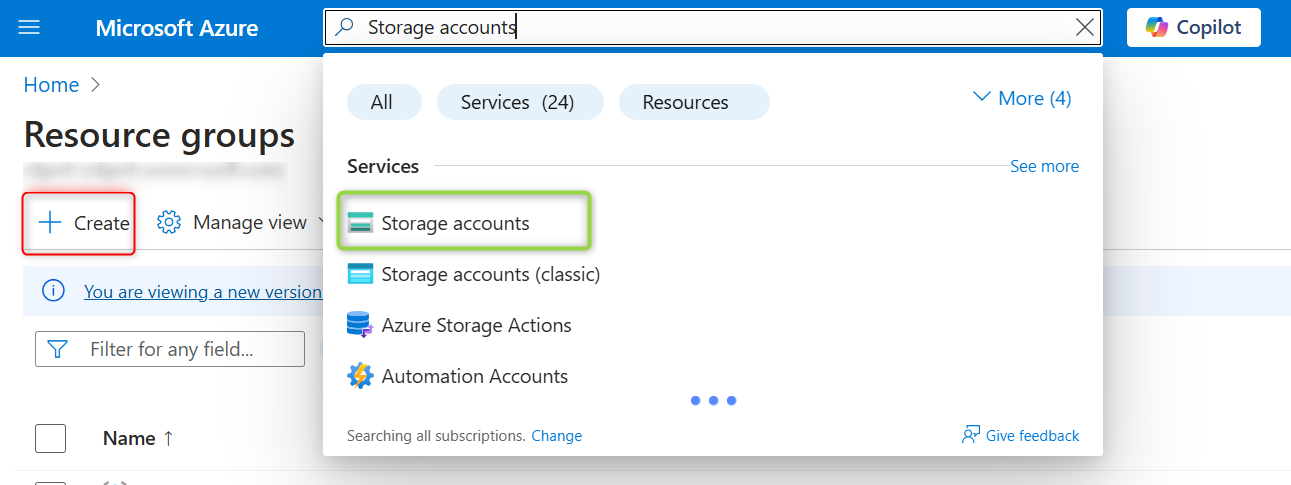
In the Azure portal, search for and select Storage accounts.
Select + Create.
On the Basics tab, select the resource group ‘Valerierg’ which we just created.
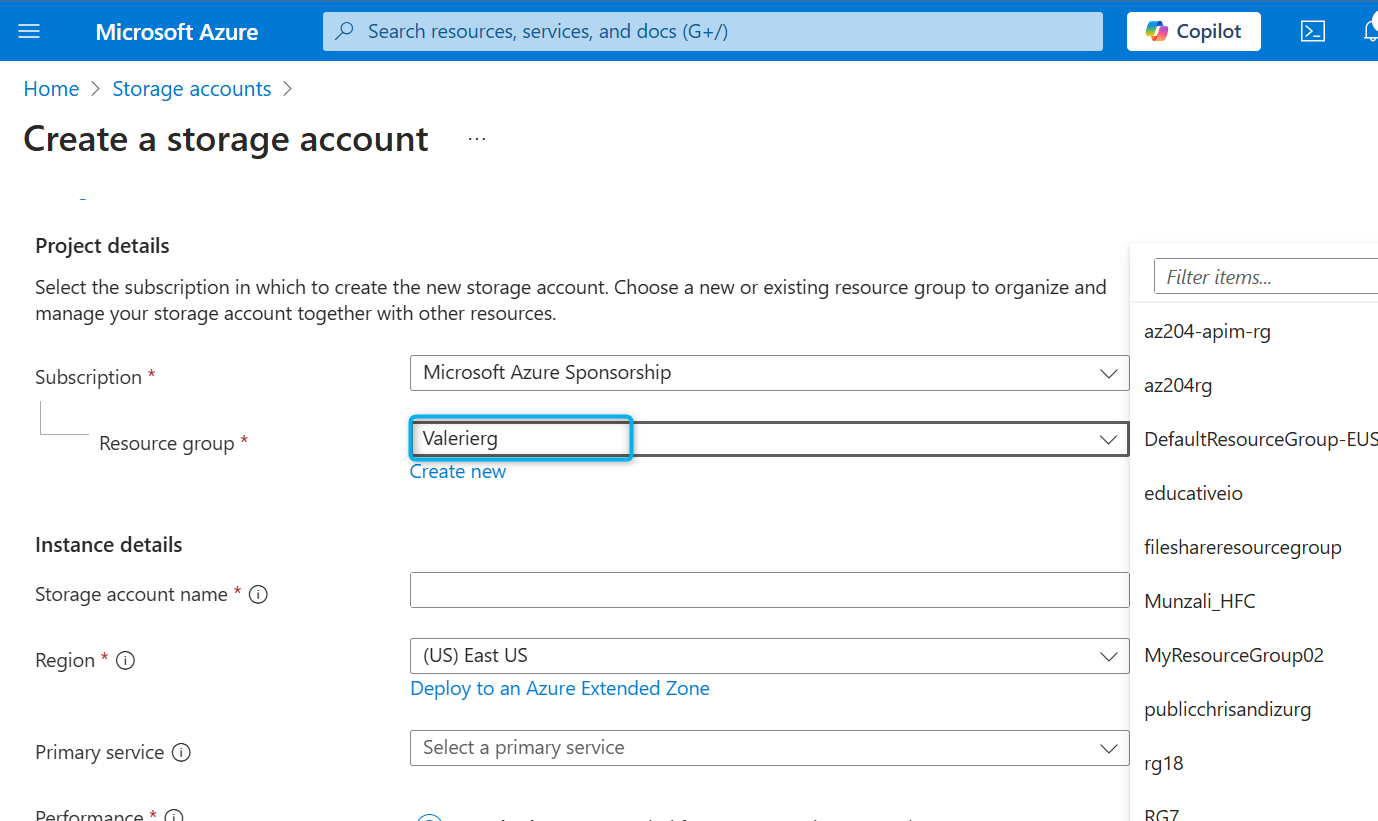
Provide a Storage account name. The storage account name must be unique in Azure. Then, set the Performance to Standard.
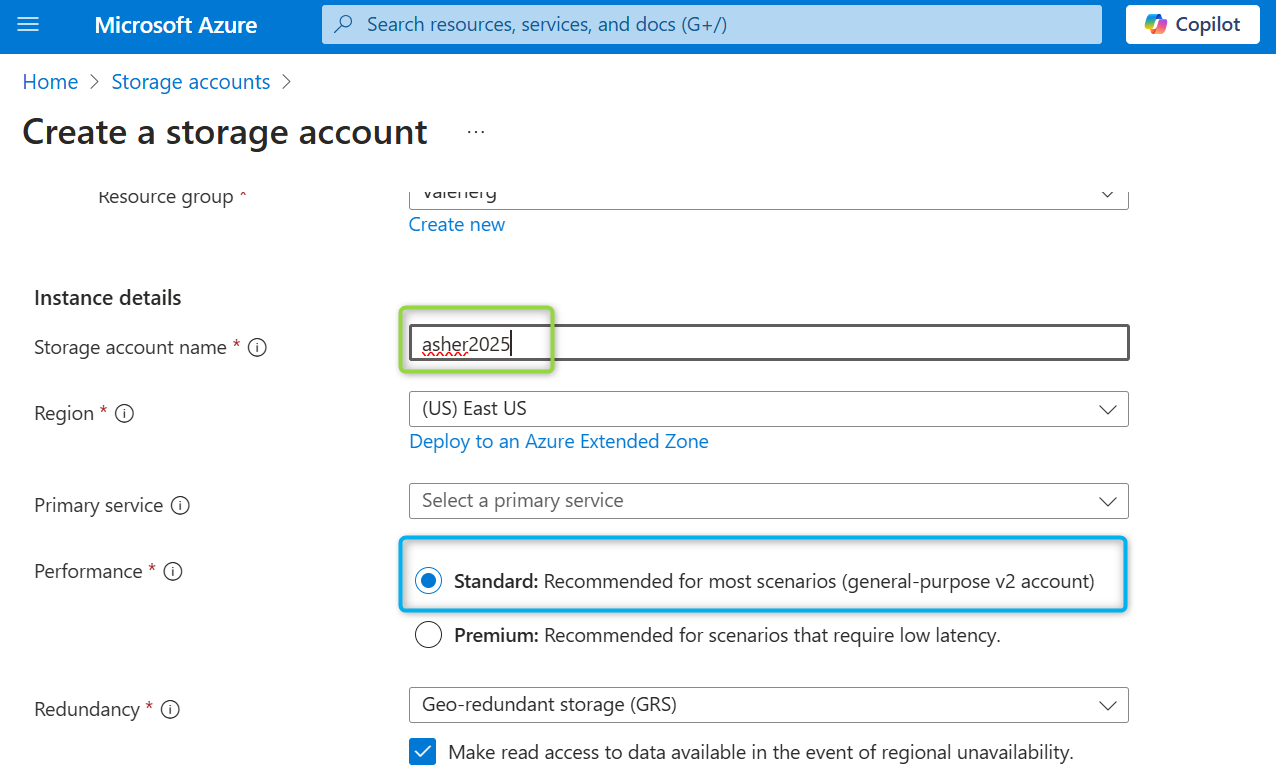
Select Review, and then Create.
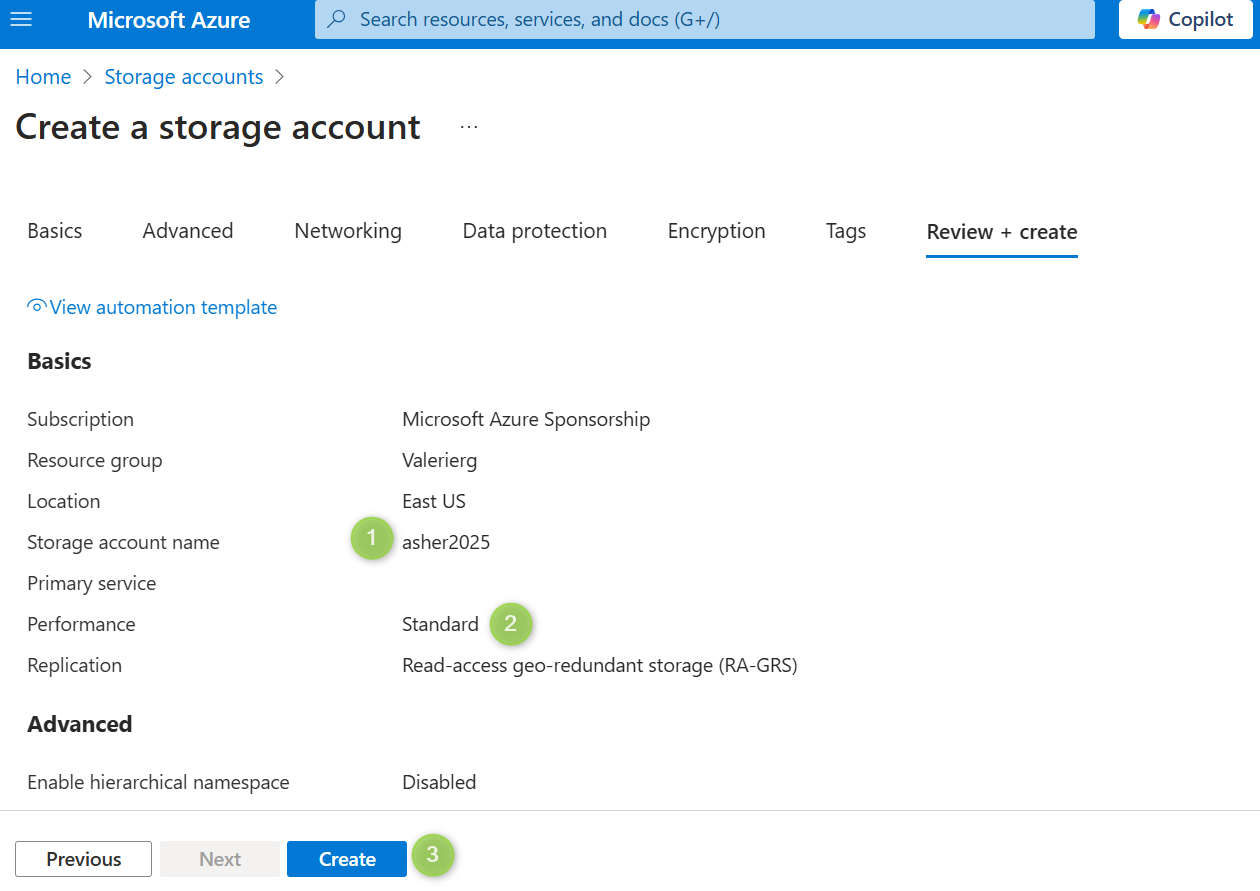
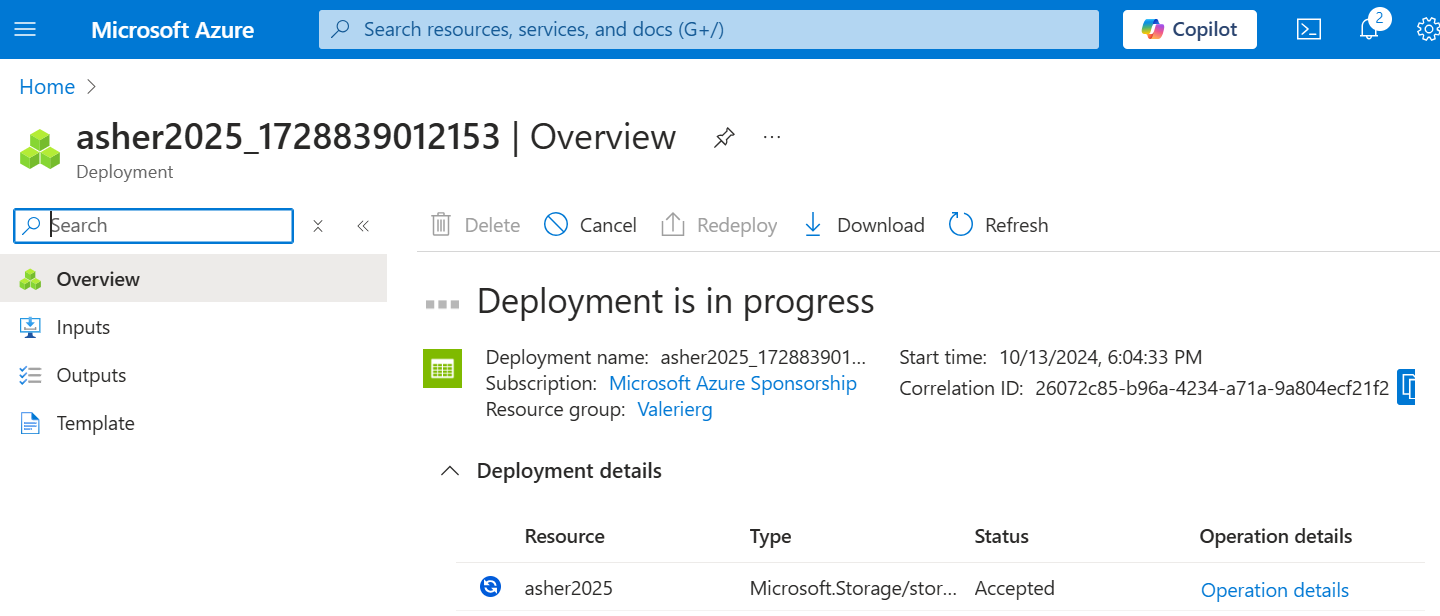
It takes few seconds to be complete and we are good to go.
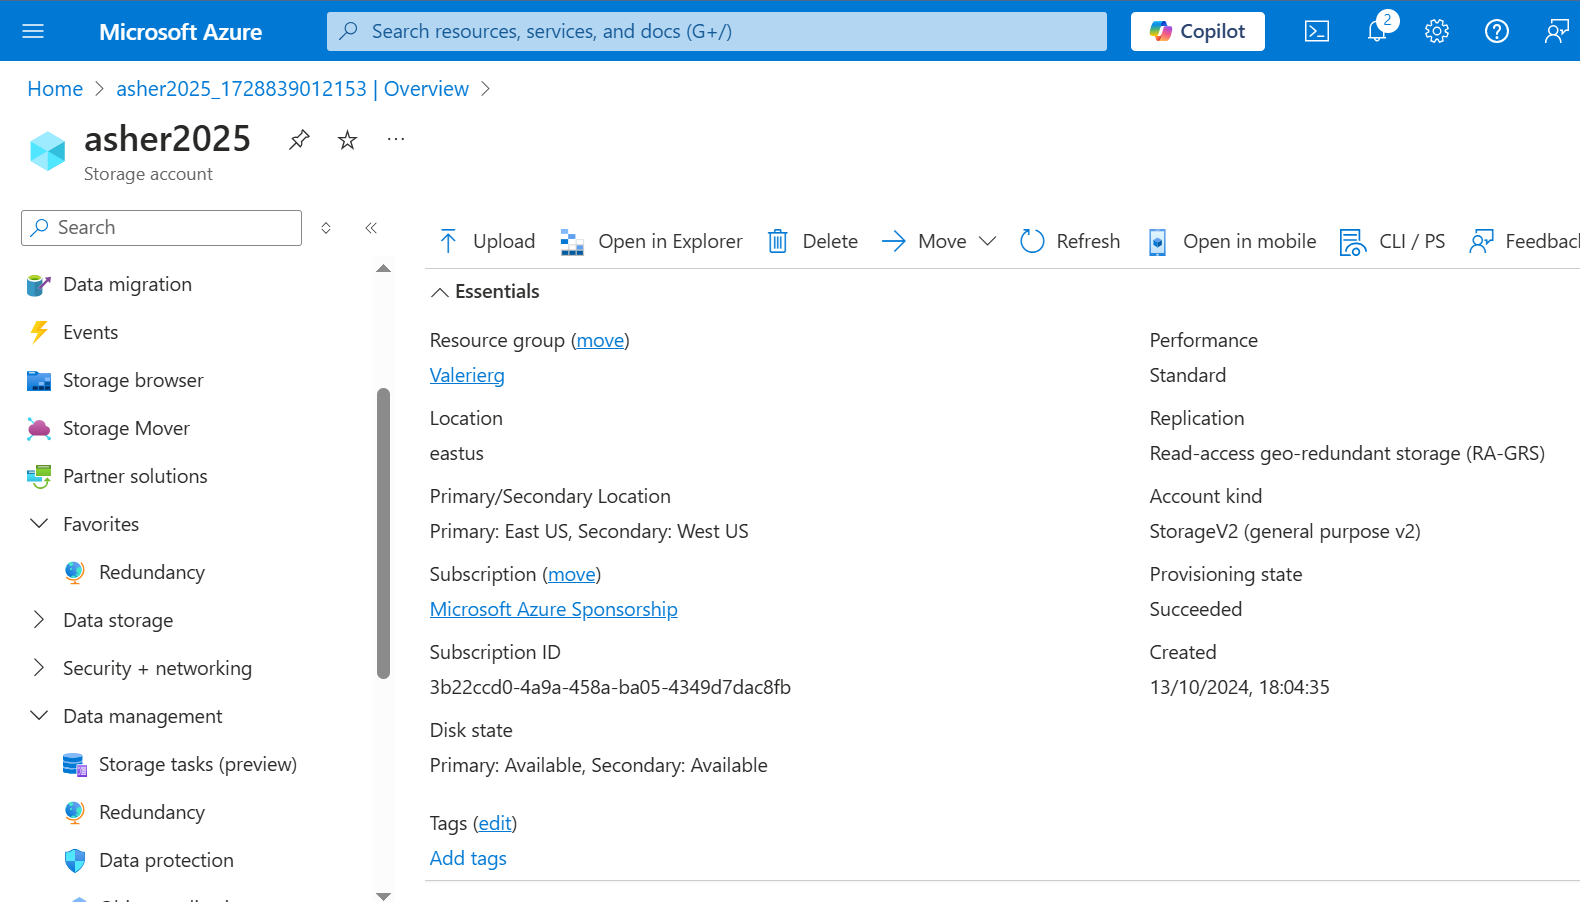
Step 3: Let's configure basic settings in the storage account.
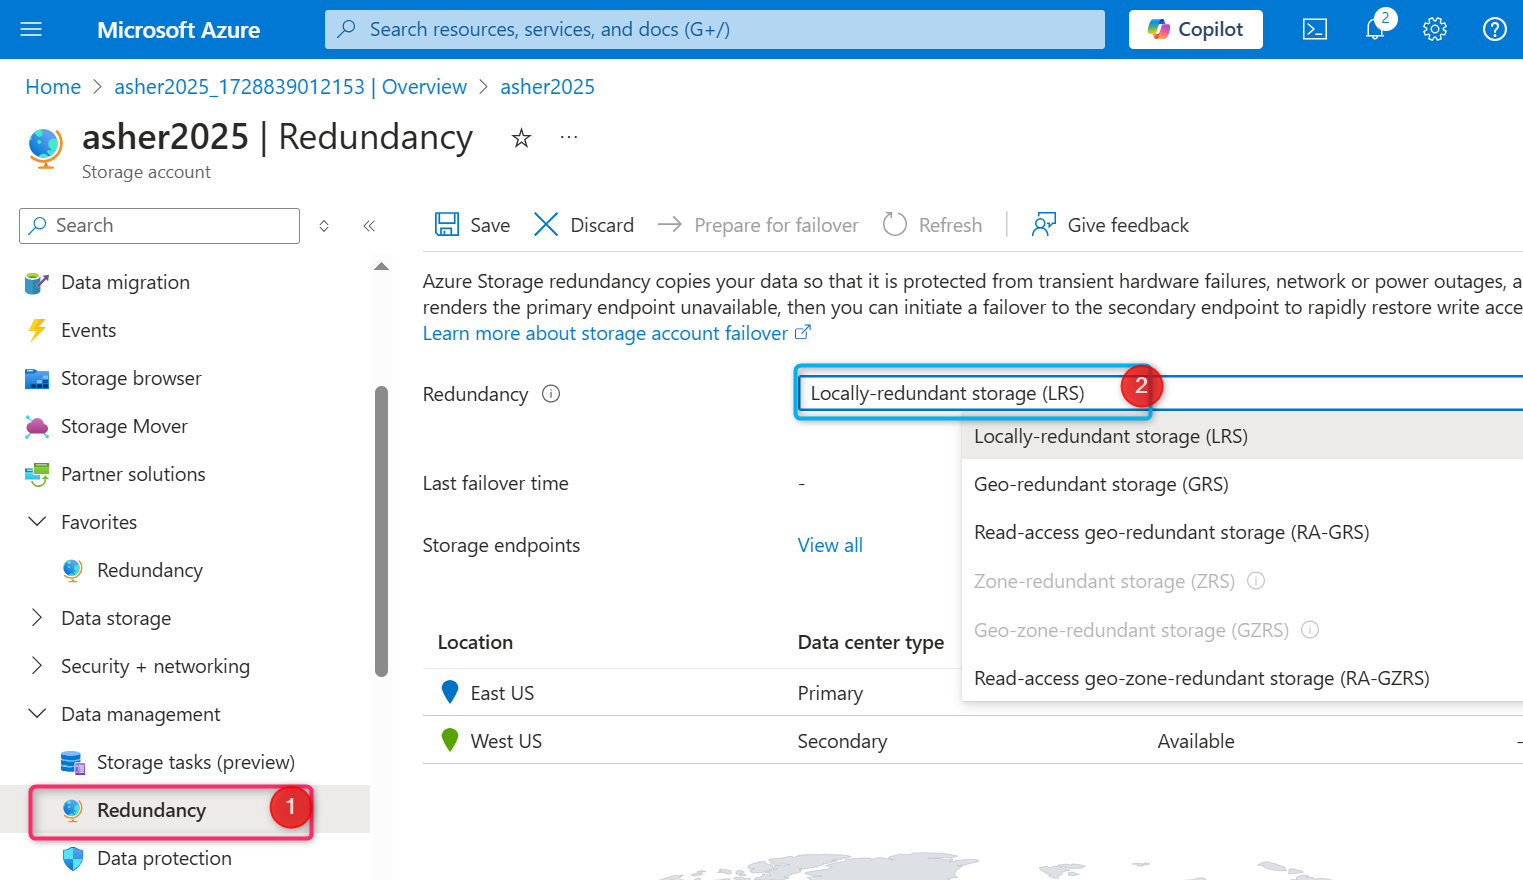
The data in this storage account doesn’t require high availability or durability. So, in our storage account named ‘asher2025’, we will go to the Data management section, select the Redundancy blade. In the Redundancy drop-down, Select Locally redundant storage (LRS).
Be sure to Save your changes
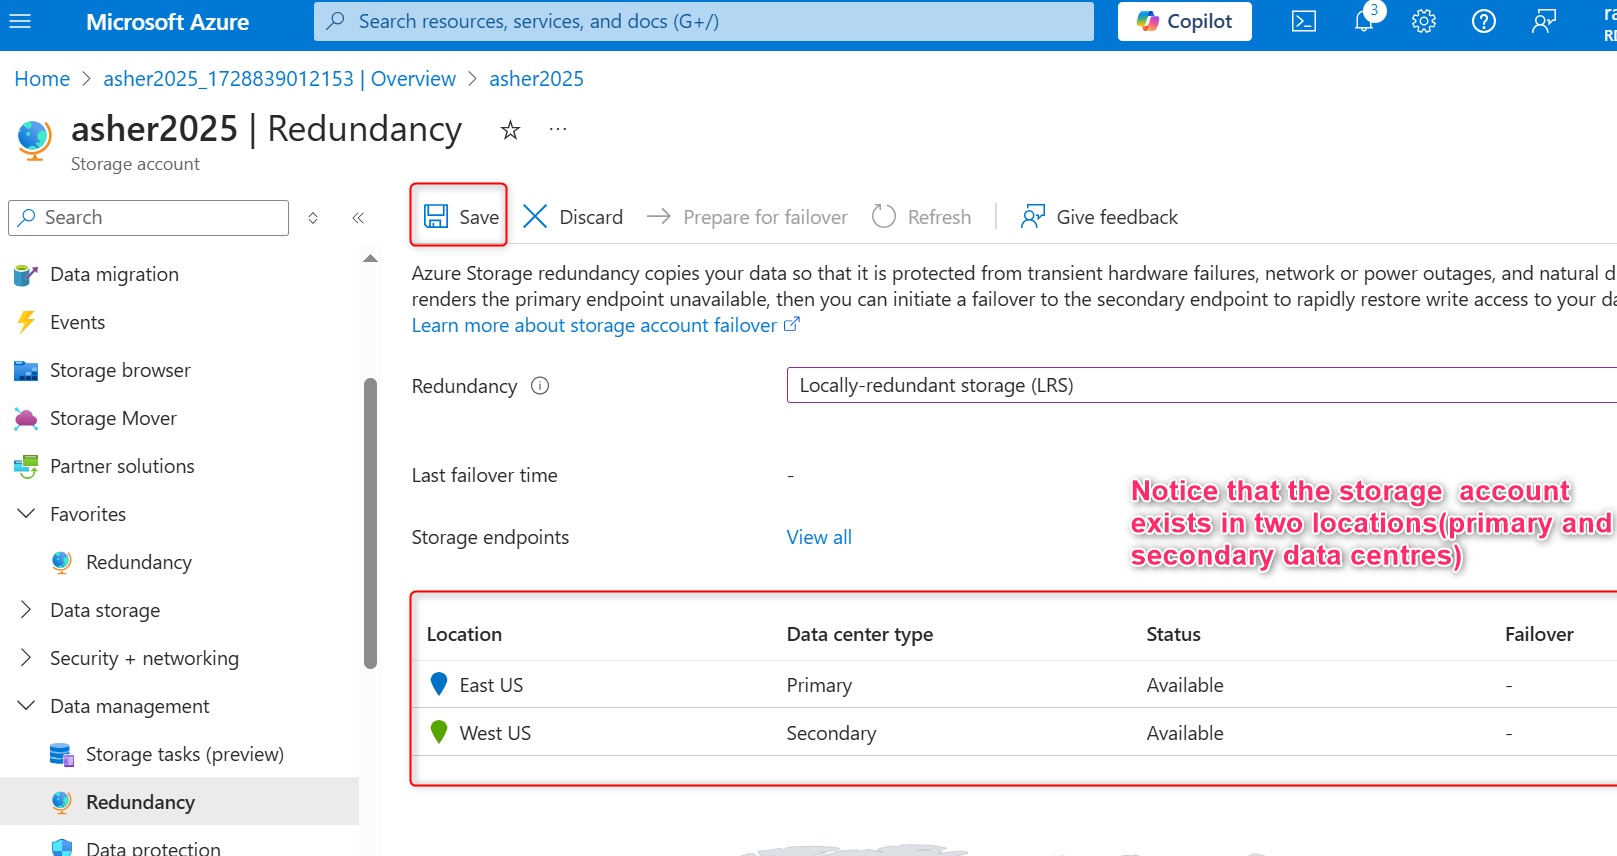
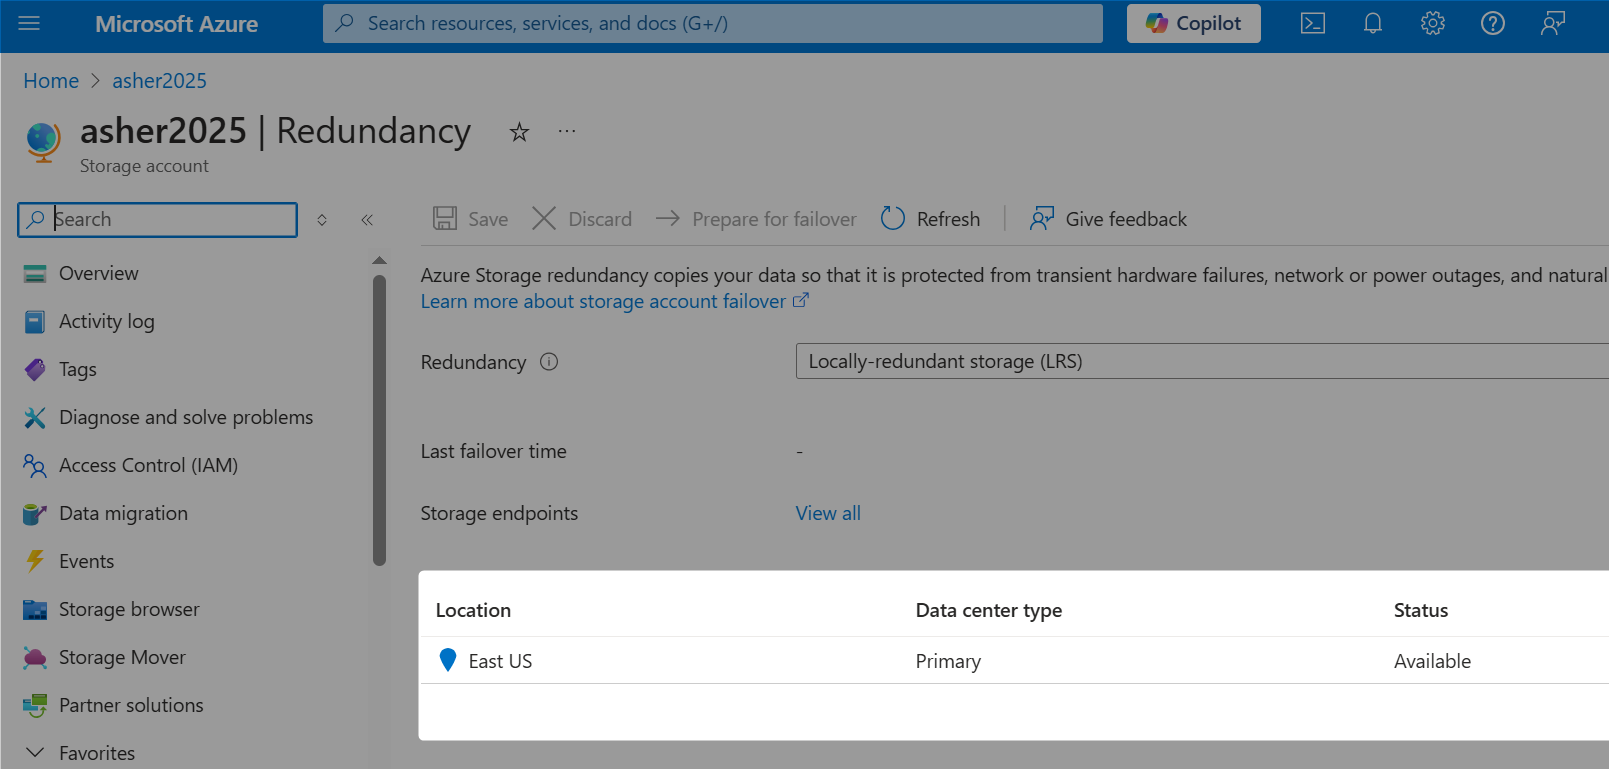
Refresh the page and notice the content only exists in the primary location.
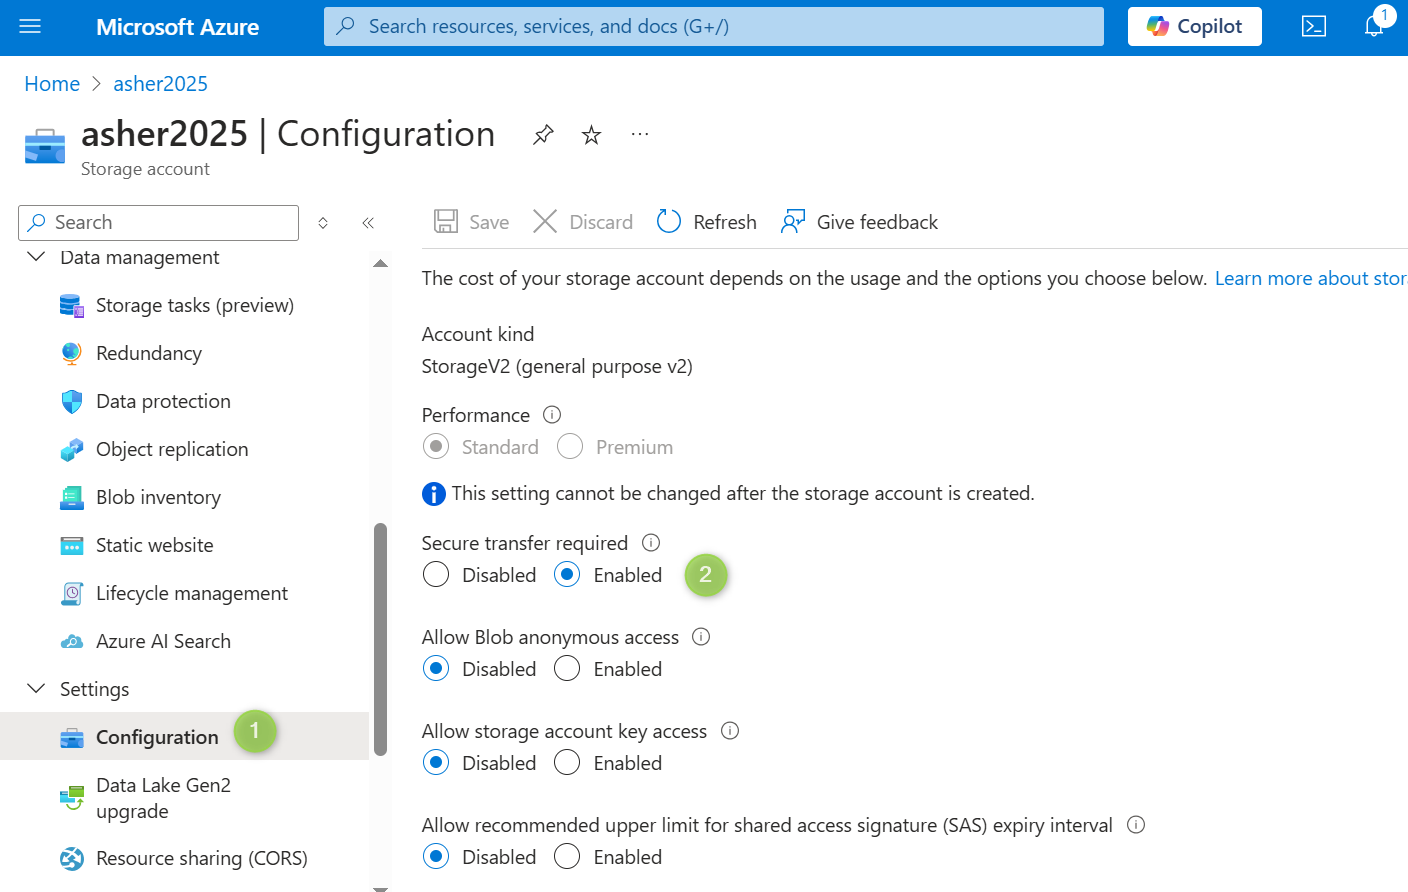
Step 4: Let's set up a secure transfer protocol. We want the storage account to accept requests only from secure connections.
In the Settings section, select the Configuration blade and Ensure Secure transfer required is Enabled.
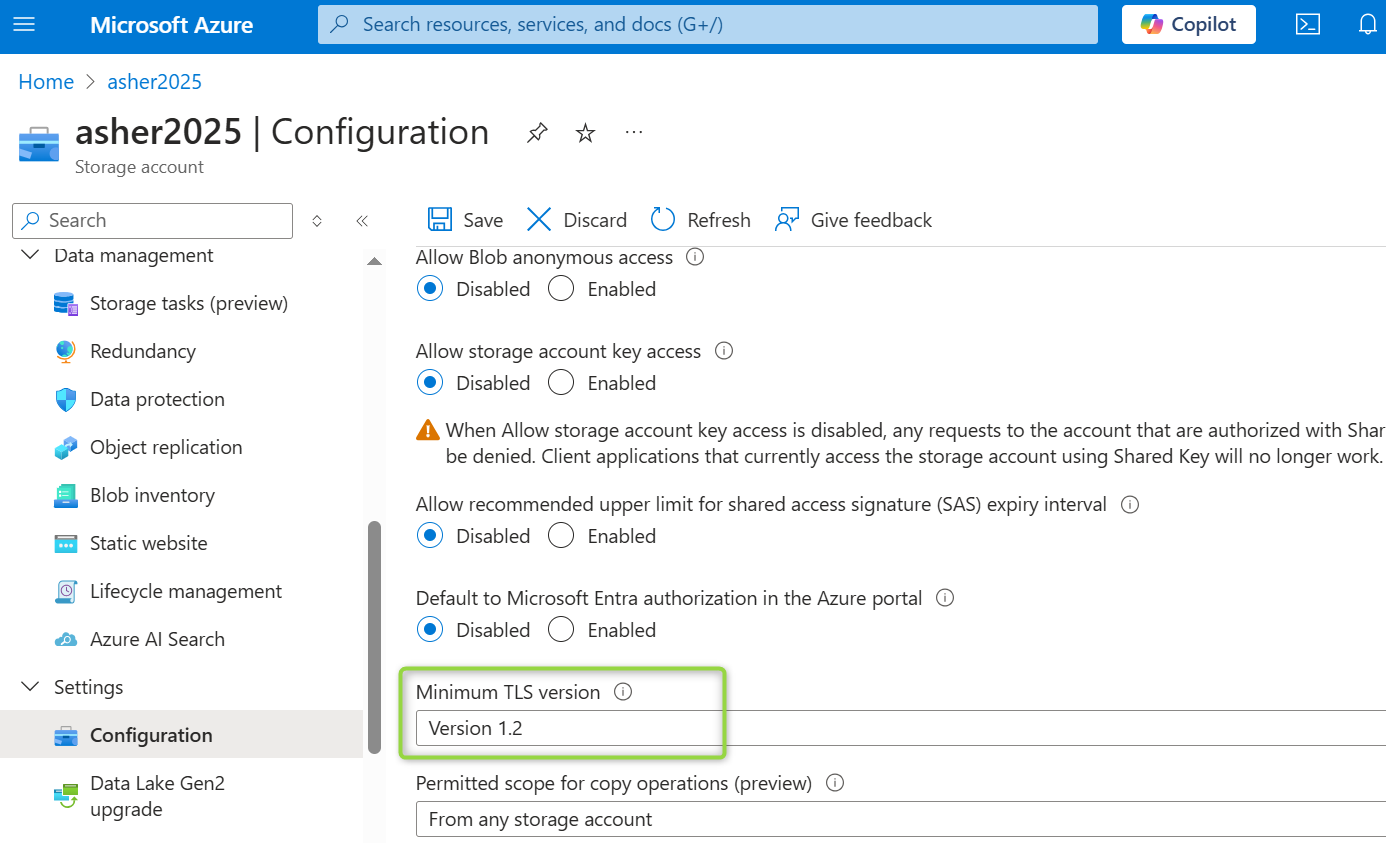
Step 5: Let's configure the storage account to use at least Transport Layer Security (TLS) version 1.2.
In the Settings section, select the Configuration blade. We’ll ensure the Minimal TLS version is set to Version 1.2.
Step 6: Let's disable requests to the storage account until it is needed again.
In the Settings section, select the Configuration blade. Ensure Allow storage account key access is Disabled.
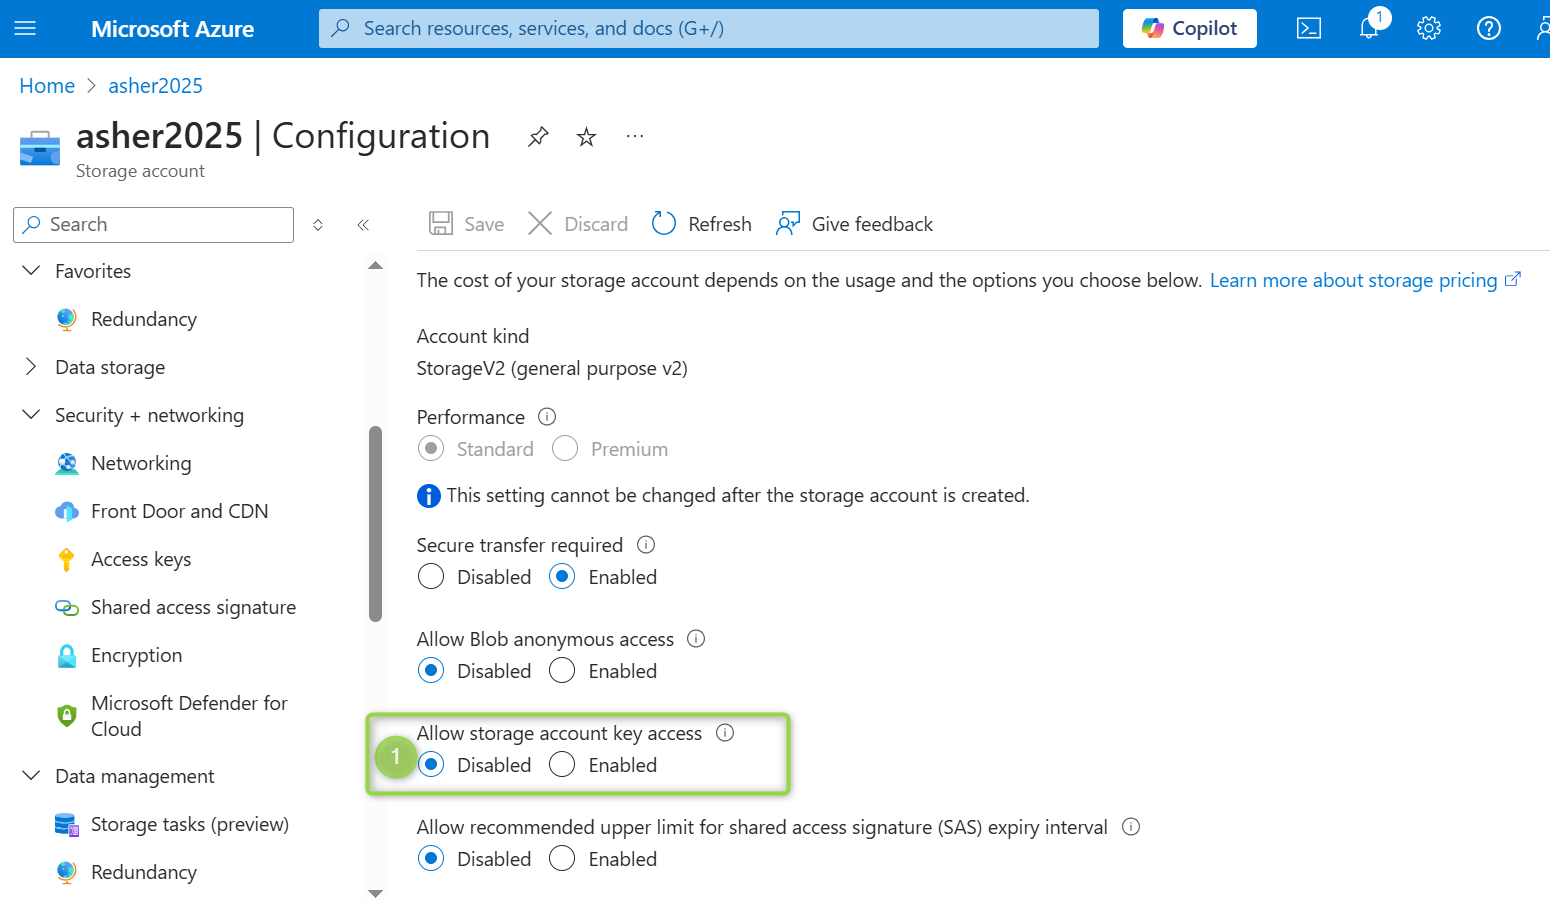
Be sure to Save your changes.
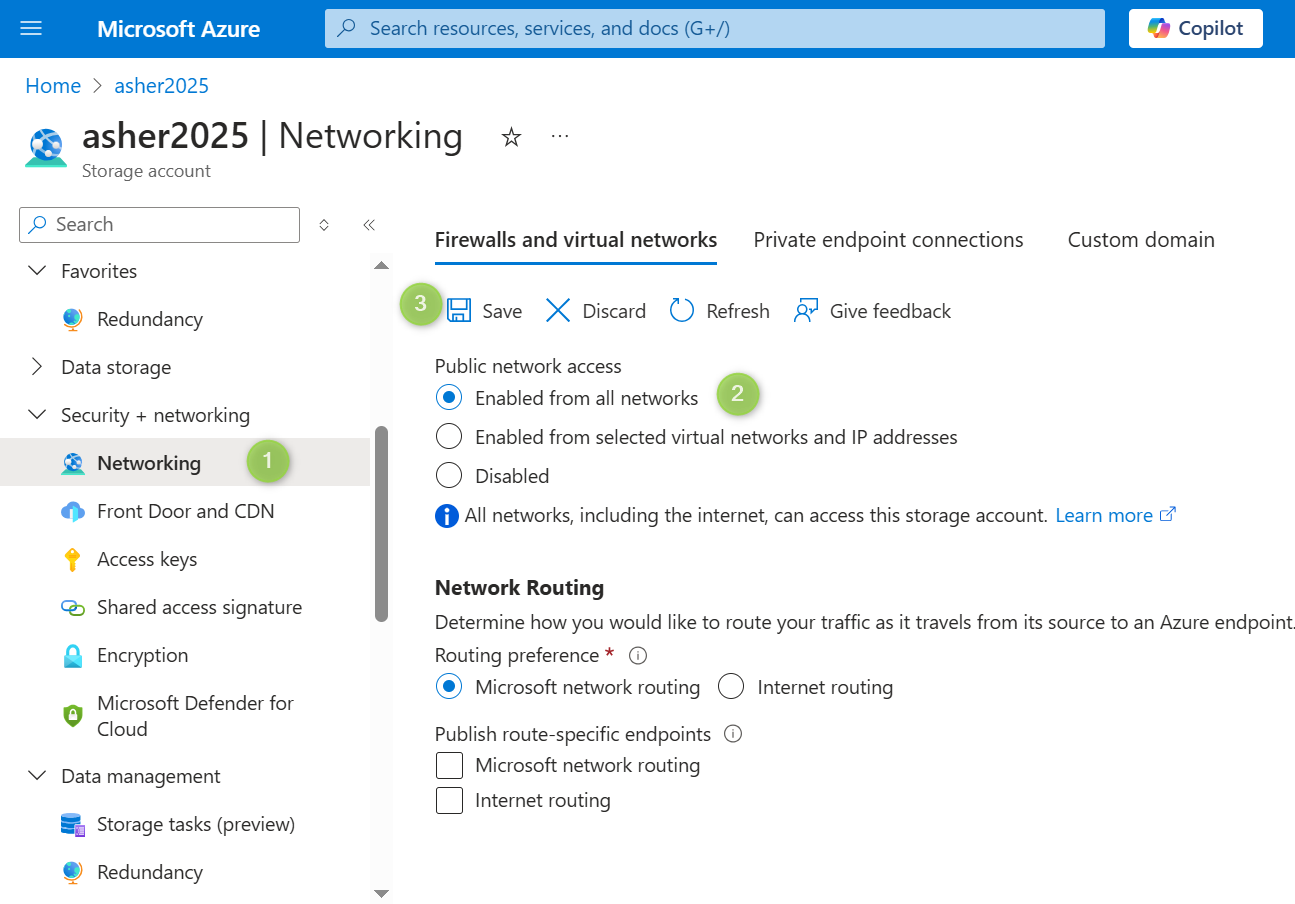
Step 7: Let's add some security checks. Make sure the storage account allows public access from all networks.
In the Security + networking section, select the Networking blade. Next, ensure public network access is set to Enabled from all networks. Lastly, be sure to Save your changes.
That's a wrap!
Did you find this article helpful? If so, please like and follow this account for more cloud-related articles.
Thank you!
Subscribe to my newsletter
Read articles from Setutsi Valerie Dean Okon directly inside your inbox. Subscribe to the newsletter, and don't miss out.
Written by

