How to Launch a Website on AWS EC2 Using Apache2 and Ubuntu: Step-by-Step Guide
 Ritik Saxena
Today, we’ll walk through the steps to deploy a website on an EC2 instance ☁️ running Apache 🌐. We will focus on the actions needed to get your website live on the instance, rather than diving into the details of creating the EC2 instance itself. However, we’ll cover the essential setup required.
Prerequisite:
Before we dive in, make sure to have your AWS account ready. Depending on your operating system, you’ll need a terminal to run the commands.
Windows User: You can use ‘Powershell’, or if you prefer, Git Bash works great.
Mac User: Built-in ‘Terminal’ will work fine.
I’ll use Git Bash for this guide, so feel free to follow along.
Creating Your EC2 Instance: The First Step to Go Live 🚀
First, create an EC2 instance and configure a Security Group with the following inbound rules.
Security group and Its Inbound rules
- Create a new Security Group with inbound rules for SSH and HTTP.


EC2 instance running on Ubuntu OS AMI
Choose Ubuntu as an Amazon Machine Image (AMI) during the process of instance creation
Select t2.micro as an instance type suitable for running small projects like ours. For more details, visit AWS Instance Type.
Generate a new OpenSSH key pair to enable SSH access to the instance.
Select the above-created Security group with inbound rules for SSH and HTTP
The default storage size is sufficient for our instance to run the website.
Launch the instance to complete the setup.

Still confused?🤔 Check out the following article that explains how to set up the EC2 instances.
Connecting to the EC2 Instance via SSH🔑
Open the configured terminal on your machine. Here, I’m using the Git Bash terminal.
Navigate to the location where the key pair is saved using the
cdcommand.Command:
cd path/to/your/keypair
For example:cd /e/AWSChange the permission of the private key file using the
chmodcommand. This step is necessary ifsshcommand gives an error while reading the .pem file.
Command:chmod 400 your-keypair.pemRun the SSH login command
Command:ssh -i your-keypair.pem username@ip_address.
In our case, the command is: ssh -i cyborg-gaming-keypair.com ubuntu@44.211.205.185

Installing the Apache Server and Setting up the Website: The Final Step 🏁🎯
Now, that we are logged in to our EC2 instance in a terminal, let’s execute some final steps to make our website live.
Updating the EC2 instance:
Command:
sudo apt update -yInstalling apache2, wget*,* and unzip packages:
Command:
sudo apt install apache2 wget unzip -yDownloading the project file from the direct URL using the wget package:
Command:
wgethttps://templatemo.com/download/templatemo_579_cyborg_gamingRename the file from ...cyborg_gaming to ..cyborg_gaming***.zip***. This step is optional if the file is already in the .zip format.
Command:
mv templatemo_579_cyborg_gaming templatemo_579_cyborg_gaming.zipUnzipping the file
Command:
unzip templatemo_579_cyborg_gaming.zipMoving all the web files to the location /var/www/html location where Apache looks for the web files
Command:
sudo mv templatemo_579_cyborg_gaming/* /var/www/html/Restart the Apache server
Command:
sudo systemctl restart apache2
Here are the commands
sudo apt update -y

sudo apt install apache2 wget unzip -y

wget https://templatemo.com/download/templatemo_579_cyborg_gaming

mv templatemo_579_cyborg_gaming templatemo_579_cyborg_gaming.zip

unzip templatemo_579_cyborg_gaming.zip

sudo mv templatemo_579_cyborg_gaming/* /var/www/html/

sudo systemctl restart apache2
All set? Let’s open the website 🚀
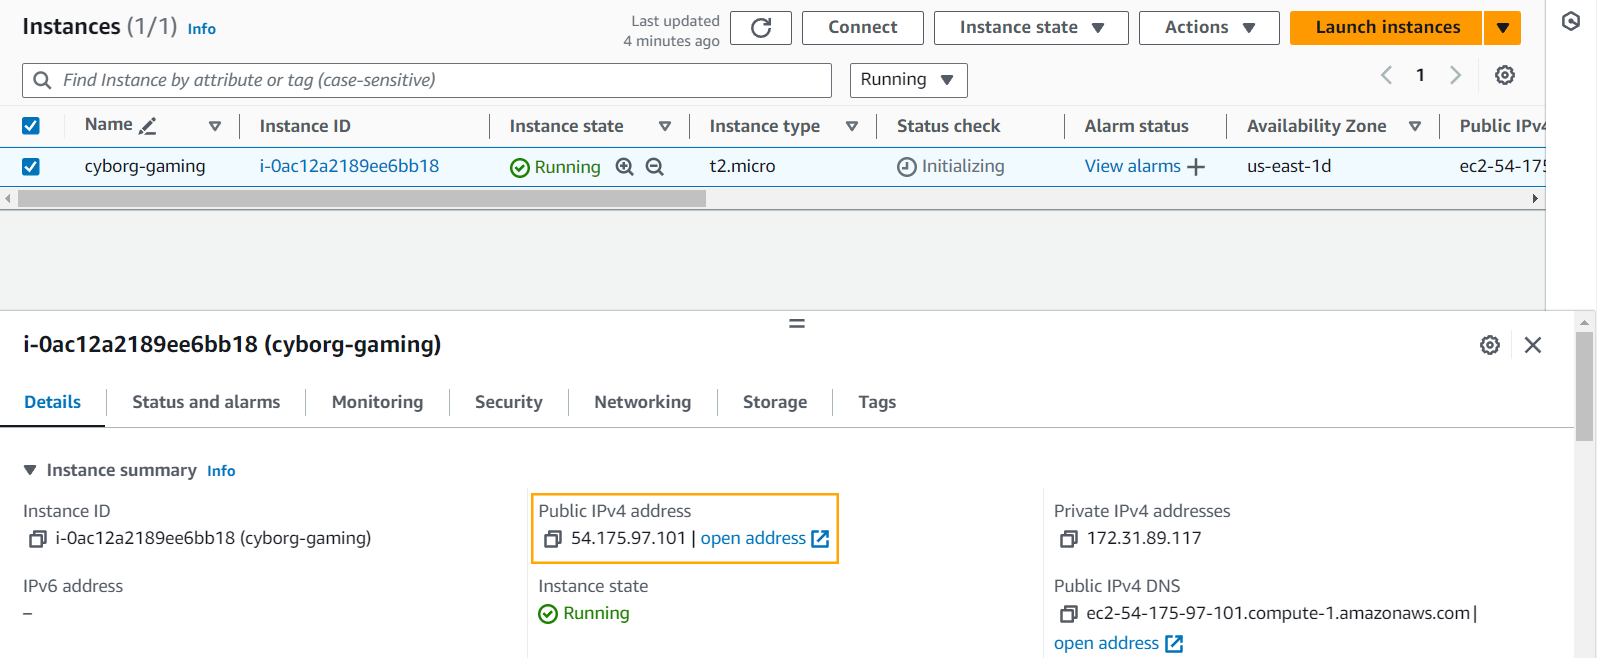
Just copy the IPv4 address of your instance, paste it into your browser’s URL bar, and hit Enter. Your site should be live! 🤛🏻

Hurray, our website is live now.

Pro Tip 💡
If you're working with a Debian-based distro like Ubuntu, make sure to use apache2 as your web server. But if your instance is a RedHat-based distro like RedHat, CentOS, or Fedora, go for the httpd server instead!
Connect with me: 🤝
LinkedIn: https://www.linkedin.com/in/ritik-saxena/

Subscribe to my newsletter
Read articles from Ritik Saxena directly inside your inbox. Subscribe to the newsletter, and don't miss out.
Written by

Ritik Saxena
Ritik Saxena
Experienced QA Engineer with a proven track record in Automation and Functional Testing for Android, iOS, and Web Applications. Over the past 2 years, I have contributed to the success of diverse projects by ensuring the delivery of high-quality software products. Currently, I am actively engaged in learning and implementing DevOps practices proficiently and professionally.