Deploying Website using Amazon EC2
 Celestina Odili
Amazon Elastic Compute Cloud (Amazon EC2) is a web service within Amazon Web Services (AWS) that provides scalable, resizable compute capacity in the cloud. It allows users to launch virtual servers, referred to as EC2 instances. It can be configured with varying amounts of CPU, memory, storage, and networking resources, tailored to the needs of applications ranging from simple websites to complex data analysis and machine learning workloads. Following the simple steps below, you will create a web server from Linux image and deploy a website to it.
1. Sign in to AWS Account
Go to aws.amazon.com and sign in to AWS management console. If you do not have an AWS account yet, click Create an AWS Account to create one.

For a guide on how to create AWS Account, click here
2. Launch an EC2 Instance
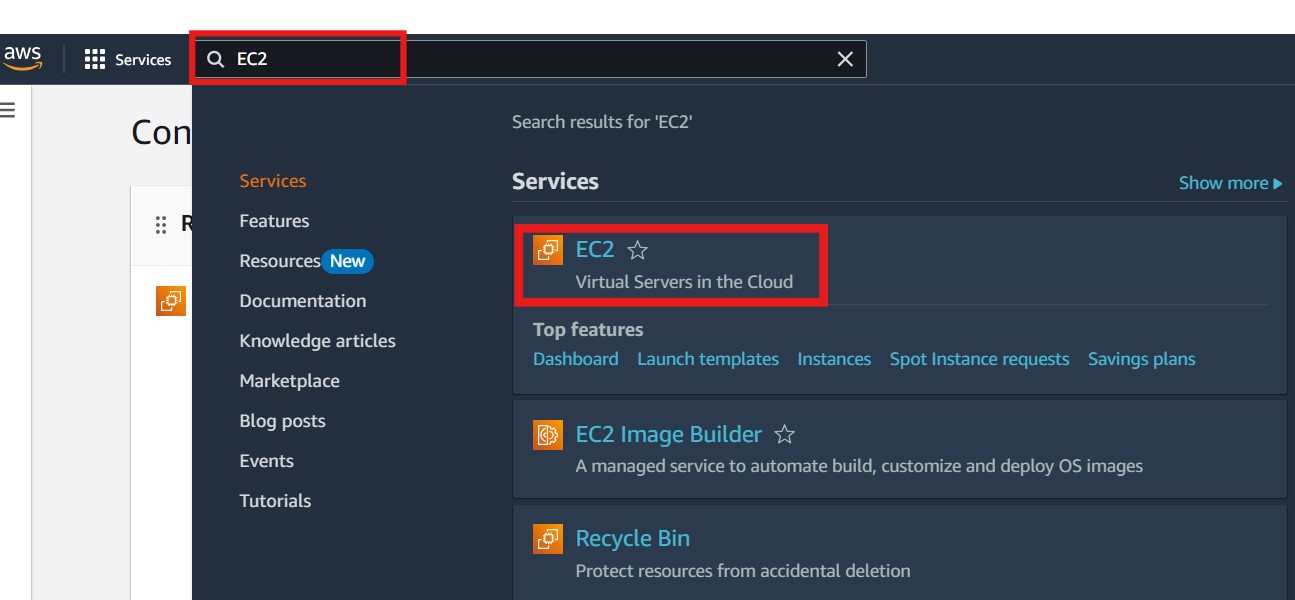
Search for EC2 on the AWS Management Console search bar and select it.
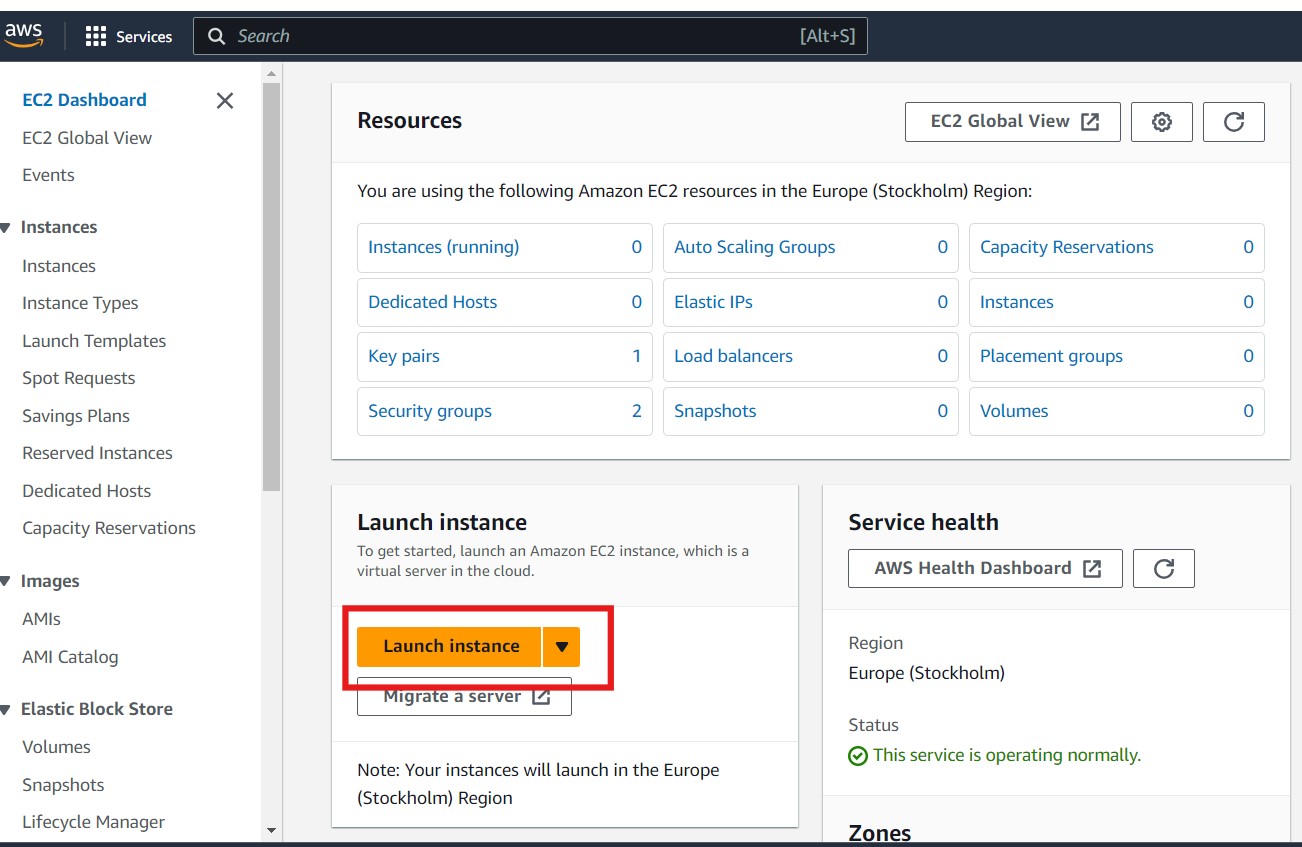
On the EC2 Dashboard, Click on Launch Instance.
3. Provide the EC2 Instance Details
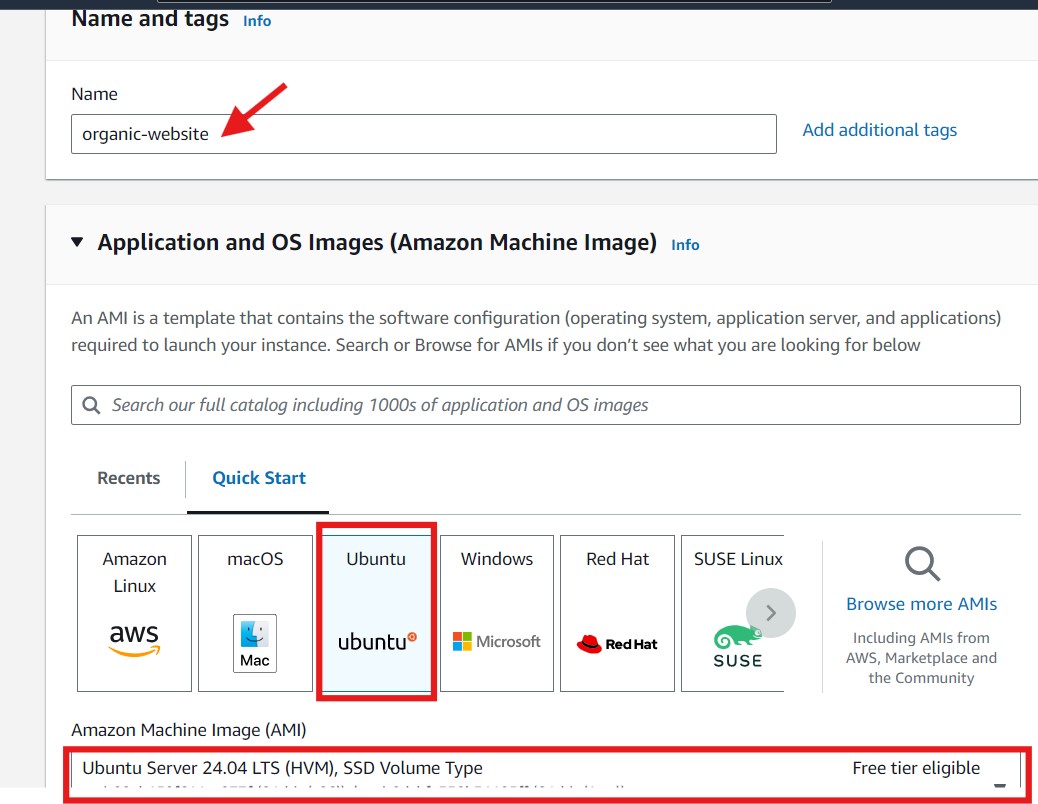
Under name and tags, provide a name for the instance.
Under application and OS Images (Amazon Machine Image), select an image type and choose a free tier eligible version from Amazon Machine Image (AMI) dropdown. For example, you can use ubuntu server 24.04 LTS.
Under description, take note of the username, you will need it for connection. For ubuntu server, the username is ubuntu
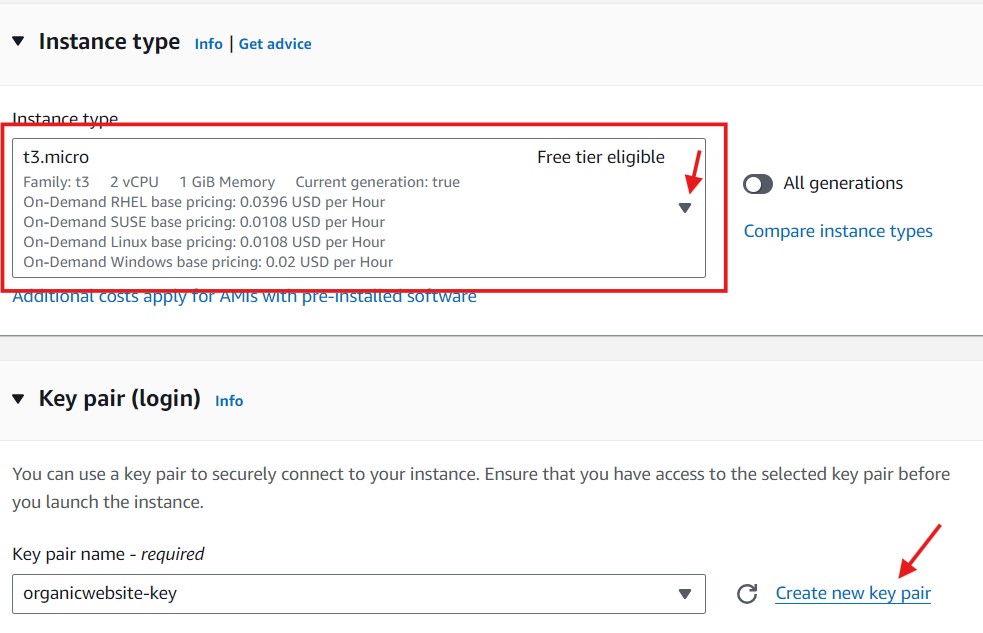
Select an Instance Type: choose any suitable type
Create new key pair or select an existing: If you create a new key pair, it will be downloaded automatically upon clicking create key pair.
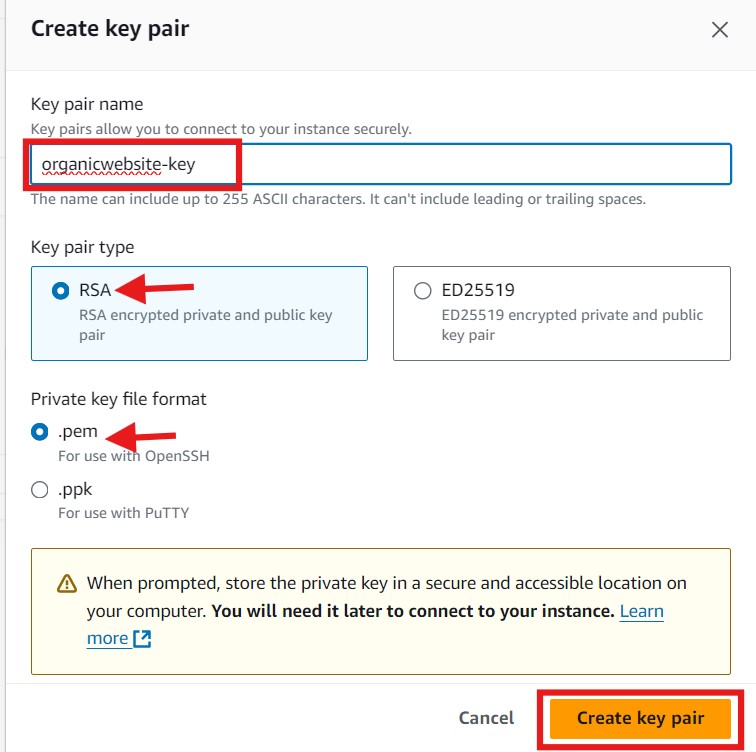
Network setting: Leave the default setting or Click edit to configure the network setting as required.
Configure security group: check allow ssh traffic from anywhere and allow http traffic from the internet to create inbound security group rule.
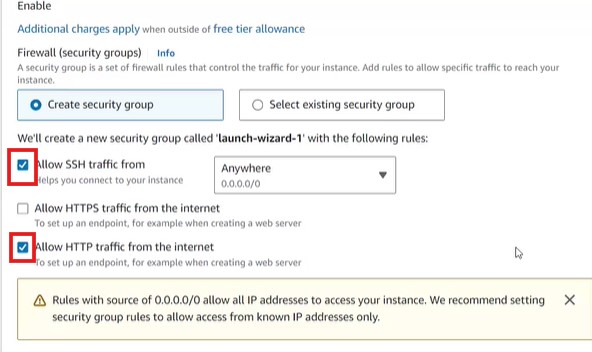
Add Storage:
- You can leave the default storage configuration or increase it based on your website’s needs.
Advanced details(optional). For this guide, leave it at default.
Summary: Review summary and Launch the instance to create.
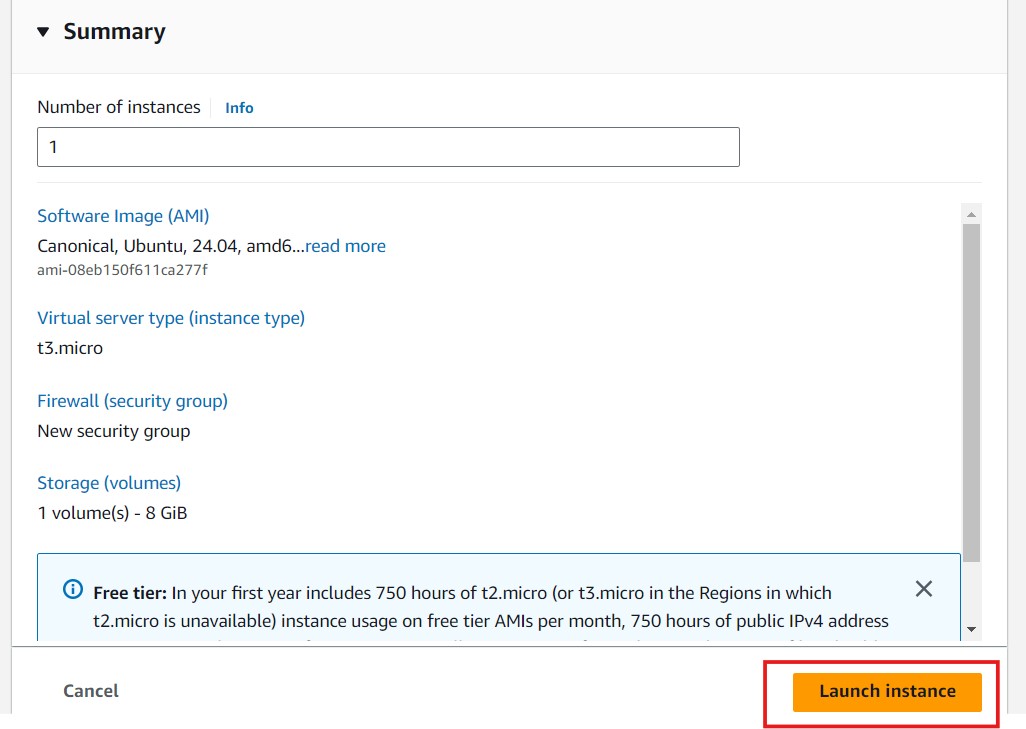
After instance is successfully created, click on the instance ID to open the details

Click the check box to view the instance summary. Note the public IP address, you will need it for connection to the EC2 Instance.
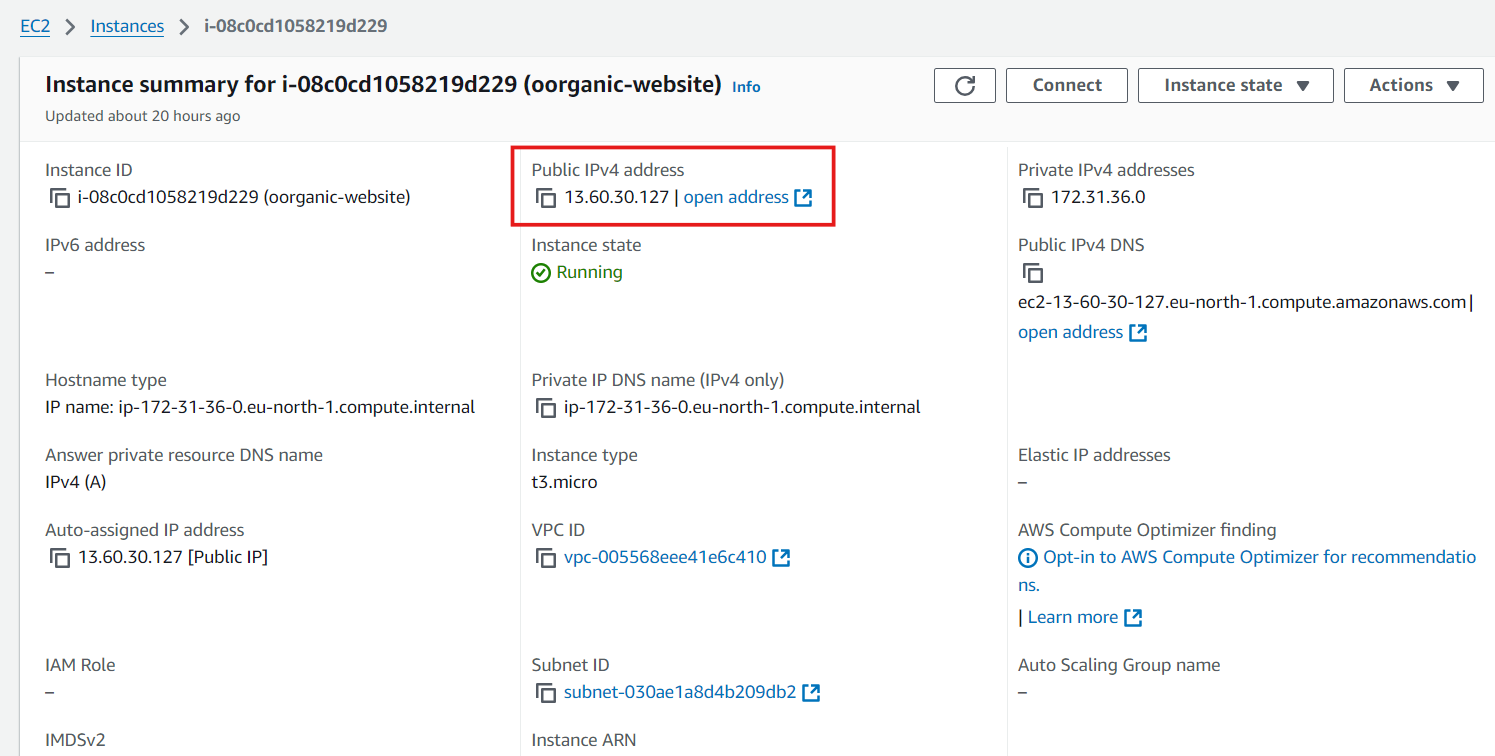
4. Connect to the EC2 Instance
Open a terminal or command prompt and connect to the instance using ssh command.
ssh -i "/path/to/your-key-pair.pem" ubuntu@<your-ubuntu-public-ip-address>To run the command, replace
/path/to/your-key-pair.pemwith your downloaded .pem key pair path and name and<your-ubuntu-public-ip-address>with your actual public-ip-address. For example,ssh -i "C:\Users\Tina\Downloads\organic-website-key.pem" ubuntu@13.60.30.127Error Connecting
permission was denied when connecting to my EC2 instance with
ssh -i "C:\Users\Tina\Downloads\organic-website-key.pem" ubuntu@13.60.30.127. See image below
Troubleshooting and Solution
When connecting to remote servers using ssh with private key, If the private key file is accessible by other users, it can pose a security risk, as someone could potentially steal the key and gain unauthorized access to the server. Many ssh clients require the private key file to have restricted permissions (usually 400 or 600) for it to be used. chmod 400 ensures that only the owner can read the file, meeting ssh's strict security requirements.
Solution steps
Navigate to the path where the key file is located
Run the following command to get the right permission and connect.
chmod 400 “your-key-name“ssh -i your-key-name ubuntu@<your-ubuntu-public-ip-address>For example
  chmod 400 organic-website-key.pem
  ssh -i organic-website-key.pem ubuntu@13.60.30.127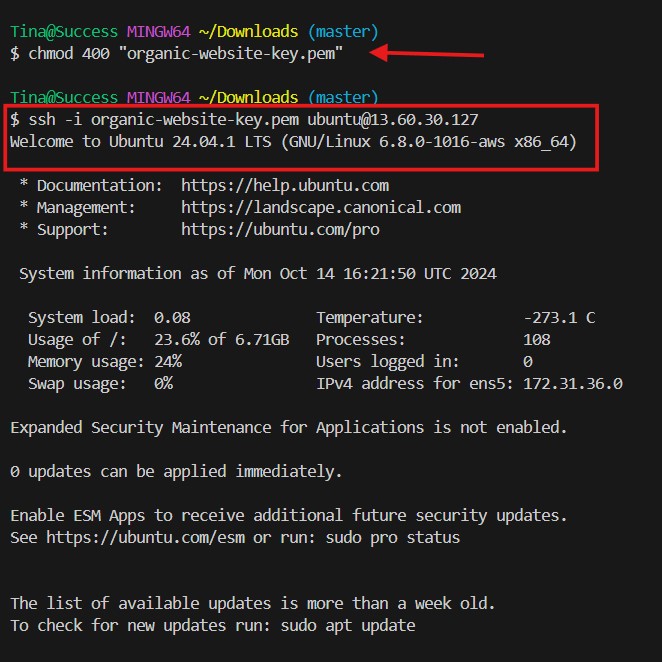
5. Install a Web Server (e.g., Apache or Nginx)
Update the package index
sudo apt update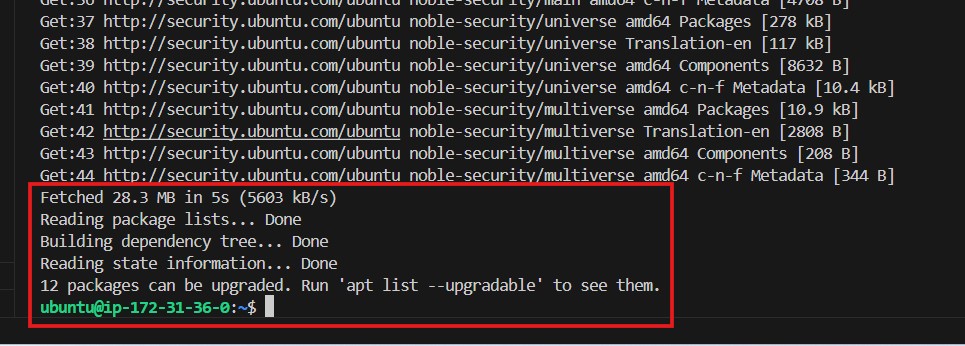
Install web server. Here we will be installing Apache2:
sudo apt install apache2 -y
Load the web server: On a browser enter the public IP to verify the web server has been started. For example,
http://13.60.30.127/.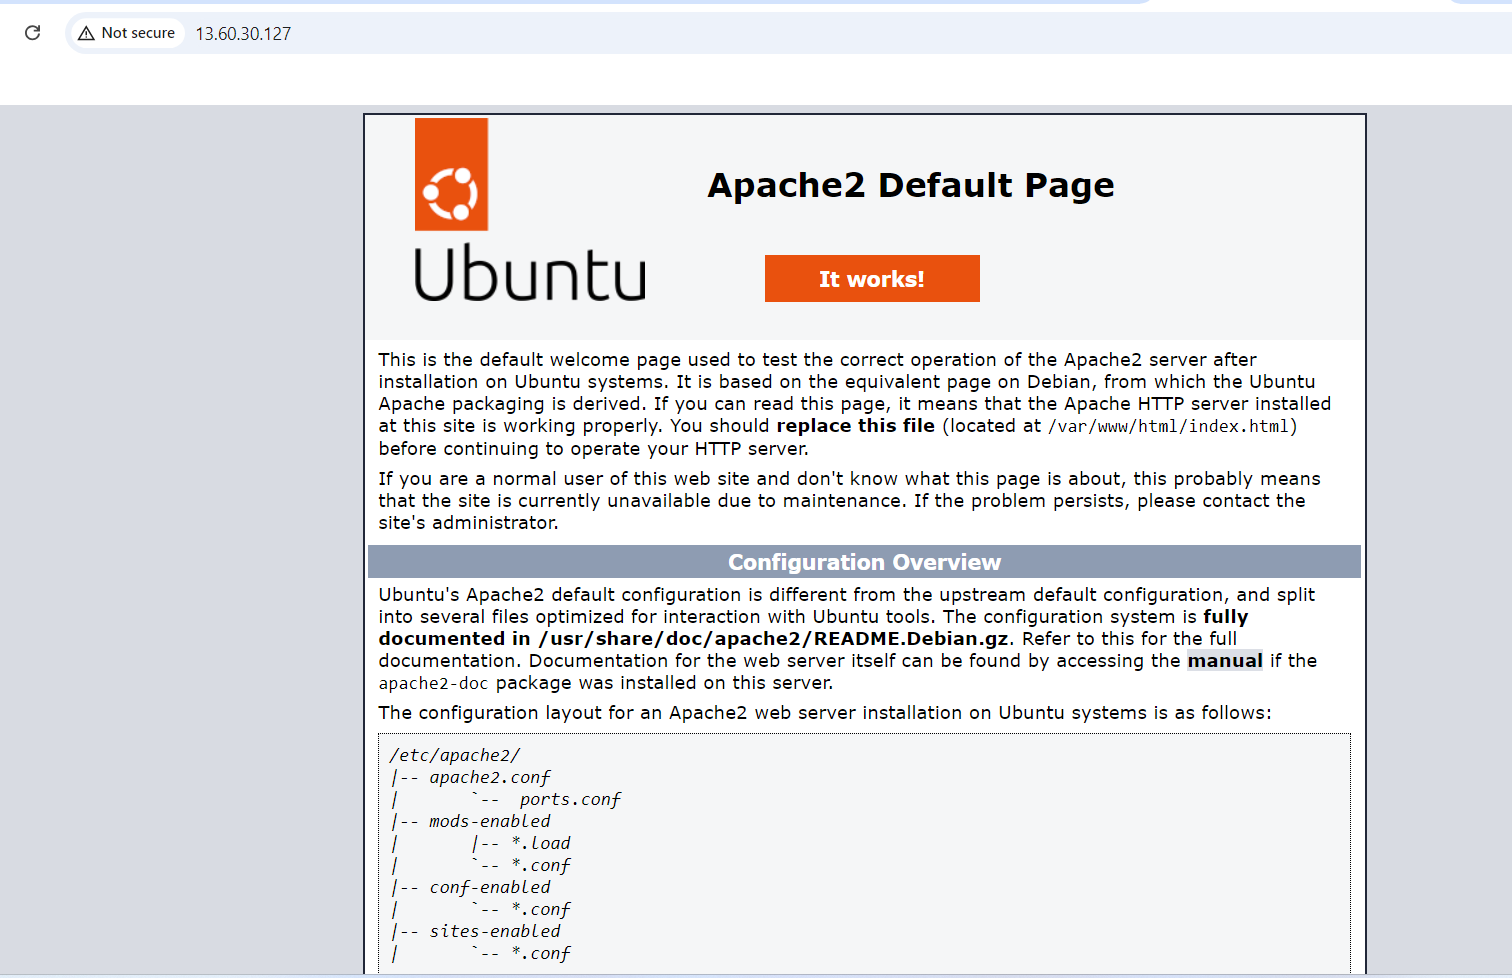
Start the Apache service: In case your web server did not load, run the following command to start it.
sudo systemctl start apache2Enable Apache to start on boot
sudo systemctl enable apache2

6. Deploy Your Website Files
Check git version to be sure git is installed during the update
git --version
Change directory to the /var/www/html directory.
/var/www/htmlis a common directory path used in Unix-based systems (such as Linux) to store web server files, typically for the Apache web server. When deploying a website, you place the HTML, CSS, JavaScript, and other resources in/var/www/html. Apache serves these files in response to incoming HTTP requests.cd /var/www/html
Upload the website files to the /var/www/html directory: You can upload by cloning any website in GitHub repo. Use this if you do not have any (https://github.com/celestinaodili/organicwebsite.git). For tutorial on how to push website to GitHub repo, click here. Run the following command to clone your website replacing https://github.com/celestinaodili/organicwebsite.git with your-website-files repo url.
sudo git clone https://github.com/celestinaodili/organicwebsite.git

Change directory to the cloned website for example
cd organicwebsiteRun the command
sudo mv * /var/www/htmlto move all the website files to the/var/www/htmldirectory
7. Test Your Website
Open a web browser and enter your EC2 instance’s public IP address (e.g.,
http://13.60.30.127/).You should see your website’s homepage.

Congratulations!!! you have successfully deployed a website to web server using Linux EC2 instance.
Subscribe to my newsletter
Read articles from Celestina Odili directly inside your inbox. Subscribe to the newsletter, and don't miss out.
Written by

Celestina Odili
Celestina Odili
Computer Scientist/ Cloud Engineer/DevOps Engineer / Technical writer
