Cloud Storage to Bigquery: Data Warehousing and Ingestion
 Harvey Ducay

Introduction
In today's data-driven world, effectively managing and analyzing large datasets has become crucial for business success. Utilizing Cloud Storage and BigQuery is a fundamental skill for data engineers, analysts, and organizations looking to leverage their data for powerful insights. This process, known as data warehousing and ingestion, forms the backbone of modern data analytics infrastructure.
In this post, we'll explore the seamless process of transferring data from Google Cloud Storage to BigQuery, understand why this integration is vital for businesses, and provide essential tips for optimizing your data pipeline. Whether you're a data professional or a business leader looking to enhance your data analytics capabilities, this guide will help you master the fundamentals of data warehousing with Google Cloud Platform (GCP).
What is Data Warehousing and Ingestion, and Why Does it Matter?
Data warehousing is the process of collecting, storing, and managing data from various sources in a centralized repository for analysis and decision-making. Data ingestion, specifically, refers to the process of importing data from different sources into a storage system – in this case, moving data from Cloud Storage to BigQuery.
This matters because:
It enables real-time data analysis and reporting
Improves data accessibility across organizations
Enhances decision-making capabilities
Reduces data processing costs and complexity
Ensures data consistency and reliability
How to Transfer Data from Cloud Storage to BigQuery
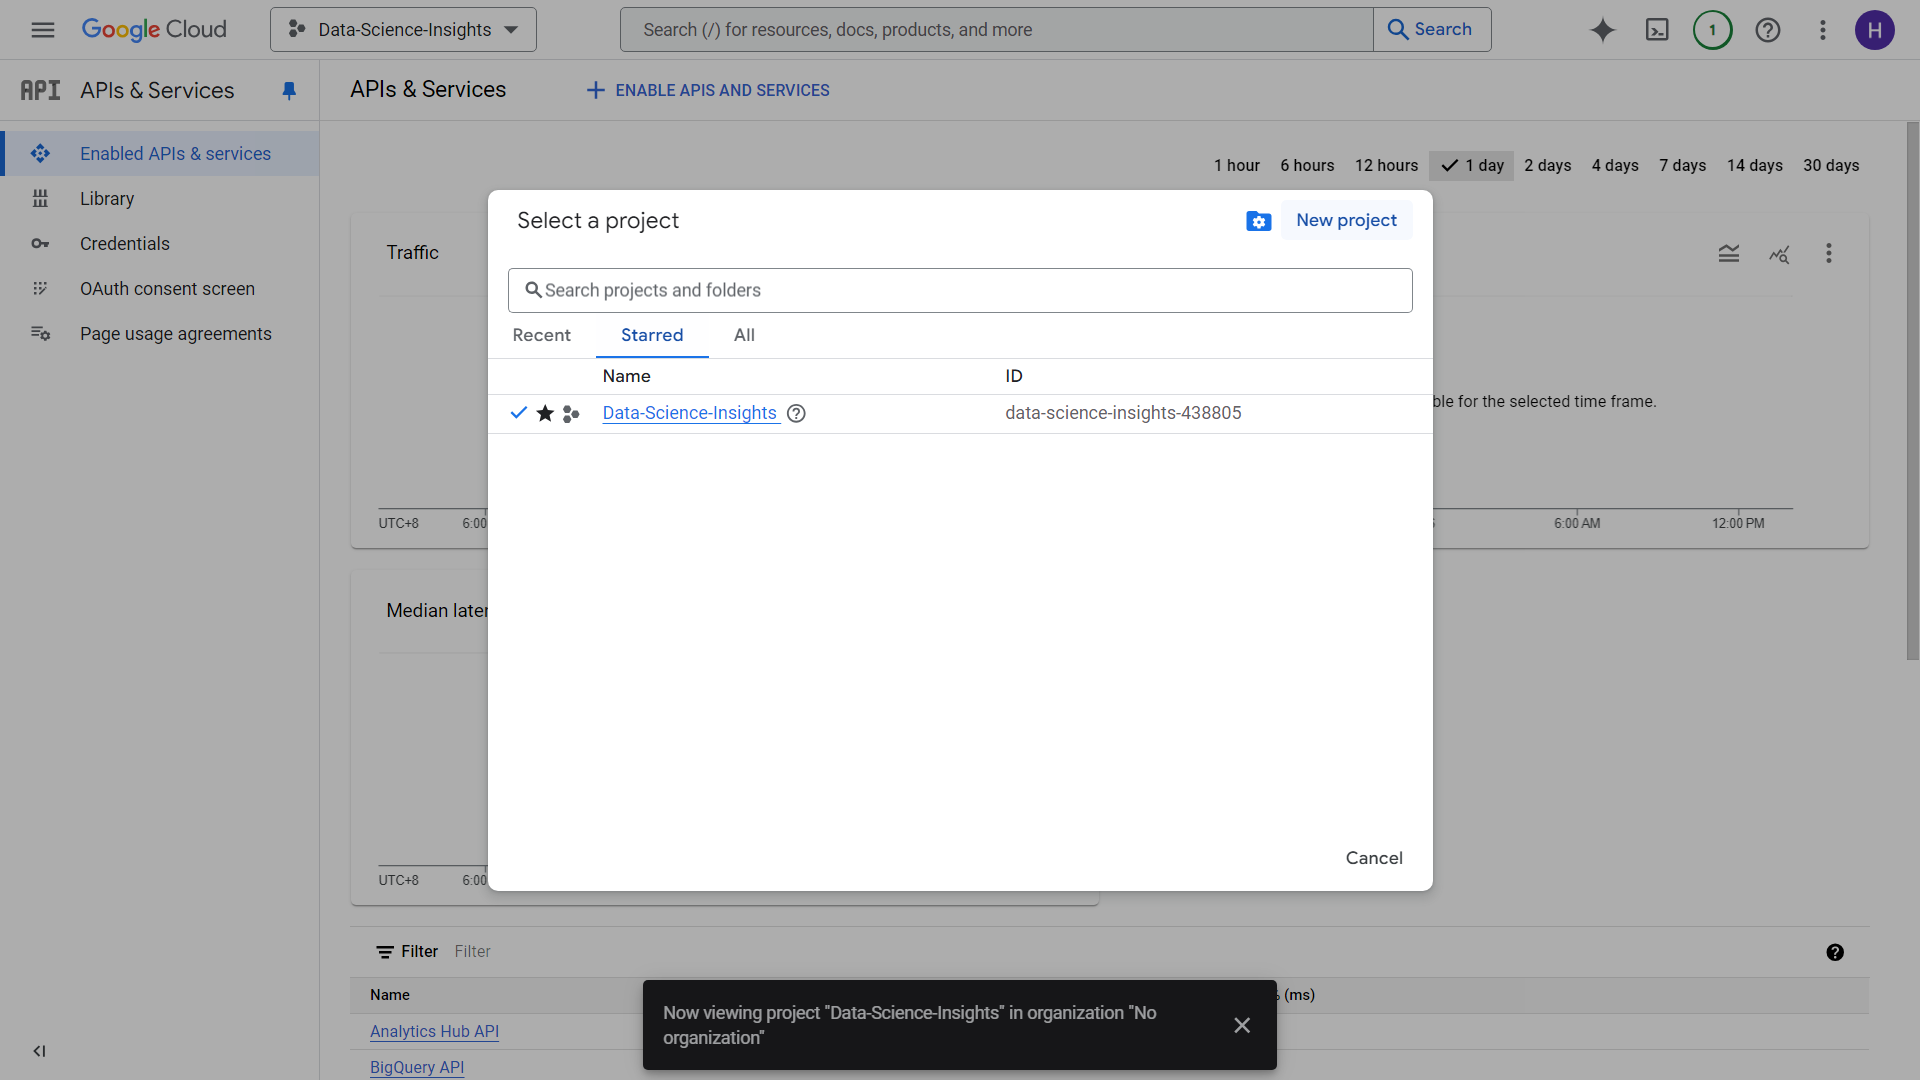
1. Create a Project within your Google Console
On the upper left hand side of your google console, a section with three dots will appear as your project. Make a project with a corresponding name, make sure you also attach a payment method in any form to get to access all google products.
2. Setting up Google Storage
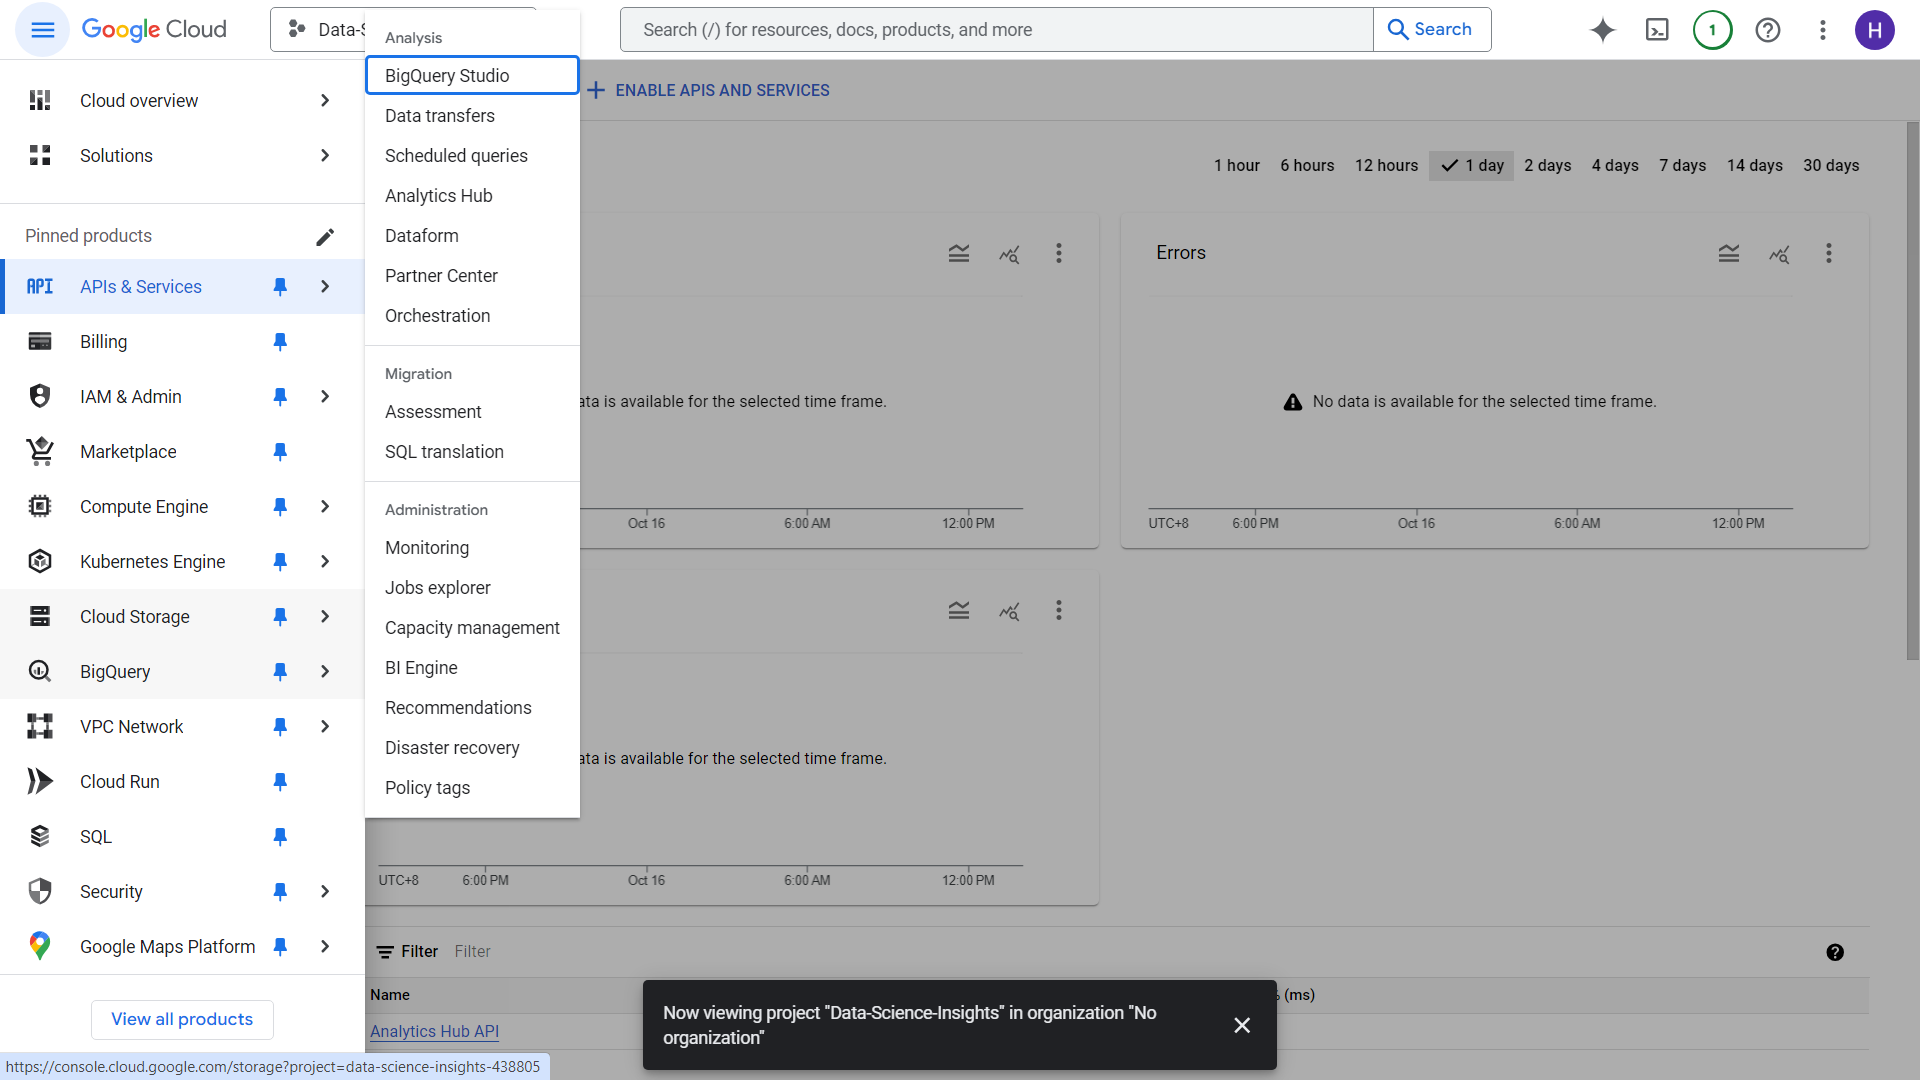
Head over the upper left side of the screen, and click the hamburger icon to see some pinned products. There you will see a section called “Cloud Storage” This is where you will upload your dataset or whatever form of data you have.
3. Creating a Bucket in Google Cloud Storage
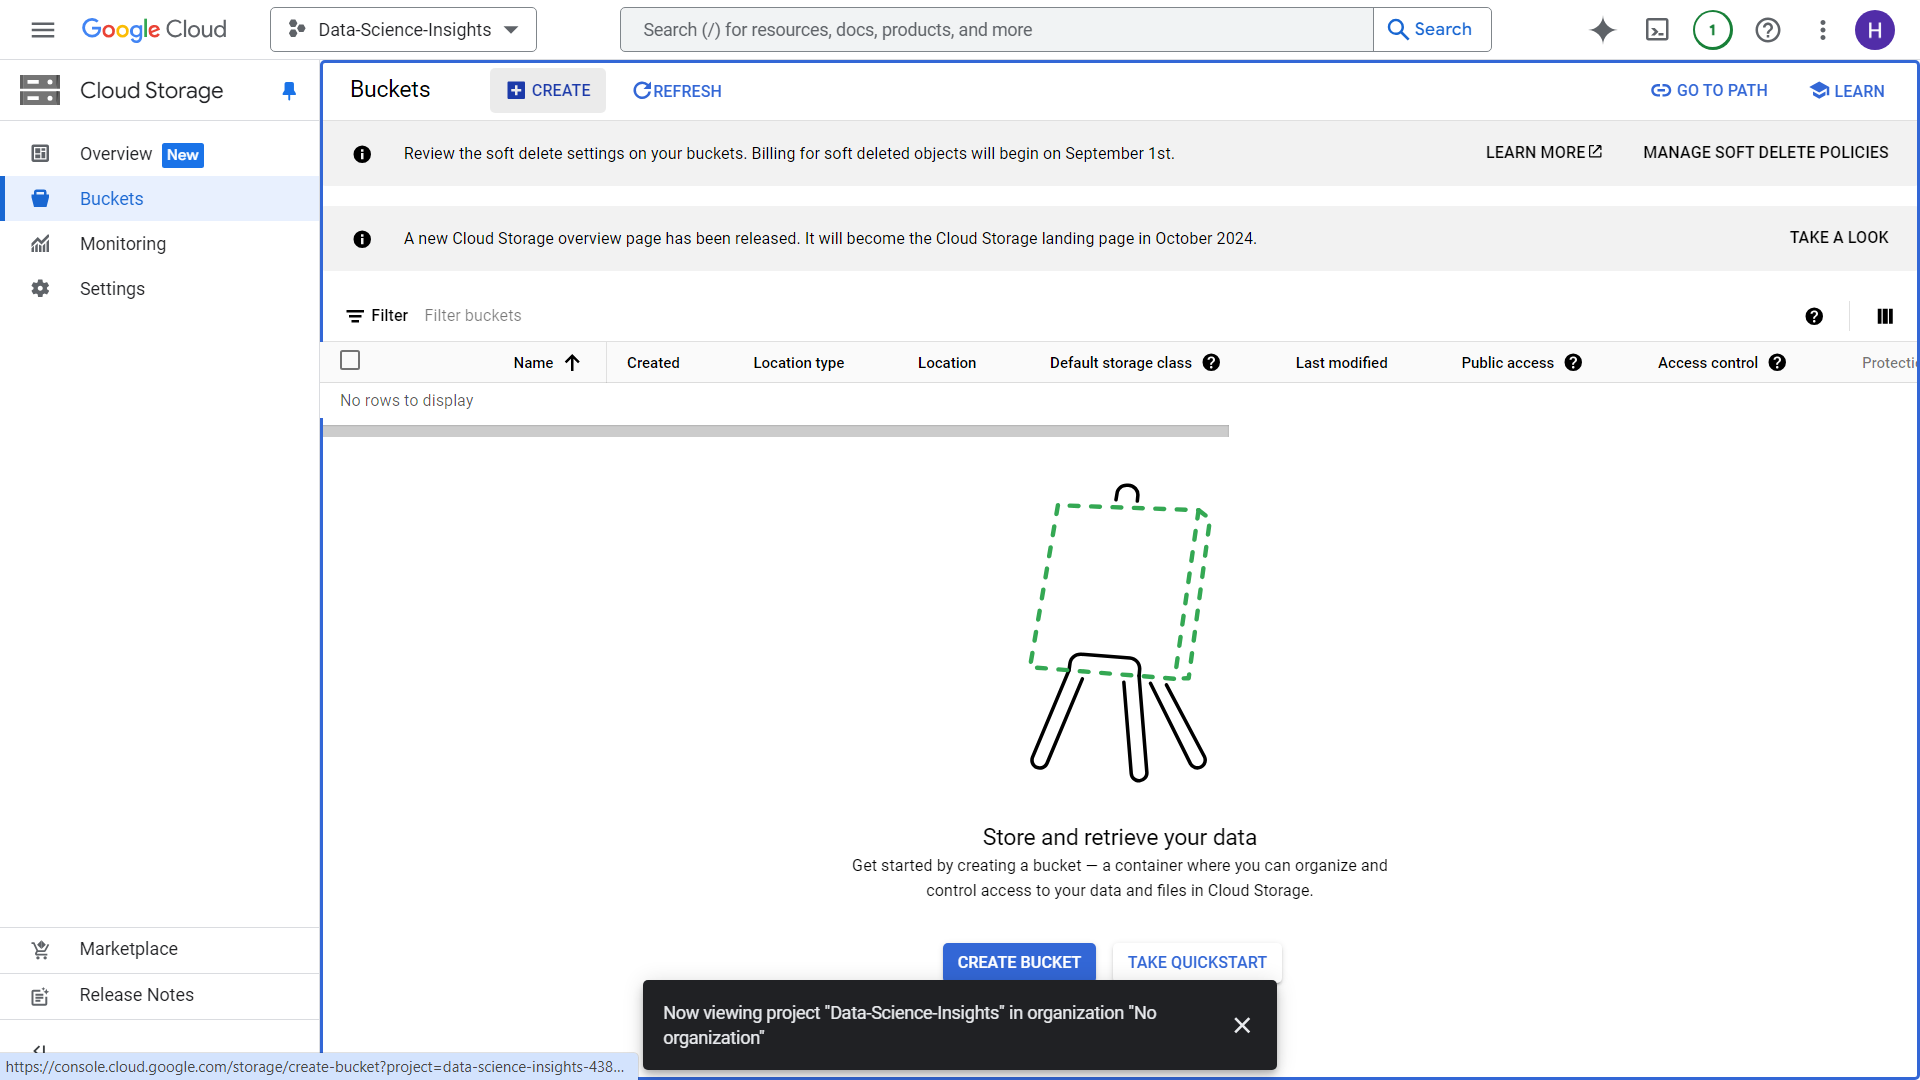
There are several ways to move data over Google Cloud Storage, but in this case we will just be uploading a 300mb CSV for a quick demo. Click over the create button on the upper left hand side
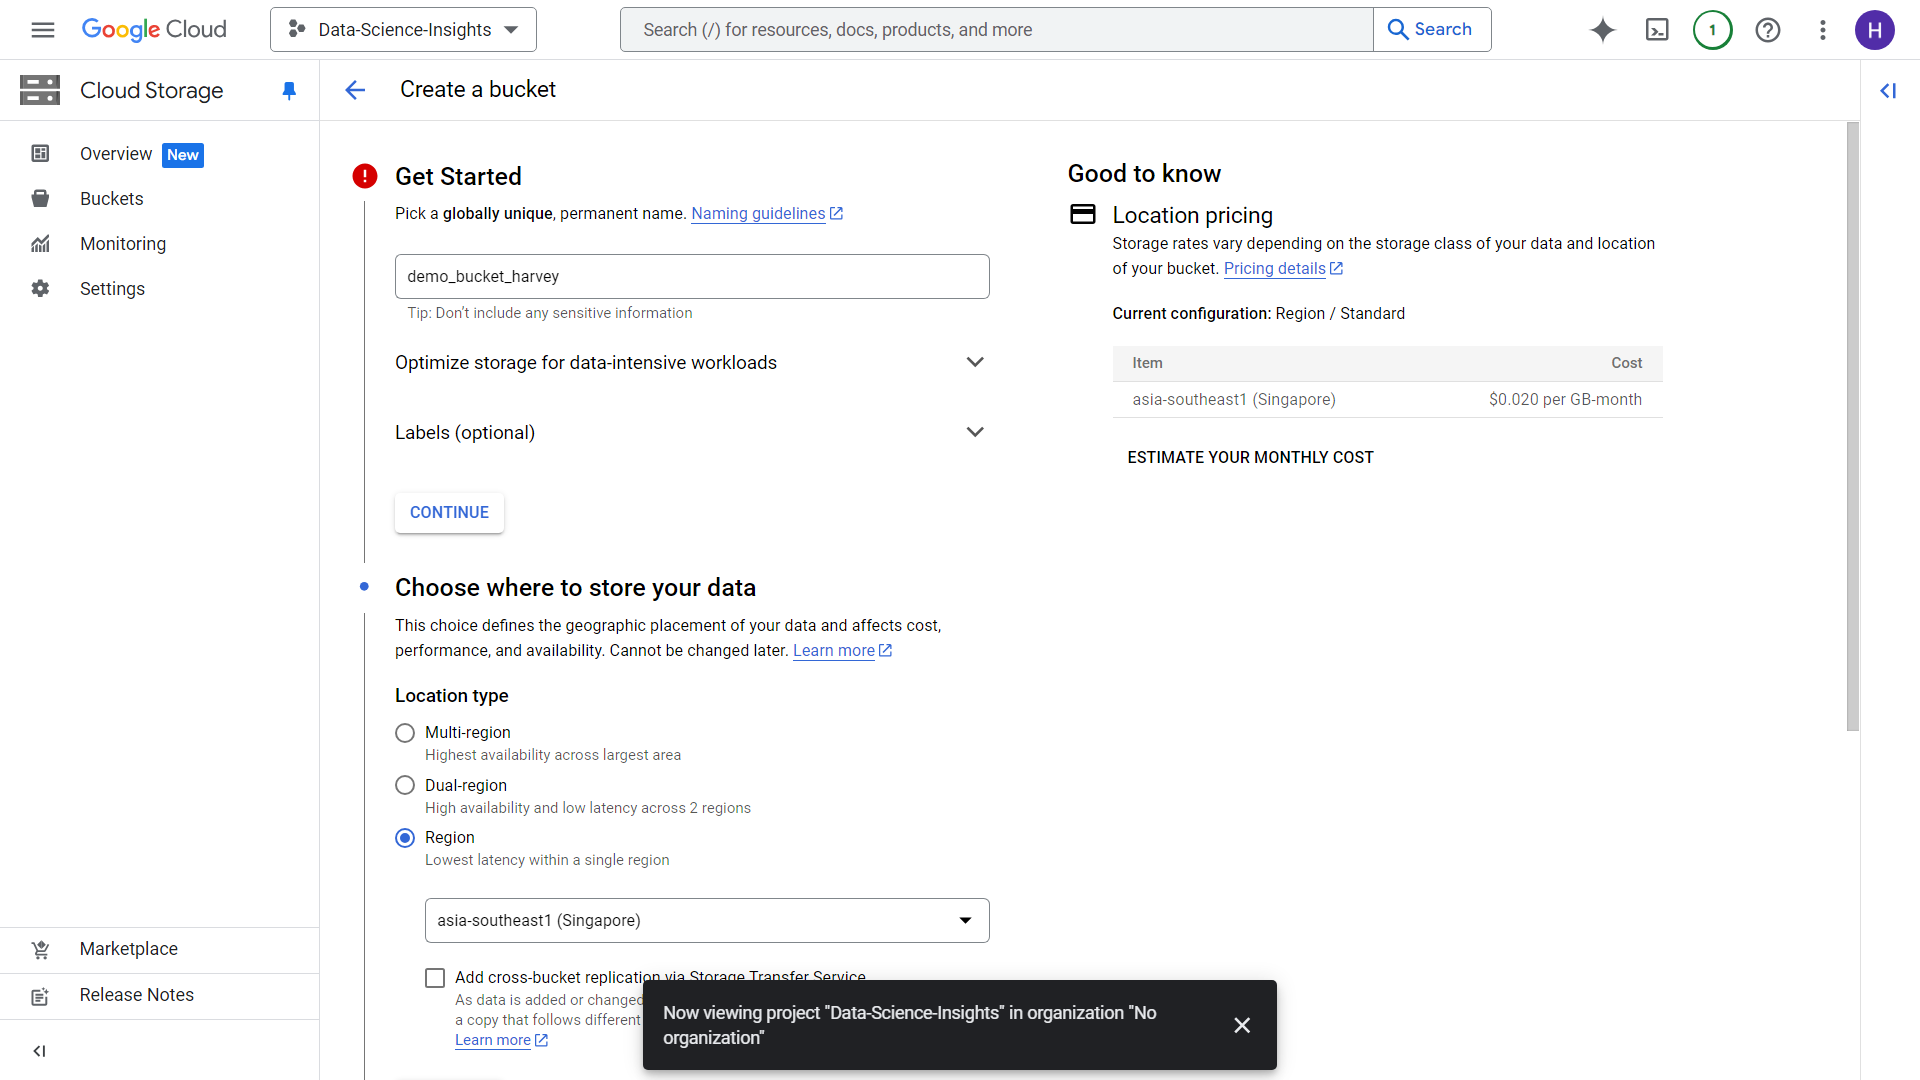
After clicking Create, you will be redirected towards this UI. Create a unique bucket name and select a region that will be the place for storage of your data. In our case, Singapore might be ideal (P.S. make sure your storage region is same as BigQuery region). We will leave everything else as default for now. You will then be prompted for “Enforce public access prevention on this bucket”. Just click okay then proceed.
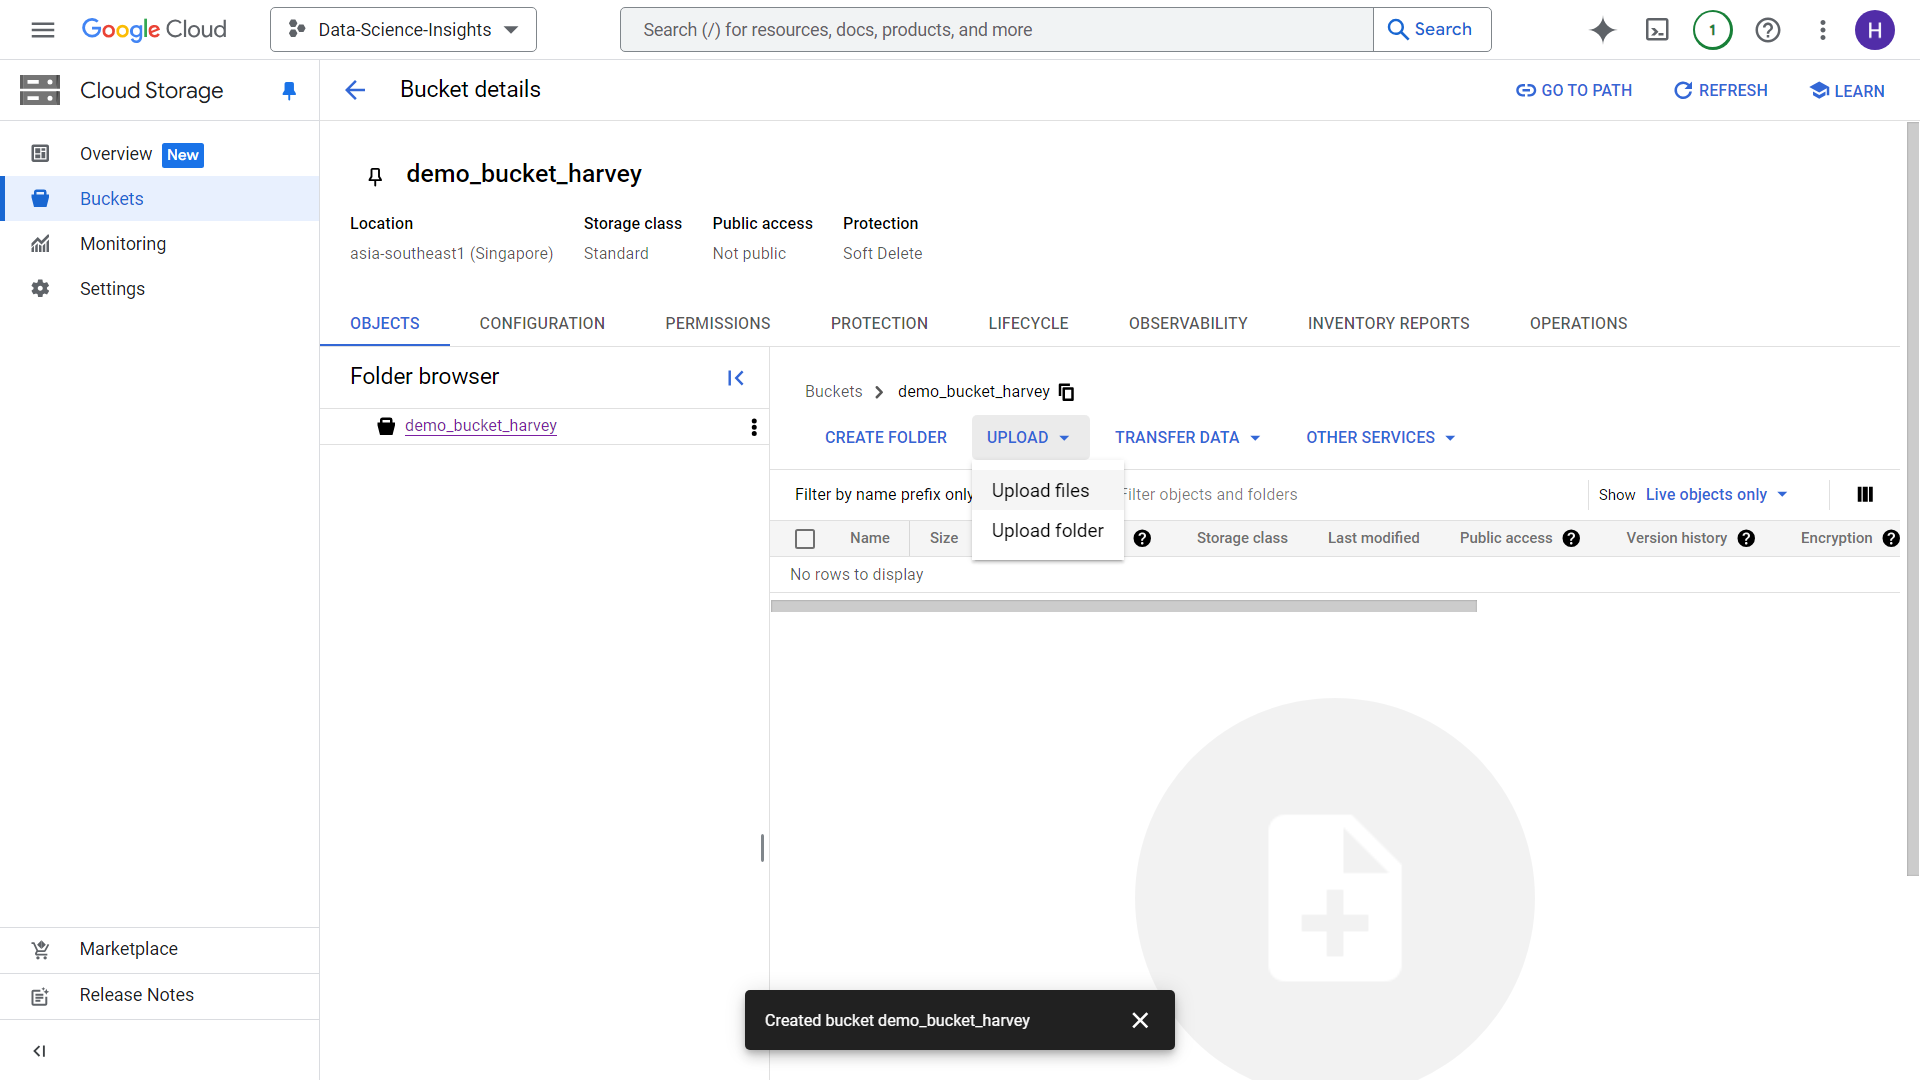
We will then be redirected towards this UI. This is the part where we upload files from our local storage or wherever. But in this demo, we will just upload a 300mb csv from local storage. Note that you can do this for any size of data, especially in the cases where you have Big Data ranging terabytes of size. After clicking upload, you will have a load job started.
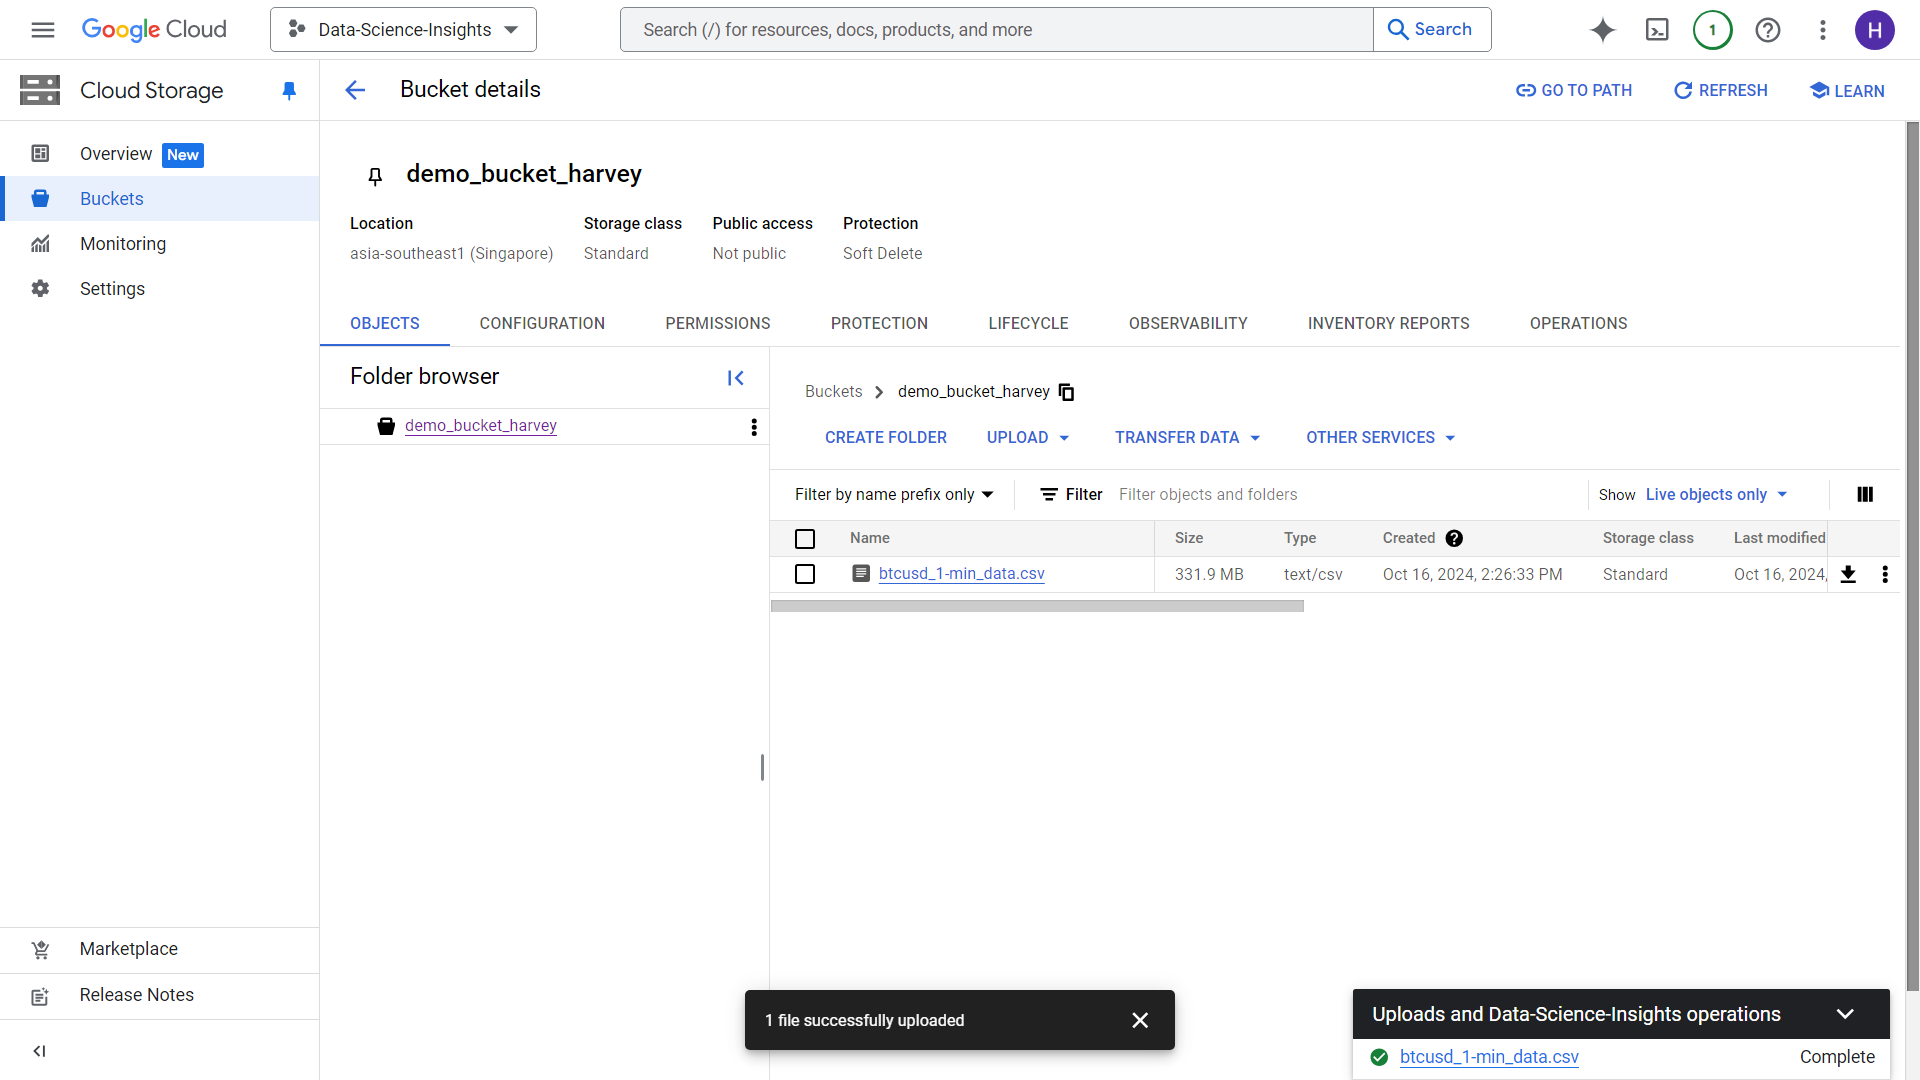
After a few minutes, completed load job will look like this:
4. Using Cloud Storage data for Big Query analysis
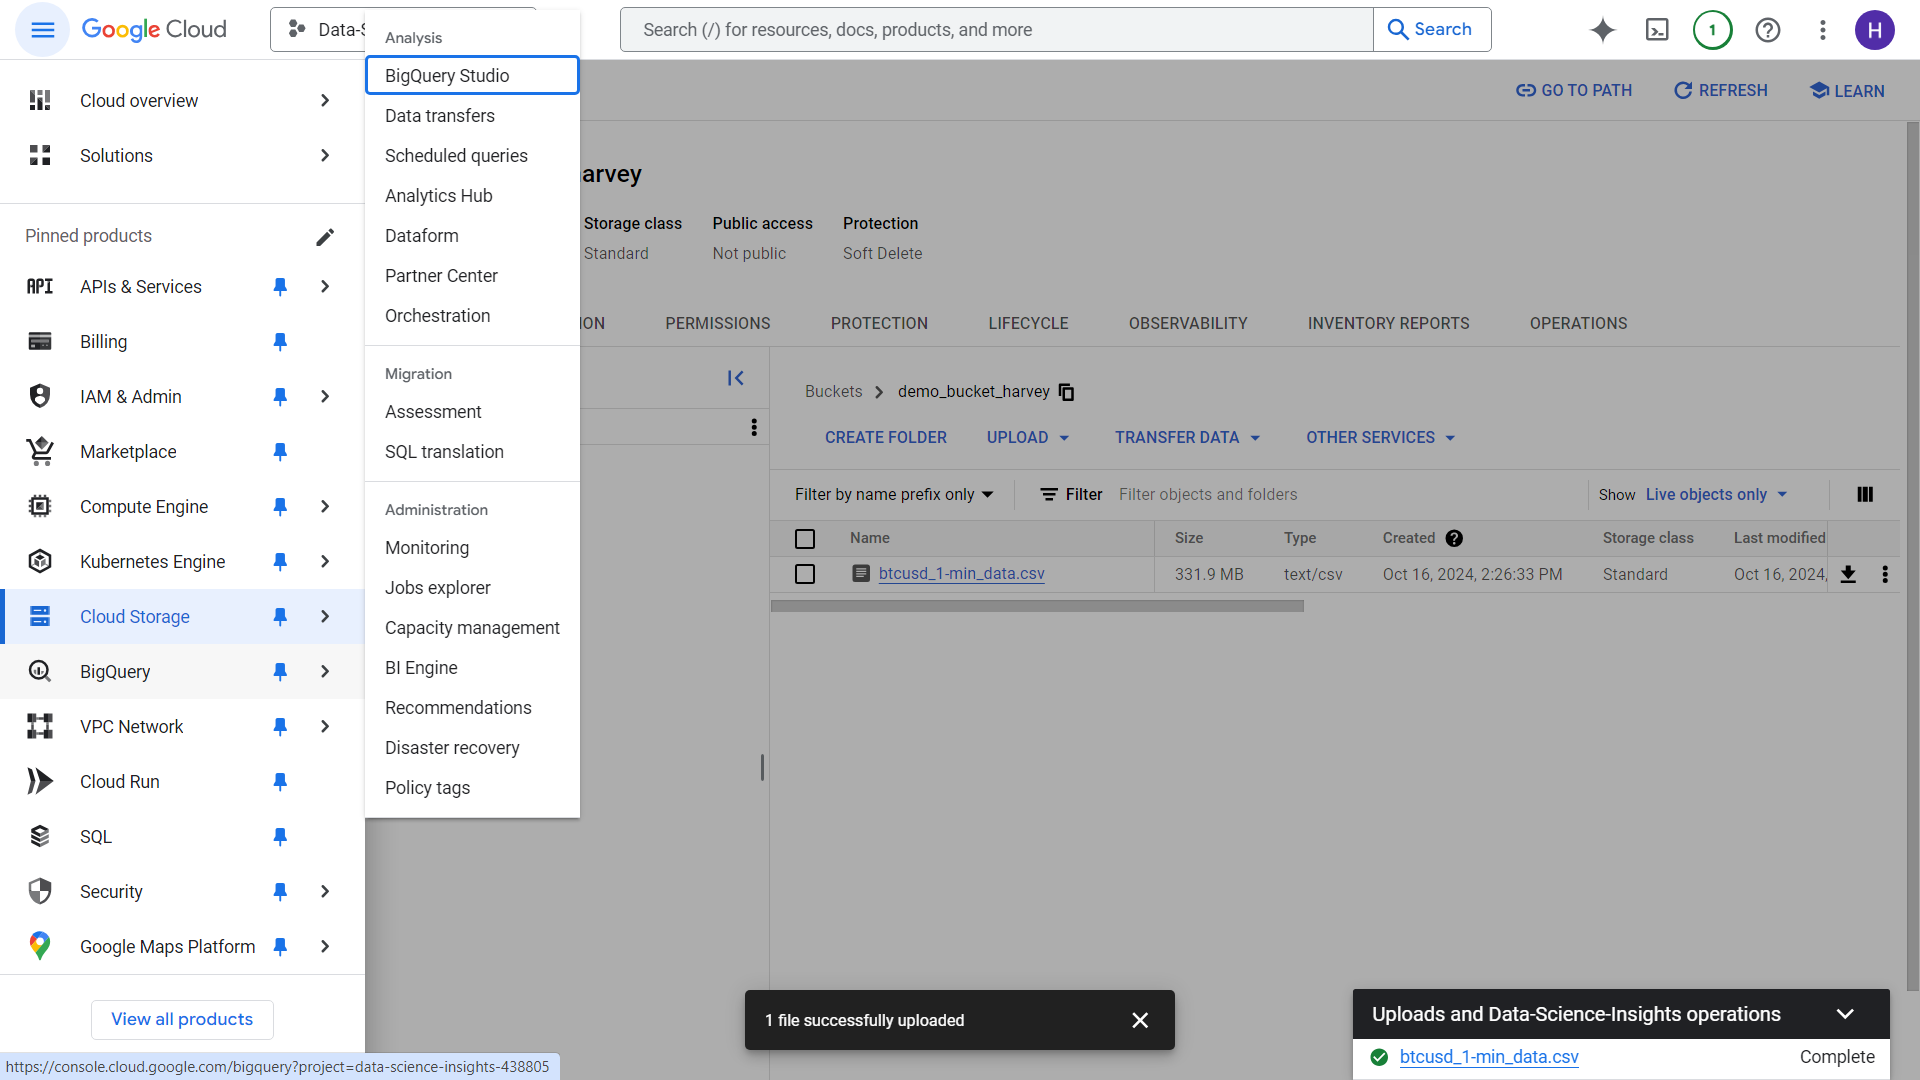
Let’s head over the upper left corner again and click the hamburger icon, there we will see the Big Query option. Click the Big Query Option
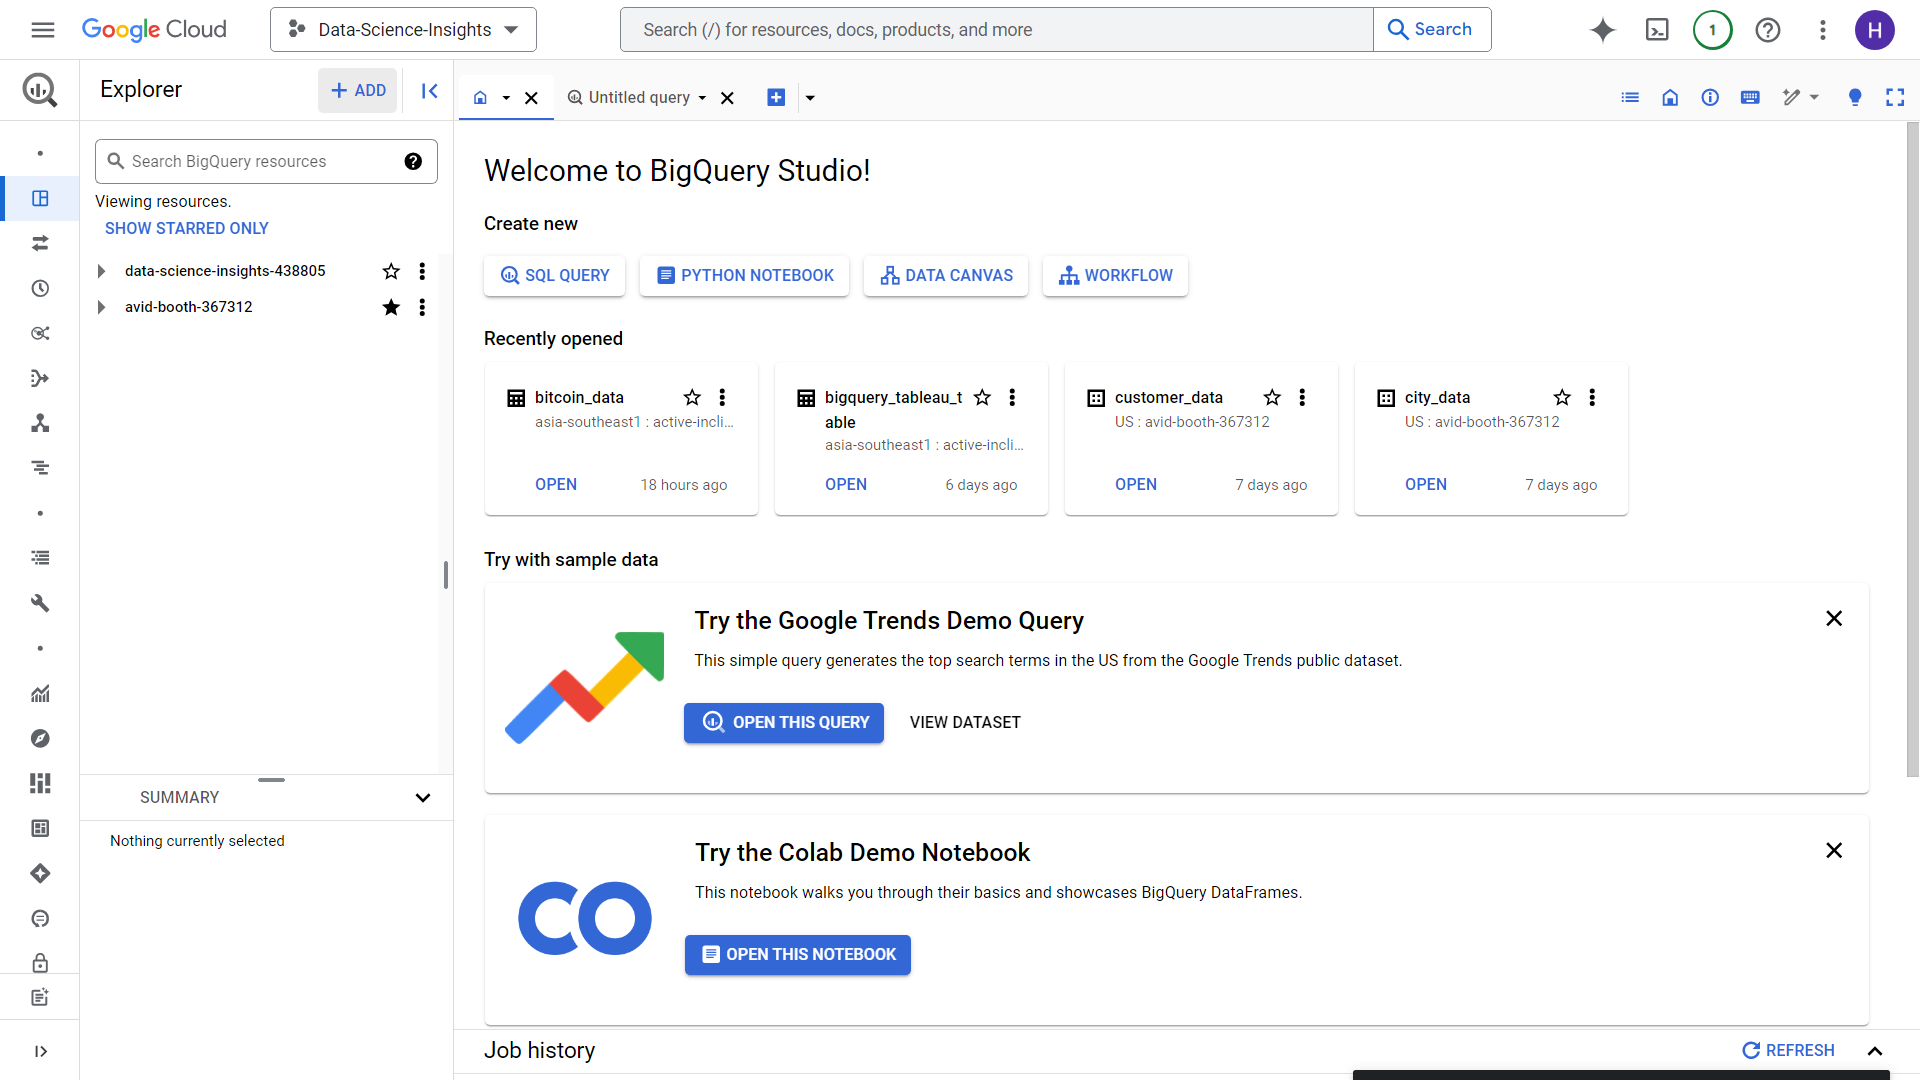
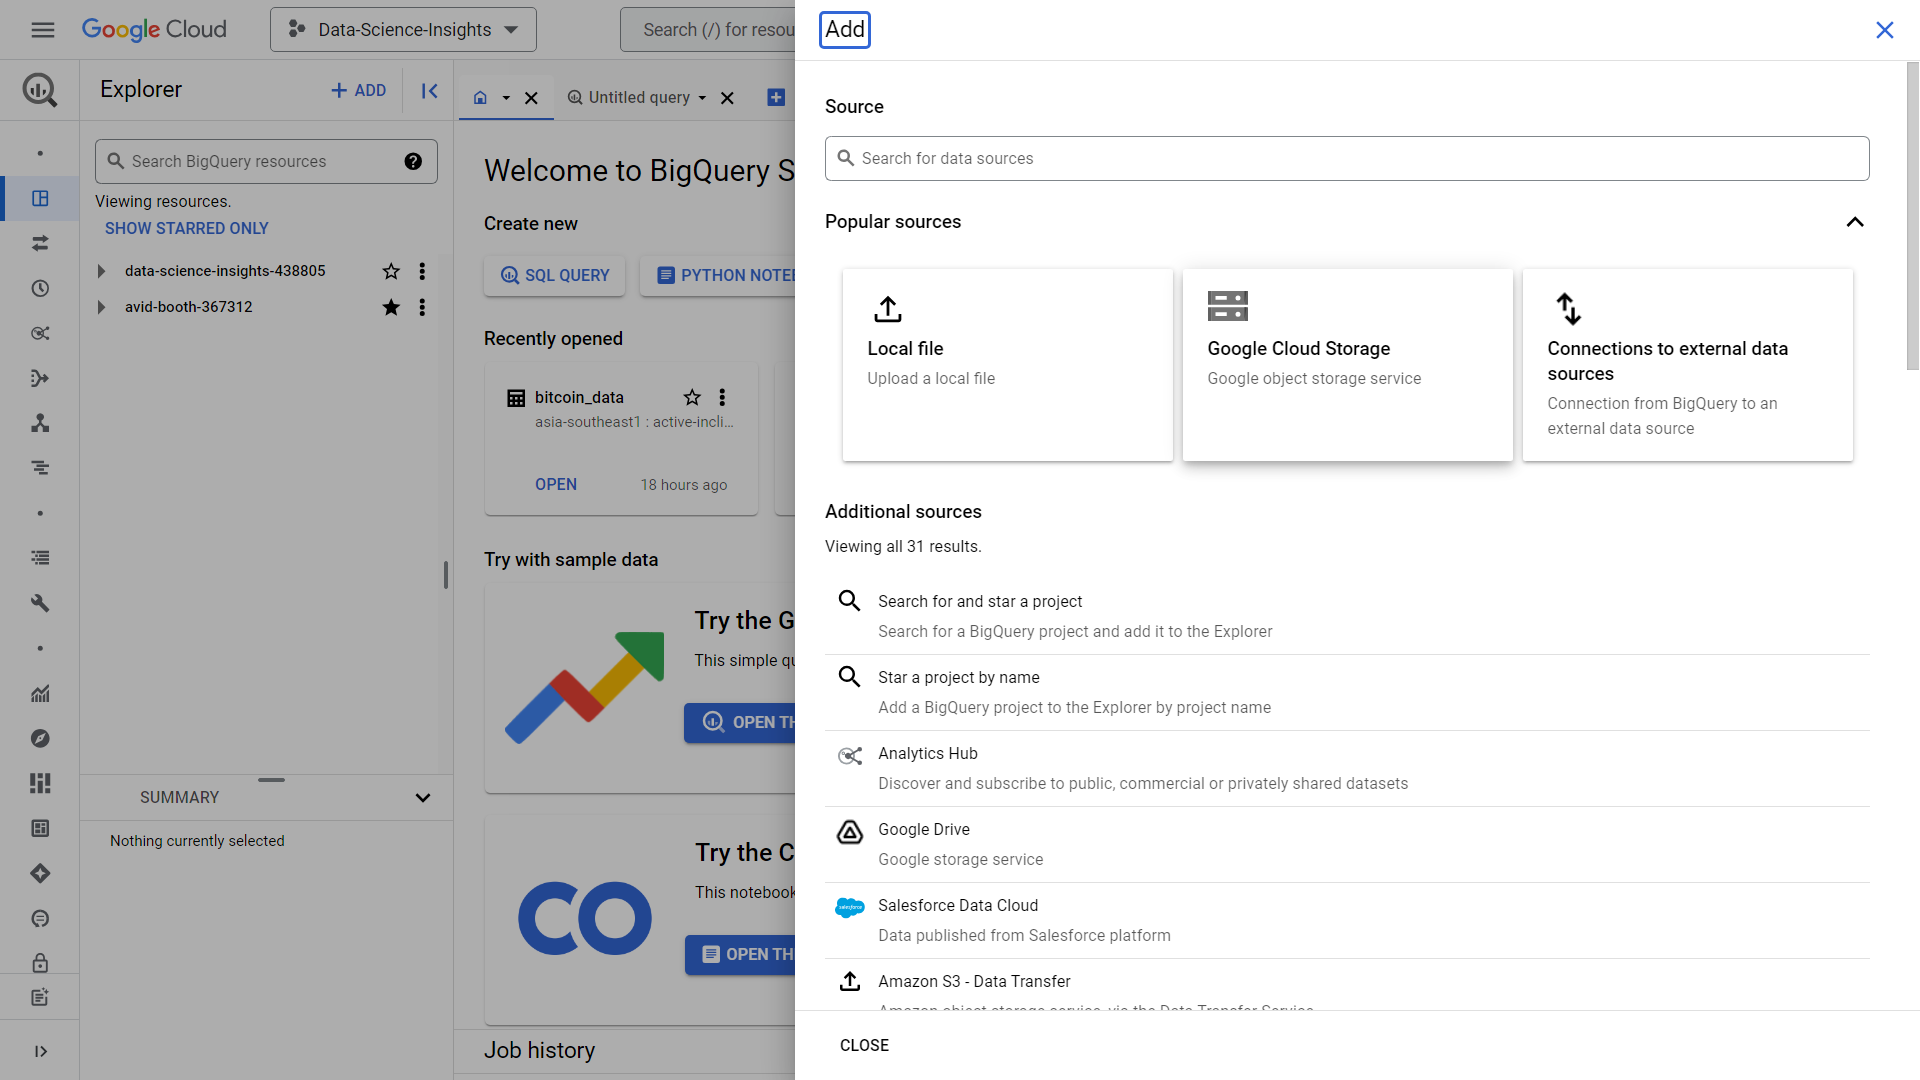
You will then be greeted with this UI, make sure to click “Add” button on the upper left portion of the screen.
Click the Google Cloud Storage option
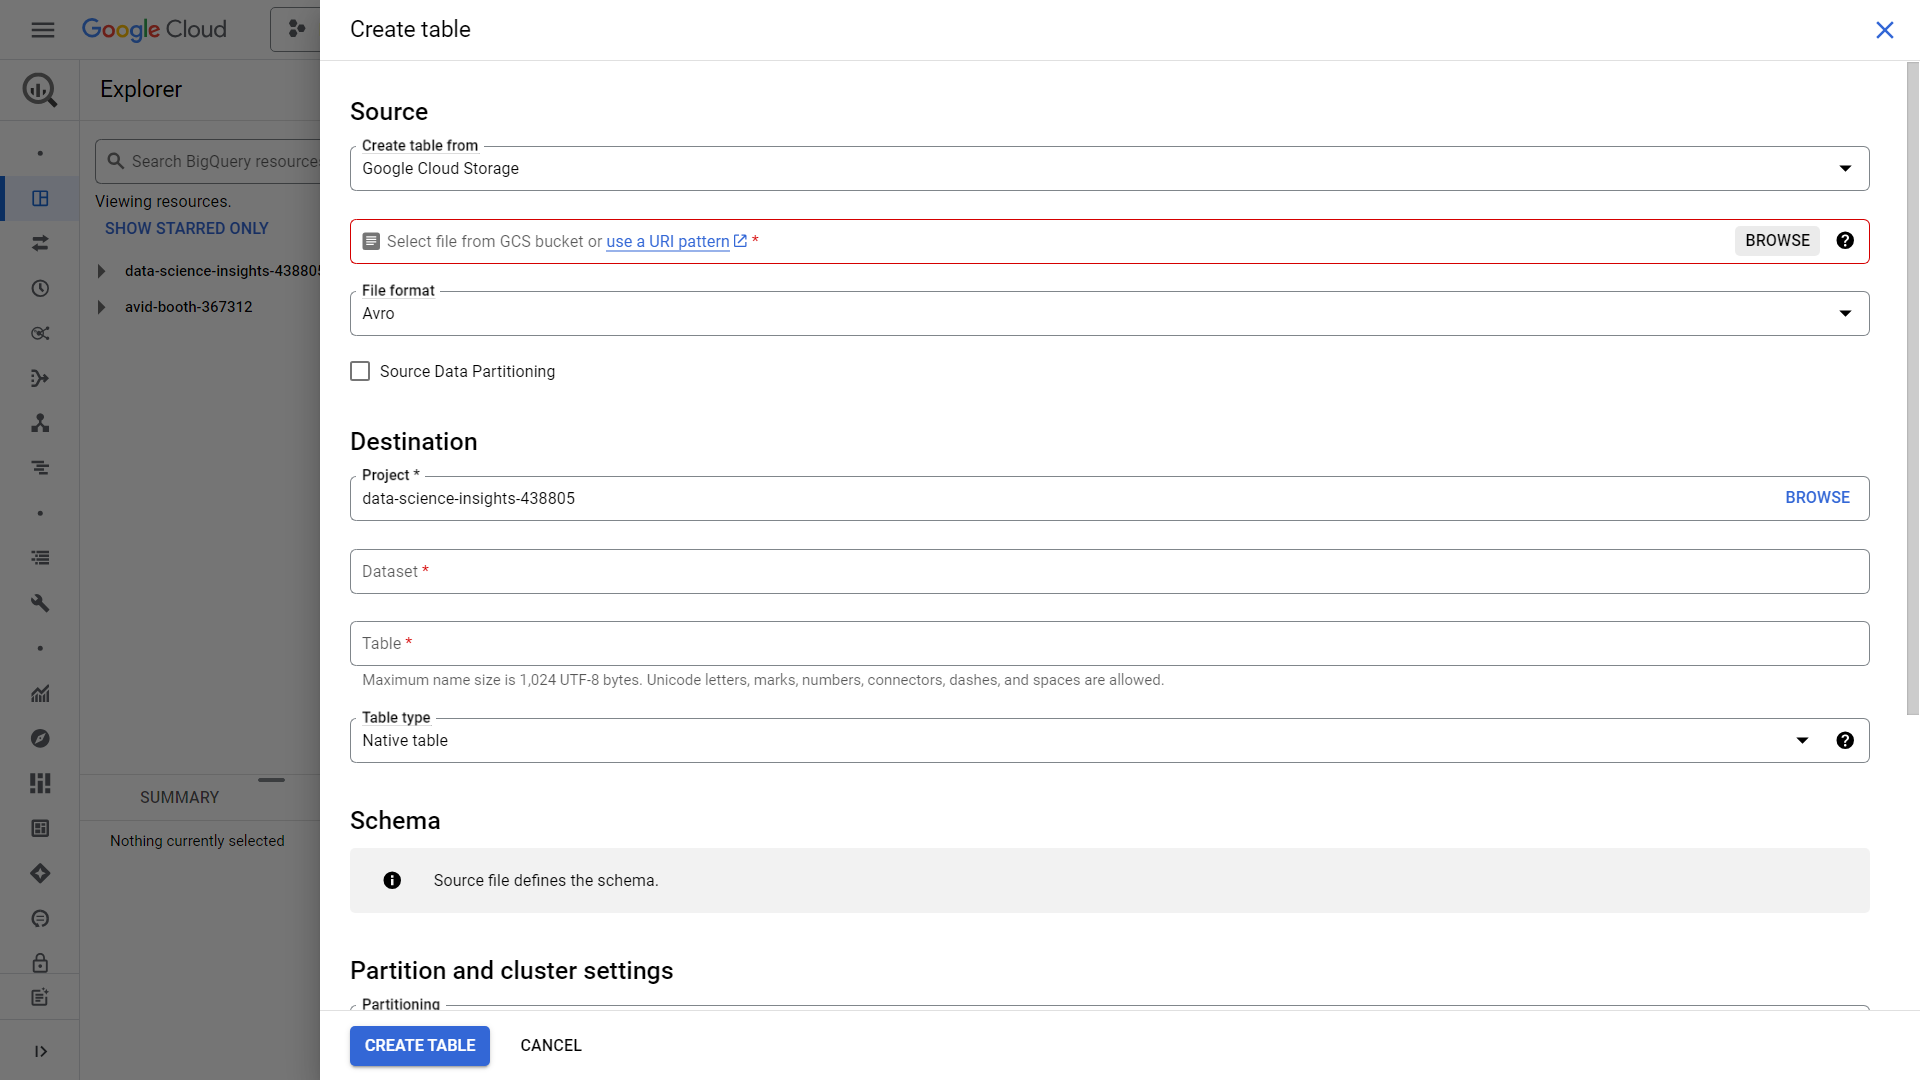
Click browse and find the file we just uploaded inside Google Cloud Storage, in our case, its the “btcusd_1-min_data.csv” in the bucket named “demo_bucket_harvey” we just created
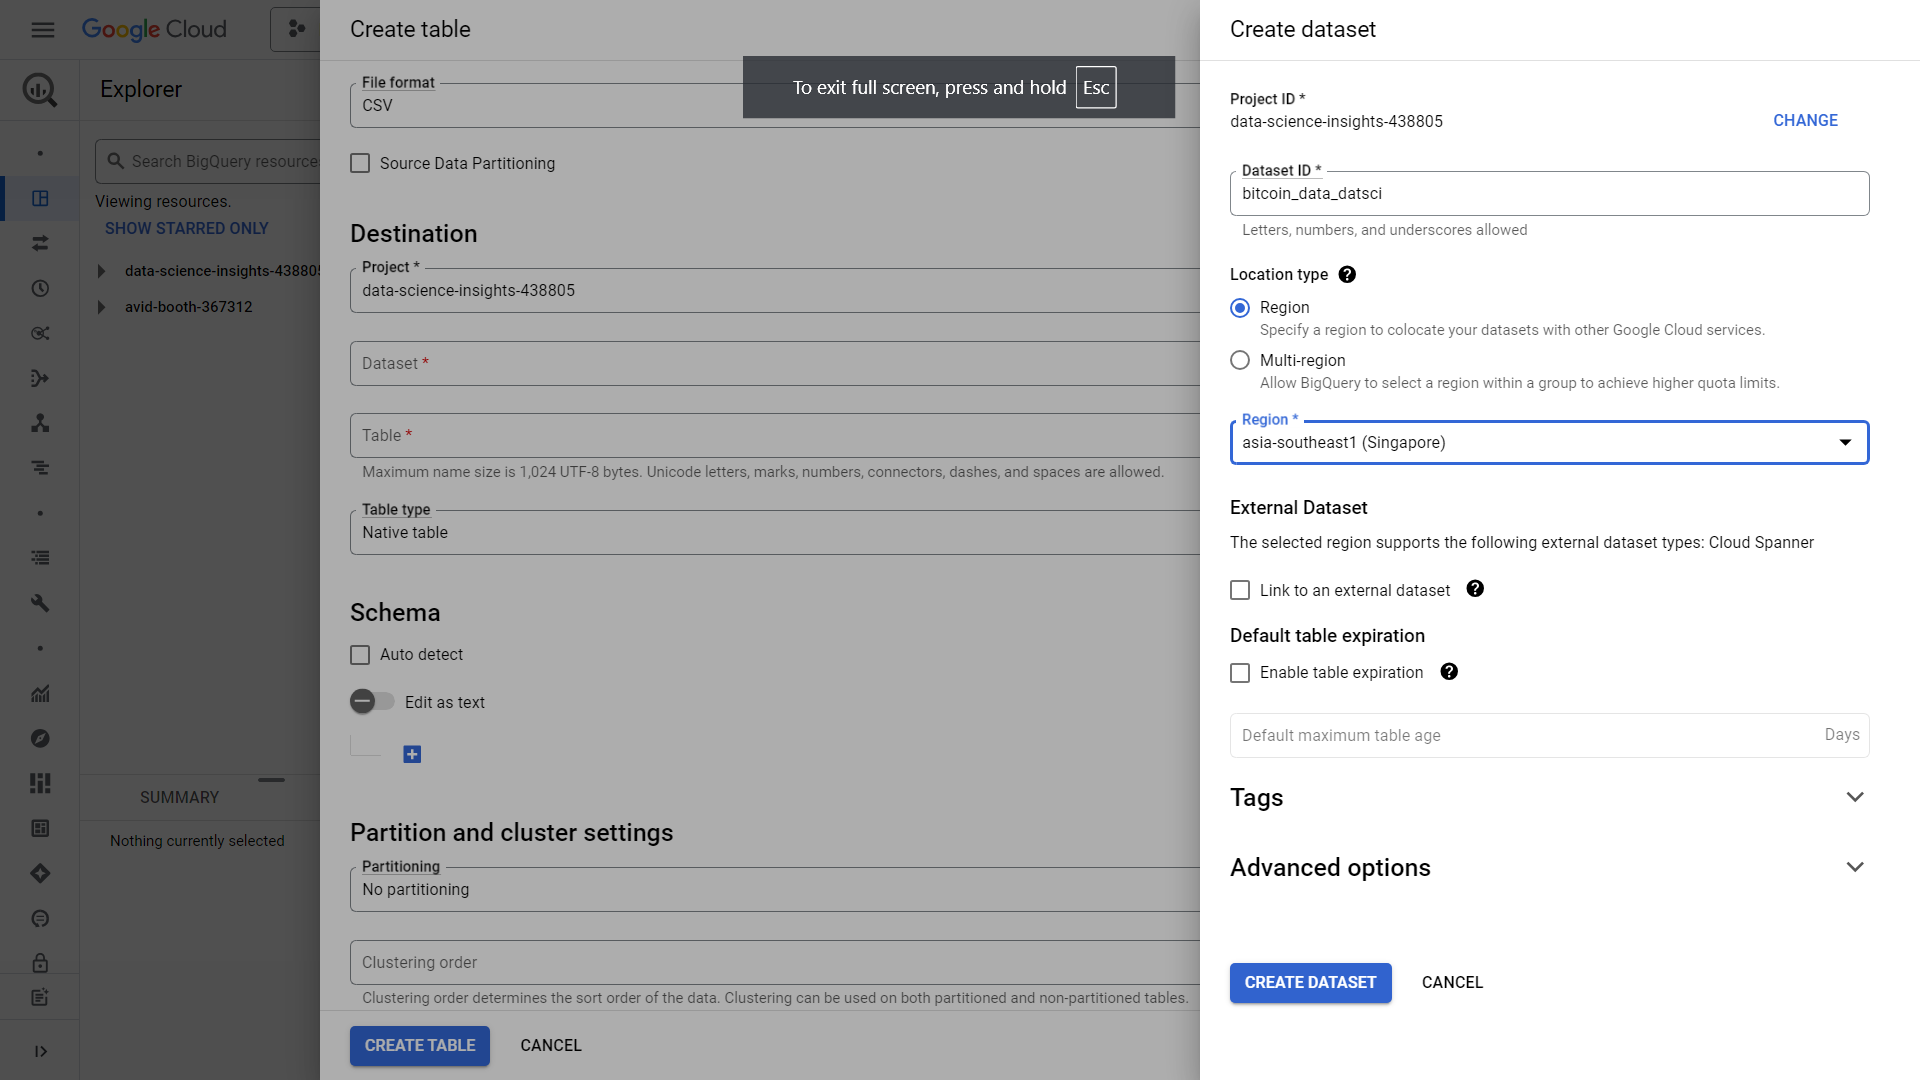
Head over the destination portion, and create a dataset. For our case, lets create a dataset named “bitcoin_data_datsci” and select a region similar for our storage, in our case its singapore. Leave everything as default and click create dataset.
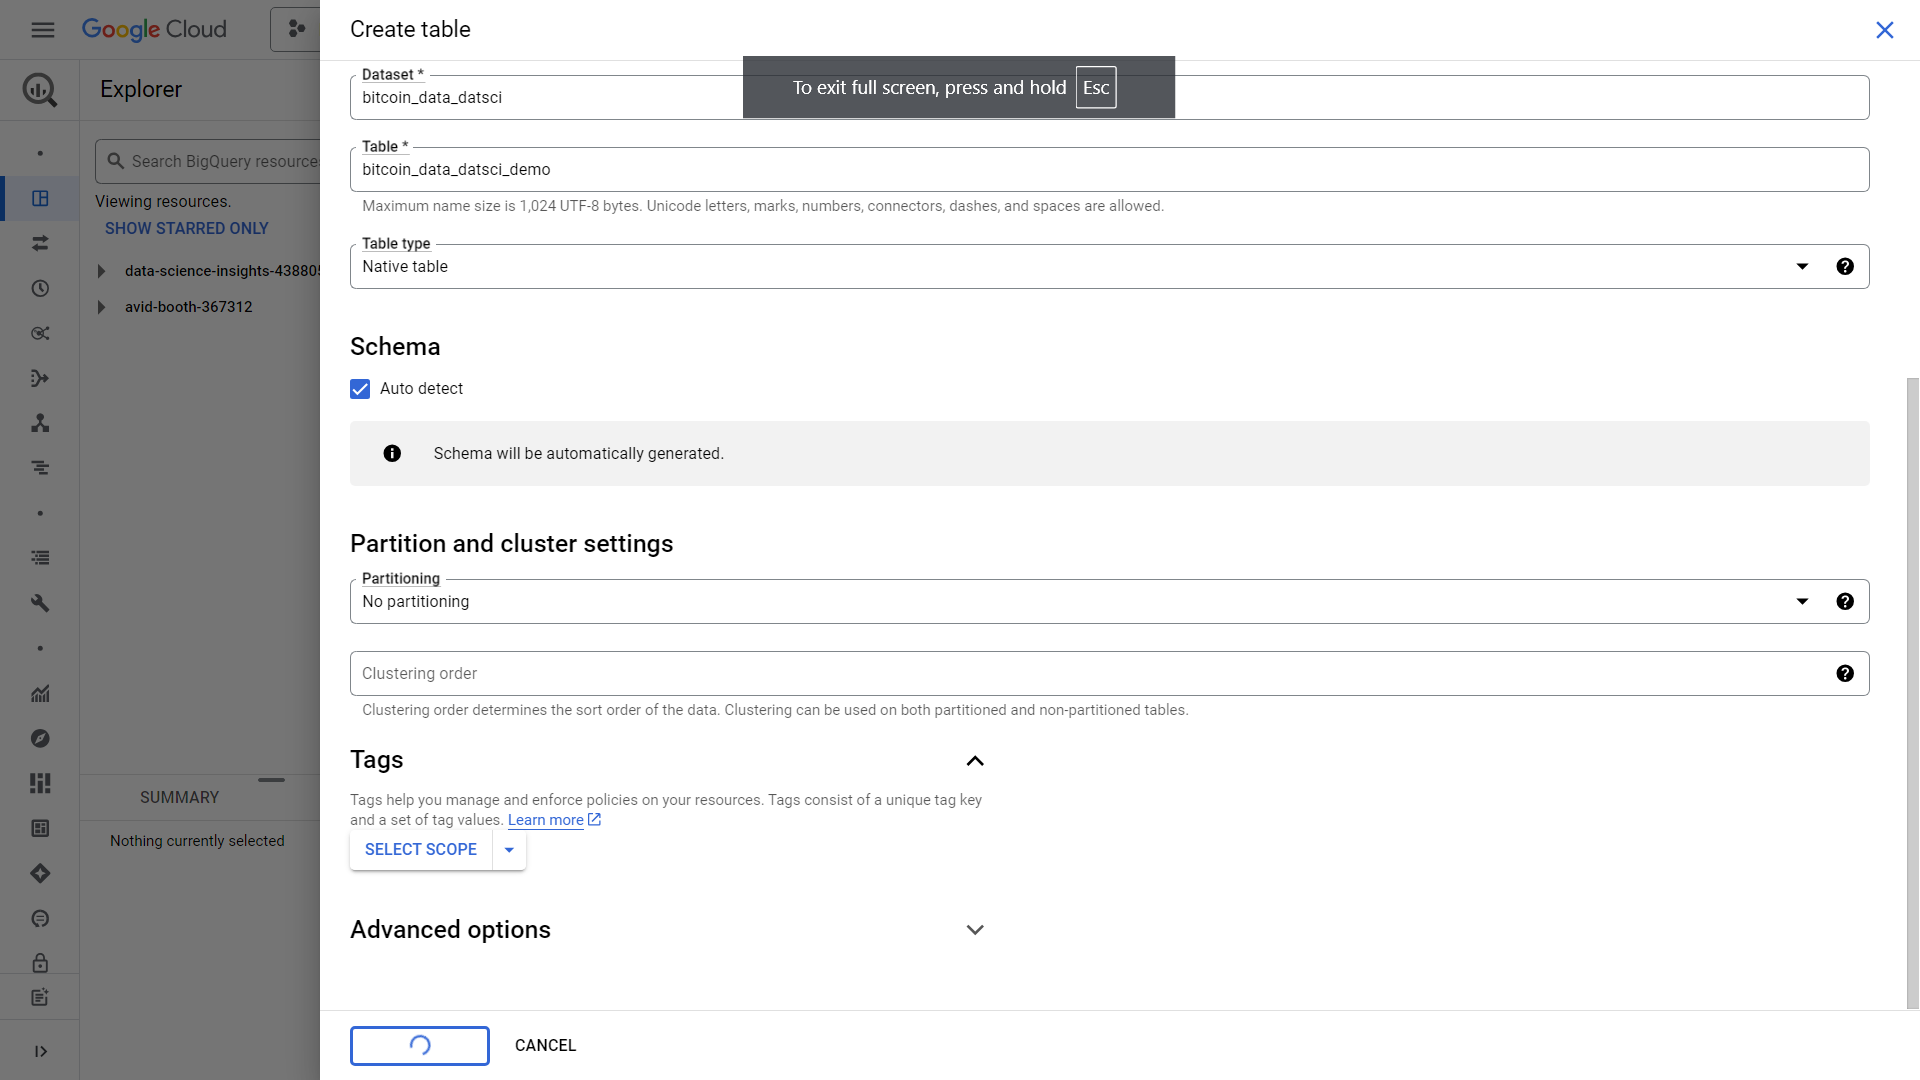
We can then name our table “bitcoin_data_datsci_demo”. Make sure to click auto-detect schema unless you want to define a schema of your own. Its easier to just auto-detect it for the sake of practice. Leave everything else by default and click create table. A load job will then be created
It will then notify you of the table made.
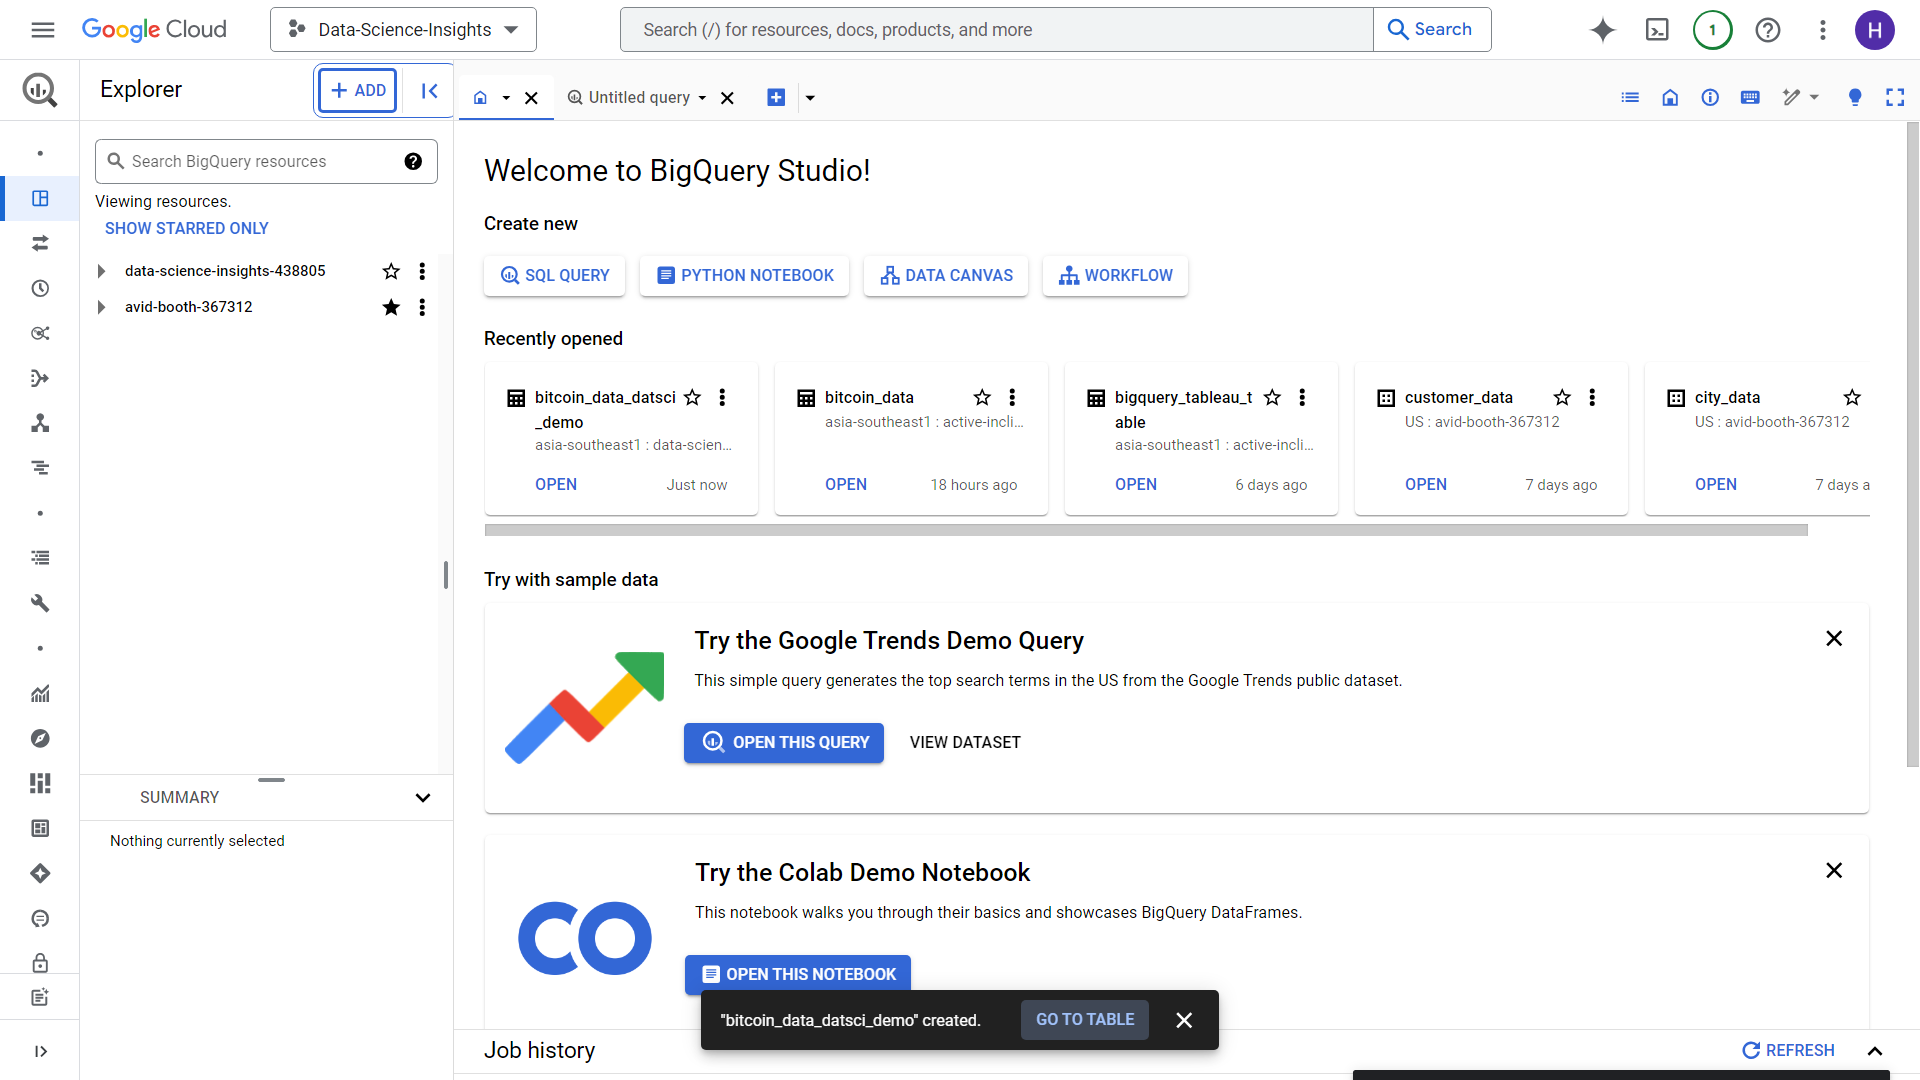
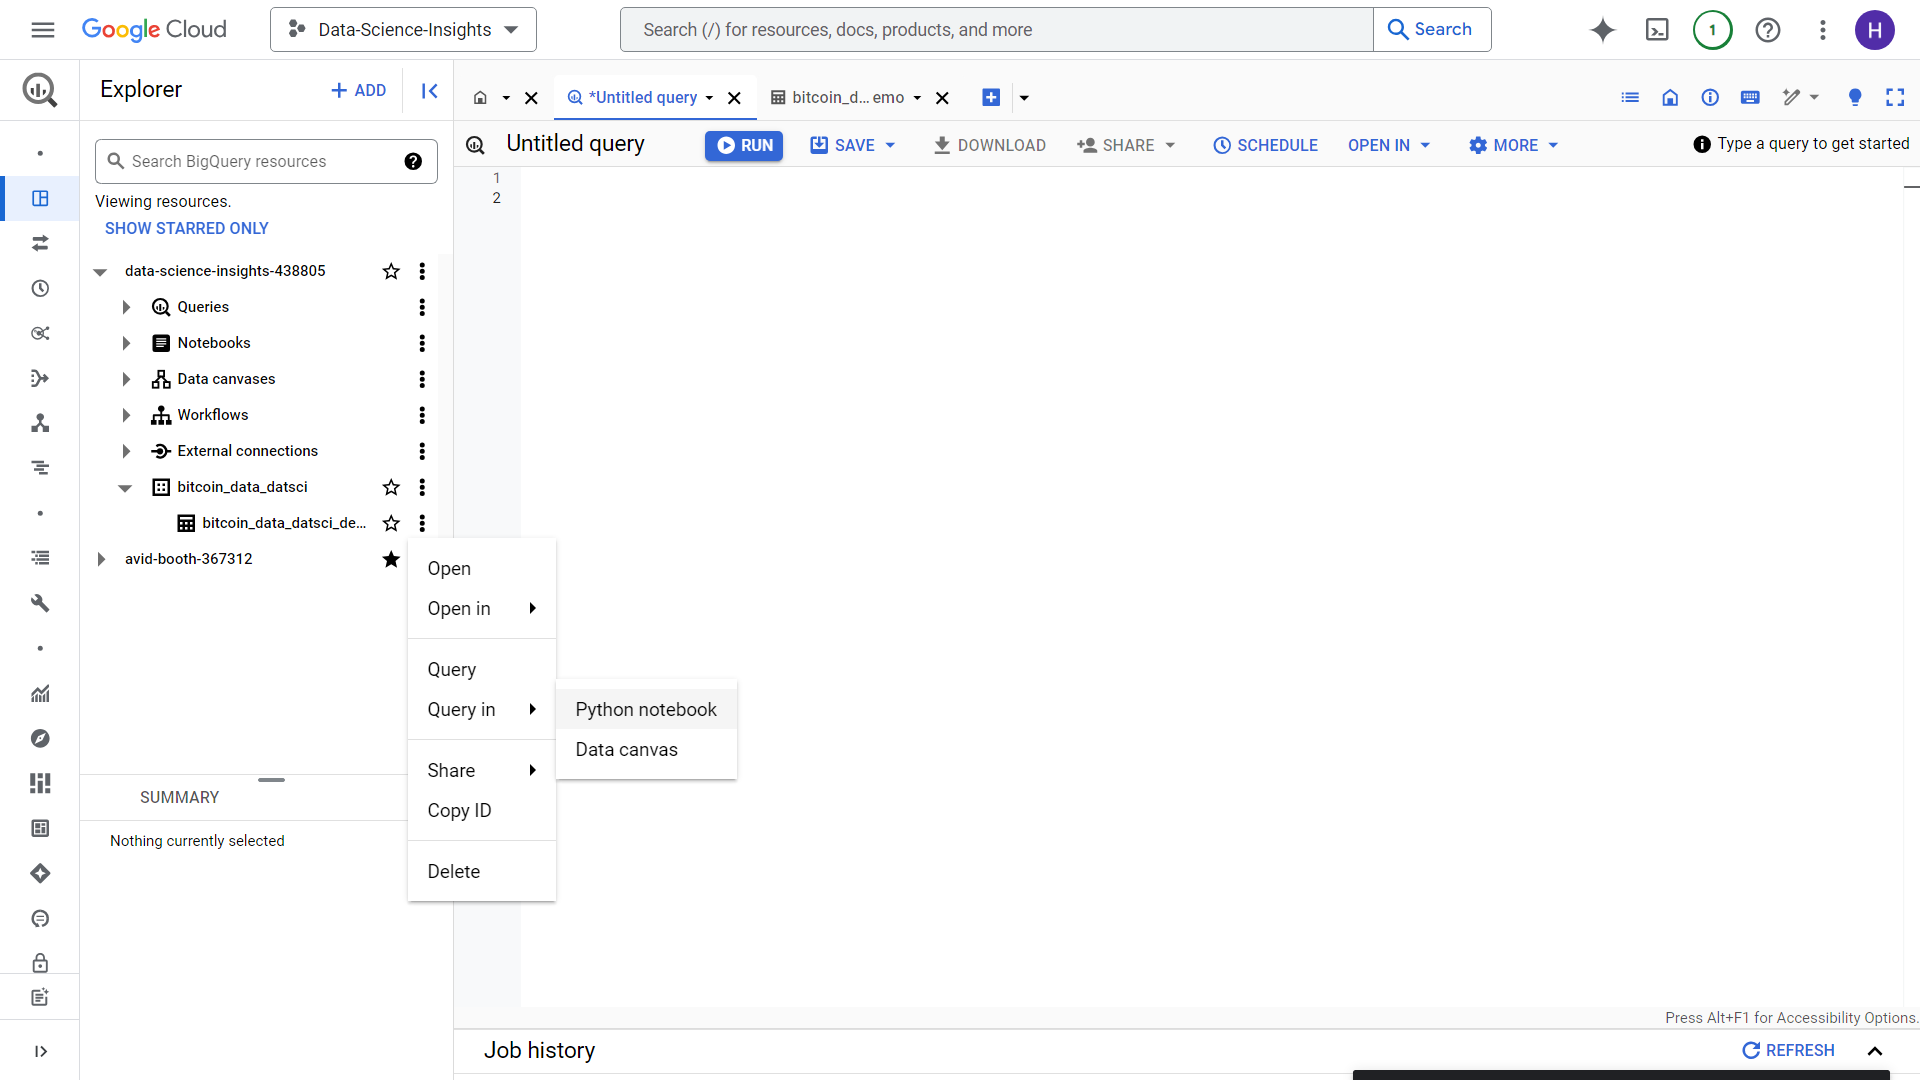
Let us try for a quick Data Exploration using jupyter in Big Query.
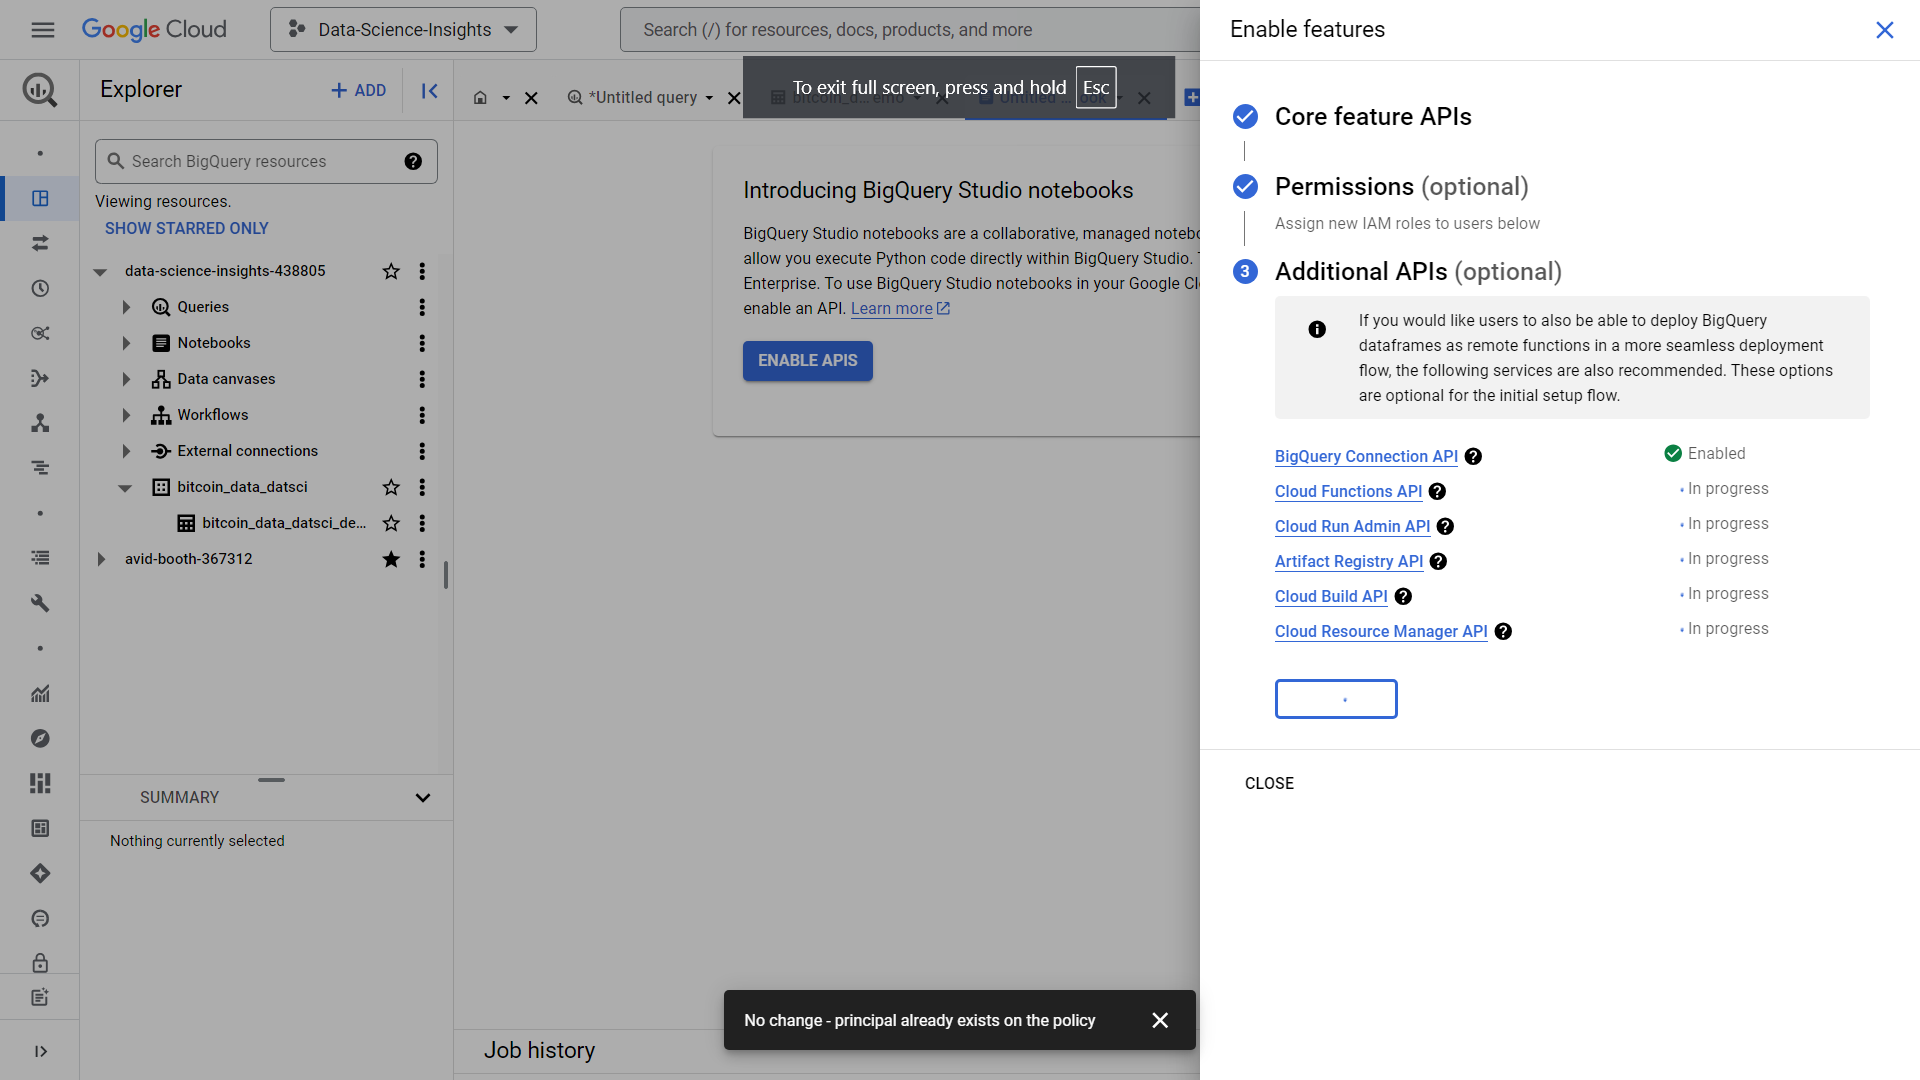
Make sure to enable ALL APIs.
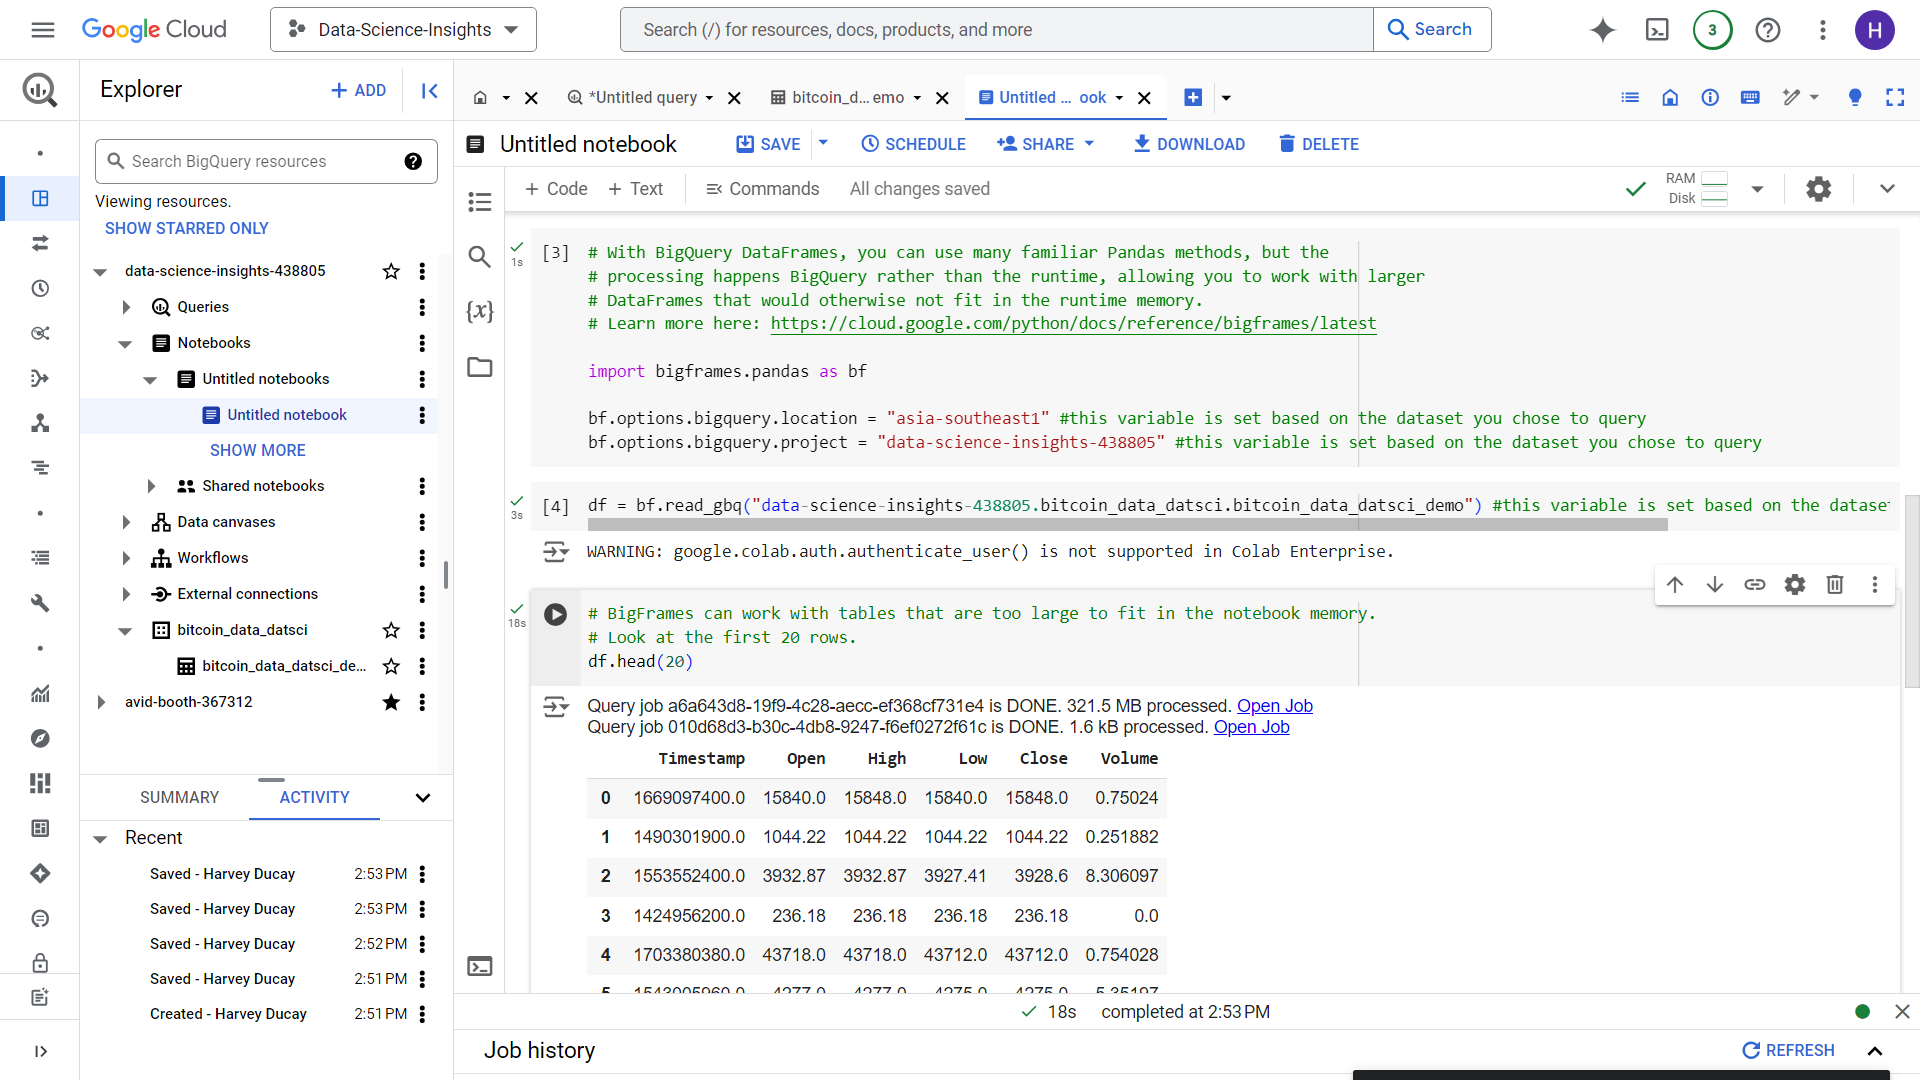
We are then met with this Jupyter notebook, let’s just query the first 20 rows just to get to see the dataset we have just uploaded (Note that using Limit clause or head for jupyter won’t reduce the amount of data scanned by the query).
Tips and Reminders for Successful Data Warehousing
Optimize File Formats
Use compressed files when possible
Consider columnar formats like Parquet
Maintain consistent schema definitions
Plan for Scale
Implement proper partitioning
Use clustering for better query performance
Monitor costs and optimize accordingly
Maintain Data Quality
Implement data validation checks
Set up monitoring and alerting
Document your data pipeline
Conclusion
Successfully moving data from Cloud Storage to BigQuery is essential for modern data analytics. By following this guide, you've learned the fundamental steps and best practices for implementing a robust data warehousing solution. Remember that efficient data ingestion is the foundation for meaningful data analysis and business insights.
Subscribe to my newsletter
Read articles from Harvey Ducay directly inside your inbox. Subscribe to the newsletter, and don't miss out.
Written by
