Installing Apache Web Server on RHEL 9: A Simple Tutorial
 Yuvraj Singh Rajawat
Are you ready to set up your own Apache web server on Red Hat Enterprise Linux (RHEL) 9? Apache is one of the most popular and reliable web servers available. Whether you're hosting a personal site or managing a larger application, Apache has your back. In this guide, I’ll walk you through the installation process step by step—let’s make it fun!
Let’s get started! 💻🔥
📋 Prerequisites
Before we begin, make sure you have:
A RHEL 9 system up and running 🖥️
Root or sudo access to install packages 🔑
📥 Step 1: Install Apache
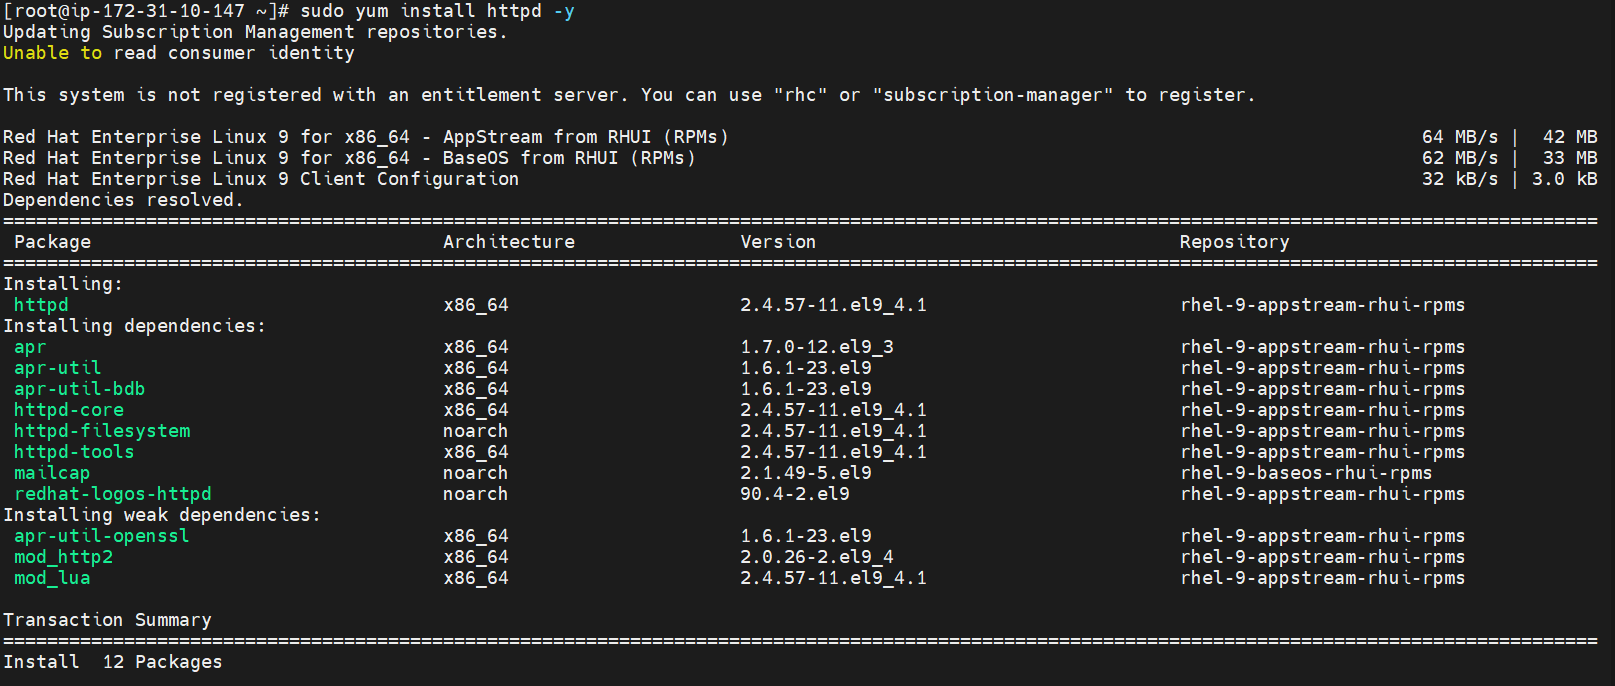
First, it’s time to install the Apache web server. Use the following command:
sudo yum install httpd -y
This command will download and install Apache along with its dependencies. 🎉
⚙️ Step 2: Start and Enable Apache
Once Apache is installed, you need to start the service and enable it to launch at boot. Run these commands:
sudo systemctl start httpd
sudo systemctl enable httpd
start will run Apache immediately.
enable ensures it starts automatically on system boot. 🔄
🔍 Step 3: Check the Status of Apache
To verify that Apache is running smoothly, check its status with:
sudo systemctl status httpd
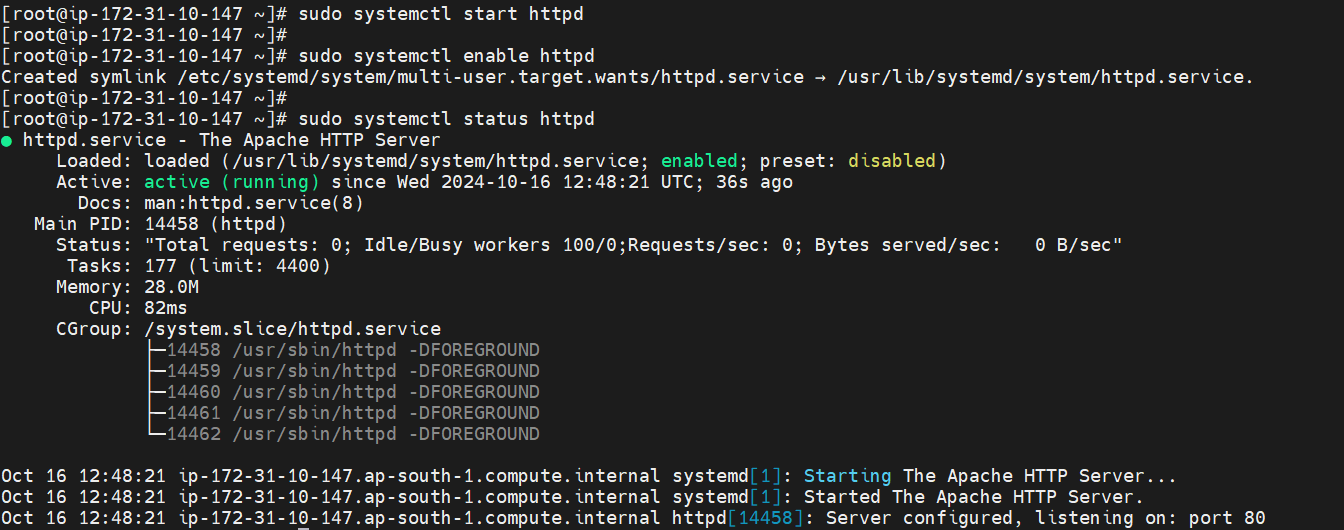
You should see output indicating that the service is active (running). If you see “inactive” or “failed,” double-check your installation steps! ⚠️
🌐 Step 4: Configure the Security Group
You’ll need to allow HTTP and HTTPS traffic. Open up Port 80 for HTTP 🔒. Use the following steps:
Security Group > Edit Inbound Rules > Add Rule >Type > HTTP > Source >Anywhere IPv4 > Save Rules
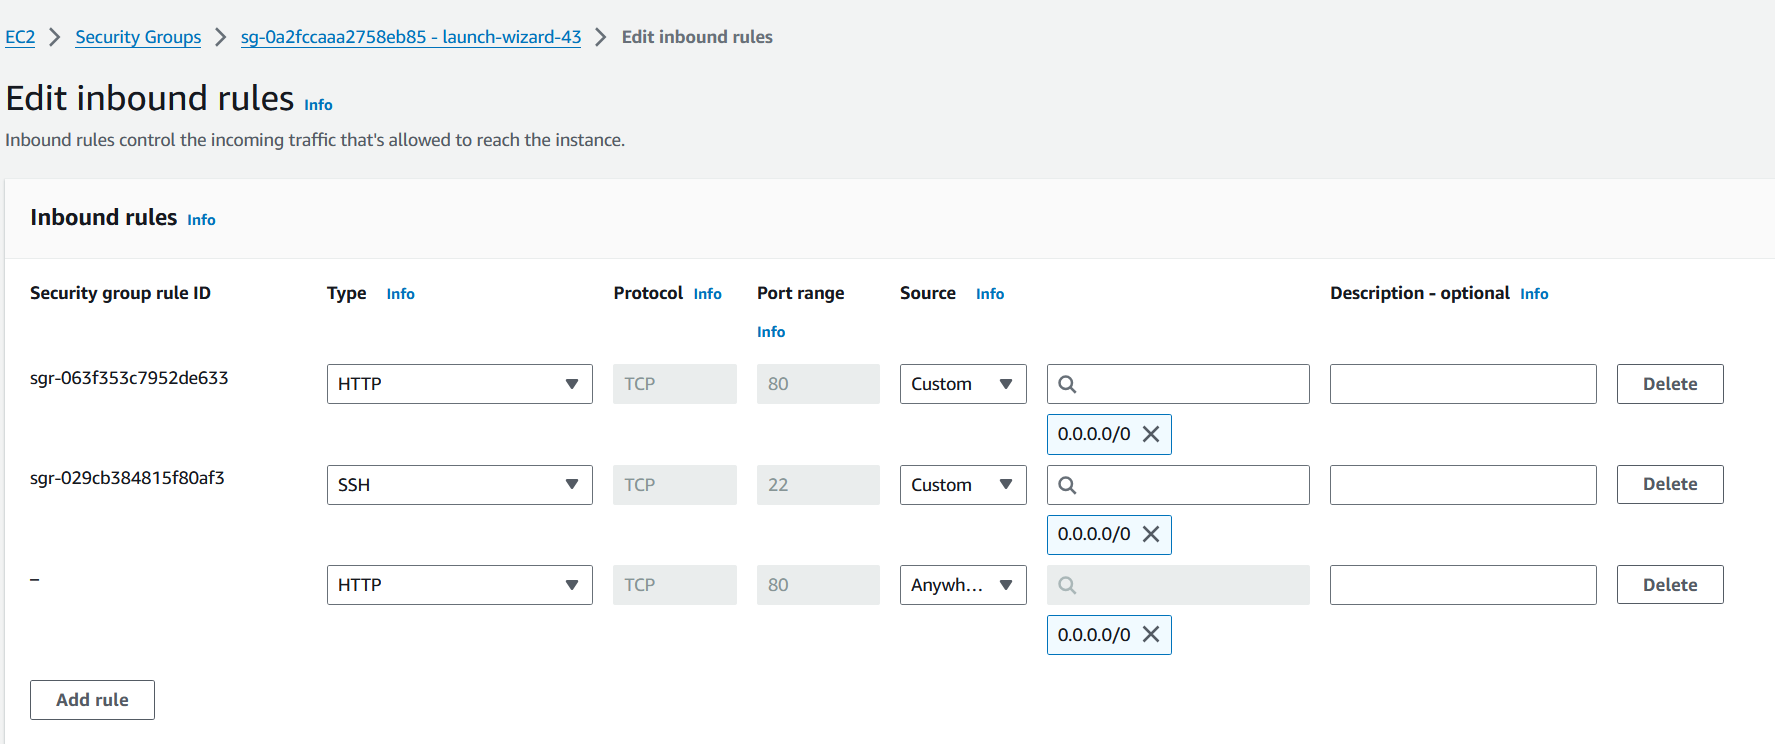
In Sources : It specifies which inbound traffic can reach your instances. In our case we are allowing "Anywhere-IPv4" that allows all possible IPv4 addresses.
📂 Step 5: Test Your Apache Installation
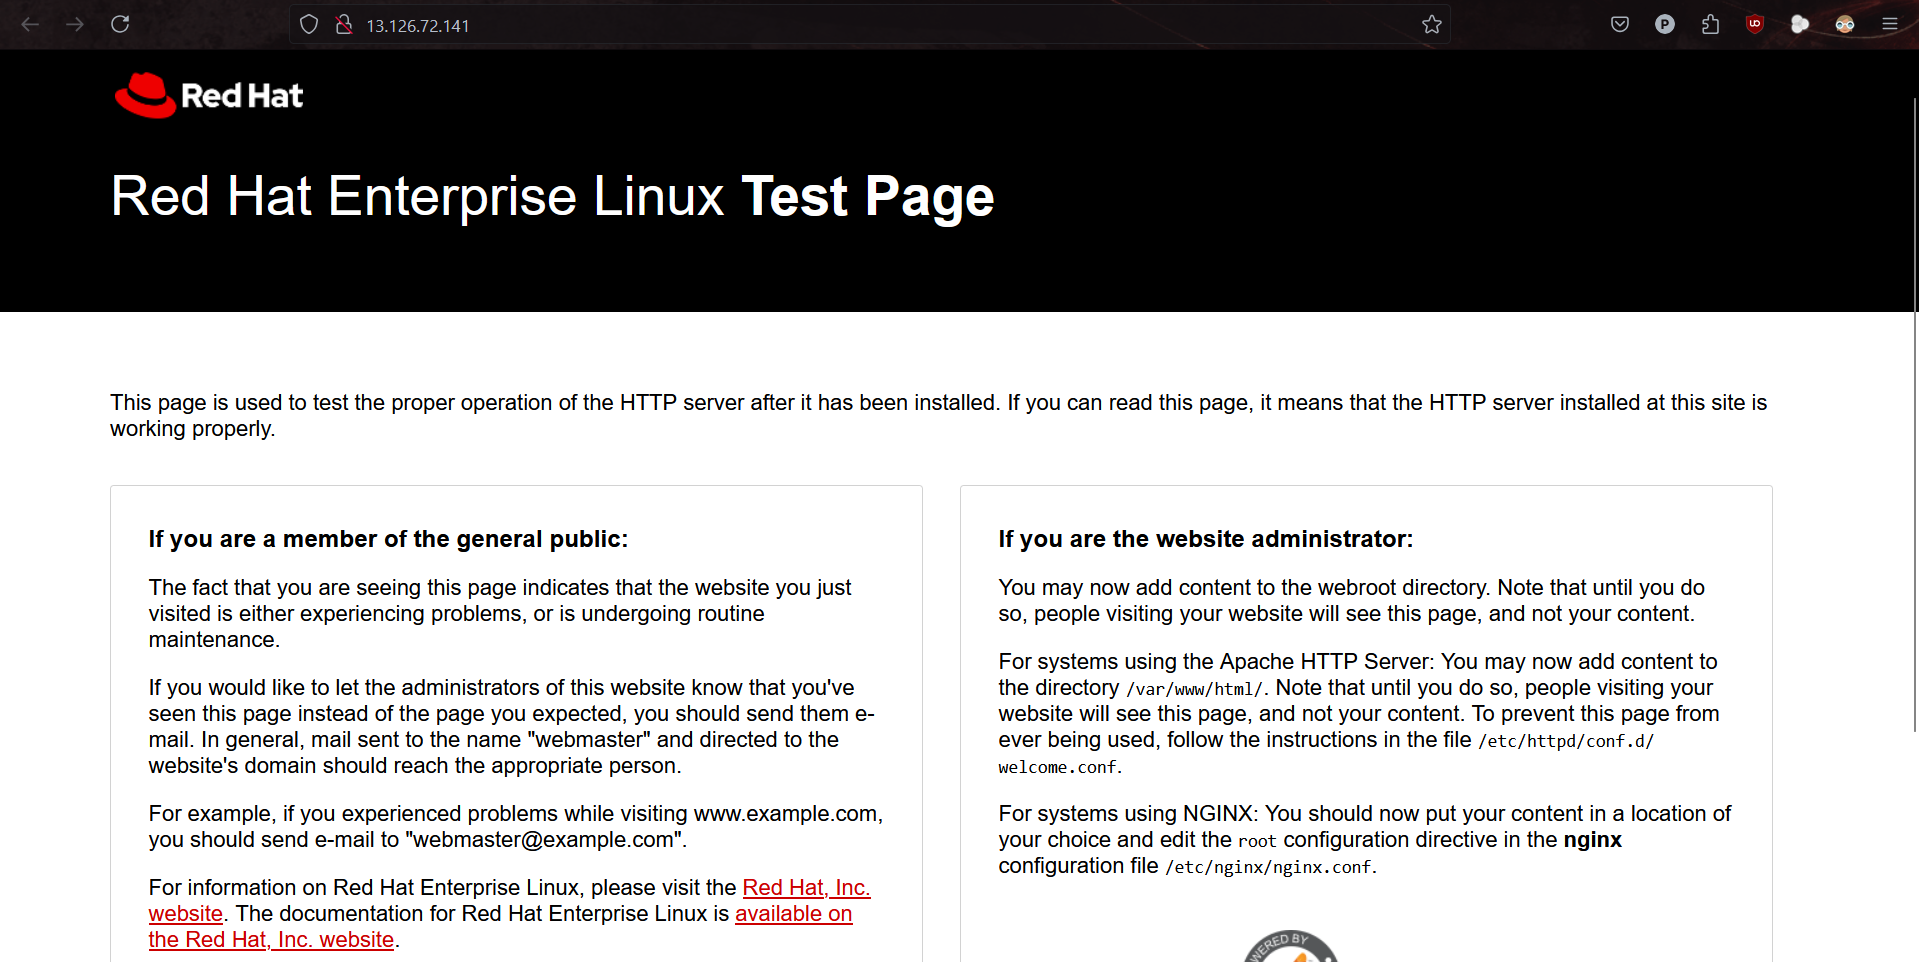
Now that Apache is installed and running, let’s verify that it’s working. Open your web browser and go to:
Replace your-server-ip with your actual server IP address. You should see the Apache default welcome page! 🎊
📝Step 6: Add Your Own Code to the Document Root
Now, let’s add your own content to the web server! By default, Apache serves files from the /var/www/html directory. This is known as the document root.
1. Navigate to the Document Root
First, navigate to the document root folder where Apache serves web files:
cd /var/www/html
2. Add Your HTML or Application Code
Let’s create a simple HTML file as an example, but you can add any code—HTML, PHP, or whatever you want to serve.
To create a new index.html file, run this command:
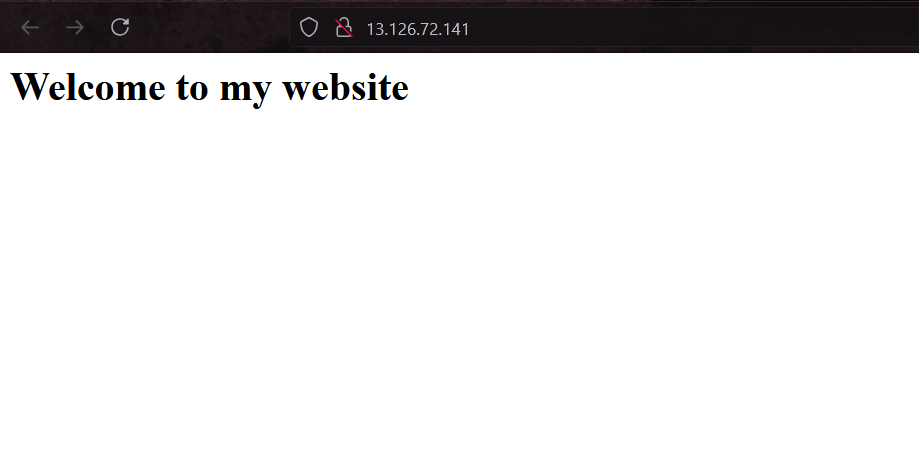
sudo echo "<h1>Welcome to my website</h1>" > /var/www/html/index.html
You can also manually upload files or code into the /var/www/html folder via vim , nano and other text editors.
3. Restart the Service
Feel free to make any necessary changes, but remember to restart Apache after editing:
sudo systemctl restart httpd

4. Test Your Code
Now, go back to your browser and reload the page by visiting your server’s IP or domain name. You should see the new content you've added, like this:
🎉 Conclusion
Congratulations! You’ve successfully installed Apache on RHEL 9. 🎉 Now you can host your own websites, applications, or whatever your heart desires!
If you have any questions or run into issues, feel free to drop a comment below. Happy hosting! 🌐✨
Subscribe to my newsletter
Read articles from Yuvraj Singh Rajawat directly inside your inbox. Subscribe to the newsletter, and don't miss out.
Written by

Yuvraj Singh Rajawat
Yuvraj Singh Rajawat
I am here to help you with your DevOps Journey.