Sessions, Cookies and Authentication
 porobertdev
About
The goal of this article is to complement the lesson from The Odin Project curriculum. Initially was written for personal use to try to understand better how this work and make information stick to my brain, but I chose to make it public hoping to help someone else too.
It’s broke in two parts: theory about how it works, and then the code implementation.
Prerequisites
basic knowledge of NodeJS and ExpressJS
you already know how databases work
Introduction
You start with a clean browser and you go to YouTube. You're shown a popup with a cookie consent, and the website will be displayed different based on your choice. Your choice will be saved.
When you go back to YouTube a few hours later, the website won't show you the popup anymore.
It works the same when you login, add items to a shopping cart etc. The website won't ask you to login again.
Essentially, you're making choices (like changing settings) on the website. Those settings are saved so that the website will restore them for you when you go back to it.
Sessions & Cookies - How They Work
We're going to use the authentication as an example, but keep in mind it works the same with other website preferences.
Let's recap a bit. When a client (user) registers on a website, the authentication credentials (e.g. username/password) are entered in the <form> element, which will make a POST request to the server once the client submits the form. Once the server receives client's data, it stores it in the database.
Now, whenever the client logs in, the server queries the database to check the user's authentication credentials and grants access if the credentials are correct.
But there's a problem. The client will need to login again, and again, and again, everytime he comes back to the website.
That's because the HTTP protocol that all websites use is stateless by default, which means it doesn't remember what the user does on your website.
The solution to that is to store the client's state (login, website preferences), and then identify the client to restore that state.
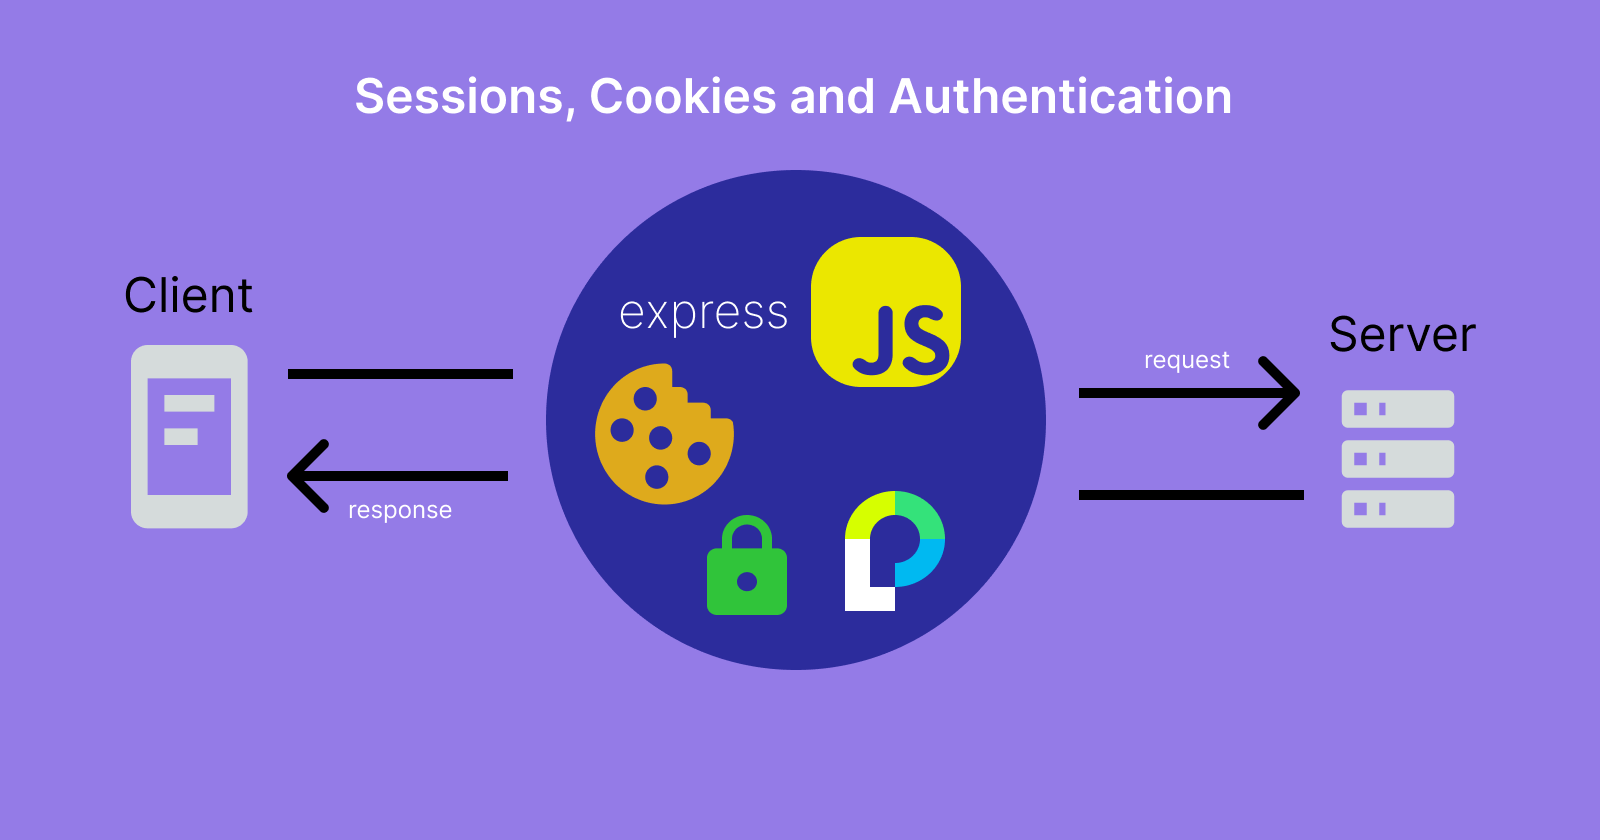
Welcome to sessions and cookies. Both are just a collection of data made of key-value pairs (like simple objects obj = {}), that are exchanged between a client and a server.
A session is stored on the server-side. One of the keys is a SID (session ID) used to identify the clients, but it also contains a cookie configuration. A good practice is to store the session in the database because it can hold large amounts of data, so it's more scalable.
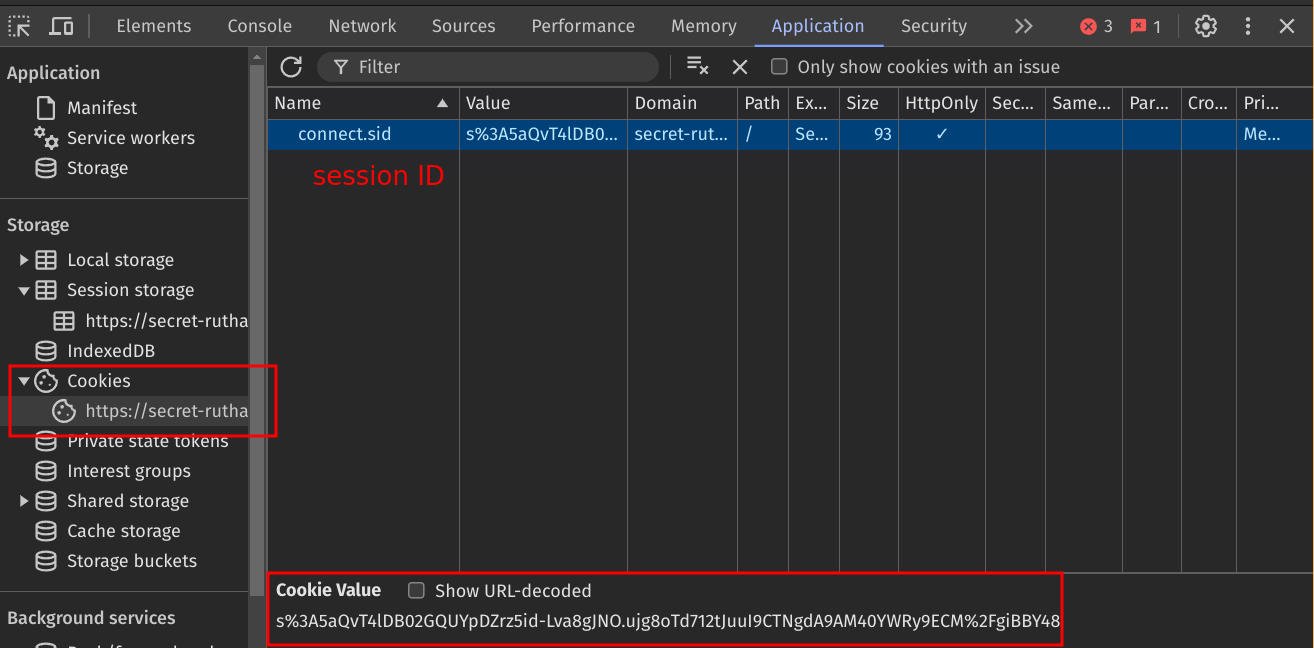
A cookie is stored on the client-side (in the browser), and it holds data about the session sent by the server. Unlike a session, the available space for a cookie is very small.
This is how session-cookie exchange works:
The client visits a login page and tries to log-in.
The server:
generates a session for the client (containing a session ID and cookie config), and then stores it in the database.

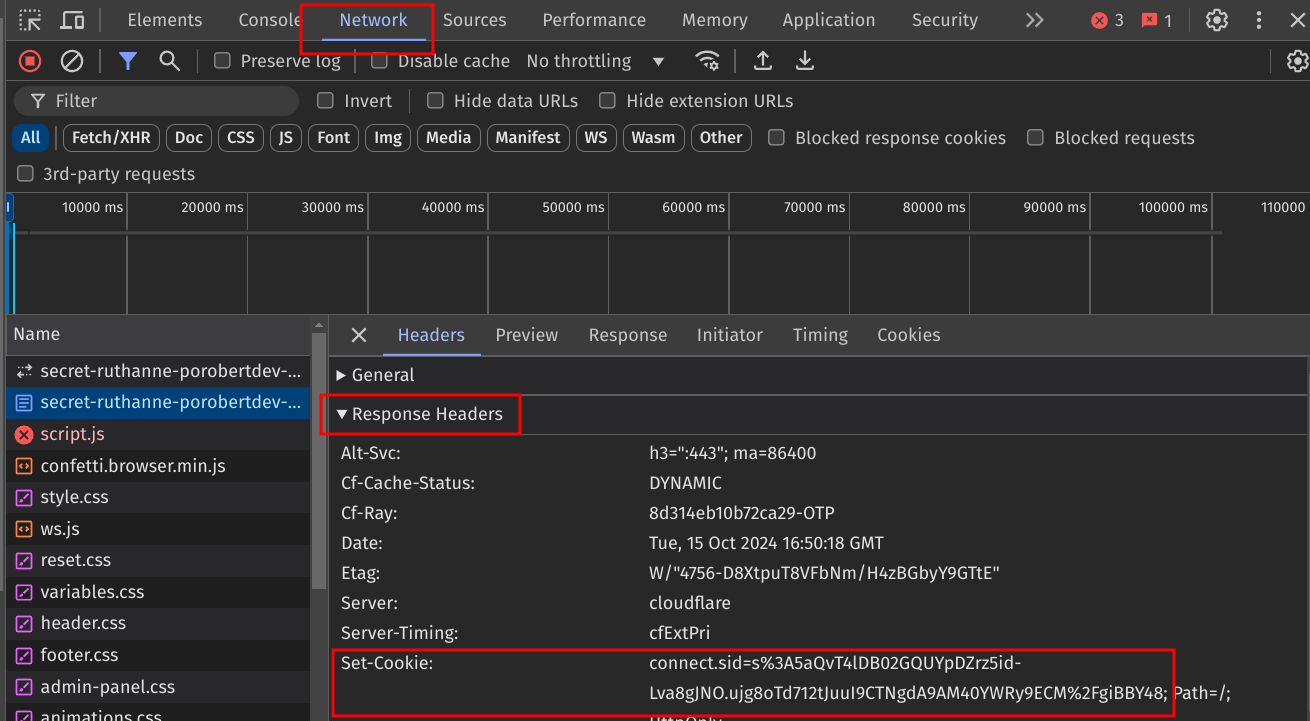
sends the session cookie back to the client using
Set-Cookieheader.
Once the client receives the server's response, it will create a cookie using the cookie configuration sent from the server, and store the session ID inside it.

Now let's say the same client (user) is still logged in, leaves the website, and comes back a few hours later:
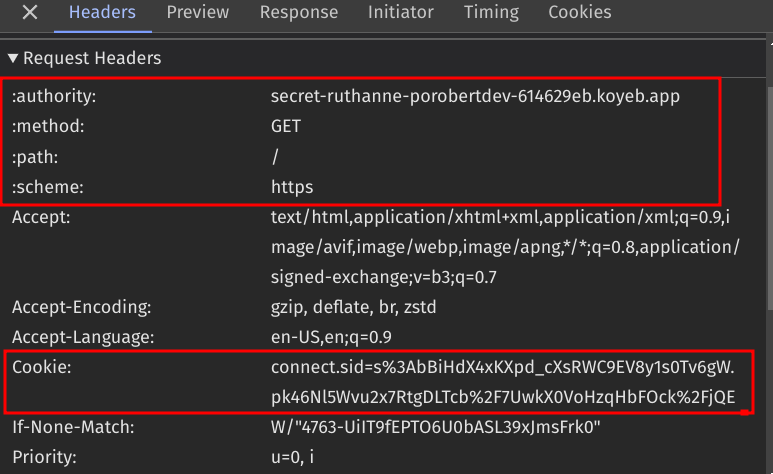
The client includes the cookie (containing the session ID) in the headers of the request made to the server.

The server queries the database to check if that session ID exists. Since it's the same client in this example, it includes the found session state in the response to the client.
The client receives the session state and HTML is rendered dynamically based on that, so he's still logged in.
Implementation using ExpressJS
As mentioned before, the session can store any key-value pair that represents a website preference: currency, default theme, items in the shopping cart etc., not just login information. We're going to implement a session and authentication.
First, let's think about authentication. You need a kind of authentication manager - a module that manages the authentication process:
Type of authentication (also called strategy), e.g. the old username/password method. There's also login with Google, 2FA etc.
Securing password (sign-up). Hashing is one way to do that, by scrambling the initial password. There are different hashing algorithms available.
Authentication validation (log-in) - comparing the credentials entered by the client with the ones from database.
So, you need a few packages:
To create a session:
express-sessionConnect the session to database:
pgandpg-connect-simplefor PostgreSQL.Manage authentication process:
Authentication manager:
passport- Simple, unobtrusive authentication for Node.js - they say.Strategy (type):
passport-localfor user/password authenticationHashing algorithm:
bcryptjs
Here's an one-liner to install everything we need: npm i express-session pg pg-connect-simple passport passport-local bcryptjs.
1. Creating a session
For any of those properties, you can see more in the official docs: https://www.npmjs.com/package/express-session#secret
secret- usually stored in env variables for security reasons - it increases the randomness of the session IDresave- whether to save the session again when a client makes a request. The default "true" is deprecated.saveUninitialized- to force a new session to be saved
// authentication/session.js

const expressSession = require('express-session');

// creating a session with an object containing the standard configuration
const session = expressSession({
    secret: 'some secr3t bro',
    resave: false,
    saveUninitialized: true,
});

module.exports = session;
2. Connecting the session to Database
As mentioned before, it's a good practice to store a session in the database because it's more secure and it can hold more data.
2.1 Create the PostgreSQL database
// database/pool.js

const { Pool } = require('pg');

// again, those credentials should be stored in env variables
const pool = new Pool({
    host: 'localhost',
    database: '', //blabla
    user: '', // blabla
    password: '', // blabla
}});

module.exports = pool;
2.2 Connect the session to the PostgreSQL DB
// authentication/session.js

const expressSession = require('express-session');
const pgStoreSession = require('connect-pg-simple')(session); // NEW
const pool = require('../database/pool');

// creating a session with an object containing the standard configuration
const session = expressSession({
    secret: 'some secr3t bro', // usually stored in env variables for security reasons
    resave: false,
    saveUninitialized: true,

    // NEW
    store: new pgStoreSession({
        pool: pool,
        table_name: 'some_table_name',
        createTableIfMissing: true,
    })
});

module.exports = session;
2.3 Tell ExpressJS app to use the session middleware
We now have a database and a session, but it’s not being used yet. Let’s tell ExpressJS to do that just like any other middleware. The session information will be available on req.session.
// app.js
const session = require('../authentication/session.js');

// server created before
// ...
app.use(session);
3. Telling server to use passport middleware on each client request
Now is the time to handle authentication. We start by choosing an authentication method, which is the user/password in this case. This method is called Local Strategy. You can check more information on the official repo and even dive deep into its code, specifically where the Strategy object is defined.
Keep in mind passport supports more than 500+ strategies.
3.1 Create authentication Strategy (type)
// authentication/strategy.js

const pool = require('../database/pool'); // To query database
const LocalStrategy = require('passport-local').Strategy; // auth type
const bcrypt = require('bcryptjs'); // hashing algorithm

/*
The password is hashed when saving the user credentials in DB.
That's not covered here, but basically:

const salt = bcrypt.genSaltSync(10);
const hashed = bcrypt.hashSync(password, salt);
*/

const verifyCb = async (username, password, doneCb) => {
    try {
        const { rows } = await pool.query(`SELECT * FROM table_name WHERE username = $1`, [username]);
        const user = rows[0];

        // validate username
        if (!user) {
            return doneCb(null, false, { message: 'Incorrect username' });
        }

        // validate password
        const match = await bcrypt.compare(password, user.password);
        if (!match) {
            return doneCb(null, false, { message: 'Incorrect password' });
        }

        return doneCb(null, user);
    } catch(err) {
        return doneCb(err);
    }
}

// it needs a function (verifyCb) to validate authentication credentials
module.exports = new LocalStrategy(verifyCb);
3.2 Create passport
At this point, we have the database, session and authentication strategy. Now we need to use passport to manage all of that. Like express-session, it’s just a middleware that can be assigned to any Express Router/app.
Passport needs two functions:
serializeUser(): which takes the user ID and stores it in the session in database aspassport: { user: userID }. This is what tells passport that the user is logged in, and it's available inreq.session.passport.userwhen authentication is successful. If that property is empty, then the user isn’t logged in.deserializeUser(): used bypassport.authenticate(). Basically, it takes the user ID from database (stored when the user created an account), and compares it with the one stored in session (stored byserializeUser). If they match, and the session haspassport.user, that means authentication is successful andreqobject will get access to methods likeisAuthenticated()and.logout.
// authentication/passport.js

const passport = require('passport');
const localStrategy = require('./strategy.js');

const pool = require('../database/pool.js'); // To query database

// use user/pass middleware
passport.use(localStrategy);

// save userID in the session in database
passport.serializeUser = ( (user, doneCb) => {
    doneCb(null, user.id);
});

// retrieve userID
passport.deserializeUser = (async (id, doneCb) => {
    try {
        const { rows } = pool.query(`SELECT * FROM table_name WHERE id = $1`, [id]);
        const user = rows[0];

        doneCb(null, user);
    } catch(err) {
        doneCb(err);
    }
});
3.3 Tell ExpressJS app to use passport middleware on all requests
// app.js
const passport = require('../authentication/passport.js');

// server created before
// ...

app.use(passport);

// restore session when a logged client requests again
app.use(passport.session());
3.4 Validate login requests aka Protect routes
Now we have a working authentication that lets users log-in if the credentials are correct.
app.get('/login', passport.authenticate({
    successRedirect: '/profile',
    failureRedirect: '/',
});
But that’s not all. In a real application, you have routes (endpoints) that needs to be protected and available only for an admin or logged-in users. Otherwise, you can end up with security flaws.
// protect /profile route
app.get('/profile', (req, res) => {
    if (req.isAuthenticated()) {
        // continue with something
    } else {
        res.status(403).send('Access Denied');
    }
});
We can write a custom middleware which we can use on multiple routes, without cluttering our code with many if block statements.
// custom middleware to check if user is authenticated
const isAuthenticated = (req, res, next) {
    if (req.isAuthenticated()) {
        // continue with next middleware
        next();
    } else {
        res.status(403).send('Access Denied');
    }
};

// protect the route
app.get('/profile', isAuthenticated, (req, res) => {
    // do something. This can be accessed only if user is authenticated
}
Conclusion
Session and cookies allows a user to save their preferences on a website, whether that's a login or some items in a shopping cart. It creates a personalized user experience that can be saved over the long term.
I hope it helped. As usual, make sure you practice a lot.
You can see my whole implementation and folder structure in the Mini MessageBoard project on Github.
Subscribe to my newsletter
Read articles from porobertdev directly inside your inbox. Subscribe to the newsletter, and don't miss out.
Written by

porobertdev
porobertdev
Full-Stack Developer: HTML | CSS | JavaScript | React | NodeJS | ExpressJS | SQL | PostgreSQL Self-taught through #TheOdinProject and #100DaysOfCode challenge. I'm here to share everything I learn and inspire people 🙂