Deploying a 2048 Game App on AWS EKS with Fargate: A Beginner's Guide
 Rishabh Mishra
Hey there! Today, we’re going to learn how to deploy a simple 2048 game application on Amazon EKS (Elastic Kubernetes Service) using an Application Load Balancer (ALB). If you're new to Kubernetes or AWS, don’t worry—I’ll guide you through each step. Let’s jump in!
Prerequisites
Before we begin, make sure you have the following tools installed on your system:
AWS CLI: This command-line tool allows you to interact with AWS services.
eksctl: A handy tool that simplifies the process of creating and managing EKS clusters.
kubectl: This command-line tool enables you to communicate with your Kubernetes clusters.
Once you have these installed, run the following command to configure your AWS credentials:
aws configure

Step 1: Installing EKS Using Fargate
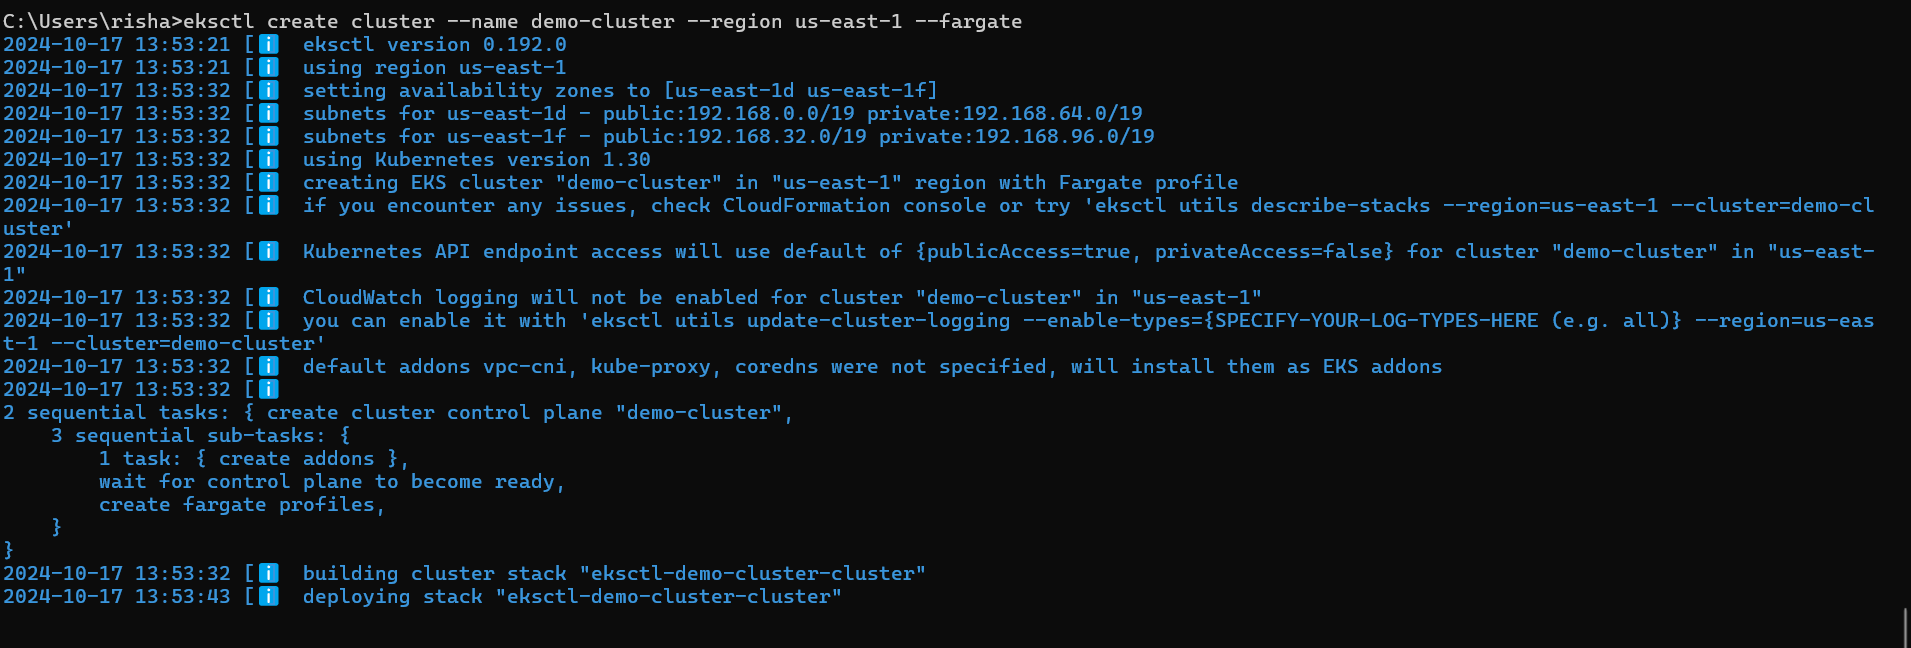
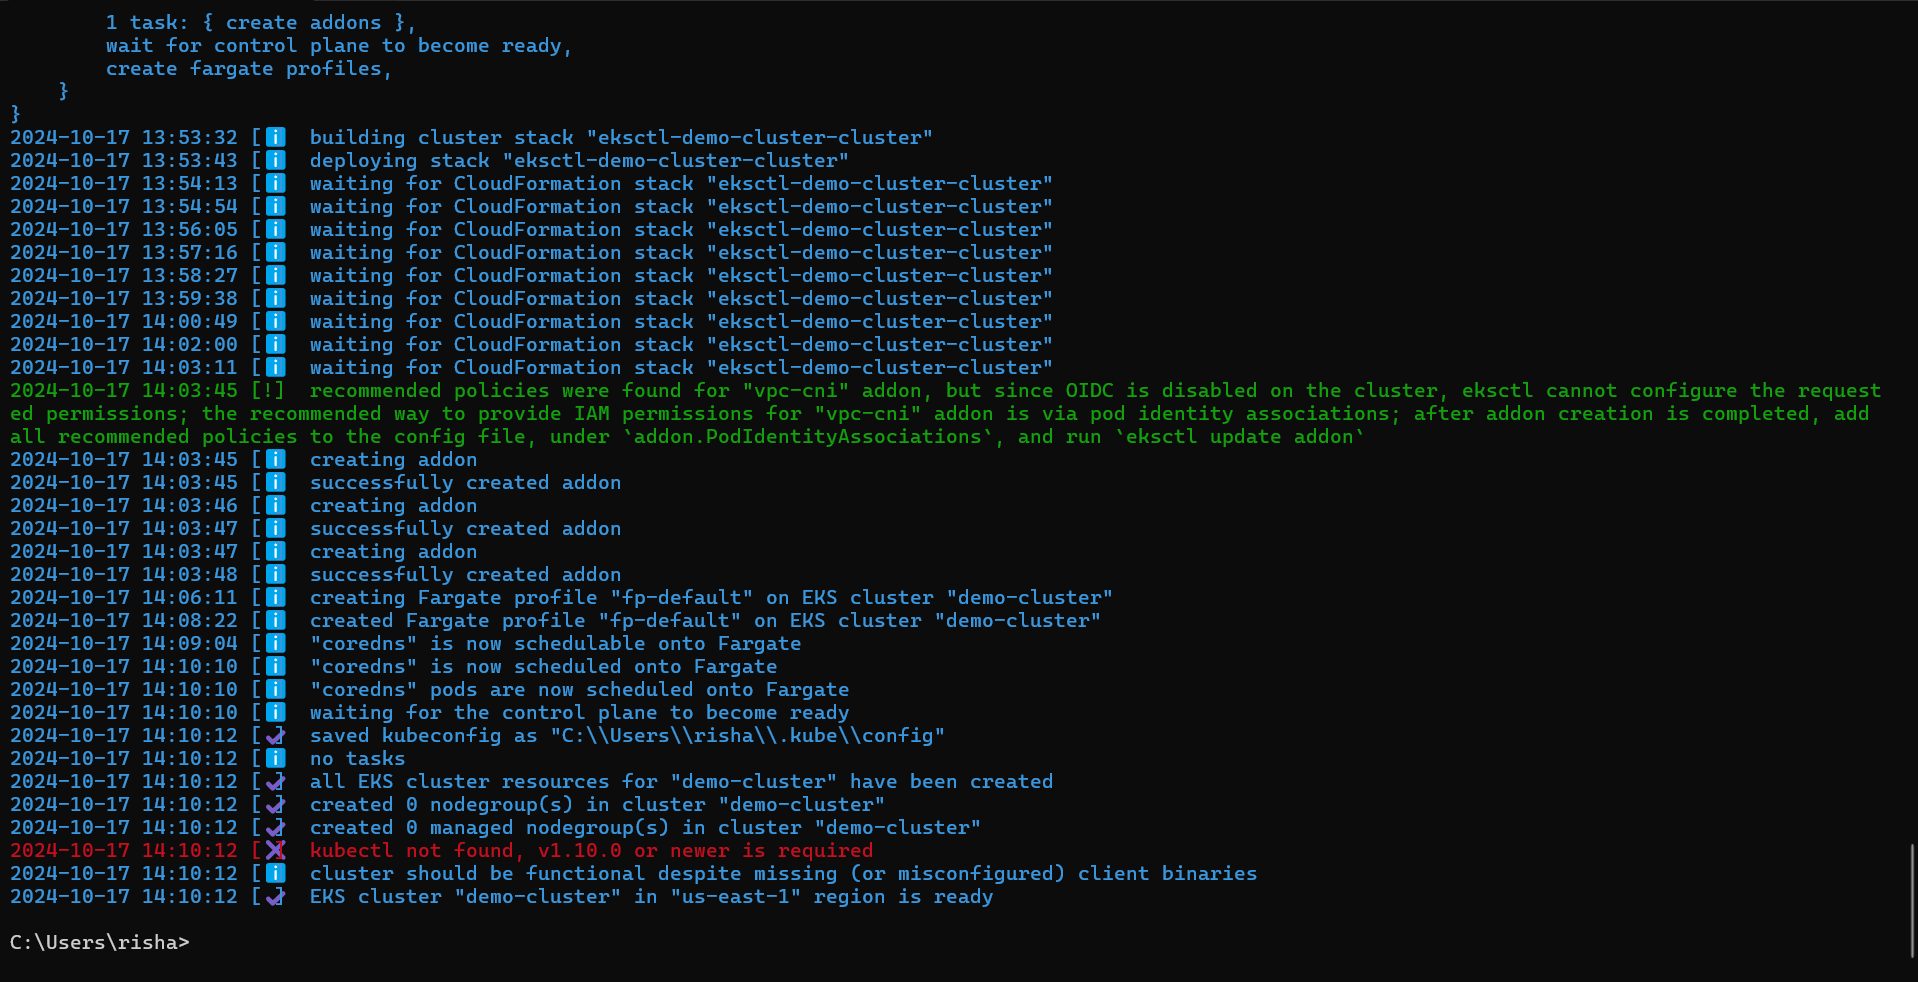
Now that we have the prerequisites ready, let’s create our EKS cluster using AWS Fargate. Fargate allows you to run containers without managing the underlying servers. To create the cluster, run:
eksctl create cluster --name demo-cluster --region us-east-1 --fargate
This command sets up a new EKS cluster named demo-cluster in the us-east-1 region.


Step 2: Downloading or Updating the KubeConfig File
After creating the cluster, you need to download or update your kubeconfig file. This file contains the configuration details needed to interact with the Kubernetes cluster using kubectl. To update your kubeconfig, run:
aws eks --region us-east-1 update-kubeconfig --name demo-cluster
This command allows you to access the resources created in your cluster through the command line.

Step 3: Creating a Namespace for the Game
Next, let’s create a namespace called game-2048 to organize our application resources. A namespace is like a virtual cluster within your EKS cluster. To create the namespace, run:
kubectl create namespace game-2048
Now we have a dedicated space for our 2048 game application!
Step 4: Creating a Fargate Profile
To run our application in Fargate, we need to create a Fargate profile that attaches to our namespace. Use the following command:
eksctl create fargateprofile \
    --cluster demo-cluster \
    --region us-east-1 \
    --name alb-sample-app \
    --namespace game-2048
This step sets up the connection between the Fargate profile and our newly created namespace.

Step 5: Deploying the 2048 Application
Now, let’s deploy the 2048 application. This involves creating a Kubernetes Pod, a service for the Pod, and an Ingress resource to allow traffic to reach our application. To deploy everything at once, run:
kubectl apply -f https://raw.githubusercontent.com/kubernetes-sigs/aws-load-balancer-controller/v2.5.4/docs/examples/2048/2048_full.yaml
This command fetches the YAML configuration file that contains all the necessary definitions for our application.

Step 6: Creating the Ingress Controller
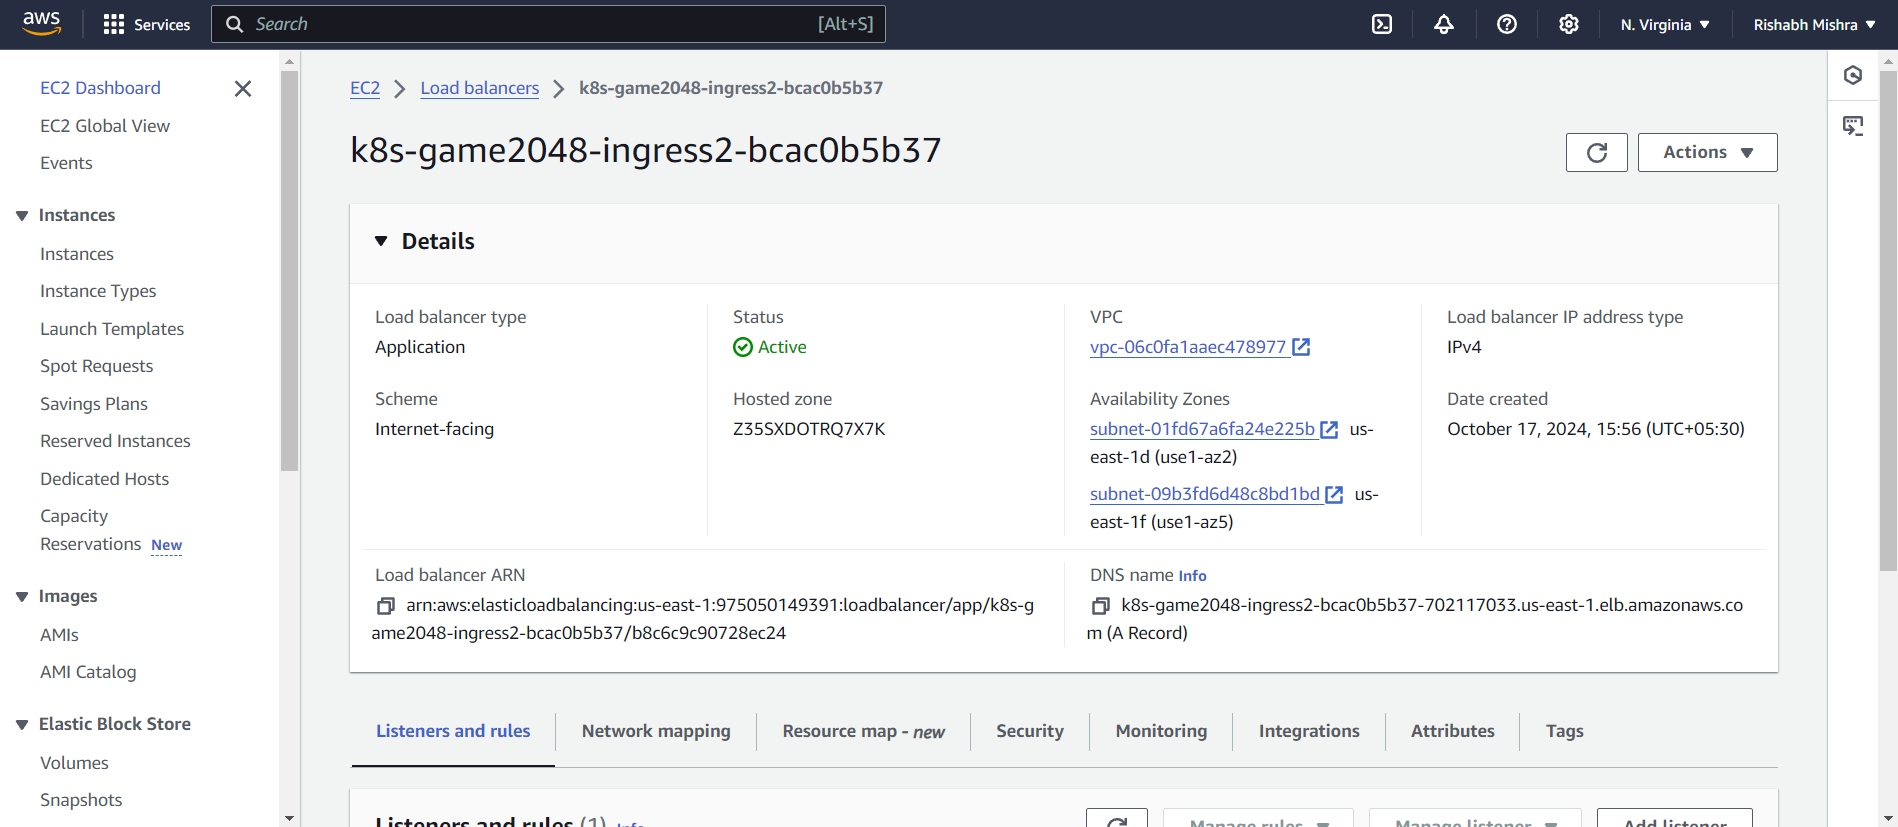
Next, we need to set up an Ingress Controller. The Ingress Controller monitors Ingress resources and automatically creates an ALB for us. Before deploying it, we need to configure an IAM OIDC Provider.

Step 7: Creating an IAM OIDC Provider
To allow the ALB Controller to access the Application Load Balancer, we need to create an IAM OIDC Provider. Run the following commands:
Set the cluster name:
export cluster_name=demo-clusterRetrieve the OIDC ID:
oidc_id=$(aws eks describe-cluster --name $cluster_name --query "cluster.identity.oidc.issuer" --output text | cut -d '/' -f 5)Check if an IAM OIDC provider is already configured:
aws iam list-open-id-connect-providers | grep $oidc_id | cut -d "/" -f4
If there’s no provider, associate one with:
eksctl utils associate-iam-oidc-provider --cluster $cluster_name --approve

Step 8: Creating a Service Account with IAM Role and Policy
Next, we’ll create a service account linked to an IAM role and policy that allows the ALB Controller to access the Load Balancer. Use the following command:
bashCopy codeeksctl create iamserviceaccount \
  --cluster=$cluster_name \
  --namespace=kube-system \
  --name=aws-load-balancer-controller \
  --role-name AmazonEKSLoadBalancerControllerRole \
  --attach-policy-arn=arn:aws:iam::<your-aws-account-id>:policy/AWSLoadBalancerControllerIAMPolicy \
  --approve
Make sure to replace <your-aws-account-id> with your actual AWS account ID.
Step 9: Creating the ALB Controller Using Helm Charts
Now, let’s create the ALB Controller using Helm charts. This controller communicates with the service account to manage the ALB for our application. First, add the Helm repository:
helm repo add eks https://aws.github.io/eks-charts

Then, update the Helm repo:
helm repo update eks

Finally, install the ALB Controller:
helm install aws-load-balancer-controller eks/aws-load-balancer-controller \
  -n kube-system \
  --set clusterName=$cluster_name \
  --set serviceAccount.create=false \
  --set serviceAccount.name=aws-load-balancer-controller \
  --set region=us-east-1 \
  --set vpcId=<your-vpc-id>
Replace <your-vpc-id> with your actual VPC ID.


Step 10: Accessing the 2048 Application
Once everything is set up, you can access your 2048 game application deployed on EKS. You should see a URL generated for the ALB. Open it in your web browser, and enjoy playing the game!

Conclusion
And there you have it! You've successfully deployed a 2048 game application on AWS EKS using an Application Load Balancer. If you have any questions or run into issues, don’t hesitate to ask!
Subscribe to my newsletter
Read articles from Rishabh Mishra directly inside your inbox. Subscribe to the newsletter, and don't miss out.
Written by

Rishabh Mishra
Rishabh Mishra
I'm Rishabh Mishra, an AWS Cloud and DevOps Engineer with a passion for automation and data analytics. I've honed my skills in AWS services, containerization, CI/CD pipelines, and infrastructure as code. Currently, I'm focused on leveraging my technical expertise to drive innovation and streamline processes. My goal is to share insights, learn from the community, and contribute to impactful projects in the DevOps and cloud domains. Let's connect and collaborate on Hashnode!