AWS CI/CD with AWS CodeCommit, CodeBuild, CodeDeploy, and CodePipeline with Rollback Capability
 Shubham Taware
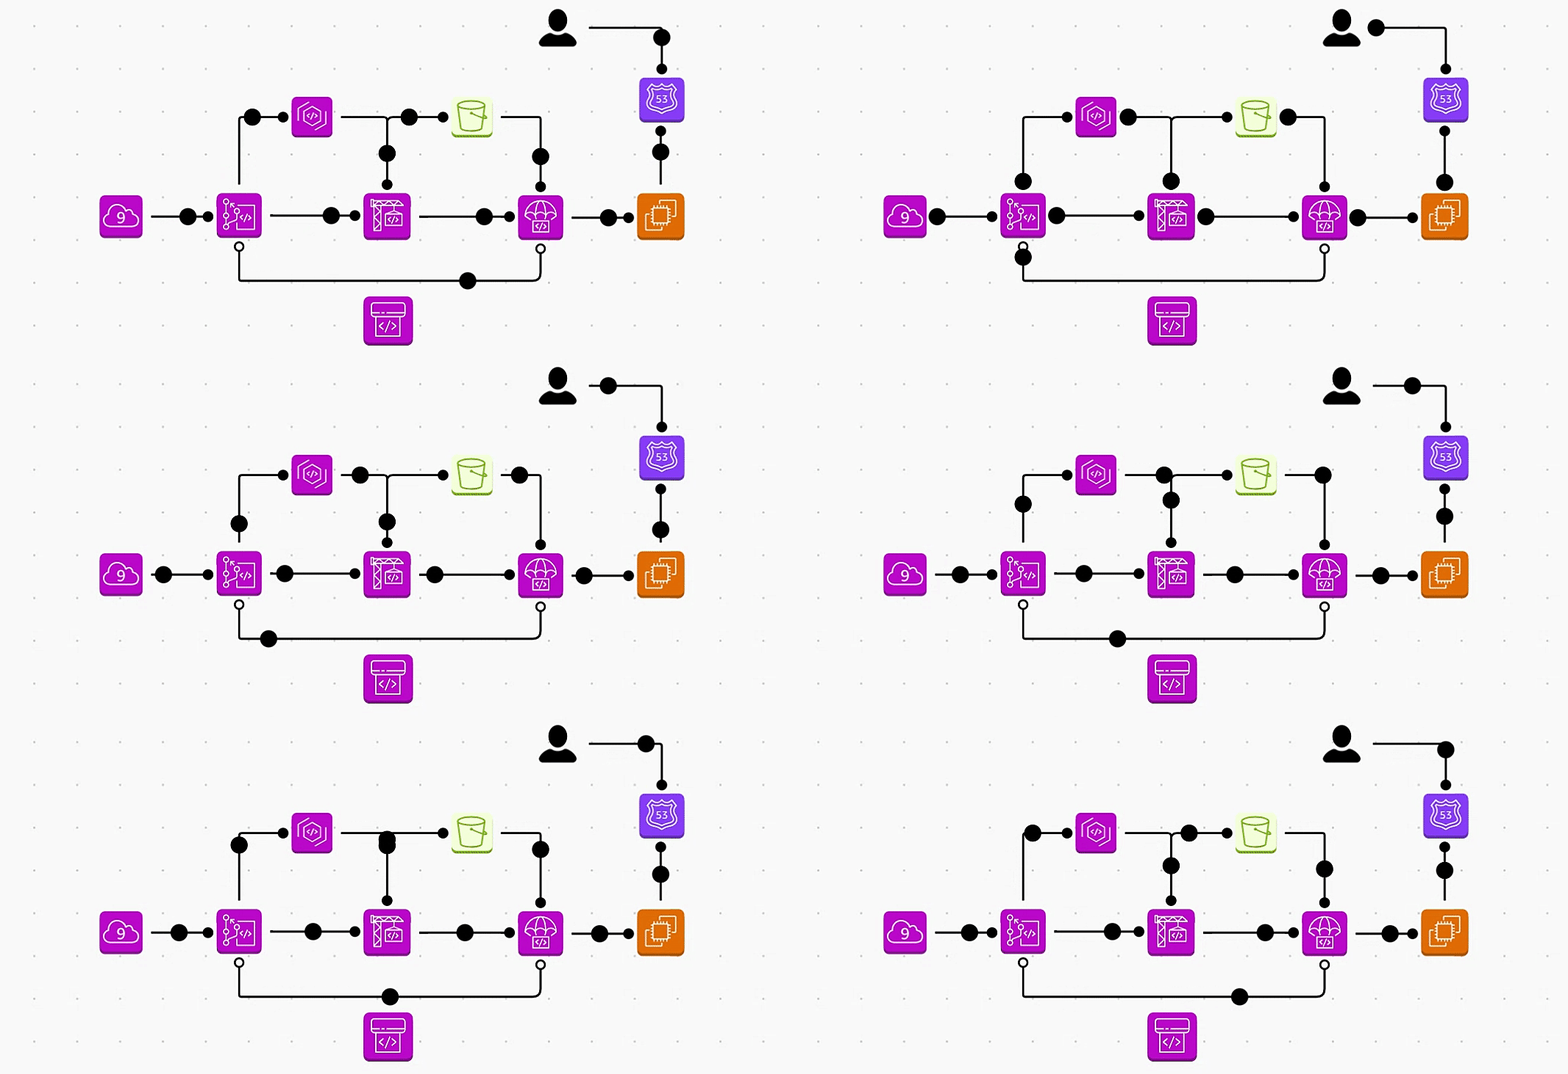
In this project, I built an end-to-end CI/CD pipeline utilizing AWS DevOps services such as Cloud9, CodeCommit, CodeBuild, Code Artifactory, CodeDeploy, CodePipeline and Route 53. The pipeline is designed to automate the entire software delivery process, from committing code to deploying the application. Artifacts are stored in S3 for version control, and automatic rollback mechanisms are in place to ensure stability in case of deployment failures. This project demonstrates the power of AWS native tools in creating scalable, reliable, and efficient CI/CD workflows, ensuring continuous integration and delivery with minimal manual intervention.
Prerequisites:
AWS Account with S3 bucket.
Any basic java project. Can have this one https://github.com/shubzz-t/AWS-Code-Pipeline.git
1. Creating Project Cloud9
Create Cloud9 Environment:
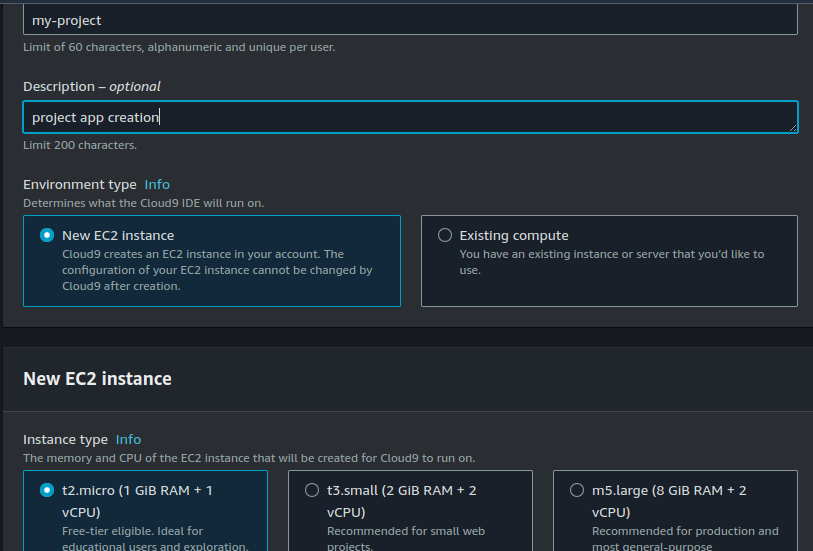
Navigate to Cloud9 and click Create environment.
Name your environment (e.g.,
my-maven-project-env), and select the instance type (e.g.,t2.micro).Set other parameters as needed and click Create.
Install Maven and Java:
Once the environment is ready, open the terminal in Cloud9 and run the following commands to install Maven and Java:
  sudo yum install maven -y
  sudo yum install java-1.8.0-openjdk -y
Generate Maven Project:
Run the following Maven command to generate your project with a specific archetype:
  mvn archetype:generate \
      -DgroupId=com.myproject.app \
      -DartifactId=myproject-web-app \
      -DarchetypeArtifactId=maven-archetype-webapp \
      -DinteractiveMode=false
This will create a basic Maven web project under
myproject-web-project. You can now navigate to the directory and start building your application.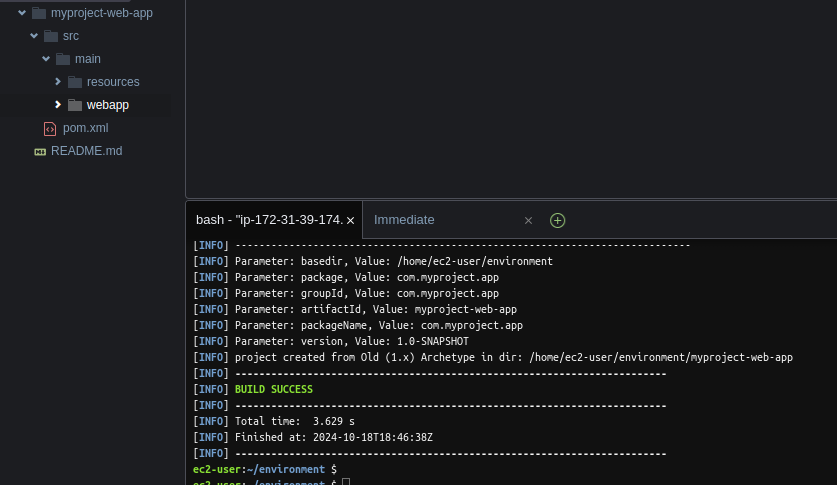
2. Push code to Code Commit:
Create CodeCommit Repository:
In the AWS Console, navigate to CodeCommit and click Create repository.
Provide a repository name (e.g.,
my-maven-web-project), and add a description if needed.Click Create to generate the repository.
Configure Git:
In your Cloud9 terminal (or local system), configure your Git user details:
  git config --global user.name "your-username"
  git config --global user.email "your-email@example.com"
Initialize Git in the Maven Project:
Navigate to your Maven project directory and initialize Git:
  cd myproject-web-project
  git init
Add CodeCommit Repository as Remote:
Copy the HTTPS or SSH URL of the CodeCommit repository.
Add it as a remote origin:
git remote add origin https://git-codecommit.<region>.amazonaws.com/v1/repos/my-maven-web-project
Add and Push Code to CodeCommit:
Add all the project files to the repository:
  git add .
  git commit -m "Initial commit"
Push the code to the
mainbranch of CodeCommit:git push origin main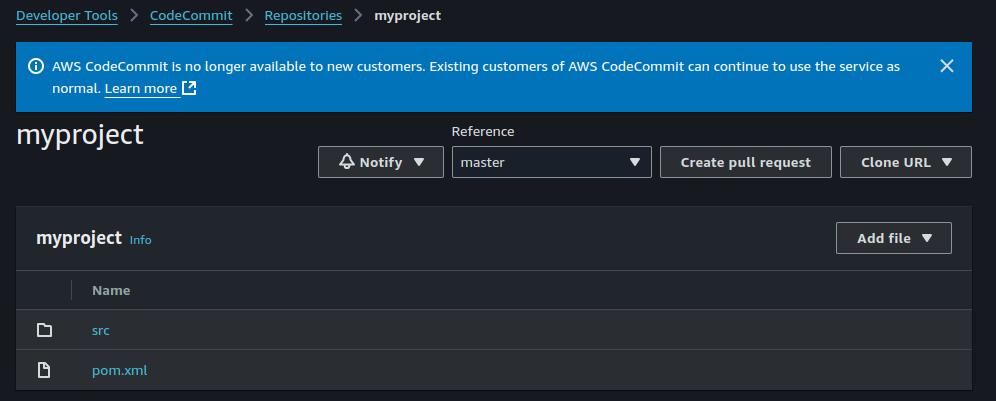
3. Configure Code Artifactory Repository:
Create CodeArtifact Repository:
In the AWS Console, navigate to CodeArtifact and click Create repository.
Provide a repository name (e.g.
my-maven-artifact-repo), and select the appropriate domain if needed.Click Create to generate the repository.
View Connection Instructions:
After the repository is created, click View connection instructions at the top.
Choose Mac and Linux as the platform and Maven as the tool.
Follow the on-screen instructions.
Copy Connection Commands:
Copy the provided commands from the View connection instructions section.
Paste the export command into your terminal to configure your Maven settings for CodeArtifact.
Create Maven
settings.xml:Navigate to your project directory:
cd ~/environment/myproject-web-projectCreate a
settings.xmlfile:echo $'<settings>\n </settings>' > settings.xmlCopy the steps 4,5,6 from the instructions and paste it in the settings.xml.
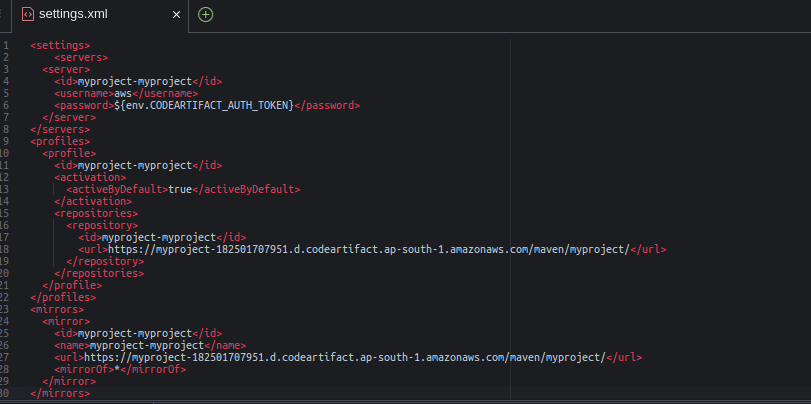
Check weather artifact repository is connected with the maven using the command.
mvn -s settings.xml compile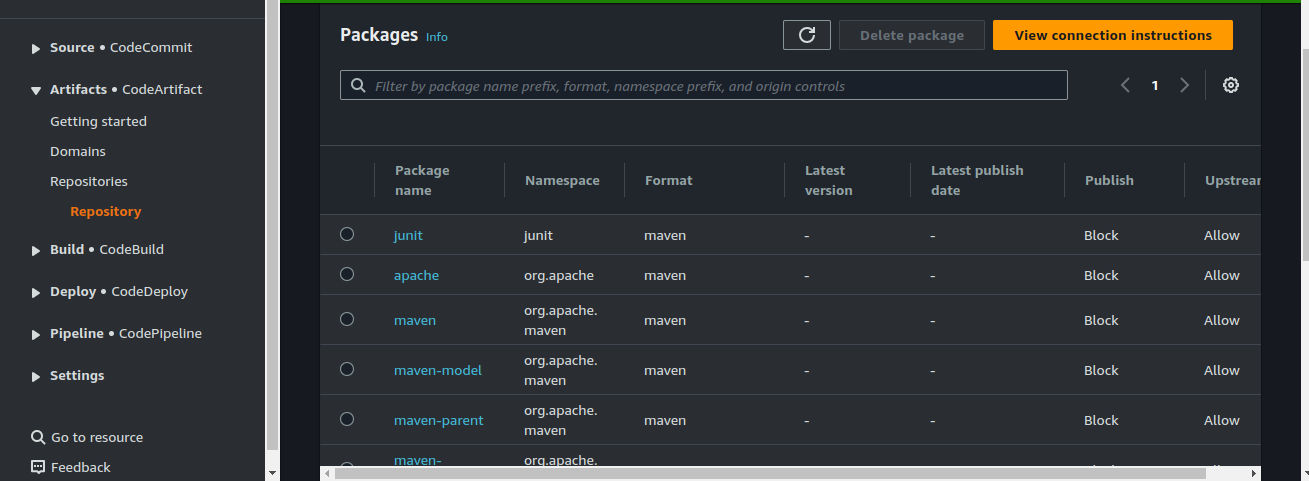
4. Code Build Configuration:
Project Name and Tags:
Go to the CodeBuild console and click Create build project.
Enter the project name as myproject.
(Optional) Add tags for better project management and categorization.
Source:
For the source provider, select CodeCommit.
Choose the repository that you created earlier.
Select the master branch.
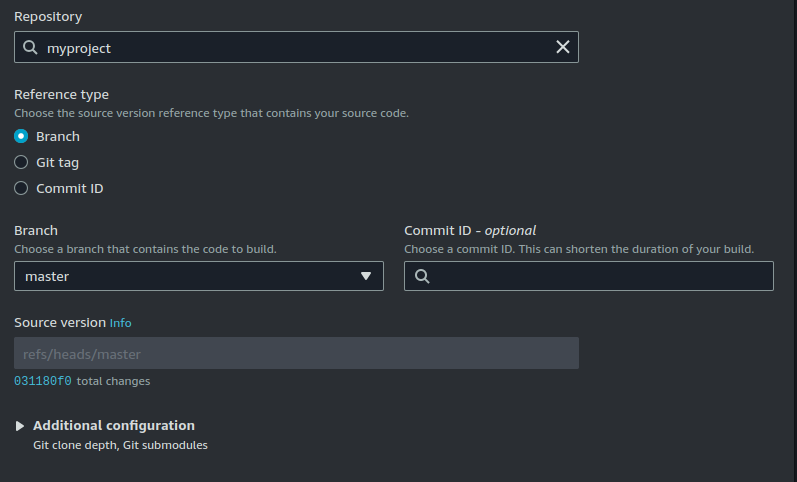
Environment:
Provisioning: Ondemand
Environment image: Choose Managed image.
Operating system: Select Amazon Linux 2. Runtime: standard.
Runtime: Select Corretto (Java) and choose the latest version available.
Service role: Select Create new service role if you don’t have one already.
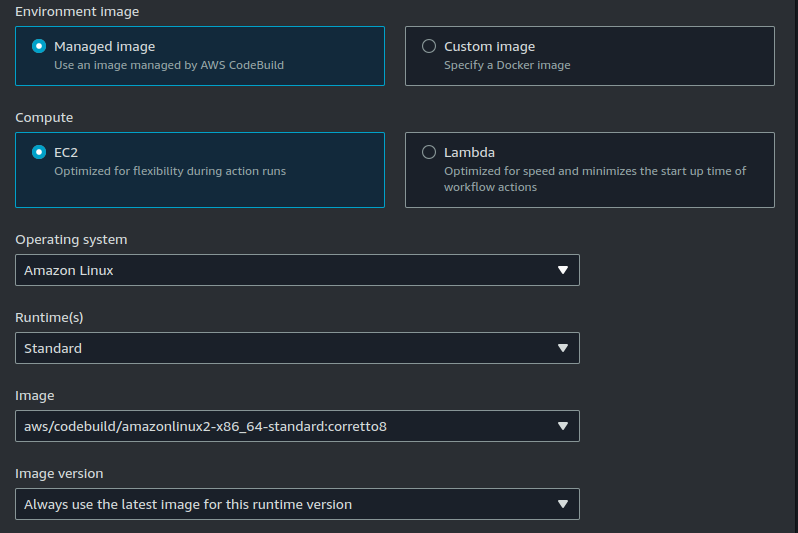
Buildspec:
- Select Use a buildspec file. CodeBuild will look for the
buildspec.ymlfile in your source code repository.
- Select Use a buildspec file. CodeBuild will look for the
Artifacts:
Artifact type: Choose Amazon S3.
S3 Bucket: Select your previously created bucket ie: myawscicdartifact .
Artifact name: Set the name to
myproject.zip.Change the packaging option to ZIP so the output will be bundled in a zip file.
Logs:
Enable CloudWatch logs.
CloudWatch log group name: Set the name to
myproject-logs.Stream name prefix: Use
webappfor easier identification.
Create Build Project:
- Review the configurations and click Create build project.
Create role for CodeBuild:
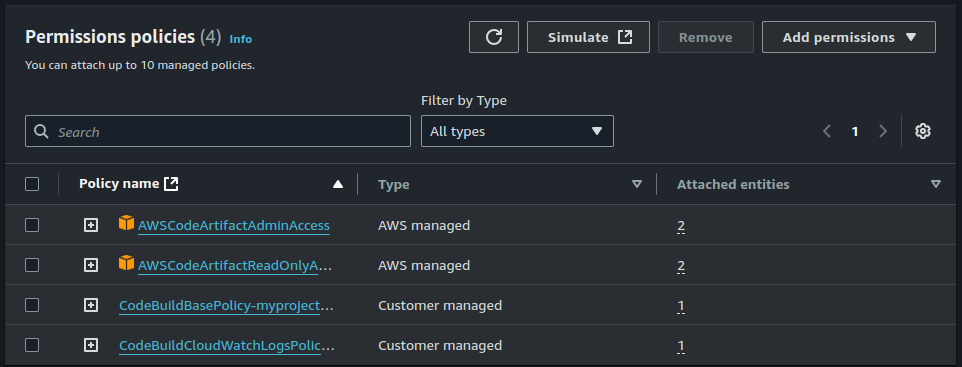
Create Build:
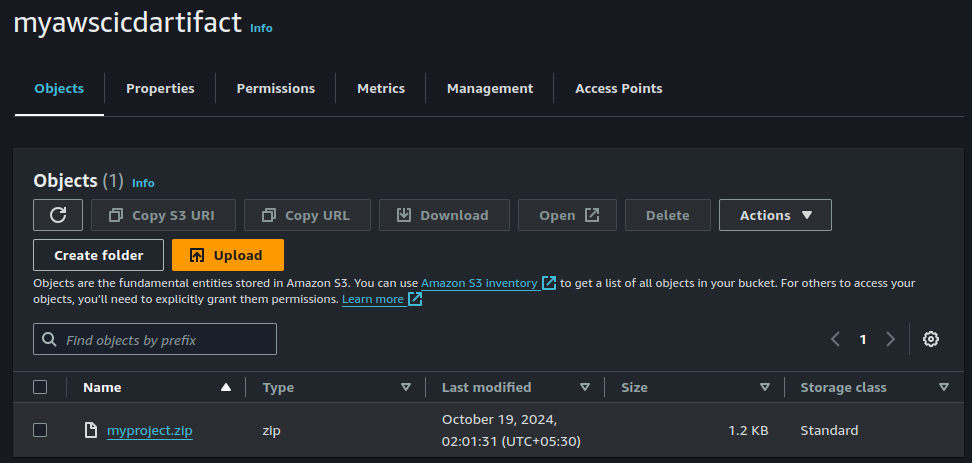
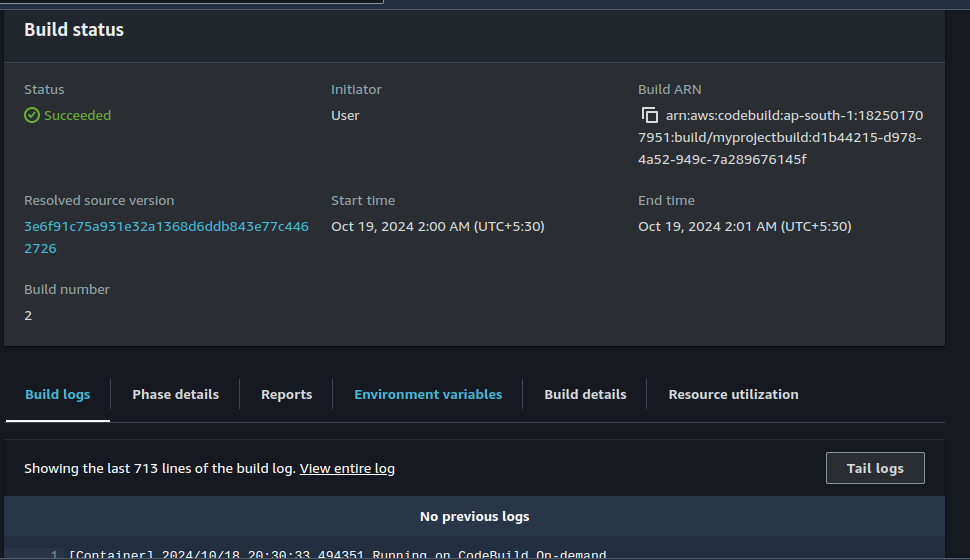
This setup configures CodeBuild to:
Source code from your CodeCommit repository.
Build using Amazon Linux with Corretto.
Output a zipped artifact to Amazon S3.
Log build activities to CloudWatch Logs for monitoring.
5. Configure Code Deploy
Create EC2 Instance:
Create ec2 instance from AWS console with t2 micro Amazon Linux image.
Give tag to the image.
Create a CodeDeploy Application:
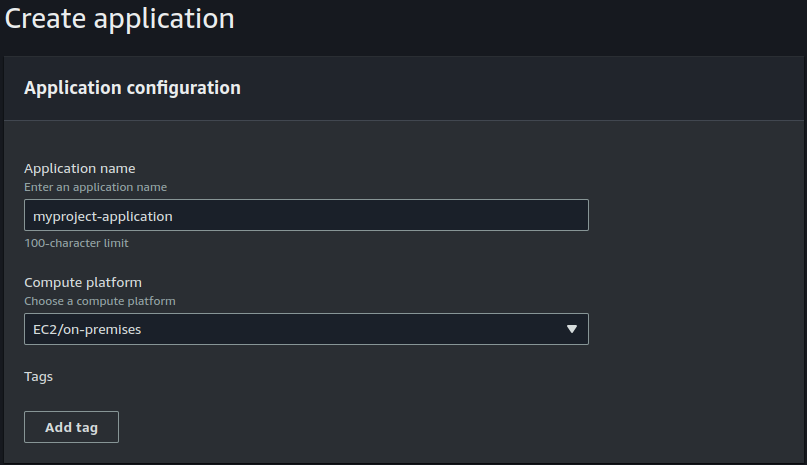
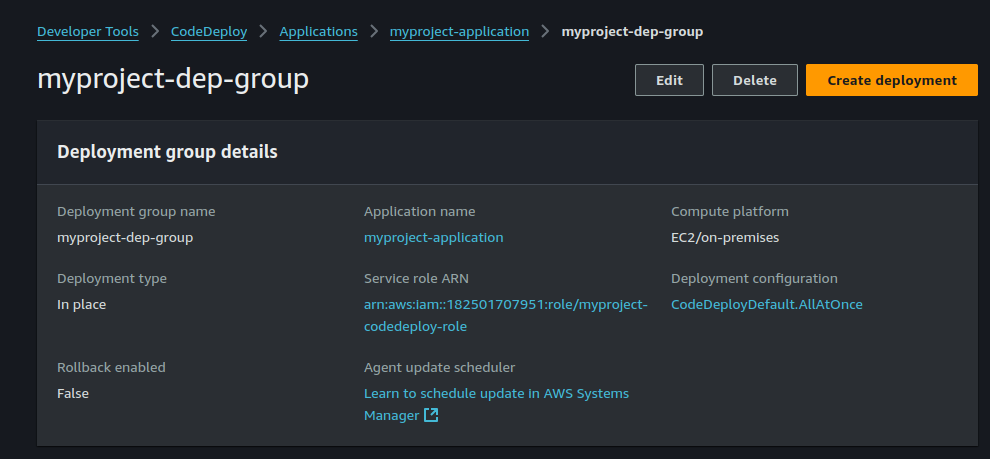
Go to the CodeDeploy console and click on Create application.
Give your application a name (e.g.,
addition-application).For the Compute Platform, select EC2/On-premises.
Create Deployment Group:
Click Create deployment group.
Name your deployment group (e.g.,
myproject-deployment-group).Select the service role with the required permissions for CodeDeploy.

For Deployment Type, choose In-place deployment.
Under Environment Configuration, select Amazon EC2 instances.
Choose the instances with the CodeDeploy agent installed.
Install AWS CodeDeploy Agent: Now and schedule updates
Update Scheduling:
Under Automatic rollback, you can leave the defaults or modify the schedule to update every 14 days if needed.
For the deployment strategy, select All at once (default) or adjust as per your requirement.
Uncheck Enable load balancing if you don't plan to use it.
Create a Deployment:
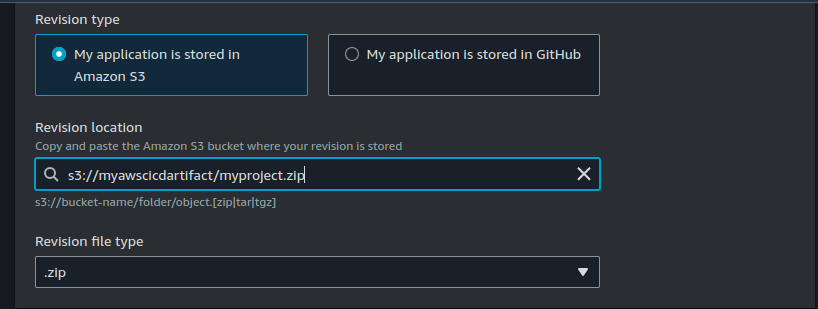
Go to Deployments and click on Create deployment.
Select S3 as the source for the application code.
Enter the S3 URI where your zip file is stored (e.g.,
s3://yourbucketname/projectname.zip).For the Revision type, ensure it is ZIP.
Launch Deployment:
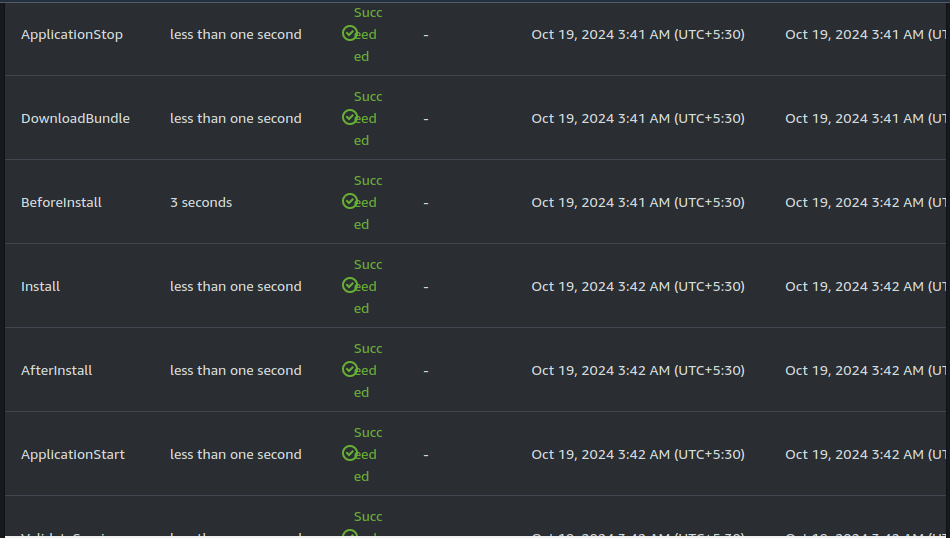
Review the configuration and click Create deployment.
CodeDeploy will deploy the application from the S3 zip file to your EC2 instances.
6. Configure Code Pipeline:
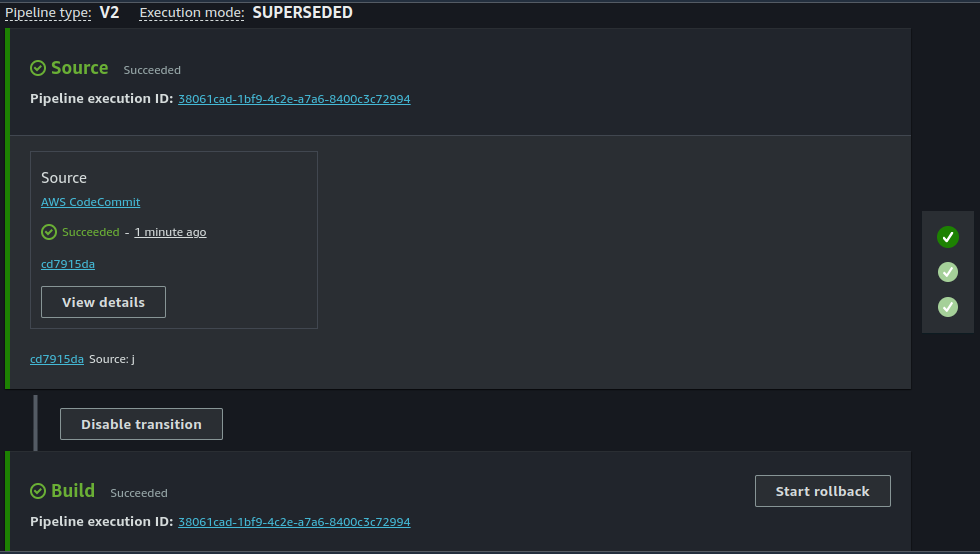
Create Pipeline:
- Give your pipeline a meaningful name.
Custom Template:
- Choose the option to create from a custom template.
Execution Mode:
- Select Superseded for execution mode, which allows for more flexible updates to your pipeline.
Service Role:
- Choose to create a new service role or select an existing one that has the necessary permissions.
Source Provider:
Select CodeCommit as your source provider.
Choose your repository and the branch you want to deploy.
CloudWatch Events:
- For the event trigger, select CloudWatch Events to initiate the pipeline based on specific events.
Build Stage:
In the build section, choose Other build providers and select CodeBuild.
Specify the CodeBuild project name and opt for Single Build.
Deploy Stage:
For the deployment stage, select CodeDeploy.
Choose your previously created deployment group and provide the deployment name.
Create Pipeline:
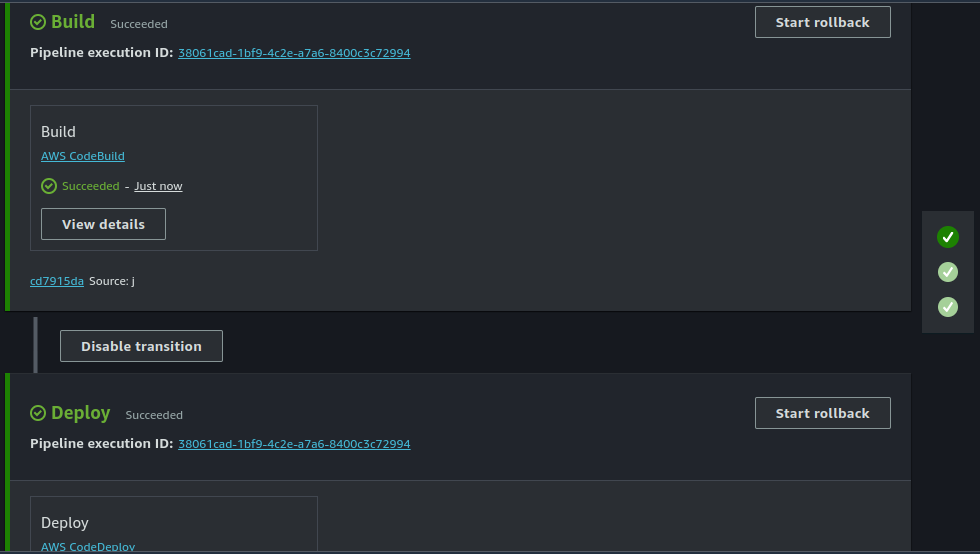
7. Route 53 Config:
Create a Hosted Zone:
Go to the AWS Route 53 console.
In the navigation pane, click on Hosted Zones.
Click on Create Hosted Zone.
Domain Name: Enter your domain name (e.g.,
example.com).Type: Select Public Hosted Zone.
Click Create.
Create an A Record (Address Record):
Inside the hosted zone, click Create Record.
Choose Simple Routing and click Next.
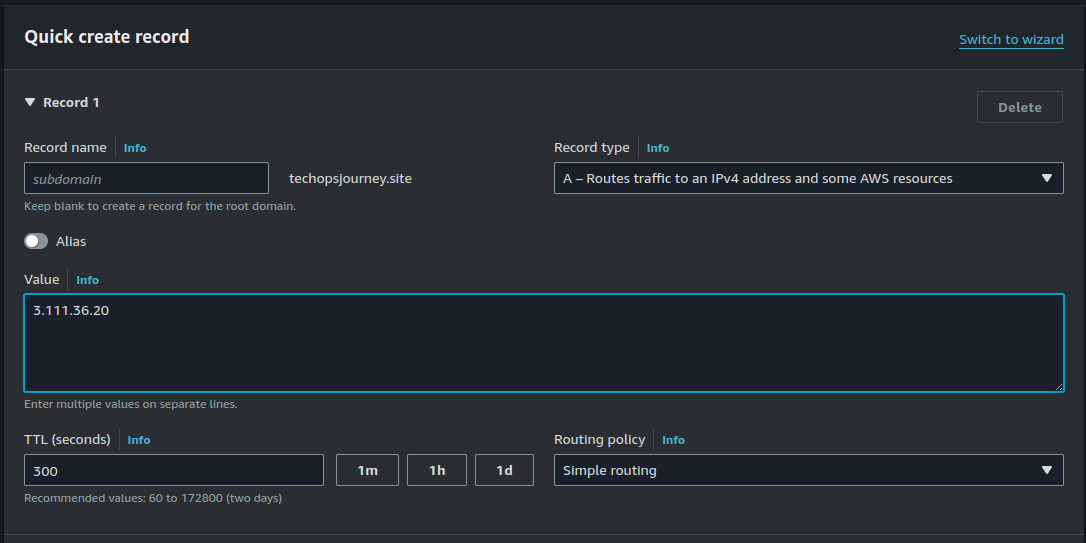
For Record Name: Enter the subdomain (if any), or leave it blank to use the root domain (e.g.,
wwwor just the root domaintechopsjourney.site).Record Type: Choose A – IPv4 Address.
Value: Enter the public IP address of your EC2 instance (e.g.,
192.0.2.44).TTL (Time to Live): You can leave the default (e.g., 300 seconds).
Click Create Record.
Update Your Domain Name Registrar (if necessary).
Update the domain's NS (Name Server) settings with the NS records from Route 53.
DNS changes might take some time to propagate globally (usually up to 24-48 hours, but often much faster).
Now you can access your website on your configured domain name. Here it is www.techopsjourney.site.
Conclusion:
This project showcases the power and flexibility of AWS DevOps services in building a fully automated CI/CD pipeline. By integrating AWS tools such as Cloud9, CodeCommit, Code Artifactory, CodeBuild, CodeDeploy, CodePipeline and Route 53, we streamlined the software delivery process, ensuring efficient and continuous integration, testing, and deployment. Storing artifacts in S3 ensures version control and traceability, while the automatic rollback mechanism enhances deployment reliability. This end-to-end pipeline not only reduces manual effort but also fosters a more scalable, secure, and stable development workflow, highlighting the potential of AWS for modern DevOps practices.
For more insightful content on technology, AWS, and DevOps, make sure to follow me for the latest updates and tips. If you have any questions or need further assistance, feel free to reach out—I’m here to help!
Streamline, Deploy, Succeed-- Devops Made Simple!☺️
Subscribe to my newsletter
Read articles from Shubham Taware directly inside your inbox. Subscribe to the newsletter, and don't miss out.
Written by

Shubham Taware
Shubham Taware
👨💻 Hi, I'm Shubham Taware, a Systems Engineer at Cognizant with a passion for all things DevOps. While my current role involves managing systems, I'm on an exciting journey to transition into a career in DevOps by honing my skills and expertise in this dynamic field. 🚀 I believe in the power of DevOps to streamline software development and operations, making the deployment process faster, more reliable, and efficient. Through my blog, I'm here to share my hands-on experiences, insights, and best practices in the DevOps realm as I work towards my career transition. 🔧 In my day-to-day work, I'm actively involved in implementing DevOps solutions, tackling real-world challenges, and automating processes to enhance software delivery. Whether it's CI/CD pipelines, containerization, infrastructure as code, or any other DevOps topic, I'm here to break it down, step by step. 📚 As a student, I'm continuously learning and experimenting, and I'm excited to document my progress and share the valuable lessons I gather along the way. I hope to inspire others who, like me, are looking to transition into the DevOps field and build a successful career in this exciting domain. 🌟 Join me on this journey as we explore the world of DevOps, one blog post at a time. Together, we can build a stronger foundation for successful software delivery and propel our careers forward in the exciting world of DevOps. 📧 If you have any questions, feedback, or topics you'd like me to cover, feel free to get in touch at shubhamtaware15@gmail.com. Let's learn, grow, and DevOps together!