Deploy backend to Netlify (manual): Step-by-Step Guide
 Hamid Nawaz
To deploy your backend on Netlify, follow these comprehensive steps:
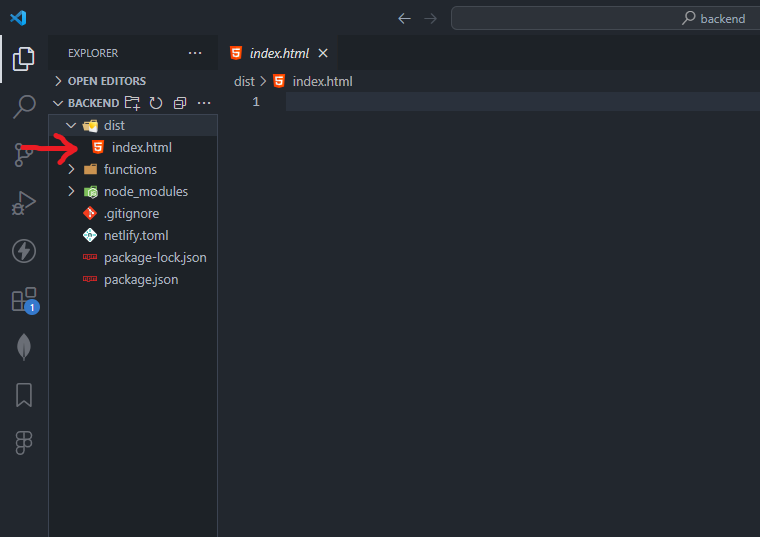
1) Create a "dist" Folder
Start by creating a "dist" folder at the project's base. Inside this folder, make an empty "index.html" file.
2) Create a "functions" Folder
Within the project's structure, establish a folder named "functions." In this folder, organize essential subfolders such as controllers, middleware, and models, and include the main "api.js" file.

3) Ensure "api.js" as the Main File
Ensure that your main file for serverless functions is named "api.js".

4) Add "netlify.toml" File
Create a "netlify.toml" file and populate it with the following configuration:
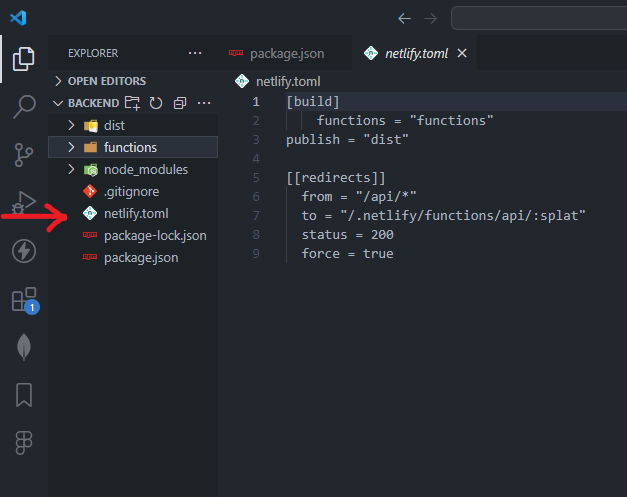
This guides Netlify to locate the functions within the specified directory.
i.e
[build]
    functions = "functions"
publish = "dist"

[[redirects]]
    from = "/api/*"
    to = "/.netlify/functions/api/:splat"
    status = 200
    force = true
5) Install packages
Install the necessary packages using the following commands:
i) npm install --save netlify-cli
or
ii) npm install --save netlify-cli -gnpm install --save netlify-lambda
npm install --save serverless-http
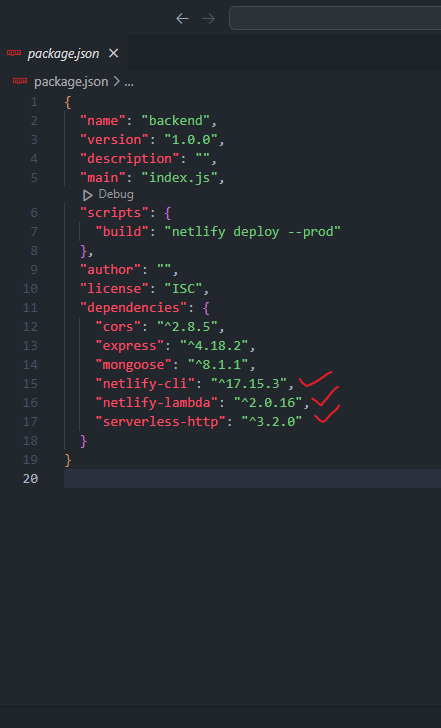
6) Edit “api.js” file
Ensure your "api.js" file is structured appropriately for serverless functions. Utilize libraries like serverless-http to adapt your existing API for serverless deployment:
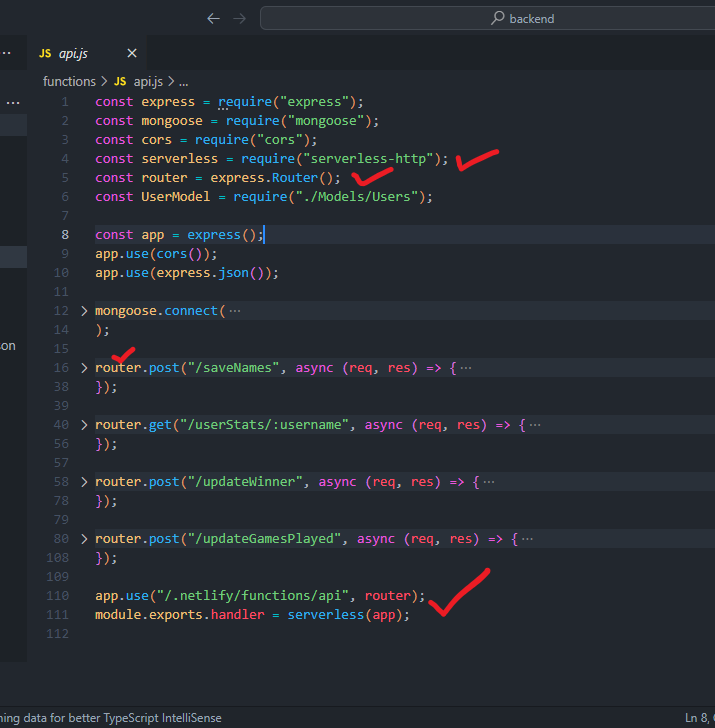
example code of api.js :
require("dotenv").config();
const express = require("express");
const serverless = require("serverless-http");
const router = express.Router()
const cors = require('cors');

const app = express();
app.use(cors({
    origin: '*',
    credentials: true,
}));

app.use(express.json());

router.get('/', async(req, res) => {
    return res.json("Running");
});

router.get('/voting-environment', (req, res) => {
    return res.json(process.env);
});

app.use("/.netlify/functions/api", router)
module.exports.handler = serverless(app)
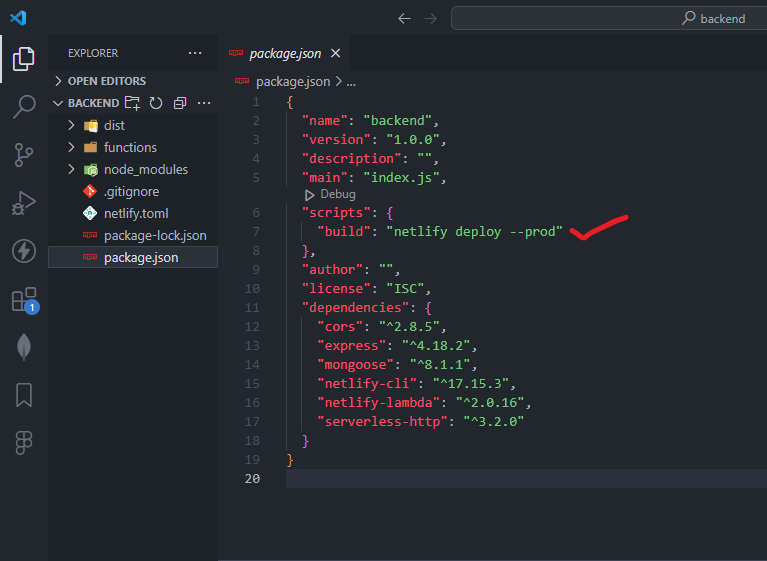
7) Edit package.json file
In your "package.json" file, add a build script:
8) Initialize Netlify
Run the following command to initialize Netlify:netlify init
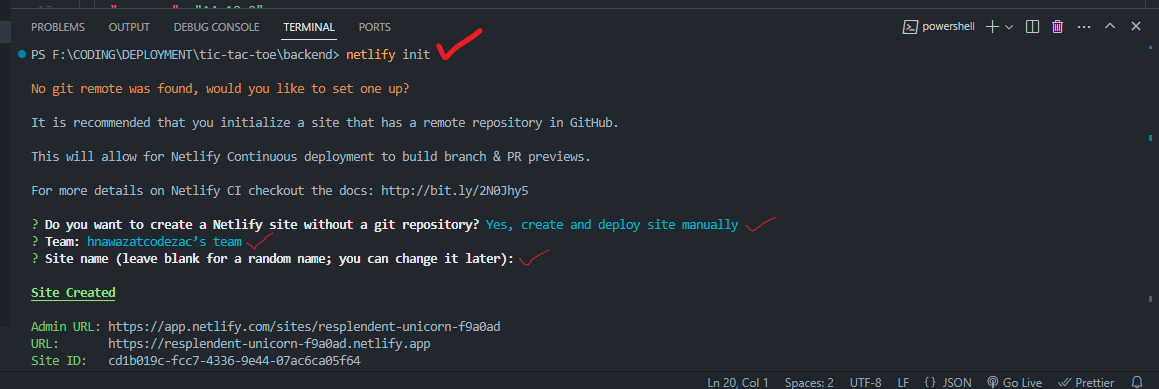
Respond to the prompts:
Confirm you deploy the site manually.
Provide your email or team name.
Specify your site name (or allow it to generate a random one).
Then it will create .netlify folder in the base directory

Note : For the first-time setup, you may need to log in with:
netlify login
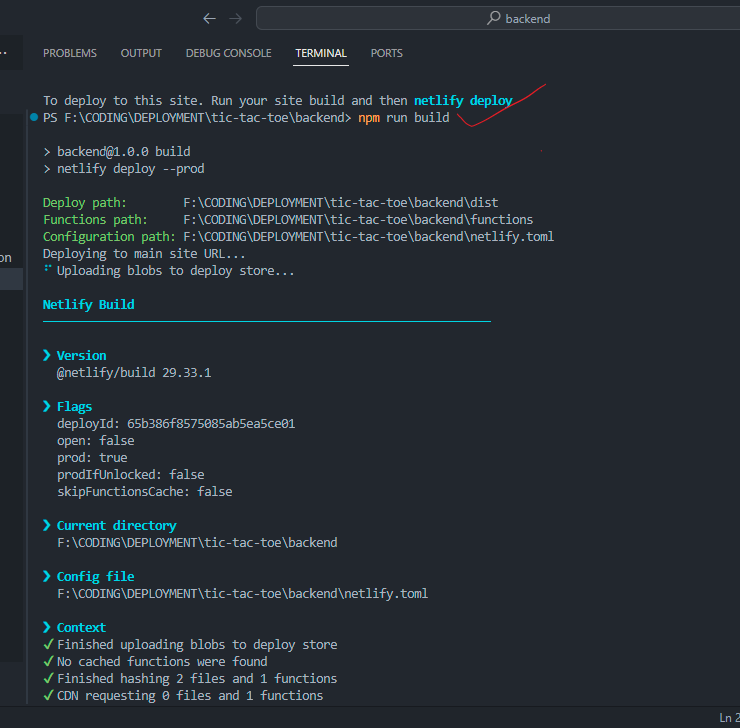
9) Build the Project
Execute the following command to build the project:
npm run build
10) choose directory
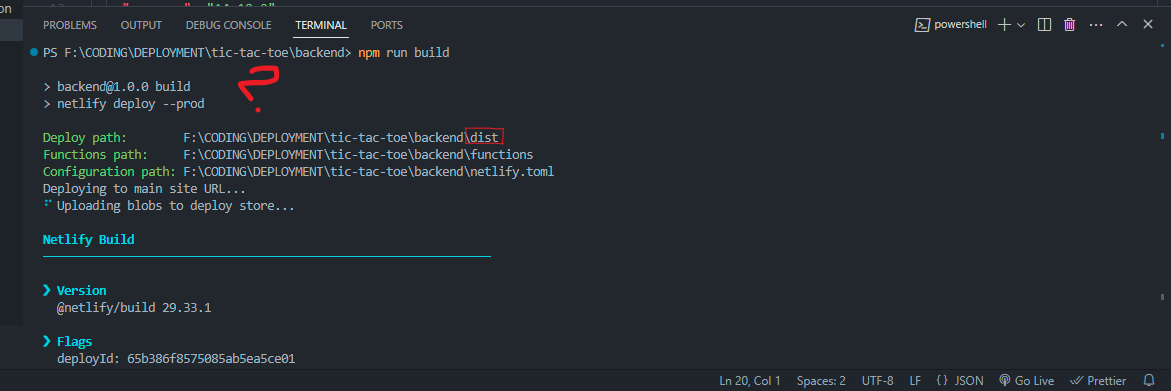
Then at below (where I marked question) it will ask directory. Initially a (.) will present but you must need to write dist like I write. It will ask only once.
11) Website URL
After the build completes, Netlify will provide you with multiple URLs. Choose the last URL generated, which will look like:
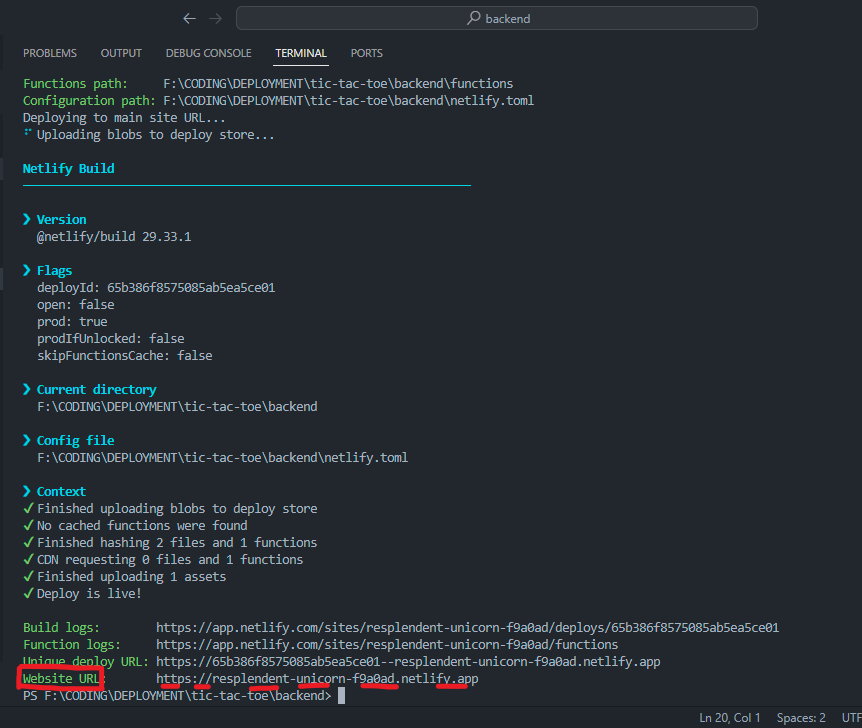
12) Edit URL
Add .netlify/functions/api after the website URL. The extra text we write after website URL was taken from api.js. So, your full URL be like :
websiteURL/.netlify/functions/api
Replace "websiteURL" with your actual site url.
By following these steps, you'll successfully deploy your backend on Netlify as a serverless function
Subscribe to my newsletter
Read articles from Hamid Nawaz directly inside your inbox. Subscribe to the newsletter, and don't miss out.
Written by
