How to Connect PostgreSQL Database to Power BI Using ODBC: A Step-by-Step Guide
 Purushotam Sharma DevOps♾️
Introduction:
Hello, data enthusiasts! 🎉 Ever found yourself wanting to seamlessly connect your PostgreSQL database to Power BI but didn’t know where to start? Well, you’re in the right place! Today, I’ll walk you through a straightforward, step-by-step process to get your PostgreSQL data flowing into Power BI using an ODBC driver. By the end of this guide, you'll be creating stunning visualizations with ease. Let’s dive in!
Step 1: Setting Up Your PostgreSQL Database on Neon.tech
To keep things simple, we’ll use Neon.tech to set up our PostgreSQL database. If you’re new to Neon.tech, don’t worry! It’s super easy and user-friendly.
Create a New Project:
Head over to Neon.tech and signup or log in. 🚀
Click on "New Project" to kick things off.
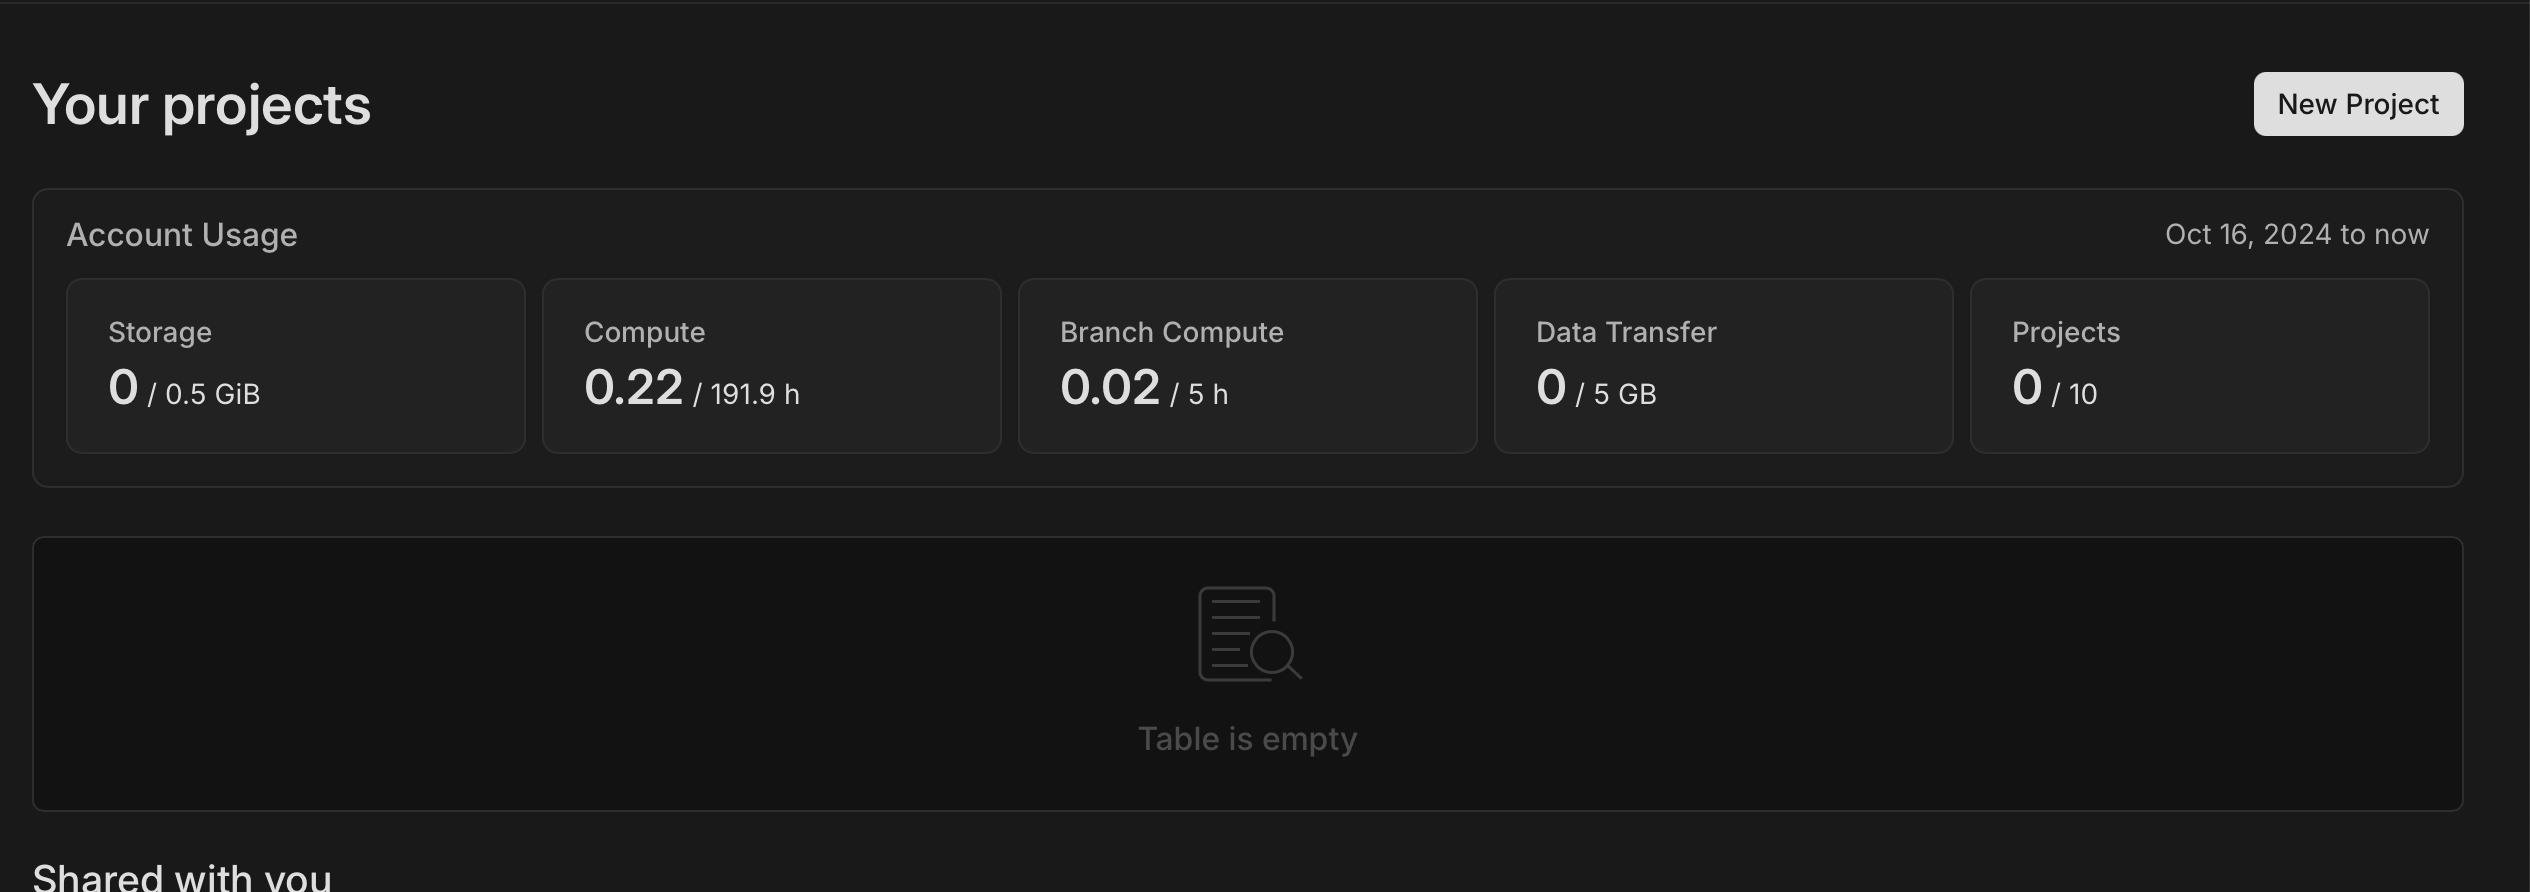
Write a name for your project, pick the PostgreSQL version, and select your preferred cloud provider and region. For this demo, the default settings will do just fine.
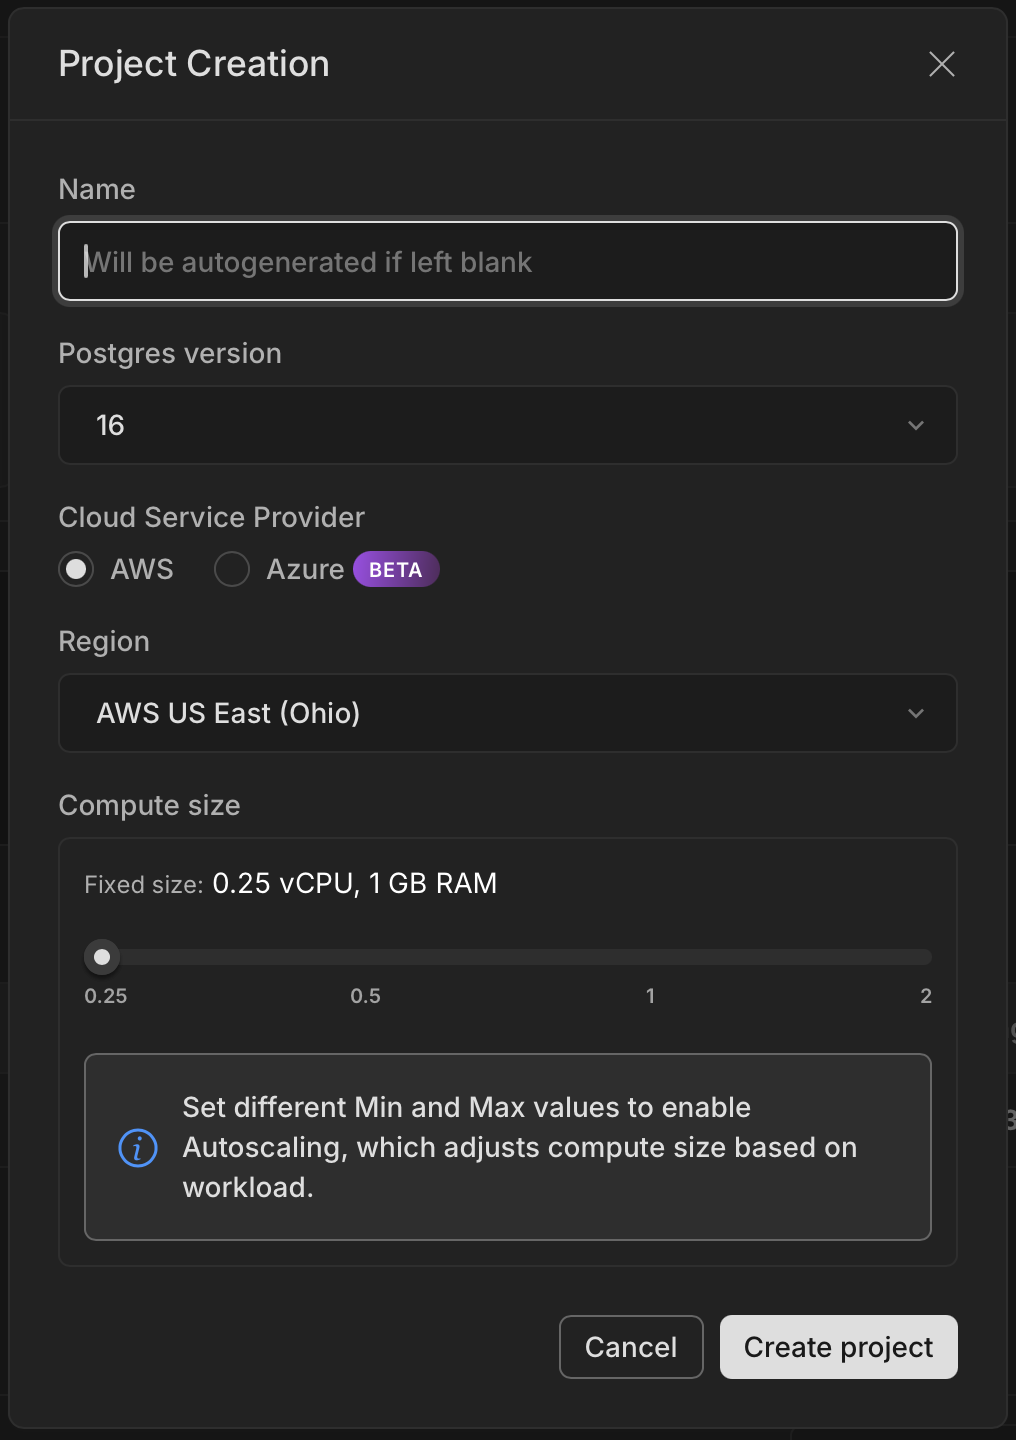
Hit "Create Project,"! 🎉
Configure Your Database:
Once your project is up, you’ll see a dashboard. Here, you can either stick with the default branch (often named "main") or create a new one if needed.
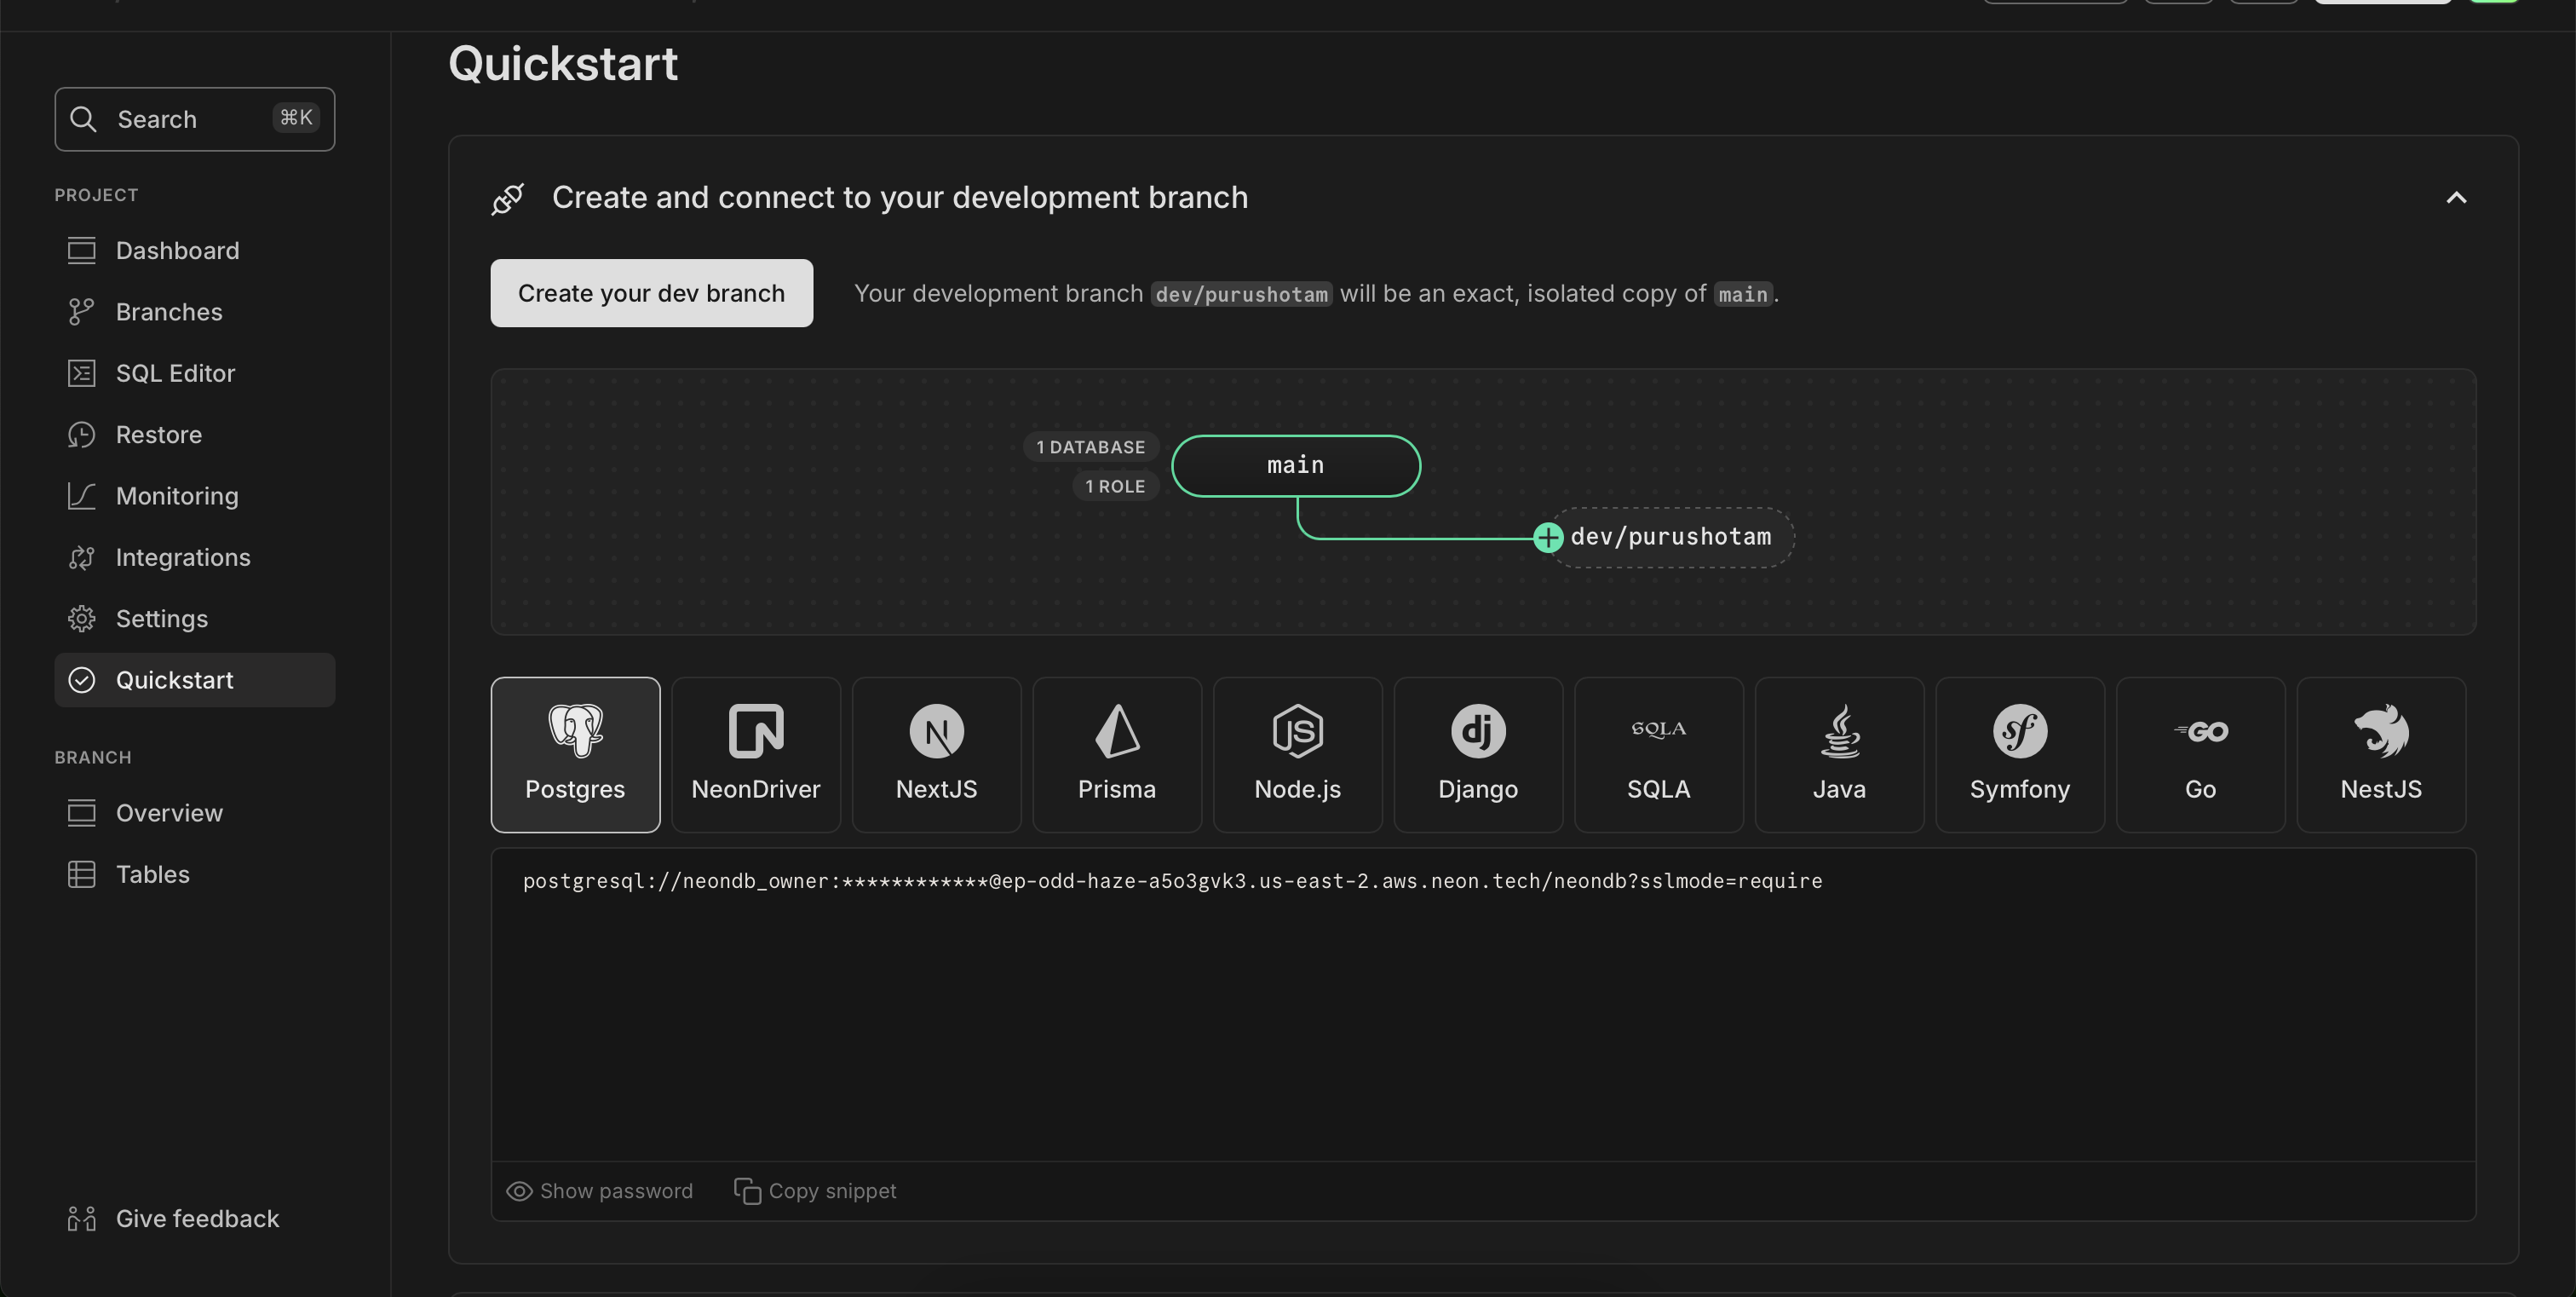
Your PostgreSQL database is now set up and ready to connect! 🙌
Step 2: Installing and Configuring the ODBC Driver
With the database in place, the next step is to set up an ODBC driver so that Power BI can talk to your PostgreSQL database. For this, we’ll use the Devart PostgreSQL ODBC Driver.
Download the ODBC Driver:
Visit the Devart ODBC Driver page.
Download the version that matches your operating system (Windows, macOS, or Linux).
Install the Driver:
- Run the installer file you just downloaded and follow the installation steps. It’s as easy as hitting “Next” a few times! 😉
Configuring the ODBC Data Source:
Open "ODBC Data Source Administrator" from your Start menu (make sure to choose 32-bit or 64-bit based on your OS).
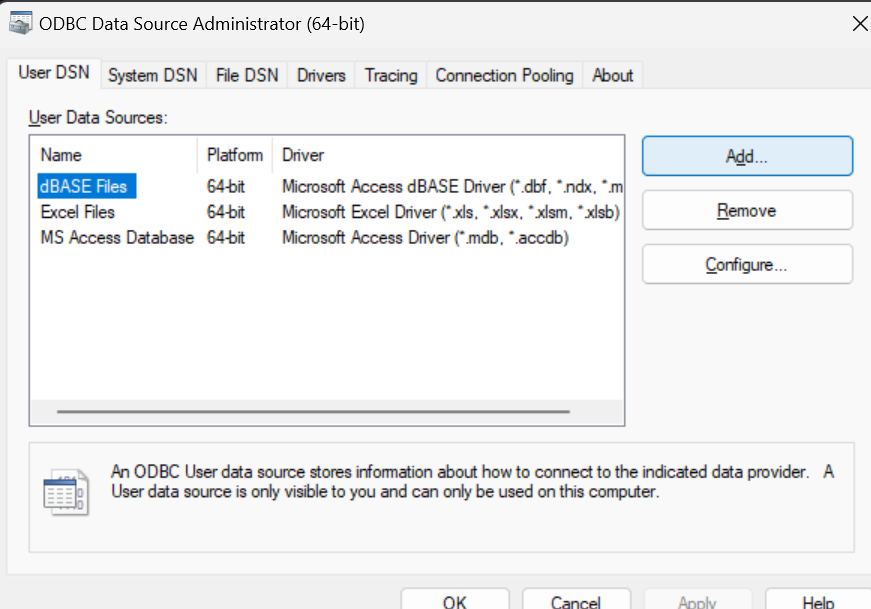
Click "Add" and select Devart PostgreSQL ODBC Driver from the list.
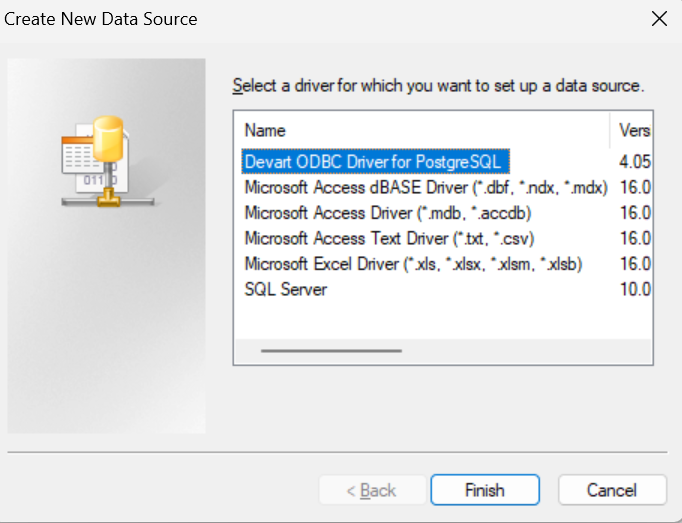
Then, click "Finish."
Fill in the Configuration Details:
Data Source Name: Name it something meaningful (like "MyProjectDB").
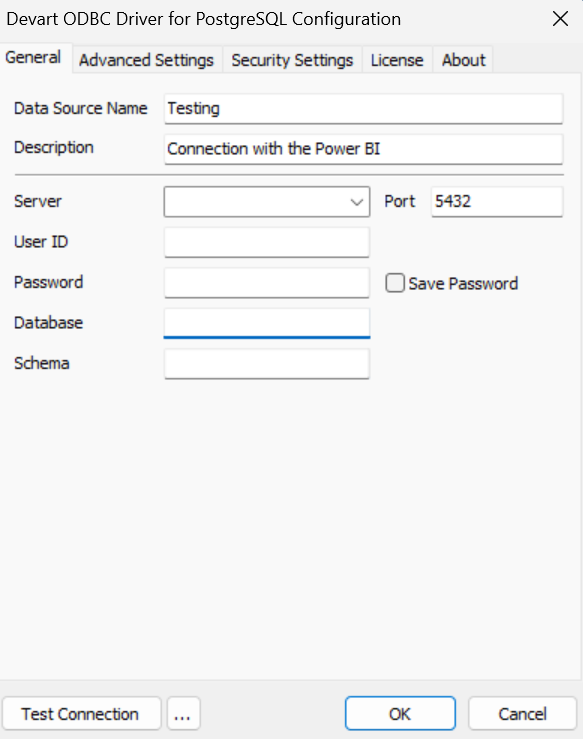
Description: Optional, but feel free to add one.
Server: Enter the IP address, domain name, or host of your database (e.g.,
ep-odd-haze-a5o3gvk3.us-east-2.aws.neon.tech).User ID: Use your PostgreSQL username (e.g.,
neondb_owner).Password: This is a crucial part! Unlike some setups, the ODBC driver requires the endpoint information, but there's no specific field for it. So, we include it directly in the password. Neon.tech offers several options for configuring endpoints—check out their documentation on connection errors for more details.
endpoint=<endpoint_id>$<password>For instance:
endpoint=ep-odd-haze-a5o3gvk3$eTQVXO7PY2JdDatabase: Type in your database name (e.g.,
neondb).SSL Mode: Make sure SSL is enabled by going to Security Settings and selecting "Use SSL."
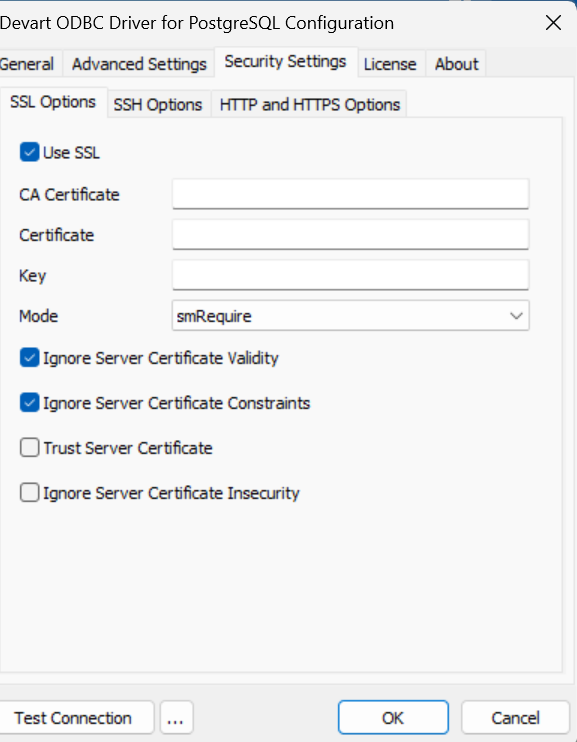
Test Your Connection:
- Hit "Test Connection" to see if everything’s working. If it’s a success, you’re golden! ✨ If not, double-check your details and try again.
Step 3: Connecting PostgreSQL to Power BI
With the ODBC driver set up, it’s time to move to Power BI. 🎨📊
Open Power BI Desktop:
Launch Power BI Desktop and click on "Get Data."
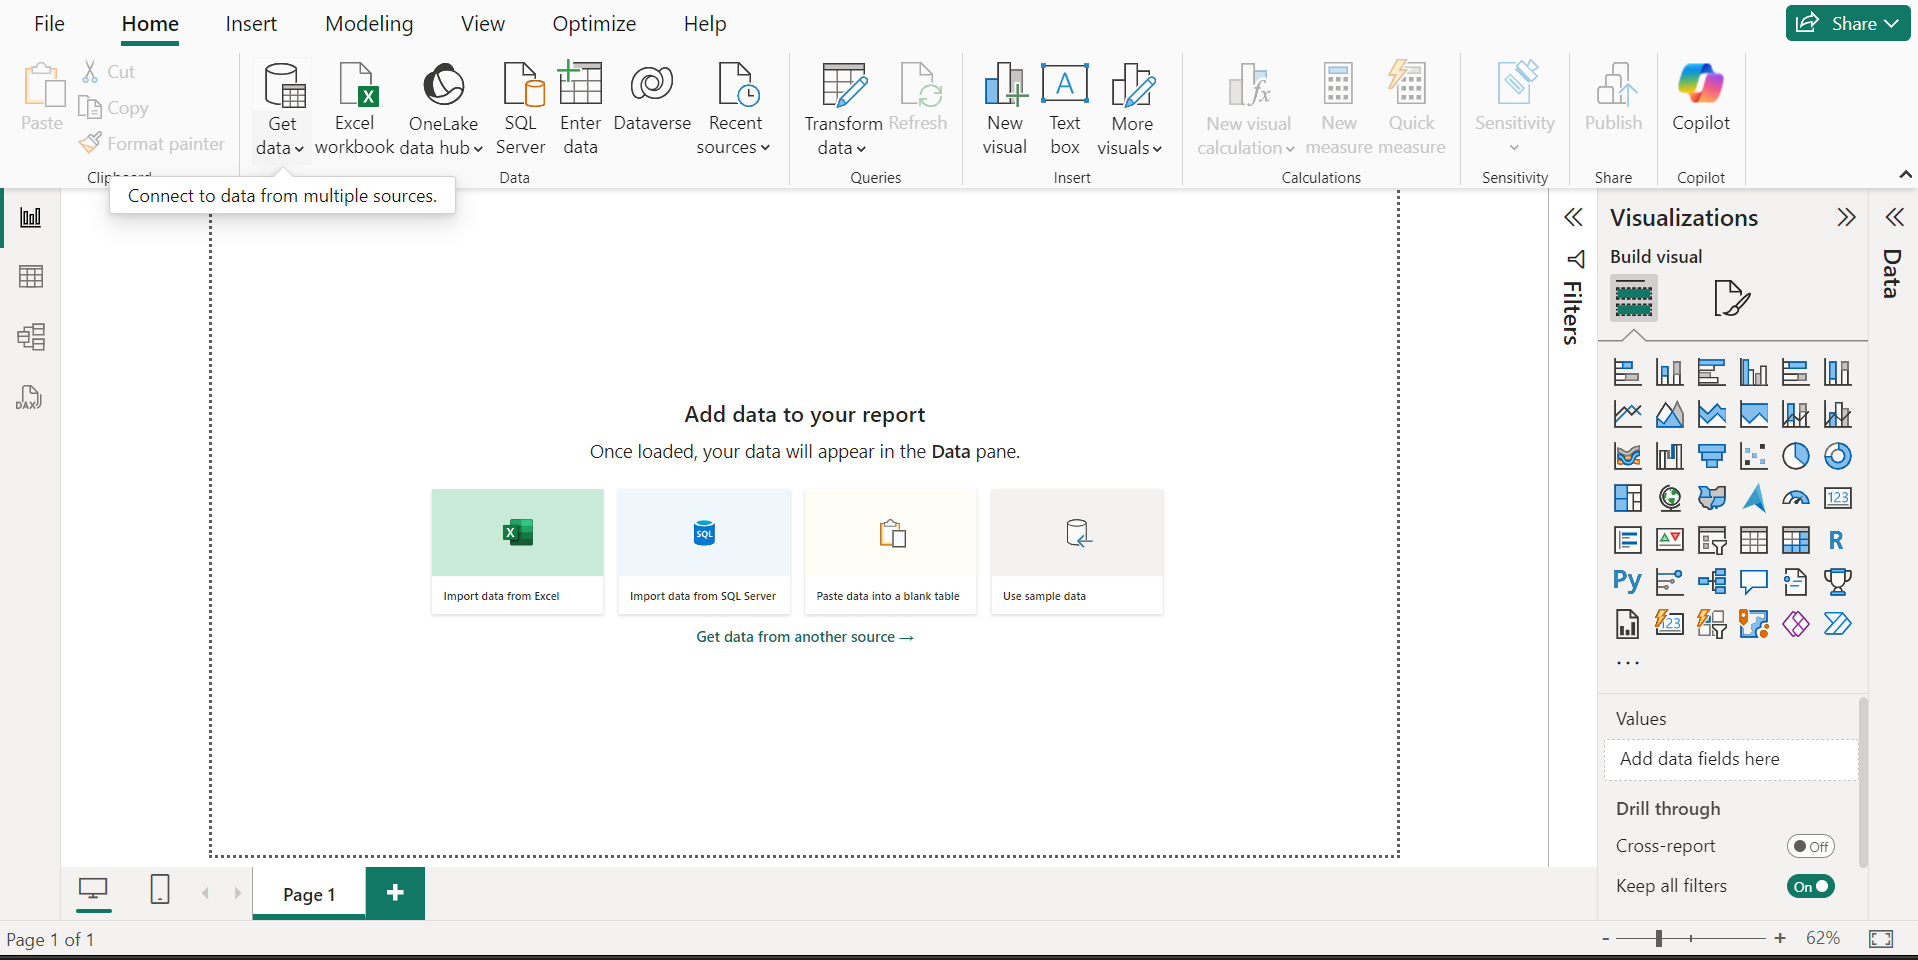
Choose ODBC Connection:
In the “Get Data” window, type in "ODBC" and select it.
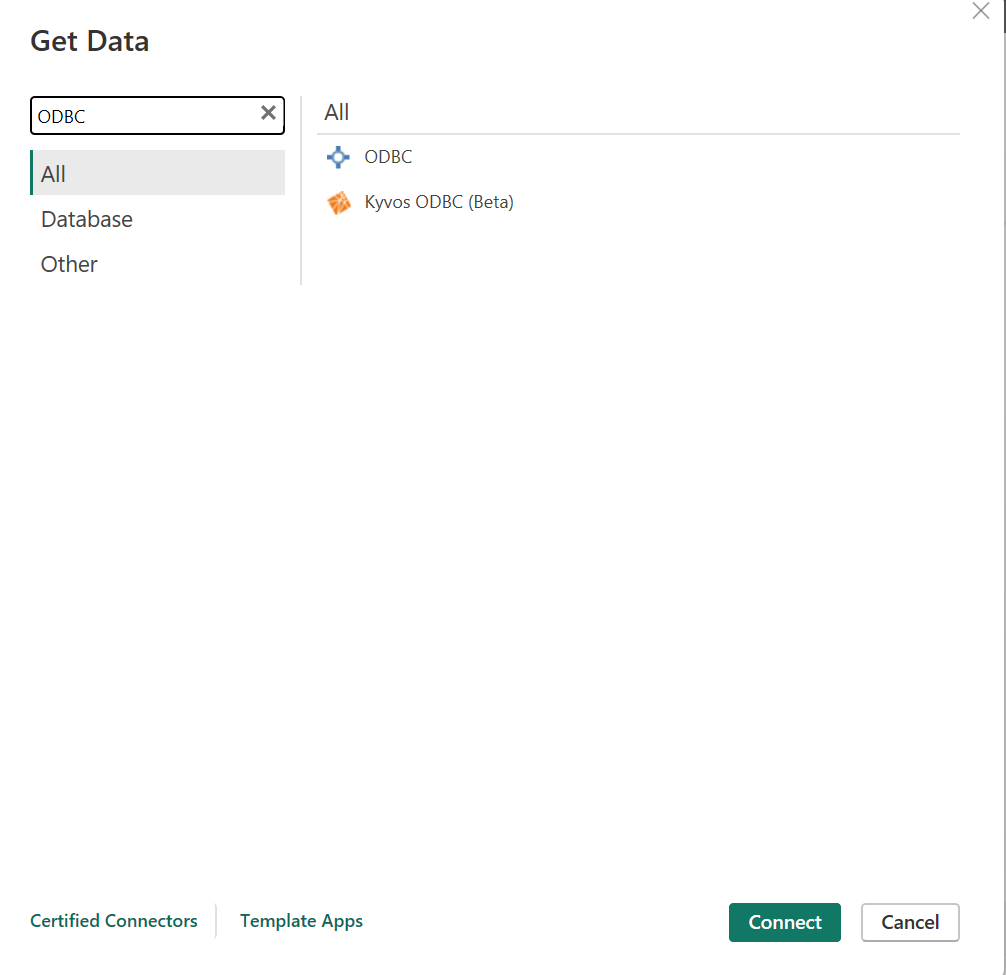
You’ll see the DSN (Data Source Name) you created earlier. Select it and click "OK."

Enter Your Credentials:
When prompted, enter the same username and password as before.
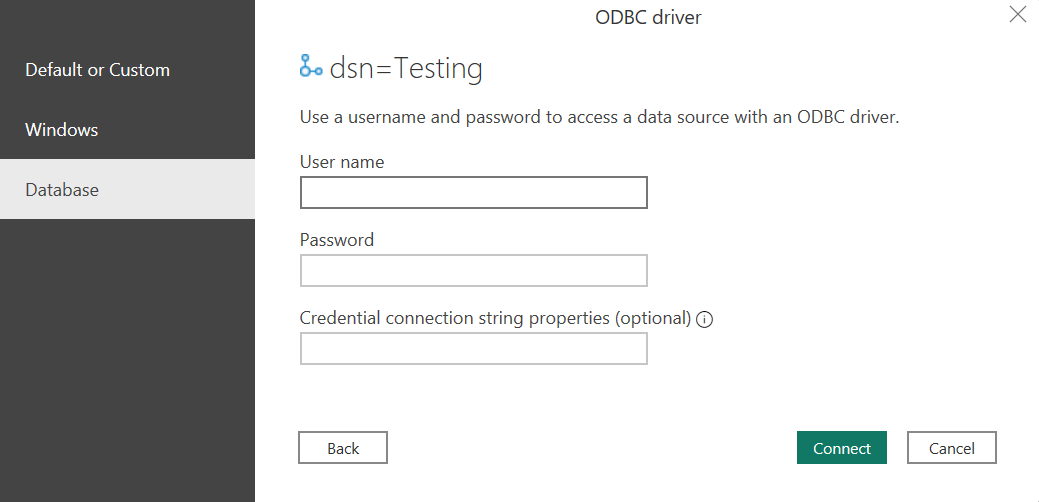
Click "Connect."
Load Your Data:
Select the tables you want to import from your PostgreSQL database.
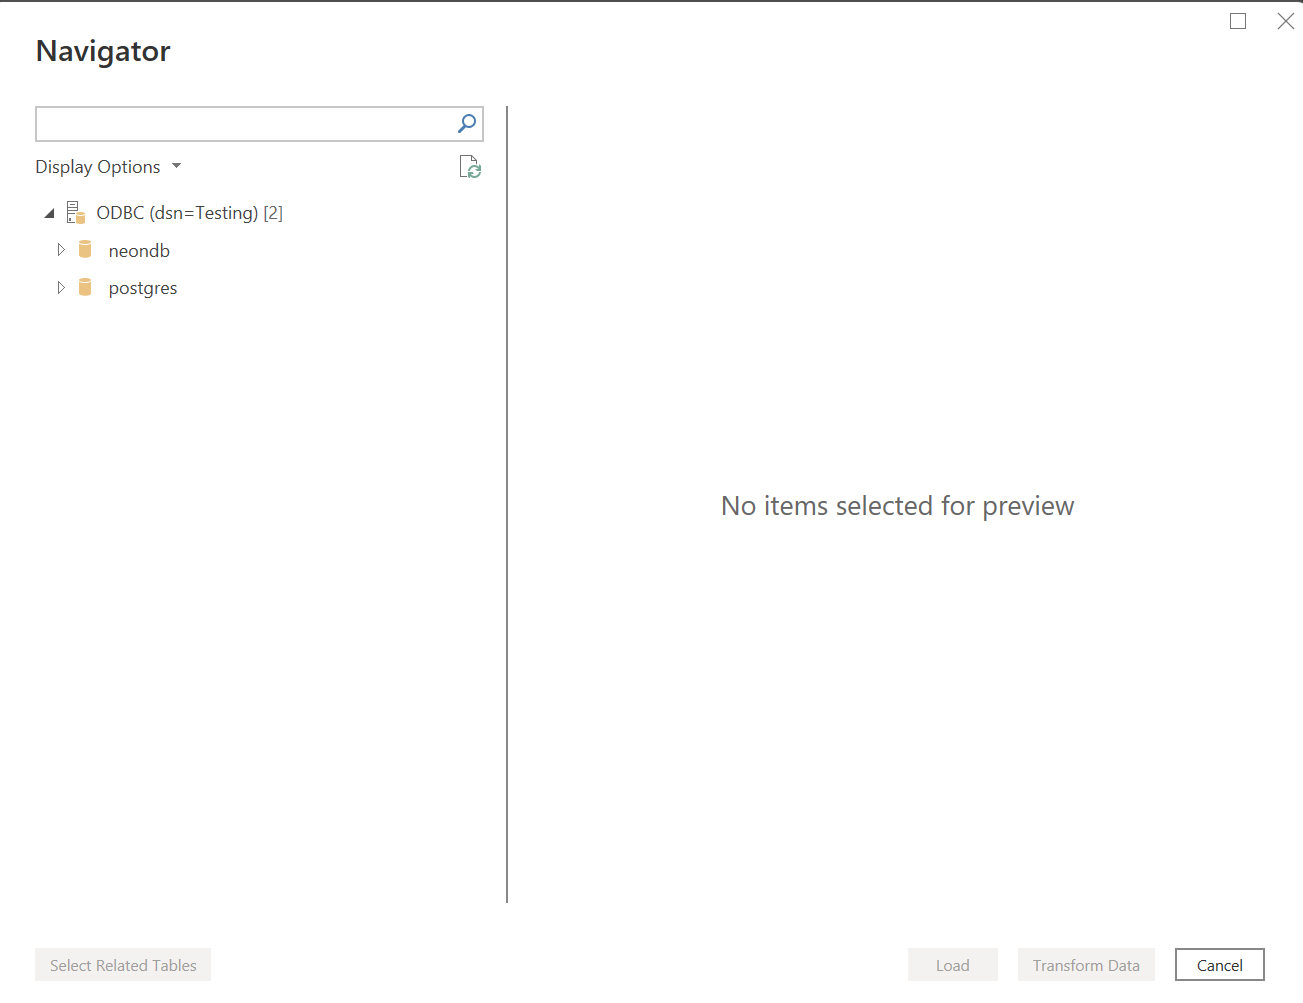
Click "Load," and Power BI will pull in your data. 🎉
Create Your Visuals:
- Once the data is loaded, you’re free to create beautiful charts, graphs, and reports to bring your data to life!
Conclusion:
And there you have it! 🎉 You’ve successfully connected your PostgreSQL database to Power BI using an ODBC driver. This setup allows you to tap into your PostgreSQL data, creating stunning, data-driven insights with just a few clicks. So go ahead, explore your data, and make the most of Power BI’s powerful visualization tools!
Got stuck somewhere? Or maybe you found a cool trick while following along? Drop your comments below, and let’s chat. Happy visualizing! 📊✨
Cover image credit: EasyInsights
Subscribe to my newsletter
Read articles from Purushotam Sharma DevOps♾️ directly inside your inbox. Subscribe to the newsletter, and don't miss out.
Written by

Purushotam Sharma DevOps♾️
Purushotam Sharma DevOps♾️
🚀 Welcome to my tech journey! 🌐 👨💻 As a Computer Applications major at Charusat University, I'm on a mission to turn ideas into reality through the power of code and problem-solving! 💡 🔧 Here's a glimpse into my tech toolbox: 🐧 Linux and Shell Scripting enthusiast - because debugging is my cardio, and coding is my warm-up! 💻🛠️ 🌐 Source Code Management wizard with Git and GitHub - where version control becomes an art! 🎨 🐳 Navigating the seas of software containerization with Docker and Kubernetes - because why settle for less than scalable perfection? 🚢🏗️ 🚀 Riding the CI/CD wave with Jenkins - making software delivery smoother than ever! 🚚🔄 🤝 Team player extraordinaire - I thrive in collaborative environments, turning challenges into victories! 🤹♂️ 🧠 Constantly evolving and adapting - always hungry for new perspectives and ideas! 🌱💡 🛠️ Skills Snapshot: Operating Systems: Windows, Linux Cloud Services: EC2, S3, VPC, CloudWatch, SQS, SES, IAM, SNS, Route53, ELB, Autoscaling, EBS, RDS Tools: Git, GitHub, Docker, Jenkins, Kubernetes, Ansible, Terraform 📧 Let's connect and explore the limitless possibilities together! Drop me a line at sharmapurushotam@hotmail.com. Thanks for sharing this tech adventure with me! 🚀🔗