From Code to Deployment: Automating with Jenkins, AWS CodeDeploy, and S3
 Abhishek Verma
Table of contents
- Overview of the CI/CD Pipeline
- Step-by-Step Process
- Step 1: Creating IAM Roles for EC2 and CodeDeploy
- Step 2: Configuring EC2 and Installing the CodeDeploy Agent
- Step 3: Creating an AMI from the EC2 Instance
- Step 4: Setting up the Auto Scaling Group (ASG)
- Step 5: Configuring an Elastic Load Balancer (ELB)
- Step 6: Setting up an S3 Bucket for Code Deployment Artifacts
- Step 7: Setting up AWS CodeDeploy
- Step 8: Integrating Jenkins with AWS CodeDeploy.
- Step 10: Verifying the Deployment Status.
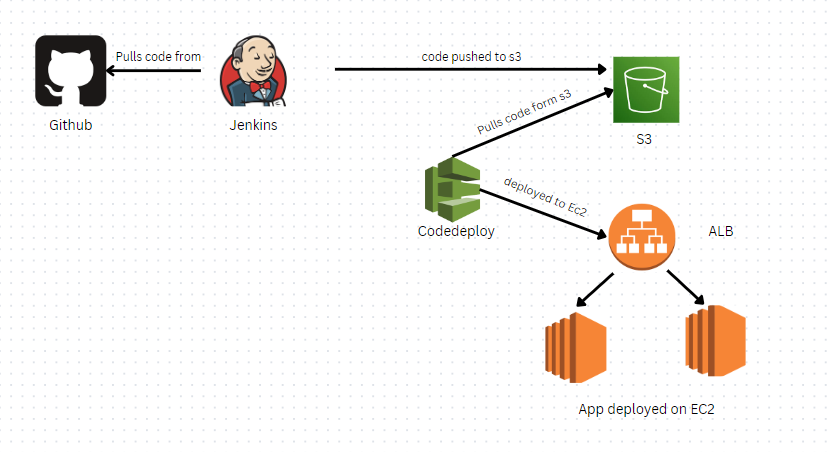
Overview of the CI/CD Pipeline
The core components of our CI/CD pipeline include:
AWS EC2: Virtual machines where your code is deployed.
AWS Auto Scaling Group (ASG): Ensures availability by automatically scaling EC2 instances.
AWS Elastic Load Balancer (ELB): Distributes incoming traffic across multiple EC2 instances.
AWS S3: Used to store code and deployment artifacts.
AWS CodeDeploy: Automates deployment across EC2 instances.
Jenkins: Continuous integration server for building, testing, and automating deployments.
GitHub: Code Repository.
Step-by-Step Process
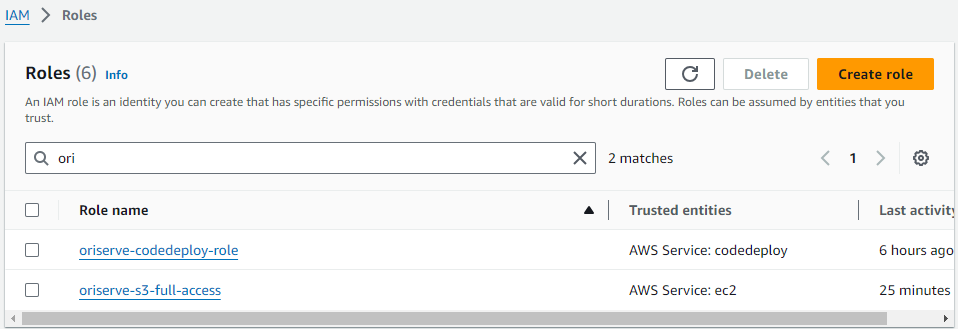
Step 1: Creating IAM Roles for EC2 and CodeDeploy
The first step in setting up the pipeline is creating the necessary IAM Roles to allow EC2 instances and AWS CodeDeploy to interact securely.
EC2 Role:
This role will help EC2 instance to perfrom taks such as pulling deployment artifacts from S3 and executing CodeDeploy commands.
The policy for this role will includes permissions policy as
AmazonS3FullAccessandAWSCodeDeployFullAccess.
CodeDeploy Role:
The CodeDeploy service requires this role to perform deployment operations on the EC2 instances.
Permissions include Amazon
AmazonEC2RoleForAWSCodeDeploywhich allows CodeDeploy to interact with EC2 instances for deployments.
Step 2: Configuring EC2 and Installing the CodeDeploy Agent
An EC2 instance is created, and a CodeDeploy agent is installed on it. The CodeDeploy agent listens for deployment instructions from AWS CodeDeploy and performs the deployment steps on the instance.
Launch an EC2 instance with the created IAM role attached.
Install the CodeDeploy agent using the following commands:
 bashCopy codesudo yum update
 sudo yum install -y ruby
 wget https://aws-codedeploy-us-east-1.s3.amazonaws.com/latest/install
 chmod +x ./install
 sudo ./install auto
 sudo service codedeploy-agent start

Step 3: Creating an AMI from the EC2 Instance
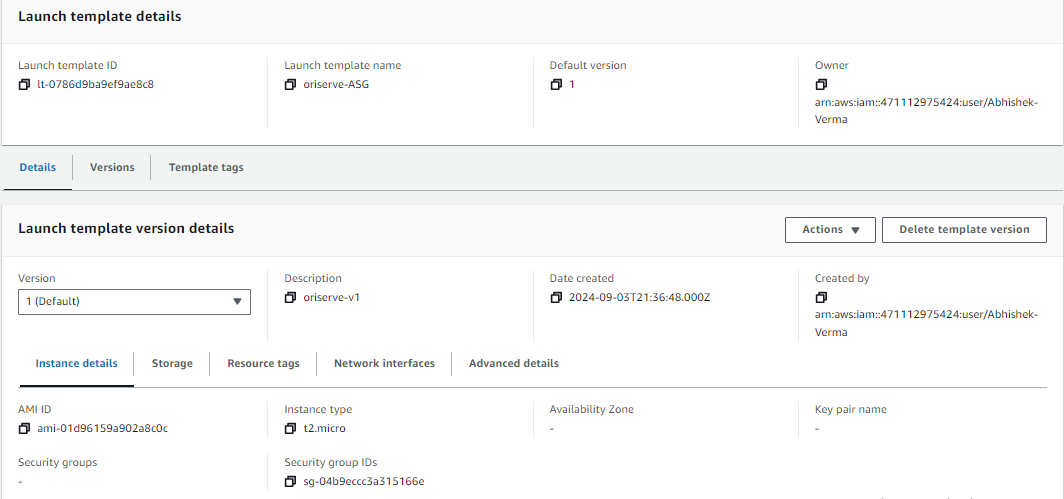
Once the EC2 instance is configured with the CodeDeploy agent, an Amazon Machine Image (AMI) is created. This AMI is used in the Auto Scaling Group (ASG) to automatically provision new instances with the necessary configuration.

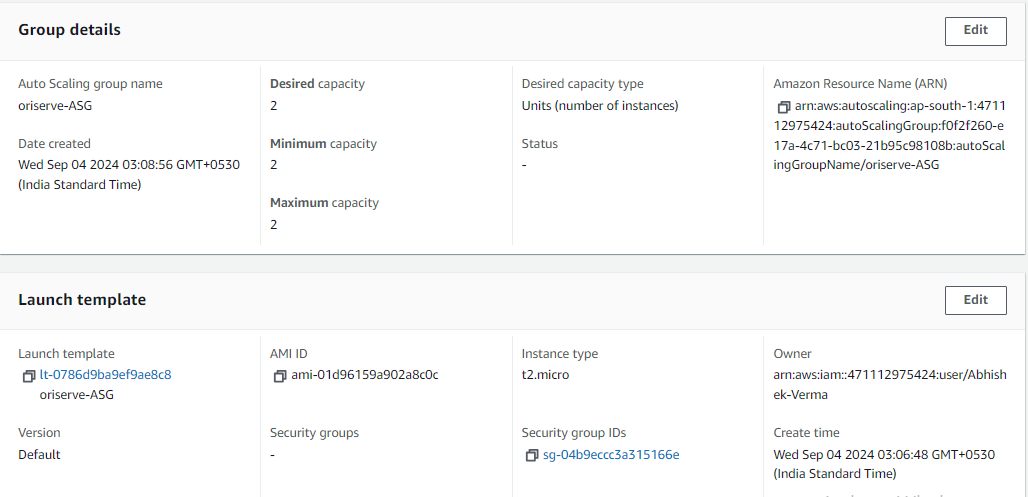
Step 4: Setting up the Auto Scaling Group (ASG)
The Auto Scaling Group (ASG) ensures that the desired number of EC2 instances is always running. It automatically adds or removes instances based on load and predefined scaling policies.
Configure the ASG to launch instances from the created AMI.
Define the desired, minimum, and maximum number of instances.
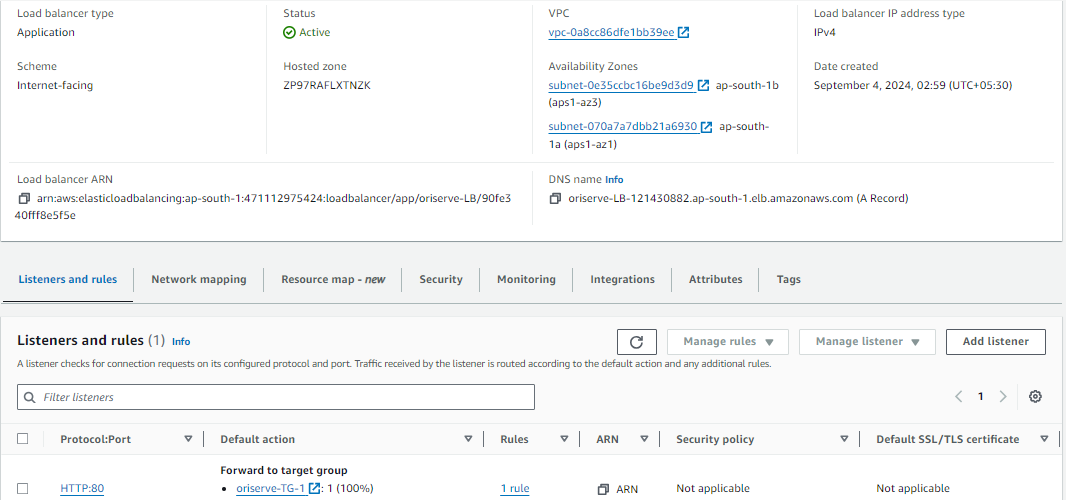
Step 5: Configuring an Elastic Load Balancer (ELB)
To ensure that traffic is distributed across your EC2 instances, an Elastic Load Balancer (ELB) is set up. The load balancer automatically directs incoming traffic to the available, healthy EC2 instances in your ASG.
Create an ELB and attach the EC2 instances launched by the ASG.
Configure Target Groups and Listeners for routing traffic, typically over HTTP or HTTPS.

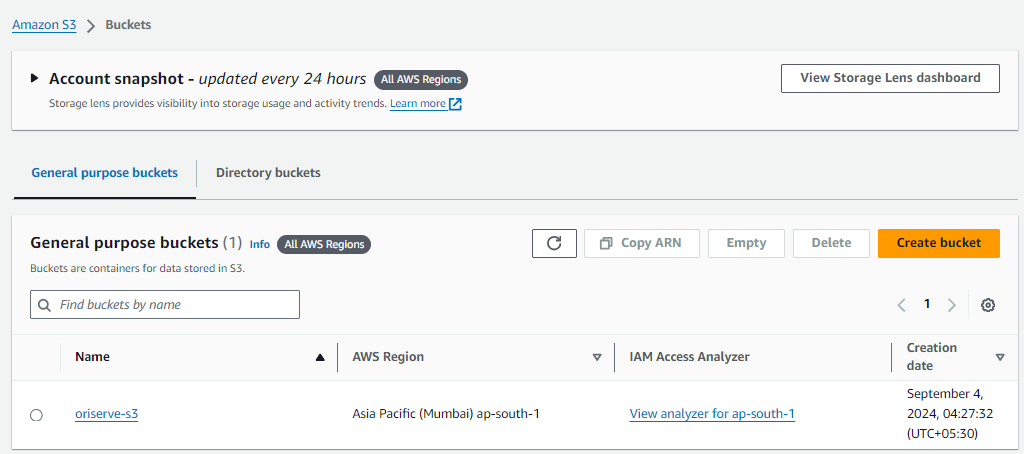
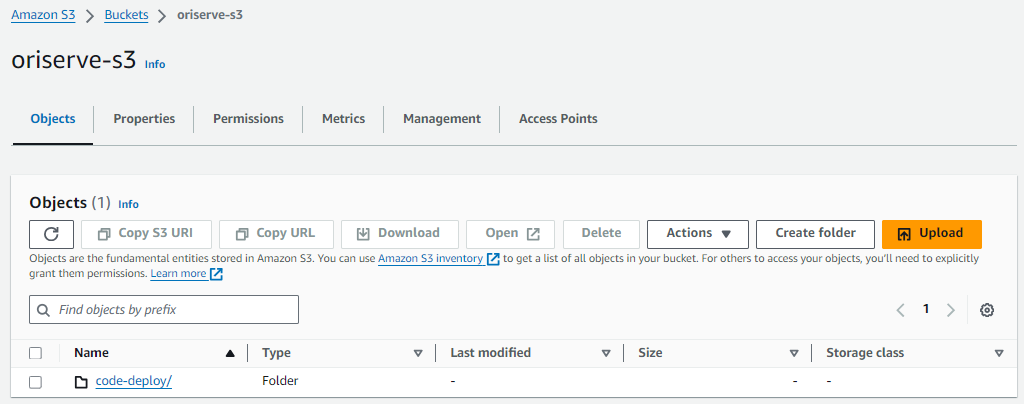
Step 6: Setting up an S3 Bucket for Code Deployment Artifacts
An S3 bucket is created to store your application code and deployment artifacts. AWS CodeDeploy will use these files to deploy the application across the EC2 instances.
Upload your application files to the S3 bucket.
Step 7: Setting up AWS CodeDeploy
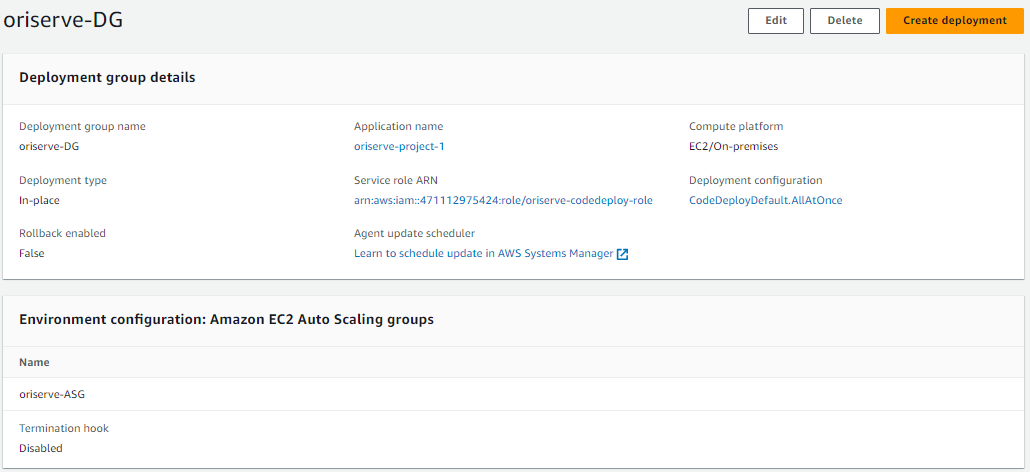
Next, we configure AWS CodeDeploy to automate the deployment process.
Create an Application: In the AWS CodeDeploy dashboard, create a new application.
Create a Deployment Group: Attach the ASG created earlier to the deployment group. This allows CodeDeploy to push updates to all instances within the group.
Step 8: Integrating Jenkins with AWS CodeDeploy.
Now we need to automate the deployment process using Jenkins. The CodeDeploy plugin in Jenkins triggers deployments whenever a new commit is made in the Git repository.
Install CodeDeploy Plugin: In Jenkins, navigate to Manage Plugins and install the CodeDeploy plugin.

Configure Jenkins Pipeline:
Create a Jenkins job that pulls the code from a Git repository.
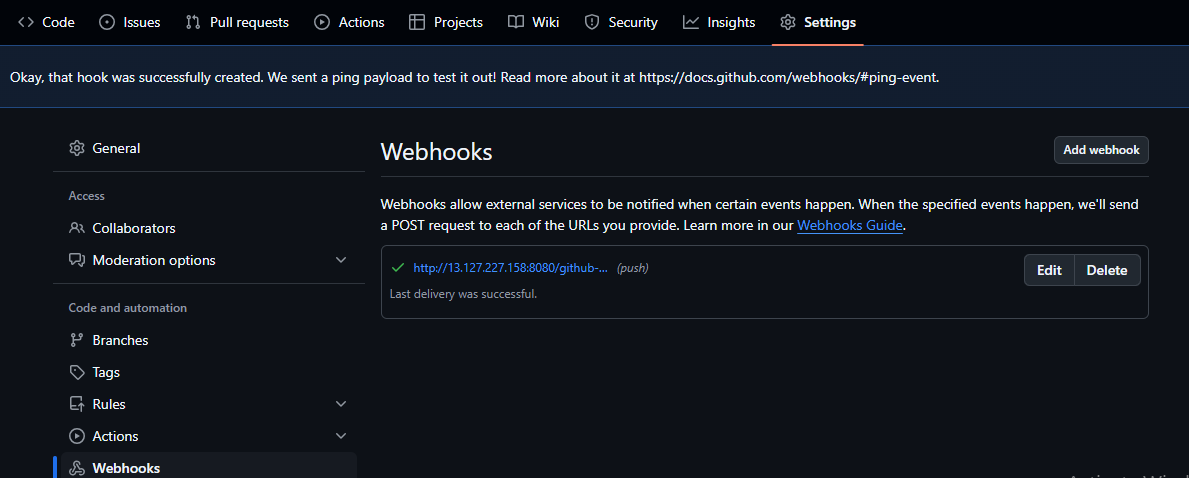
Use Webhooks (in GitHub also) to trigger builds automatically whenever there’s a new commit.

In the Post-Build Actions, add the AWS CodeDeploy plugin to push the code to S3 and trigger the deployment in CodeDeploy.
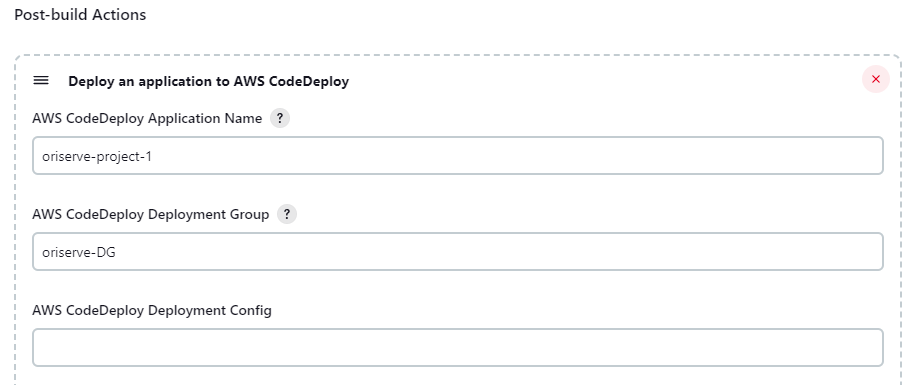
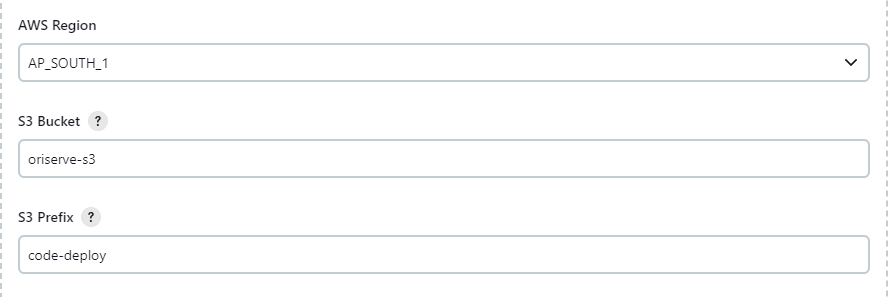
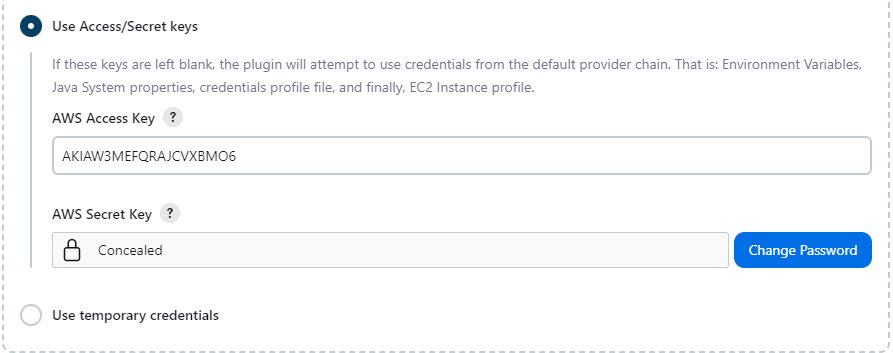
Once the pipeline is set up, you can manually or automatically trigger builds whenever new code is pushed to the repository. Jenkins will:
Clone the code.
Build the application.
Upload the build artifact to the S3 bucket.
Trigger AWS CodeDeploy to deploy the application on EC2 instances.
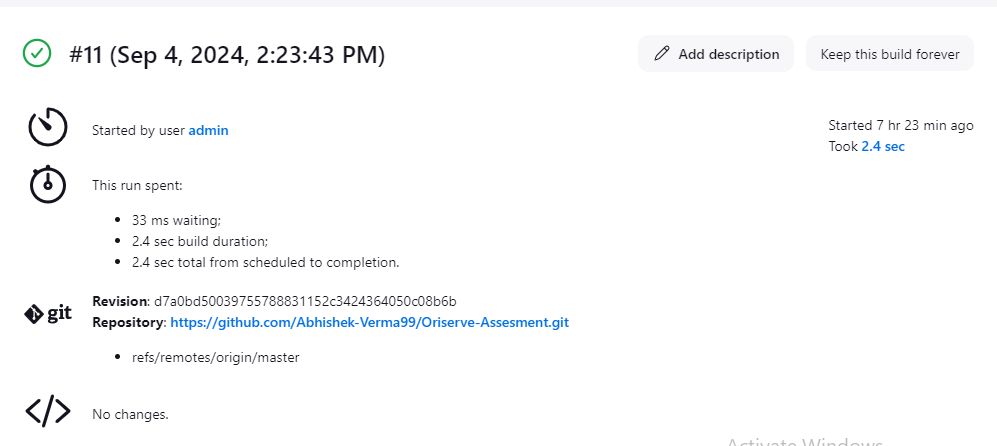
Step 10: Verifying the Deployment Status.
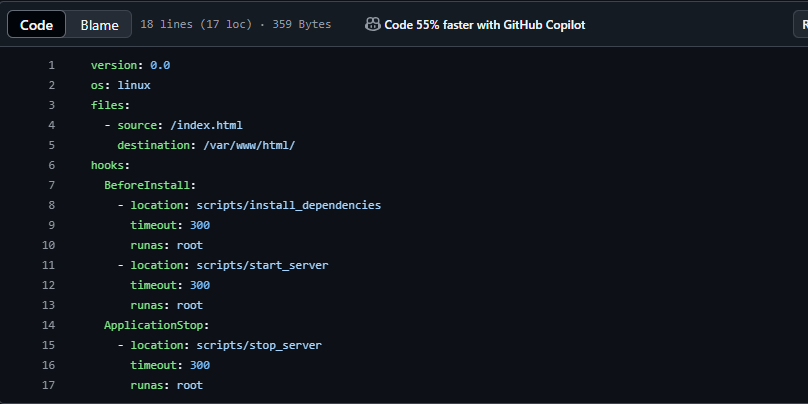
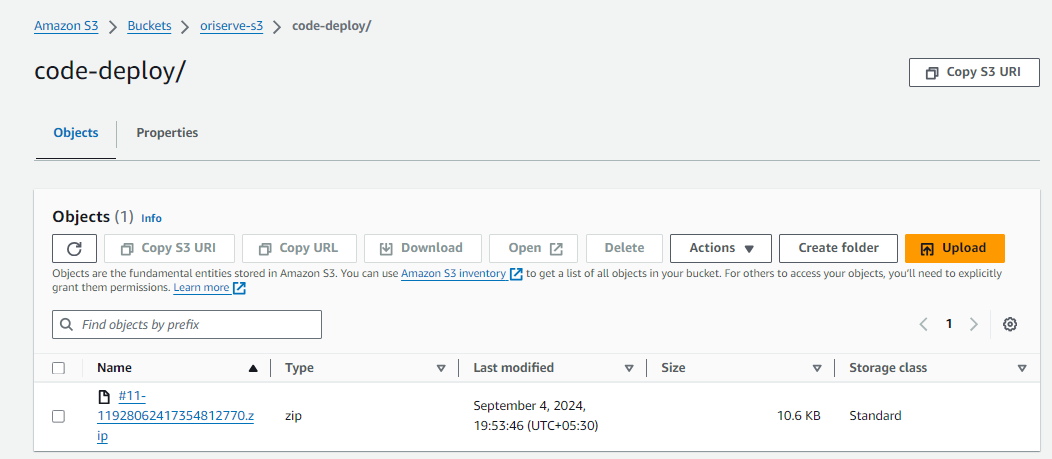
Code pushed to s3 along with appsec.yml file , which is crucial for codedeploy as it defines how CodeDeploy should deploy the app. ( all the files related to app deployment are present in this zip file).
Appsec.yaml file
Code Files Pushed to s3 bucket:
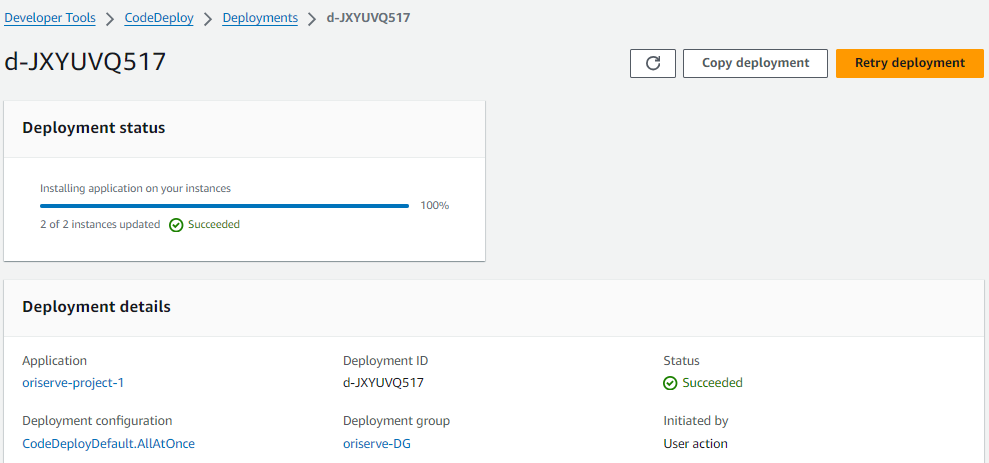
CodeDeploy Deployment Status :
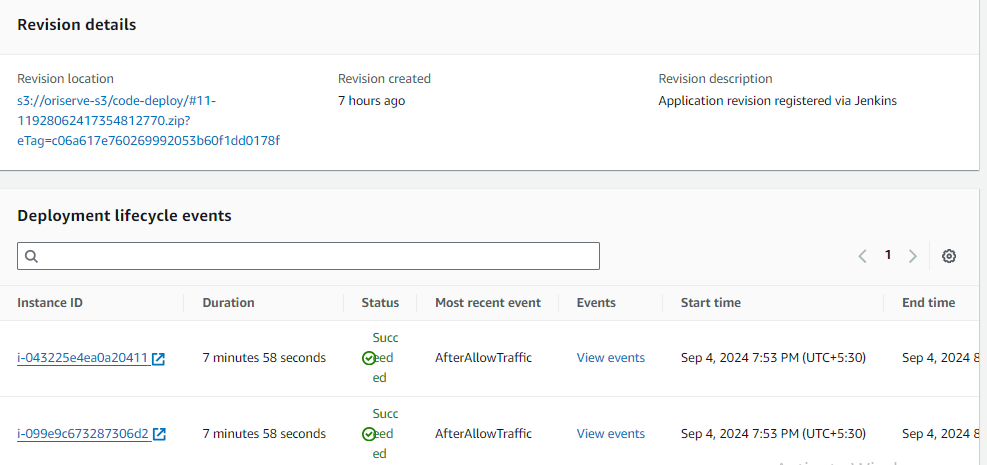
Step 11: Accessing the Application.
We can access the application using the LoadBalancer DNS.

SOME PROBLEMS ENCOUNTERED
Problem 1. Jenkins not starting - while starting jenkins service on EC2 I was getting an error.
Error - Job for jenkins.service failed because a timeout was exceeded. See "systemctl status jenkins.service" and "journalctl -xeu jenkins.service" for details. on AWS Linux.
Solution - After Some investigation , I got to know that the java version which I was using was the reason of the error , so I uninstalled the java and installed latest java-17 and the error was resolved.
Problem 2. Under Deployment one instance was going in draining state while the application was successfully deployed on 2nd instance.
Solution - After checking the events of deployment and after googling the issue also I wasn not able to solve the issue so I decided to login to EC2 and randomly checked for codedeploy-agent service status and voila the error was caused because the service was not running , I restarted the agent and the app was deployed on all the instances.
Thanks all. Good luck out there!
Follow for more such amazing content :)
Happy Learning 😊
Subscribe to my newsletter
Read articles from Abhishek Verma directly inside your inbox. Subscribe to the newsletter, and don't miss out.
Written by
