Launching Amazon EC2 Instances through AWS CLI in Virtual Private Cloud
 Vasuki Janarthanan
EC2 Instance:
Amazon Elastic Compute Cloud (EC2) also known as Virtual machines was created on the VPC used to run our workloads, not the infrastructure.
Why it is important?
Let’s say I am using the Windows Operating system but for my project, I want to switch to the Linux Operating System. So instead of installing Linux OS in my local machine. I will rent that Server from the vendors(ex aws).
What AWS will do, we are making a request to AWS API that I want a virtual instance (in AWS that is known as EC2 Instance) where I used to work on that infrastructure as a virtual.
And What this AWS API will do, it will say “Okay you are asking an EC2 instance and I have a Huge Data center that consists of Physical Servers. In each physical server Hypervisor was installed, based on the region you are requesting one of my Physical servers will create a Virtual machine, and as a response, I will give an IP address and access key for you. So with that IP address and access key, you can access your EC2 instance virtually.
Before creating an EC2 Instance through AWS CLI, we will first create through UI :
First, create an AWS account “https://aws.amazon.com/console/”
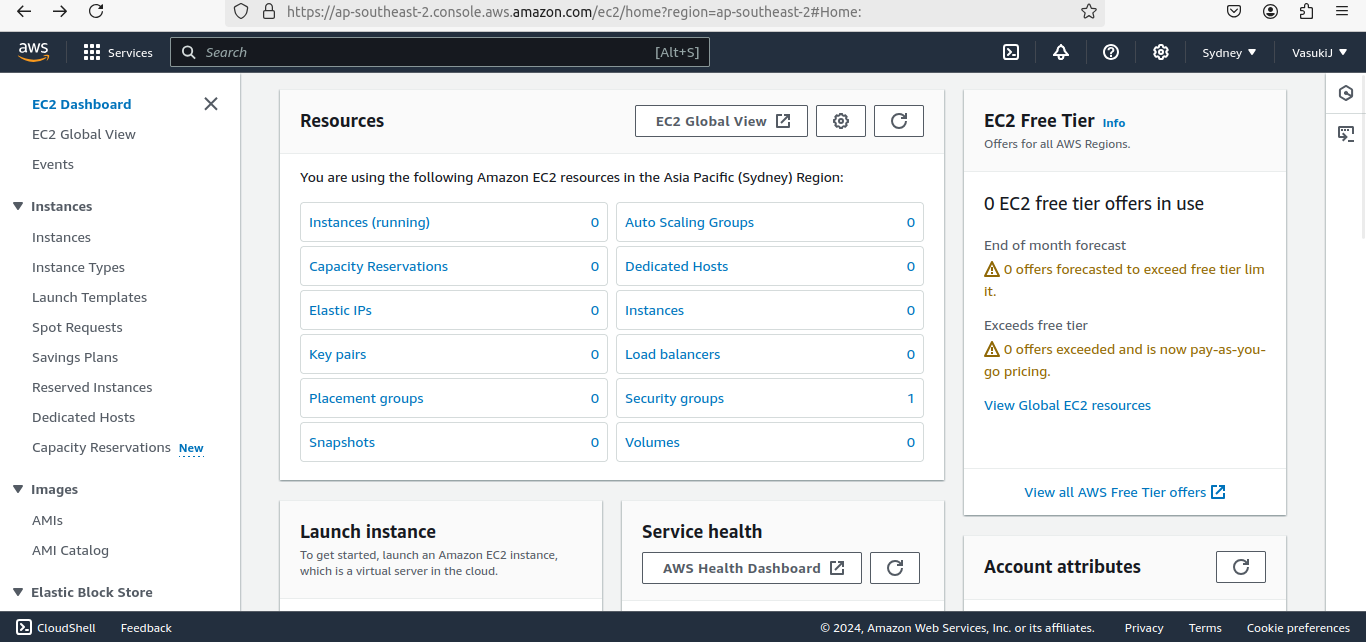
Initially, your dashboard will look like this. Then click ‘Instances’ and then at the top click Launch Instances.
Then give your instance name, choose which OS you want, and then give the key-pair name(login) that is used for login purposes. Make sure to note that.
Finally, click “Launch Instance”. Then your EC2 Instance is successfully launched.
Successfully EC2 Instance is created with a name of ‘Elsa’ and it was in a running state and it will create an Instance ID for our Virtual Instance.
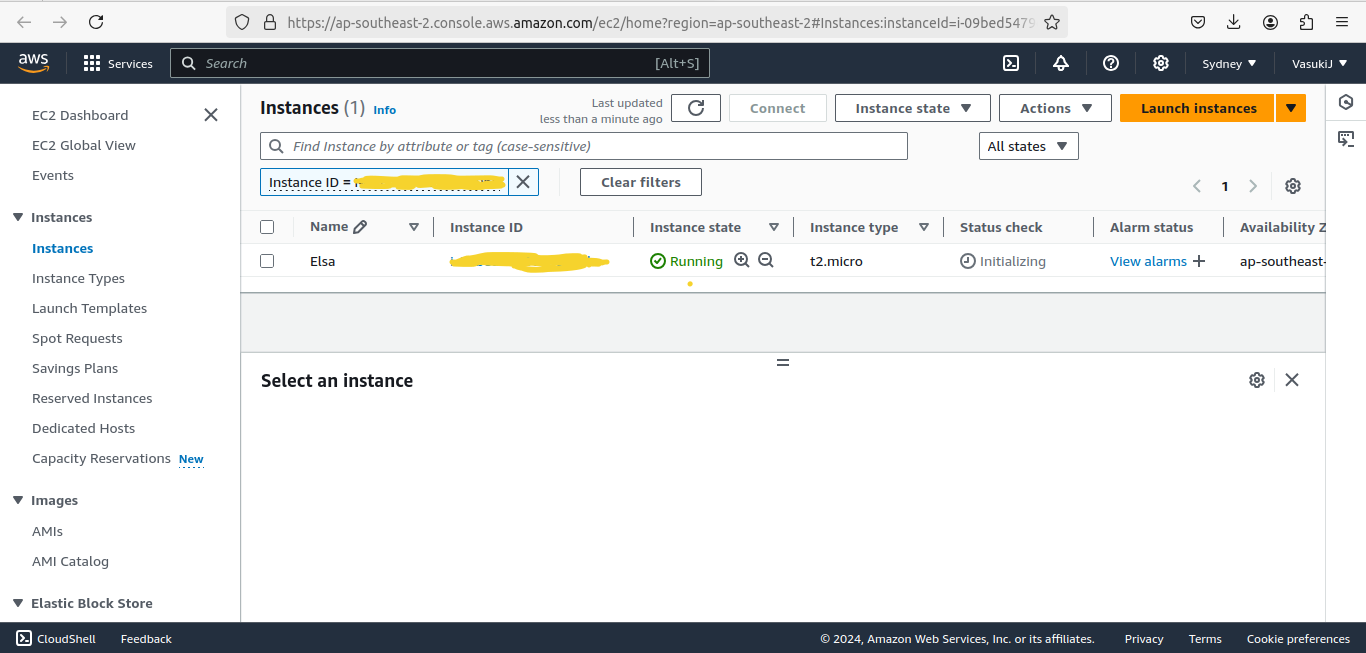
Next, We connect to this Virtual Instance through UI. For that Click on Instance ID.
Click Connect, then it will navigate to another page, again click “Connect”.
After that it will open AWS Console.

Now we will create “myfirstfile” in this Virtual Instance.
COOL! We Launched and connected to the EC2 Instance through UI and AWS Console. It was manual process, as a DevOps Enginner we need to speed this task by automation. So that, we will write some command to connect to this EC2 Instance from our Terminal. Not in AWS console.
Connecting to EC2 Instance from our Terminal not in AWS Console :
Open your Terminal and type this command, to get your public IP4 Address that was displayed in EC2>Instances>Instance_ID tab.
“ssh ubuntu@*yourPublicIP4Address*”

Then give ‘Yes’ for continue connecting. Press Enter, It shows Permission denied because of we are giving our key-pair.
So give this command with Key-Pair.
‘chmod 600 /your-pem-file-location’
‘ssh -i /your-pem-file-location ubuntu@yourIP4 ADDRESS’
Explanation for these commands: **‘**chmod 600’ will make your pem file only access to the root user and restrict permission for other than root user.
‘ssh’ is a Secure Shell Protocol that is used to communicate with two systems over the network in a encrypted mode. ‘i’ for identification of the pem file. Along with that we are giving ‘ubuntu’ because we choose ubuntu as our OS and with public IP4 ADDRESS.
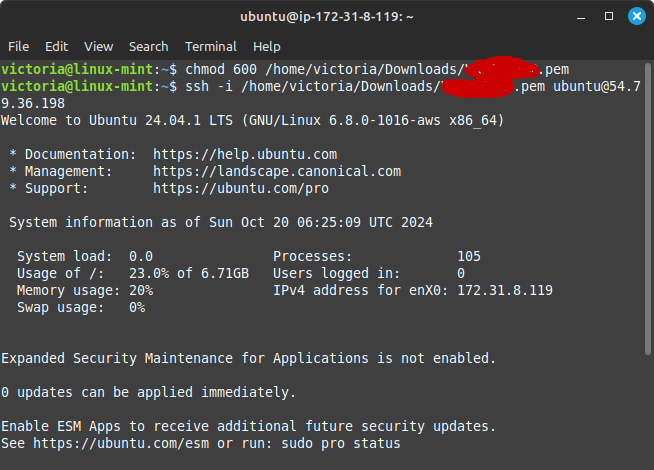
Now we connected to our Virtual Instance from terminal. Then list the files in that instance.

It will display the ‘myfirstfile’ which we was created in AWS Console. It shows that we successfully connected to the EC2 Instance. Then create another file in this terminal and make list of it.
Launching EC2 Instance Through AWS CLI :
By using AWS Command Line Interface, we can automate the tasks like managing and controlling aws services by running scripts in command line.
Install AWS CLI “https://docs.aws.amazon.com/cli/latest/userguide/getting-started-install.html”
Open AWS console, click on your profile, then select “security credentials” and get the “access key”.
Open terminal, type this command
“aws configure”
It will ask AWS access key id, secret access key, region name. (region name was displayed behind your profile).

Then to launch EC2 Instance, use this command
$ “aws ec2 run-instances --image-id ami-xxxxxxxx --count 1 --instance-type t2.micro --key-name MyKeyPair --security-group-ids sg-903004f8 --subnet-id subnet-6e7f829e*”*
Here replace the bold words with your actuall key ids.
So we need Image id, Key name, security group id, subnet id.
For Image id, use this command:
$ aws ec2 describe-images --owners amazon
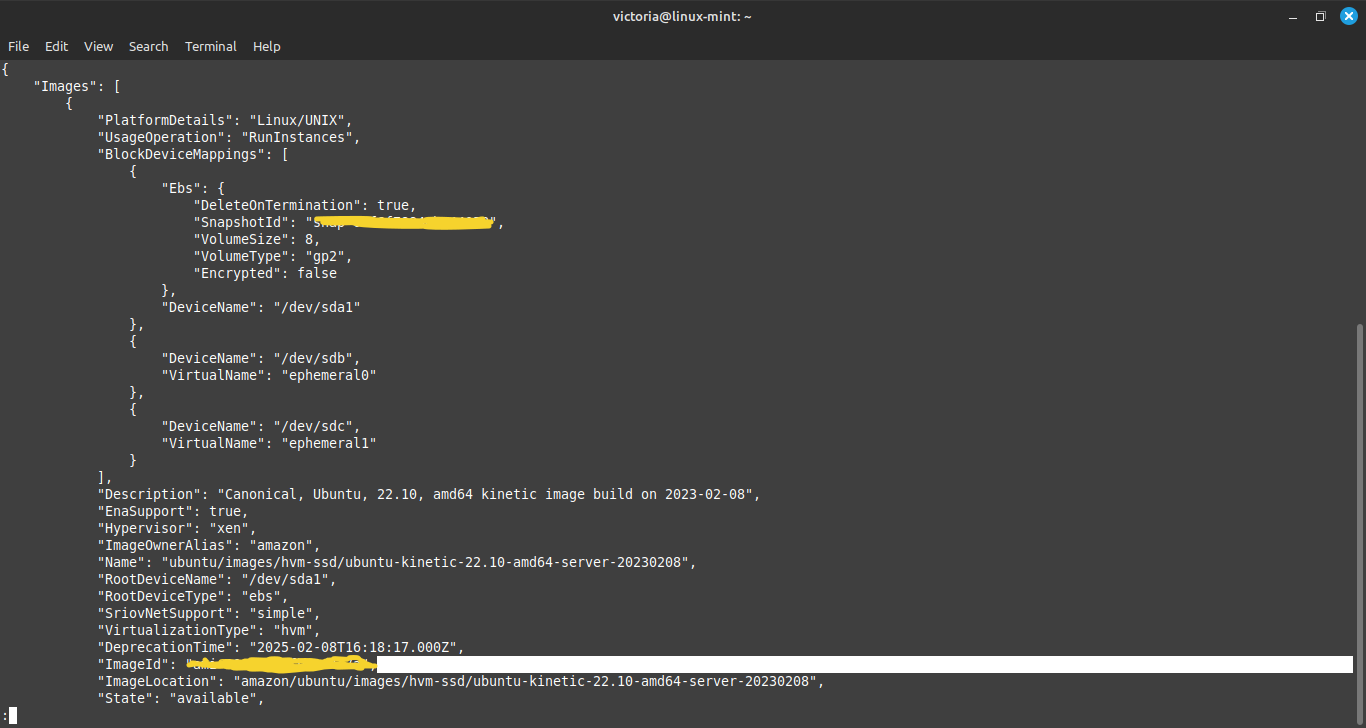
Note down the “ImageId”.
For Key name, as we know that was downloaded as .pem file
For Security group id, use this command:
$aws ec2 create-security-group --group-name my-sg --description "My security group" --vpc-id vpc-1a2b3c4d
Replace bold ones with your values. For vpc-id it will displayed on your AWS console dashboard.

Note down the “GroupId”.
For Subnet id, use this command:
$ aws ec2 describe-subnets
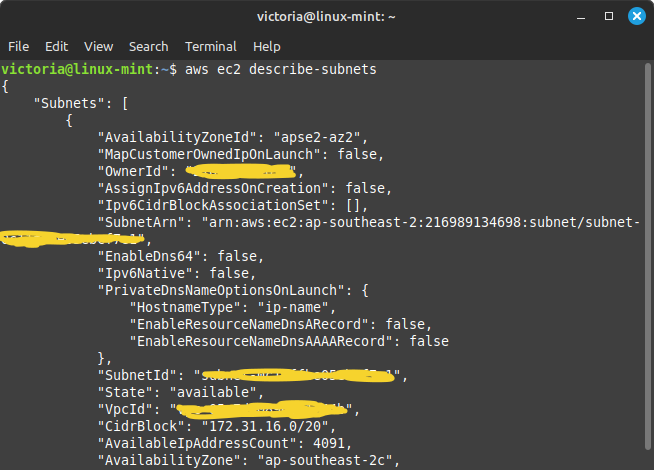
Note down the “SubnetId”.
Then Finally, run this command with actuall values of your own
$ aws ec2 run-instances --image-id ami-xxxxxxxx --count 1 --instance-type t2.micro --key-name MyKeyPair --security-group-ids sg-903004f8 --subnet-id subnet-6e7f829eThen open the aws console, Our EC2 Instance is created on the VPC and it is running.
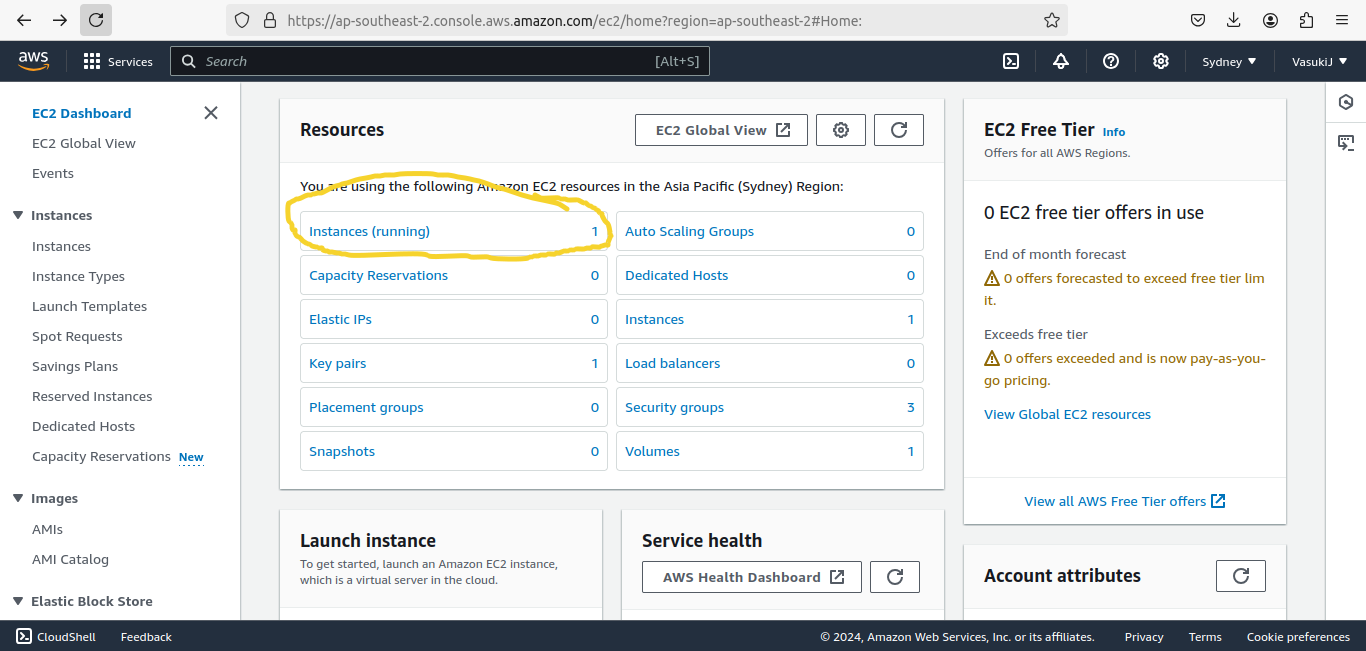

Now Virtual Instance is created, but Name field is empty. We have to set the name by using tag command in terminal.
“$ aws ec2 create-tags --resources i-5203422c --tags Key=Name,Value=MyInstance”
Here, i-5203.. is the instance id. Replace of your own and give name to the instance in Value field.

Now name for our EC2 Instance is created.

COOL! WE SUCCESSFULLY LAUNCHED EC2 INSTANCE IN VPC USING AWS CLI.
Now we terminate our Instance.
$ aws ec2 terminate-instances --instance-ids i-5203422c
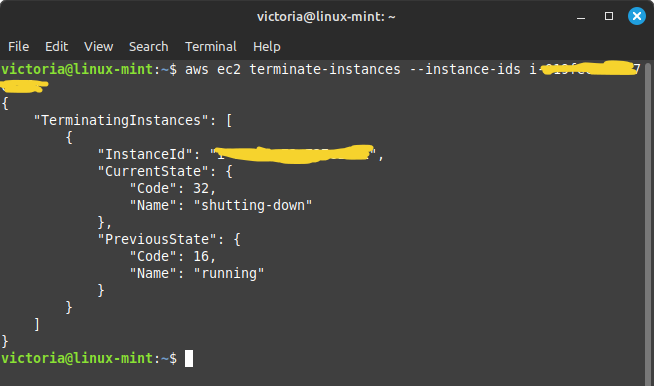
Great! We actually created the EC2 Instance through UI and AWS CLI. And connected through AWS Console and Terminal.
Happy DevOps Journey!
Subscribe to my newsletter
Read articles from Vasuki Janarthanan directly inside your inbox. Subscribe to the newsletter, and don't miss out.
Written by

Vasuki Janarthanan
Vasuki Janarthanan
While traveling on my DevOps Journey, I am sharing insights gained through experimenting with DevOps and Cloud practices.