Network Automation Monitoring -- Source of Truth
 pDamasceno
Introduction
In network automation, a "source of truth" is vital for managing and automating network devices, IP addresses, and connectivity.
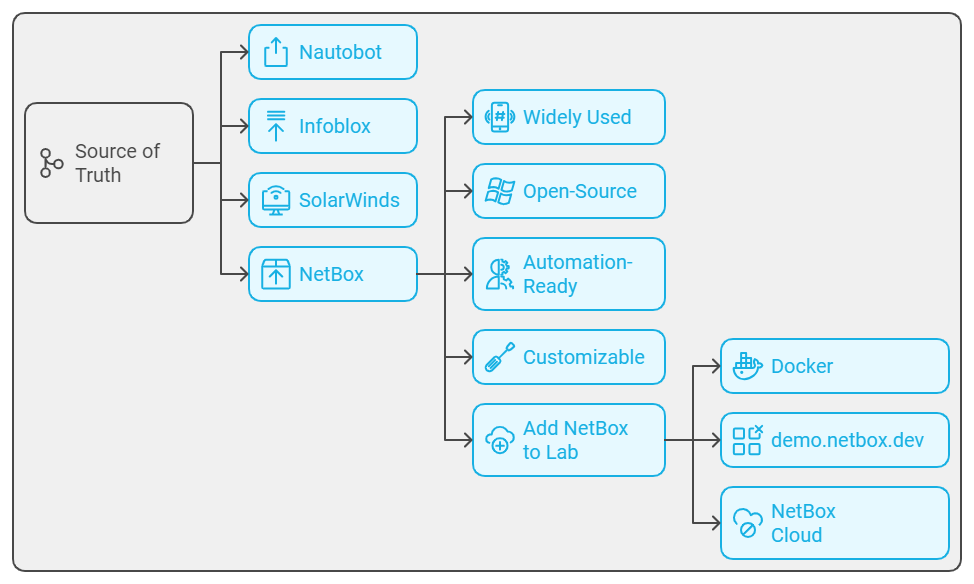
There are several alternative solutions that can serve as a "source of truth" for network automation, such as Nautobot, Infoblox, SolarWinds, and Netbox.
NetBox is a great option, widely used, open-source, with a lot of automation integration, and customizable. In this episode, we'll explore how to add NetBox to your network automation lab using three methods: Docker, demo.netbox.dev, and NetBox Cloud.

Why NetBox?
Before diving into setup methods, let's briefly explore why NetBox is such a valuable tool in a network automation environment:
Centralized Network Inventory: Manage all network assets in one place.
Automation-Ready: Easily integrates with automation tools like Ansible, SaltStack, Stackstorm, or custom Python scripts.
Extensibility: Custom fields, reports, and plugins make NetBox adaptable to any network environment.
1. Deploying NetBox via Docker
Why Docker?
Using Docker allows for quick, repeatable setups and testing in isolated environments. It’s ideal for local labs where you want full control over your NetBox instance without installing dependencies manually.
This will be my method of choice since I will dig deeper into developing plugins and tweaking some other features.
Pros:
Full control and customization.
Easily reproducible across environments.
Cons:
Requires local resources.
Must manage Docker environment and upgrades.
2. Using the NetBox Demo Site (demo.netbox.dev)
Why demo.netbox.dev?
The demo site is ideal if you want to quickly explore NetBox without setting up any infrastructure. It’s great for testing features or creating a proof-of-concept.
Steps:
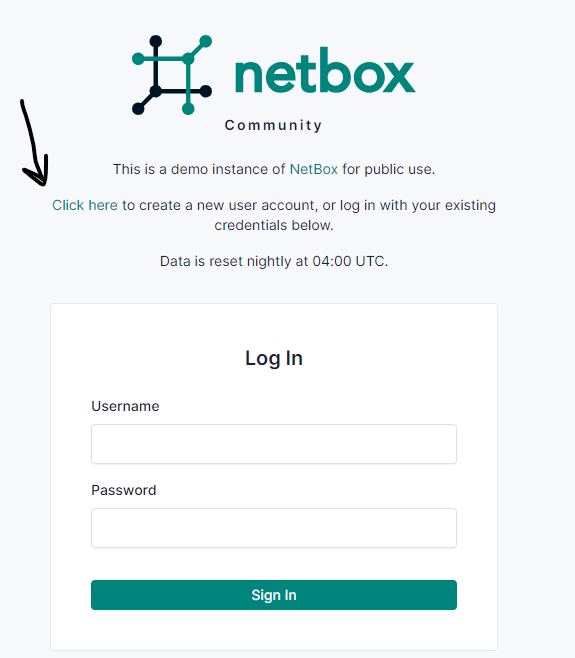
Visit the demo site:
Navigate to demo.netbox.dev.Create a new account

Create an API
Explore the environment:
The demo includes preconfigured devices, IP addresses, and connections. You can experiment freely, but note that it resets regularly.
Pros:
No setup is required.
Instant access to a working instance.
Cons:
Not persistent; changes will be lost after resets.
Limited customization compared to your own instance.
3. Using NetBox Cloud
Why NetBox Cloud?
NetBox Cloud provides a hosted SaaS edition of NetBox.

Steps:
Sign up for an account:
Go to netboxlabs.com/free-netbox-cloud/ and create an account.Configure your instance:
Once your instance is provisioned, you can start adding your network data, managing devices, and integrating with automation tools.Managed service:
NetBox Cloud takes care of backups, updates, and monitoring, allowing you to focus on managing your network.
Pros:
Fully managed and scalable.
Includes backups, monitoring, and support.
Cons:
Requires a paid subscription.
Reliance on cloud services.
Conclusion
Now that you’ve seen three methods to add NetBox to your lab, you can choose the best option based on your needs:
Docker: Best for local labs and flexible environments.
demo.netbox.dev: Ideal for quick exploration and testing.
NetBox Cloud: Perfect for production environments needing a managed service.
In upcoming episodes, we’ll explore integrating NetBox with automation tools, ensuring it plays a central role in your network automation workflows.
Subscribe to my newsletter
Read articles from pDamasceno directly inside your inbox. Subscribe to the newsletter, and don't miss out.
Written by
