Using GitHub Actions for Automated Resume Deployment
 Pushpinder Pal Singh
Introduction
Over the past weekend a took up a bit of a project I was not expecting, using Github Actions for building and deploying my Resume! I love programming and when I came across LateX, I knew I want to use it for building my resume. The advantages that motivated me were the ability to use Git versioning, which would allow me to track changes, and the opportunity to write code instead of dealing with clunky Word files.
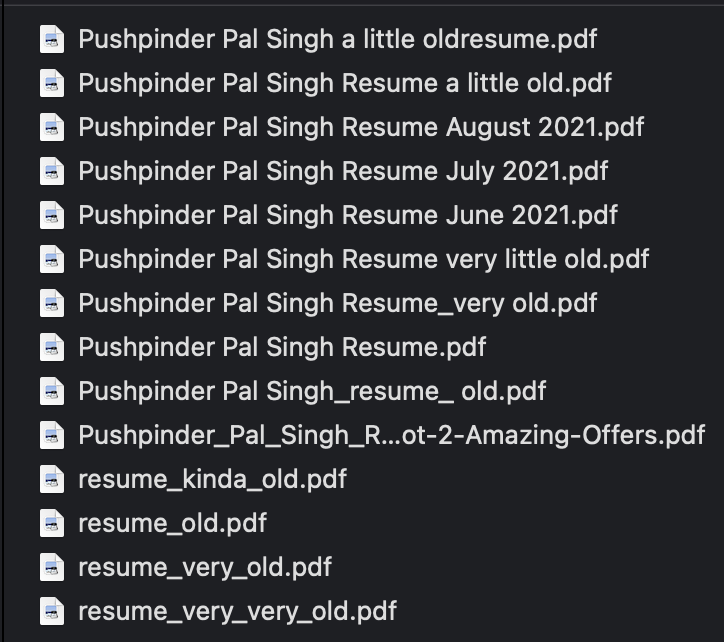
I had been managing my resume manually for a while, but my current process wasn’t ideal 👇

The Problem
Previously, I would update my resume, export it as a PDF, and upload it to Google Drive and update my Bento. This process was tedious and prone to version control issues. I wanted a streamlined, automated way to generate and deploy my resume.
The Plan
My initial plan was to set up GitHub Actions to build the LaTeX resume and automatically create a release. This would allow me to download the PDF from GitHub whenever I needed it. However, as I configured GitHub Actions, I realized I could also deploy my resume directly to GitHub Pages. This meant that my resume would always be available online, with a permanent URL that stays updated whenever I push changes—no more manually uploading to Drive!
Why Automation?
By using GitHub Pages, I now have a single, static URL for my resume that is always up to date. This means I can share the link with anyone and be sure they have the latest version of my resume. I love automation!
Getting Started
To get started, I looked up a latex resume template I liked. There are some pretty good templates over at overleaf. Once you picked the template you like, go ahead and download the zip of the complete latex structure.
For building and editing the latex project, you would need the following -
A text editor, I prefer VS Code for this
Tex build system, I used brew to install
You could also utilise Github Spaces for this if you’re not planning to use latex much apart from resume. If the latex build is failing for you when you open project in code, you might want to update the following configurations to latex-workshop.latex.tools
  {
    "name": "xelatex",
    "command": "xelatex",
    "args": [
      "-synctex=1",
      "-interaction=nonstopmode",
      "-file-line-error",
      "%DOC%"
    ]
  },
  {
    "name": "bibtex",
    "command": "bibtex",
    "args": [
      "%DOCFILE%"
    ]
  }
],
"latex-workshop.latex.recipe.default": "first"
Deploying with GitHub Actions
Once you’re happy with your resume, let’s move on to the fun part - pushing the project to GitHub and using GitHub actions to deploy you’re resume to GitHub pages. I am assuming you know how to use git and create repositories on GitHub so I will be skipping to deploying Github Actions.
GitHub Actions Workflow
I am using the following workflow for compiling, creating a release and deploying the resume. Going over the workflow, it will be triggered when we push any updates to master branch. It will compile the latex, and then trigger the Create Release and Deploy to Github Pages jobs simultaneously. It will create a release based with today’s date and a unix timestamp at the end, to avoid conflicts for multiple releases in the same day.
name: Compile LaTeX and Create Release

on:
  push:
    branches: [ master ]

jobs:
  compile_latex:
    runs-on: ubuntu-latest
    steps:
      - name: Checkout repository
        uses: actions/checkout@v4

      - name: Compile LaTeX document
        uses: xu-cheng/latex-action@v2
        with:
          root_file: main.tex  # Replace with your main .tex file name
          latexmk_use_xelatex: true

      - name: Check for PDF
        run: |
          if [ -f "main.pdf" ]; then
            echo "PDF file found"
          else
            echo "PDF file not found"
            exit 1
          fi

      - name: Upload PDF artifact
        uses: actions/upload-artifact@v4
        with:
          name: resume-pdf
          path: main.pdf

  create_release:
    needs: compile_latex
    runs-on: ubuntu-latest
    steps:
      - name: Get current date
        id: date
        run: echo "::set-output name=date::$(date +'%d/%m/%y-%s')"

      - name: Create Release
        id: create_release
        uses: actions/create-release@v1
        env:
          GITHUB_TOKEN: ${{ secrets.PAT }}
        with:
          tag_name: v${{ steps.date.outputs.date }}
          release_name: Release ${{ steps.date.outputs.date }}
          draft: false
          prerelease: false
    outputs:
      upload_url: ${{ steps.create_release.outputs.upload_url }}

  upload_asset:
    needs: [compile_latex, create_release]
    runs-on: ubuntu-latest
    steps:
      - name: Download PDF artifact
        uses: actions/download-artifact@v4
        with:
          name: resume-pdf

      - name: Upload Release Asset
        uses: actions/upload-release-asset@v1
        env:
          GITHUB_TOKEN: ${{ secrets.PAT }}
        with:
          upload_url: ${{ needs.create_release.outputs.upload_url }}
          asset_path: ./main.pdf
          asset_name: Pushpinder_Resume.pdf
          asset_content_type: application/pdf

  deploy_to_github_pages:
    needs: compile_latex
    runs-on: ubuntu-latest
    steps:
      - name: Checkout repository
        uses: actions/checkout@v4

      - name: Copy generated PDF to deployment directory
        run: |
          mkdir -p out
          cp main.pdf out/{Name your resume}.pdf

      - name: Create index.html
        run: |
          echo '<html><body><a href="{Name your resume}.pdf.pdf">View Resume</a></body></html>' > ./out/index.html

      - name: Deploy to GitHub Pages
        uses: peaceiris/actions-gh-pages@v4
        with:
          github_token: ${{ secrets.PAT }}
          publish_dir: ./out
          publish_branch: gh-pages
I am using a different access token than what GitHub provides as default because it needs heightened privileges. In the workflow you could see I am using secrets.PAT.
Final Thoughts
Once the workflow completes successfully, you would be able to see the your resume as a release in your repo. Also the resume would be deployed at https://{Your-Username}.github.io/{Your-Repo-Name}/{Name your resume}.pdf.
This setup saves me tons of time and keeps my resume always up-to-date and ready to share. No more fussing with file uploads or outdated links—just push, and it’s live! If you love automating things, give it a shot and enjoy the peace of mind. Happy automating! ✌️
Subscribe to my newsletter
Read articles from Pushpinder Pal Singh directly inside your inbox. Subscribe to the newsletter, and don't miss out.
Written by
