OutSystems 11 User Providers Explained
 Stefan Weber
While preparing material for a course on OutSystems 11 Authentication, I noticed there isn't much information available on User Providers and how to create a custom one. In this article, I aim to explain the purpose of User Providers, the default ones available, and how to create a simple custom User Provider.
What is an OutSystems User Provider?
First and foremost, a User Provider offers logically isolated user accounts for modules. They are logically isolated because, physically, all user accounts are stored in a central entity called User within the (System) module.
Modules that share the same User Provider module can access the same user base, but not user accounts from a different User Provider. When you query the User entity using an Aggregate, OutSystems only returns the accounts linked to the module's attached User Provider. This means OutSystems automatically applies a filter.
A User Provider module is a standard OutSystems module with the "Is User Provider" property set to Yes. It can include additional logic and even screens for managing user accounts or external Identity Providers, and most importantly, logic for logging in a user. We will explore this logic in more detail later.
However, it is not the User Provider itself that performs the actual login.
User account login is handled by server actions in the (System) module, specifically Login and LoginPassword. Both actions need a User Identifier from an existing user record in the User entity, also found in the (System) module. The Login action only needs a User Identifier to log in a user, while LoginPassword also requires a password.
The User entity includes various attributes such as Name, Username, Email, and MobilePhone. Internally, the database table also contains some additional fields, with the User Provider being one of them.
When inspecting the attributes, you'll notice that none of them are mandatory (except for Creation_Date and Is_Active). In fact, you don't need to fill in any values for these attributes to perform a user login using the (System) module's Login server action. However, for LoginPassword, you must provide a value for the Password attribute.
In summary:
A User Provider is a module that provides logical isolation of user accounts.
Login is managed by the Login or LoginPassword server actions in the (System) module. These actions use an existing user record from the User entity within the same module.
A minimal user record in the User entity includes an Identifier, Creation Date, and Is Active indicator. For LoginPassword server action the Password field must be populated.
Default User Providers
OutSystems 11 includes two default User Providers: ServiceCenter and Users. The ServiceCenter User Provider is used in the Platform administration and development applications like LifeTime, Service Center, and Service Studio. Users is the default User Provider for your end-user applications (or modules, to be precise).
Users is linked to the default Application Template (Reactive, Mobile, Service) that come with OutSystems. This means that whenever you create a new application using one of these default templates, the Users User Provider is automatically selected.
For the ServiceCenter User Provider, you manage user accounts in LifeTime, which then syncs with all managed Service Center environments. The Users User Provider has its own user interface available at https://<environment domain>/users, where you can manage user accounts, groups, and link application roles with users and groups. Additionally, you can set up federated authentication with a SAML-compatible Identity Provider or through LDAP and more.
Although you can switch between User Providers at any time, note that LifeTime does not let you associate application roles with users. So, if you want to use the ServiceCenter User Provider in your application modules and restrict access based on user roles (screens or using CheckRole), you will need to create your own logic for assigning roles to ServiceCenter users.
Custom User Providers
Besides using the default User Providers, you can create custom User Providers. You can create any module and set its "Is User Provider" property to Yes. Then, use this module as a User Provider in other modules, meaning "This module isolates user accounts for multiple other modules."


Custom User Provider Requirements
Now that we understand the basics of OutSystems User Providers, the question is, what are the minimal requirements for a custom User Provider? The short answer is “Absolutely nothing.” Yes, that's true. You can create a blank module, declare it as a User Provider, and use it in your application modules.
In your application module, you can use the CreateUser action of the (System) module's User Entity to create user accounts and the Login action to log in a user by their identifier. The created user record will automatically be isolated to the attached blank User Provider, even though you created the user record in your application module and not in the User Provider.
But of course, this is not how a custom user provider is meant to be used, so let's take a look at the default Users User Provider and its capabilities.
Users User Provider Capabilities
The Users User Provider is a Traditional Web module with a management web interface you can access under https://<environment domain>/users.
The web interface of Users allow you to
Manage User Accounts
Manage User Groups
Associate application roles to users and groups
Configure federated authentication with a single SAML compatible Identity Provider or configure external login via an LDAP directory.
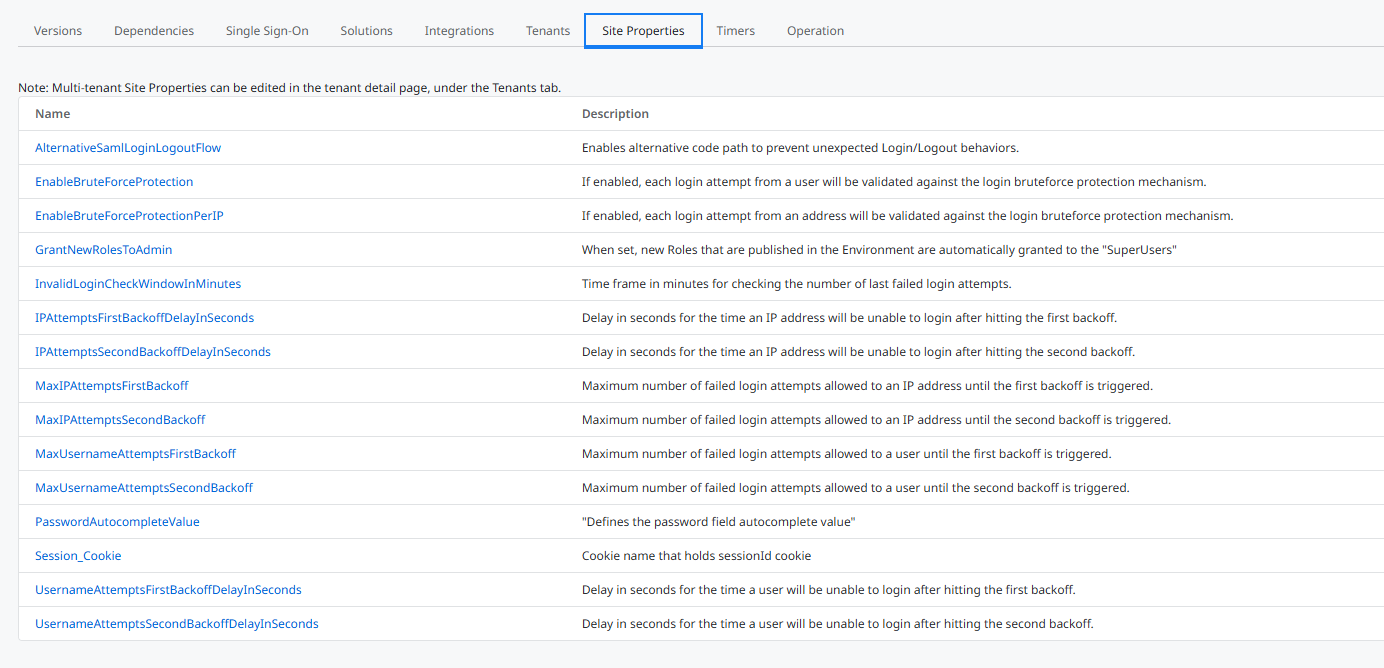
In addition the Users module has some site properties for certain configuration options for the user login process.
And most importantly, it provides server actions that contain the logic for managing users, groups, and the user login process.
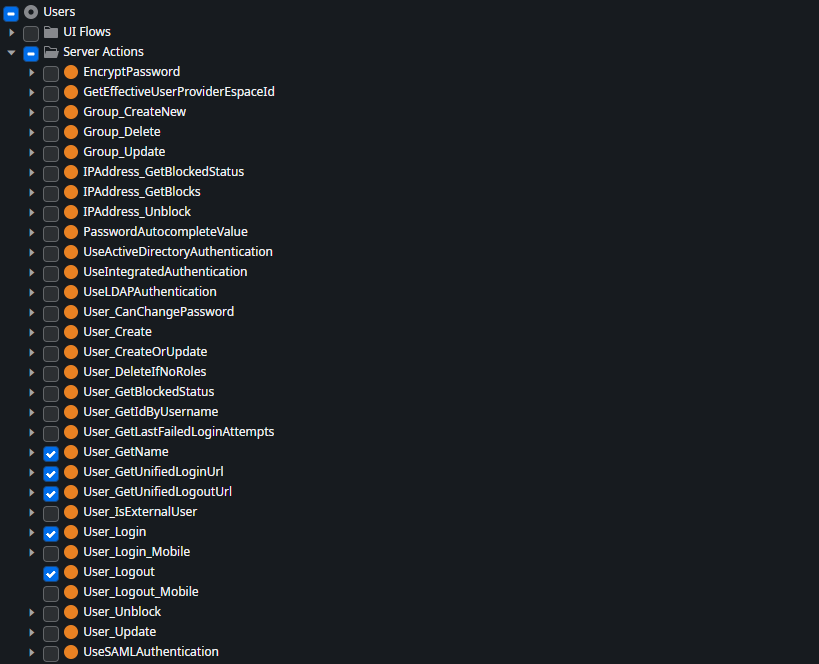
The User_Login server action is call from the Login screen of an application module created from the default Reactive Web application template. It takes a username and password as input, performs checks, logs messages, and finally calls the LoginPassword server action from the (System) module.
To explore the details of the Users User Provider you can open it as clone by right clicking on Users and selecting Open ‘Users’ module.
Minimal User Provider Implementation
In this section, we will explore the essential components of a (most) basic User Provider. For reference and guidance, I have published a basic User Provider called "Most Simple User Provider" on Forge.
The sample User Provider application has two modules:
MostSimpleUserProvider - This is the actual User Provider with the application property "Is User Provider" set to Yes.
MostSimpleUserProviderUI - A simple administration UI for our User Provider. This module has the application property "User Provider module" set to MostSimpleUserProvider.
User Provider Module
Open the MostSimpleUserProvider module in Service Studio.
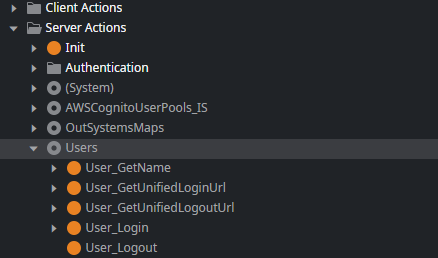
The module exposes one public role Administrator and four server actions. The Administrator role is required to create a new user account and in the UI module to grant access to the user account administration screen.
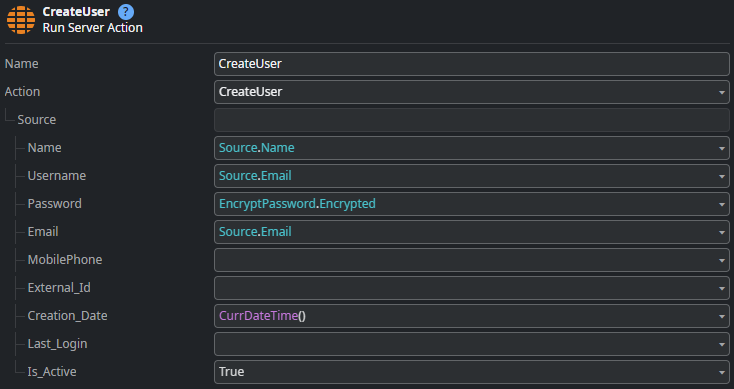
User_Create Server Action
This action creates a new user account for this User Provider. It requires a full name, an email address, and a plain text password as input.
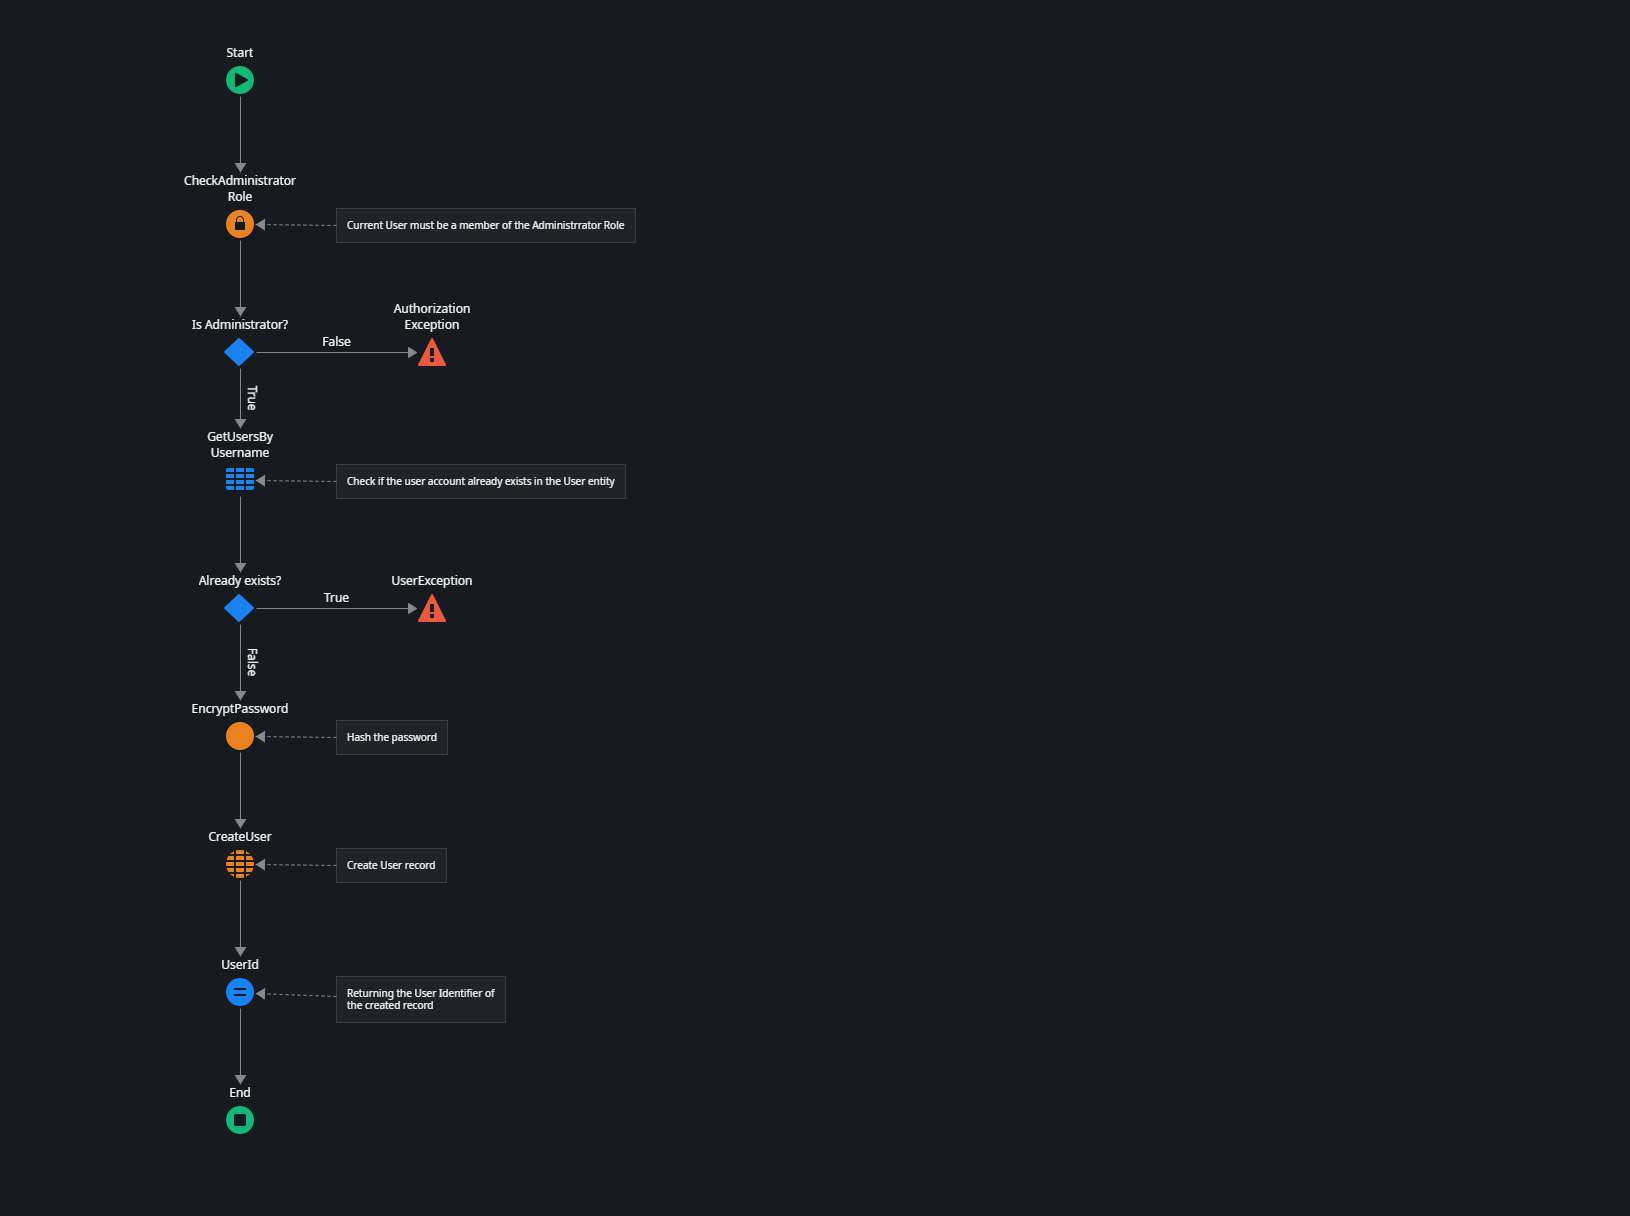
It first checks if the current user has the Administrator role.
Then it queries the User entity in the (System) module to see if the account already exists.
Next, it runs the EncryptPassword server action from the Util folder, which uses the GenerateSaltedSHA512Hash action from the PlatformPasswordUtils module to create a hash from the plain text password.
Finally, it uses CreateUser from the User entity to create a new user record.
User_Login Server Action
The User_Login action needs an email address and a plain text password as input.
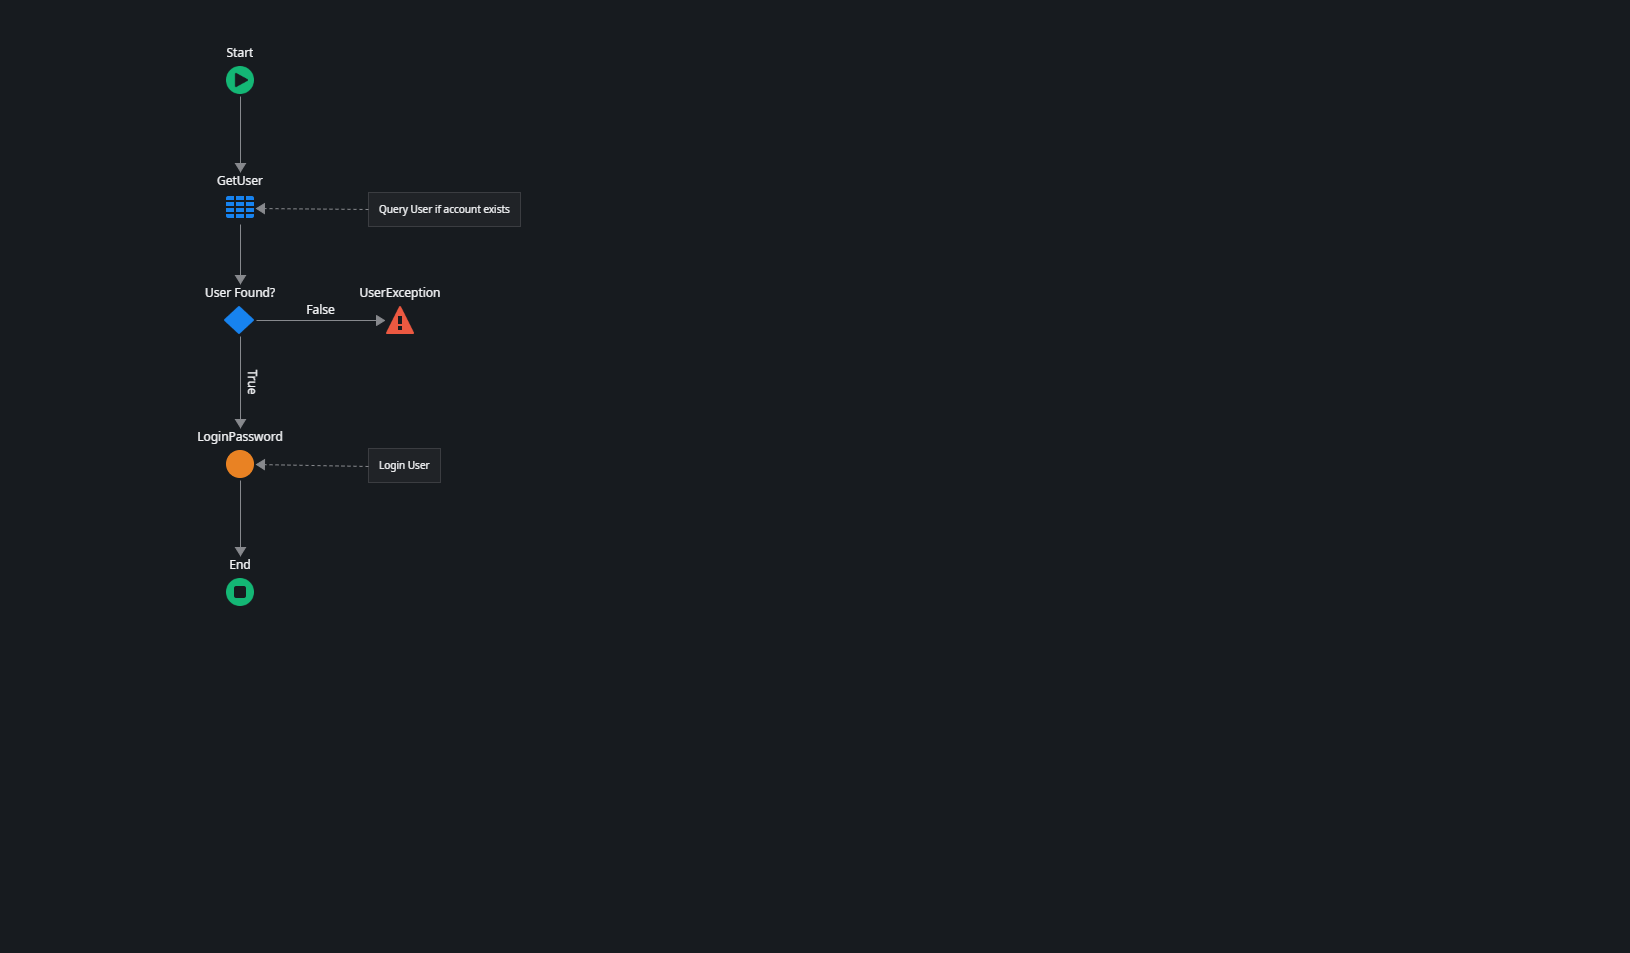
It first checks if a user with the given email address exists in the User entity (keep in mind that user accounts are separate between User Providers).
Then it uses the LoginPassword action from the (System) module to attempt logging in the user. LoginPassword uses the plain text password and throws an exception if the password's hash does not match the user's record Password value.
The remaining server actions, User_Logout and User_GetName, are straightforward. User_Logout simply logs out the current user, and User_GetName returns the full name of the currently logged-in user.
User Provider Administration
Next, open the MostSimpleUserProviderUI module in Service Studio.
This module has a single screen called Admin that queries the User entity, returning only the users linked to the User Provider. The screen is restricted to users with the Administrator role.
The UserFormOnSubmit client action is the most interesting part of the screen. It calls the User_Create server action from our MostSimpleUserProvider User Provider to create a new user account.
Now, try to start the administrative UI in the browser. You will be redirected to the login page, and...
You can't log in using any of your known user accounts because our User Provider doesn't have any user accounts yet. You also can't create a user account without having a user account with the Administrator role. It's a catch-22.
Configure User Provider Administrator
Fortunately, the OutSystems platform allows you to create an administrative account for User Providers in Service Center. This internal account always has the username "admin" and is automatically granted all roles defined in the User Provider.
Open Service Center and go to Factory - Modules. Search for MostSimpleUserProvider and select the module.
In the Single Sign-On tab, you'll see a button labeled "Configure Administrator User", which is only available in modules declared as a User Provider. Click the button and set a password for the administrative user account.
Back on the login screen of the MostSimpleUserProviderUI, log in using:
Username: admin
Password: The password you set in Service Center
After successful login you should now see the Admin screen with a single user record Administrator. Go ahead and create some additional user accounts.
Applying the User Provider to an Application
The final step is to apply our custom user provider to a new application. OutSystems provides a default application template that uses the default Users User Provider. We will use this template and modify it. In a real custom user provider scenario, you would create your own custom application template.
In Service Studio, create a new Reactive Web Application. Then, create a Reactive Web module and open it.
Click on your module title in the elements tree and select MostSimpleUserProvider for the “User Provider module” application setting.
Add references to all server actions of the MostSimpleUserProvider module.
Remove all references from the Users module.
Applying these changes will cause some errors due to missing dependencies, but we will address them now.
Switch to the Logic tab and open the DoLogin server action in the Authentication folder.
Remove the unused parameters
Expand the Source input parameter set Email to Username and Password to Password.

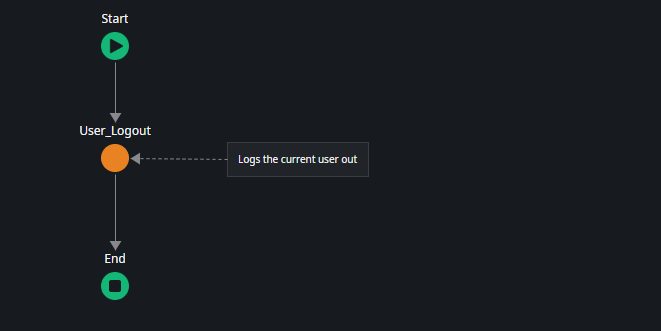
Next open DoLogout
- Remove everything except the User_Logout action.
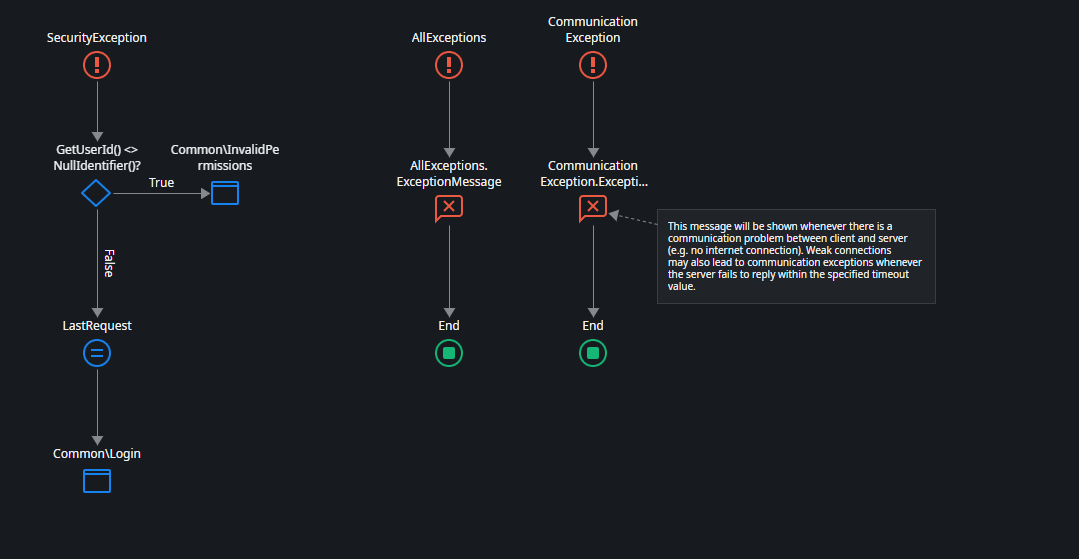
Switch to the Interface tab and in the Common UI flow open OnException
- Remove User_GetUnifiedLoginUrl and the following If statement.
Still in the Common UI flow open the ClientLogin client action in the UserInfo block.
- Remove User_GetUnifiedLoginUrl and the following If statement.
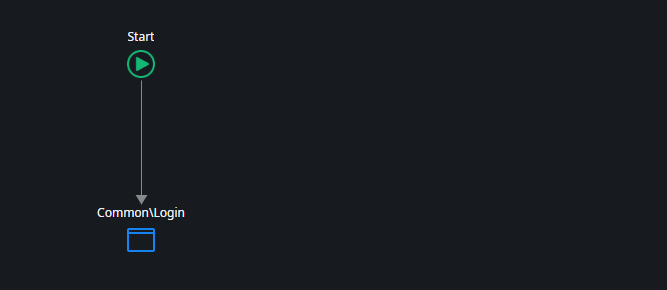
After this final modification, all errors should be fixed. There are still some warnings, such as the RememberLogin input parameter not being used (we always set the Persistent Login to false in our User Provider), but we will leave it as it is.
Create a demo screen in your application and add some text widgets. Ensure that the screen is accessible to Registered users, then publish the application and open it in the browser.
Try logging in with one of your created user accounts.
Summary
A custom User Provider in OutSystems 11 primarily offers logically separate user accounts for connected applications. A User Provider should include logic for managing users, application roles, and secure user sign-in. As shown in this article, a User Provider can be very simple, but it can also be complex with extra features like federated authentication and more.
The End?
Building a custom User Provider to replace the default Users User Provider can be a challenging task. The first question to ask yourself is, "Do I really need a custom User Provider?" In most cases, it's better to develop your authentication flow on top of the existing default User Provider. For example, if you only need federated authentication using OpenID Connect, you can use one of the existing Forge components that work with the default User Provider.
I hope you found this helpful and that I explained the topic well. If not, please let me know by leaving a comment.
Subscribe to my newsletter
Read articles from Stefan Weber directly inside your inbox. Subscribe to the newsletter, and don't miss out.
Written by

Stefan Weber
Stefan Weber
Throughout my diverse career, I've accumulated a wealth of experience in various capacities, both technically and personally. The constant desire to create innovative software solutions led me to the world of Low-Code and the OutSystems platform. I remain captivated by how closely OutSystems aligns with traditional software development, offering a seamless experience devoid of limitations. While my managerial responsibilities primarily revolve around leading and inspiring my teams, my passion for solution development with OutSystems remains unwavering. My personal focus extends to integrating our solutions with leading technologies such as Amazon Web Services, Microsoft 365, Azure, and more. In 2023, I earned recognition as an OutSystems Most Valuable Professional, one of only 80 worldwide, and concurrently became an AWS Community Builder.